In Short
- Use Side Buttons on a no Home Button iPhone and a Home Button iPhone.
- Use the Assistive Touch Button to Screenshot.
- Add a screenshot button on the iPhone.
- Use the Back Tap Feature. Tap on the back side of your iPhone to screenshot.
To take a screenshot on your iPhone. The correct trick only works for capturing or taking a screenshot on an iPhone. Additionally, you can read the instructions below to get the screenshot as an alternative. Then, you must press and hold the side button, which no longer works for activating Siri.
Steps for Taking a Screenshot on iPhone and later: 4 Alternative Methods
Without Assistive Touch, we can use the physical button on the iPhone without making any further moves in settings on the new iPhone.
Method 1: Command to take an iPhone Screenshot
→ No Home Button iPhone, Press the Side button + Volume Up button at once. [See image below]
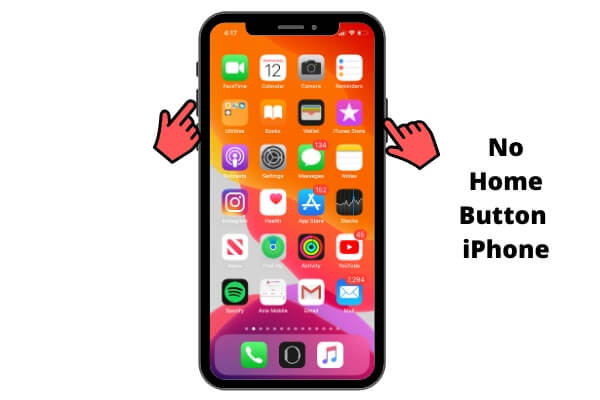
→ Home Button iPhone, Press the Side Button + Home Button at Once [See image below].

While you take a screenshot on your iPhone, you can see a screenshot preview at the lower-left edge side. From there, you can edit, crop (Resize or change the Screenshot shape from the preview directly, tap on Preview > Drag Screenshot blue border to resize > Done for save), use markup, and instantly share with someone else.
- Easy to identify, it’s an iPhone’s screenshot.
Method 2: How to add a screenshot button on iPhone
Use the Screenshot button (AssistiveTouch Button) called the virtual button on your iPhone screen. Enable the Touch Button on the screen and take screenshots quickly without the Button.
- Launch the Settings App on your iPhone.
- Next, Scroll & Tap on Accessibility.

- Tap on Touch.
- Select AssistiveTouch.
- Enable AssistiveTouch.

- Now, Tap on the AssistiveTouch Button.
- Tap on Device (Customize Assistive Touch on iOS).

- Next, select the More icon.
- Tap on Screenshot.
Method 3: Take a screenshot on iPhone Using the Back Tap
in iOS 14 and later, iPhone model users will get a new way to take a screenshot on their iPhone using the back Tap feature.
- Launch the Settings App on your iPhone.
- Scroll the screen and tap on Accessibility.

- Next, Select Touch.
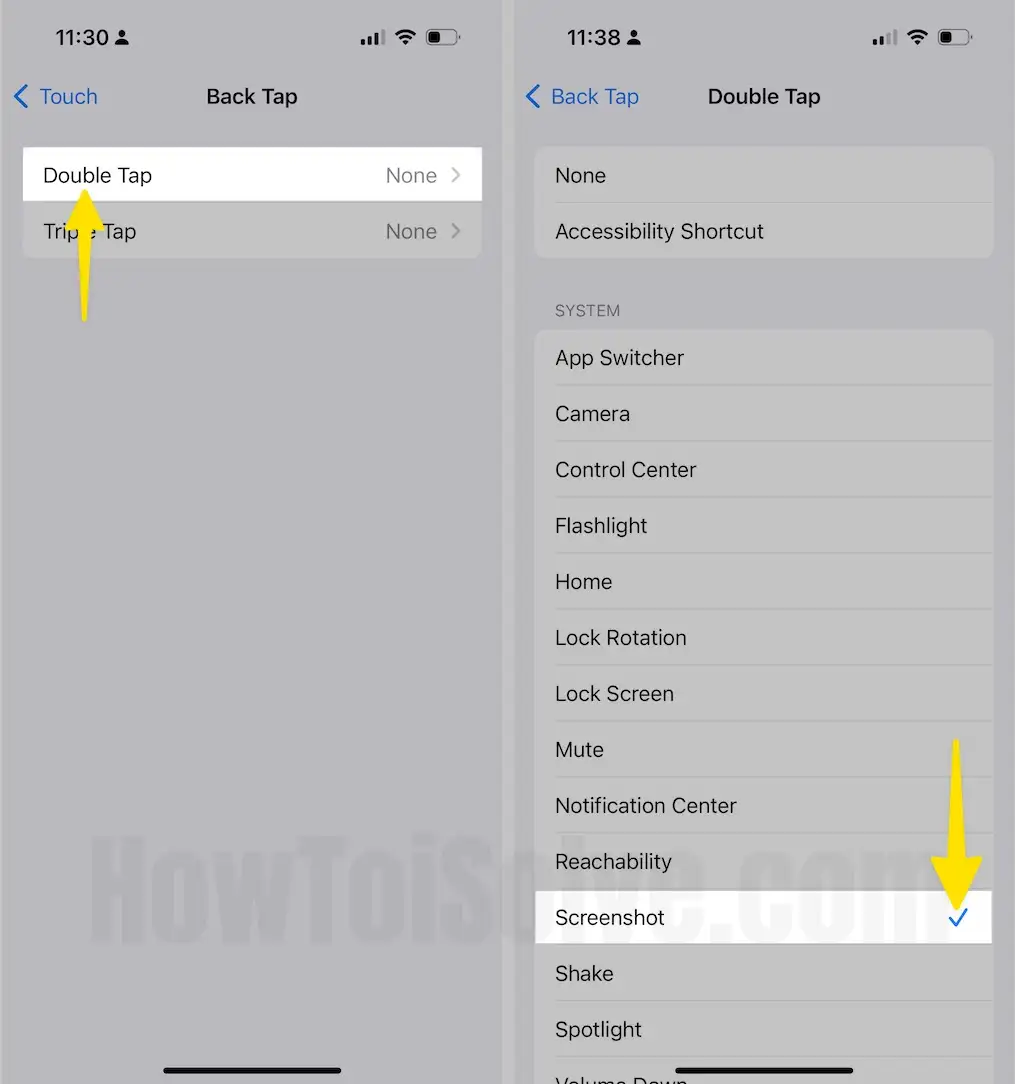
- Again, scroll the screen and tap on Back Tap.

- Now, there are two options: Double-tap OR triple-tap, then Select Double-tap.
- Choose a Screenshot from the list.
Now, let’s try to double-tap the back of your iPhone. So your Phone will take a screenshot that has never been done before.
Method 4: How to add a screenshot button on iPhone (Without Buttons)
Have you failed to take screenshots on your iPhone without buttons? In the first attempt of many reasons, like. Use Assistive Touch to take a screenshot on your iPhone without pressing Buttons. Customize the assistive touch button. Follow the steps below,
- Launch the Settings App on your iPhone.
- Scroll and Tap on Accessibility.
- Again, scroll & tap on Touch, which appears under the Physical and Motor section.

- Tap on AssistiveTouch.
- Enable AssistiveTouch. Next, Select Double-Tap under the Custom Actions.
- Choose a Screenshot from the list.

Now, Double-tap on the Assistive Touch button to take a screenshot.
That’s it.
Read more: Fix screenshot not working on iPhone or iPad.
Fingers crossed! You guys, now force press on the Touch screen home button (Dark spot on Screen) to take a screenshot on any app, text message conversations, anywhere on your iPhone.
Tips:- Record Screen on iPhone without Mac or PC – Screen Recorder in iOS
How to Delete a Screenshot on iPhone
To remove the captured screenshot and save bytes on your Apple phone, you need to venture to the bottom of the given guide.
- Launch the Photos App on your iPhone.
- Tap on Albums appear at the Bottom-Right Corner, then Scroll Down the Screen to tap the Screenshots Folder.

- Tap on a Picture that you wish to trash.
- Now, tap on the trash icon at the bottom right corner.
- Tap on Delete Photo and validate it.
Finish.
You also like the following article
→ Delete multiple pictures on iPhone
→ Best AirPrint Printers to print from your iPhone
Get More Tricks that you need to know about the iPhone
How to Use iPhone Without a Home button? [Access Control Center, Apps Switcher, Accessibility Shortcuts, Apple Pay, etc.]
Tip to Set Up Face ID on iPhone? [To unlock your iPhone with your Face]
Don’t miss to share and debate your opinions in the annotation box below.


