
Printing double-sided on Mac is a cakewalk move. You save time, lower your printer energy consumption, and use fewer papers, eventually saving trees. Plus, if you have large documentation or a Booklet to print, double-sided is cost-effective, and you have to carry half of the weight. But, despite its vivid benefits, it’s not default settings on your Mac computer. Luckily, macOS offers the capability to do so.
In addition, most Modern printers include features to print on both sides; it’s just like a cherry on the cake. Here in this guide, we will show you how to print double-sided on a Mac.
Also Checkout Best Printer for Mac
How To Enable Two-Sided Printing On Mac
This article will show you how to enable double-sided printing on the latest macOS when using specific applications or browsing Safari.
How to Print Double-Sided on Mac When Using an App
Double-sided printing on Mac is straightforward, especially when using apps like Microsoft, Pages, etc. Before we begin with the procedure, connect the Mac computer with the Duplex Printer.
Print Double Sided In Pages on Mac
macOS Ventura And Later
1→ Open the document you are willing to print on pages.
2→ Select Files. Click on Print…
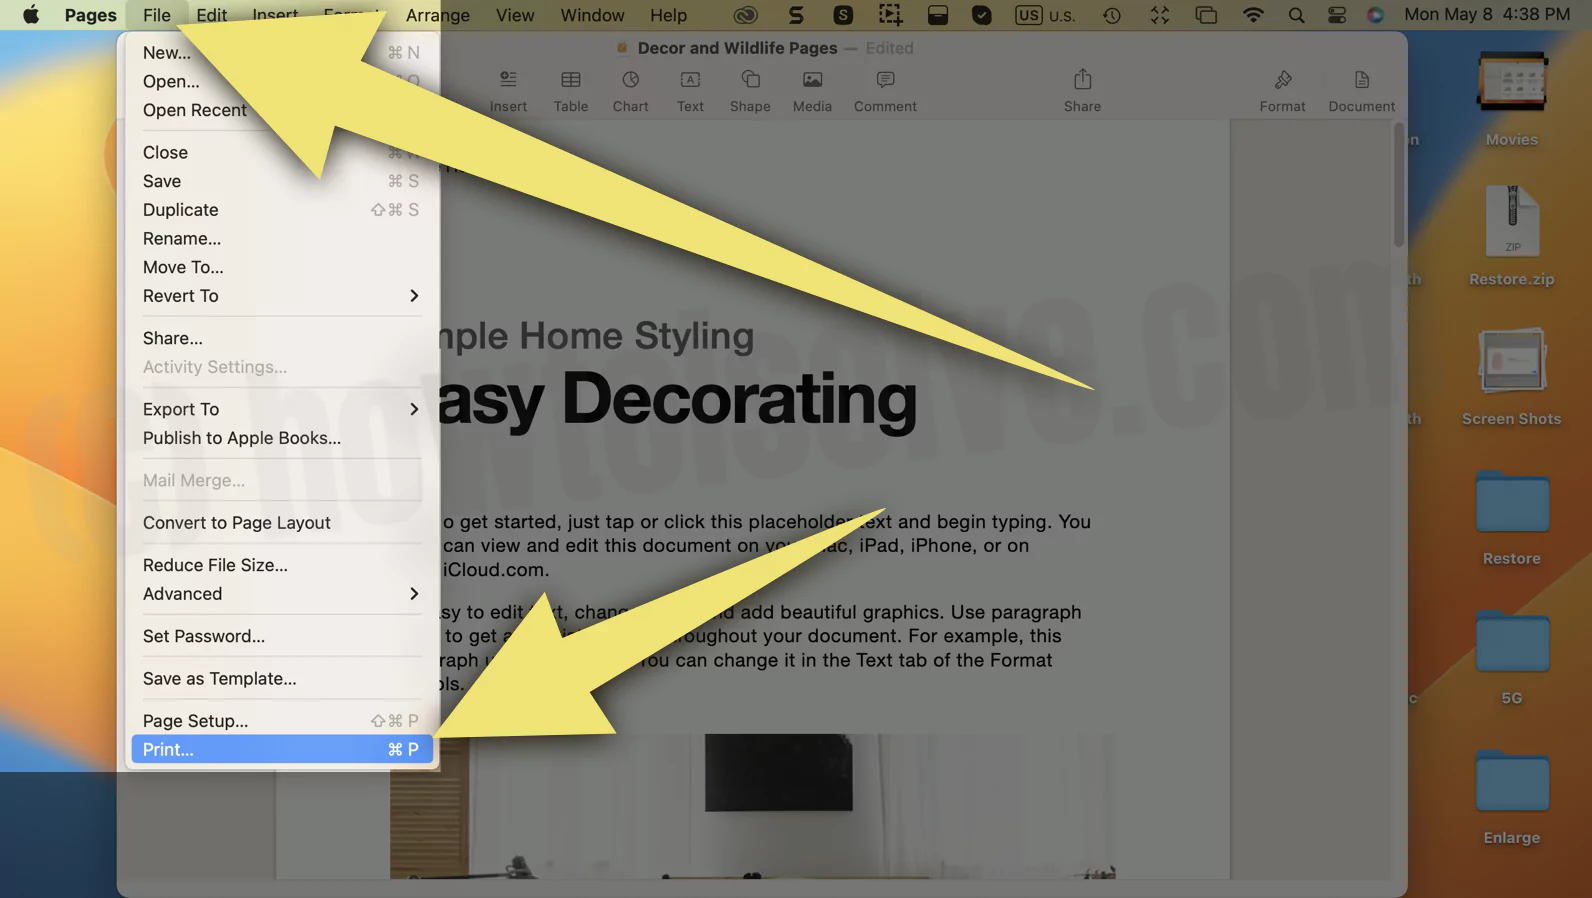
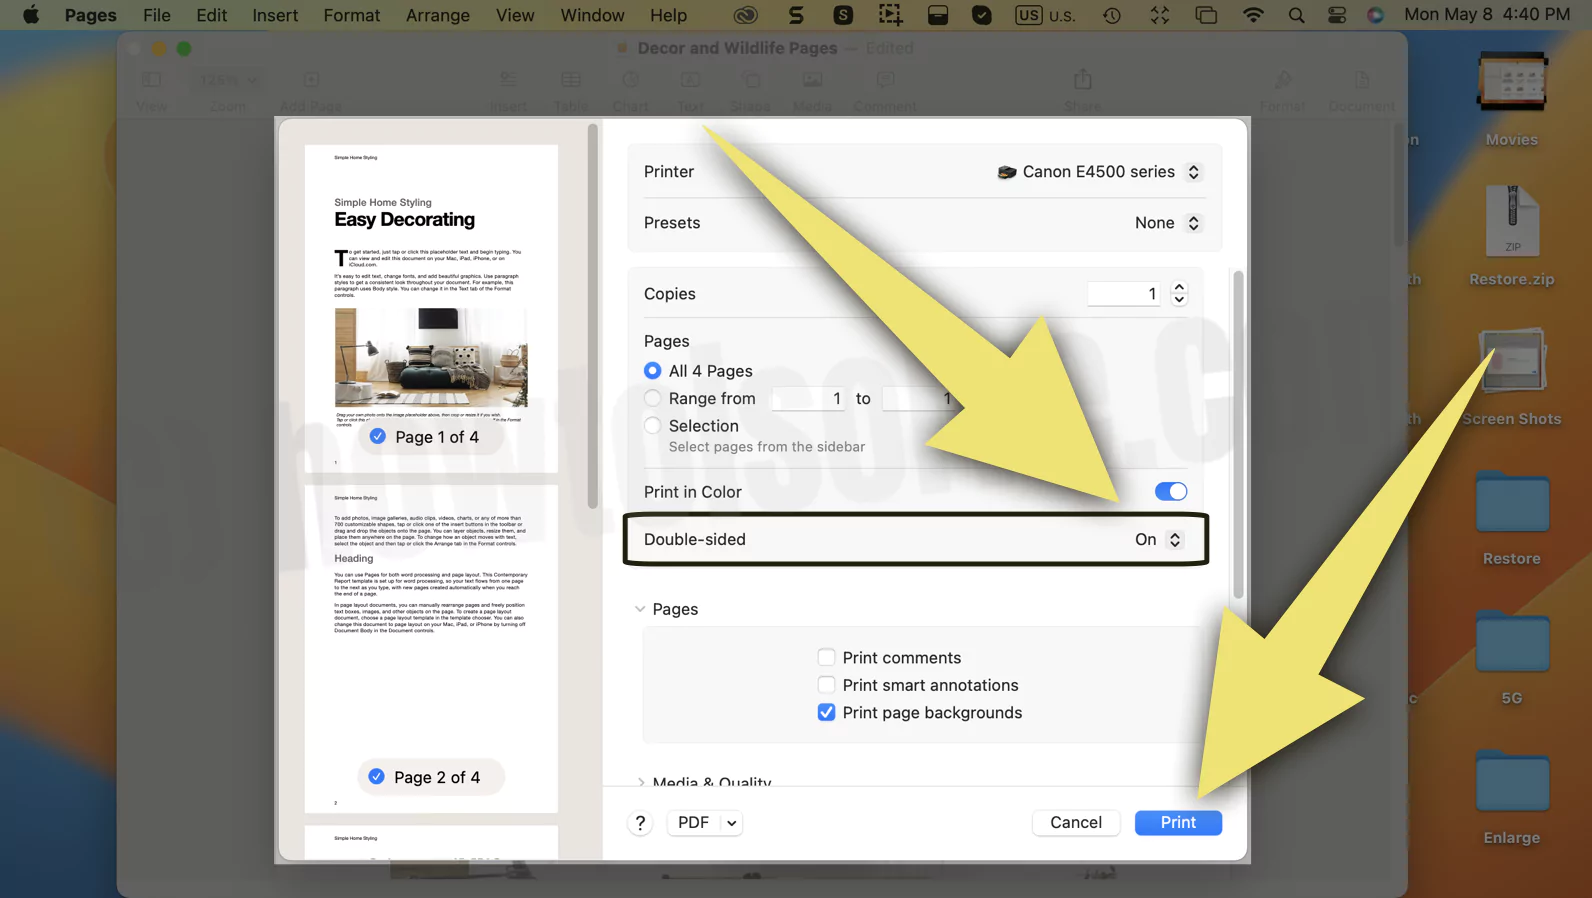
3→ Access the Double-sided drop-down.
4→ And Set it up either to ON or ON(Short Edge Binding). And give a Print.
macOS Monterey And Earlier
- Open the document you are willing to print on pages.
- Select Files.
- Click on Print…
- At last, check the box next to the Two-sided. And further, click on Print Button.
Print Double Sided in Microsoft Word on Mac
macOS Ventura And Later
1→ Open the Document you are willing to give a print for.
2→ After this, select the File from the top menu bar. Swipe down and select Print…
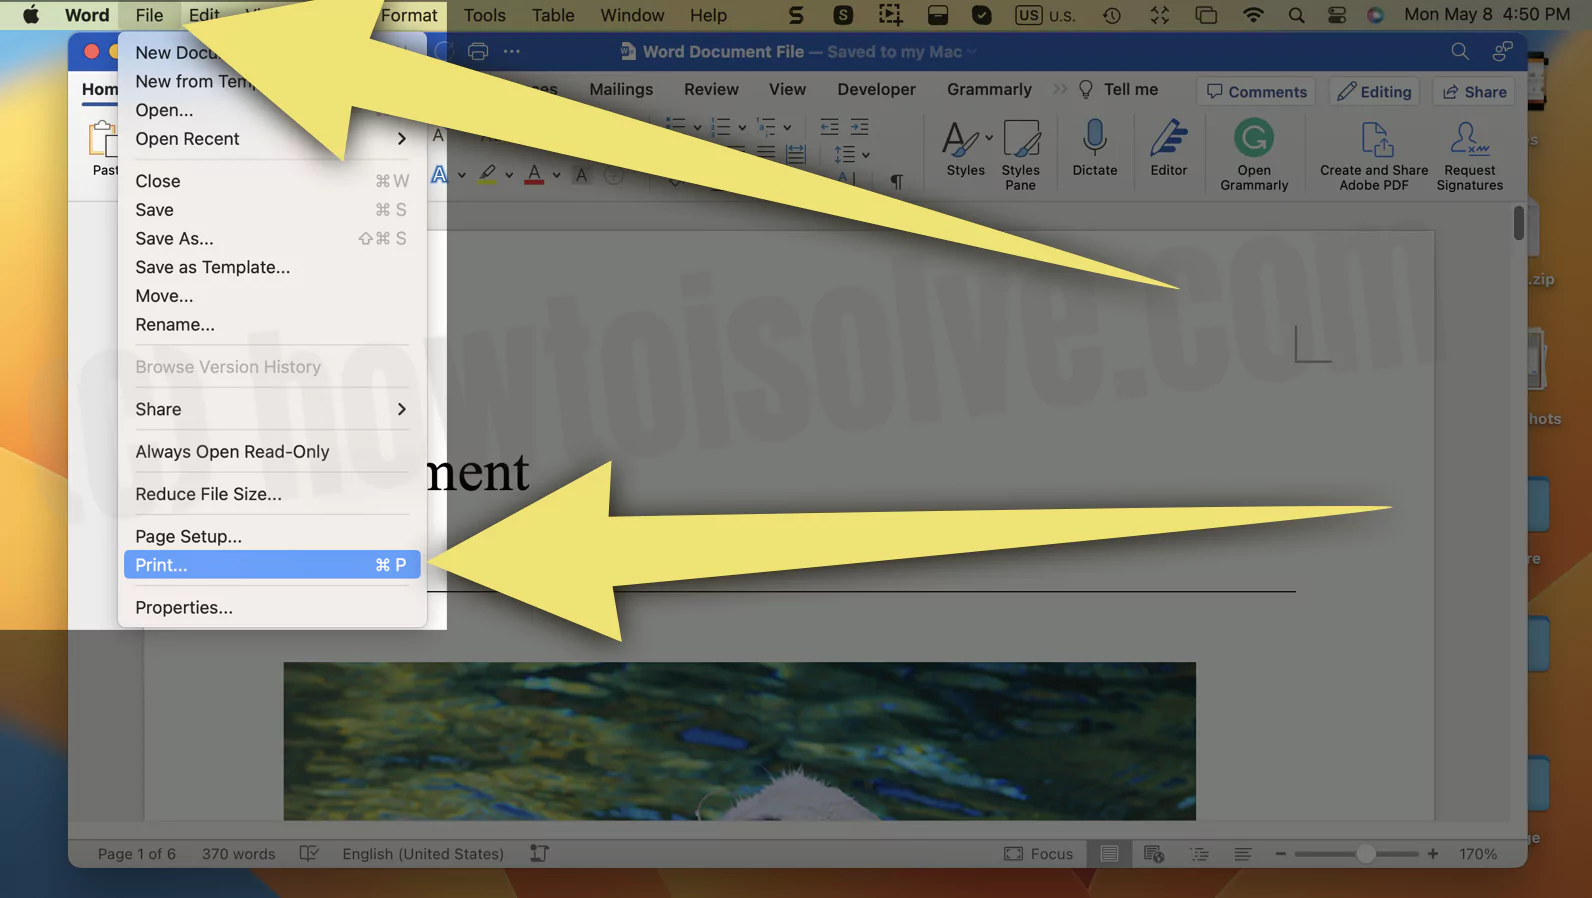
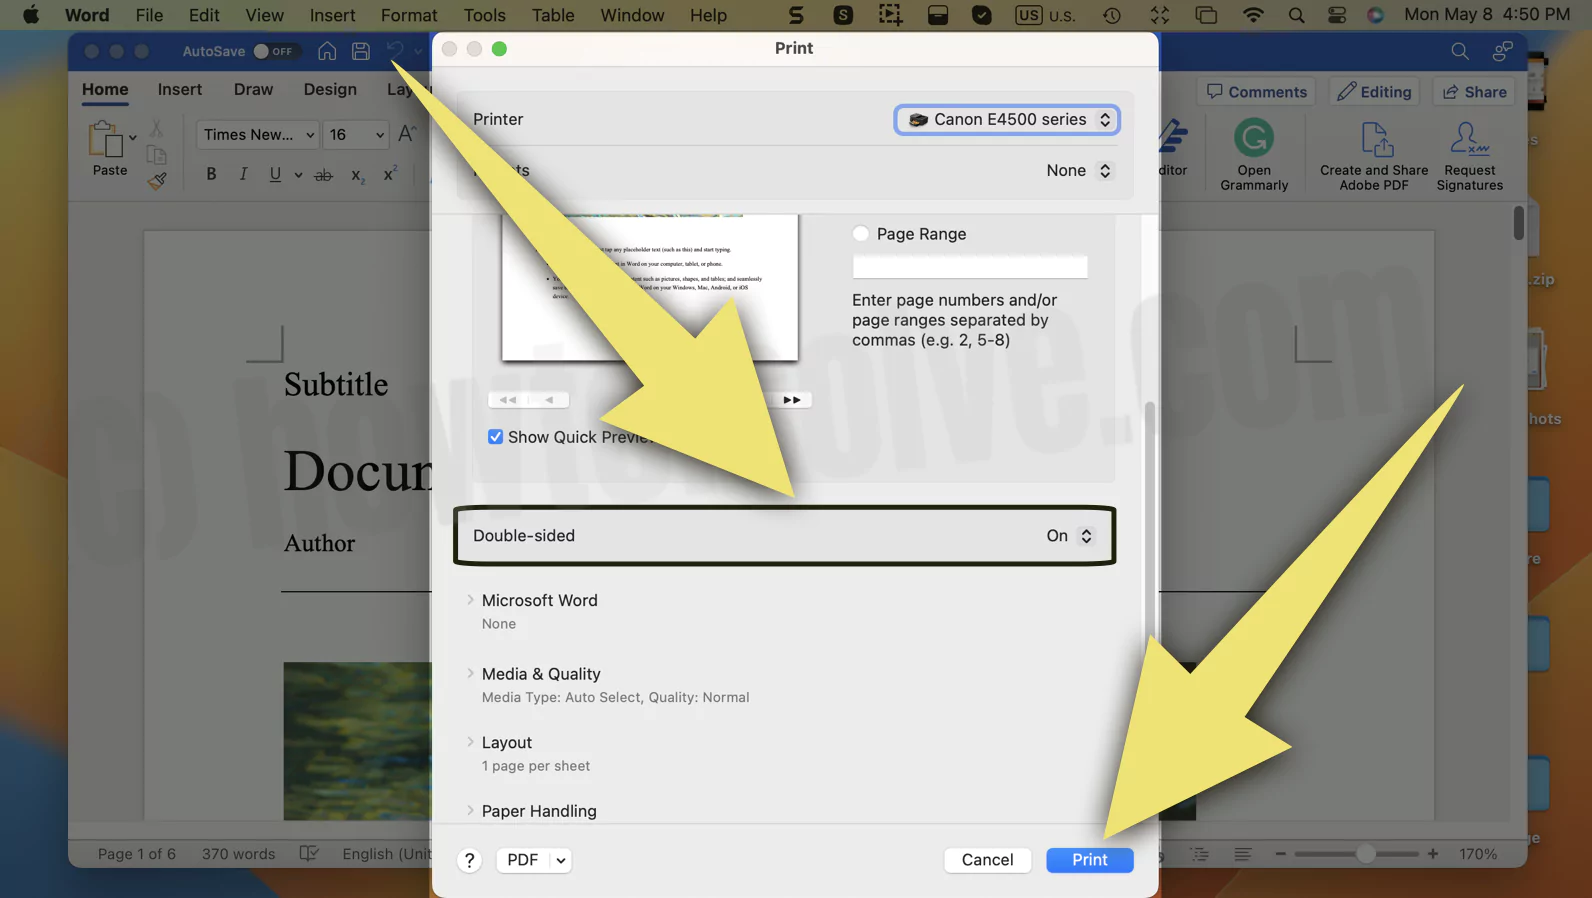
4→ From the next window, set the Double-Sided to ON. > Print.
macOS Monterey And Earlier
- Access the Document you are willing to give a print for.
- After this, select the File from the top menu bar.
- Swipe down and select Print.
- Click Copies & Pages > Layout.
- Navigate to Two-sided drop-down.
- Choose Long-Edge binding or Short Edge Binding from the menu.
- At last, click on Print.
That’s It!
Print Double-sided in Preview on Mac
Note: The double-sided in the Print preview will be greyed out if you try to print PDF only with a single page via Preview.
macOS Ventura And Later
1→ Right-click on the desired PDF and select Open With.
2→ Next, choose Preview.
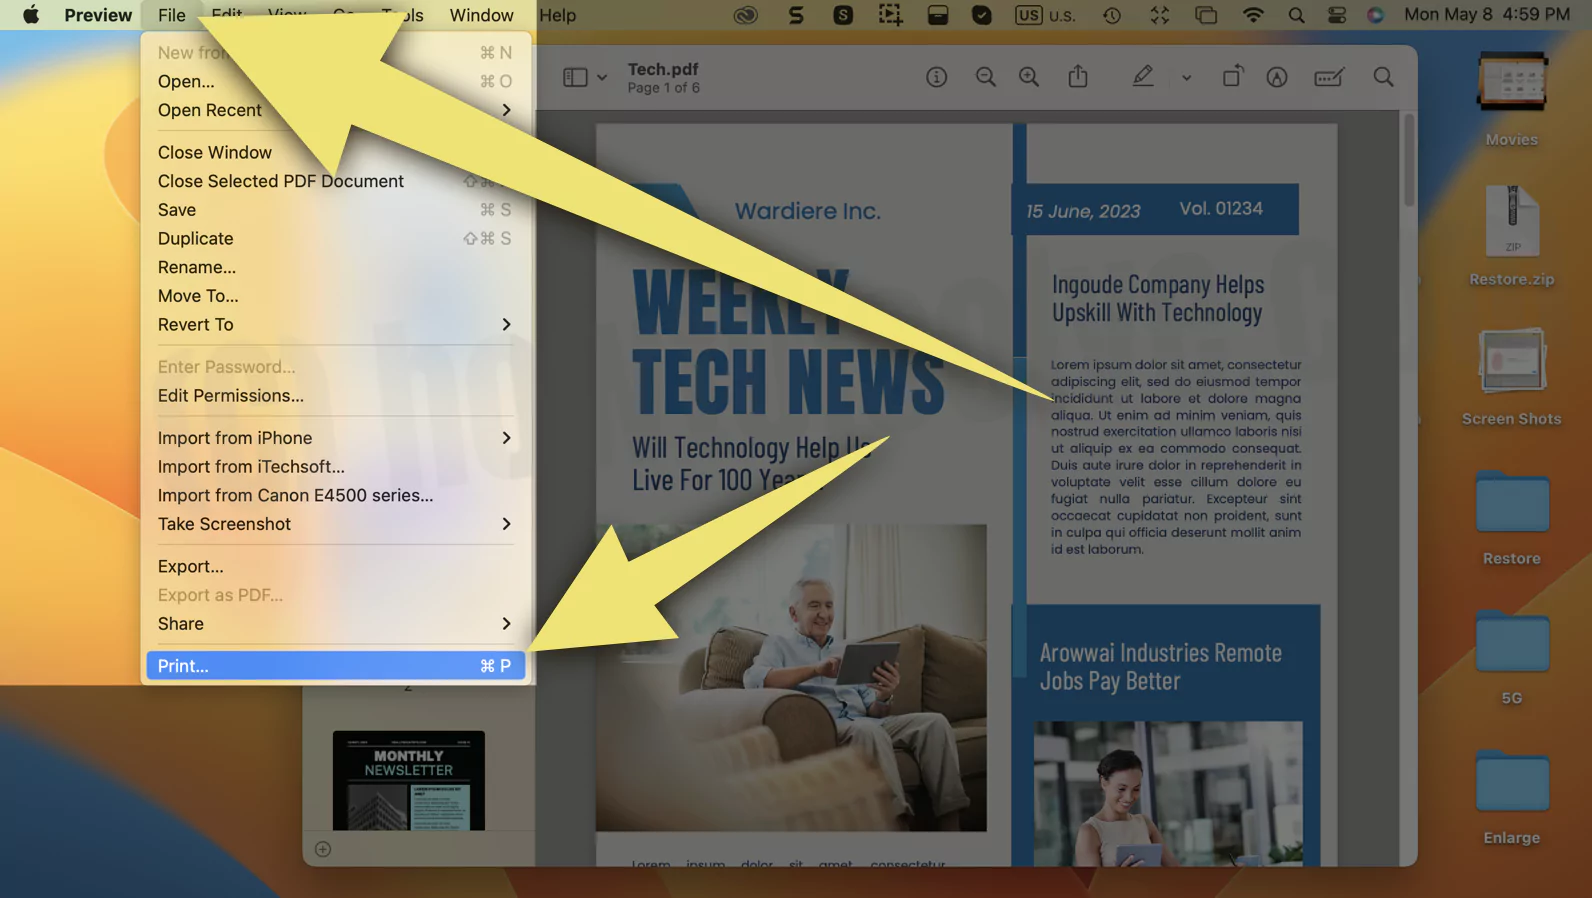
3→ Click on the File from the menu bar.
4→ Scroll down and select Print…
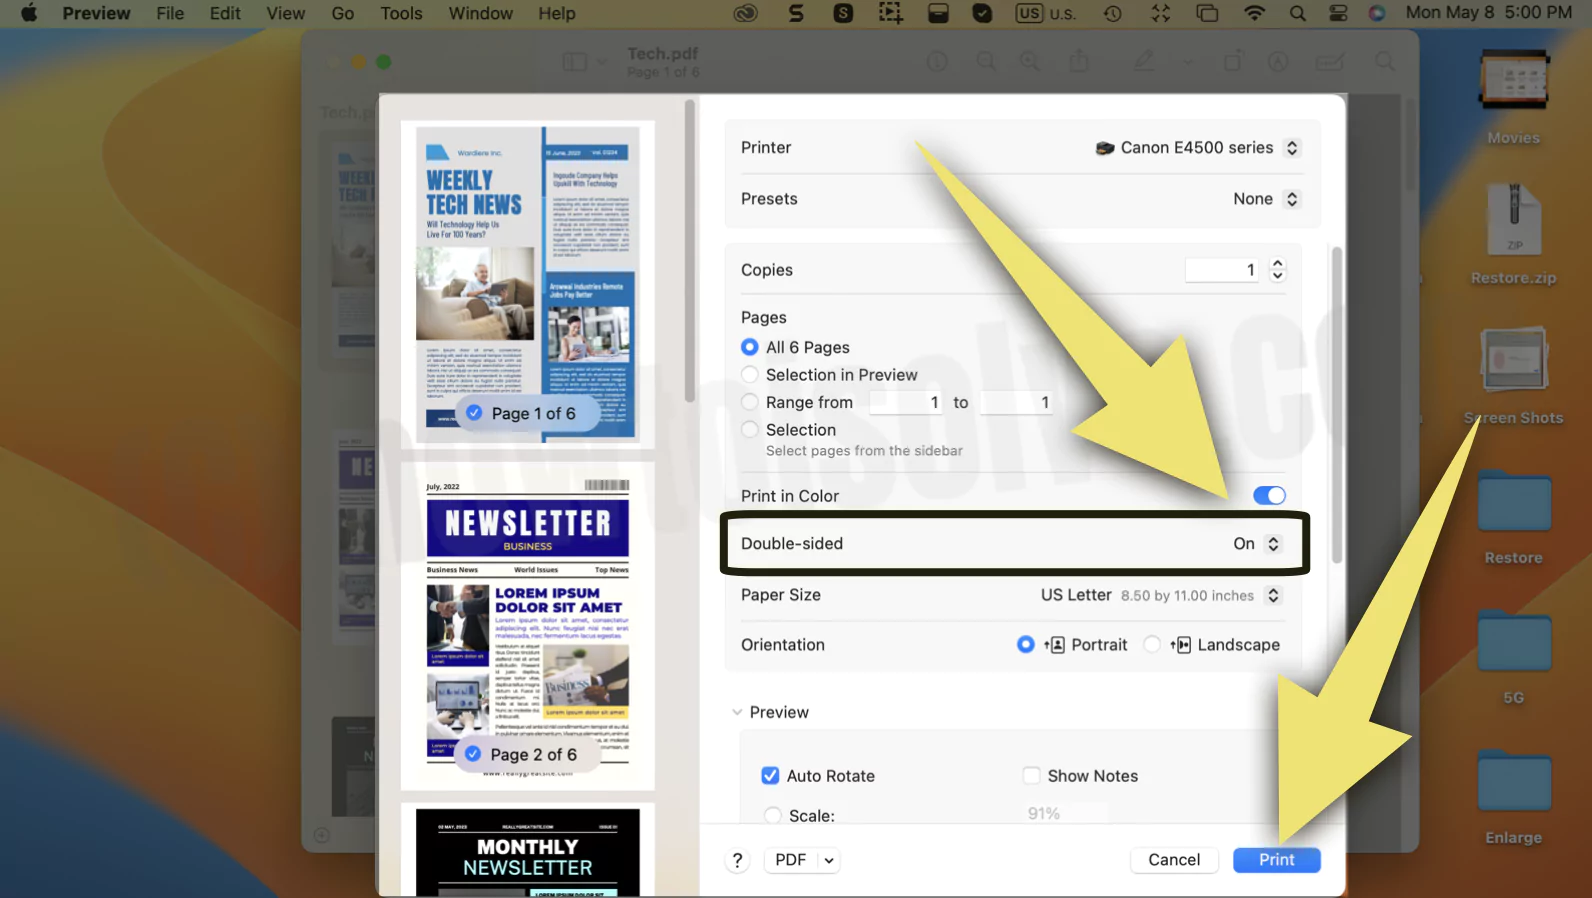
5→ Select the Double-Sided drop-down, and choose On or On(Short Edge Binding). > Print.
macOS Monterey And Earlier
- Navigate to the desired PDF and right-click on it.
- From the prompt, select Open With > Preview.
- After this, choose File from the menu bar.
- Click on Print…
- At last, check the box next to the Two-sided. And then give a print.
Print Double-sided in Adobe Acrobat on Mac
Note: The double-sided in the Print preview will be greyed out if you try to print PDF only with a single page via Adobe Acrobat.
1→ Navigate to the desired PDF and right-click on it.
2→ From the prompt, select Open With > Adobe Acrobat.
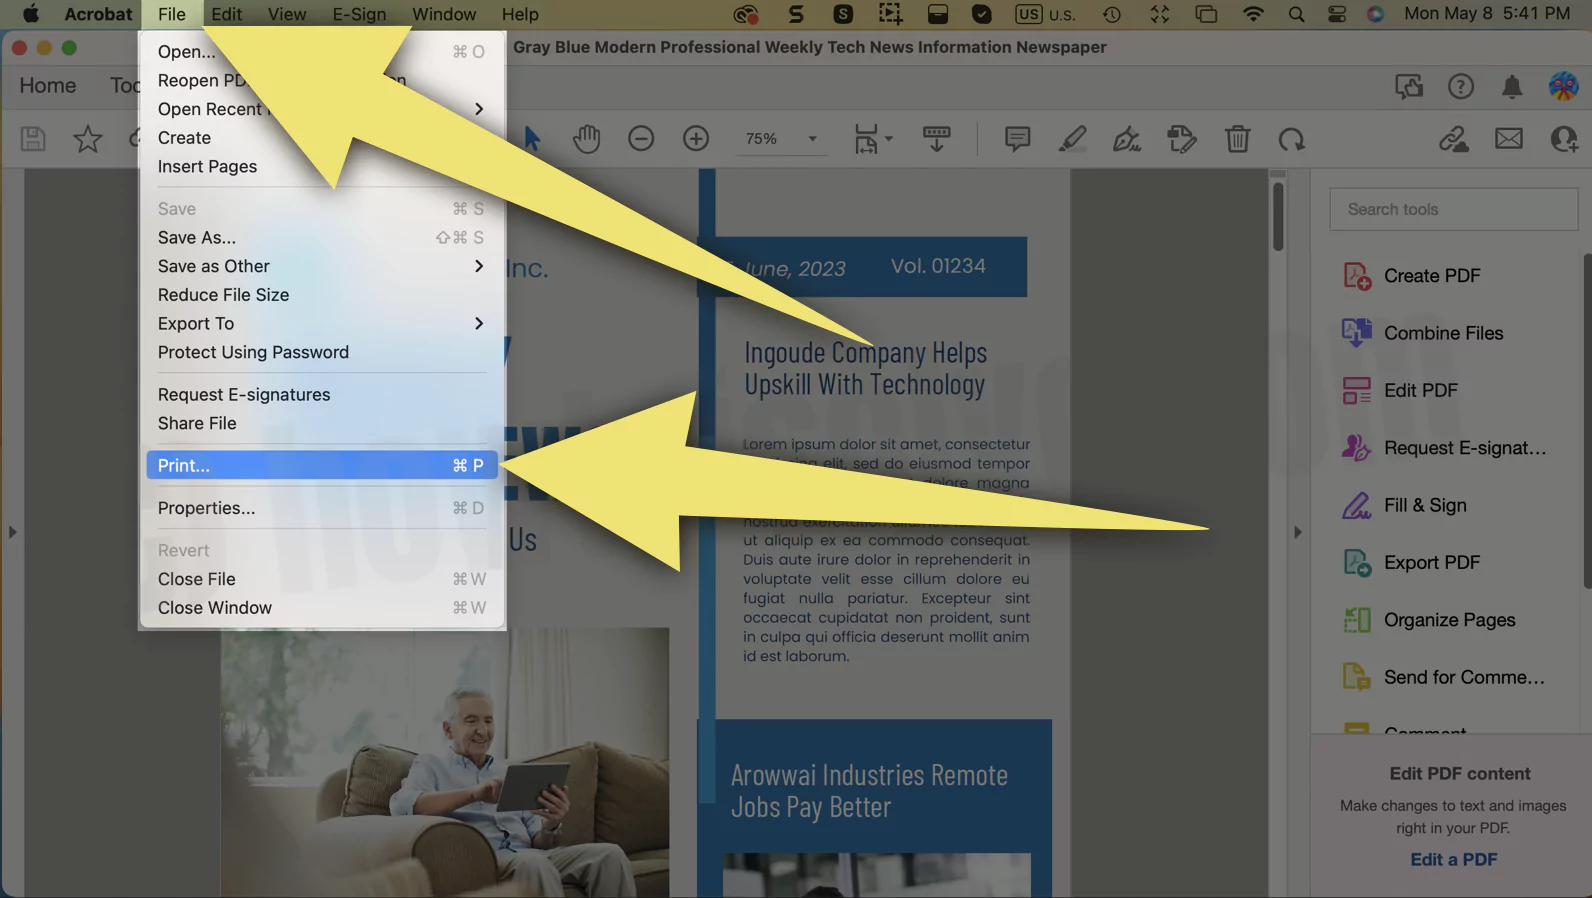
3→ Next, select the File from the menubar.
4→ Choose Print…
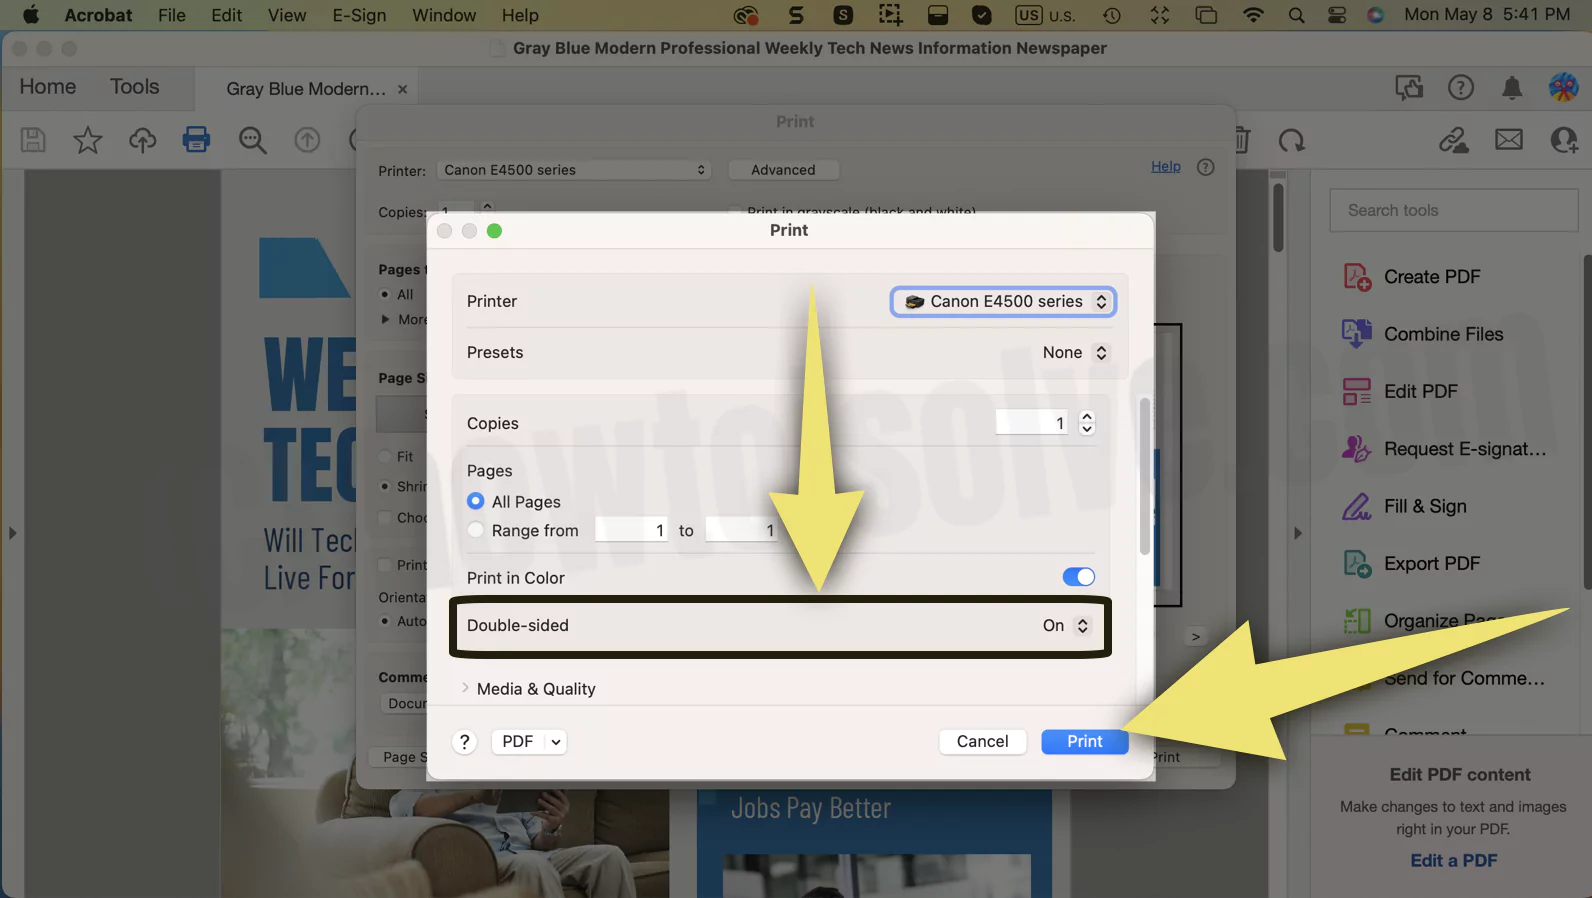
5→ In the next window, select Printer…A button from the bottom.

6→ Select Yes. To Allow Print Setup Dialog box provided by Operating System.
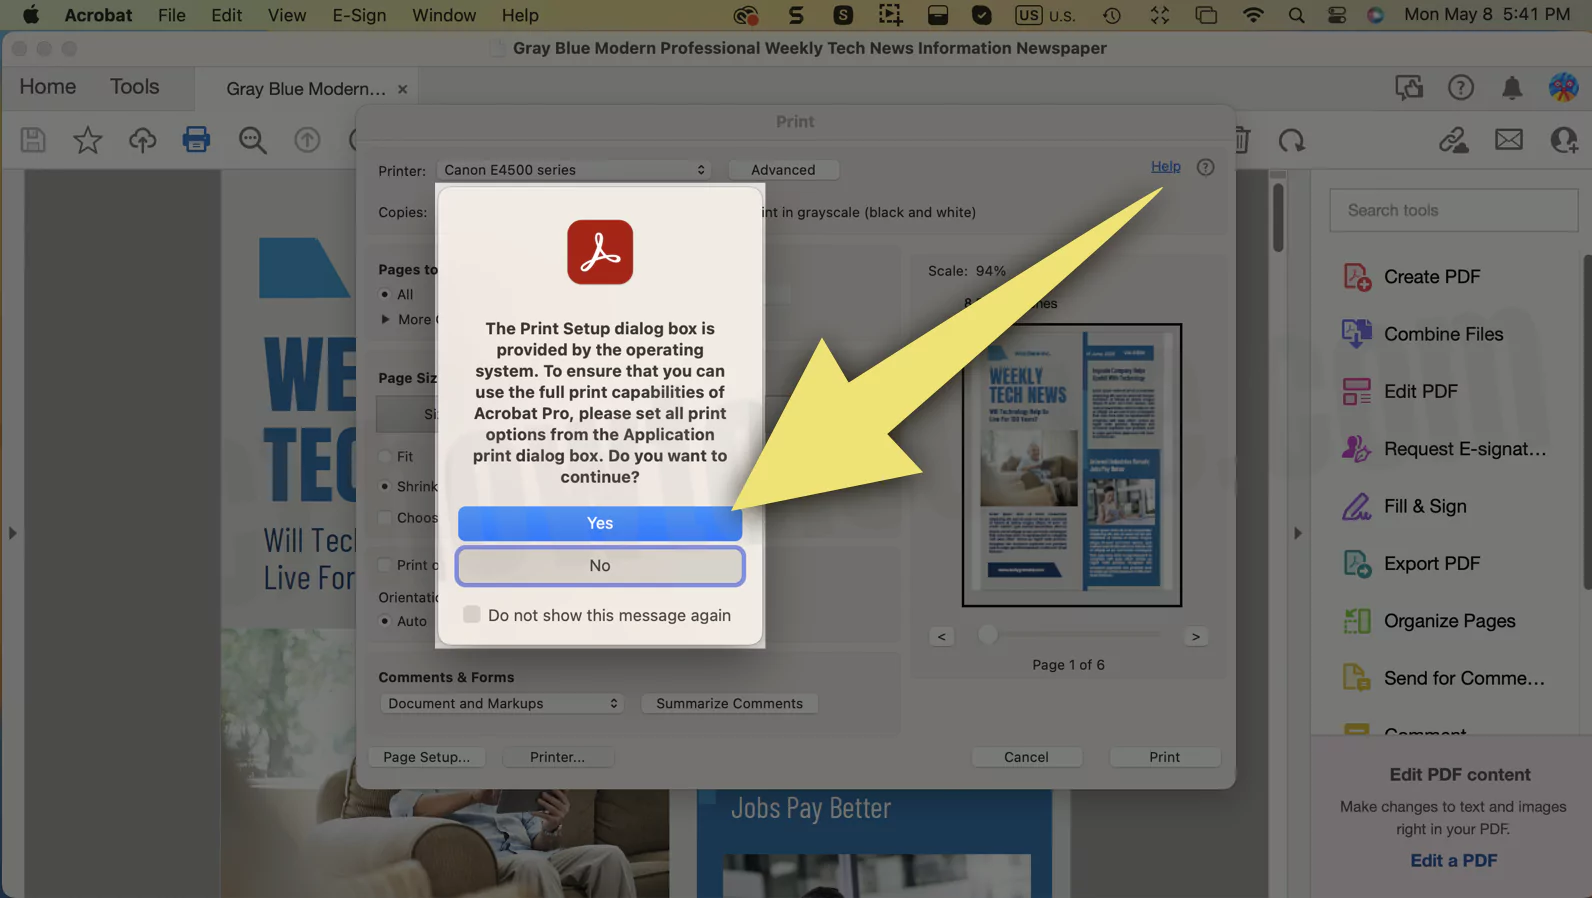
7→ And then set it Double-sided to On.
- For macOS Monterey and earlier, check the box next to the Two-Sided.
Long Edge Binding Vs. Short Edge Binding
It’s worth knowing the difference between long-edge binding Vs. short edge binding: The short edge binding prints a double-sided sheet so you can flip the page over vertically. In contrast, the long edge binding prints a double-sided sheet so that you swipe the pages just like a Book.
Keep note, on macOS Ventura and later versions, ON replicates the Long Edge Binding, and for Short Edge Binding, it’s ON (Short Edge).
How to Print Double-Sided on a Mac When Online
The procedure for double-sided when online is similar. So if you are online and want to double-sided physical print, here’s how you can do it.
For macOS Ventura And Later
- First off, open the desired webpage.
- Click on the File from the menu bar. And select Print (Press Command + P).
- Now click on More Settings.
- Check the box next to the Print On Both Sides.
And from the below drop-down, select Flip on Long Edge or Flip on Short Edge. Lastly, take a preview and click on Print Button.
For macOS Monterey And Earlier
- First off, open the desired webpage.
- Click on the File from the menu bar. And select Print (Press Command + P).
- Now click on More Settings.
- Choose Print Using System Dialog…
- Check the box next to the Two-Sided.
- At last, select the Print Button.
The two-sided print procedure is almost identical in Firefox, Safari, and Chrome.
Two-sided printing option greyed out
Some users will find out the Two or Double-sided option greyed on Mac. This is because you don’t have the Duplex Printer, Or the file, PDF, or Document you are printing doesn’t have more than one page. And in case the printer supports the duplex printer, then you will see the option available in the Layout drop-down.
So what if the printer is not duplex capable? How do I print double-sided?
If there is no duplex printing feature, then you will need to print the one and then reload the other empty side of the page in the printer.
Conversely, you can configure the settings with your printer in Paper Handling. Firstly, set it to print the odd number of pages(1,3,5,7…). And then, reload the empty side pages and further set it to print an even number of pages(2,4,6,8..). Here is how you can do it.
macOS Ventura And Later
1→ Open the File, Docx, PDF, etc. Click File from the menu bar. Select Print…
2→ Swipe down to Print Dialogue and choose Paper Handling.
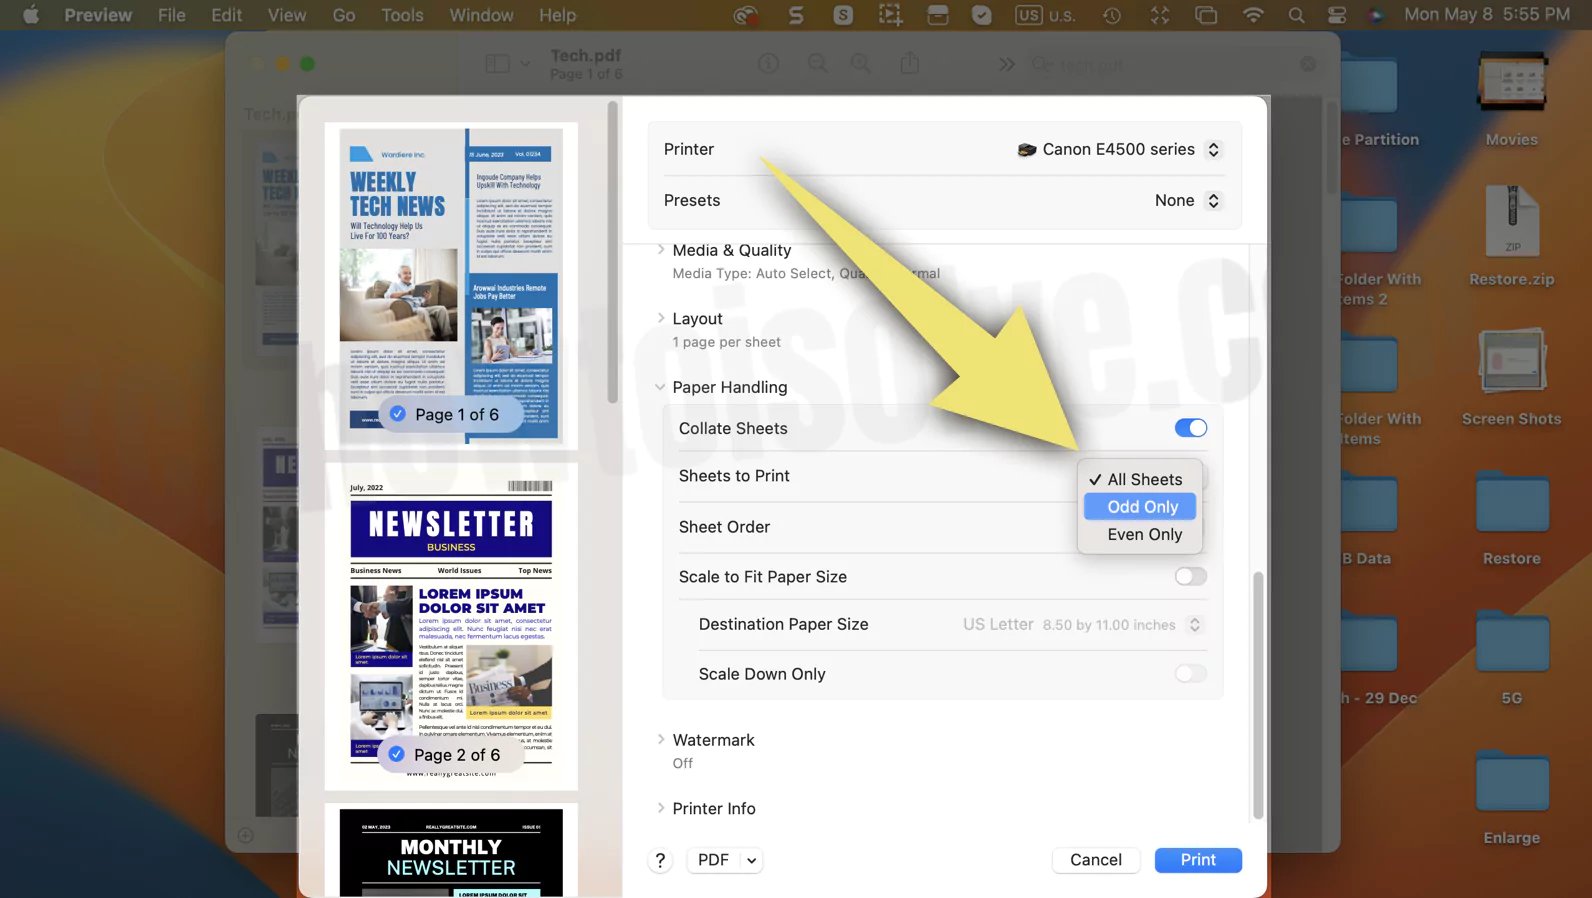
3→ Click Sheet to print drop-down, Set Odd Only, and give a print.
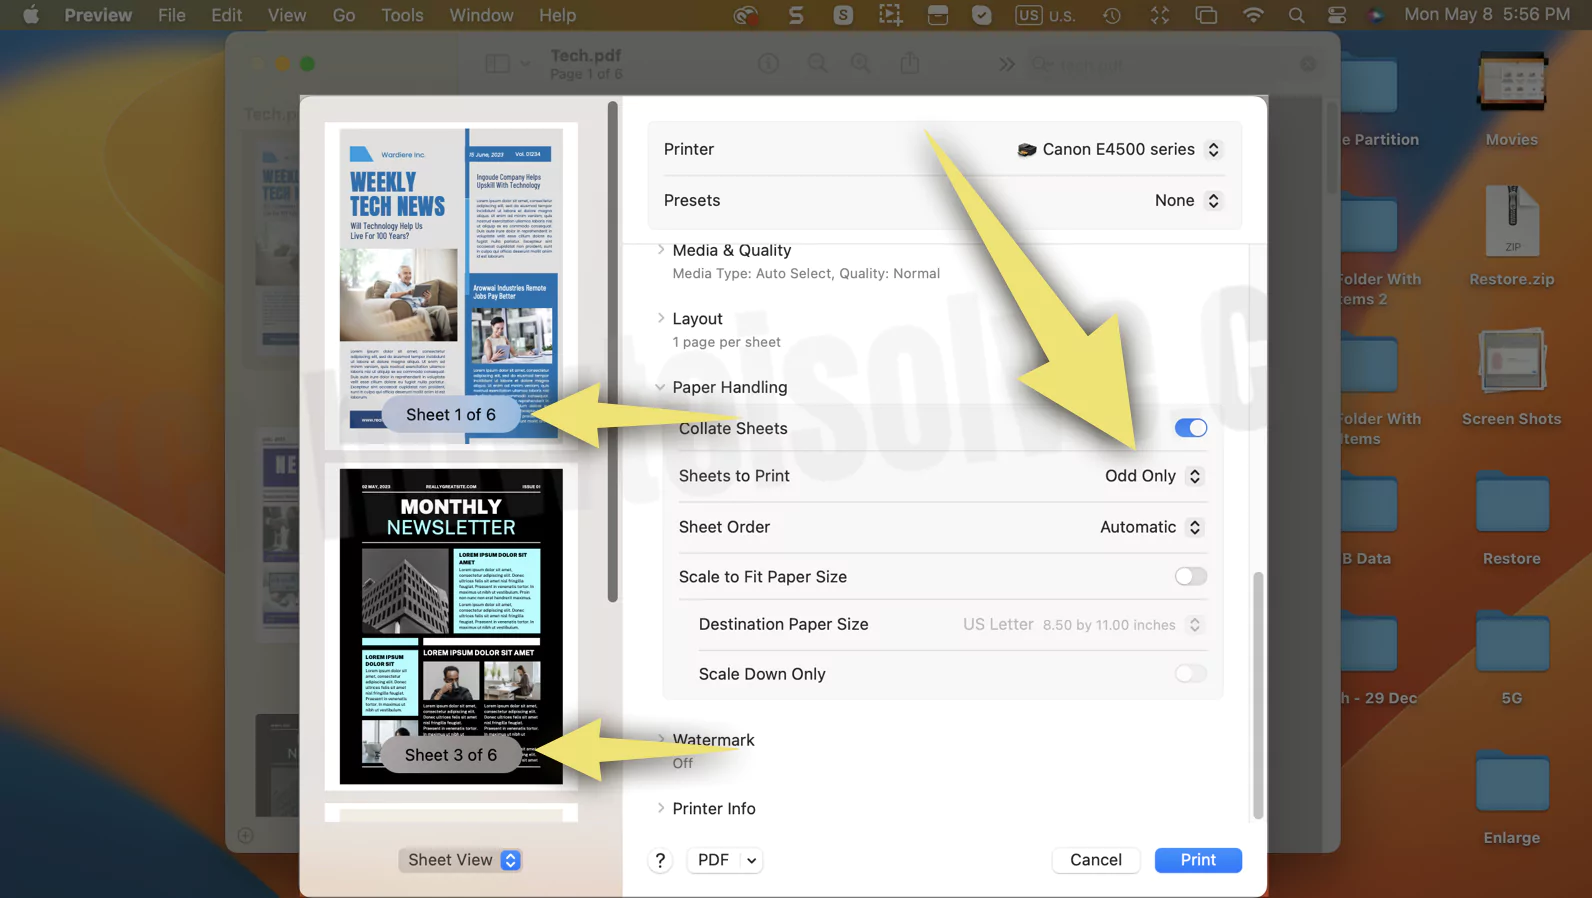
Once the print for odd pages gets finished, arrange the empty side of paper in order in the printer.
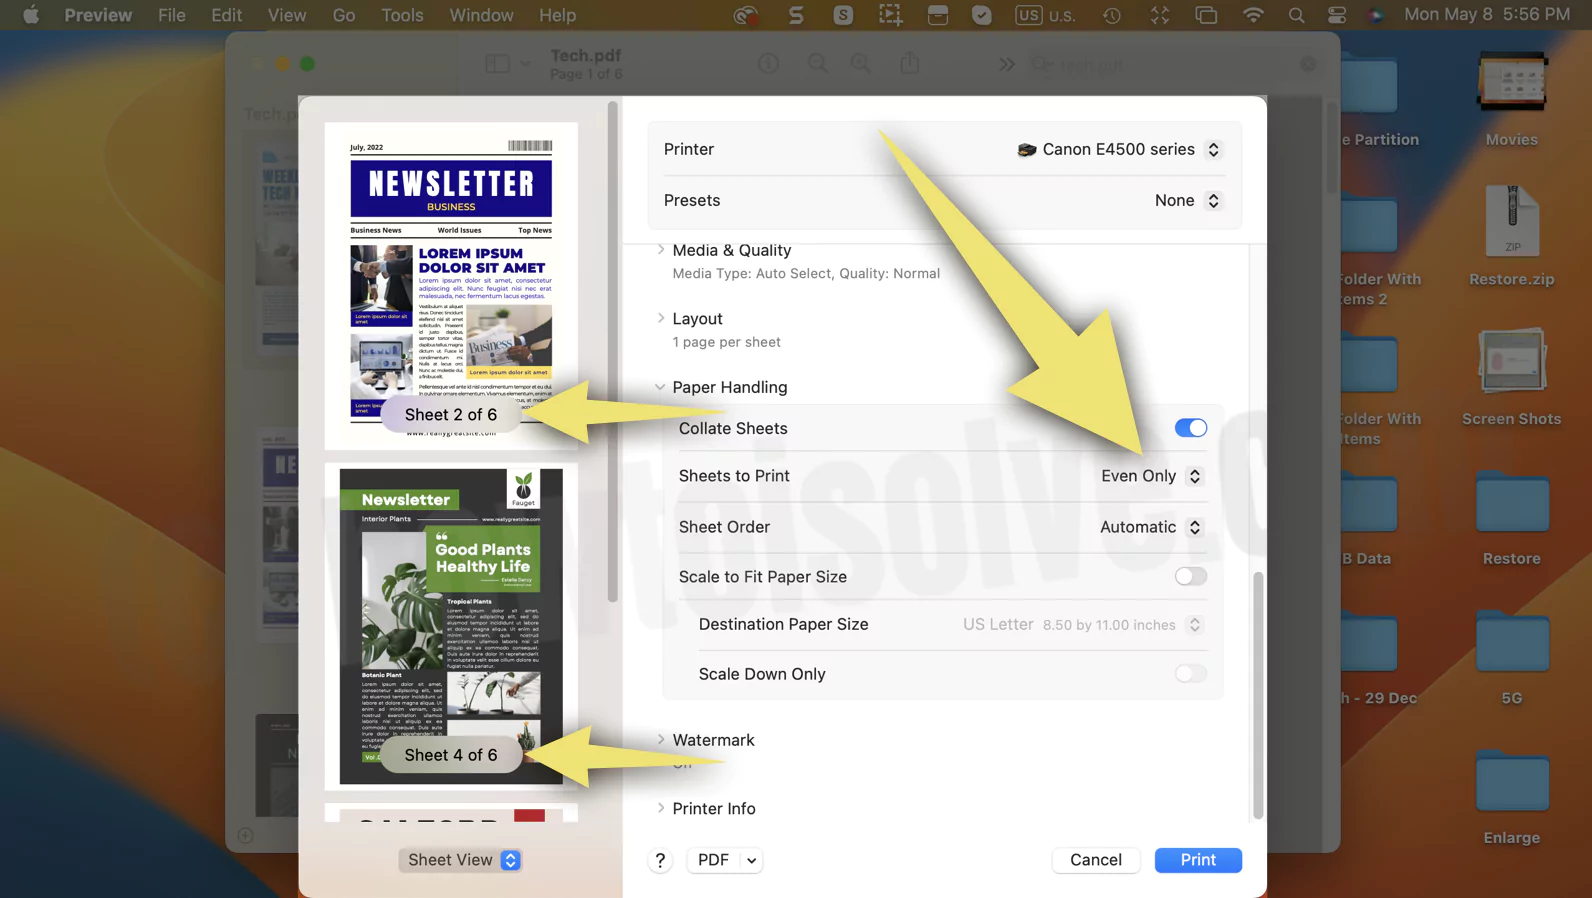
Then set up the printer settings to Even Only by following the steps above.
macOS Monterey And Earlier
- Open the File, Docx, PDF, etc.
- Click File from the menu bar.
- Select Print…
- Swipe down to Print Dialogue and choose Preview Drop-down.
- Select Paper Handling.
- Click Pages to Print, and set it to Odd Only.
Once the print for odd pages gets finished, arrange the empty side of paper in order in the printer. Then set up the printer settings to Even Only by following the steps above.
Why Can’t Print Double-Sided On Mac?
If there is not a double-sided or two-sided option available in the printing preview. It means the Duplex feature on the macOS Monterey and earlier versions is turned off. Here is how you can enable it.
- Go to Apple Logo > System Preferences…
- Choose Printer And Scanner.
- Select the connected printer and choose Options And Supplies.
- Go to Options Menu, and check the box next to the Double Printing Units.
How To Set Automatic Duplex Printing On Mac
Being a frequent user of the double-sided print, performing each of these lengthy steps each time can be irritating and time-consuming. However, there are no such settings available on Mac. But to prevent such scenarios, the Mac computer allows creating the preset for the personalized print settings. If you want such settings on your computer, do read our article on how to change and save presets on Mac.
Fix: Printer Not Working on Mac
Final Thought!
Here we end up with the procedure to print double-sided on new and old macOS. In addition, we showed how to fix Double-sided or two-sided not working on Mac. I hope you got all your answers cleared for double-sided print on Mac.


