
If you are using a Macbook, You must be familiar with Apple mail. For those who are not, apple mail is the in-built mail service provided by Apple on your Mac to organize and manage your email account without going to a third-party mail applications.
Initially, setting up Apple mail asks you the mail service provider of your choice. Where you can select your service provider, whether it is Google, yahoo, outlook, or iCloud, then feed in your id and password on the next page, and you can access your email account from Apple Mail.
The news for the Apple mail application here is that they have introduced a new feature where you can schedule your emails ahead of time. While this feature was already present in google mail, the absence from the Apple mail application has been a bit inconvenient for the users by far. Well, not anymore!
How to Schedule Email on Apple Mail App on Mac
Let’s dive in and look at how to use the schedule mail feature of the Apple mail application on your Macbook.
Step 1: Get your mail ready.
This essentially means getting everything you want to include in the mail ready to send. For instance,
- Receiver Details
- Subject Line
- Body
- Signature
- Attachments, if any
Step 2: Go to the scheduling option
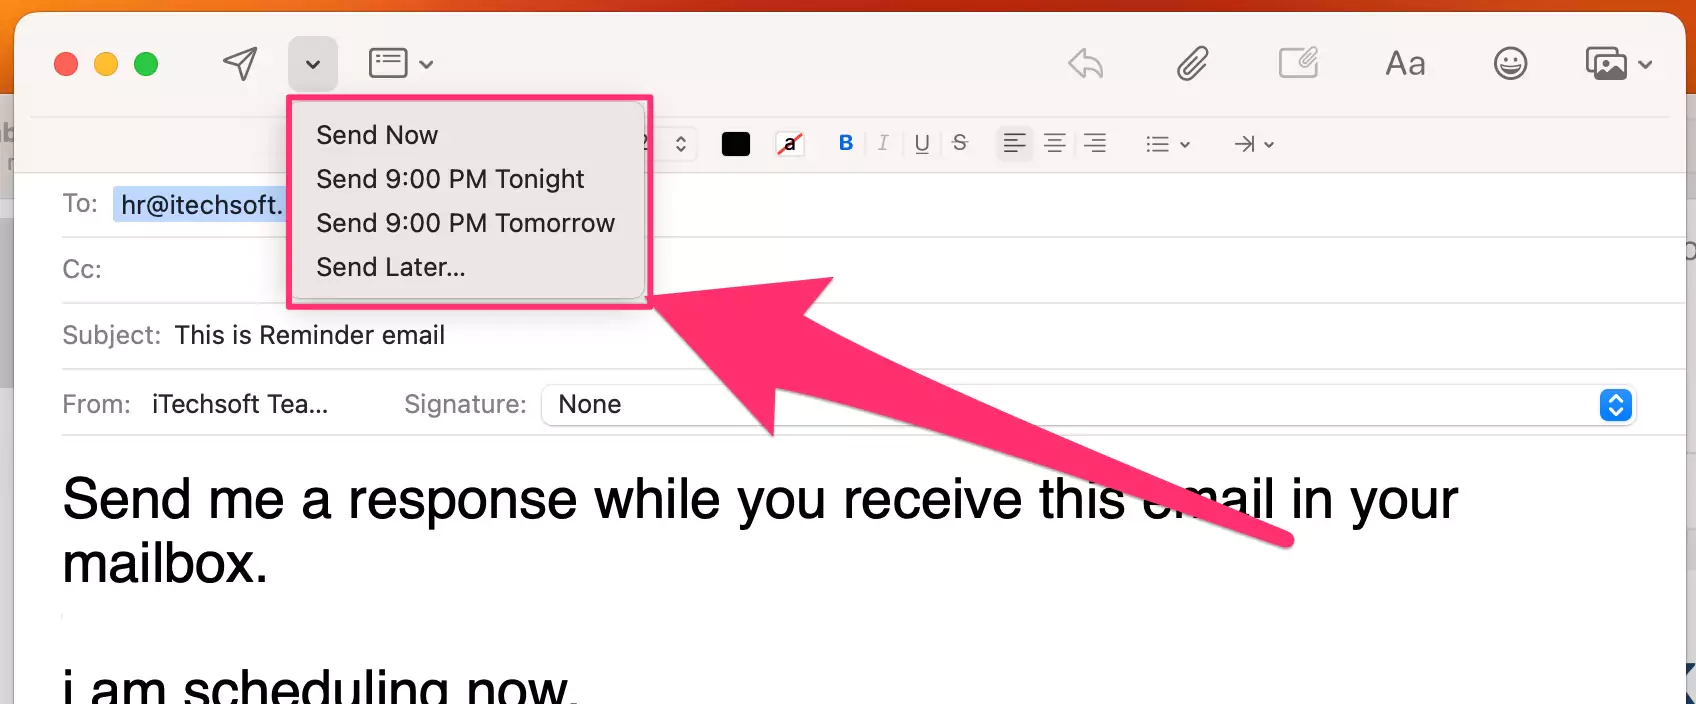
On the top left corner of the screen, right beside the sending option, there is an arrow representing a drop-down menu. Click the same to see the available options.

Step 3: Select the preferred scheduling option
Once you click the drop-down arrow, you will see a list of suggestive times you would want to schedule sending the email. Alternatively, you can set a customized time and date to schedule the mail by selecting the ‘Send Later option.
Step 4: Select the Date and Time
Once you click on the ‘Send Later’ option, a dialogue box will open with a time and date setting.
- Select your Preferred date and time
- Click the Schedule button

This will confirm that the device sends the mail on your set date and time. But, there is a catch: you need to ensure that the device will be online in the said time to ensure the email is delivered on the scheduled time.


