If you’re troubleshooting file sharing, NAS connections, or network issues on Windows 11, you may need to check which SMB (Server Message Block) version your system is using.
In this guide, you’ll learn simple methods to check SMB version using PowerShell and Windows settings—no advanced skills required.
What Is SMB Version (Quick Info)
SMB (Server Message Block) is a protocol used for:
- File sharing
- Printer sharing
- Network communication
👉 Different versions exist:
- SMB1 → Old and insecure
- SMB2 / SMB3 → Modern and secure
Method 1: Check Active SMB Version (Most Accurate)
This shows which SMB version is currently being used in a real connection.
🪜 Steps:
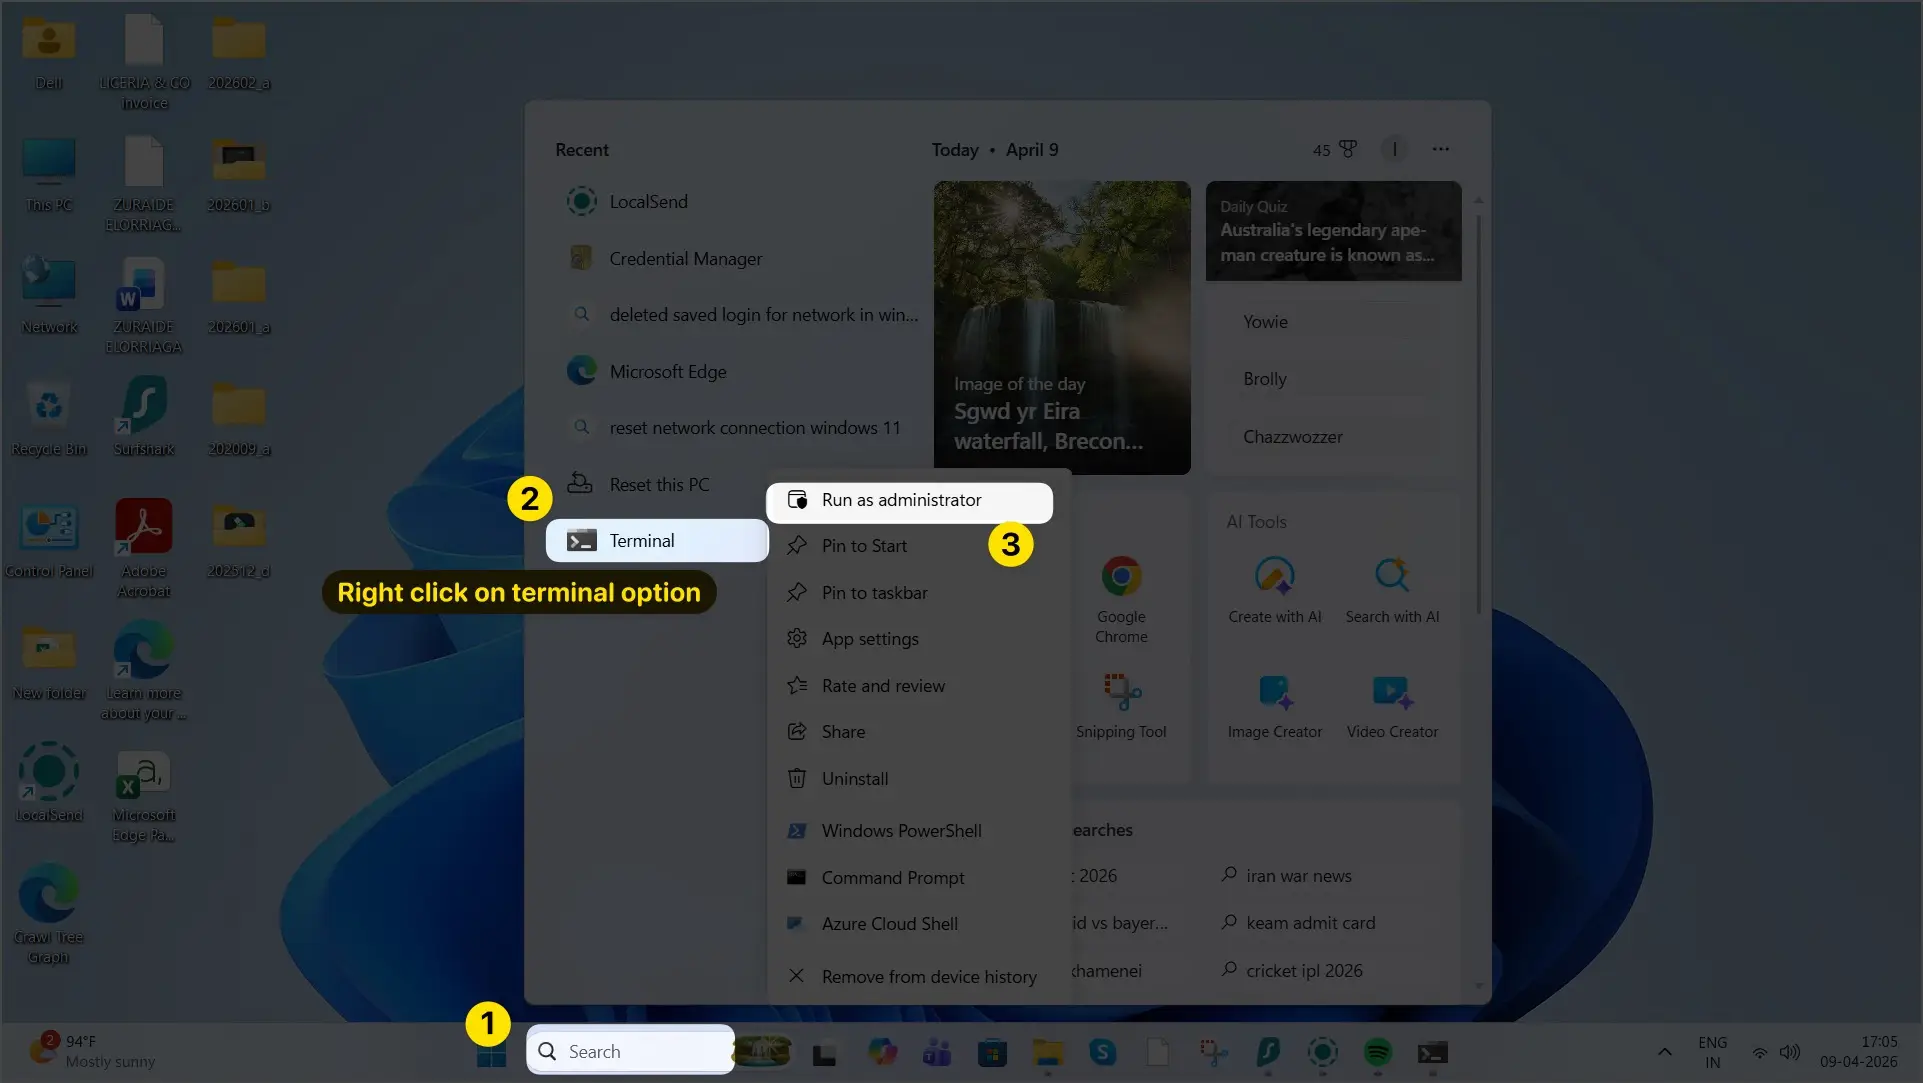
- First of all, click on Search bar in Windows 11 pc computer. (You can see this in the example screenshot provided)
- Next, Right click on the Terminal option.
- Select Run as administrator to open Terminal (Admin) or PowerShell (Admin).
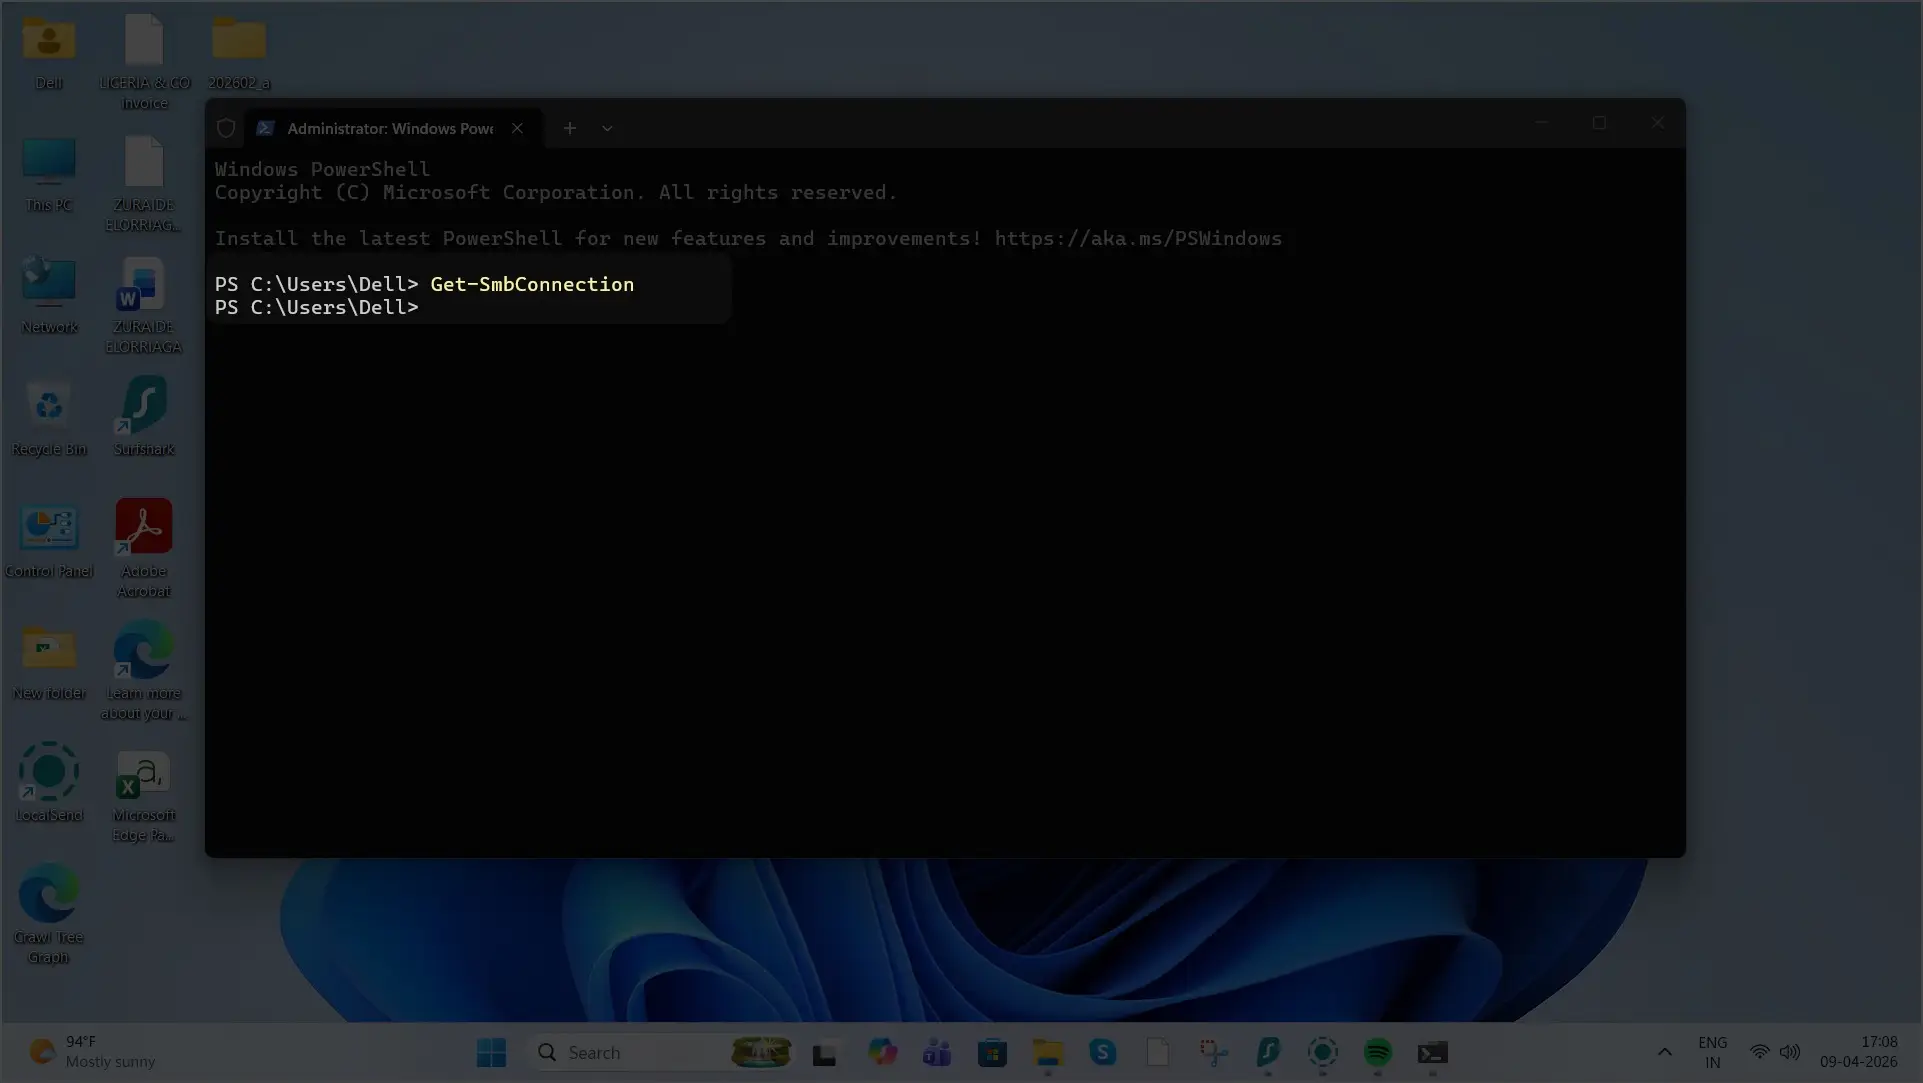
- Type this command:
Get-SmbConnection
- Press Enter Key.
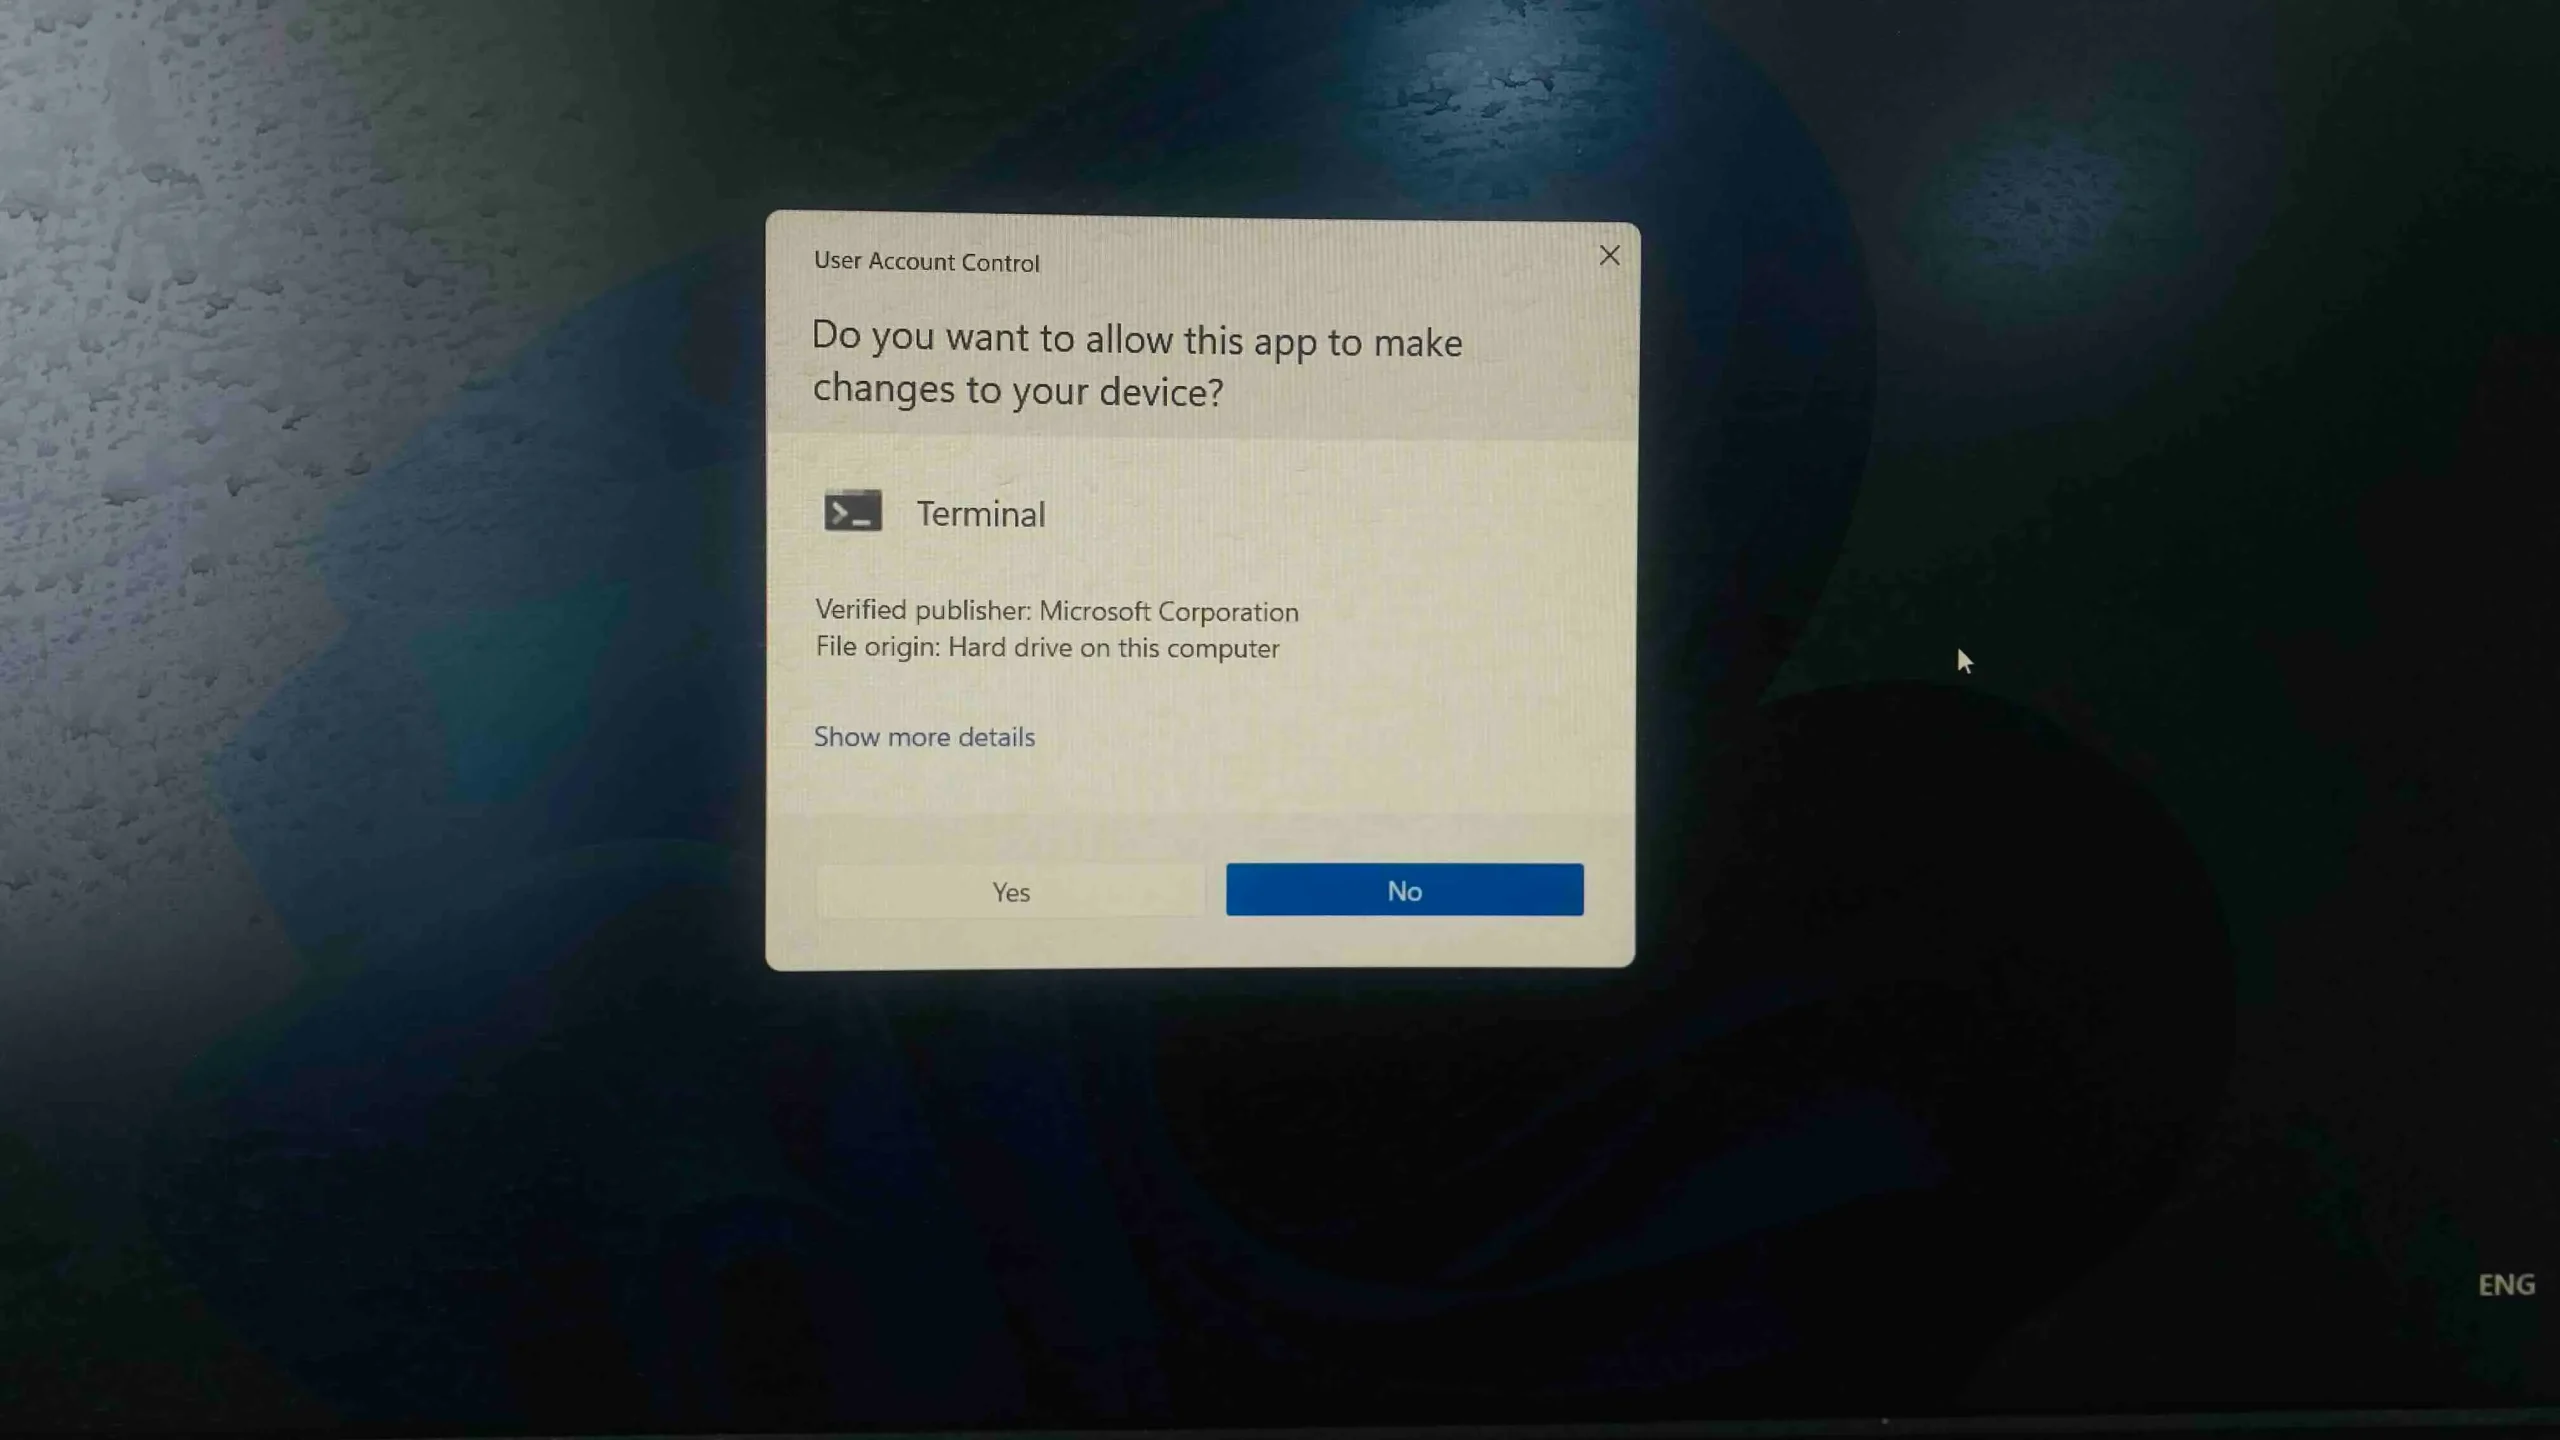
A pop-up asks you – Do you want to allow this app to make changes to your device? Click on Yes.
What to Look For:
- Check the Dialect column
👉 Example values:
- 3.1.1 → Latest (Windows 10/11)
- 3.0 → Modern
- 2.1 → Older
Method 2: Check Enabled SMB Versions (Server Settings)
This tells you which SMB versions your system supports.
Check SMB2 / SMB3
Run this command:
Get-SmbServerConfiguration | Select EnableSMB2Protocol
👉 If result = True
✔️ SMB2 and SMB3 are enabled
Check SMB1 (Important)
Run this command:
Get-SmbServerConfiguration | Select EnableSMB1Protocol
👉 If result = False
✔️ SMB1 is disabled (recommended)
Method 3: Check SMB1 via Windows Settings (GUI)
You can also check SMB1 without using commands.
🪜 Steps:
- Press Win + R
- Type:
optionalfeatures.exe
- Press Enter
- Scroll down to:
👉 SMB 1.0/CIFS File Sharing Support
Result:
- ✔️ Checked → SMB1 enabled
- ❌ Unchecked → SMB1 disabled (recommended)
SMB Versions Explained (Easy Table)
| SMB Version | Introduced In | Status |
|---|---|---|
| 1.0 (CIFS) | Windows 2000 | ❌ Insecure / Deprecated |
| 2.02 | Windows Vista | ⚠️ Old |
| 3.0 | Windows 8 | ✅ Good |
| 3.1.1 | Windows 10 / 11 | ✅ Best |
Which SMB Version Should You Use?
👉 Recommended:
- Use SMB 3.1.1 for best performance and security
👉 Avoid:
- SMB1 (only use if absolutely required for old devices)
Common Issues & Fix
❌ SMB Not Showing?
- Make sure you are connected to a network share
❌ SMB1 Required?
- Enable it temporarily
- Disable after use
❌ Connection Problems?
- Update Windows
- Restart your PC
- Check firewall settings
Final Verdict
Checking SMB version on Windows 11 is simple if you follow the right method.
👉 Best method:
- Use
Get-SmbConnectionfor real-time version
👉 Always:
- Keep SMB2/SMB3 enabled
- Avoid SMB1 unless necessary
Pro Tip
If your NAS or device only supports SMB1, it’s time to upgrade—it’s not safe anymore.