If you’re using a Windows-shared printer or a print server in your office, SMB printing is the easiest way to connect from a Mac. SMB (Server Message Block) is the same protocol Windows uses for file and printer sharing — and macOS supports it natively.
With the new macOS Tahoe 26 update, Apple improved SMB’s speed and security. However, it also changed how Macs authenticate and discover printers. So, if you’re setting up SMB printing for the first time — or reconnecting after an update — this guide walks you through every step.
✅ If your printer suddenly stopped working after updating, check my full guide: [Fix SMB Printing Issues on macOS Tahoe 26].
What Is SMB Printing and How Does It Work?
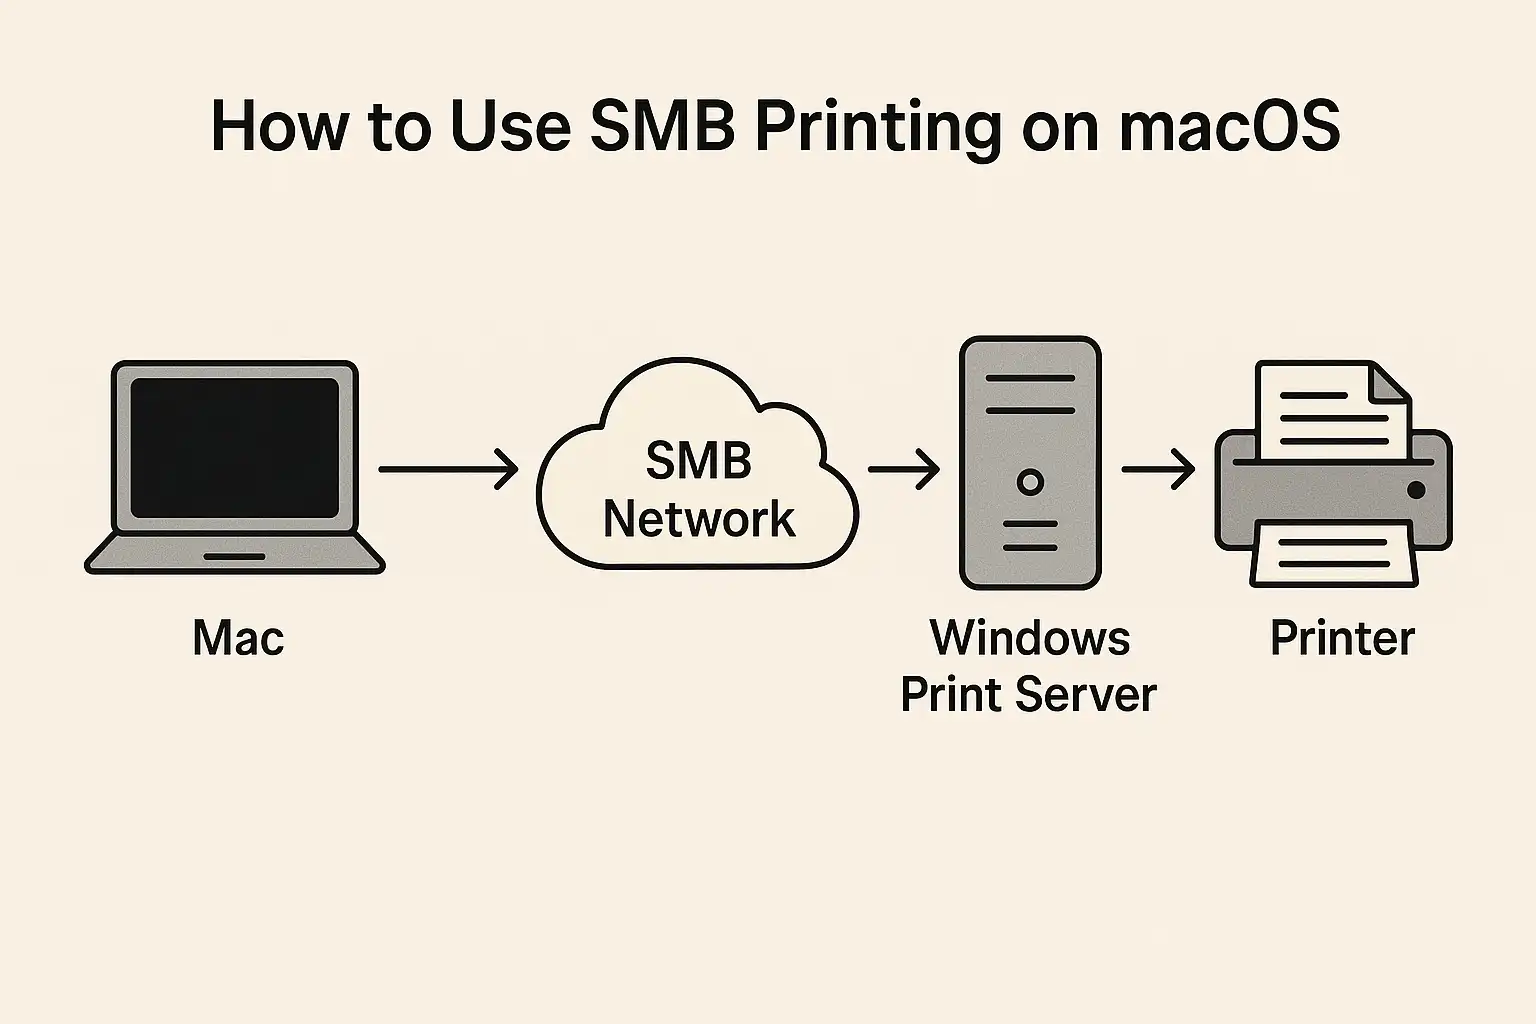
SMB printing allows your Mac to communicate with a printer shared on another computer — usually a Windows PC or server. Here’s how it works:
- macOS connects to the shared printer using the smb:// protocol.
- The printer host authenticates your username and password.
- macOS sends print jobs through the network using SMB ports (TCP 445).
It’s perfect for shared office networks or when your printer is attached to a Windows machine.
✅ Learn more: [Mac connect to SMB with username and password] — covers login details, Keychain management, and authentication fixes.
Requirements Before You Start
Make sure you have these ready:
- A Mac running macOS 14 or newer (Tahoe 26 recommended)
- A printer shared from a Windows PC or print server
- Correct printer driver installed on your Mac
- SMB sharing enabled on the host computer
- Both devices connected to the same local network or VPN
Step-by-Step: Add an SMB Printer on macOS
Step 1. Open Printer Settings
- Go to System Settings > Printers & Scanners.
- Click the + button to add a printer.
Step 2. Choose “Windows Printer via SMB”
From the add-printer window, select Windows Printer via SMB under “Advanced” or “Add Printer or Scanner.”
Step 3. Enter the SMB Address
Type your printer’s SMB path in one of these formats:
smb://printserver.domain.com/PrinterShare
or
smb://username@printserver.domain.com/PrinterShare
✅ Tip: Always use the Fully Qualified Domain Name (FQDN) rather than an IP address. For example:smb://officeprintserver.mycompany.com/HP_LaserJet
If you only know the IP:smb://192.168.1.15/HP_LaserJet
—but for reliability, assign a hostname later.
For detailed troubleshooting if this fails, see [Fix SMB Printing Issues on macOS Tahoe 26].
Step 4. Authenticate with Username and Password
When prompted:
- Enter your Windows account or domain credentials.
- Check “Remember in Keychain.”
This ensures smoother reconnection after restarts.
Step 5. Select the Correct Printer Driver
Choose “Select Software…” or “Use: Generic PostScript” if your model isn’t listed.
If you want duplex or color controls, install the latest manufacturer driver (HP, Canon, Brother, etc.).
Step 6. Test Your Printer
Click Add → Print Test Page to confirm your setup works.
If it fails, verify that your print server’s SMB sharing is active and credentials are correct.
Add Printer Host to /etc/hosts (Optional but Recommended)
If your printer server isn’t reachable by name, macOS may not resolve it properly. You can fix this by editing your hosts file:
- Open Terminal.
- Run:
sudo nano /etc/hosts - Add:
192.168.1.15 printserver.domain.com - Save (Ctrl + O → Enter → Ctrl + X) and restart.
Now you can always connect via hostname.
Advanced: Share a macOS Printer with Windows
You can also share your printer from a Mac to Windows PCs.
- Go to System Settings > General > Sharing > Printer Sharing.
- Enable the toggle and select which printer to share.
- Other devices can connect using:
\\MacName.local\PrinterName
✅ Guide: [Connect to Mac SMB from Windows] — explains how to access shared printers or files across platforms.
Common SMB Printing Errors and Fixes
| Error Message | Likely Cause | Quick Fix |
|---|---|---|
| “Cannot connect to printer” | Incorrect path or DNS resolution | Use FQDN or edit /etc/hosts |
| “Authentication failed” | Cached or wrong credentials | Delete old Keychain entries, reconnect |
| “Printer not responding” | Driver mismatch | Disable the firewall temporarily or check VPN |
| “Connection timed out” | Re-add printer using the correct driver | Disable the firewall temporarily or check the VPN |
Tips for IT & Power Users
- Use
smbutil view //username@printserver.domain.comin Terminal to test connection. - Avoid using guest or anonymous SMB sessions — they’re blocked in Tahoe 26.
- Keep your SMB print server updated for compatibility with macOS’s SMB 3.
- On corporate networks, confirm that SMB signing/encryption policies match macOS defaults.
Wrap-Up
Setting up SMB printing on macOS Tahoe 26 is straightforward once you use the right path, correct credentials, and proper drivers.
If something doesn’t work, switching from IP to hostname and clearing Keychain entries usually solves the issue fast.
Share Your Experience
Did this guide help you print from your Mac successfully? Leave your reaction or comment below — your feedback helps others in the macOS Tahoe community get their printers working again!


