For legal and business documents signatures need daily. Your presence is a sign; enact yourself in both the physical and virtual worlds. You can’t overlook the fact that PDFs are replacing paper papers in most businesses.
Have you ever thought about putting your Signature on a Mac and making it look official and professional?
Mac users may be familiar with Preview, a tool that comes preinstalled with the ability to sign PDF documents electronically. If you have a Mac, though, you can complete the task in under five seconds and without the Use of any pricey software and send them out en masse.
How to Add Handwritten Signature to Word document on Mac
Method 1:- Import Signature to Word
There are many ways to add a signature to Word. Inserting a signature into a Word Mac is easy to follow the normally applicable process. However, to make the process easy to run, we recommend that you make sure that the following steps apply:
Step 1) Make PNG Signature Image:- Proceed by signing a piece of paper, scanning it or capturing using your Phone camera, and saving it in any popular format to your Mac system. Then Remove the Signature Background online, Follow the below steps,
- Sign your Signature on White Paper with a Blue or Black ink pan.

- Capture Photo of your Signature with White Background only, and Move Signature Photo to your Mac using Airdrop if your Have iPhone; otherwise, transfer Signature photo in any way [Mail, cloud].

- Now, open https://www.remove.bg/ on your Mac browser and upload the Signature to Remove Background from it. Once the process is done, click on the Download Option.

- Now, your Signature will save into a PNG file. Use This Signature on Word, Explaining in next step.

Step 2) Add Signature to Word:- If you have Word installed on your Mac, click Insert > Images > Images from File to start the process. 
After adding it to Word, 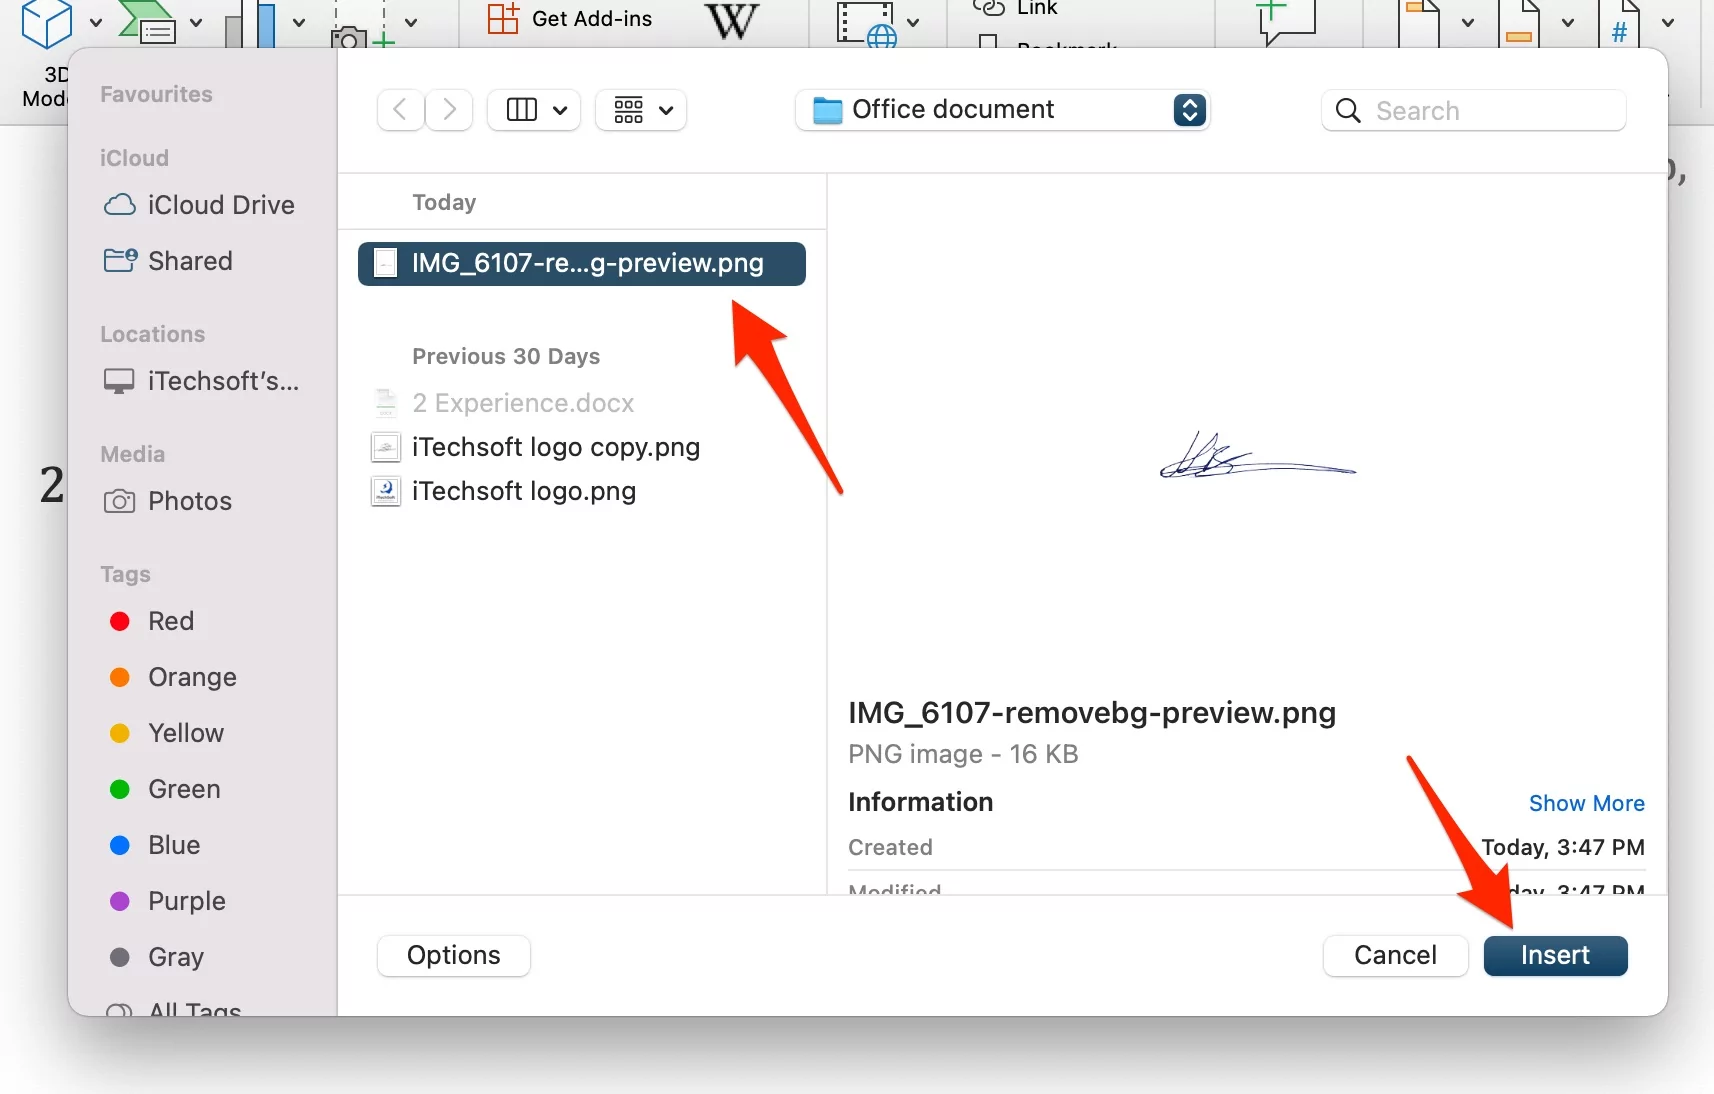
click the Format tab’s image. Then, click Crop to resize the Signature as needed.
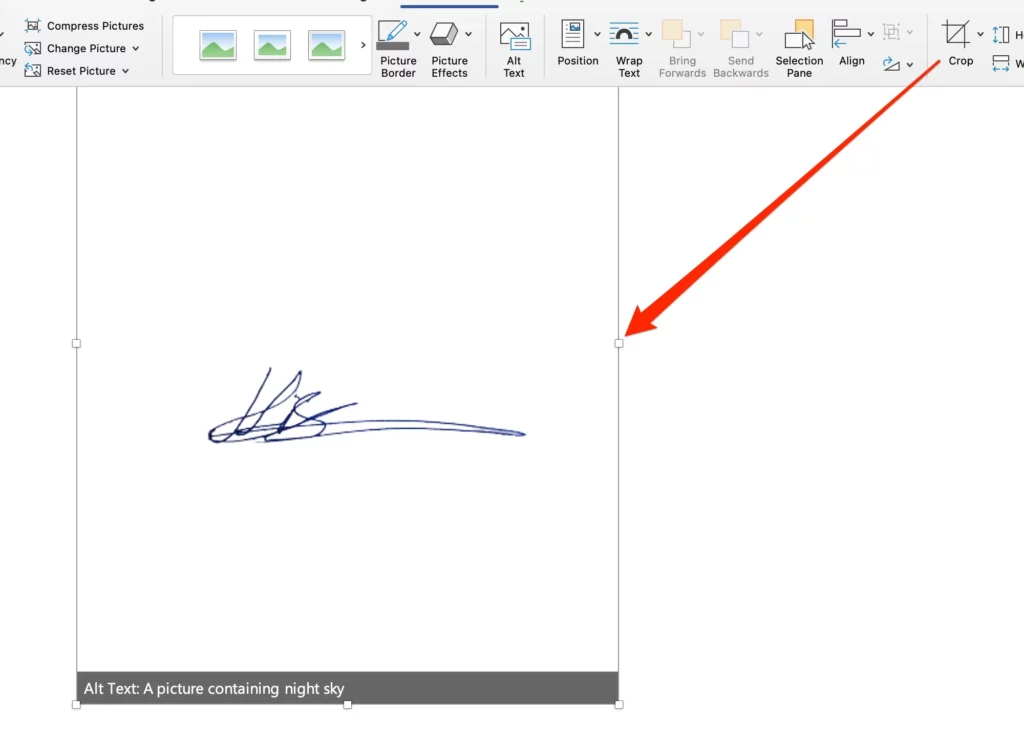
To Put the Signature anywhere in the Document, Use the Wrap Text tool, and Select “In Front of Text.” Now, Move the Signature on the Document page where you set it. Also, we can resize the Signature picture using the Border.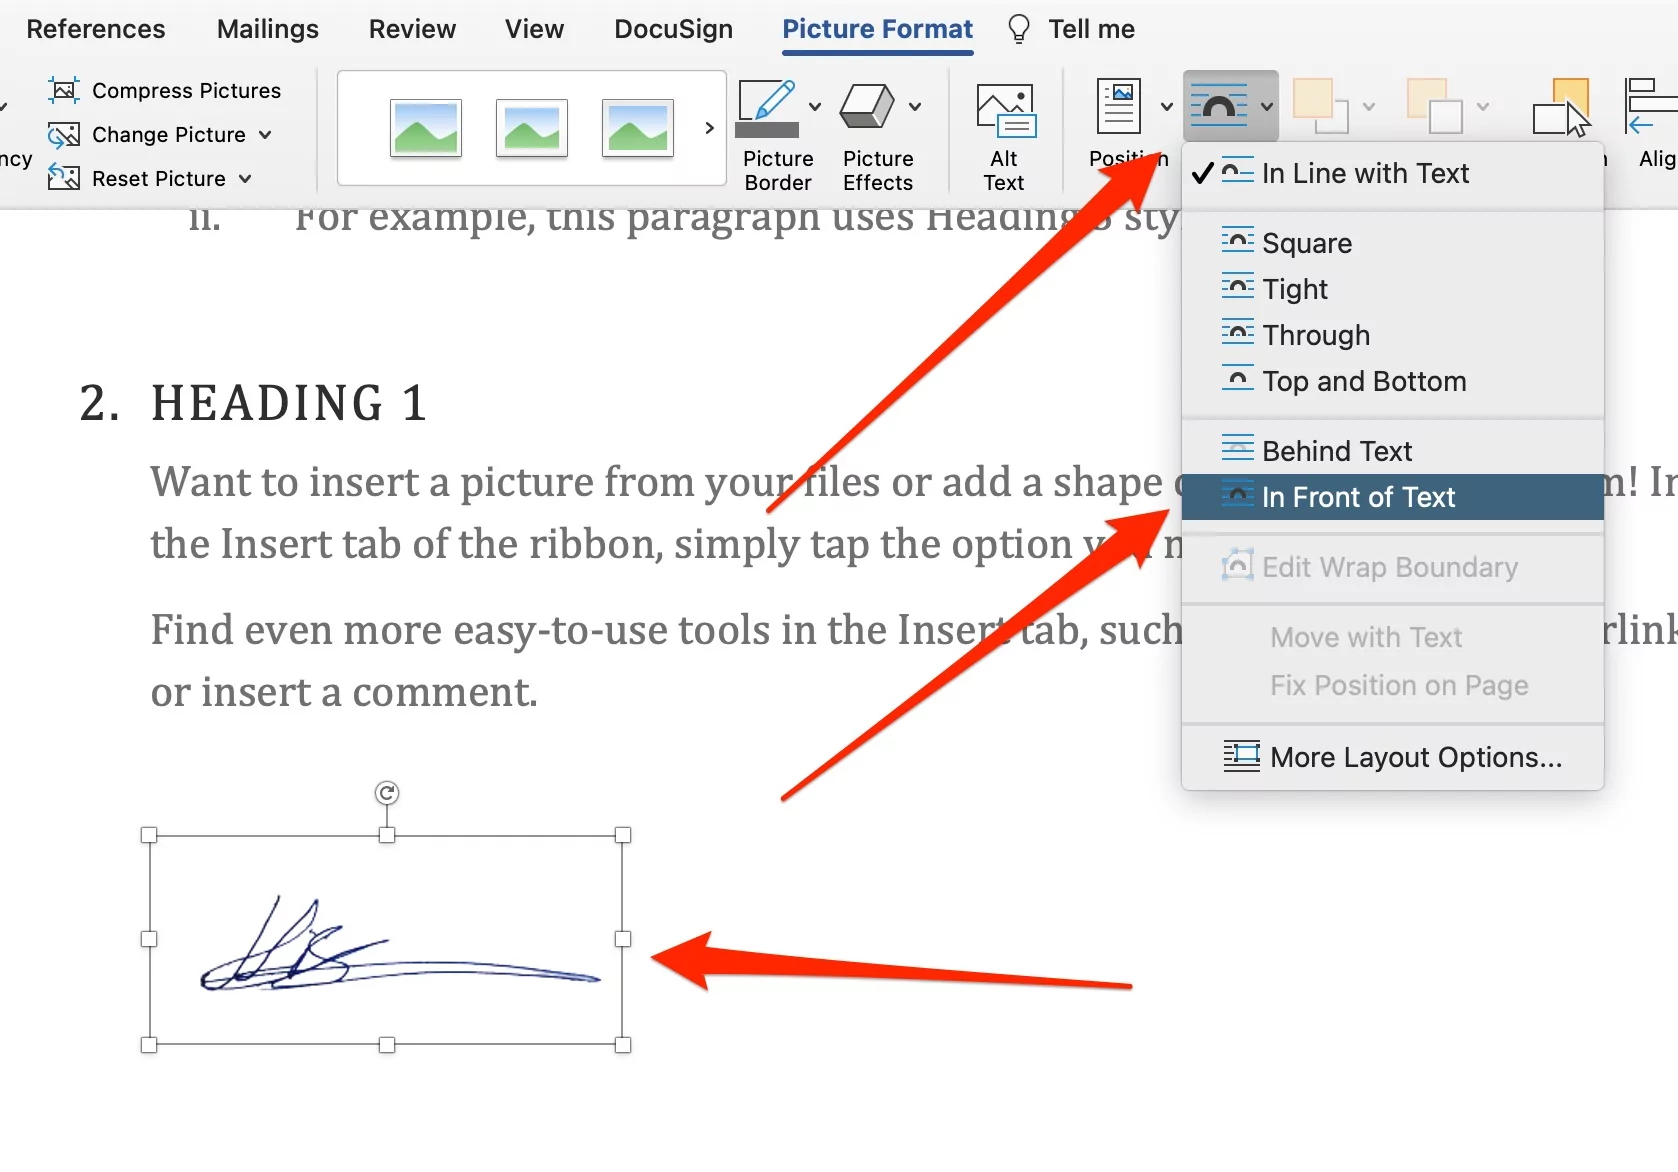
Place the signature on the Word document in correct alignment, That’s it.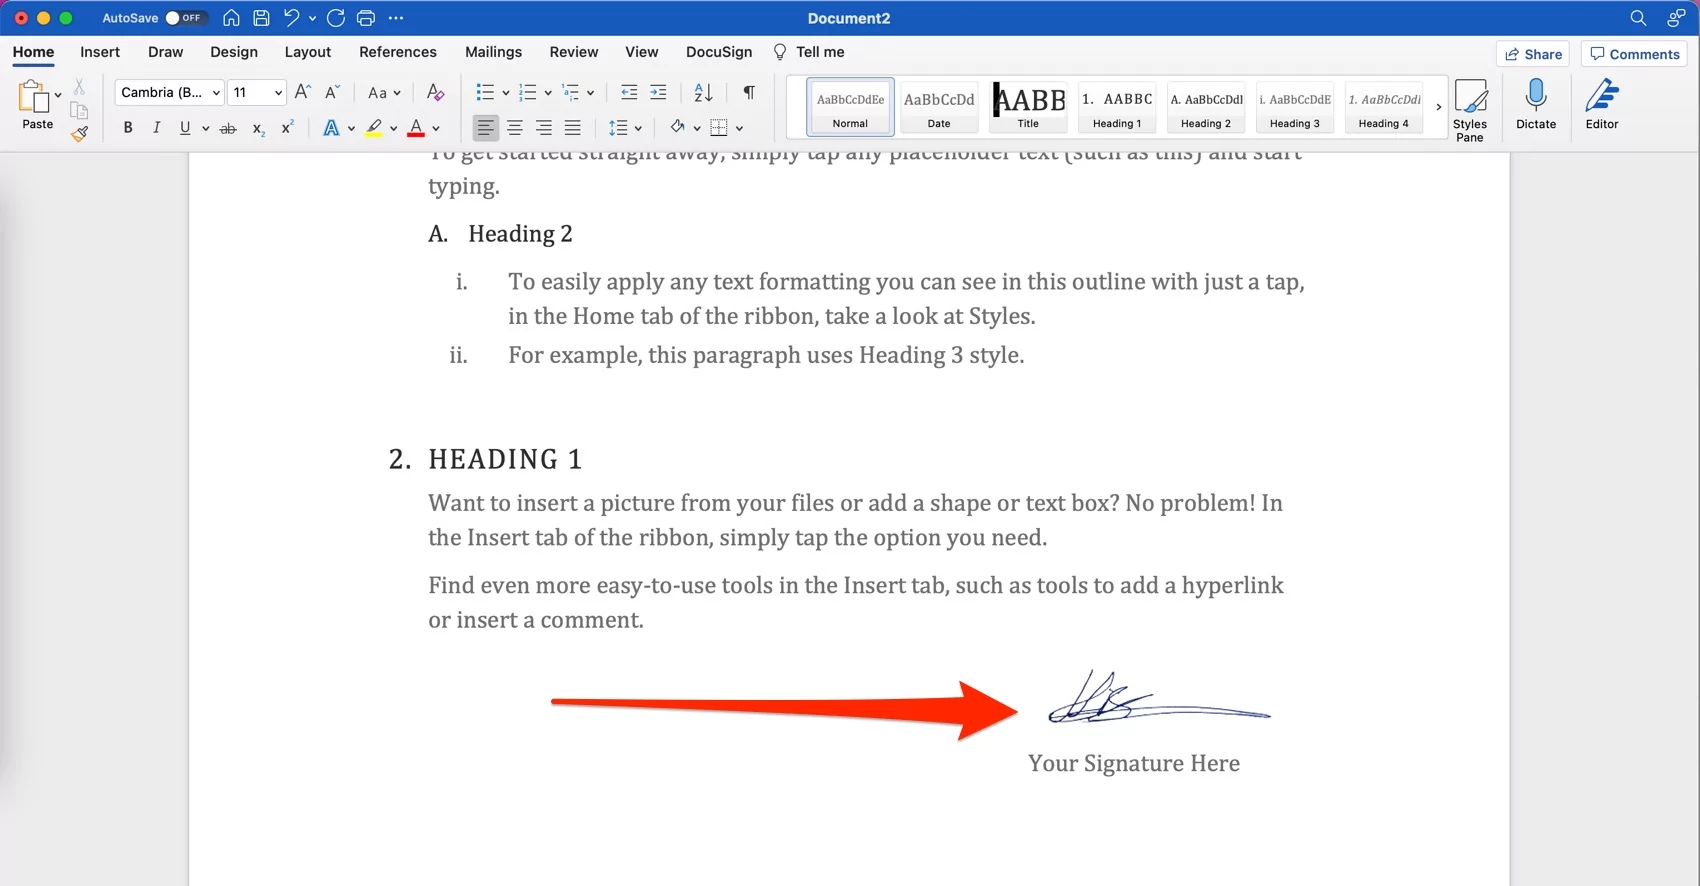
Enter the text below the image, select both the image and the text and, click AutoText > New.
After, enter the name of the Signature in the dialogue box that appears. Then click OK—Signature of the Ward Mac.
Step 3) Now the Signature is created as above, you can add it at any time. Click Auto Text > Auto Text from the Insert menu to complete the process.
Tip: You need to follow the same process to add a signature to your Word document every time.
What to do when you don’t have a signature image saved? Luckily Mac users have a Preview program that provides built-in document-signing capabilities.
Method 2 :- Use Draw tool Option
Draw a Live Signature on Word Document is the easiest method; make sure your Microsoft Word is updated with the latest version. And follow the steps below,
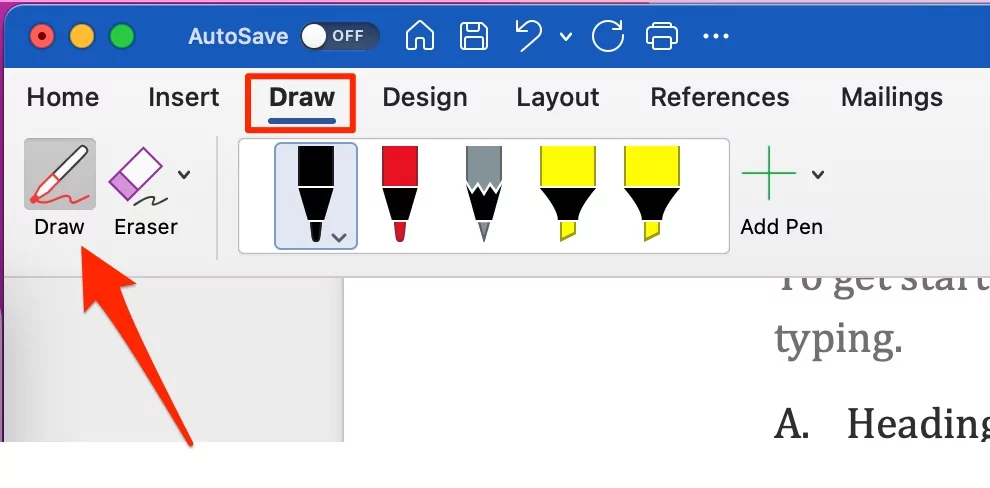
- Open Word Document on your Mac. Click on Draw Tab.

- Select Pencil and Color as well.

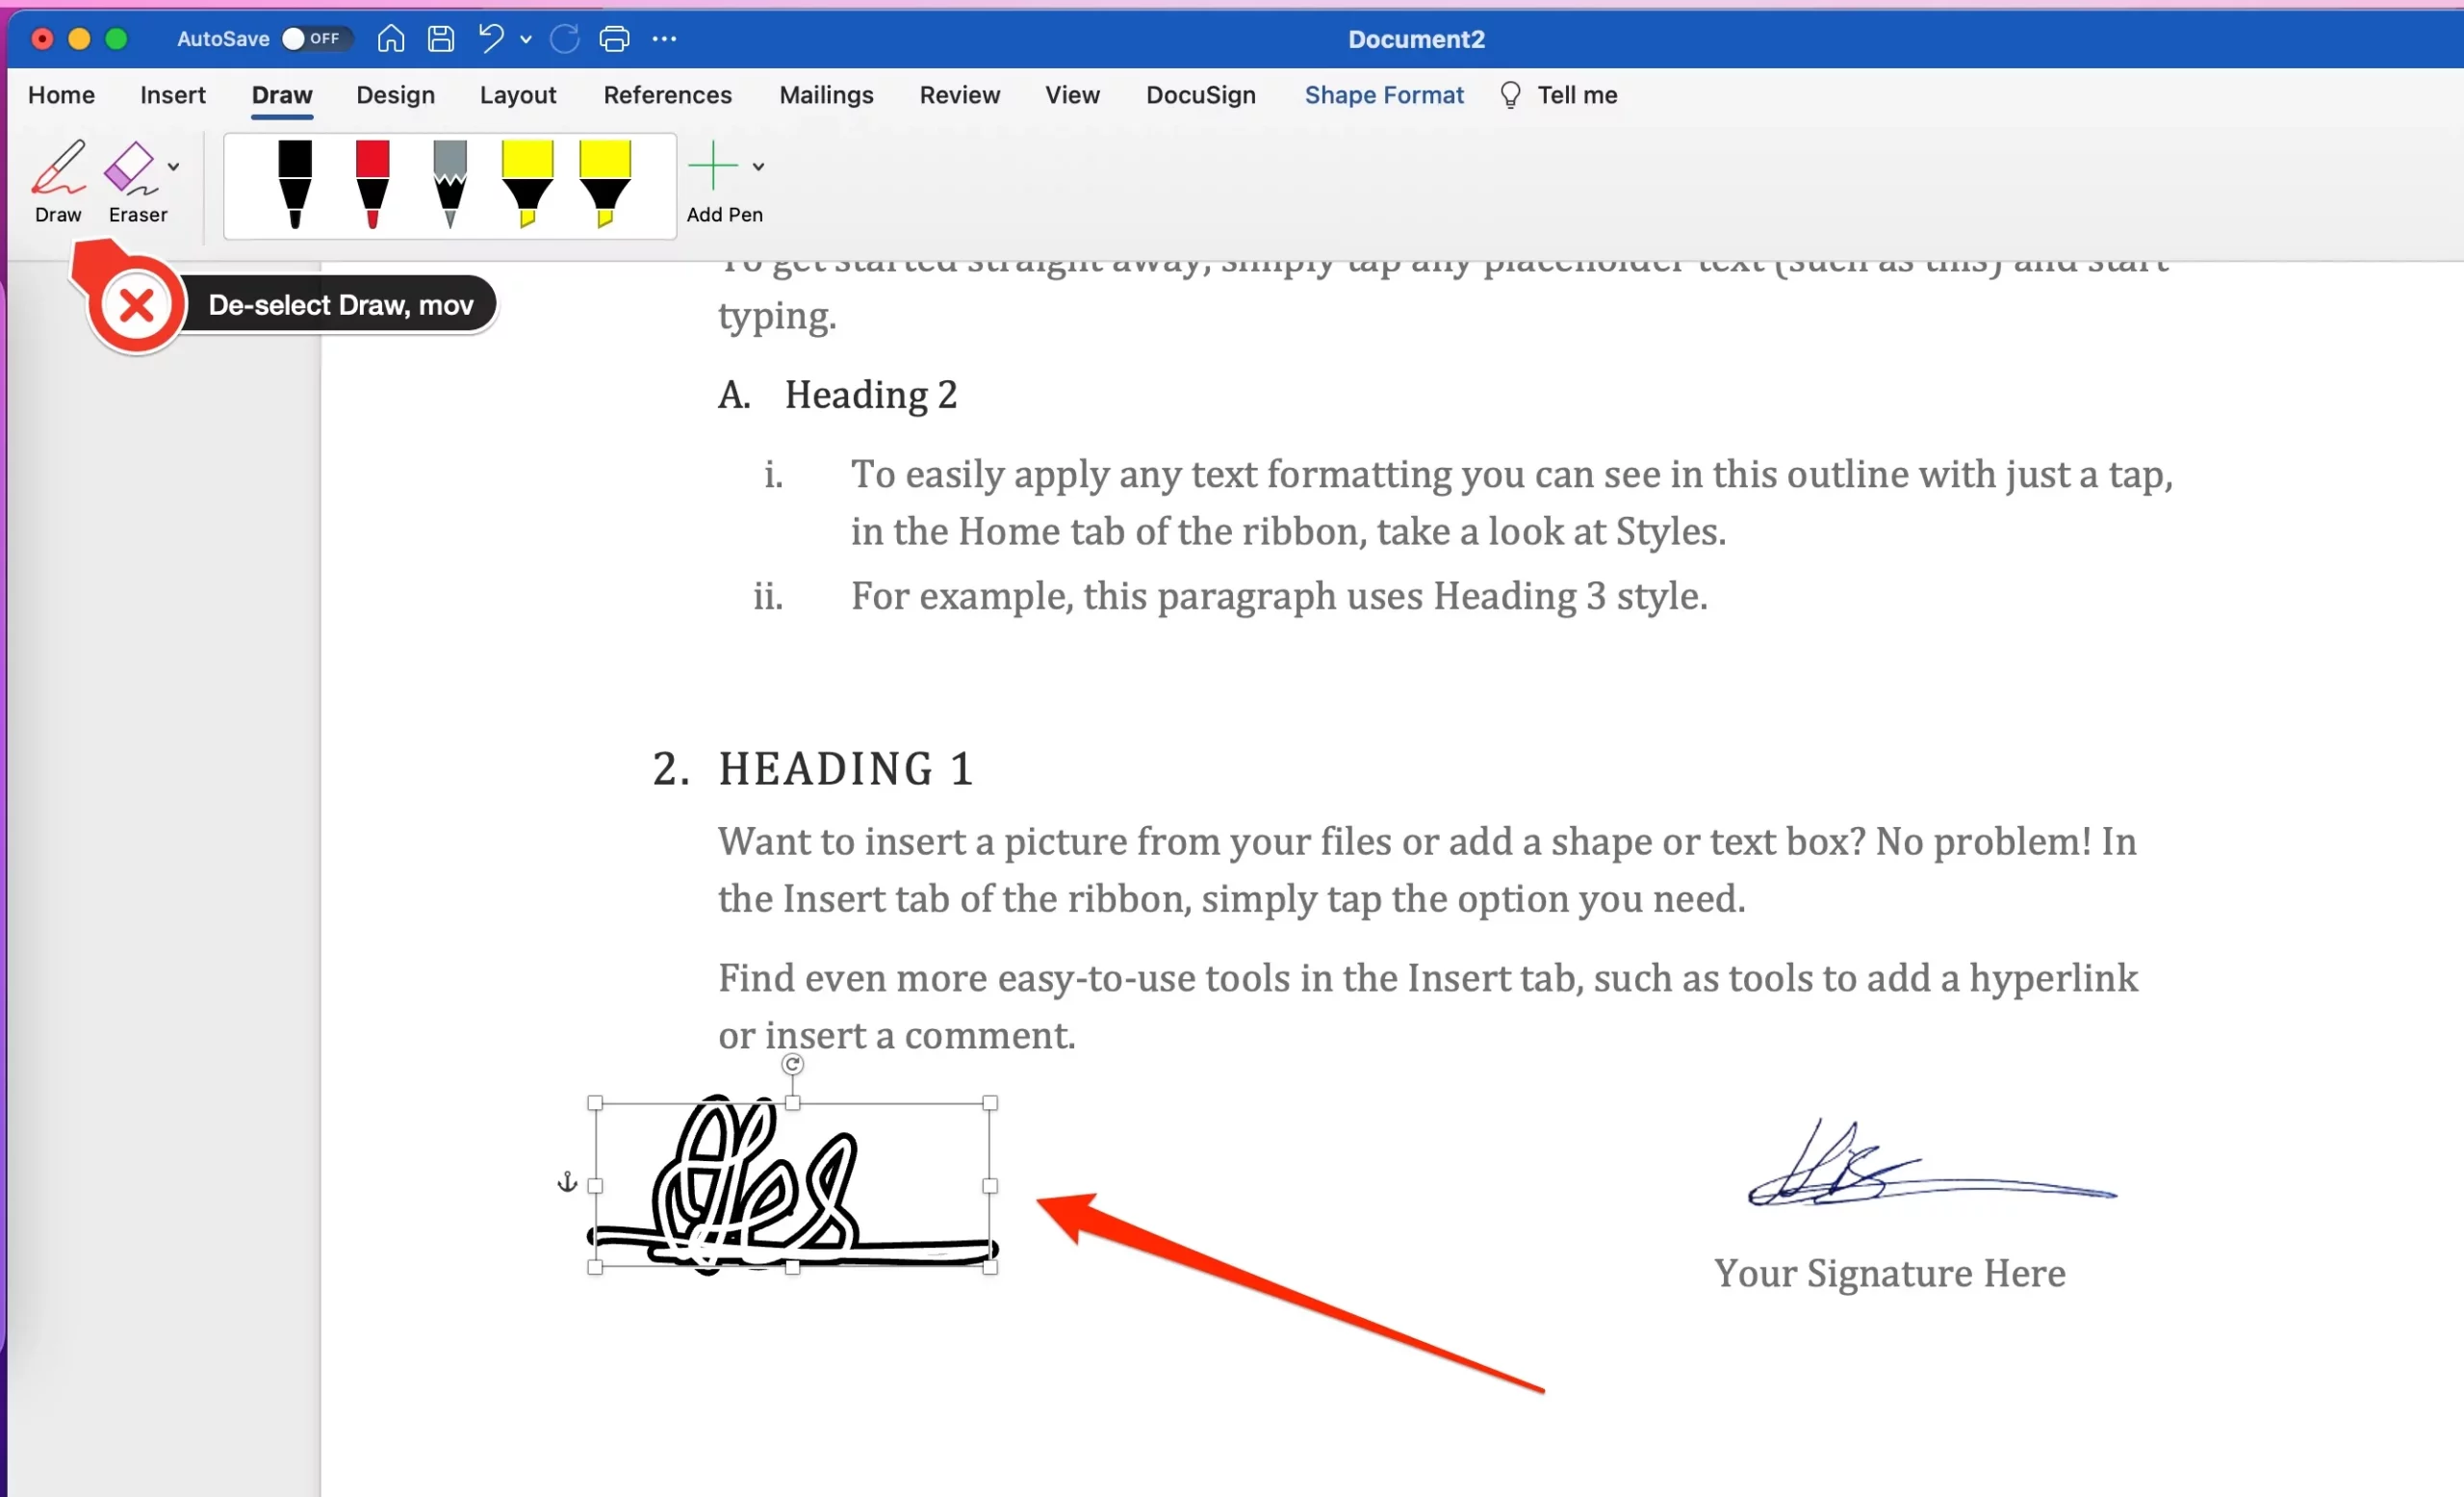
- Now, use a soft hand to sign the Document where you want in the Document.
- That’s it. Again, De-select the Tool and Move the Signature where you place it in the Document also, we can resize from the signature border.

- Do alignment in Document, That’s it.

Electronically Sign a PDF Using Trackpad, Camera or iPhone
Using Trackpad is increasingly common. If you have a Trackpad, create your Signature with the Trackpad on your fingers. It allows me to use multi-finger motions in ways that a regular mouse would not allow.
Please don’t waste time printing documents and signing them by hand. Instead, if you’re presently working on a project, add your Signature using the Trackpad. It’s important to note when making your electronic Signature, it’s best to look at Preview and go steadily to achieve the best results.
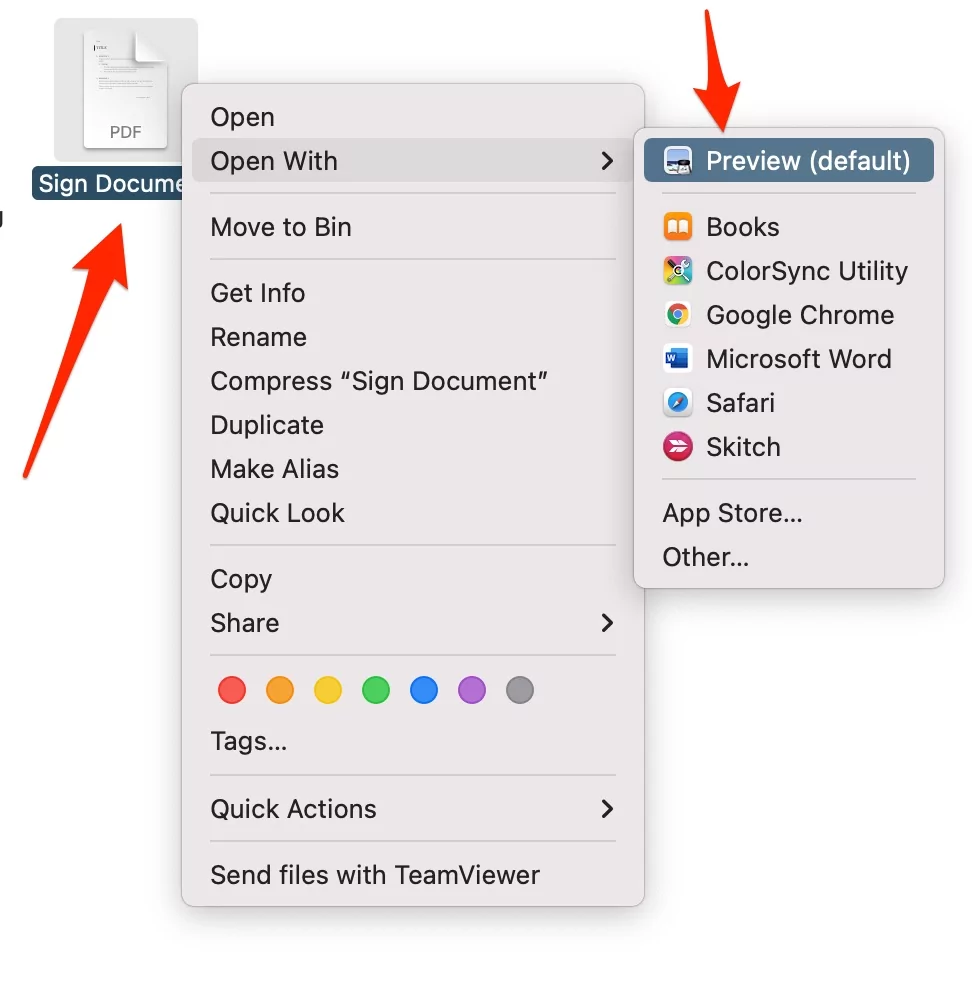
- Open PDF document in Preview on Mac.

- Next, Click on the Markup tool and See the Editing tool for PDF documents in Preview.

- Now, Click on the Signature tool, and Choose to Create a Signature Option. Or Use Existing Signature.

- Now, Use the Prefer option from Trackpad, Camera, or iPhone.
- If you are on MacBook or iMac with Trackpad, then select the Trackpad option and Sign on it to capture the Signature.
- For Camera:- Use your Mac camera, and keep your Handwritten Signature taken on White paper.

- The last option is to use iPhone: iPhone signed in the same Apple ID, automatically see the White screen like Drawing board, Sign on iPhone screen and Tap on done to use it on Document that is opened on Mac Preview.

- That’s the way to do Handwritten Signatures on PDF on Mac.
These days using a Trackpad, you can also draw your Signature with an iPad stylus, which you can also paste into your emails immediately.
How to Insert Handwritten Signature to Pages on Mac
In most cases, you will need to sign a PDF file digitally. As said above, if you don’t have an image, use the preview app built into your Mac to create a new one.
Method 1: Insert from iPhone
You have an iPhone, then we can directly access or Add Sketch as a Signature to the Page using iPhone’s screen. Follow the below steps,
- Open Pages on your Mac. From top Menu, insert > Insert from iPhone.
- Select Option from “Take Photo,” “Scan Documents,” or “Add Sketch.” Tap on Add Sketch option.

- Just wait for 2 to 3 seconds, and your iPhone will see the Drawing pad. Using your finger, draw a handwritten Signature and Tap on Done to use it on the Pages document.
- That’s it. Your Signature is movable on the page document.
If you are having the connectivity issue on Use of your iPhone to insert Signature to Page, then try the alternate method given below,
Method 2: Import Signature PNG file to Pages
Without iPhone, Import & Use PNG signature file to sign the Document in pages. As explained earlier, First, Do a sign on white paper and Capture a photo of that sign to use for the Document. 
Move this Signature photo file to your Mac using Airdrop or Email. Next, Remove Background from the Signature online and save it into a PNG file. Now, Save on your Mac.
Now, Copy the Signature and Paste it on the Page document. Now, alight the Signature correctly with Resize, Picture format option.

- Resize Signature:- Select the Signature Picture file, and use Resize icon to change the signature image.
- Rotate Signature:- Select Signature > Format > Arrange > Set angle [90, 180, or 270] depending on your signature’s orientation.
That’s it.
Method 3:- Using Preview on Mac
Step 1) Open any image in the Preview.
Step 2) Click the [Show Marker Toolbar] button. 
Step 3) Click the Signature button on the toolbar to select an existing signature, or click Create Signature to create a signature. 
Step 4) Use the preview signature to magnify it and shoot it properly. Then, go to the menu bar, click File > Take Screenshot > From Selection. (You can also use the keyboard shortcut Command + Shift + 5 to open the onscreen utility.)
Step 5) After all the above steps, you have an image of your Signature that you can save and add to your Page using the steps above.
How to insert Signature in Word Mobile – iPhone, Android
iOS and Android users can also do handwritten signatures on documents using the app. follow the below steps,
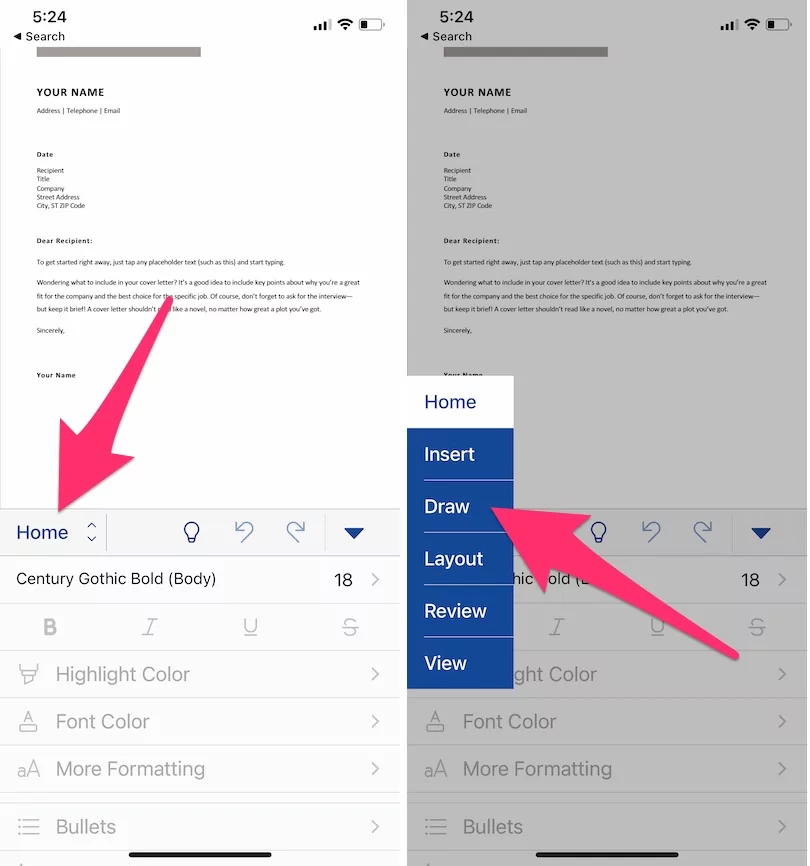
- Open Word document to Word app. And Click on Edit Option.

- and See the Home Tab option > Select Draw option.

- Start Inking > Select Pencil and Color to Sign document on Phone’s screen.

- Select the Crop tool to Move or Resize the signature by tapping on Signature.
- That’s it.
Now that you’ve created your Signature, it’s time to put it to work, making remote work or virtual services a breeze. There’s no need to seek a scanner or fax machine as paperless workflows continue!


