
Wanna capture what’s happening on your iPhone screen — a gameplay clip, app tutorial, or quick demo? Apple’s built-in Screen Recording tool makes that super easy. But first, you need to add it to your Control Center before you can start using it.
Here’s the latest step-by-step guide that works perfectly on iOS 26, for all models, including iPhone 17, 16, and 15.
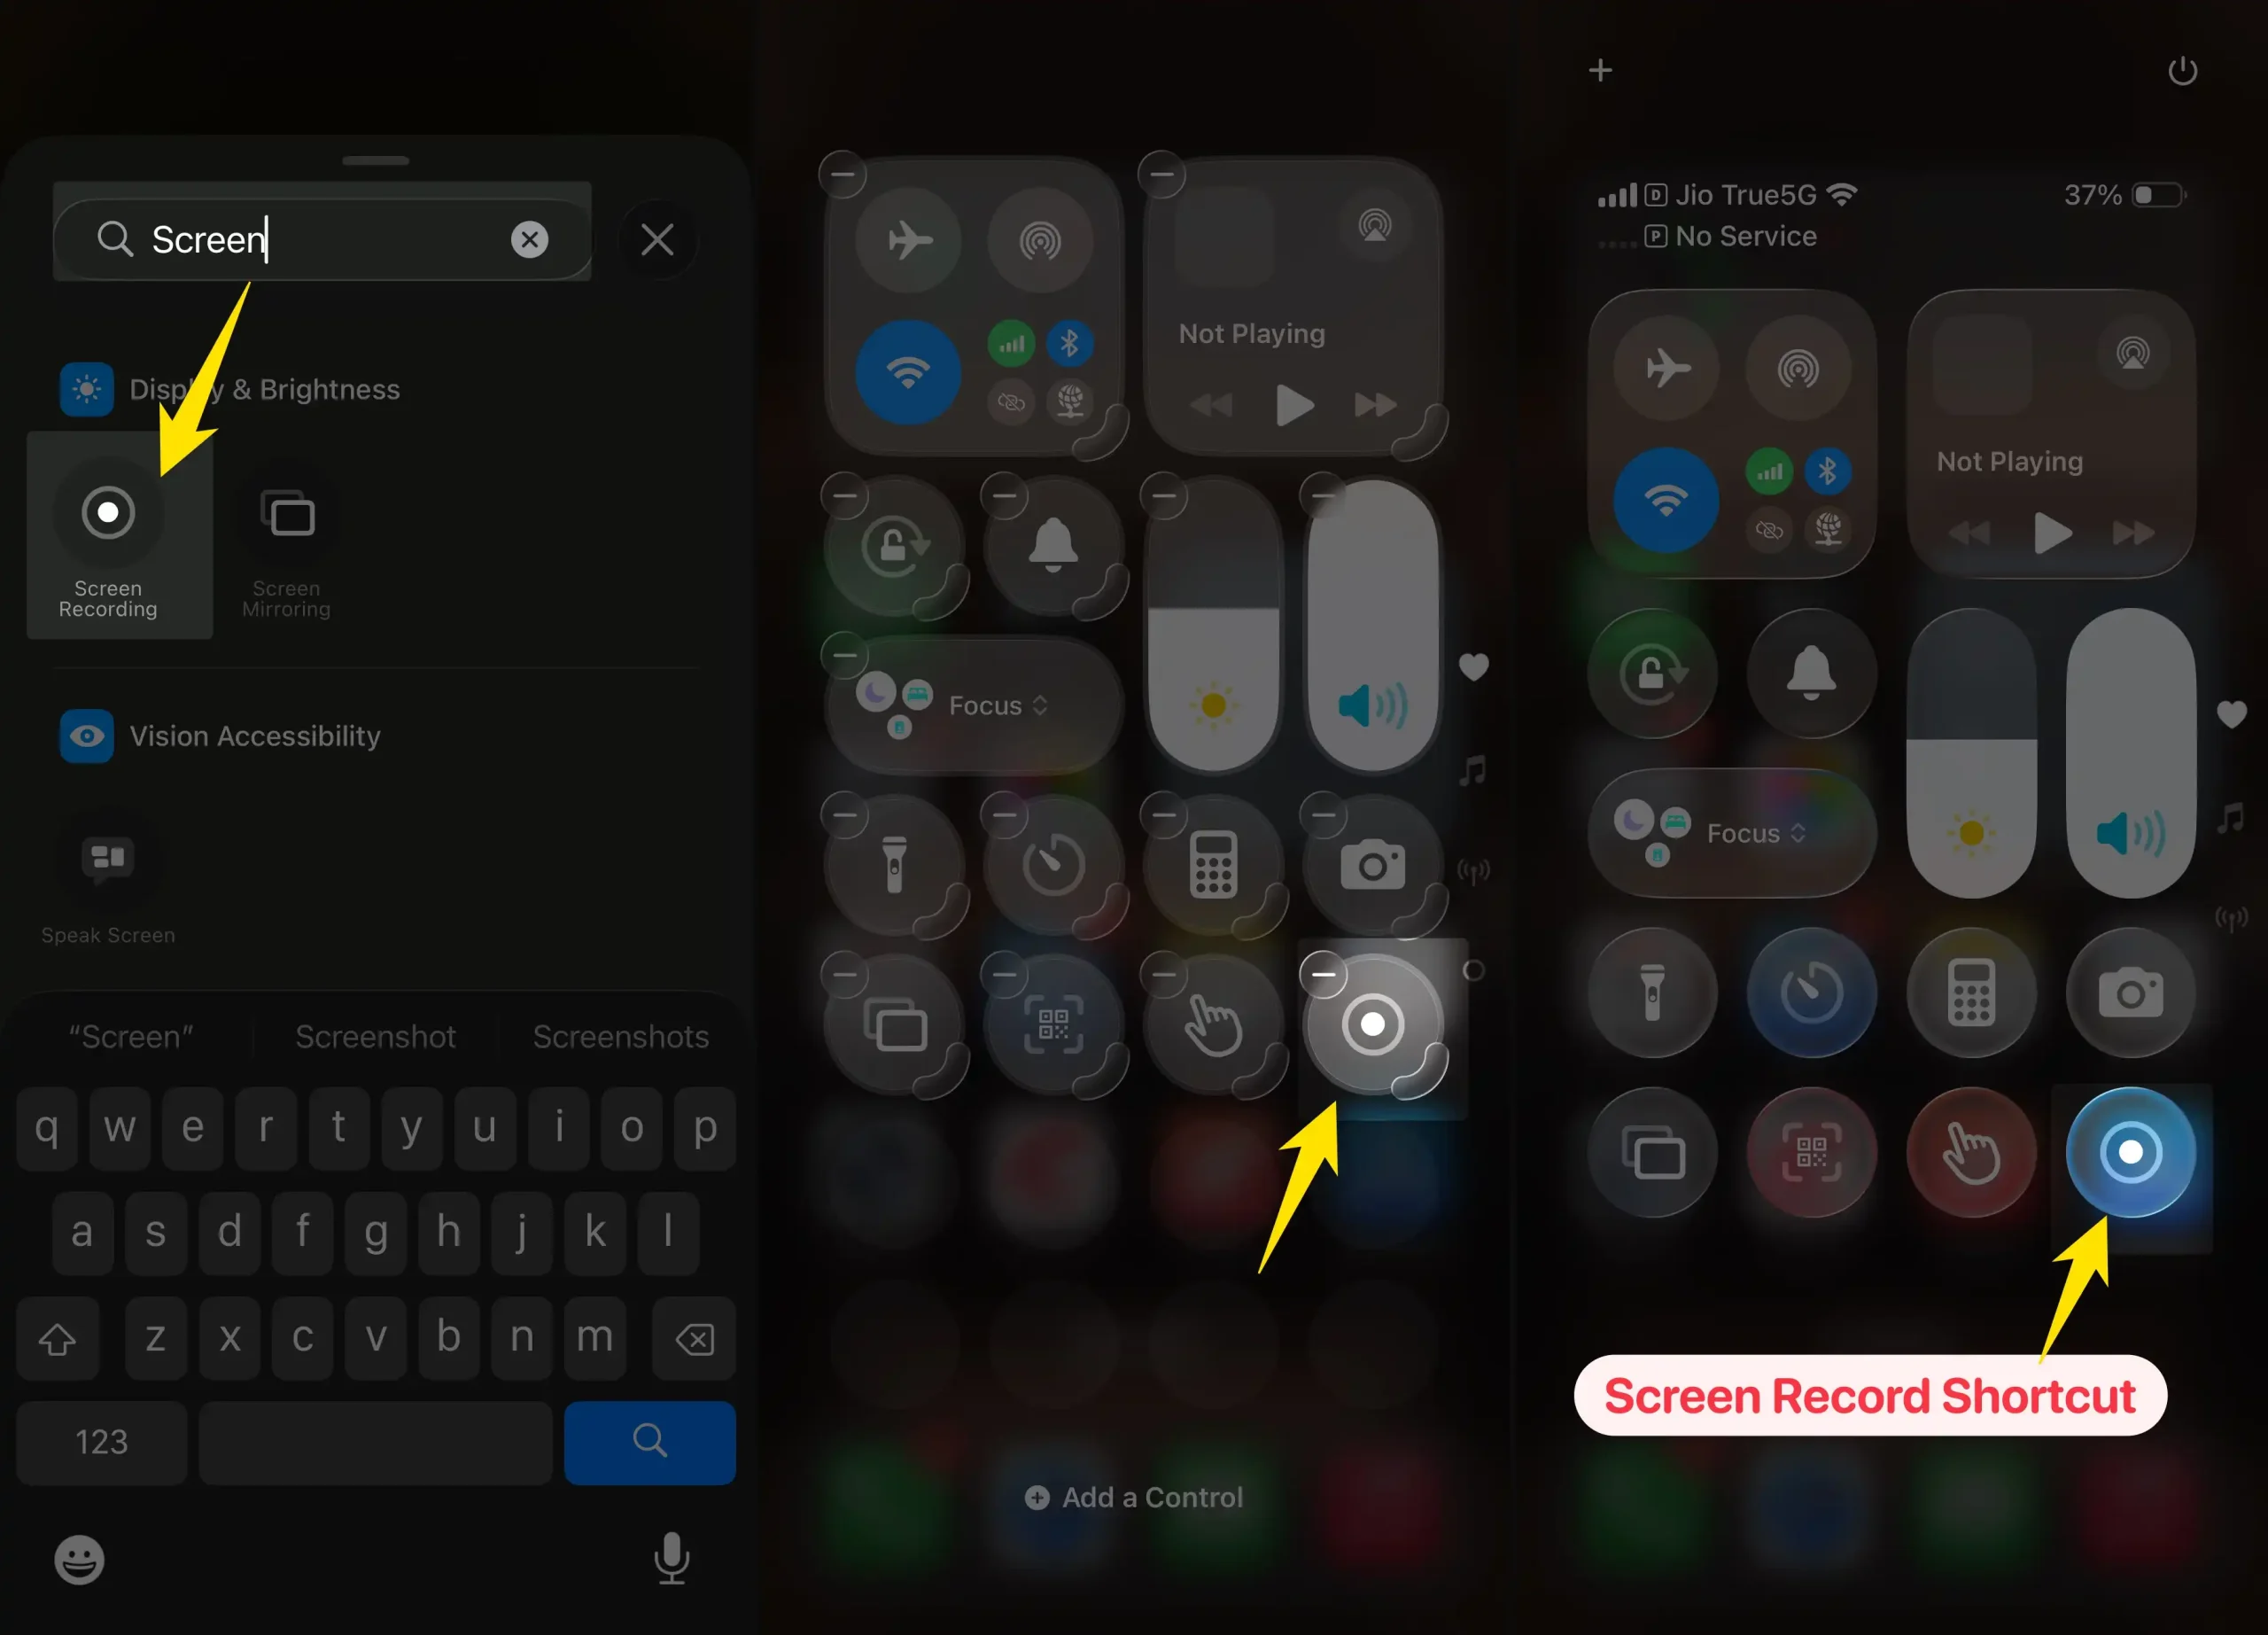
Step-by-Step: Add Screen Recording to Control Center
- Unlock your iPhone.
Make sure you’re on the Home Screen before you start. - Open Control Center.
Swipe down from the top-right corner of your screen. (On older models with a Home button, swipe up from the bottom.) - Enter Edit Mode.
Tap the “+” button in the top-left corner of the Control Center menu — or long-press on any blank space, then tap Add a Control.

- Find Screen Recording.
In the search bar, type recording or scroll down the list. You’ll see the option labeled Screen Recording. - Add to Control Center.
Tap the Screen Recording shortcut. The shortcut instantly appears in your Control Center panel. - Exit Edit Mode.
Tap once outside the menu or hit Done to save the change.
That’s it — you’ve added Screen Recording to your iPhone!
How to Start Recording
- Swipe down from the top-right again to open Control Center.
- Tap the record circle icon — you’ll see a three-second countdown before recording begins.
- To include your voice, press and hold the icon, then turn on the Microphone toggle.
- When finished, tap the red status bar or the record button again to stop.
- Your video automatically saves in the Photos app.
Quick Tips
- Make sure your iPhone has enough storage before recording.
- You can trim or edit your clip directly in the Photos app.
- To record system audio only, leave the microphone turned off.
- The same steps work for iPads running iPadOS 26 or later.
Wrap-Up
That’s how easy it is to add and use Screen Recording on your iPhone 17, 16, or 15 running iOS 26. Once you’ve added it to Control Center, recording your screen is just one tap away.


