
Backing up your iPhone to iCloud, a Mac, or a Windows PC can be crucial for preserving your data. Here’s a table summarizing the steps for each backup method:
| Backup Destination | Steps to Backup iPhone |
|---|---|
| iCloud | 1. Connect to Wi-Fi. 2. Go to Settings > [your name] > iCloud. 3. Tap iCloud Backup. 4. Tap Back Up Now. |
| Mac (macOS Catalina and later) | 1. Connect your iPhone to your Mac using a USB cable. 2. Open Finder. 3. Select your iPhone in the sidebar. 4. Click ‘General’ tab, then select ‘Back up all of the data on your iPhone to this Mac’. 5. Click ‘Back Up Now’. |
| Mac (macOS Mojave and earlier) | 1. Connect your iPhone to your Mac. 2. Open iTunes. 3. Click the iPhone button in the top left. 4. Click ‘Summary’. 5. Choose ‘This computer’ under Backups. 6. Click ‘Back Up Now’. |
| Windows PC | 1. Connect your iPhone to your PC. 2. Open iTunes. 3. Click the iPhone button near the top left of the iTunes window. 4. Click ‘Summary’. 5. Choose ‘This computer’ under Backups. 6. Click ‘Back Up Now’. |
These methods will help you ensure your iPhone data is securely stored and easily recoverable in case of device failure, loss, or when upgrading to a new phone.
Backing up your iPhone refers to copying the files and settings on your iOS device to another storage location—say, a Mac, Windows PC, or iCloud. An iPhone Back Up will come in handy if your device gets lost or damaged.
In such a case, you won’t lose vital information; you only need to restore your Back Up data to your new iPhone. How to back up your iPhone mainly depends on the platform you wish to use, as you will learn throughout this guide.
What is an iPhone Back Up?
This refers to a copy of your iPhone data, preferences, and settings that are stored on a different device or the Apple iCloud. Having a back up ensures that you don’t lose such information when you replace an iOS device or after an iOS upgrade.
Throughout this guide, you will learn the various methods you can use to back up your iPhone to a Mac, iCloud, or Windows PC.
How to Back Up Your iPhone to Different Platforms
As you may be aware, you can backup your iOS device to iCloud, a Windows computer, or a Mac. The appropriate procedure for backing up your iPhone depends on your preferred storage platform.
Here are some of the most convenient methods you can use to back Up your iPhone to different platforms:
A). How to Backup iPhone to iCloud
The manufacturer recommends that you back up your iPhone to iCloud. This option is also the easiest as you don’t need another device to back up your iPhone. When you use this method, almost all your data and settings get saved to the cloud.
However, it will not save the data you may have backed up on other cloud services. Similarly, backing up your iPhone to iCloud won’t save such things as your Apple mail data, Touch or Face ID settings, Apple Music Library, App Store content, and Apple Pay information.
Nonetheless, there is still plenty more you can back up with the 5 GB of free storage space iPhone users get on iCloud. So, what iPhone data does iCloud store? Your iPhone back up on iCloud will include the following:
- Your iPhone settings, app organization, and Home Screen layout.
- Visual Voicemail password and purchased ringtones
- Your Apple Watch back up
- Text (SMS), iMessage, and MMS messages
- App data, videos, and photos
To create an iPhone back up on iCloud using the iPhone itself, follow these steps:
- Ensure that the iPhone is connected to a reliable and secure Wi-Fi network.
Note: If your iPhone supports 5G connectivity, your carrier may allow you to back up your iPhone to iCloud via the cellular network instead of Wi-Fi. If you’d rather use the cellular network, navigate to Settings > [your profile name] > iCloud > iCloud Back up. Find the Back up Over Cellular option and toggle it On.
- Launch the Settings app on the iPhone. If you cannot find the app, swipe downwards from the middle of the Home screen. Next, tap on the search bar at the top to reveal the keyboard, and then type Settings into the search bar. Tap Go to navigate to Settings.
- Tap on your Name—appears as the first option at the top of the screen, adjacent to your Apple ID image/ icon, as shown below.
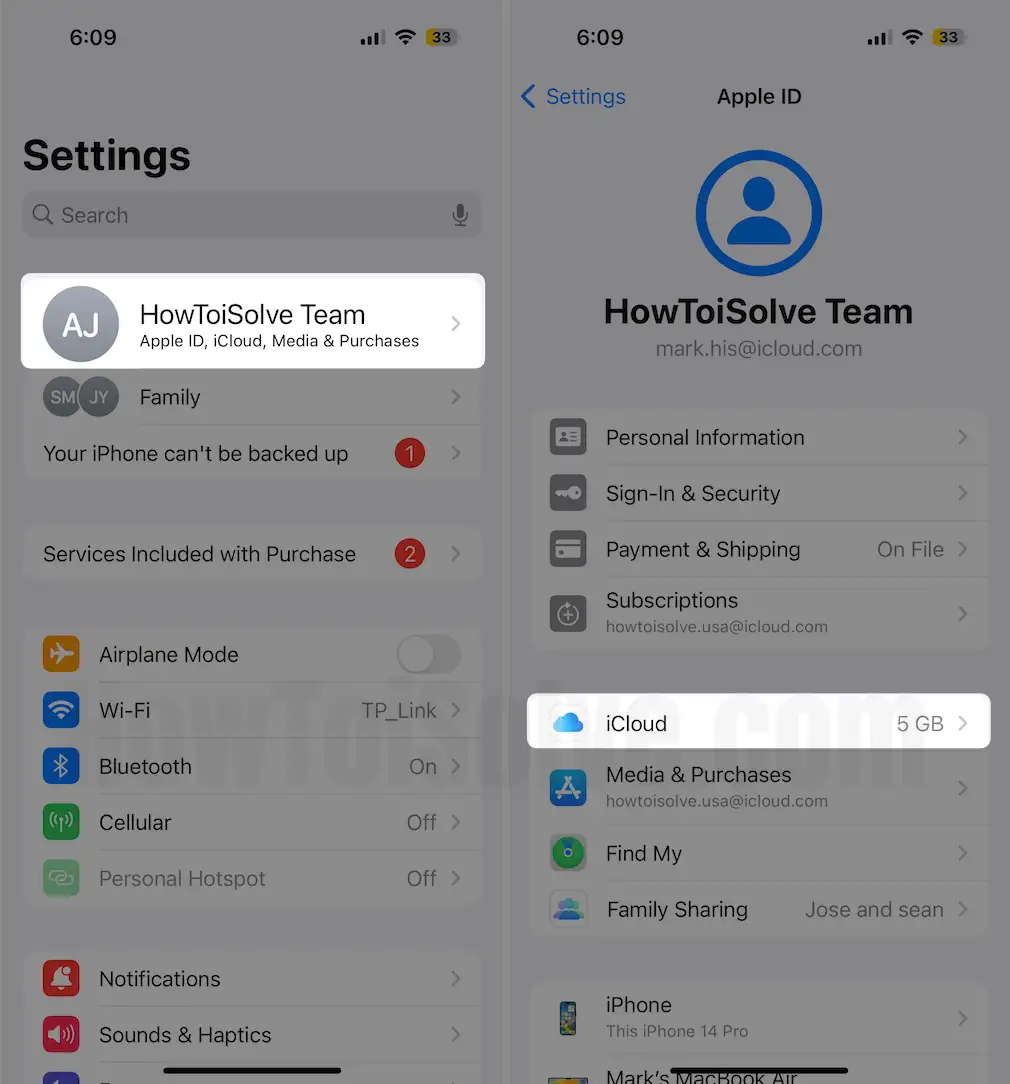
- Tap on the iCloud option as shown in the image above. The iCloud page allows you to select the data you wish to back up on iCloud. It lists such options as calendars, contacts, reminders, and notes. To add or remove any of these items to your iPhone back Up, tap on the toggle button next to it.
- Now select the iCloud Back Up option on the iCloud page. If this option is off, tap on the toggle button on the right side of the screen to turn it On.

Note: When on, the toggle button should be green in color. If it is gray, you need to toggle it on, by tapping it just once.
If the iCloud Back Up is already enabled (On)—the toggle button is green—skip to the next step.
With the iCloud Back Up option toggled on, it will automatically back up your iPhone data to iCloud whenever the device is locked, connected to the Wi-Fi, and charging.
- To manually back up your iPhone to iCloud, tap on the Back Up Now button to initiate the process. Wait for the iPhone to finish creating its back Up on iCloud.
Note: if you happen to get the “back Up failed because there is not enough cloud storage”, you do not have enough space left on iCloud to store the selected items. In such a case, you can buy additional iCloud storage space by upgrading to iCloud+.
Alternatively, navigate to the iCloud screen and deselect the items you don’t need to back up, as explained in step #4 above. If you successfully created an iPhone back Up on iCloud, you can easily view and manage it on the iPhone, Mac, or even a Windows PC, as described below:
How Do I Know If My iPhone is Backed Up
How to view and manage your iPhone back Up on iCloud depends on the device you are using. Here is how you use an iPhone, Mac, or Windows PC to view and manage your iCloud Backups:
i. How to View and Manage Your iCloud Backups on an iPhone
- Navigate to Settings on your iPhone and select your Profile Name at the top of the screen, next to your profile image.
- Depending on the iOS version you are running on your iPhone, you should:
- iOS 15 and Earlier Versions – tap on Manage Storage, and then select Backups.
- iOS 16 and Later Versions – tap on the iCloud Back Up option.

This operation should display all your devices that have iCloud back Up turned On. If you wish to delete any of the Backups, tap on the respective Device’s Name and then select either the Delete Back Up or the Delete & Turn Off Back Up option.
ii. View and Manage Your iCloud Backups From a Mac
The procedure for viewing and managing iCloud Backups on a Mac varies slightly depending on the macOS you are running. Nonetheless, the following steps will guide you:
- You need to open the iCloud page on your Mac. Depending on your macOS version, here is how you can do that:
- On macOS 12 and Earlier Versions: click on the Apple icon on your desktop to reveal the Apple menu. Next, navigate to System Preferences and click on your Apple ID. Now select iCloud.
- For MacOS Ventura: click on the Apple icon, then select System Settings from the Apple menu that appears. Next, click on [your name] close to the top of the sidebar. Now click on iCloud on the right side.
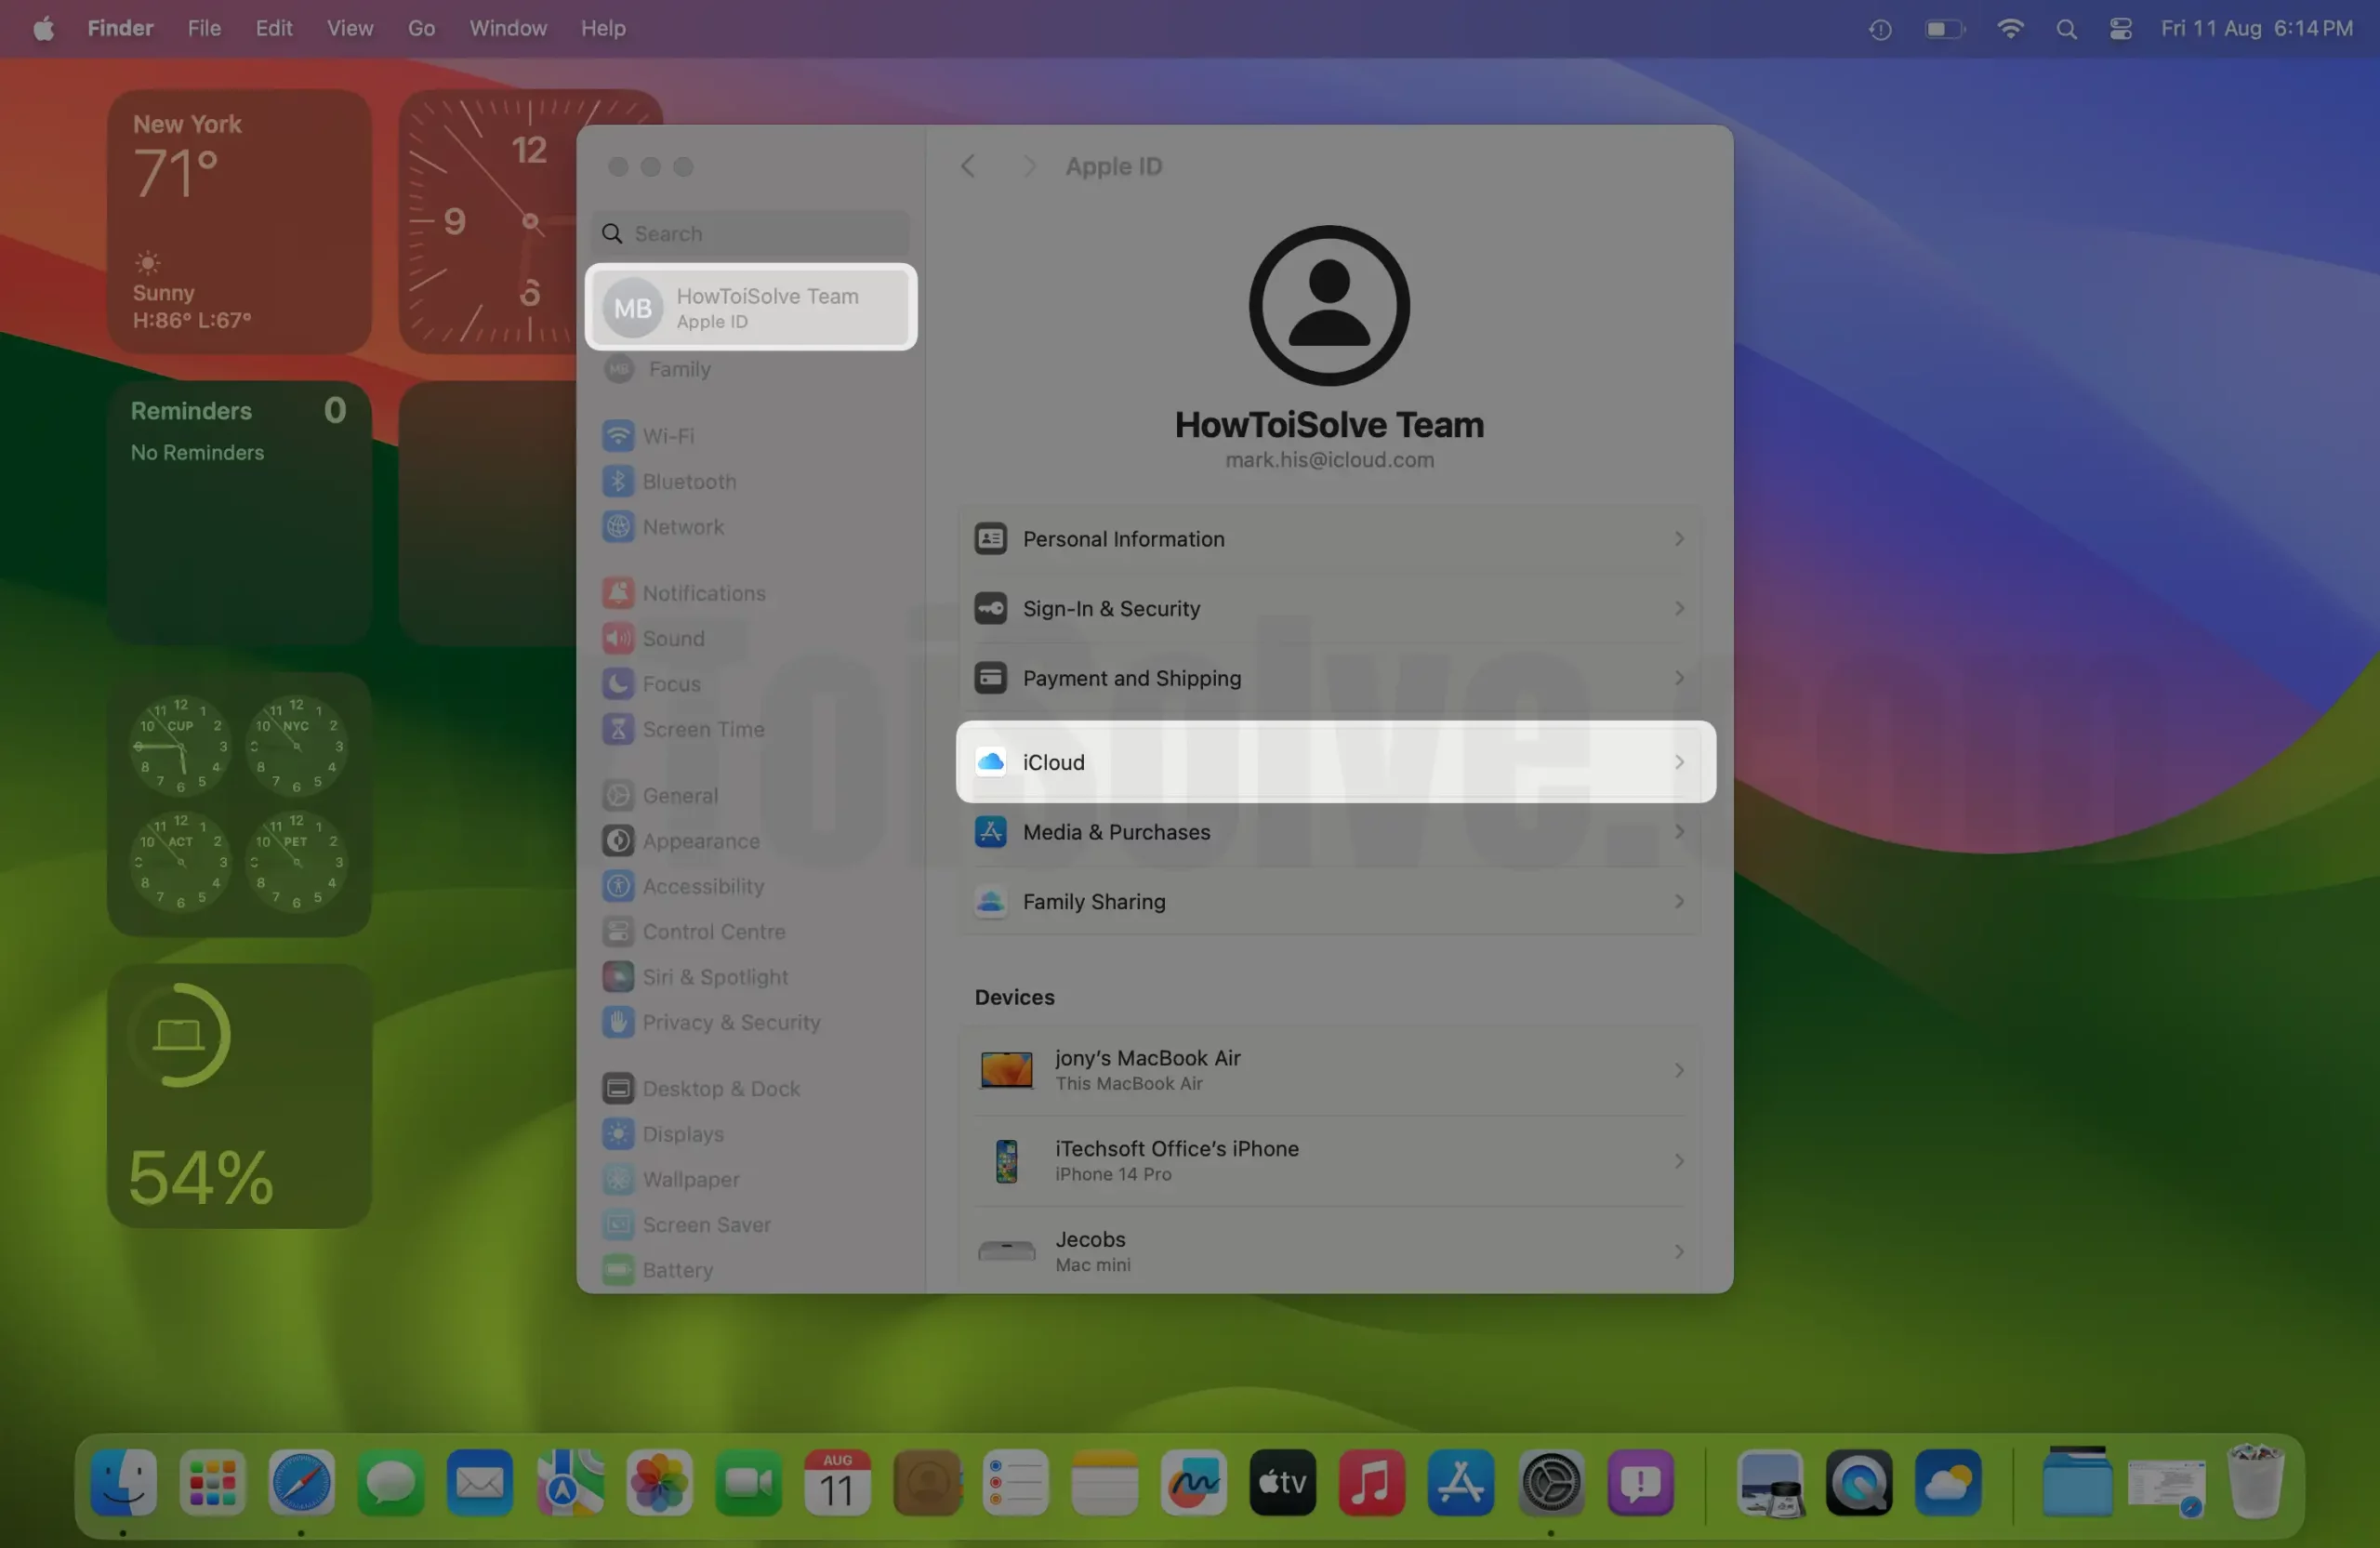
- Regardless of the macOS version, you should now click on Manage,

- and then select the Backups category.
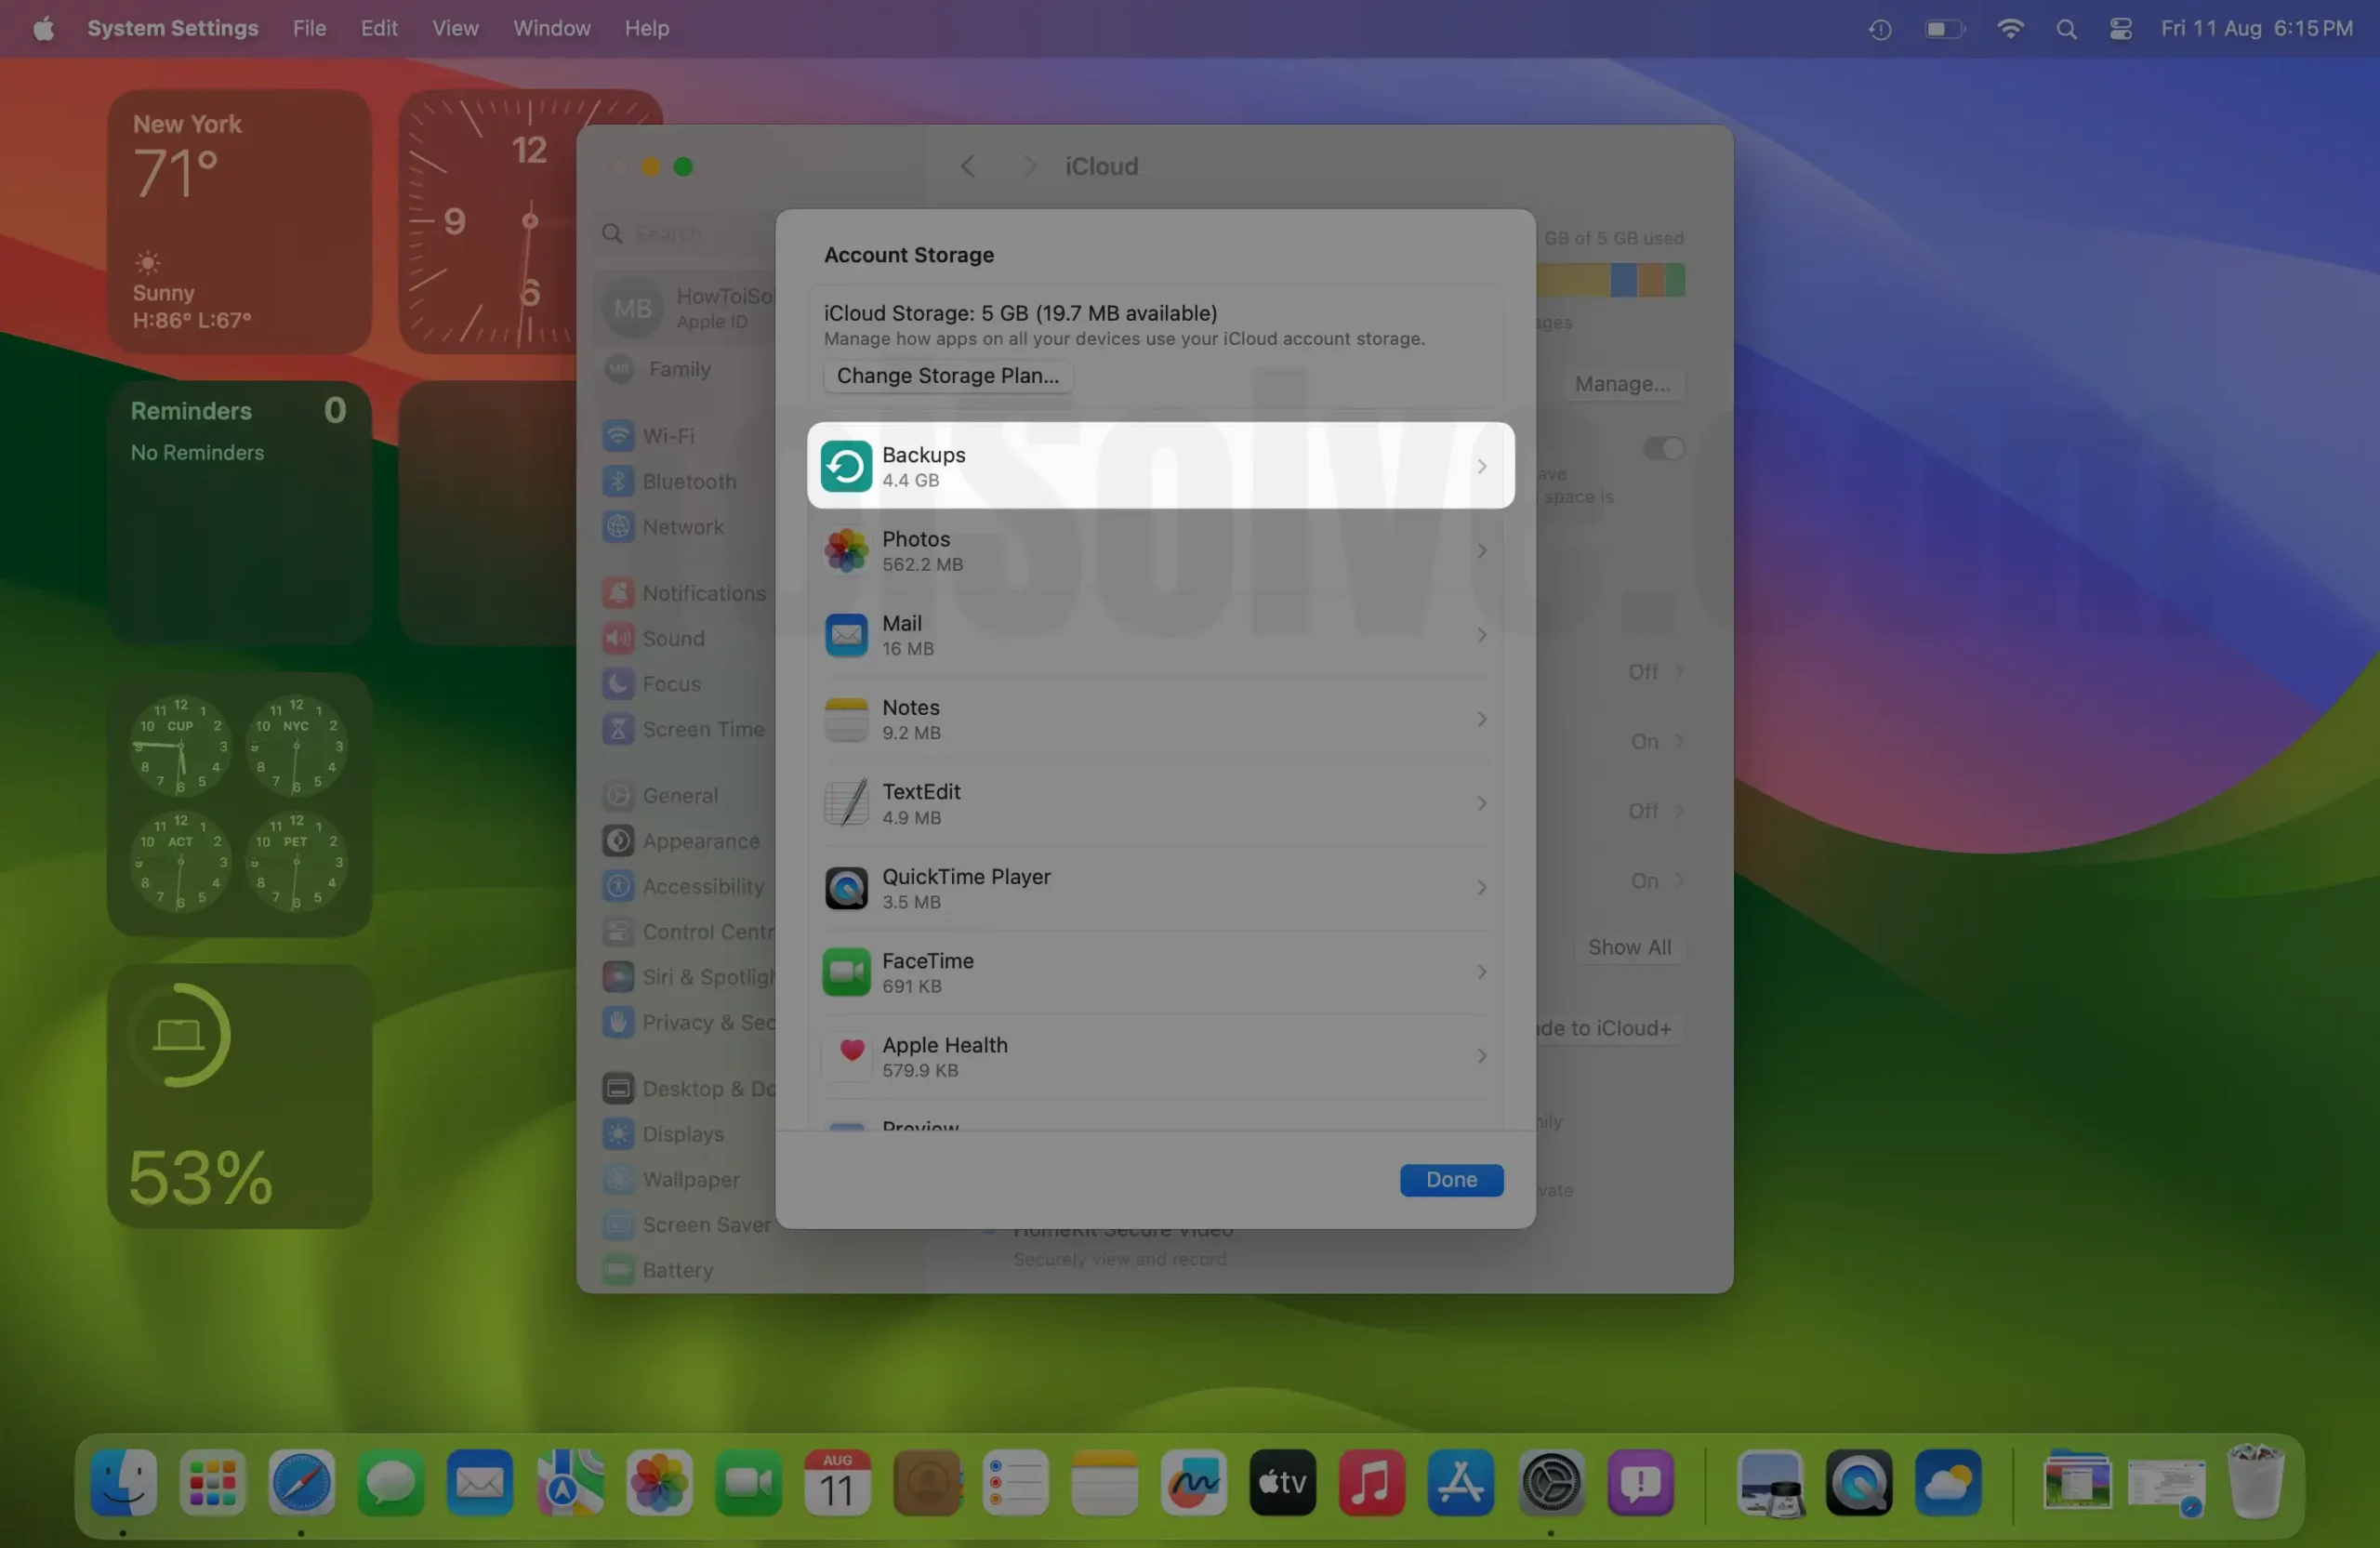
- This will display a list of all your devices that have iCloud Back Up turned on.
If you wish to delete any of the Backups, click on its device name then click the Delete or Remove button.

To Back Up your iPhone to iCloud from Mac,
Open Finder on Mac, and Connect your iPhone to Mac using the Lightning cable, Now your iPhone will appear on the left side of the window, On the Right side Select “Back up your most important data on your iPhone to iCloud” > Back Up Now. That’s it.

iii). How to View and Manage iCloud Backups on Windows
- Launch the iCloud for Windows app on your Windows computer.
- Click on Storage and then on Backups on the left
- To the right, you should be able to see your devices with iCloud Back Up turned on.
To delete any of your iCloud Backups, select the corresponding device name then click on the Delete button.
B). How to Back Up iPhone to a Windows PC
Don’t have enough storage space on iCloud to back up your iPhone and don’t want to upgrade to iCloud+? Then you must be wondering, how to back up your iPhone without iCloud. Well, there are several other ways to back up your iPhone.
What’s more, you can create a back Up for your iPhone on a Windows computer using the iTunes app. In this case, you need to have the iTunes for Windows app installed on the PC, the iPhone you wish to back up, and its charging cable.
If you are interested, here is how to back Up iPhone to iTunes on Windows:
If you don’t have the app on your Windows PC, you should first download and install iTunes for Windows app from the official website.
- Pair your iPhone to the Windows PC via the recommended USB cable—just use its charging cable.
Note: You may also connect your iPhone wirelessly to the PC by setting up syncing over Wi-Fi, as illustrated later on in this guide.
- Launch the iTunes app on your PC and then click on the iPhone button—positioned on the top-left corner of the iTunes window, towards the left side of the Library tab.
- Under the Backups section, check whether the “This Computer” option is selected. If not, select it before proceeding to the next step.
- Click on the Summary
- You may choose to encrypt your iPhone back Up, especially if it contains sensitive data like passwords and health data. To do this, click on the checkbox adjacent to Encrypt local back Up. Next, enter your preferred password and then click on the Set Password button.
Note: Step #6 is optional as you don’t have to encrypt your back Up. Once encrypted, you’ll be required to enter a password to access your iPhone back Up on Windows PC. If you don’t need to encrypt your back Up data, skip this step.
- Once you’ve enabled encryption, iTunes should automatically start backing up the iPhone. Otherwise, just click on the Back Up Now button to initiate the process.
Once iTunes is done backing up your iPhone to a Windows PC, you can view and manage the back Up data. To do this, open the iTunes app on your PC and navigate to Edit > Preferences from the top Menu.
Next, click on Preferences and navigate to the Devices tab. If encrypted, you should see a lock icon next to the iPhone Back Up you just created. As long as the Encryption option is enabled, all your Backups to this computer will be encrypted.
How to Enable Wi-Fi Syncing on a Windows PC
You could also pair your iPhone to a Windows PC wirelessly and then Back Up its data into the PC. To pair your iPhone wirelessly, the Wi-Fi Syncing option needs to be enabled. Here is how you can enable this option:
- Launch iTunes on your Windows PC and click on the iPhone icon—towards the top-left corner of the window.
- Next, click on the Summary
- Under Options, select Sync with this [device] over the Wi-Fi option.
- Finally, click on the Apply button to update these changes.
C). How to Back Up iPhone to Mac
You can also Back Up your iPhone to a Mac or MacBook computer. Depending on the macOS version you are running on the Mac, you can use either Finder or iTunes to back up your iPhone.
To check which macOS version you are running, click on the Apple icon on your Mac. Next, select the About This Mac option. Having verified your macOS version, you can use either of the following methods to Back Up an iPhone to a Mac:
Method 1: How to Back Up Your iPhone to Mac using Finder
You can only use Finder to back up your iPhone to Mac if you are running macOS Catalina or a later version of the operating system (OS). With the introduction of the macOS Catalina, back in 2019, Apple got rid of iTunes on Macs.
It was replaced with three apps for podcasts, music, and TV. As a result, the Back Up option on Macs was moved to Finder. However, the procedure for backing up your iPhone to Mac using Finder is pretty much the same as using iTunes.
Here is how you can use Finder to Back Up your iPhone to a Mac:
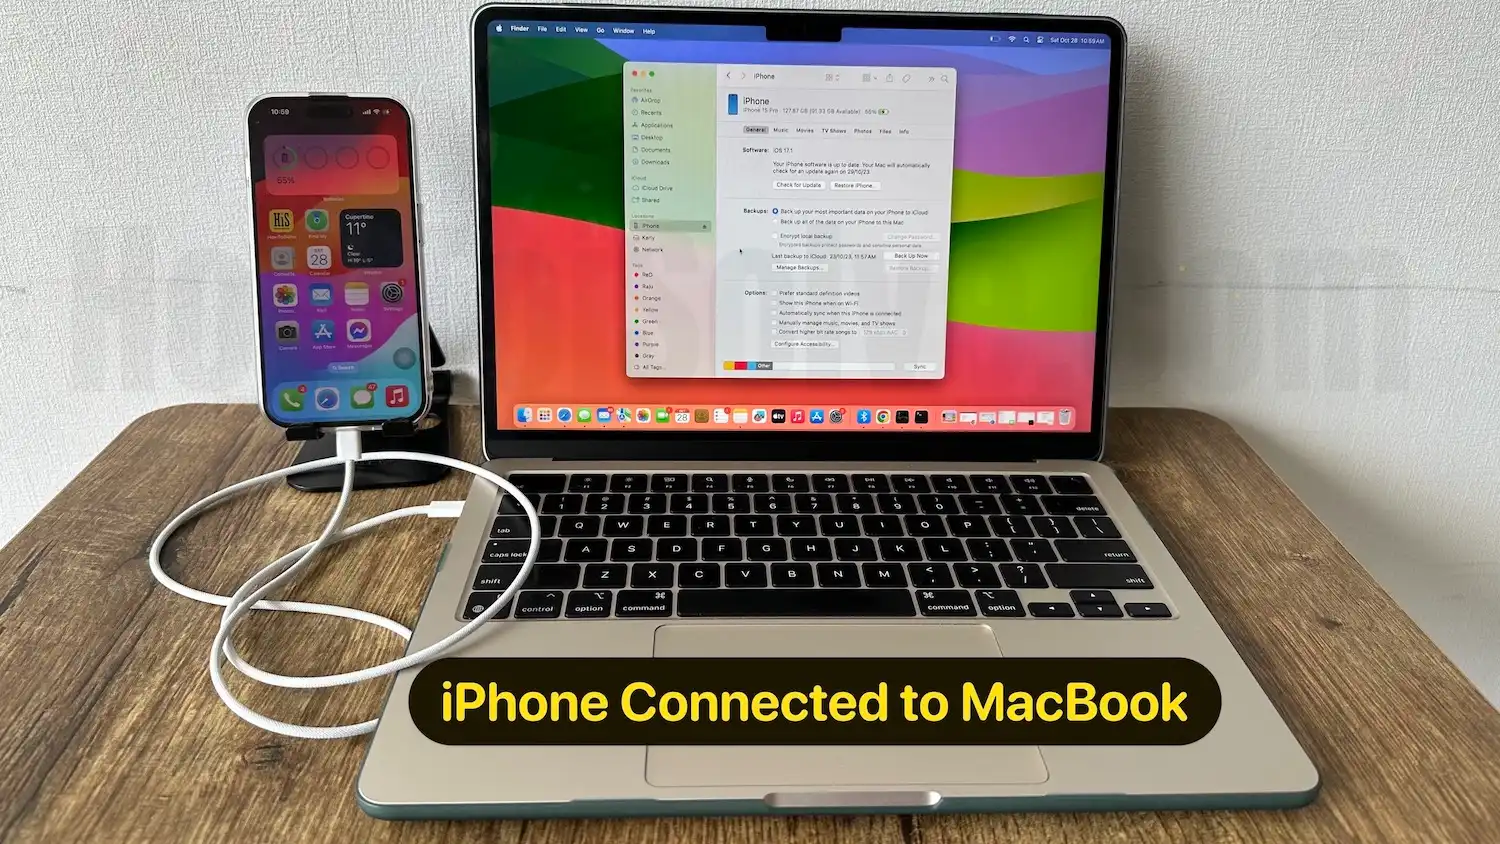
- Using the iPhone’s charging cable, connect it to your Mac computer.
Note: Just as is the case with Windows computers, you can pair your iPhone to a Mac wirelessly. To do this, you need to set up the syncing over Wi-Fi as described later on in this guide.
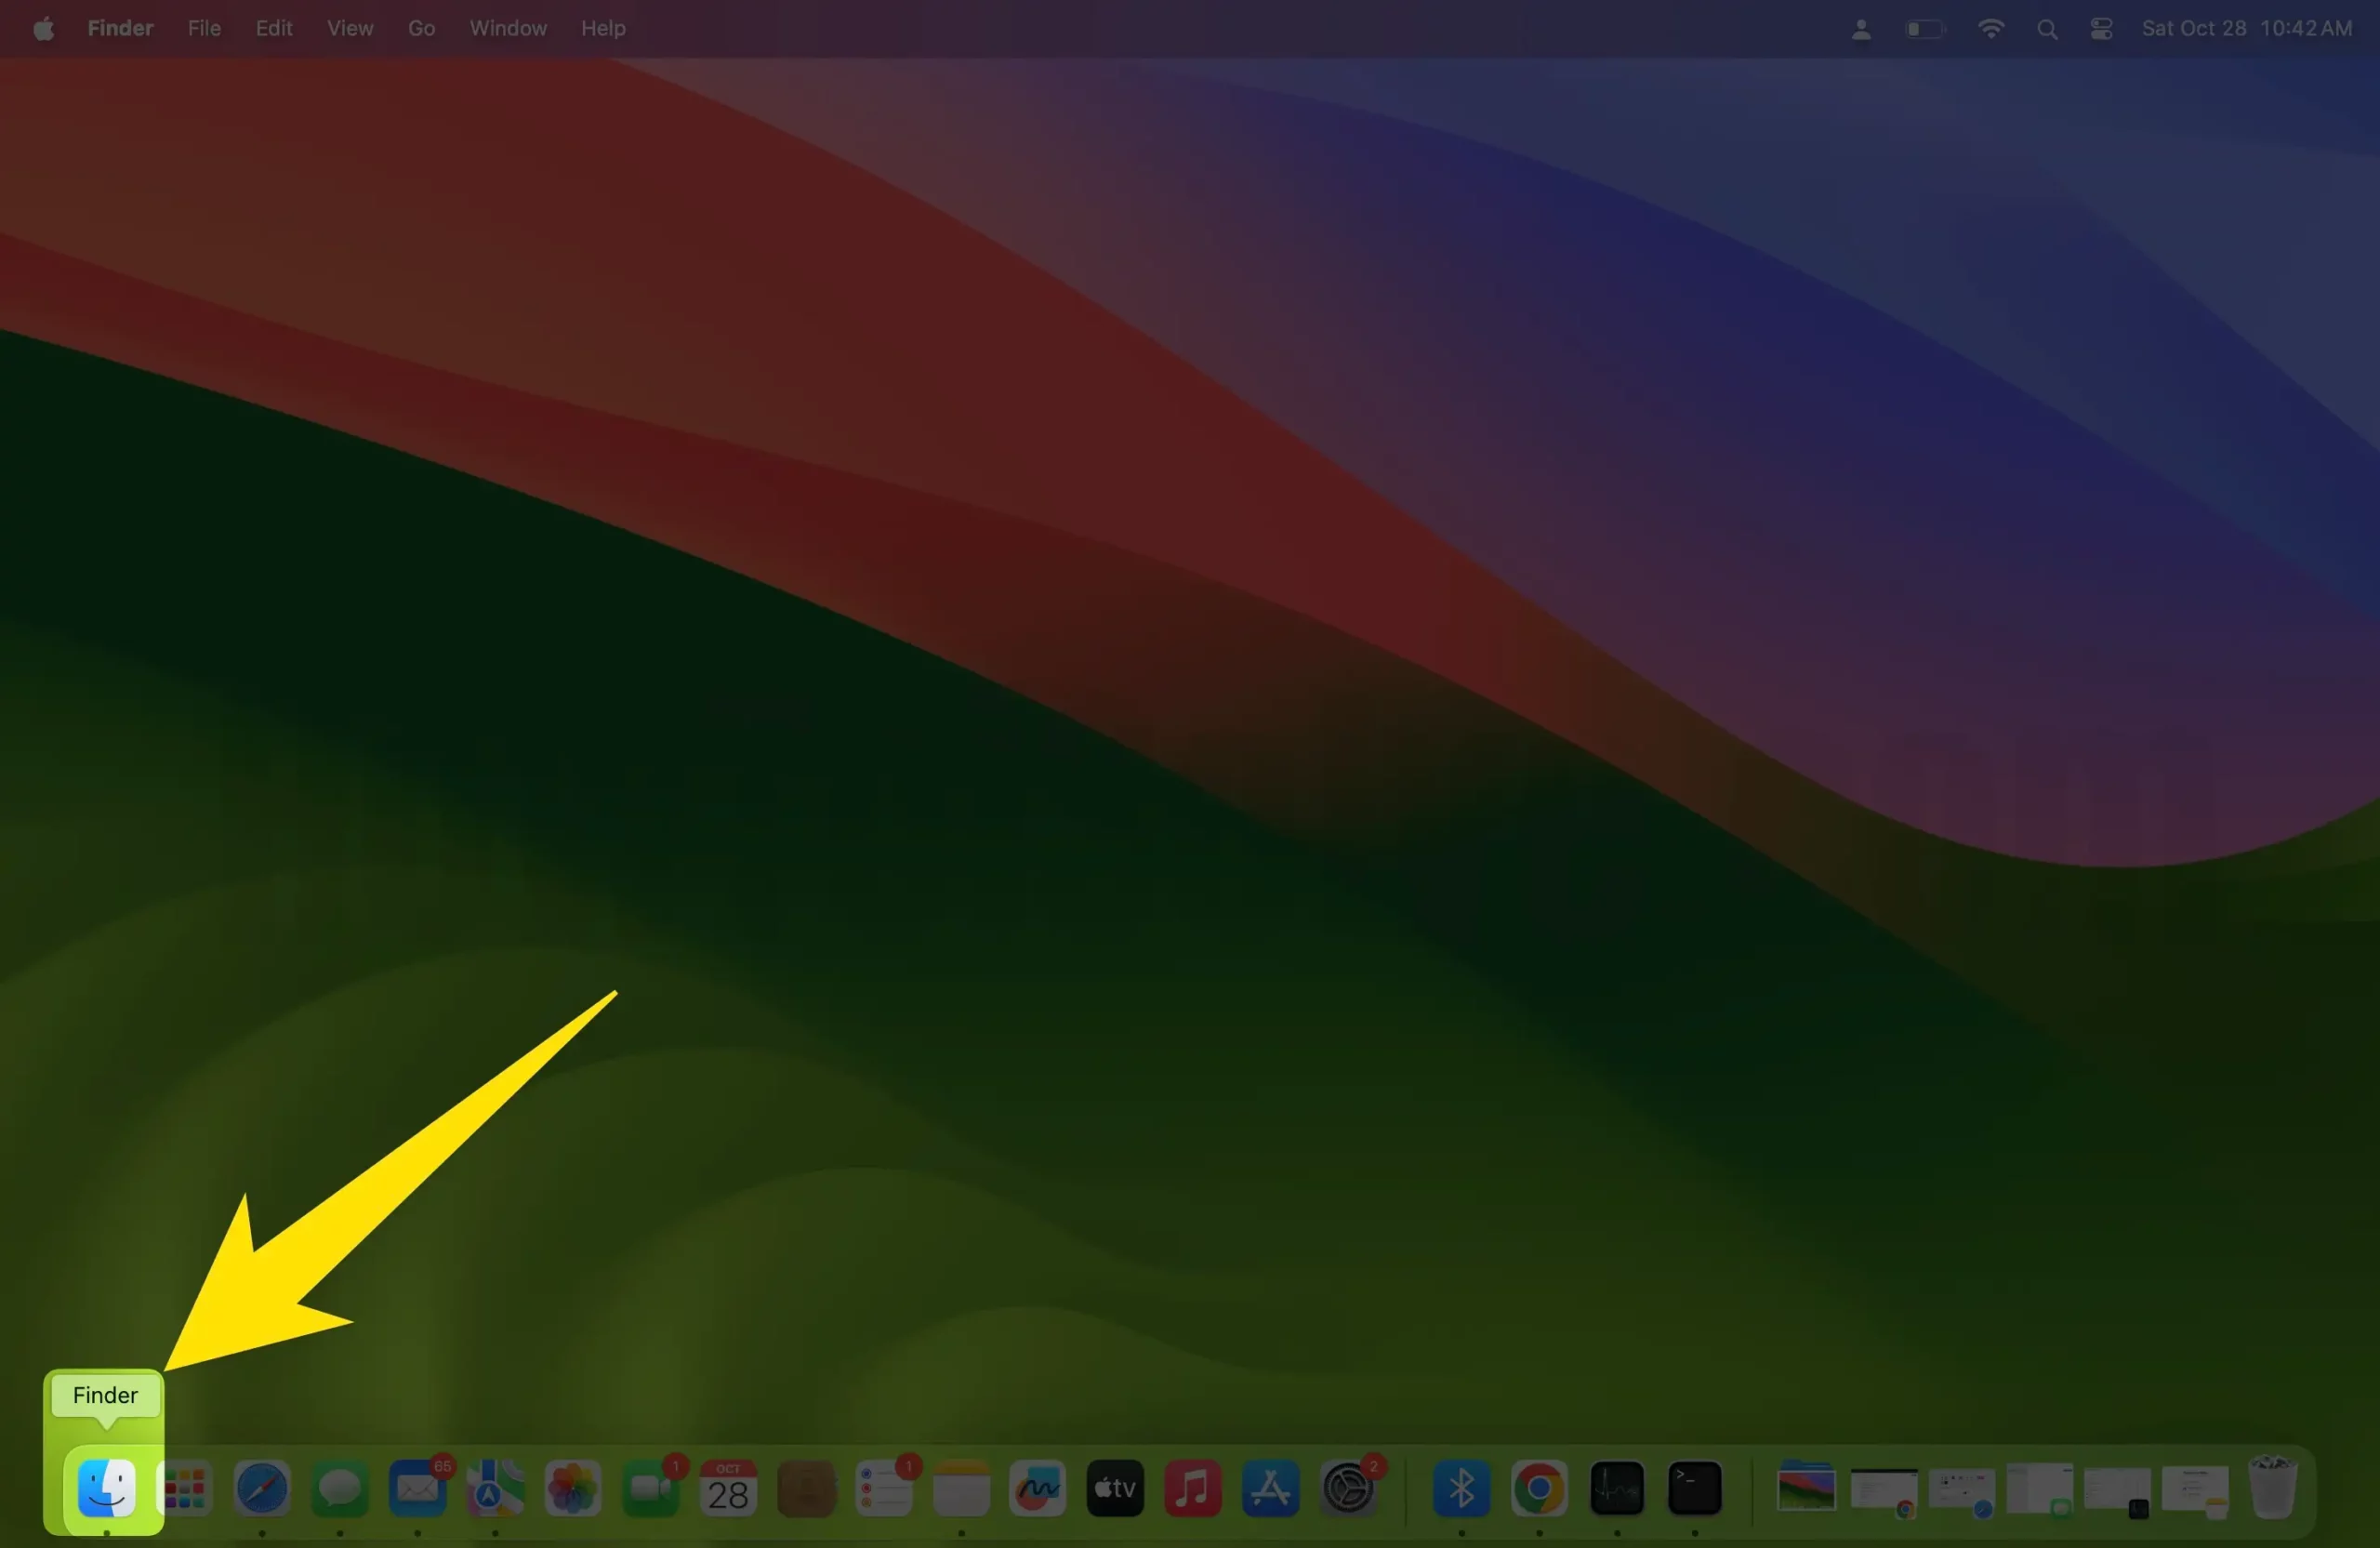
- Click on the gray-blue Finder icon on the Dock to open a Finder window on your Mac. Alternatively, left-click on the desktop and then press the N and Command keys simultaneously to launch Finder.
- Under Locations, find your iPhone’s name on the left sidebar of the Finder and select it.
Note: if this is your first ever time to do this, you need to click on the Trust button on the Finder window. Next, tap Trust on the connected iPhone and then enter your passcode—enter the passcode you normally use to unlock your iPhone.
You may also be asked whether you wish to set your iPhone up as new or restore it from a previous Back Up. If you get such a prompt, select the first option.
If the name of your iPhone does not appear on the left sidebar, click on Finder from the Menu Bar—at the top of the screen. Next, select the Preferences option from a drop-down menu that comes up. Now navigate to the Sidebar tab—positioned at the top of the pop-up window that just opened.
Click the checkbox adjacent to the CDs, DVDs, and iOS Devices to enable it. Go back to the Finder window to see whether your iPhone is now listed, select it, and proceed to the next step.
- Click on the General tab—located at the top of the Finder window—and select the Backups category.
- Click on the circle next to the Back up all of the data on your iPhone to this Mac option to check it. This allows you to copy all your iPhone data to the Mac computer.
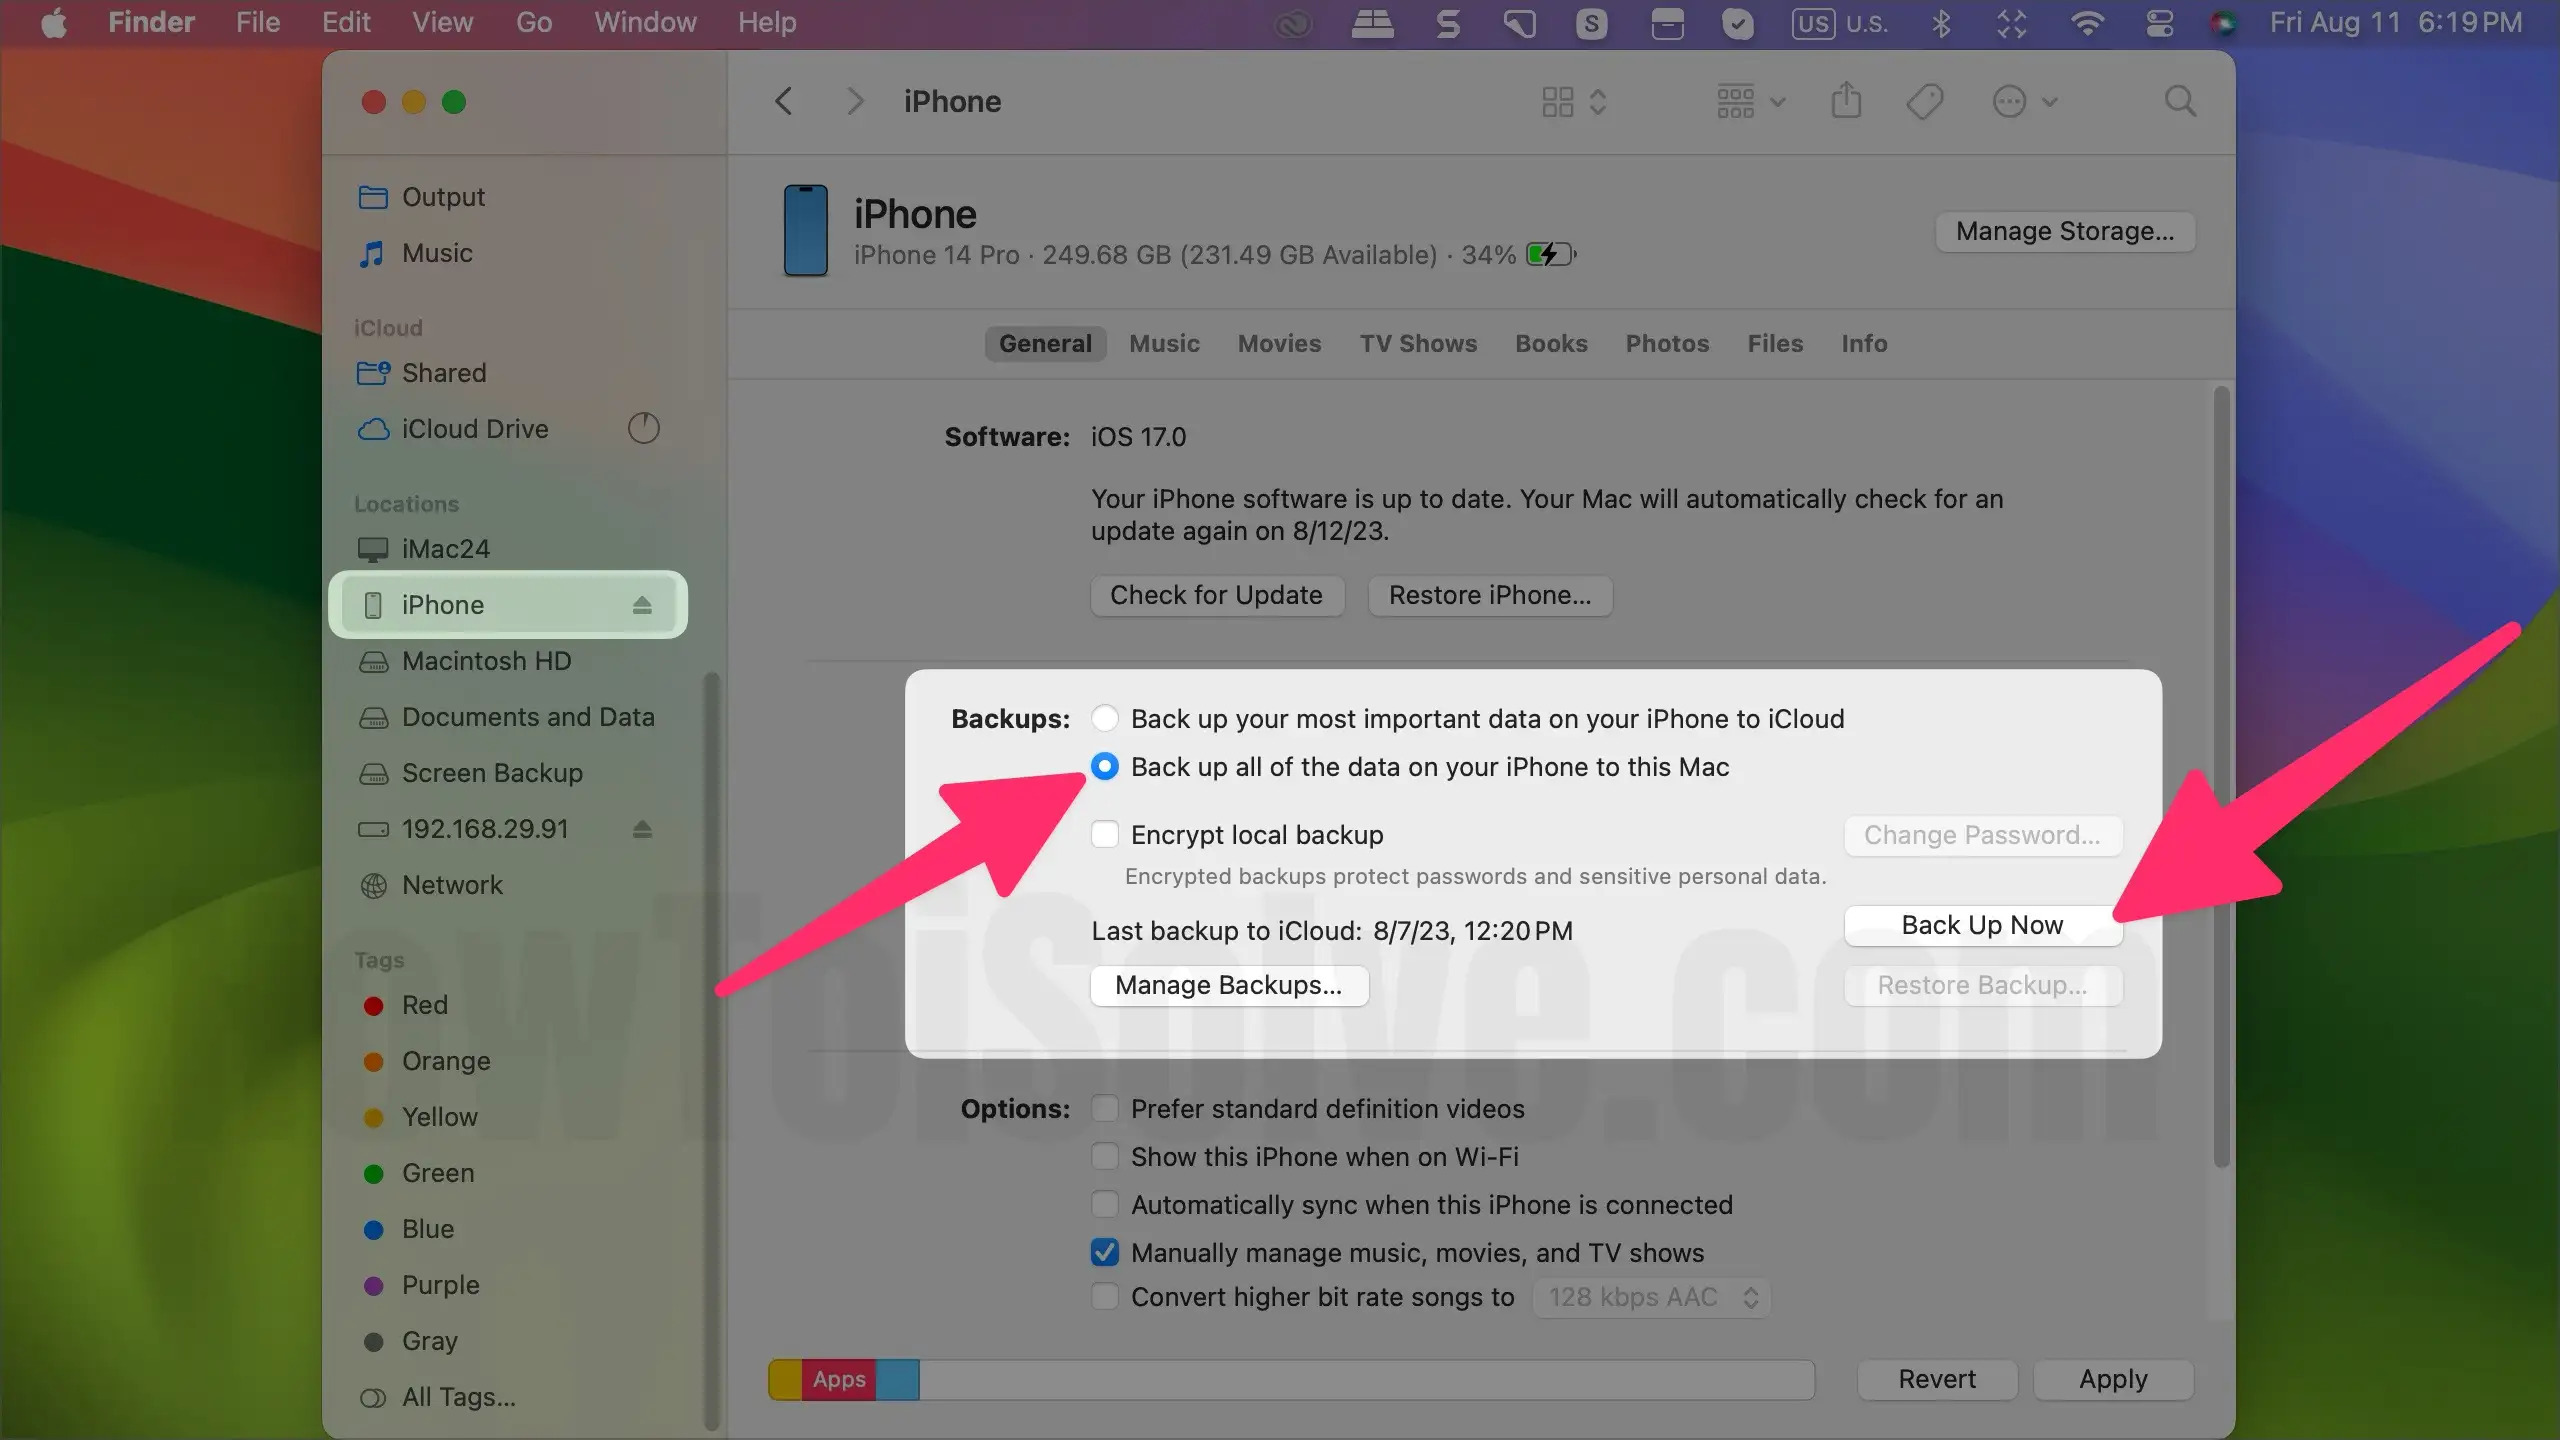
At this point, you can also choose to encrypt your Back Up data for enhanced security. To do this, click on the checkbox to the left of the Encrypt local Back Up heading and setup your preferred password.
- Once you are done setting up the encryption, the system should automatically start backing up your iPhone to Mac. If it does not start on its own, click on the Back Up Now button to manually initiate the process.
Note: If you cannot see the Back Up Now button, navigate back to the General tab and try to expand the Finder window.
When the Back Up process is in progress, buttons on the Backups section of the Finder window will be grayed out. A graph at the bottom and a status message should indicate that your iPhone is being backed up.
Once completed, buttons on the Backups section become clickable once again. What’s more, the date and time for the Last Back Up will be indicated—it should be today’s date.
Method 2: How to Back Up Your iPhone to Mac Using iTunes
Now for Mojave 10.14 and earlier macOS versions, you cannot use Finder to Back Up your iPhone to a Mac. Instead, the Backups option for these macOS versions is located on the iTunes app.
By default, iTunes on such macOS versions is designed to automatically Back Up your iPhone whenever you connect it to the Mac. You can also Back Up your iOS device to Mac manually using the iTunes app, as described below:
- Pair your iPhone with the Mac you normally sync with, either via a cable or wirelessly.
- Open the iTunes app on your Mac and then click on Device—a button situated close to the top-right corner of the iTunes window.
- Next, click on Summary, under Settings
On iOS 3.0 and later iPhones, you can also encrypt your iPhone Back Up on iTunes for Mac. To do this, select the Encrypt [device] Back Up option, type in your preferred Back Up password, and then click on Set Password.
- Once you are done, click on the Back Up Now button, positioned just below Backups.
To view and manage your iPhone Back Up and other Backups on your Mac, launch the iTunes app and navigate to: iTunes > Preferences. Finally, click on Devices to display your iPhone Backups in iTunes. If encrypted, the Back Up data will have a lock icon.
How to Turn On Wi-Fi Syncing on Your Mac
Whether you’ll be using iTunes or Finder to Back Up your iOS device to Mac, you first need to pair the device to your Mac.
You probably don’t want to have to plug in every time you back up. Luckily, you can turn on Wi-Fi syncing between your iPhone and computer with these steps:
- Connect the iPhone to a Mac using the charging cable
- Launch Finder on the Mac and select the connected iPhone from the sidebar
- Click on the General tab at the top and then enable the Show this [device] when on Wi-Fi option.
Back Up Your iPhone to Google Drive
Lastly, you can also take advantage of the free clinic storage space offered by Google on Goggle Drive to Back Up your iPhone. This is particularly the case if you only want to Back Up some items and not all the data on your iPhone.
As you already know, Apple’s iCloud offers 5GB of free storage space. To get more space on iCloud, you are required to pay a subscription fee. If your 5GB of iCloud storage space is almost full, you should consider backing up your iPhone on Google Drive.
The following steps will help you Back Up your iPhone on Google Drive:
- Ensure that your iPhone is connected to a stable Wi-Fi network as this transfer of data to Google Cloud is only possible through Wi-Fi.
- If you do not have the app already, download and install the Google Drive app onto your iPhone—search it up on the App store on your device.
- Open the Google Drive app on your iPhone by tapping on its icon.
- Now sign into your Google account using your Google sign in email and password.
- From the top-left corner of the screen, tap on the Menu Bar to bring up the menu.
- Next, select the Settings option and the tap on Back Up.
- Tap the Contacts option then tap on the toggle button adjacent to it to allow Google Drive access to your iPhone contacts.
- Next, tap on Calendar Events and toggle it on and do the same for Photos & Videos.
- Having enabled all the iPhone items you wish to Back Up, you can now tap on Start Back Up to initiate the process.
Depending on the items you toggled on in steps #7 and #8 above, Google Drive will now begin backing up your iPhone data, such as calendar events, contacts, photos, and videos. Once Google Drive is finished backing up your iPhone to the cloud, tap on the Done button.
Final Verdict
If your iPhone is misplaced or damaged, the loss of personal data can be devastating. To avoid such a scenario, it is best to prepare for such an eventuality long before it happens. Having a Back Up for your iPhone is a great thing as you won’t have to start from scratch.
With a Back Up, you only need to restore it to your new device and get the settings, preferences and data you had on your previous device right away. Depending on the storage platform, you can Back Up your all your iPhone’s data—right from settings, Home screen layout, and preferences to images and videos.
With the steps illustrated throughout this guide, you should have an easy time backing up your iPhone to iCloud, Mac, Windows PC, or Google Drive.


