Do you want to ensure videos, photos, and games look their best on a Mac computer? Calibrating the Color on a Mac is the key. Monitor color calibration to make the screen as black and colorful as accurately as possible, and fortunately, you can do this using the built-in feature.
Moving forward, how you acquire the Mac Screen varies on multiple factors, such as the position of the screen, ambient light, and, at last, how old the display is. Considering all these factors, we have compiled a detailed guide on how to easily calibrate your Mac computer in any macOS.
Calibrate Mac’s Display Color for Photography, Printing and Editing
This article explains to you how to do mac color calibration so remain stuck with it without missing out on essential points. And at last, we will let you know how to Get Consistent Colors Across All Devices Using ColorSync Utility.
How To Launch Display Calibrator Assistant
Here are the steps to launch the Display Calibrator Assitant on Mac. Keep in mind the steps varies from OS, so go through the steps as per the macOS installed on your Mac Computer.
macOS Ventura & Later Versions,
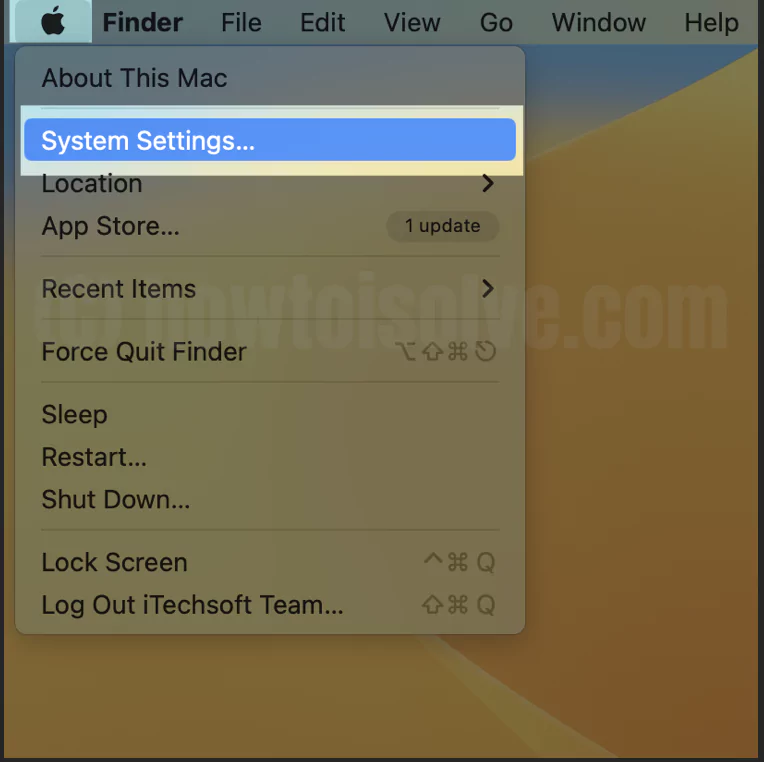
1→ Select Apple Logo > System Settings…
2→ Choose Displays > Color Profile. The list of color profiles will appear.
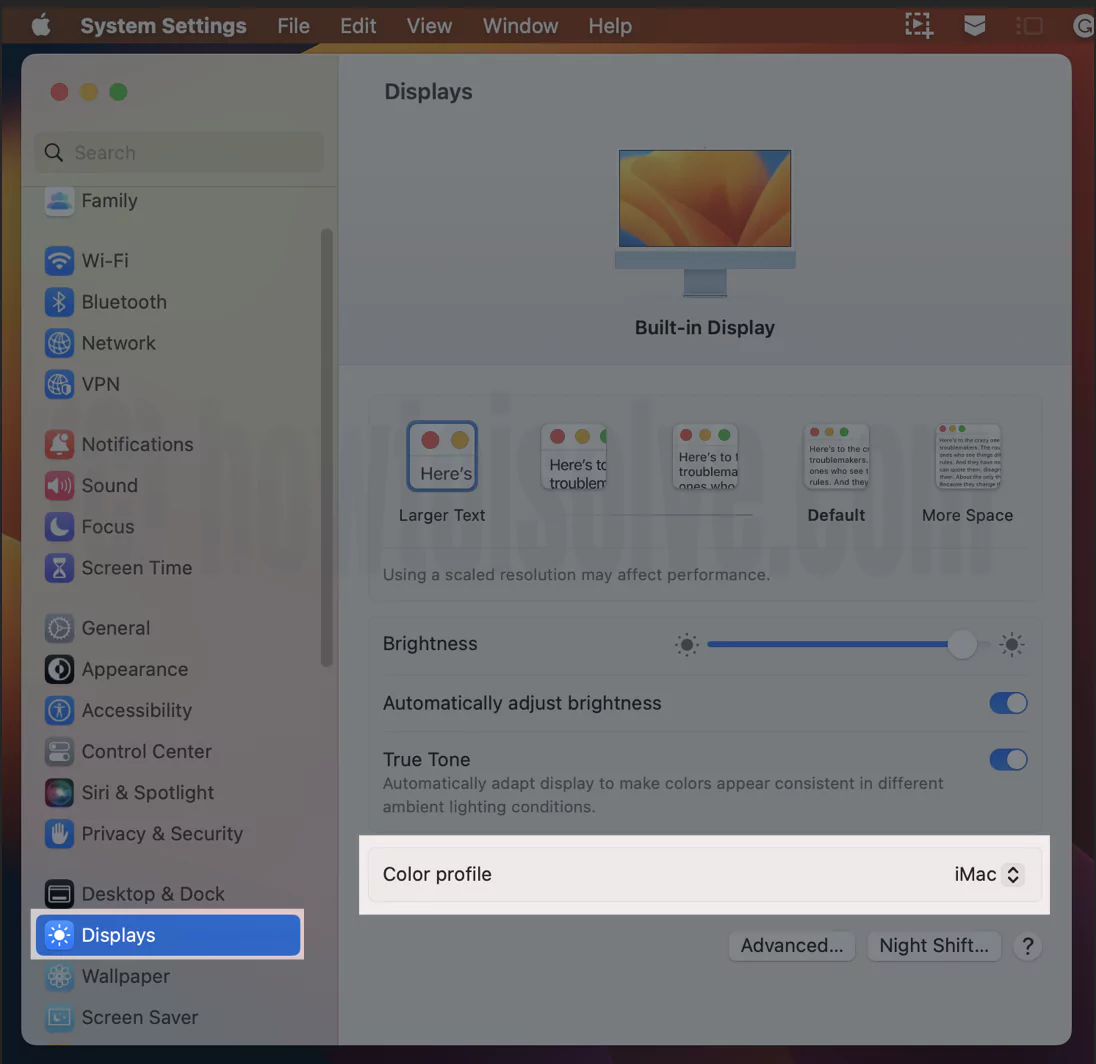
- Scroll down to and select Customize…

- Now select the + Icon to create the Personalize Display Profile.

- Next, you will encounter the Display Calibrator Assistant Introduction page. From the page, choose Continue.

macOS Monterey & Earlier Versions
- Select Apple Logo from top menu > System Preferences…
- Choose Displays.
- Choose Color Profile DropDown and select Customize…
- Now choose the + Icon to create the Personalized Display Profile.
- After selecting the + Icon, you will receive the Display Calibrator Assistant Introduction page. From the page, choose Continue.
Now after reaching out to these steps, explore the below-mentioned Settings.
Setup Display Adjustment
It’s an informative screen that lets you know what type of settings you must prefer before the Mac color calibration procedure.

Things To Note…
- Initially, configure the Contrast to the highest level.
- Next, configure the brightness level using the image mentioned in the right side picture. Enhance the brightness until the Oval Shape hardly appears. Lower the brightness level is the right part of the image visible brighter than the left half.
After reaching out to the settings before the Mac color calibration procedure, select Continue in the lower right corner.
Select Target White Point
The target white point in the monitor color calibration is the setting that allows complete tint the display. The settings determine how the display will capture the color white. That’s the reason white points are measured in the Kelvin. Usually, the display tends to have 6500(D65). However, you can customize it to the different levels from 4500k to 9000K; it can also determine as (D50, D65…9300).

Note: If you are doing Web-Based Graphics or another task, it’s always recommended to have 6500K (D65).
To customize it, check the box Use Native White Point, other while Target White Point Slider greyed out. Now drag the slider to the neutral white point.
Administrator Options
The Administrator Options in the Display Calibrator Assistant resemble the separate display calibrated Profile. So if you carry the administrator rights, you can allow the different owners to use monitor color calibration settings configured by you. If you want to allow it, check the box next to the Allow Other Users To Use This Calibration and then click Continue. If not, directly click on Continue.

Keep in mind that the Allow Other Users To Use This Calibration is only visible when you log in with Administrator Credential on Mac Computer.
Give Profile A Name

To make the Mac Color Calibration settings separately visible with a unique name, now you have to give your Profile a name. After assigning the desired name, choose Continue at the bottom right corner of the Window.
After this, you will receive a Display Calibrator pop-up saying, “Display Calibrators Wants To Make Change”; enter the administrator name and password.


Conclusion
In the conclusion screen, you will receive the message saying a new calibrated profile has been created and configured as a current profile for this display.
However, you can change the Profile directly from the System Settings… > Displays > Color Profile on the latest macOS (macOS Monterey & Earlier System Preferences… > Displays > Color Profile).
Other Color Calibration Settings
The below-mentioned settings are available in the limited or older macOS version. So if you want to Calibrate The Colors On A Mac, these are some different settings you need to configure wisely.
Note: The Native Gamma And Target are located right below the Set Up in the Display Calibrator Assistant.
Setup Native Gamma
In the procedure to calibrate the colors on a mac, a Native Gamma configuration needs to be set up. In the technical world, Gamma is a relation between numeric value of a pixel in an image and the brightness of that pixel when it appears on display.
This scenario will ask you to move at least 3-Feet away from the screen. It suggests dragging the Left Slider until the Grey Apple Icon in the center equals the brightness of the Background. Similarly, drag the Right Slider until the Apple Logo is neutral to the Background. It will eventually ask you to sit or squint back to the display.
To determine the Luminance Response Curve, choose Continue.
Setup Target Gamma
This configuration in calibrating the Color on a Mac modifies the overall Contrast of the screen. The Display Calibrator Assistant will let you know the picture in real time and how the different contrast level affects the image on display. You will not capture the numerical Gamma when the next to the Use native gamma checkbox is checked. You can firmly drag the slider until you reach the desired Contrast. The changes will appear on the screen in real time.
Get Consistent Colors Across All Devices Using ColorSync Utility
The ColorSync Utility is the detailed color profile information on your Mac Computer. It includes Summary Information and a Three-dimensional view of the color space. Moreover, there is a calculator in it which offers the color value of the pixel on screen.
Moving forward, you can now use the ColorSync Utility to customize the image by enrolling the effect changing brightness and al-last correcting brightness and colors.
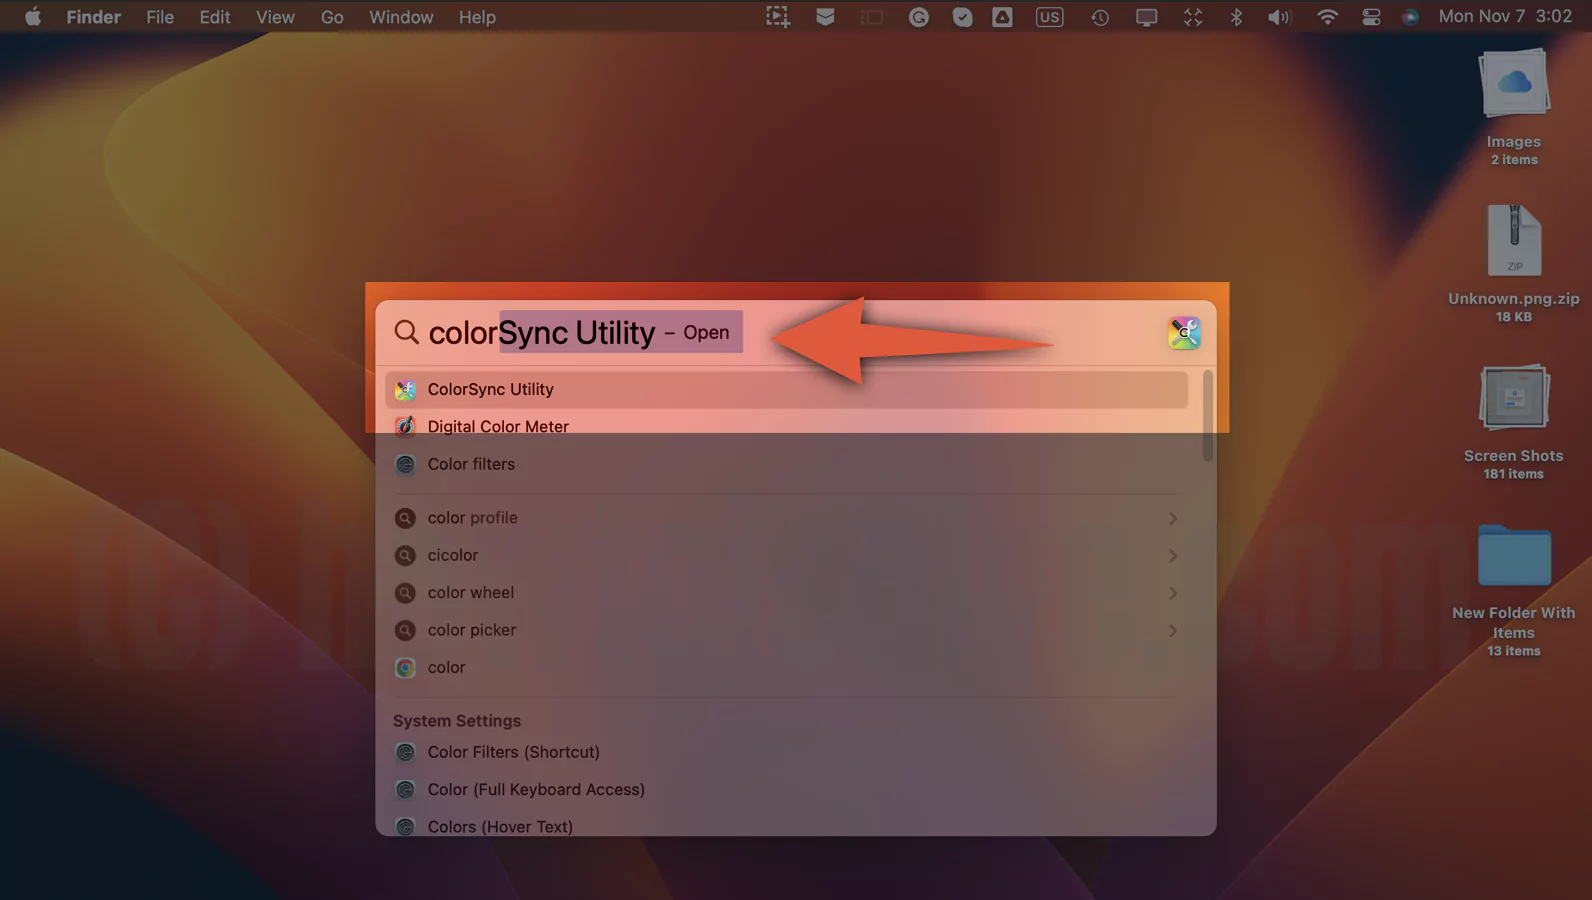
1→ Press the Command + Space to feature Spotlight; in the Spotlight, search for ColorSync Utility and select it.
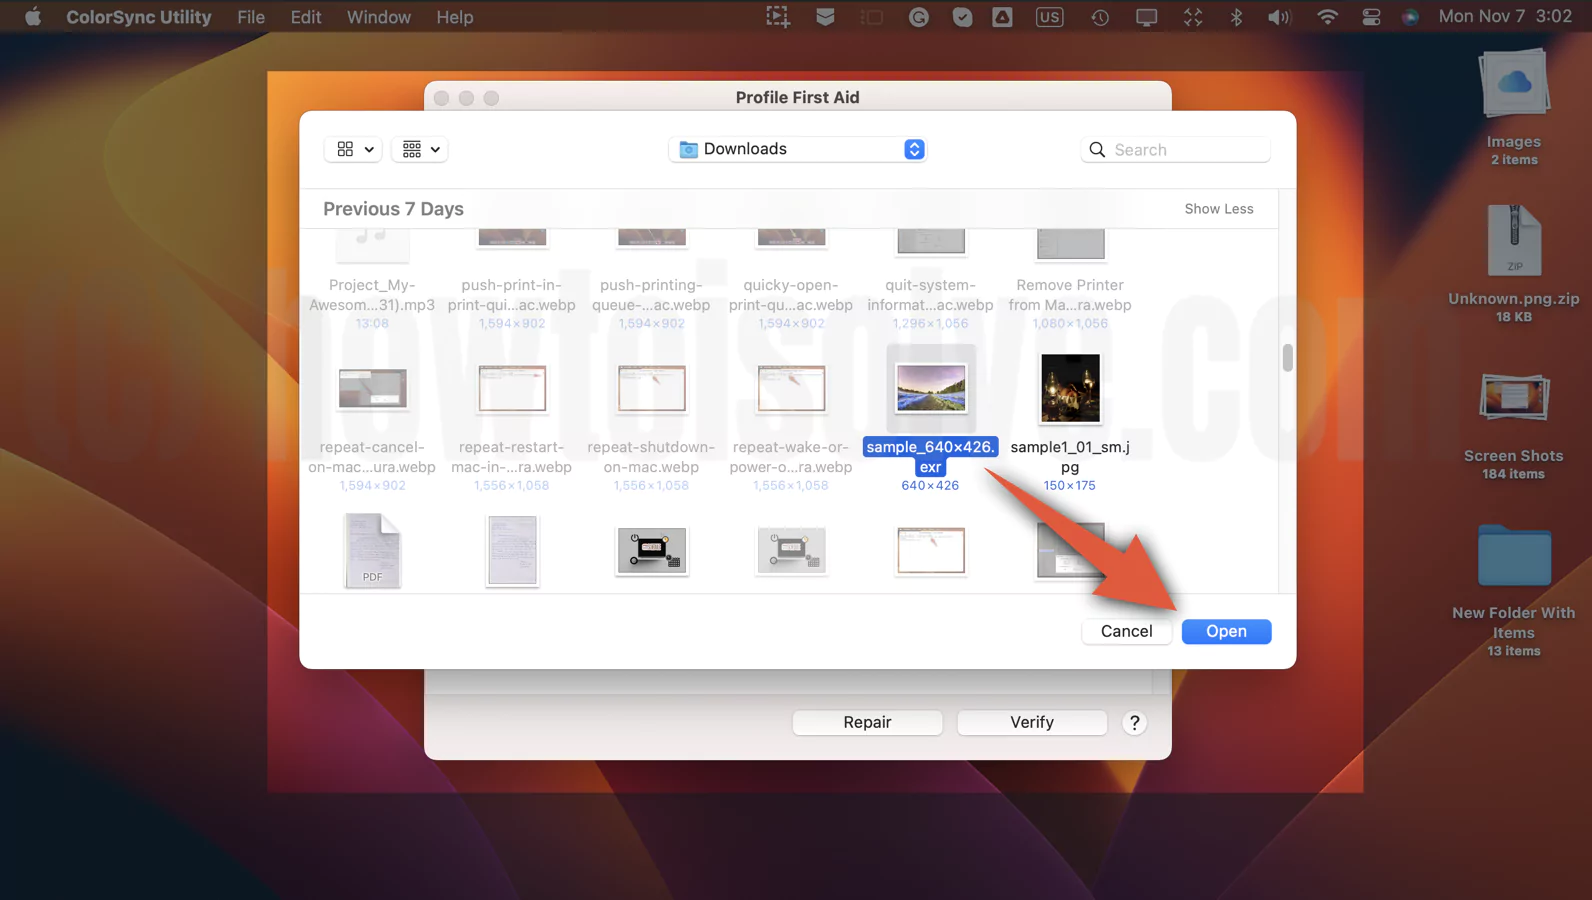
2→ When the ColorSync Utility is open, choose File from the Menu Bar.

Next, select the Open(Command + O) and choose the image from the preferred location.
When the image opens, select the Dropdown at the bottom left of the screen. There will be three options, as mentioned below.
Match Profile: Picking it out this option will customize the image to match the ColorSync Profile.
Assign Profile: This option will assign the ColorSync Profile to a picture.
Apply Profile: It customizes the pixels in a picture to make it similar to the new ColorSync Profile and Color Model.

- Now from the middle Dropdown, please select the desired Profile from it.
Note: When you select the Apply Profile, in the middle Dropdown, you will receive extra options Abstract, Colorspace, Display, Input, Named Color, and Output. In case you select Match Profile or Assign Profile, you will only receive Display, Input, and Output (Abstract, Colorspace, and Named Color will be greyed out)
- Moving forward to the right-side Dropdown, you will encounter multiple options, as mentioned below.
Automatic: Uses predefined intent.
Perceptual: The option is helpful for photographers as it applies realistic-looking colors.
Relative Colourimetric (Media Relative): The ability to maintain the accuracy of Color. Useful for Logo Designers.
Saturation: Designed to maintain the vividness of the Color. Mainly useful for graphics.
Absolute(White Point Relative): Customize the Color to describe differences in white Color.
- After clicking on any of mention above options, select Apply at the bottom right corner of the screen.
There are extra settings in the same ColorSync Utilities Window, located at the Right Top Corner of the screen.
Adjust Image Size: In these settings, you will receive various settings related to image sizes, such as Resize, Quality, and DPI.

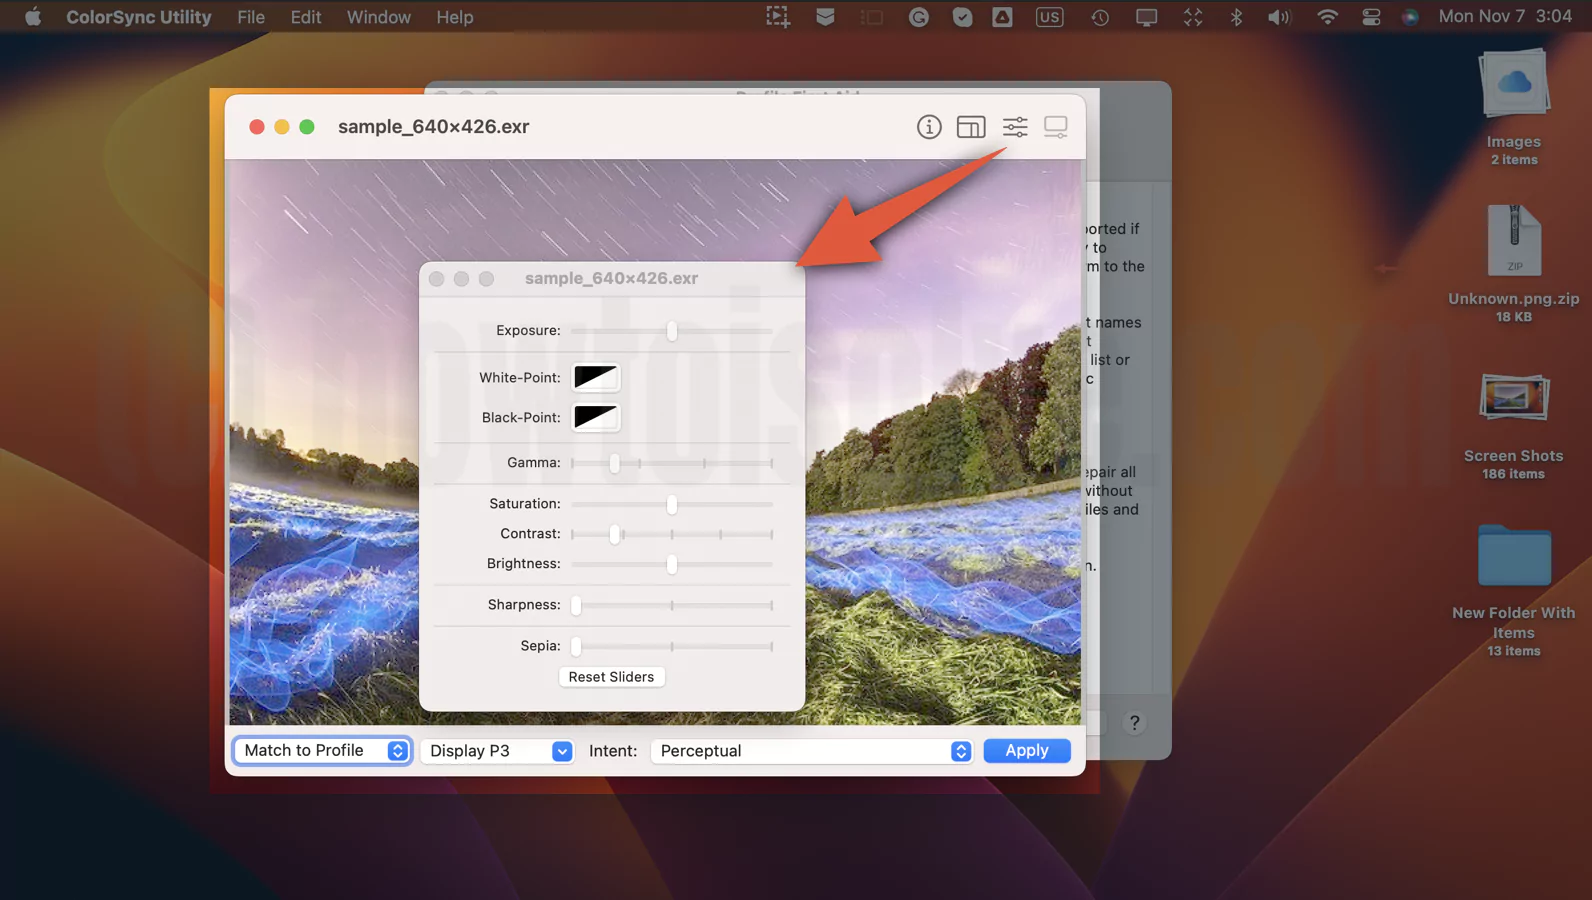
Image Correction: Here in this setting, you will receive aspects related to image correction; settings such as Exposure, White-Point, Black Point, Gamma, Saturation, Contrast, Brightness, Sharpness, and Sepia.
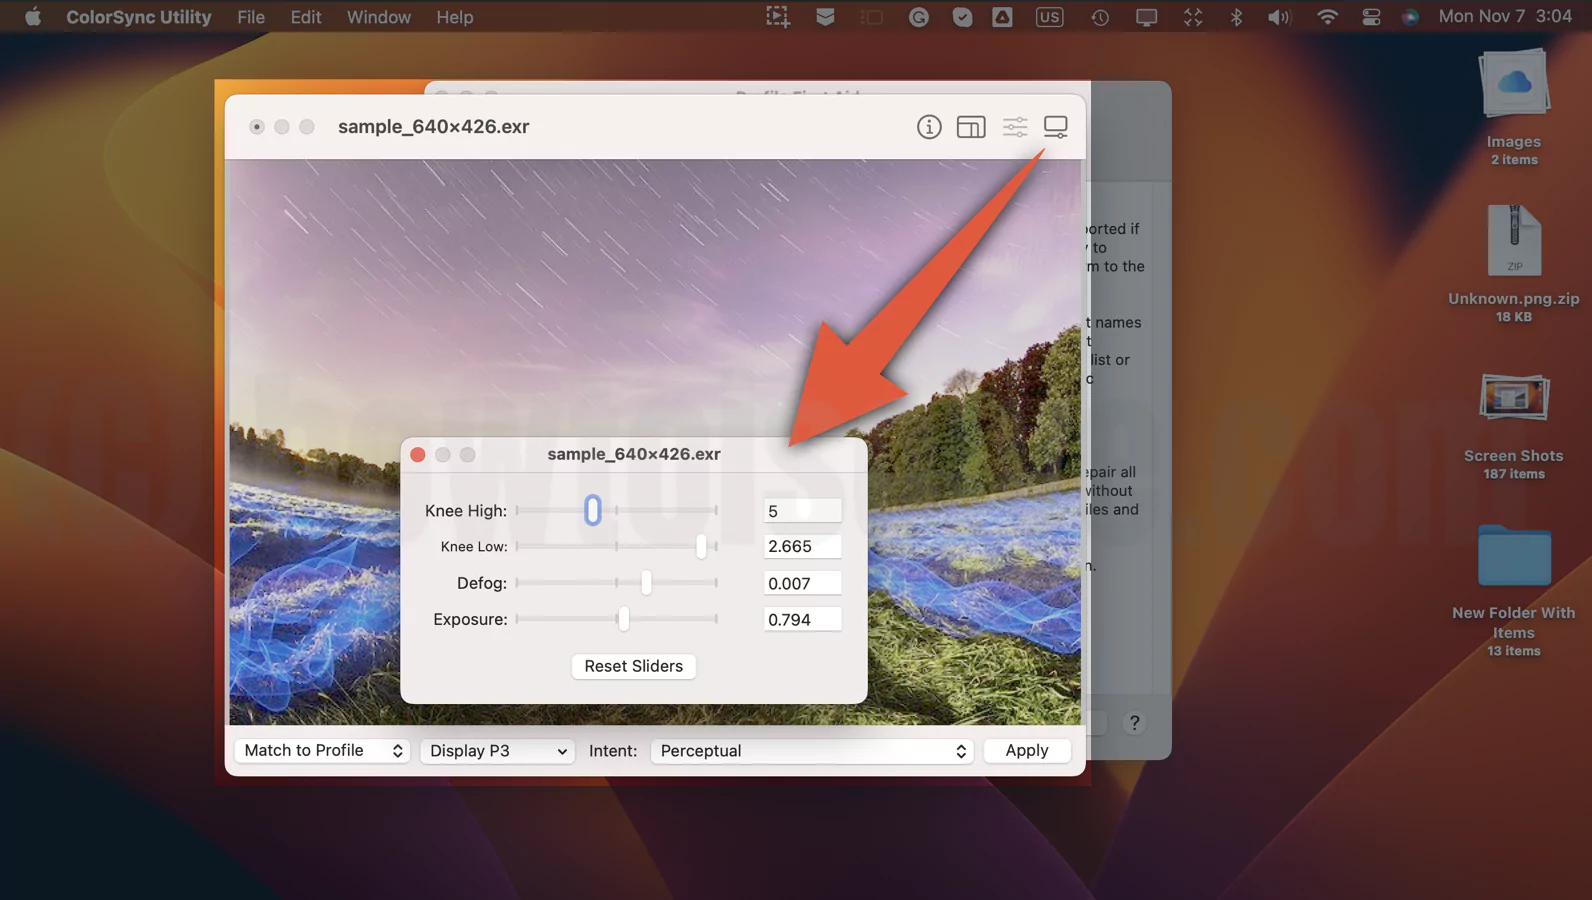
Tone Mapping: In this setting, you can adjust the Knee High, Knee Low, Defog, and Exposure. To do so, drag the corresponding slider when it reaches your requirement. Keep in mind the settings as only applicable in the image having .exr format; instead of this format, tone mapping will grey out.
Bottom Line
Hassle-freely compile your task where the color calibration is must needed because as of now you have mastered how to efficiently calibrate the colors on Mac.
FAQs
Is Macbook Pro Color Accurate?
Yes, the Macbook Pro Screen Color Accurate; as of now, it covers 65% of seRGB at the same point, and retinas are around 95%-100%. And the great news is that Apple made it easier to color calibrate on all Macs, especially on MacBook pro 14 and 16 Inches. To learn about color calibration, go through the above guide.
How Do I Color Correct My Monitor?
It’s nothing but Color calibrate your Mac Monitor. Doing so will create your color profile, so whenever you access your Mac computer using the Administrator Crendital, it will, by default, activate the Color Profile.
Why Does My Mac Screen Have A Blue Tint?
If you encounter the blue tint of the Mac screen is a rare phenomenon, but whenever you receive Blue Screen with a beach ball or blue tint, first of all, verify the peripherals are accurately connected. However, in some cases, Blue tint on the screen seems normal on the MacBook as it doesn’t include the anti-microfiber coating. Considering this, we suggest gently cleaning the screen using Microfiber Coating.
Does Macbook Pro Need Color Calibration?
Calibrating the Mac display isn’t always required if you constantly work in a Home or Office environment for a routine task. But if you are a graphics designer or photo editor and want to calibrate the Mac screen to accurately Color match the photos, then at some point, you may require Color Calibration. To know about it, follow the above guide.
How Do I Calibrate My Macbook Screen?
Navigate to the System Settings… > Displays > Color Profile Dropdown> Customize… in the latest macOS Version and for the older macOS versions, head to the System Preferences… > Displays > Color Profile Dropdown> Customize… Now follow the on-screen instruction to calibrate Mac Monitor for photo editing. Or you can go though the mentioned guide fro better understanding.
Which Color Profile Is Best For Macbook Air?
Well, it completely differs from person to person. However, you can try it out by going through every step mentioned in the guide above and let us know your preference by dropping it in the comment box below.
Is iMac Good For Color Grading?
Which current Mac is best for Color grading? Got cleared after personally using the iMac for color grading tasks. However, keep in mind the iMac display is always on to go for color grading, but ensure that the installed OS doesn’t mess things up.
Are Macbook Pro Screens Calibrated?
Yes, every MacBook pro built with a Liquid XDR display goes under the calibration process to ensure the perfection of P3 Wide color panel.
Why Is My Screen Color Messed Up Macbook?
Software-related bugs are the most prominent reason for screen color way off, or Why is MacBook screen Color distorted. The first thing you must try is running the diagnostics on the MacBook.
Why Does My Mac Screen Look Like A Negative?
If the Color doesn’t look accurate on the Mac or Mac Screen is Hazy, try creating a personal color profile. To make the personal color profile go through our tutorial to calibrate Color on the Mac.
Why Does My Macbook Have Rainbow Lines?
The Band line often keeps strobing or flickering, possibly due to the prolonged use of the MacBook. And in the worse case, it identically increases over time. If that’s so, we suggest shutting off the Mac computer and letting it cool down.


