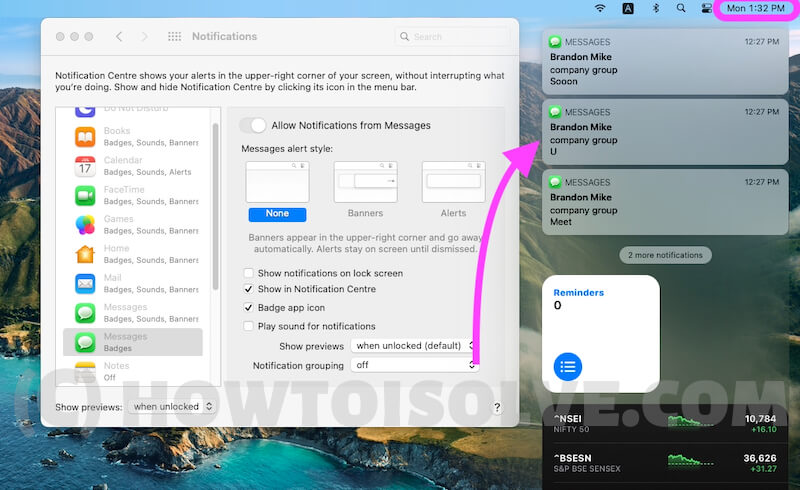
This feature is designed to prevent alerts and notifications from cluttering up your screen. With Group Notifications, all alerts from a particular app are grouped together so that you can easily remove them with one swipe.
This feature is available on iPhone, iPad, Apple Watch, and Mac devices that are compatible.
If you want to learn how to use Group Notifications on your Apple device, we’ll guide you through it step-by-step.
How to Group Notifications By App on iPhone, iPad
Step 1: Launch the Settings App on your iPhone > Tap on Notifications.

Step 2: Choose the App on which you want to Receive Group Notifications and Tap on it. For example, we have taken WhatsApp for the stack of Group Notifications > Tap on Notification Grouping > Select By App.
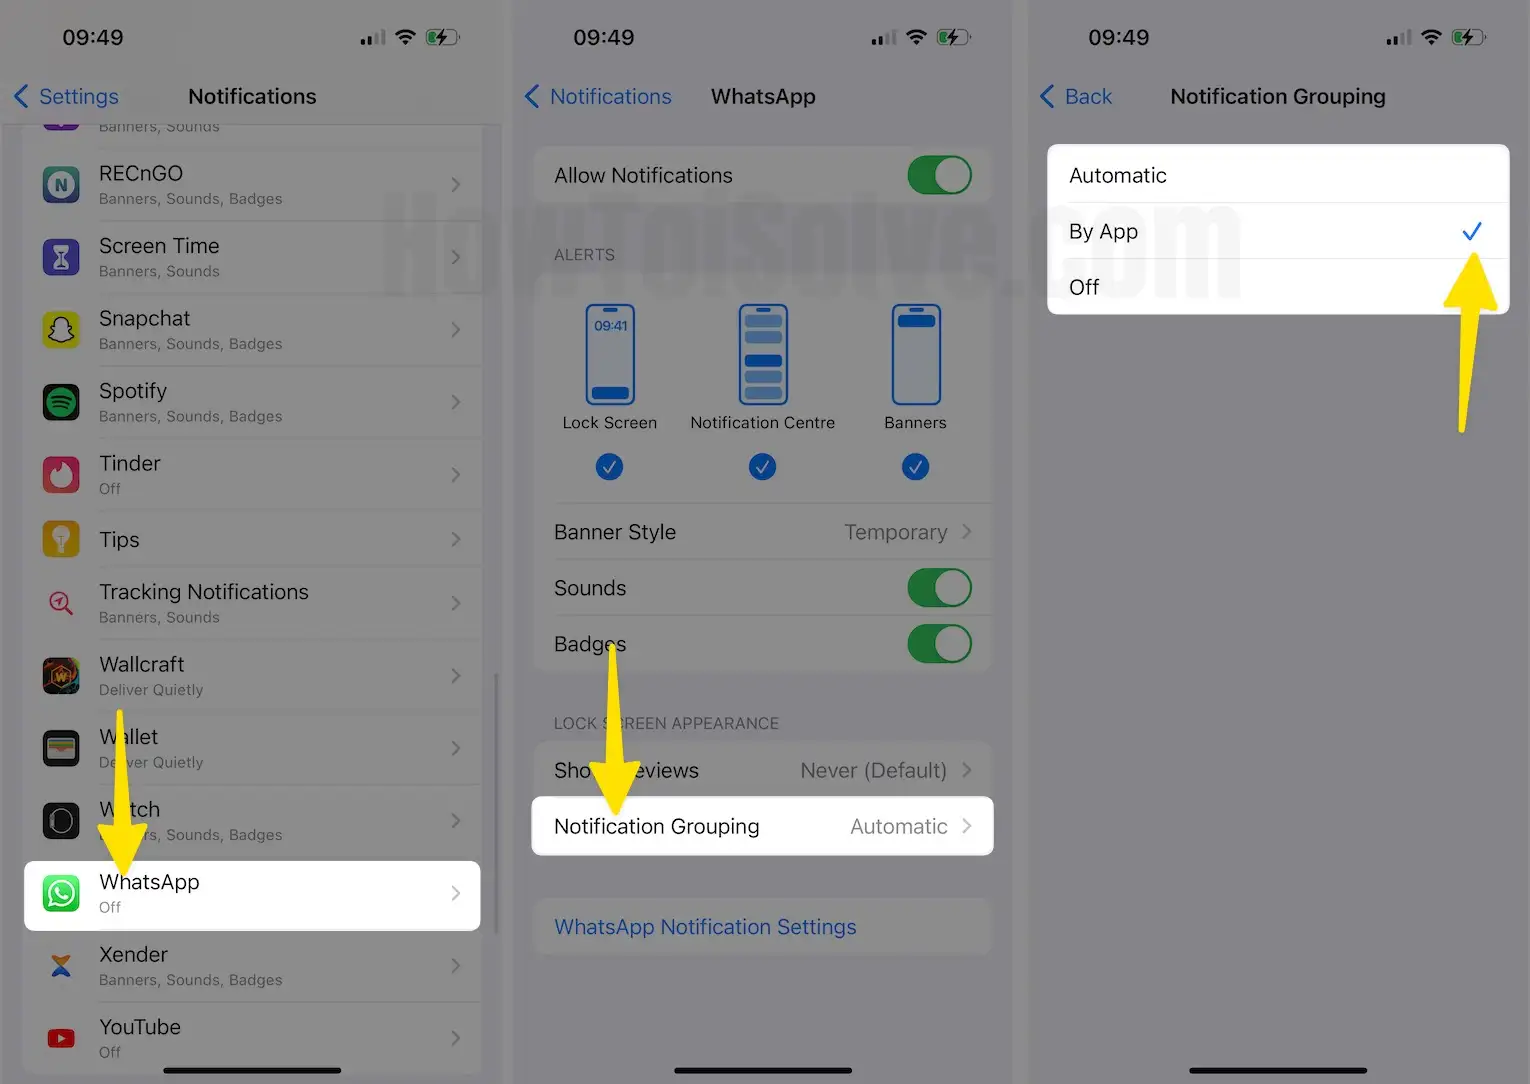
From now all the alerts and notifications will be grouped in one stack. Kindly remember that you have to repeat this procedure for each application individually.
Ever your mind changes and you would like to revert to Group Notification by App, then you can turn off Group Notifications by App for a specific App at any time.
Here’s How to Manage Group Notifications in iOS 12
To Disable Group Notifications by App on iOS
Step 1: Launch the Settings App on your iPhone > Tap on Notifications.
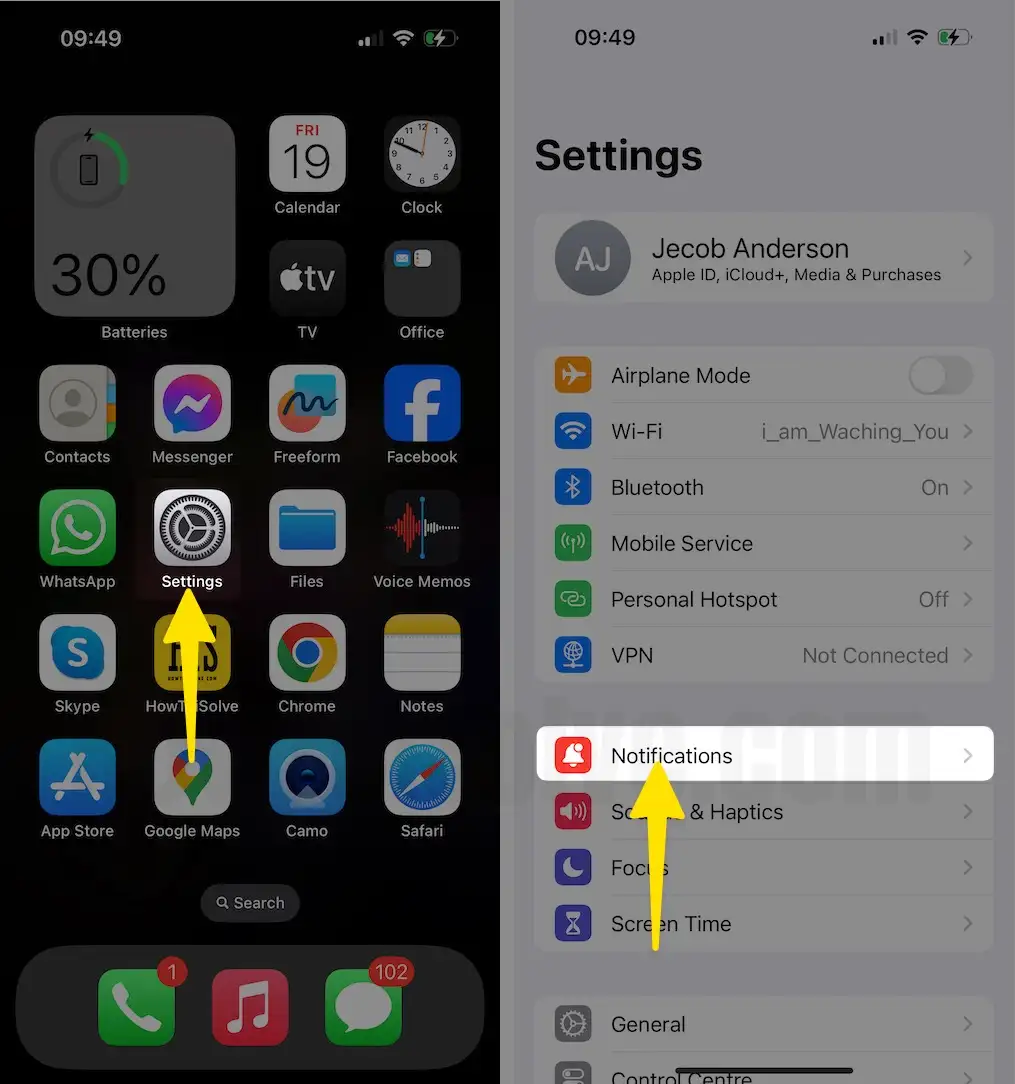
Step 2: Choose an App that you want to Stop Group Notifications > Tap on Notification Grouping > Select OFF.

Now, we will talk about the Apple Watch; in WatchOS 5 or later, Apple also offers a Group Notifications stack for Apple Watch, too. Let’s a closer look!
How to Enable Group Notification by App on Apple Watch
In addition to iOS devices, you can also receive group notifications on your Apple Watch. Since the display of an Apple Watch is significantly smaller than that of an iPhone, having group notifications on your watch can be very helpful. Let’s take a look at the steps required to set up group notifications on your Apple Watch.
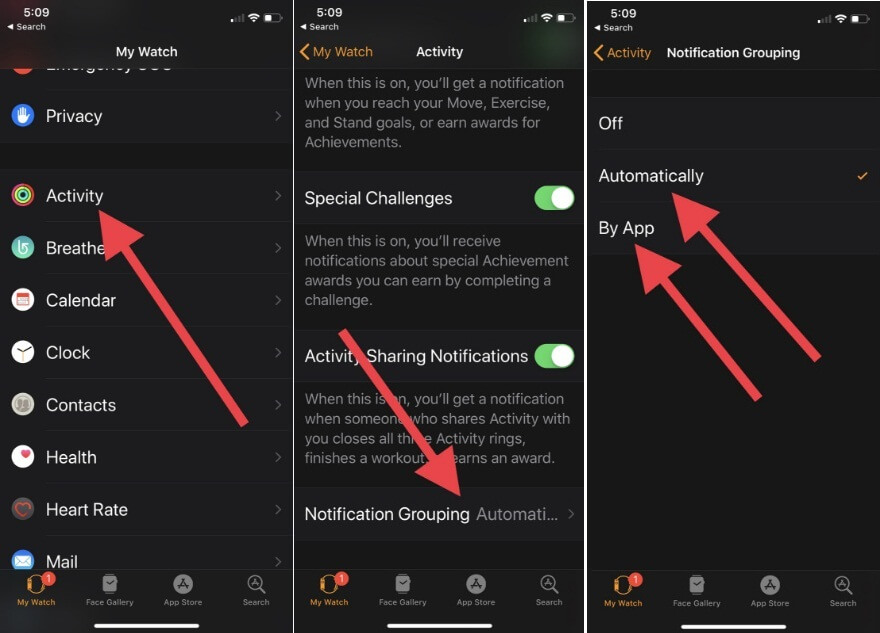
On your iOS Device, Open the Apple Watch app > On the Bottom of the Screen, Tap on My Watch > Select Activity > Swipe down to the Bottom of the Screen and Tap on Notification Grouping > Now, Choose By App.
So, guys, this is the most in-demand feature you will get in iOS and watchOS as a free update in the coming fall.
How to Enable Group Notifications on Mac
Group Notifications play a very important role in reducing notification clutter and keeping the Mac Notification Center clean, like crystal. All the MacOS Big Sur Compatible Devices can turn on Group Notifications on MacBook Pro, MacBook Air, and other Macs.
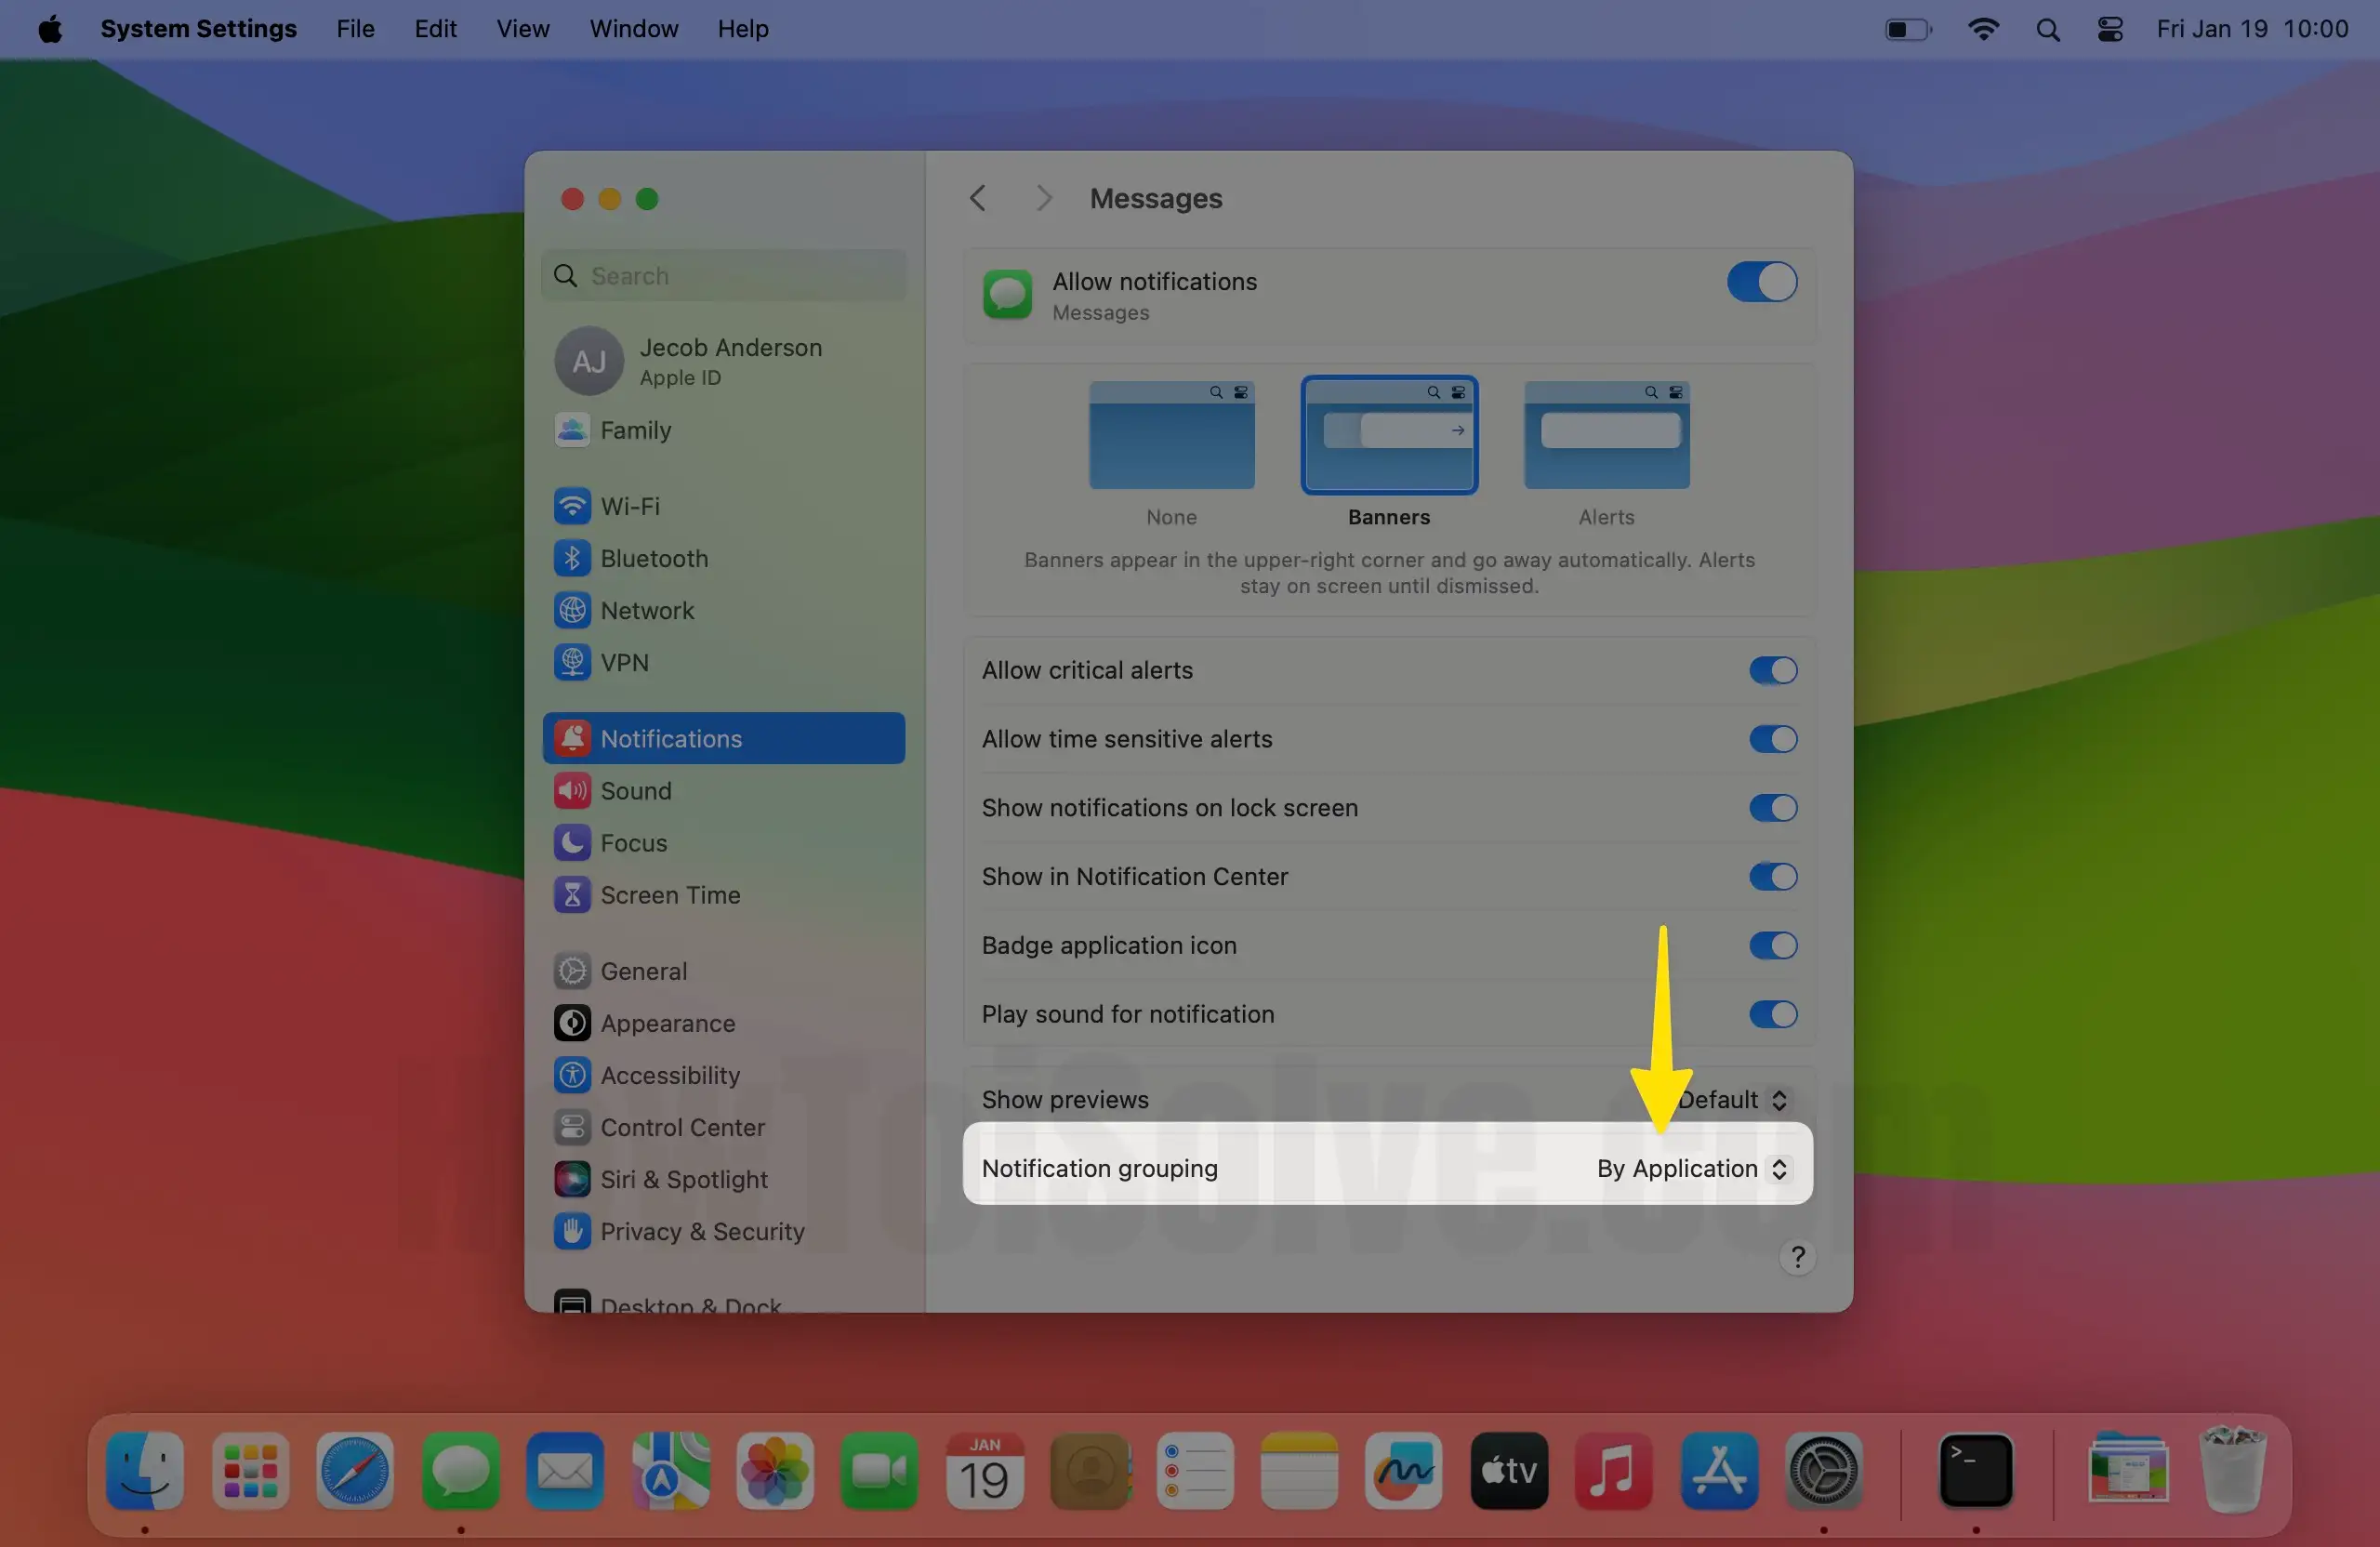
Like all other Apple devices, Mac offers three options to group notifications [Automatic, By Application, Off], lets see how it can be done.
How to Enable Group Notifications on Mac
Step 1: Click on the Apple Logo From the Mac Menu > Select System Settings.
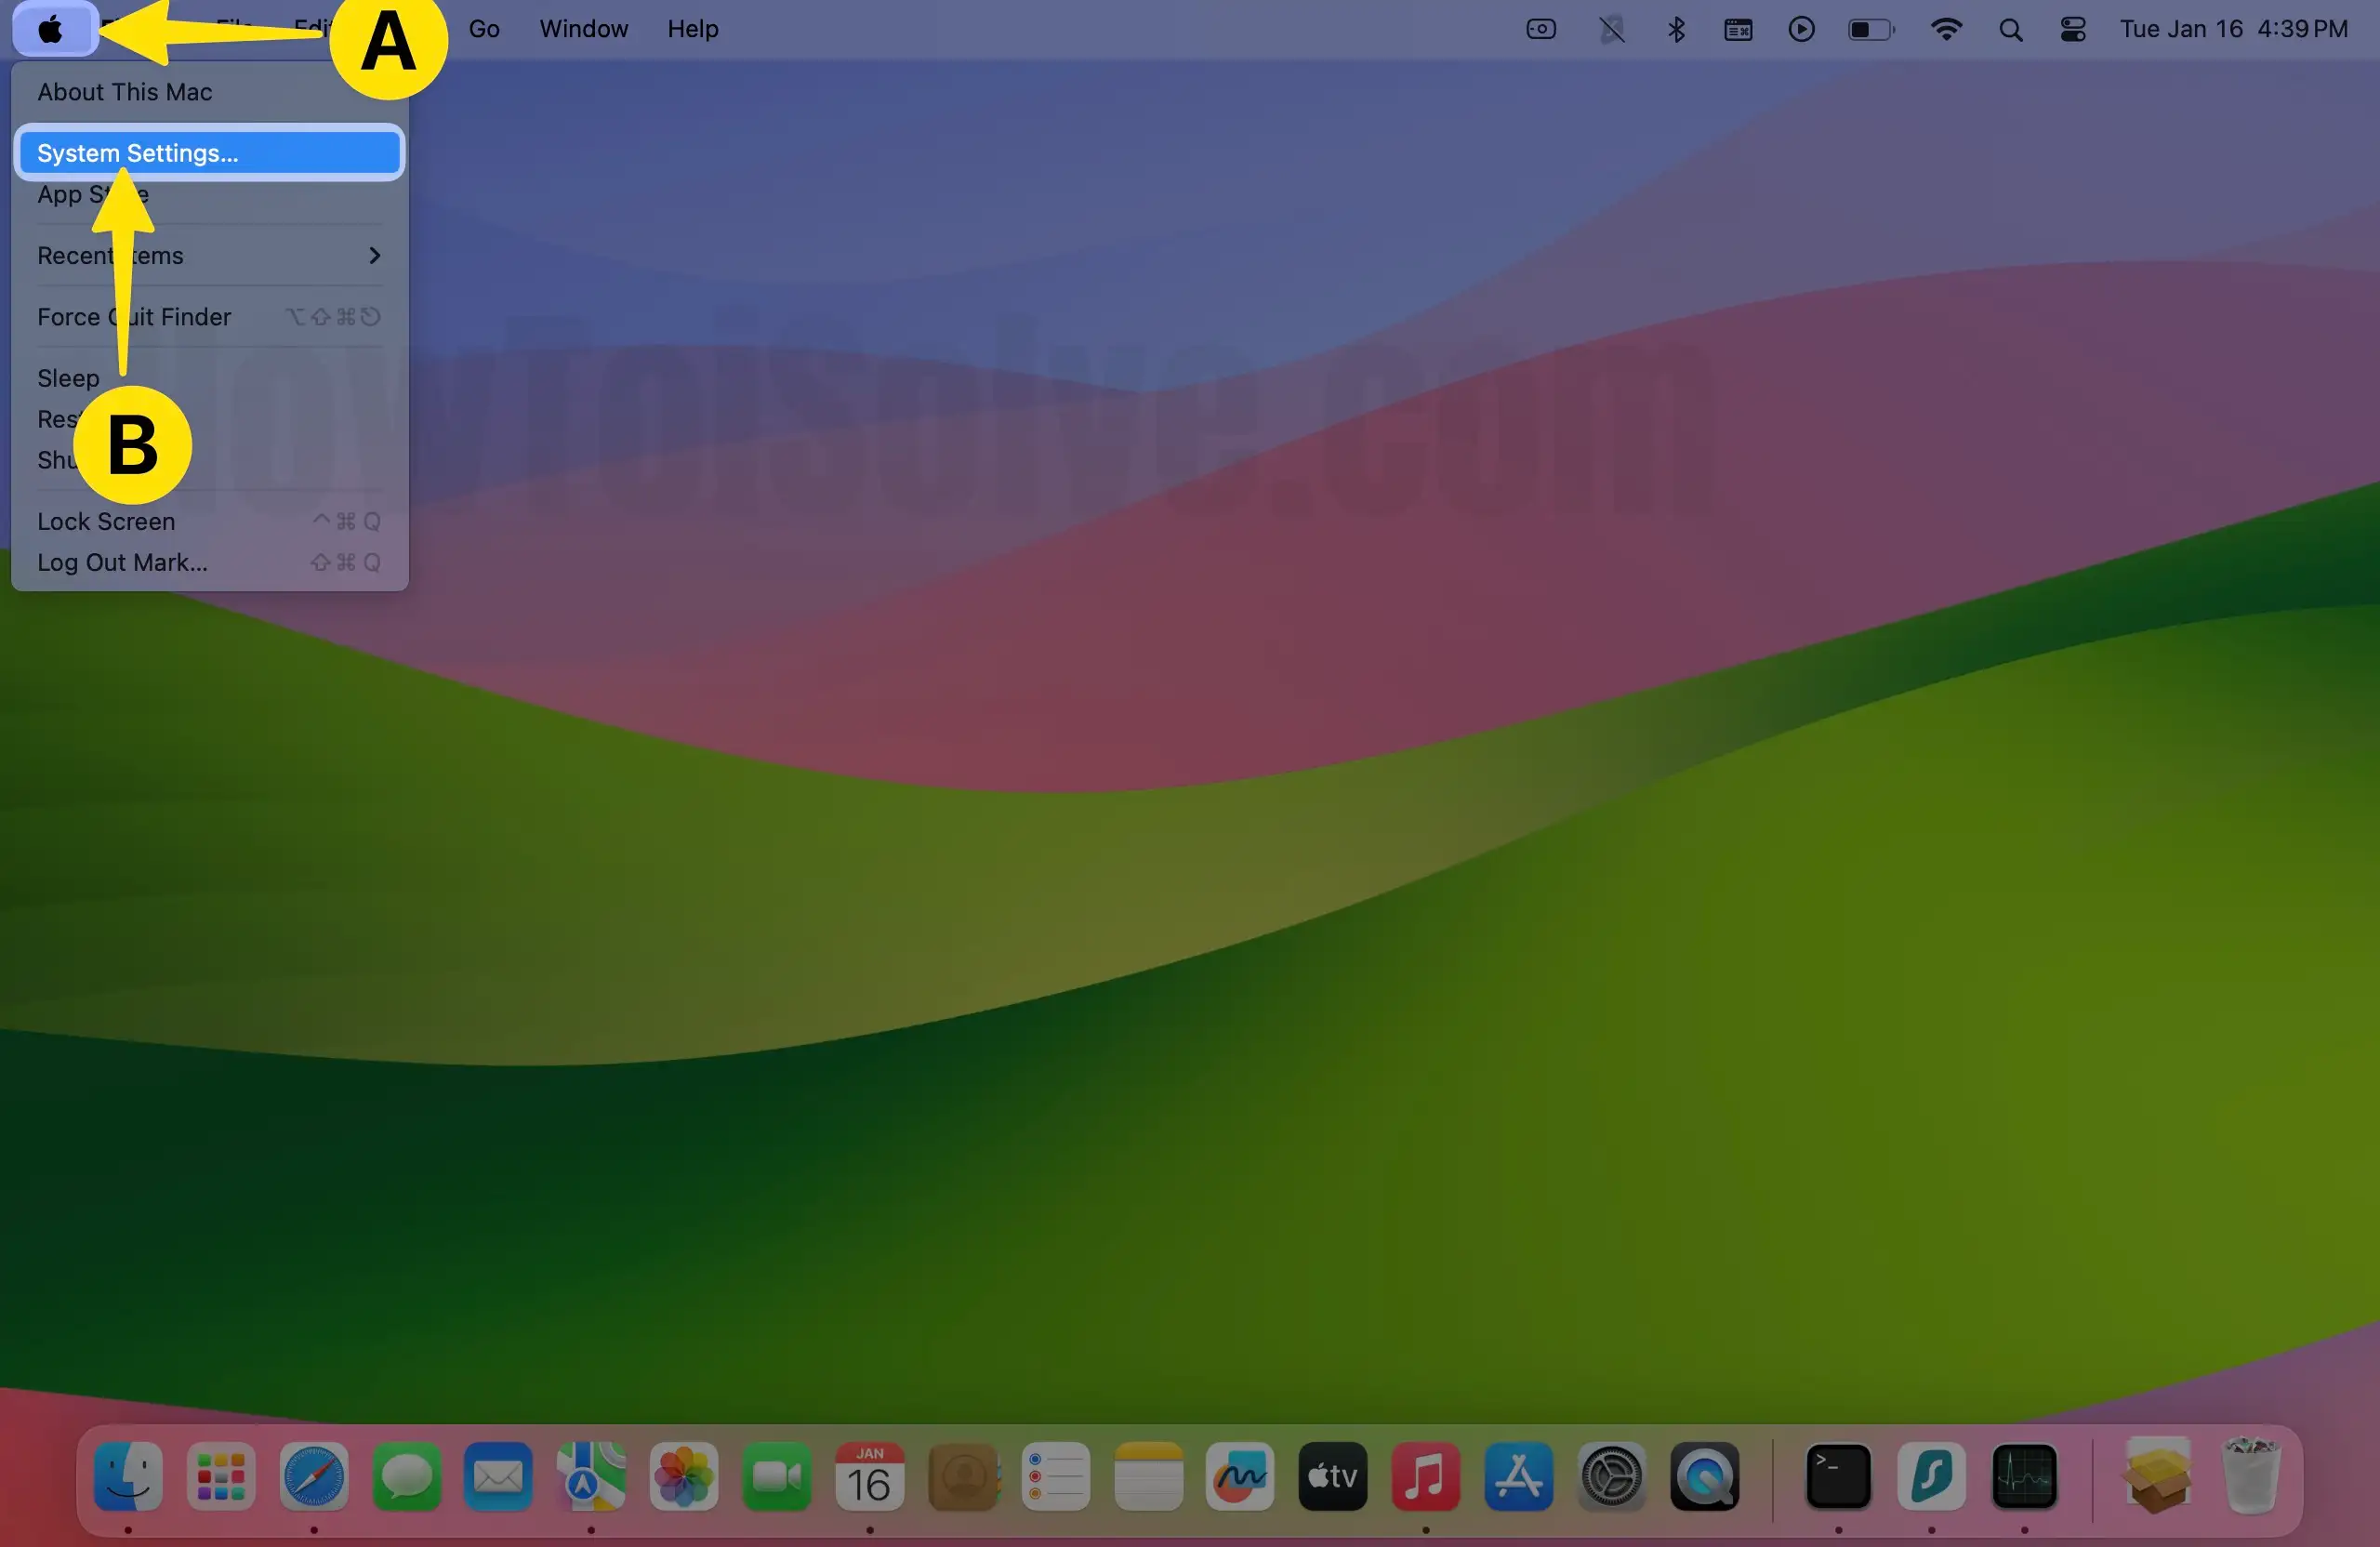
Step 2: Click on Notifications from the left pane > In the Applications Menu, Click on the Desired App on the right side.

Step 3: Click on Notification Grouping > Choose By Application.
That’s it.
Older macOS
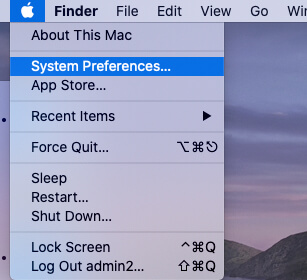
Step 1: Click on the Apple logo that you’ll find on the top navigation menu. From there, choose System Preferences.
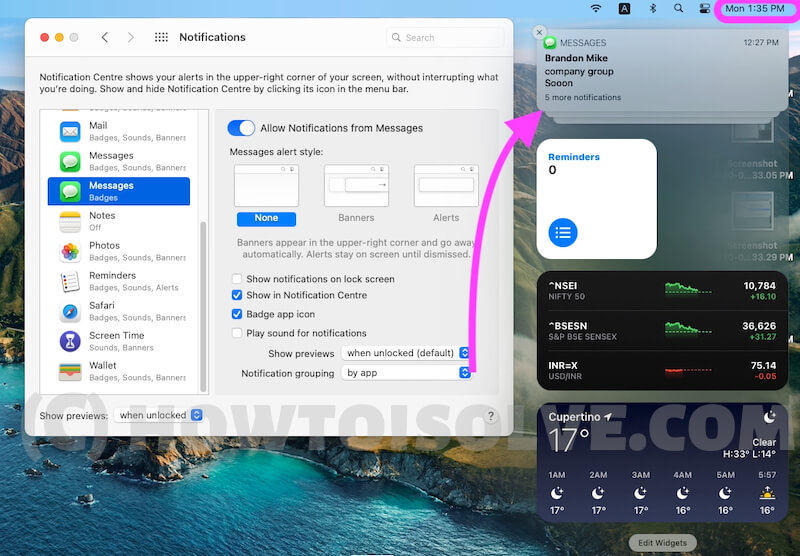
Step 2: Go to Notifications. On the sidebar, all the applications will be listed. Choose the one for which you want to enable group notifications. After that, on the main screen, look for the Notification grouping.
Let’s check out what they mean,
It will show three options: automatic, by app, and off.
- By app: This option will group notifications for a particular application that you’ve chosen.
