Even in 2025, faxing isn’t dead — especially for business forms, medical records, or legal documents that still need that official touch. The good news? You no longer need a bulky fax machine. Your iPhone 17 can handle sending and receiving faxes in just a few taps.
Here’s everything you need to know.
Why Fax from an iPhone 17?
Modern fax apps make it easy to:
- Send signed PDFs, images, or scanned files straight from your iPhone.
- Receive faxes securely, without a phone line.
- Keep a digital record of every fax you send or receive.
- Use your iCloud, Files, or Notes documents directly.
With iOS 26, everything integrates smoothly — even scanning a document with your camera and faxing it within seconds.
Step 1: Choose a Fax App
You’ll need a reliable fax app since Apple doesn’t include faxing natively. Here are some top-rated options from the App Store:
| Fax App | Best For | Key Features |
|---|---|---|
| iFax | Works perfectly with the Genius Scan app | Secure, supports signatures, integrates with cloud storage |
| eFax | Frequent fax users | Real fax number, file sharing, and receipt confirmation |
| FAX.PLUS | Occasional users | Free tier, simple UI, supports multiple formats |
| MyFax | Small businesses | Great tracking tools and templates |
| Genius Fax | Quick single faxes | Works perfectly with Genius Scan app |
Tip: Most apps give you a trial or a few free pages before requiring a plan.
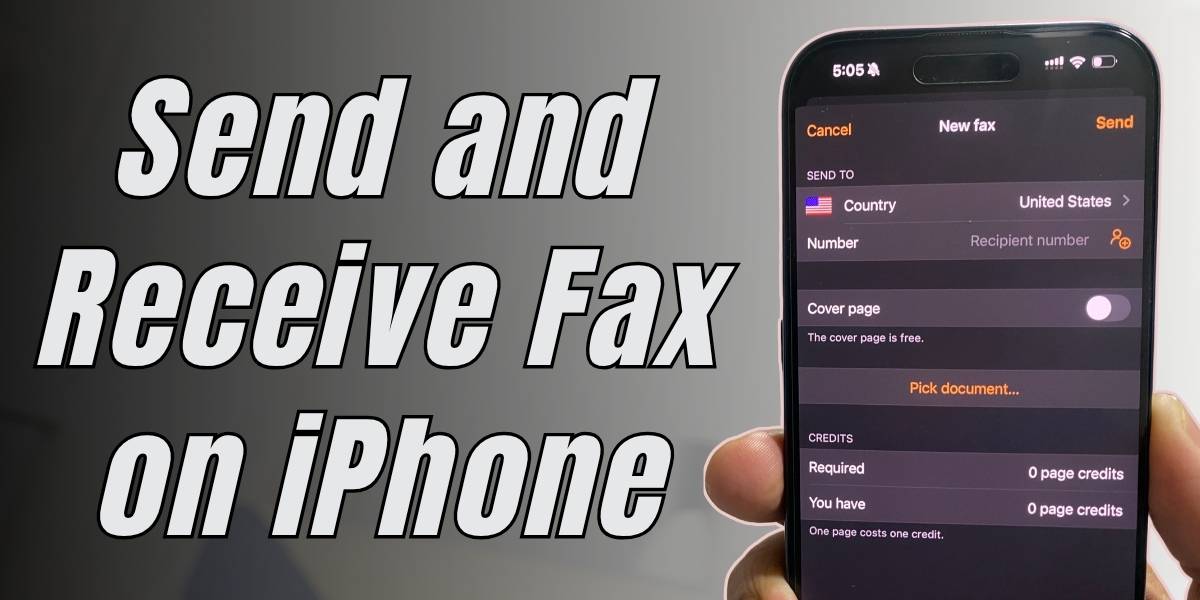
Step 2: Sending a Fax
Once your app is installed:
- Open the fax app on your iPhone 17.
- Tap New Fax or the ➕ icon.
- Enter the fax number (including country or area code).
- Add your file — you can choose from Files, Photos, or Scan Document.
- Tap Send.
That’s it! You’ll usually get a confirmation once the fax is delivered successfully.
Pro Tip: If the document needs a signature, open it in the Files app → Markup tool before uploading to the fax app.
Step 3: Receiving a Fax
Receiving faxes depends on the app:
- Apps like eFax or iFax give you a dedicated fax number.
- When someone sends a fax to that number, you’ll get a push notification or email alert.
- The file appears as a downloadable PDF inside the app.
You can save or share it directly through Mail, Messages, or AirDrop.
Step 4: Keep It Secure
Fax apps today use end-to-end encryption and HIPAA-compliant systems for healthcare and legal users.
Still, keep these safety practices in mind:
- Avoid using public Wi-Fi while faxing.
- Always double-check the recipient’s number.
- Delete sensitive faxes once sent or stored safely in iCloud Drive.
Troubleshooting Fax Errors
If a fax fails:
- Check your internet connection.
- Make sure the number is correct and includes the country/area code.
- Retry after a few minutes — sometimes the recipient’s line is busy.
- Update your fax app to the latest version for iOS 26 compatibility.
Final Thoughts
Faxing on the iPhone 17 is surprisingly simple — no cables, no machines, just a few taps.
Whether you’re signing a contract, sending paperwork to a clinic, or forwarding a legal doc, you can do it all from your pocket.
✅ Recommended App: iFax — it’s secure, fast, and feels built for iOS 26.
So next time someone asks you to fax something, just smile — because your iPhone 17 already does that.