In Notes, you can create a table as per your need and demand comfortably. Tables are the best way to store and retrieve information instantly, and it becomes easy to read and understand.
In this article, you will get some major guidelines to create a table on macOS Mojave and high sierra using Notes.
Explained: use Tables in Notes App on macOS Mojave, High Sierra
1. The easiest way to create table is given below:
1. Launch Notes on Your Mac device. (Using Spotlight Search or Applications finder)
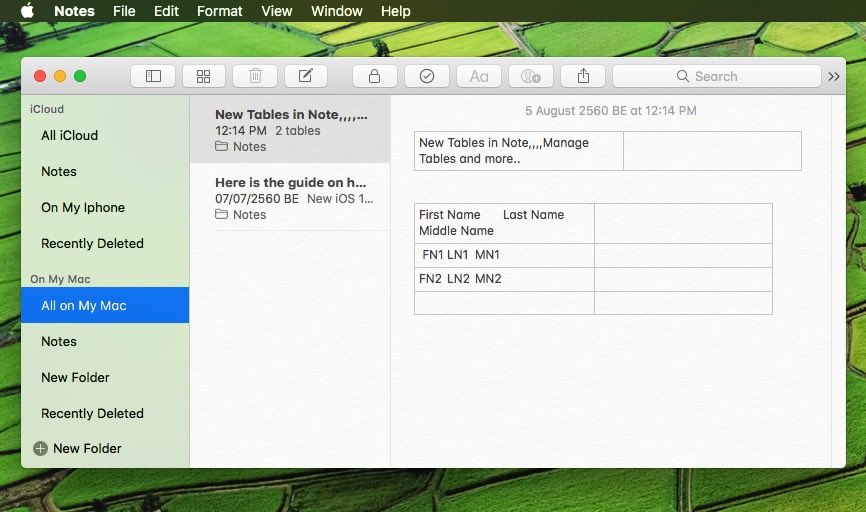
2. There you will see the toolbar, tap on Table: it seems to be like two columns with three rows or if you didn’t find it on the toolbar then click on Format and then you will get Table button.

3. Now begin to type whatever you like.
4. Tab key is used to navigate among the boxes.
5. And Press enter (Windows Keyboard) – Return (Mac Keyboard) key for Enter text in the new row in the table in a note.
2. Add More Columns and Rows to Existing Table
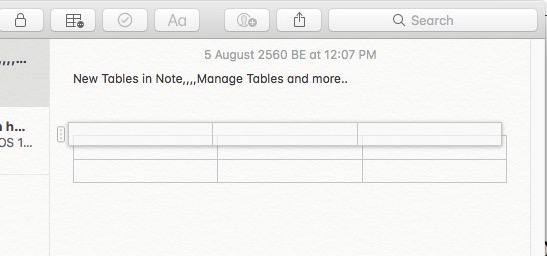
Once you launch Note and Open Table, you will get two columns and two rows by default, but it is not enough for anyone.
1. Open up the table which you want to edit or launch a new one.
2. To create a new row, the cursor should be placed in the last row and then tap on return.
3. For creating a new column, just put the cursor in any of the cells, and when ellipse arrives then click on it, the column will be added.

4. In you don’t see the option for add Rows or Columns that click on the Downward arrow.

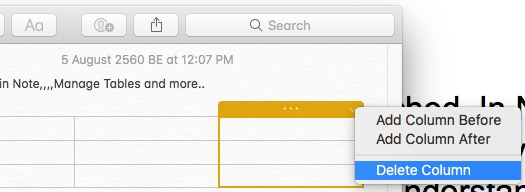
5. Choose the option for Add Column Before, Add Column After or Delete column.
3. How to rearrange rows and columns
1. Open new table or existing table in a note.
2. Click on row or column which ever you want to move and after clicking a small ellipse will emerge on the left side of the row and the upper side of the column.
3. Tap and hold the ellipse to select the particular cell for moving it from its place.
4. After selecting the row or column drag it to a new place, other row or column will replace them to a new position.
5. Hence by this way, the row or column will get replaced.
4. Delete a column from table
1. Launch the note on your device and create the table or open any saved file.
2. Point the cursor on the cell of the column which you want to delete.
3. Click on ellipse icon on the top of the column and there downward arrow will appear.
4. By tapping on that arrow, some options will emerge including Deletion of the column.
5. Click on the delete column option and hence the column will be eliminated.
5. How to convert text to table
1. Open new note or existing file on your device.
2. Select the text which you want to convert or copy to the table.
3. Once the table is opened, then you can quickly place the content of selected text in columns.

6. How to convert table into text
1. Create a new note or open saved the file to convert it into text.
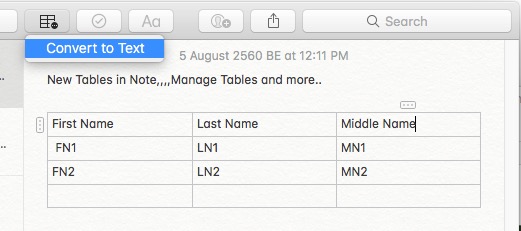
2. You need to click on any cell to make the cursor visible.
3. Click on the toolbar and then press Table key on it.
4. There you will get an option Convert to Text, and by clicking on it, the tables will be converted as per your wish.
Also Convert any Text into a table format, Select text and Click on table icon in Notes app Menu tools.
7. How to format text inside your tables
1. Fire up Notes.
2. For the further process, you need to press Command-T to pop-up Fonts Window.
3. Print text by tapping Command+I.
4. Now press Command+K, and there you will get space to paste selected link.

5. For changing the alignment of text go to format then click on the text.
8. How to delete multiple cells contents
1. Launch the table or create a new one.
2. Tap on particular cell and drag across the table and appeared outline would be of orange color.
3. To delete content, click the right button and there you will get an option like Delete cell content.
Or Press Delete key from the keyboard.
Above all are the key functions and Feature about new Tables in the note in New MacOS High Sierra. Let’s share your experience on use Tables in the notes app on your Mac. Also Touch with us on Facebook, Twitter or Google+


