Do your applications often jam and face difficulty operating essential functions on Mac? That is due to WindowServer taking too much CPU cycle on Mac. Before finding a solution to lower windowserver CPU usage on Mac, first learn what windowserver is on Mac.
What is WindowServer on Mac?
The WindowServer on Mac is a core process that manages Open apps on display and other display components. In layman’s language, WindowServer is responsible for whatever you see on the mac screen.
The WindowServer process runs in the background; hence you never notice it. However, it is an essential process on Mac. Therefore, you can’t force quit it if it misbehaves. Furthermore, generally, it misbehaves due to corrupt apps or due to, viruses or malware.
If you open too many apps or windows on Mac, then windowserver will consume more CPU, leading to Sluggish CPU performance. However, there are other reasons for the slow CPU cycle on Mac.
Also Helpful: Speed Up Mac [Quick Ways to Fix].
Why Does WindowServer Take Many CPU cycles?
There are some reasons why WindowServer takes more CPU cycles than it does. Eventually, it slows down your Mac. Hence here are some of the reasons for WindowServer taking many CPU Cycles.
- Many Desktop icons and Open Apps.
- Simultaneous multiple displays.
- Corrupt App hogging memory.
- Using lots of macOS effects like transparency and drop shadow.
- Older Macs face difficulties in processing the latest visual effects.
How to Check WindowServer
CPU usage
To check how many CPU Cycles WindowServer is taking, follow the steps below.
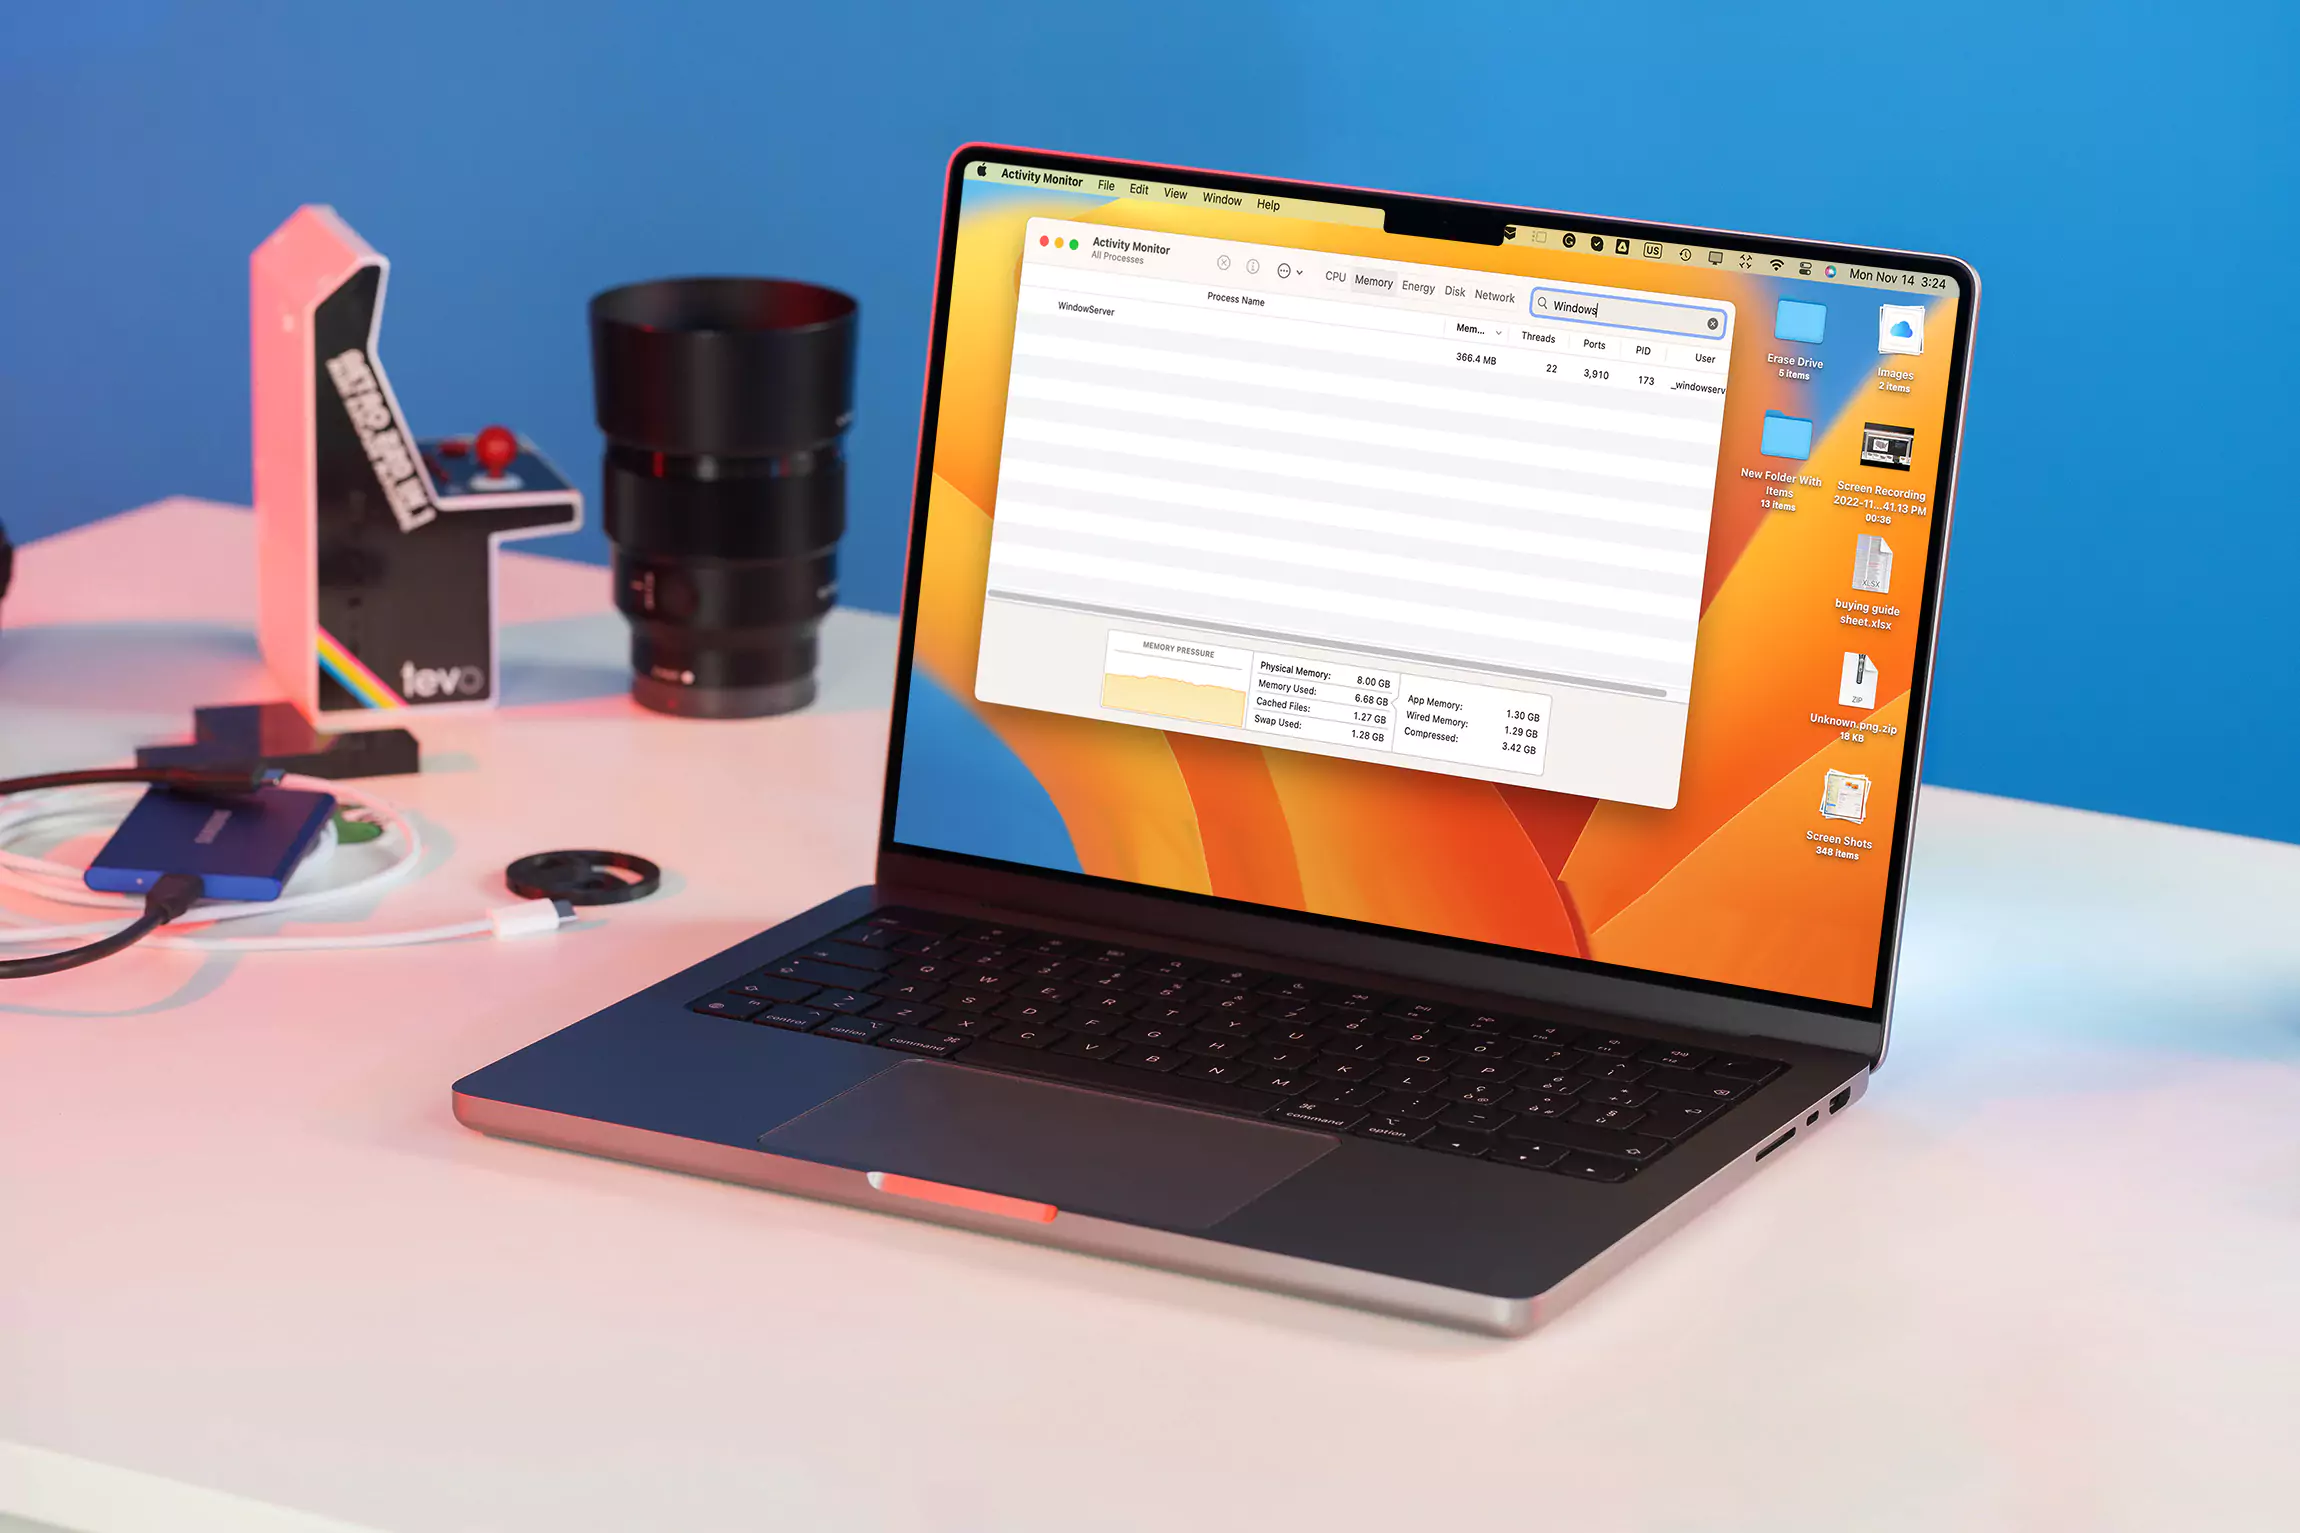
1# Press the Command + Space bar to Open Spotlight Search. Type Activity Monitor in the Search box and hit return. Else Select Activity Monitor.

Alternatively,
1→ Goto Finder > Click on Applications > Utilities > Click on Activity Monitor to Open it.
2→ Select CPU Option at the Top and Type “WindowServer” in the Searchbox.
3→ Note down CPU% WindowServer Process is consuming. If it takes more than 50% of the CPU, it’s taking too much.
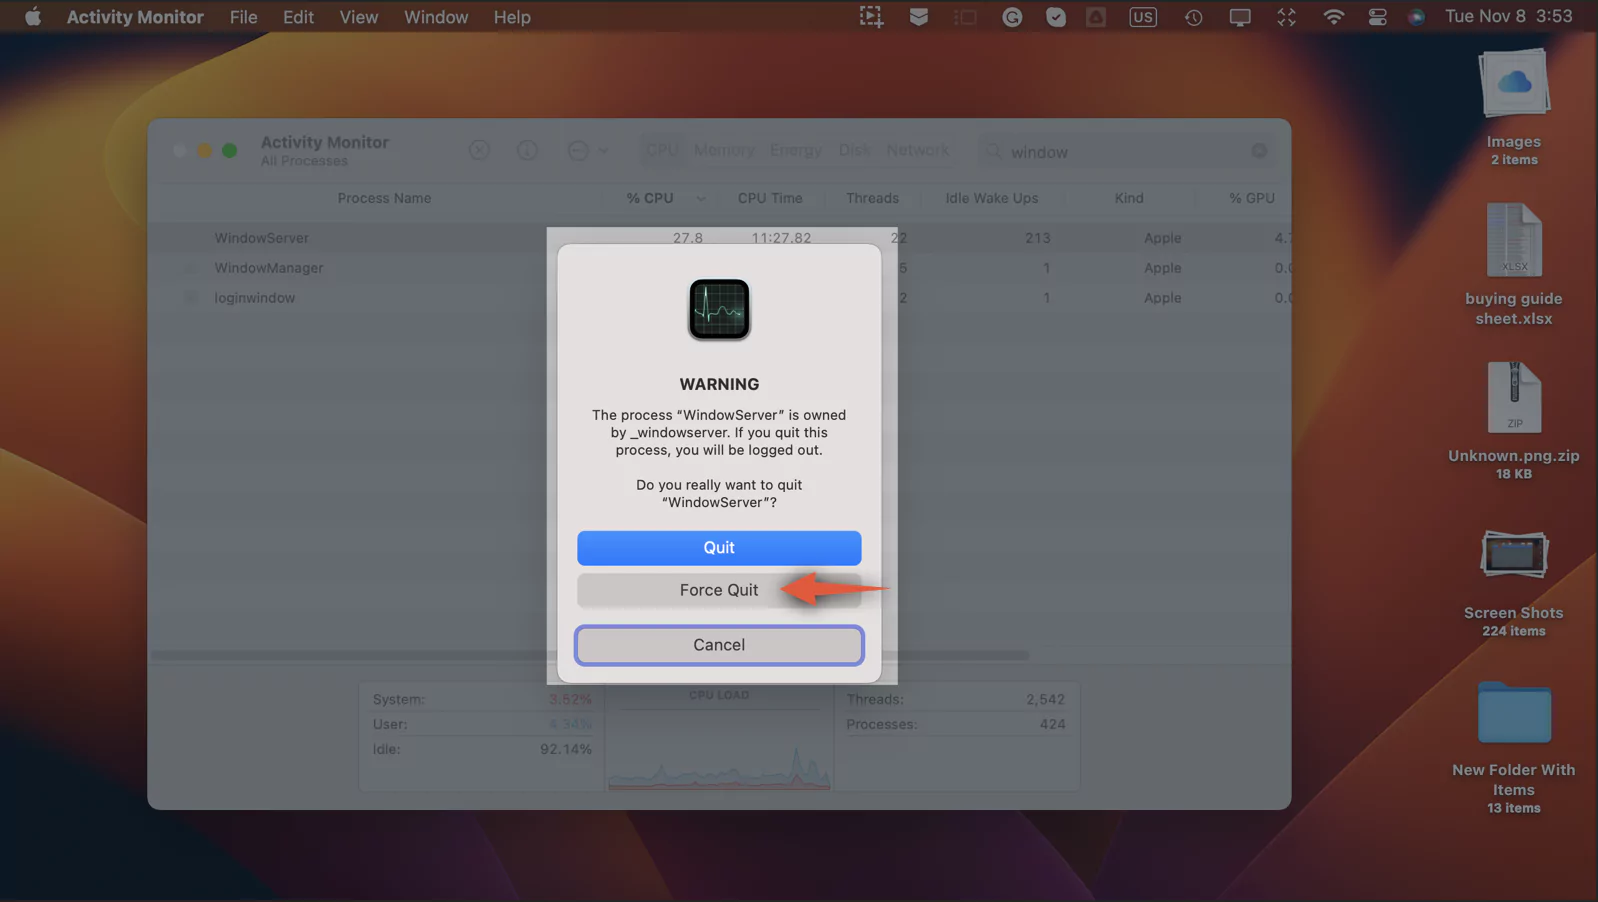
Therefore, you need to curb WindowServer CPU Utilization using various Solutions.
How to Reduce WindowServer’s CPU usage on Mac?
Does your Mac is running slow?
Here are the various Solutions to Reduce the High CPU usage of Windowserver on Mac.
Solution 1. Decrease the number of files and folders on the desktop
The decreasing number of files and folders helps the window server look for fewer visual elements instead of many. For instance, if there are 20 folders and ten files on your mac desktop, combine them all into one folder. Hence WindowServer will focus on one folder rather than 30 and ultimately uses less CPU Cycle.
Solution 2. Close Unnecessary Windows and Apps
The more windows and apps are open; it will consume more CPU resources. Therefore, to reduce the load on the CPU, close all unnecessary windows and apps.
If you cannot close any app, you can force quit those apps. Further, to do so, Press Command + Option + Escape to open Force Quit Application Window on mac. Now select useless or unnecessary Apps and click the Force Quit button at the bottom. Save files before closing or force quitting the App or window to avoid data loss.
Solution 3. Reduce Visual Effects on Mac
By default, visual effects like transparency and motion are enabled under display settings on Mac. The visual effects offer users a great visual experience. However, it provides a great visual experience at the cost of high CPU Utilization. Therefore, to avoid more CPU utilization reduce visual effects.
Here are steps to reduce transparency and motion on Mac.
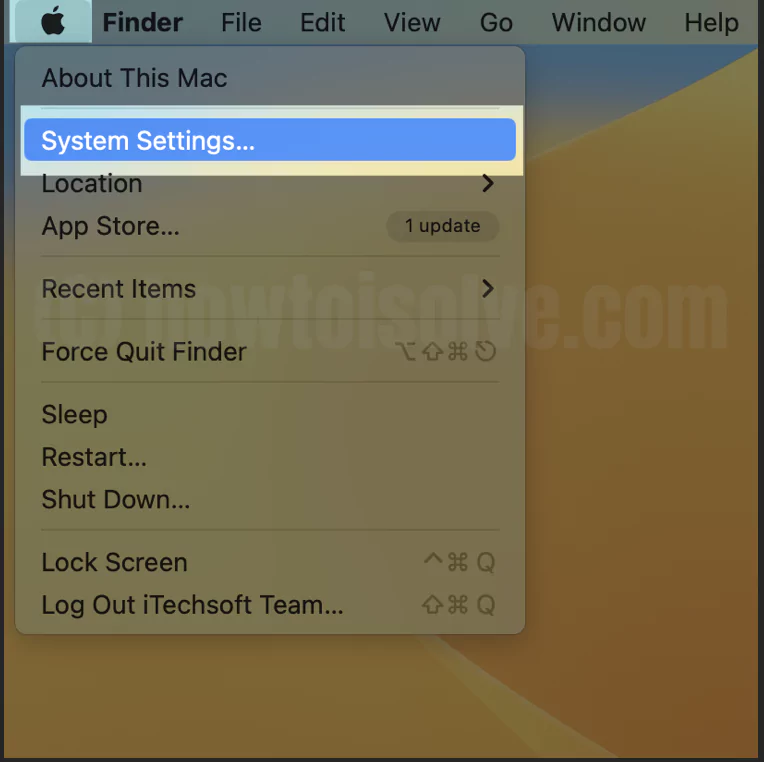
1→ Goto Apple Logo.
2→ Select System Settings.
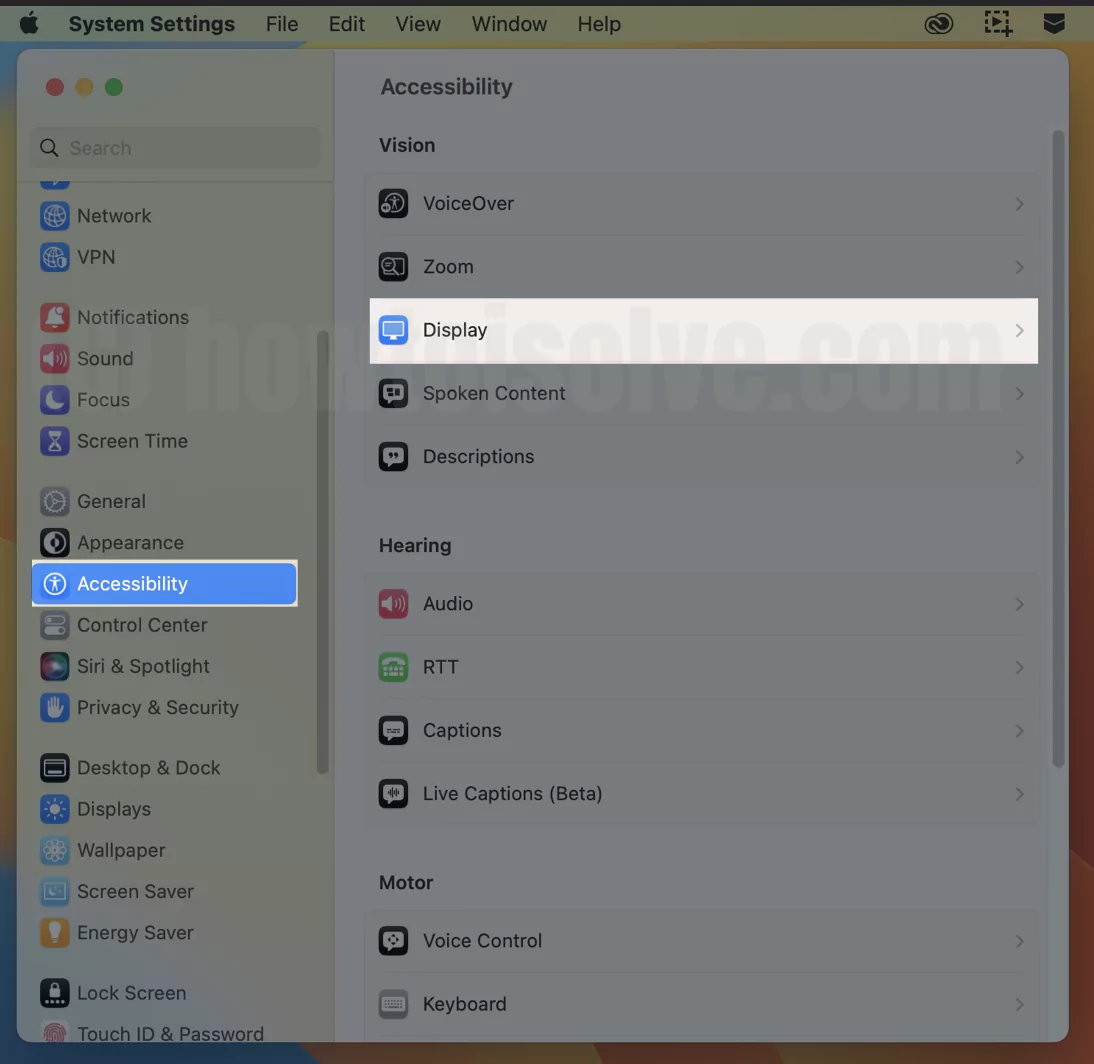
3→ Click on Accessibility from the left side Menu.
4→ Select Display.
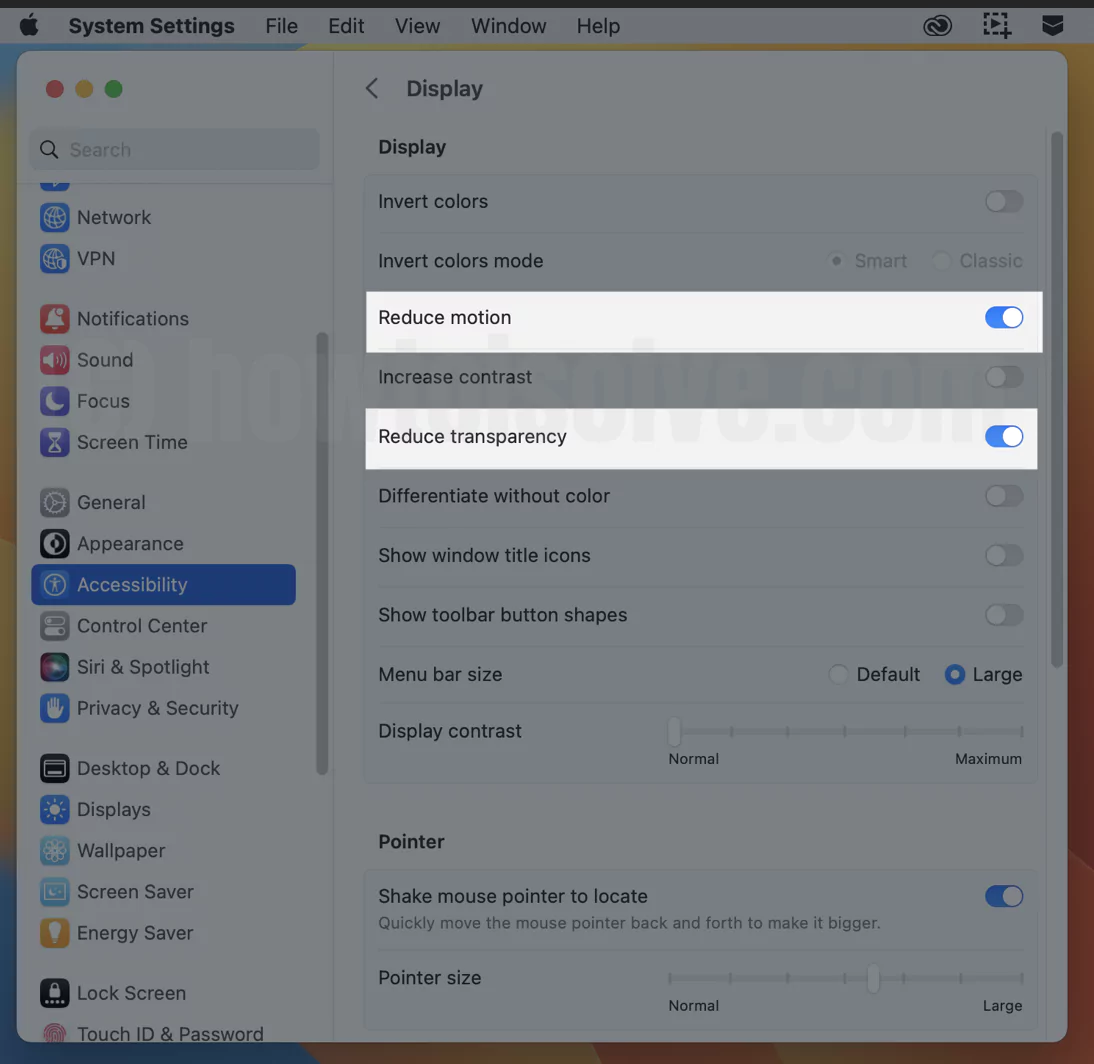
5→ Turn on the toggle next to “Reduce Motion.”
6→ Turn on the toggle next to “Transparency.”
That’s it! Reducing visual effects means reducing CPU load.
Solution 4: Decrease the number of additional desktops
Closing additional desktops will eventually decrease WindowServer CPU usage.
Here are steps to close additional desktops on Mac.
1→ Press F3 and Hover the mouse on the upper Panel Strip to See all Desktop screens.
2→ Hover the mouse over the Desktop screen.
3→ Click on the Close button to Remove the Desktop screen.

Alternatively,
1→ Click on “launchpad” from Dock.
2→ Search and Select “Mission Control“.
3→ Next, Hover Mouse Over unused desktops.
4→ Click on ‘X'(Close button) at top left of the desktop.
After removing the additional desktop, check whether your mac performance is improved.
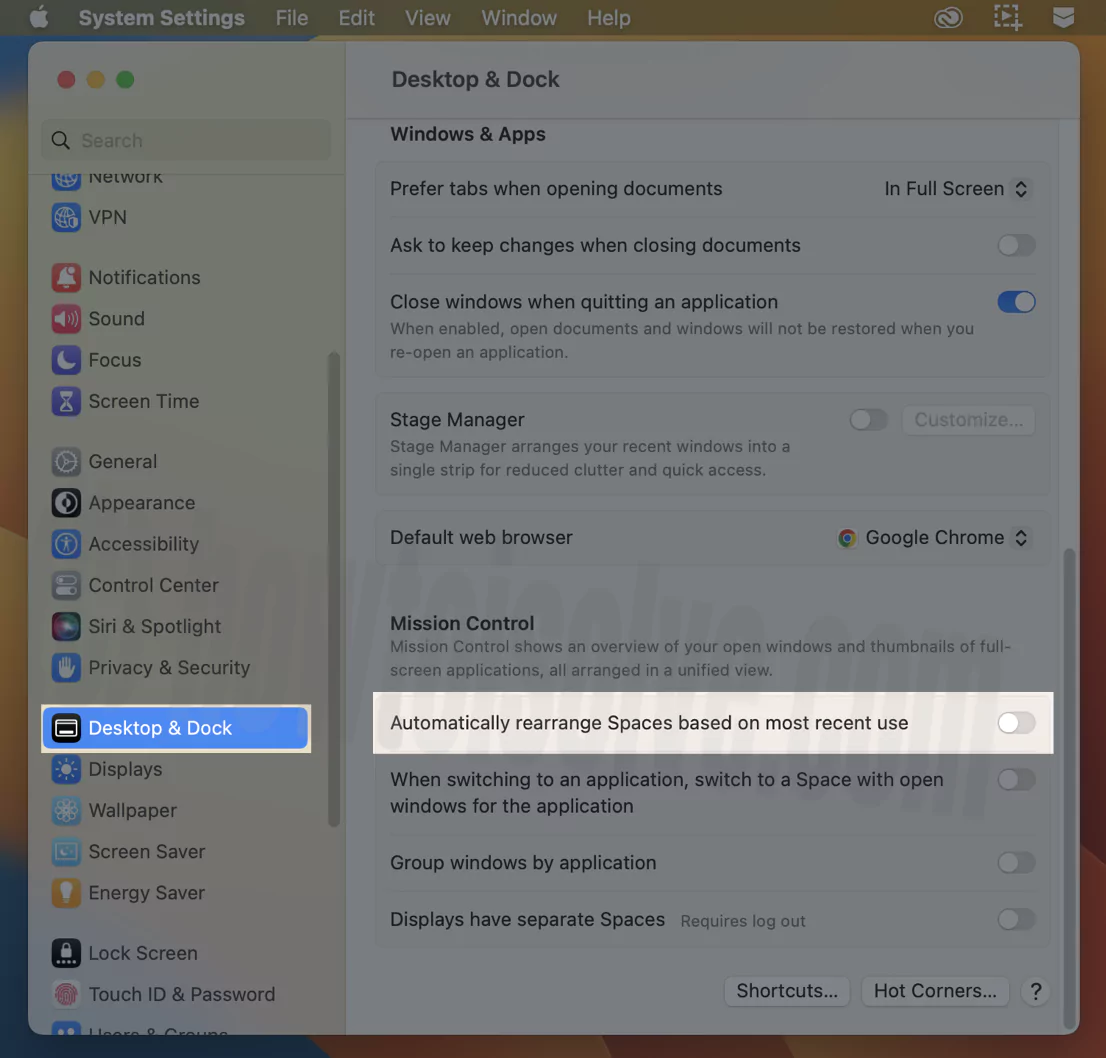
Solution 5: Disable Mission Control Automatic Rearrange spaces
Are you using “Automatically rearrange spaces based on most recent use” for the virtual desktop environment? Then, it will consume CPU utilization. Hence to decrease Windowserver CPU Load, you need to turn off “Automatically rearrange spaces based on most recent use.”
Here are the steps to do so.
1→ Goto Apple Logo and Select System Settings.
2→ Click on Desktop & Dock.
3→ Under the “Mission Control” Option, “Turn off” toggle next to “Automatically rearrange spaces based on most recent use.”
Now, it will not automatically rearrange spaces based on recent use.
Solution 6: Turn off Spaces for Displays
Suppose you have multiple displays. Then to minimize WindowServer CPU usage on Mac, you need to disable “displays have separate spaces.”
Follow the below steps to do so.
1→ Goto Apple Logo and Select System Settings.
2→ Click on Desktop & Dock.
3→ Under the “Mission Control” Option, the “Turn off” toggle next to “displays have separate spaces.”
4→ Log Out of Mac or Reboot. Go to the apple logo from the top left menu > Log Out (Make sure all running apps will close, and Save the unsaved document before Logout)
You are Done!
Solution 7: Repair System Using First Aid
If you have any corrupt files on the System, it will take more CPU resources. Hence, it’s better to clean the whole System to lower CPU load.
Here are steps to clean your System.
1→ To Open “Spotlight Search“, Press the Command + Spacebar.
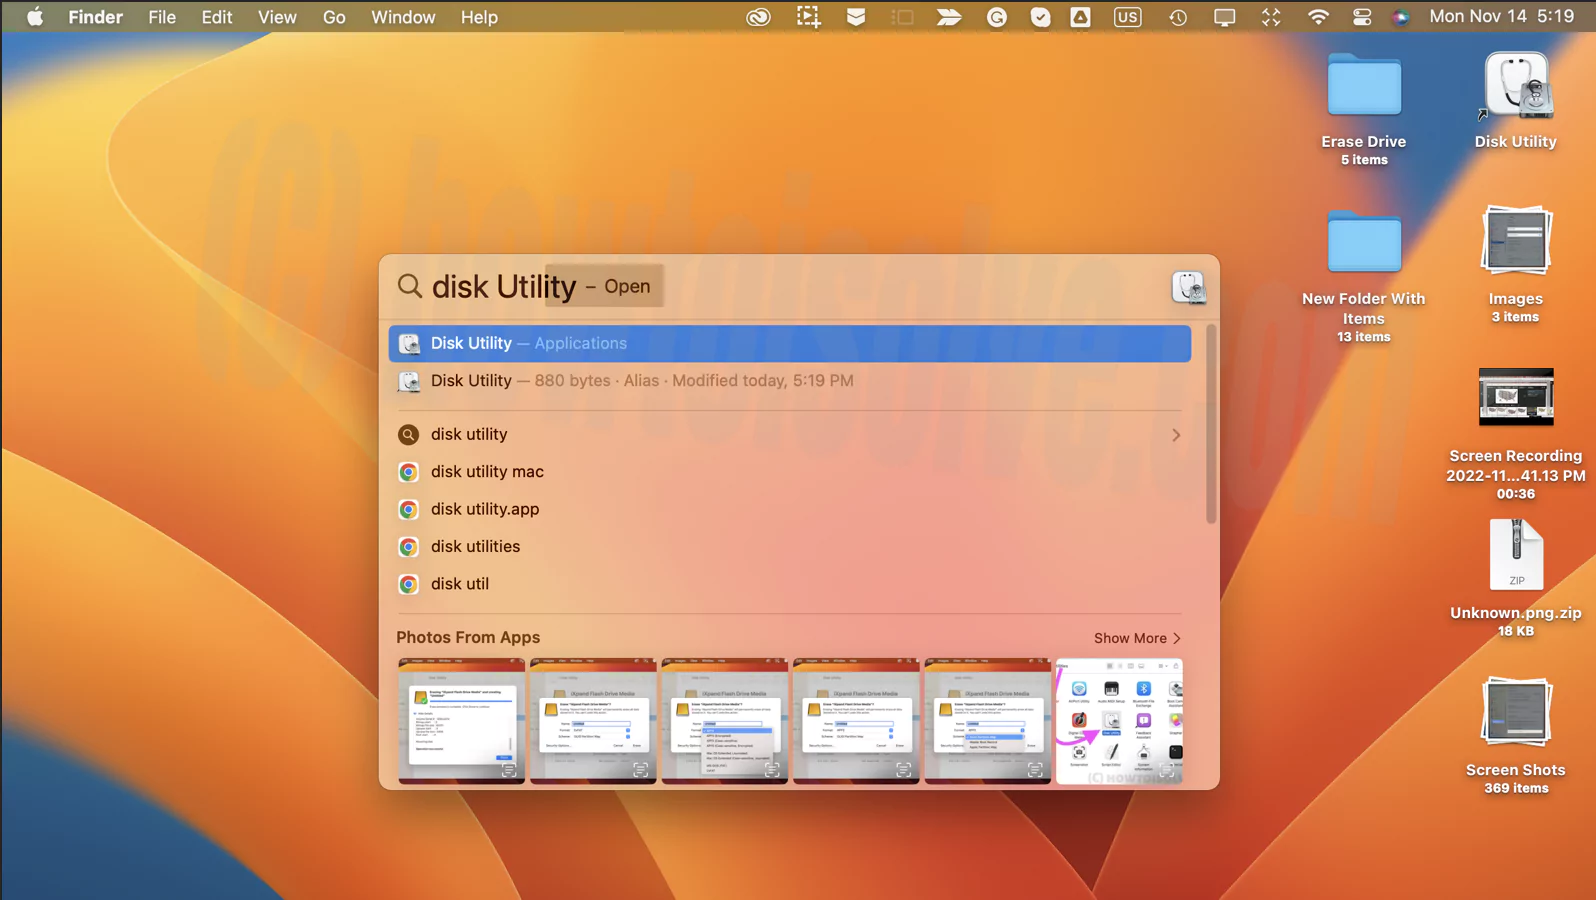
2→ Search Disk Utility in Search Box and hit return to open it.
3→ Choose Macintosh HD from the left sidebar and Select “First Aid.”

4→ Next pop-up will generate with the message “Run First AID on “Untitled”? First AID Will Check the Volume for Error. It Will then Repair the Volume If Necessary”.
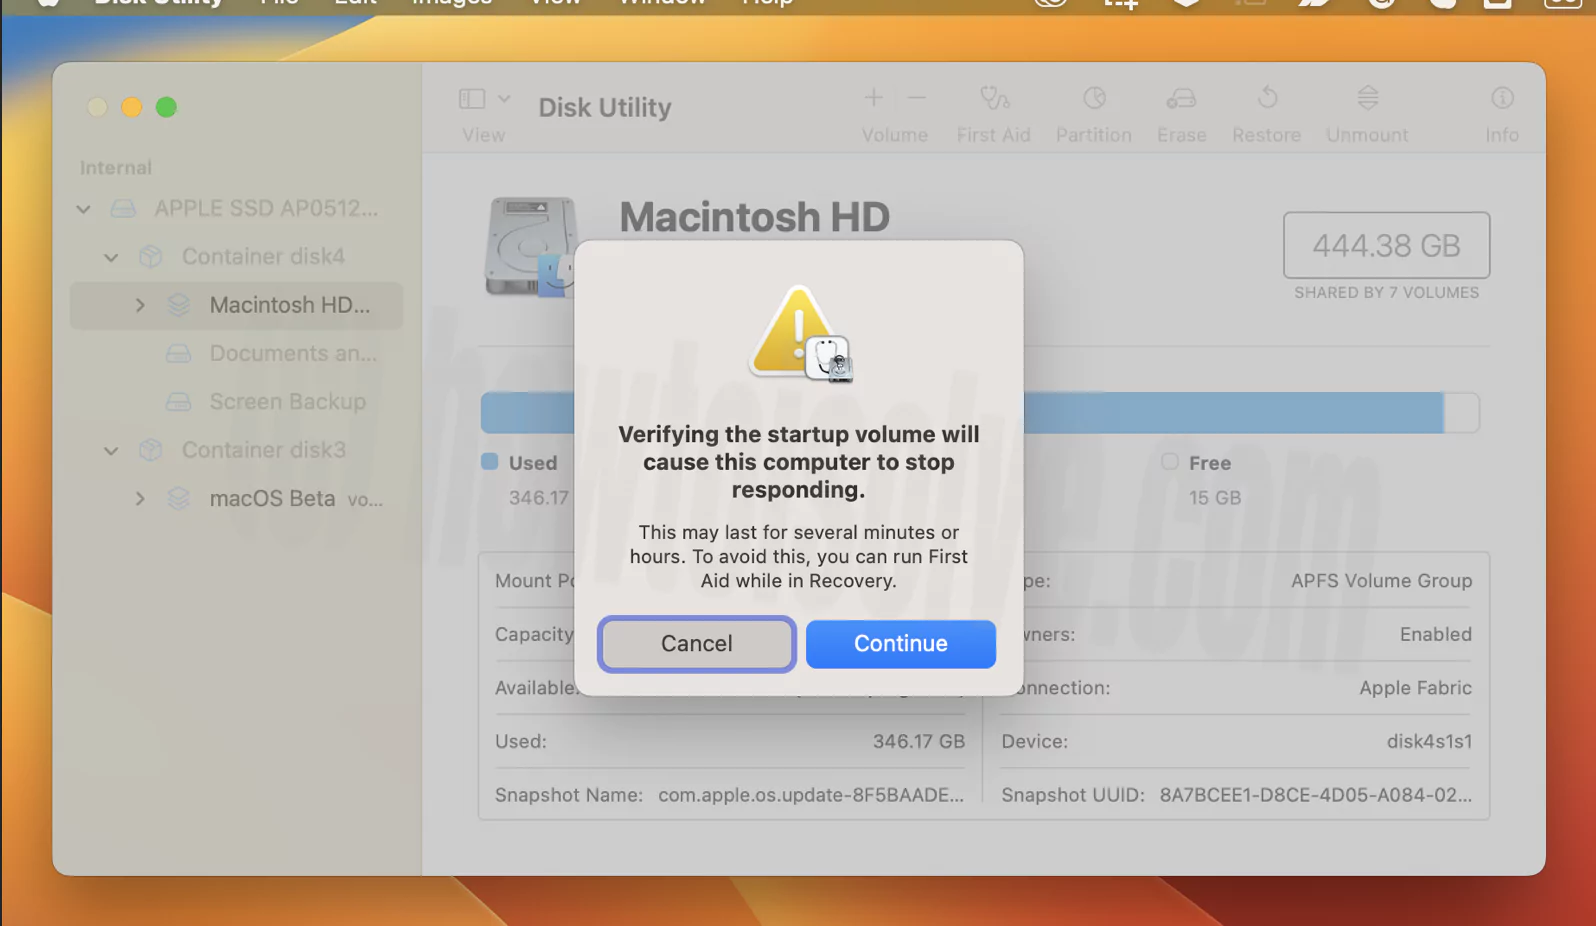

5→ Select Run.
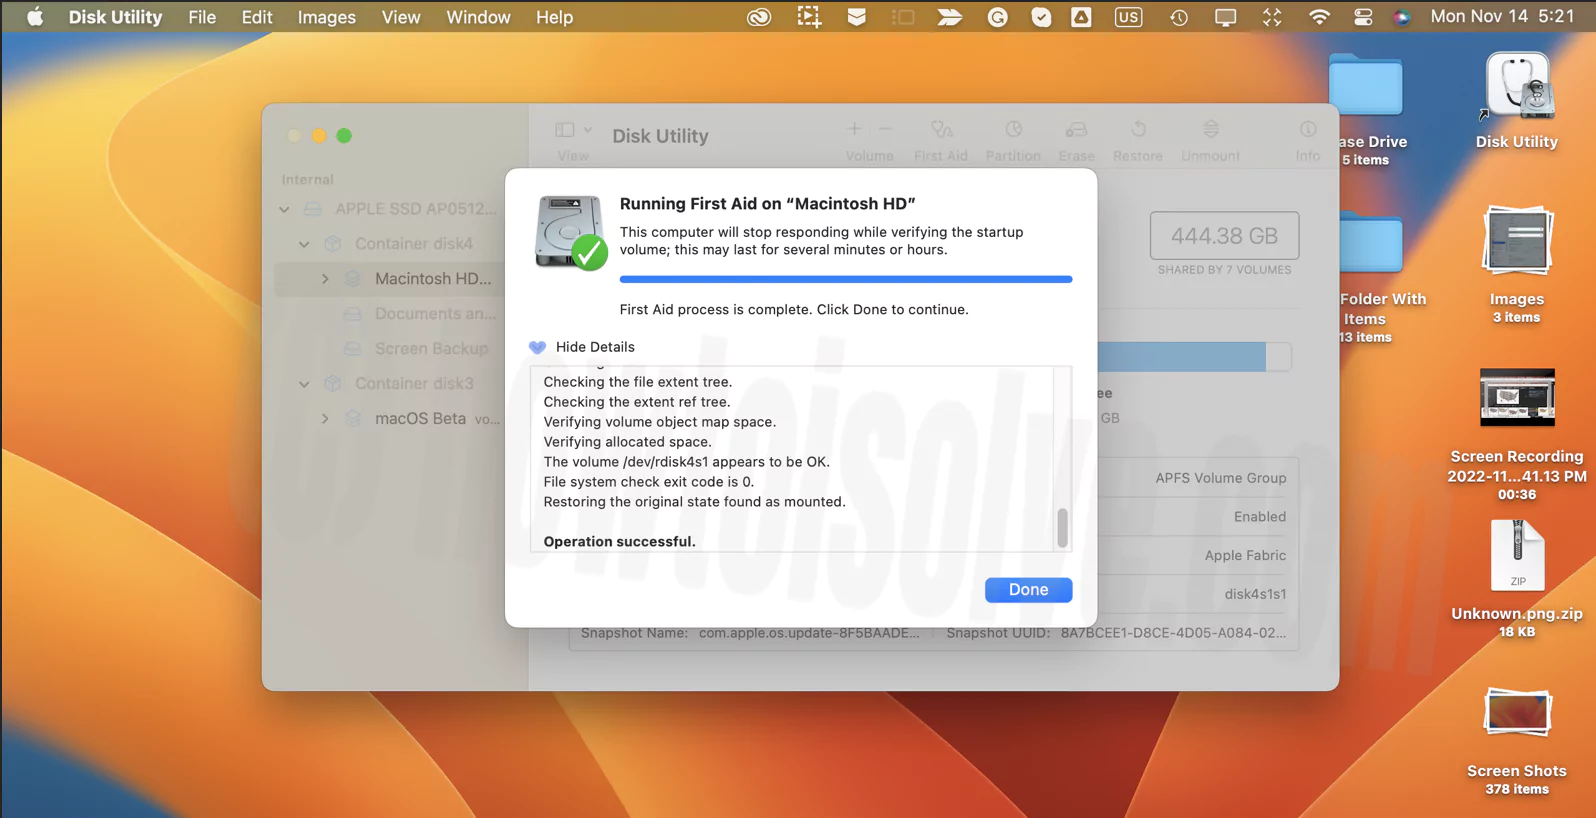
The above Steps will repair any Corrupt or buggy file on your Mac. Hence ultimately, it will save CPU usage. Although after repairing the whole System, your problem persists, then better to remove that specific corrupt file. Follow the next solution to do so.
Solution 8: Remove the Corrupt Application
Often you experience that mac performance could be better. Then there may be the case that it’s due to a corrupt application. Hence Windowserver will require more CPU to access it. Therefore, removing buggy or corrupt applications is better for increasing mac performance.
Follow the below-mentioned steps to remove the Application from Mac.
1→ Go to Finder.
2→ Select the “Go” Menu at the top and Click on Applications or Press “Command +Shift + A” to Open Applications.
3→ Next, Select Corrupt App and Right Click on it.
4→ Click on the “Move to Trash” option from the drop-down menu.
Your App got permanently uninstalled from your Mac. But, again, you can install it to use it. if you are getting errors or the app won’t uninstall from your Mac, then Force quit process from the activity monitor. and Try again.
Solution 9: Reboot your Mac
Rebooting Mac is crucial to deleting cashes and freeing up RAM and temporary files. Therefore, it will fix the problem of the Window Server High CPU load.
To Reboot your Mac:
- Click on Apple Menu.
- Select Restart.
- Wait a While and further check whether your WindowServer Mac high CPU issue is fixed.
Solution 10: Update System Software
Sometimes older versions of Mac may have a bug, which will Utilize more CPU. Hence to prevent this, Update your Mac. Follow these steps to update your Mac to the latest version.
1→ Select Apple Menu from your Mac.
2→ Now select System Settings.
3→ Click on Software Update.
4→ The prompt generates. Next, check whether your mac software version is Up to date.
5→ If not, then update it to the latest version of macOS.
Updating your System will resolve many issues So does WindowServer’s High CPU usage.
What happens if you quit WindowServer?
Once you find in Activity Monitor that WindowServer is taking too much CPU usage, you must think of force quitting it. However, it’s not a viable solution as it has the worst implications for the system. Further, it will close all active application and triggers a hard log out. Additionally, it will refresh Operating System.
Therefore, we don’t recommend forcing quitting Windowserver; instead, try Solution we have written in the above article to decrease WindowServer CPU Load.
FAQs
Q1. Why is WindowServer preventing sleep Mac?
Sometimes WindowServer prevents Mac from sleeping. There are various reasons for that. The possible causes are that someone is using shared services on your Mac, preventing mac sleep. Else make sure that no Bluetooth device is currently connected.
Q2. How do I reduce WindowServer memory usage?
To reduce WindowServer memory usage, follow the brief Solution given below.
- Decrease the number of files and folders on the desktop.
- Close Unnecessary Windows and Apps.
- Reduce Visual Effects on Mac.
- Decrease the number of additional desktops.
- Disable Mission Control Automatic Rearrange spaces.
- Turn off Spaces for Displays.
- Repair System Using First Aid.
- Remove the Corrupt Application.
- Reboot your Mac.
- Update System Software.
For Detail solution, kindly check the above article. Further, using the above solutions, you can also fix the issue of how I fix high CPU usage on Mac.
Q3. How do you stop unwanted programs running in the background Mac?
To stop unwanted programs running in the background on Mac, you need to force quit it from Activity Monitor on your Mac.
Follow these steps to force quit the App or Process from Activity Monitor.
1# To Open Spotlight Search Press the Command + Space bar. Search for Activity Monitor in the Search box. Else Select Activity Monitor.
Alternatively,
1# Goto Finder > Select Applications > Next Under Utilities > Click on Activity Monitor to Open it.
2# Select the App from the list of Apps and Processes in the Activity Monitor window.
3# Next, Select the “X icon”(Stop icon) at the top of the Activity Monitor window.
4# Confirmation prompt Pop Up. Select Force Quit.
Make sure to save your data as a force quit will immediately close an application, leading to data loss.
Q4. How do I free up memory on my server?
When your mac slows down, it indicates high memory usage; hence you must free up memory on your macOS server to run it smoothly. Here is how you can do it.
- Close process or app hogging the RAM
- Boot up your Mac
- Declutter your mac desktop
- Disable unnecessary login items
- Close unnecessary browser windows
- Close unnecessary finder windows
- Free up RAM with a Terminal or Third-Party tool
- Delete Unused browser extensions
- Stop auto-start Applications at the login
Use the above solution to free up memory on macOS Server and use Mac as the New one.
Q5. How do I remove WindowServer from my Mac?
The WindowServer on Mac takes care of Graphical User Interface element drawing. Hence Window Server will redraw tasks to process each new visible GUI window. Consequently, it will consume more CPU. After knowing that Windows Server is an Essential process of Mac, it is recommended not to remove it if you do so, then Mac is most likely to behave abnormally.
Q6. How do I reduce memory usage on my Mac?
You can reduce memory usage on your Mac using the following brief tricks.
- Boot up your Mac
- Declutter your mac desktop
- Disable unnecessary login items
- Close unnecessary browser windows
- Close unnecessary finder windows
- Free up RAM with a Terminal or Third-Party tool
- Delete Unused browser extensions
- Stop auto-start Applications at the login
Using the above solutions, you can quickly reduce memory usage on Mac.
Q7. How do I reduce 100% CPU usage?
Here is a quick solution to reduce 100% CPU usage on Mac.
- Declutter your desktop.
- Close Unnecessary Windows and Apps.
- Close Resource hogging Applications.
- Reduce Visual Effects on Mac.
- Decrease the number of additional desktops.
- Disable Mission Control Automatic Rearrange spaces.
- Turn off “Spaces for Displays.”
- Repair System Using First Aid.
- Remove the Corrupt Application.
- Reboot your Mac.
- Update System Software.
Using the above-given Solution, you will reduce 100% CPU usage on Mac.
