Know-How to Set & Share Custom Name and Photo in iMessage on iPhone/iPad? Find the Correct way to Share your Profile picture in iMessage or Share the Display Name in iMessage in iOS/iPadOS with your iMessage Contacts though you are not in the contact list. So you can identify without sharing your name in imessage, who are you?
Here’s also a solution for your iPhone Error “Sharing Name and Photo not Available” Because iCloud and iMessage Accounts are Different or Not Signed in. I bet in a few years, all the iPhone users won’t use third-party messaging applications such as WhatsApp, Skype, etc.
The reason behind this is straightforward; Apple is giving its users all the facilities and flexibility in first-party apps only. Then why would anyone download third-party apps? Today, we will see one of the best updates to the Messages app on iOS. Also, fix the issues while you enable assigning the profile picture and name not showing on iMessage, and Fail to save or share.
The latest iOS lets you personalize all the settings on the iMessage app, such as Profile Picture, Display Name, and with whom you want to share your personal information. So, let’s see how to customize the Messages app in iOS/iPadOS/MacOS.
Enable or Disable Profile picture or Name shown on Message Conversations on iPhone, iPad, Mac
1: Share iMessage Display Name and Profile Picture [Turn off/Disable anytime]
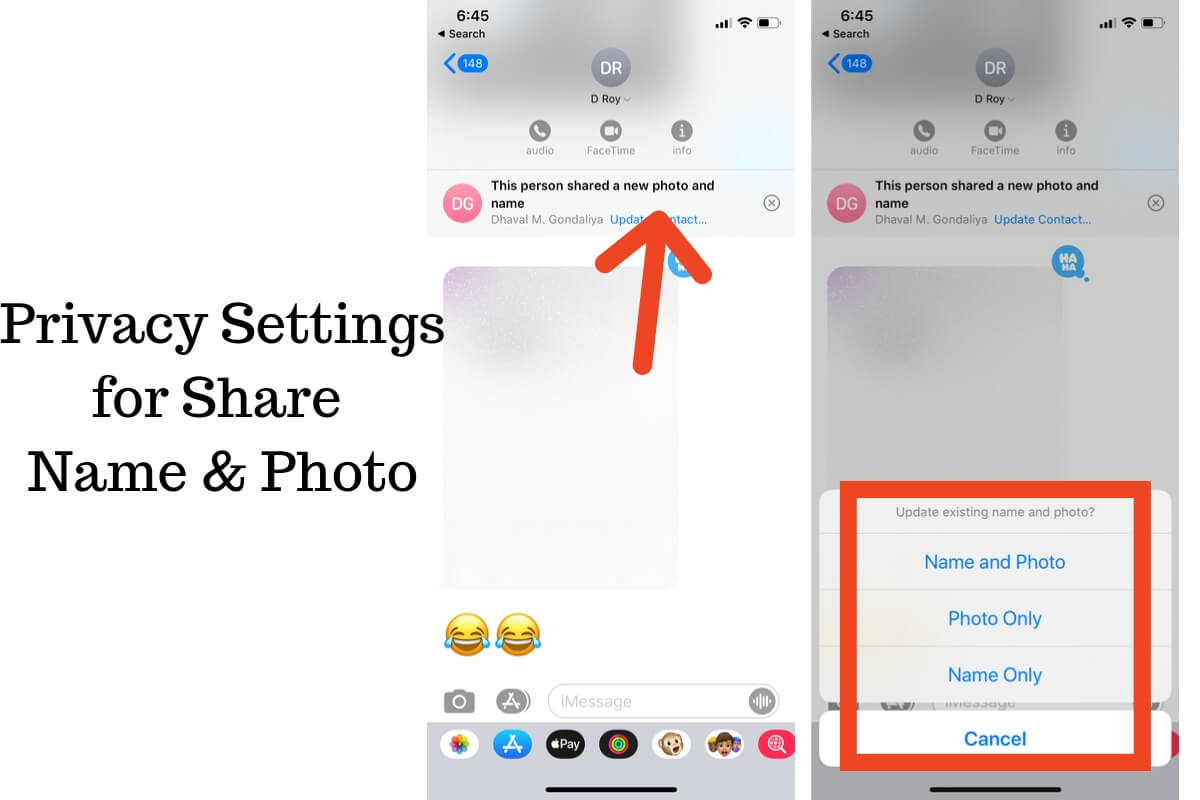
This option lets you share your Display Name and Profile Photo with the person you want to share. Like, if any anonymous contact is messaging you, and if you have selected Contacts Only, that person won’t be able to see your Display Name and Profile Picture. There are two different ways through which you can implement these settings.
Method 1:
- Step #1: Open the “Settings” app.
- Step #2: Scroll down and tap “Messages”.
- Step #3: Go to “Share Name and Photo”.
- Step #4: Make sure “Share Name and Photo” is enabled. [Error: Sharing Name and Photo not Available] Find in the last of this article.
Step #5: Important privacy settings on who allows you to see your name and photo. Select your option from, Contacts Only/Anyone/Always Ask.
Turn off Share Name and Photo in iMessage: We can change or turn off these settings any time, Follow the same steps that are given in Method 1 and Method 2. Just Disable the Share name and Photo option toggle. These settings will be applied to your Whole iCloud account.
Method 2:
- Step #1: Navigate to the “Messages” app.
- Step #2: Then, tap on Three-Horizontal dots for more options.
- Step #3: Tap “Edit Name and Photo”.
- Step #4: Now, check if you have enabled the “Share Name and Photo”.
- Step #5: Now set the privacy for Who allows you to see your name and photo. Under Share Automatically, go for any of the options, Contacts Only/Anyone/Always ask.
Add Group Name and Photo on iPhone in the Messages app
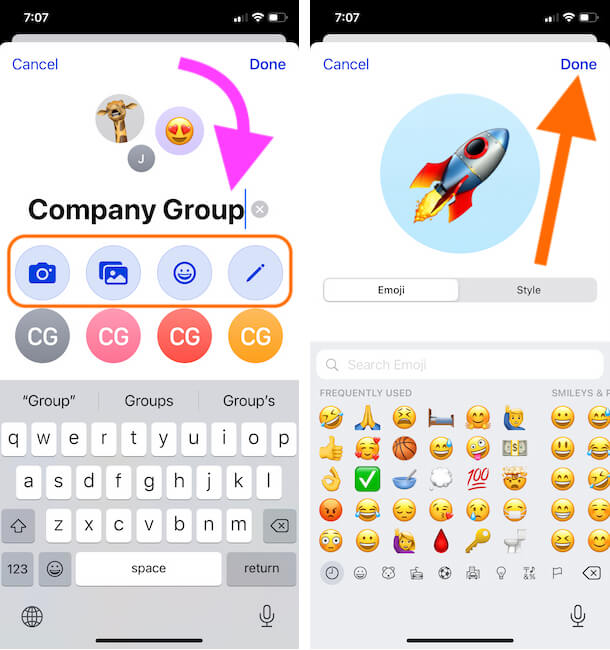
We can assign group names and photos on the iPhone Messages app, Follow the below steps to give a new group name and Photo, So we can easily search Group conversation with Group name and Identify with the Group profile picture.
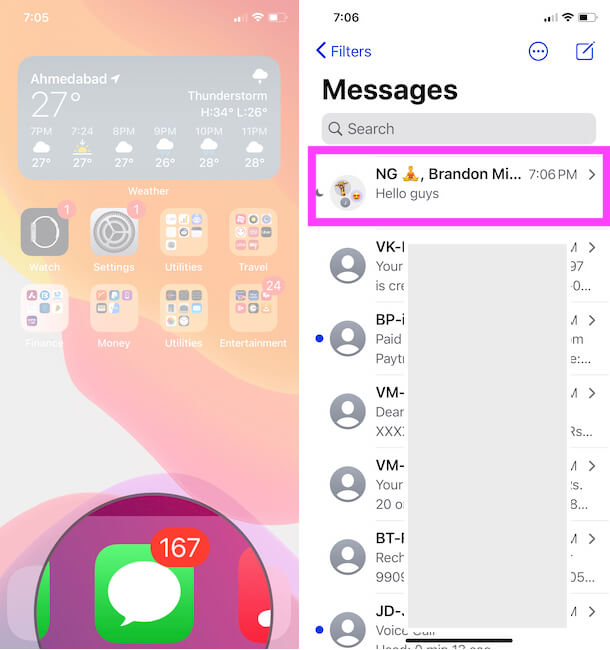
- Open Messages app on iPhone/iPad. Now Find a Group conversation and Open it.
Add Group Name and Photo on MacBook, or Mac in the Messages app
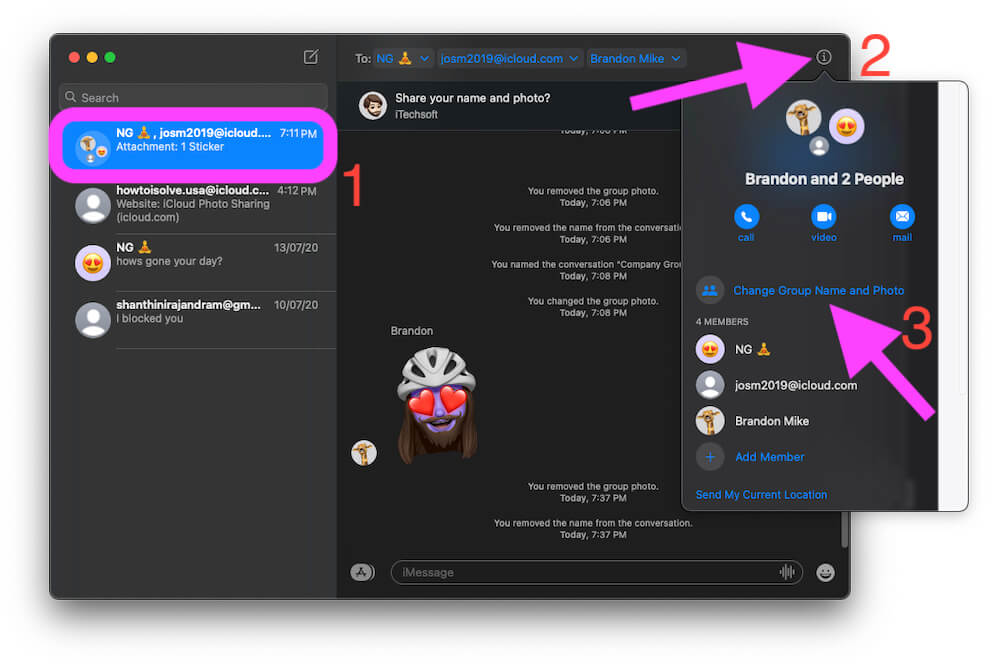
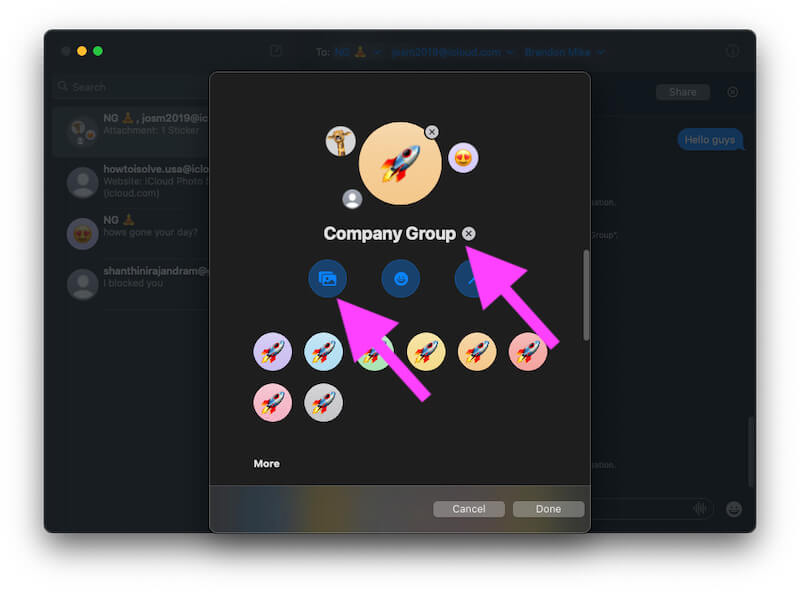
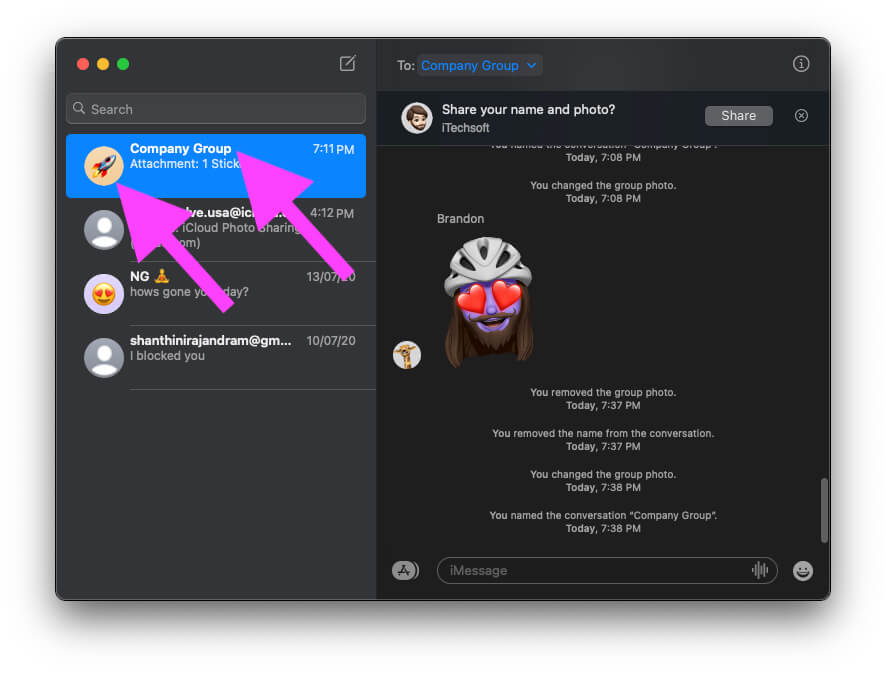
macOS Big Sur and later macOS Update allows users to set Group name and Photo as a Profile picture. Mostly all iMessage features come on the Messages app on MacBook, and Mac. Follow the below steps to Assign a Group name and Picture on Group Conversation in the Messages app on MacBook, or Mac.
- Open Messages app on MacBook, or Mac. Click on Group info. Click on Change Group name and Photos.
How to Change Display Name in iMessage
Previously, in iOS 12 or earlier iMessage was displaying the same name that was associated with your Apple ID. And there was no way you can change that name. But with iOS, Apple has given you the privilege to change the name and set whatever name you like. Let’s do it!
Method 1:
- Step #1: Go to the “Settings” app.
- Step #2: Select “Messages”.
- Step #3: Tap “Share Name and Photo”.
- Step #4: Next, you will see the same name as your Apple ID.
- Step #5: Tap and change the name.
Method 2:
- Step #1: Open the “Messages” app from the Home screen.
- Step #2: Tap on More options.
- Step #3: Choose “Share Name and Photo”.
- Step #4: There, you can change your name.
3: How to Change Profile Photo in iMessage
Likewise, if you want to change the profile picture in iMessage, follow the methods below. if you want to show your original profile or share with others on iMessage conversation, You can set your Profile to Mimoji Face or Monograms with tons of customization settings like hair, Lips, Earrings, Goggles, Eyebrow, Fairness, Cap, Nose, Airpods, or More.
Method 1:
- Step #1: Launch the “Settings” app.
- Step #2: Locate and tap “Messages”.
- Step #3: Tap “Share Name and Photo”.
- Step #4: Tap on the image where it says “Edit”.
- Step #5: Multiple options are available to set the profile photo in iMessage iOS 13 such as,
- Edit Current Photo
- Choose a Photo from the iPhone
- Capture New Photo
- Use Animoji or Memoji
- Choose Initials
- Take New Memoji
Method 2:
- Step #1: In the “Messages” app, tap More options.
- Step #2: Select “Share Name and Photo”.
- Step #3: Tap on “Display Picture” and set the new one.
Troubleshooting Error for Sharing Name and Photo Not Available
Failed to Share Photo and Name in iMessage on iPhone, iPad: iOS 13 Sharing Name and Photo is not Available Because iCloud and iMessage Accounts are Different or are not signed in. You must have active To use this feature across all iCloud accounts you must be active with iMessage Apple ID.
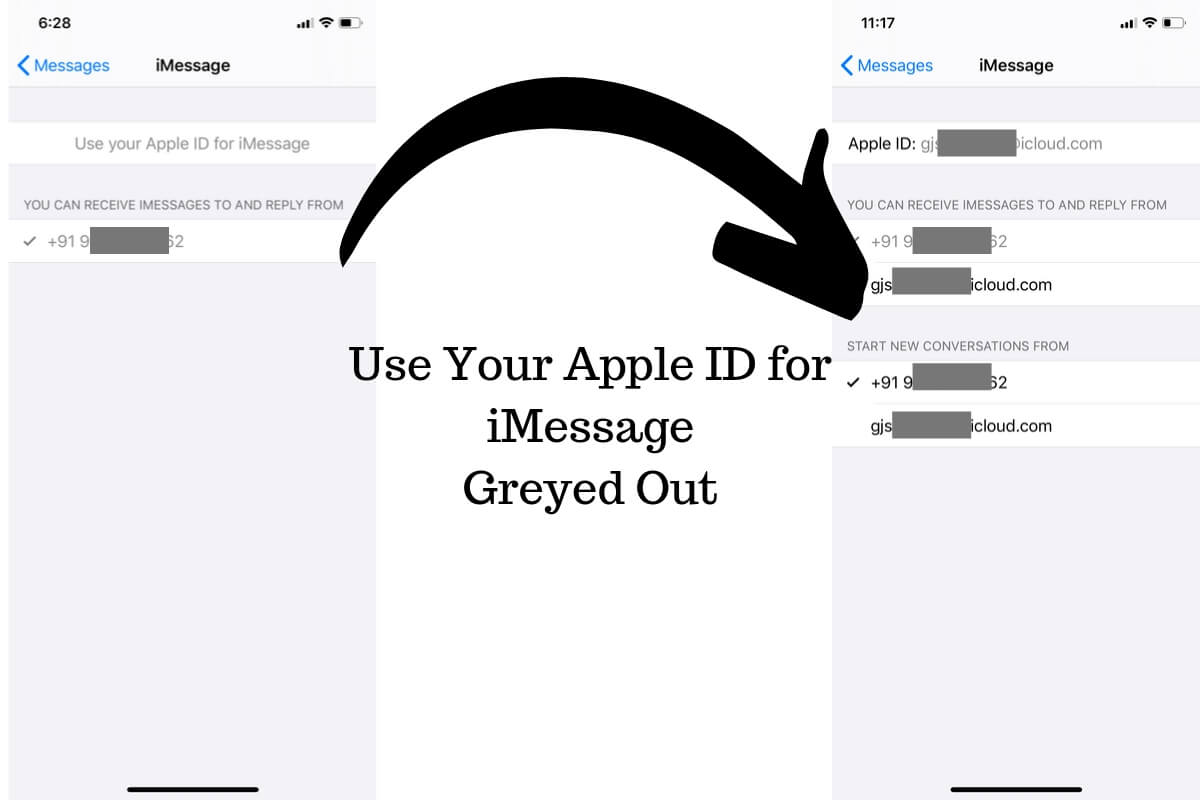
Most of the users are getting the error message, That preventing from turn on Share Name and Photo. Go to the Settings app > Messages > Send & Receive > Apple ID must be Selected. Most of the User is showing a message “Use your Apple ID for iMessage“.
- To Assign Apple ID for iMessage, Tap on it and select the Sign In option from the popup. That show the below screen. Login with an Apple ID password and Sign in.

[Helpful Fix: Use Your Apple ID for iMessage is Greyed out, Now Check internet connection/ Wait for Few Seconds/Force Close Settings app and Again check].
