When editing photos, tasks such as combining and merging the images are generally done through photoshop or some software. But, if you want to go the same on Mac, using whatever you have on your system by default has been a tedious task. While we can use the Preview app but a too lengthy process to set Pictures side by side Horizontally or Vertically.
Generally, people would have to go through the whole process manually with Preview app by selecting the photos and opening the same in the Preview app. Manually resizing the images to fit the grid and then adjusting them to fit the screen. It is not easy to combine photos side by side on Mac, but this has been the way to do it for quite some time now.
Although there is an alternative way to do the same, you can combine or merge photos on Mac via a shortcut with the Preview app.
Now, we have the application and the particular shortcut that we need to be installed on your system. We can use this shortcut to combine photos vertically on Mac. We can also combine photos in Grid on Mac using this particular shortcut. So, let us go through the process.
How to Combine photos on Mac using Preview
- Launch the Finder on your Mac > Select the Download Folder > Navigate to the folder that contains the images you want to combine.

- Select the Images > Click on Open With Preview.

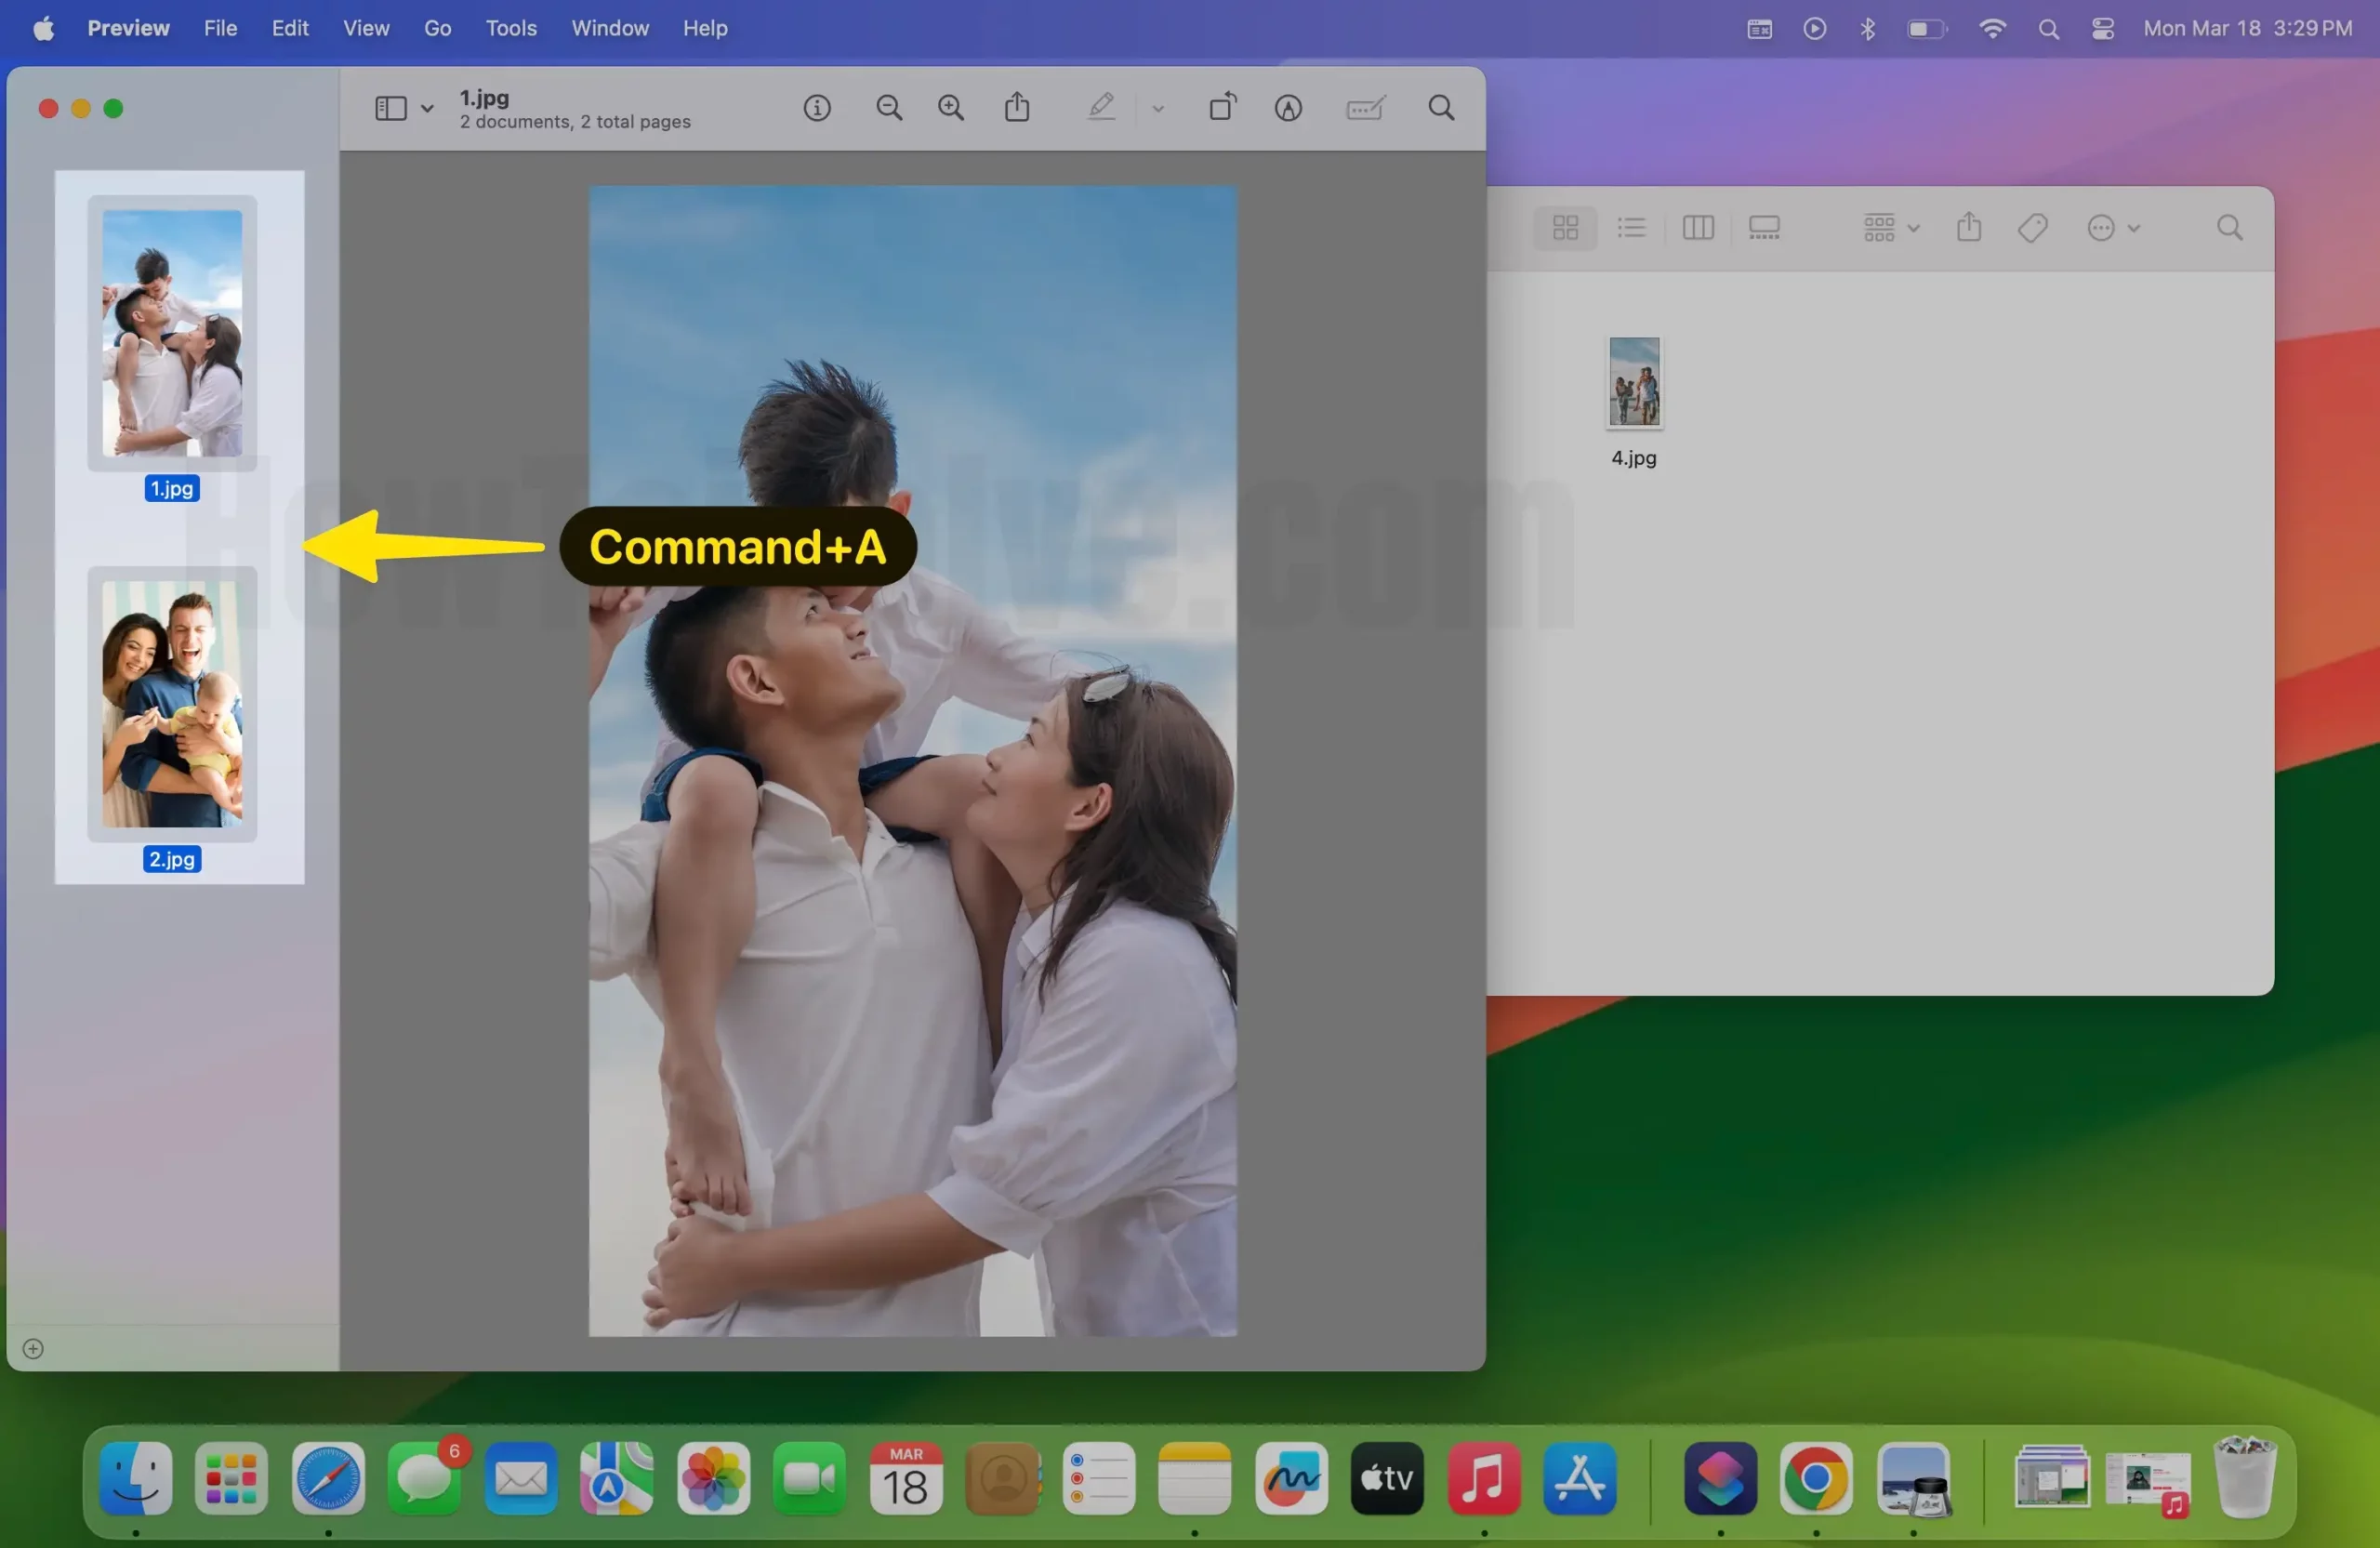
- Choose Select All to select the entire image Or Press the Command + A keyboard shortcut.
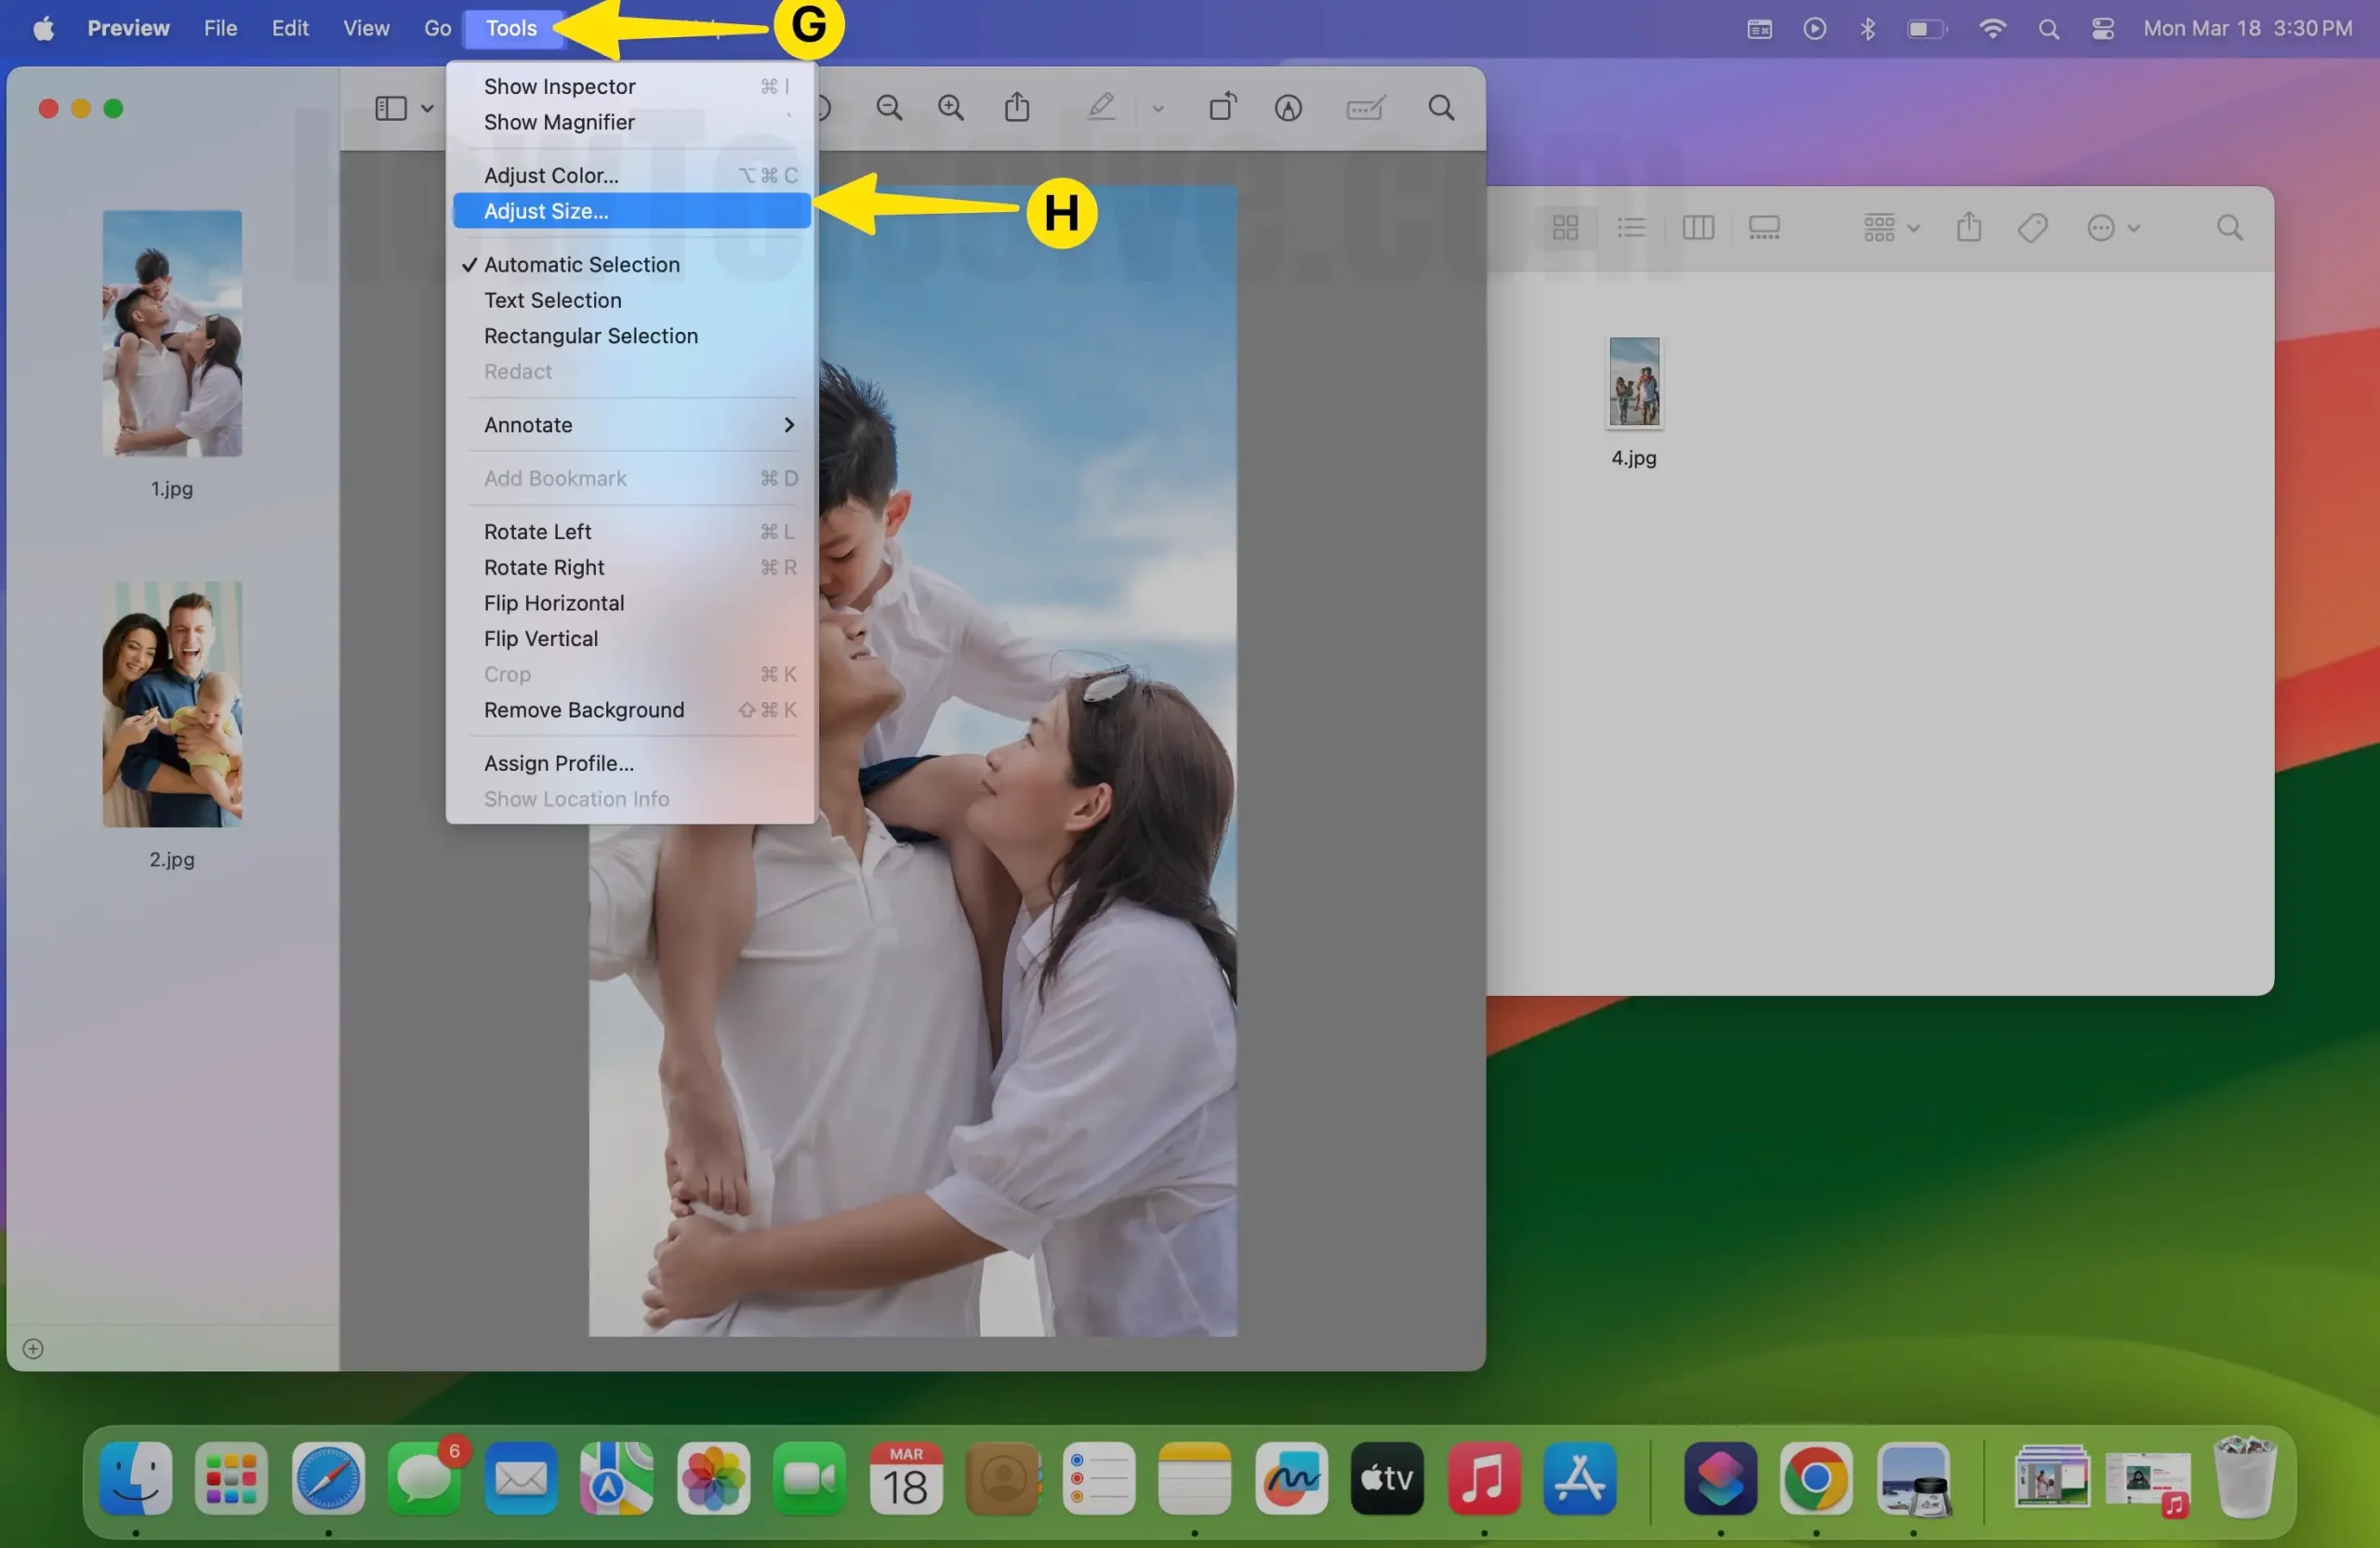
- Select Tools From the Mac Menubar > Click Adjust Size From the Prompted Menu.
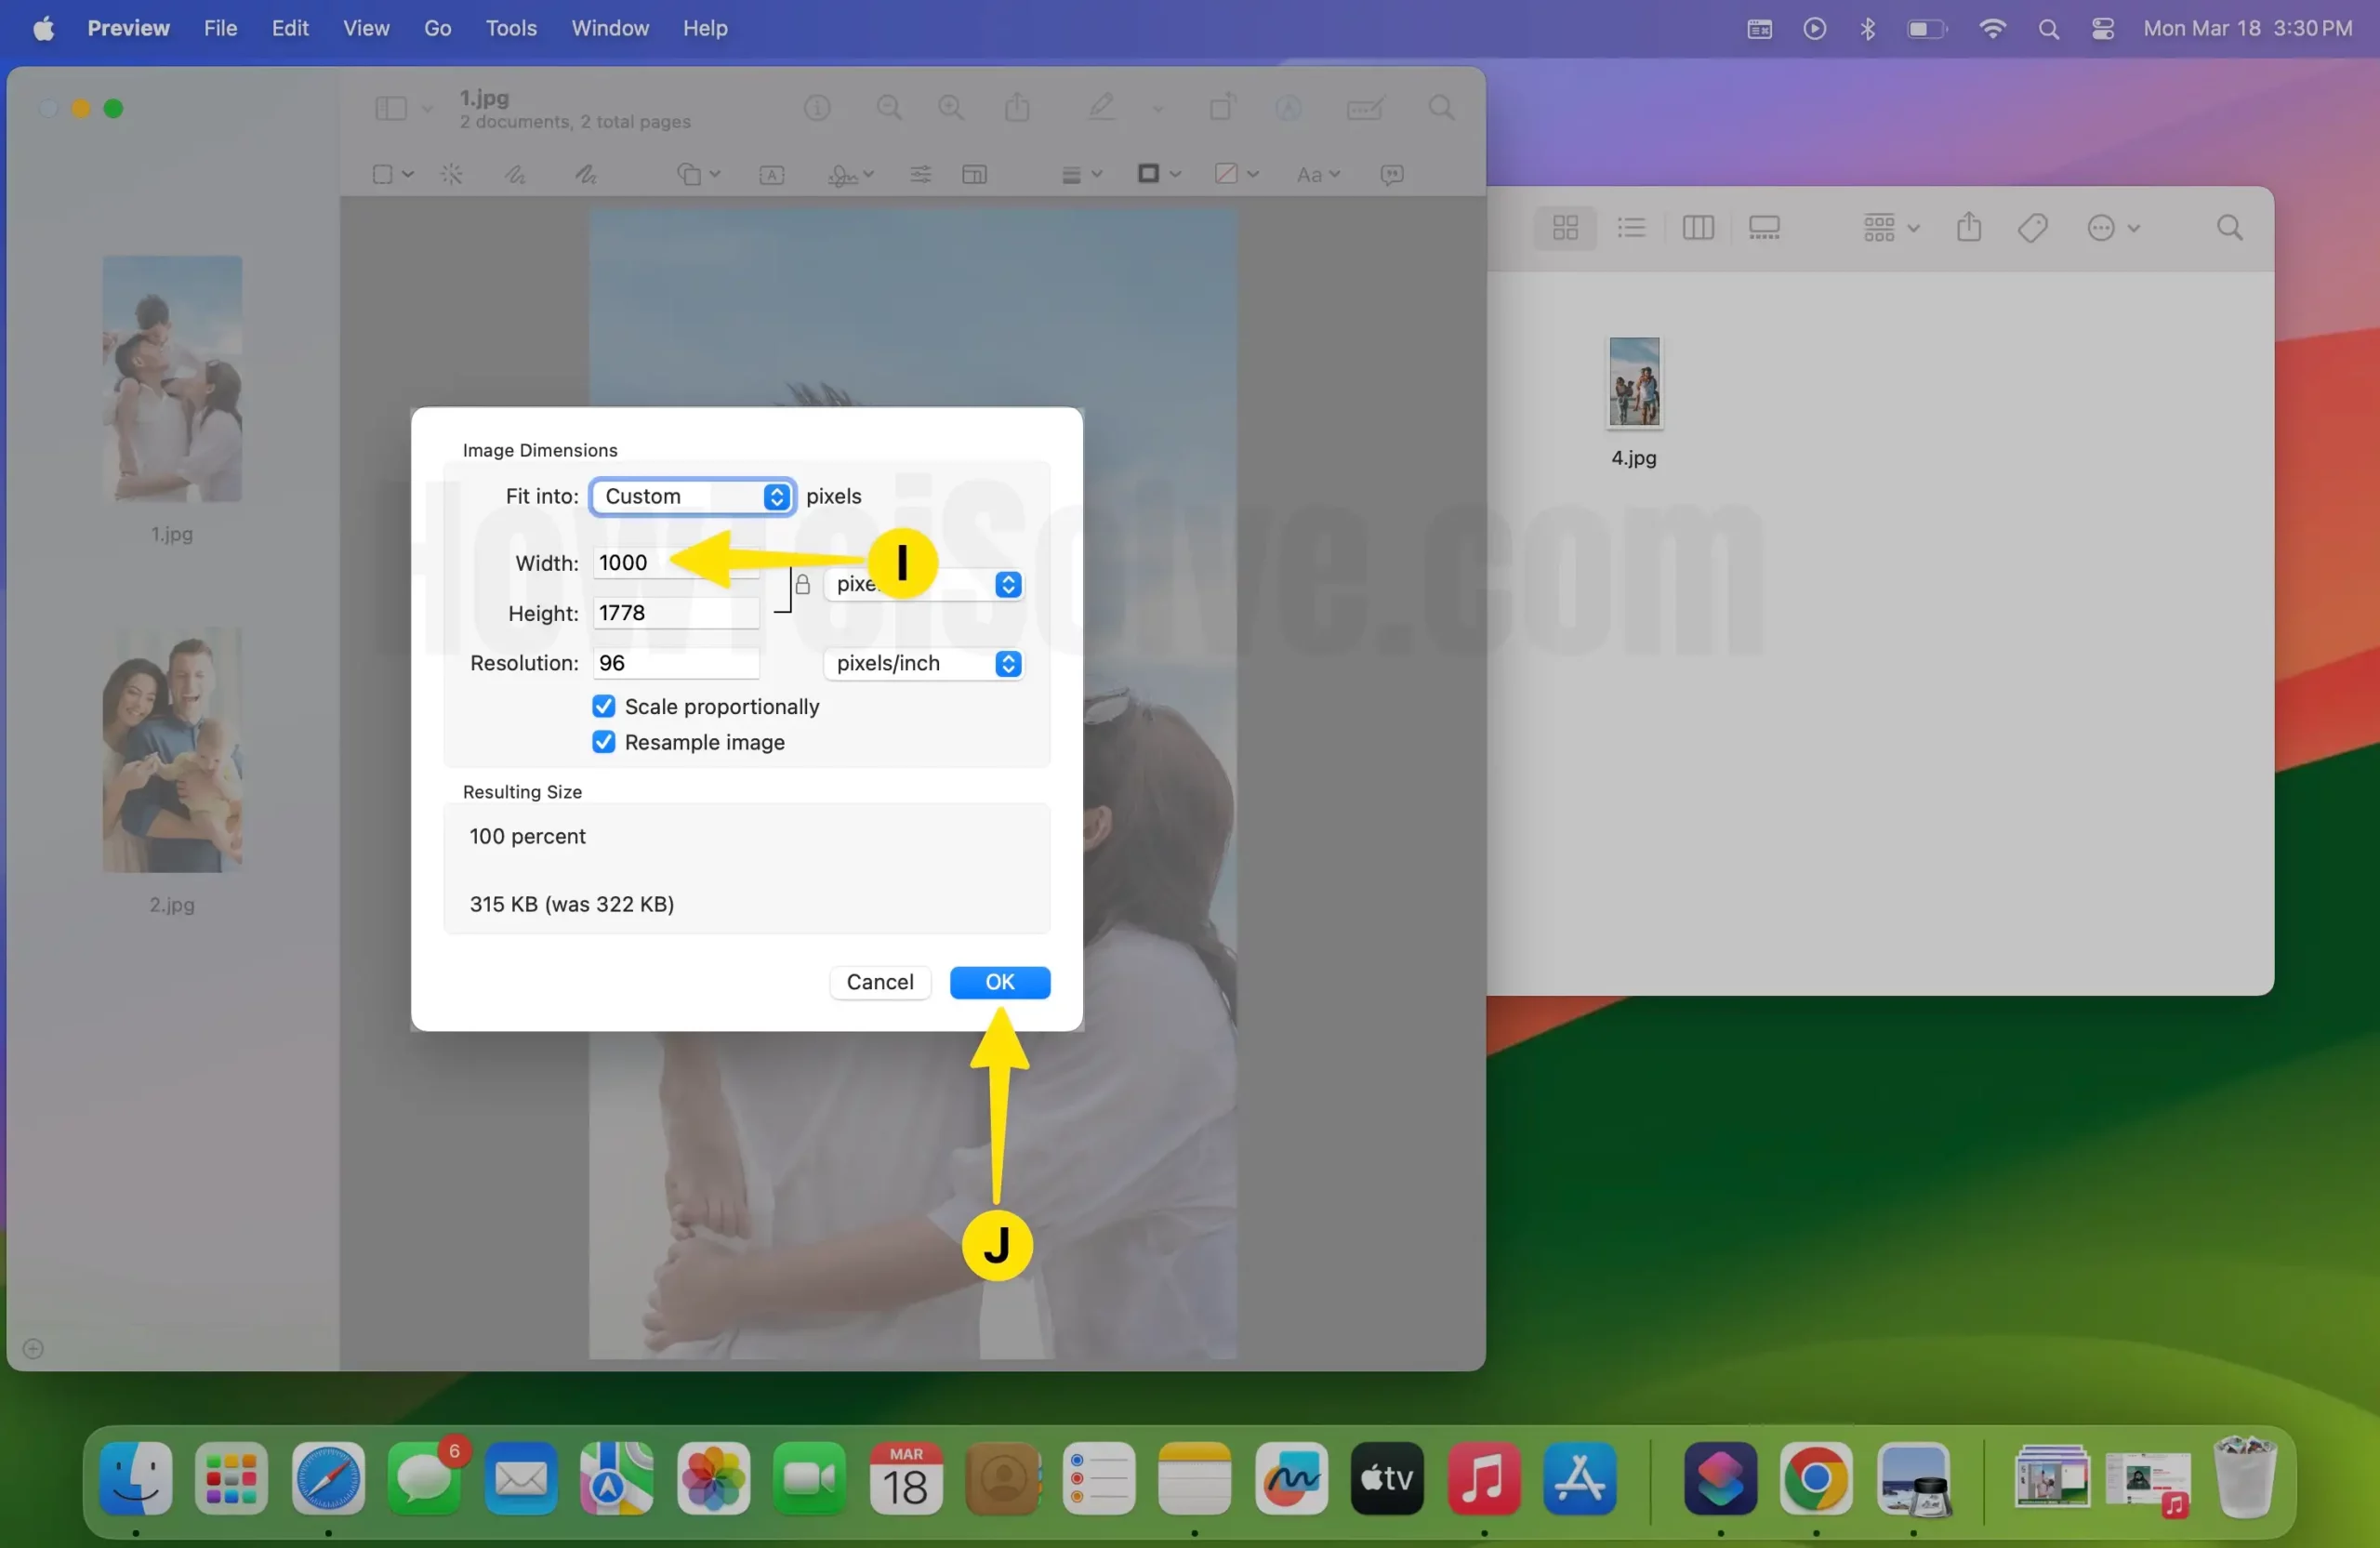
- Enter the Width of the Images > Click OK.
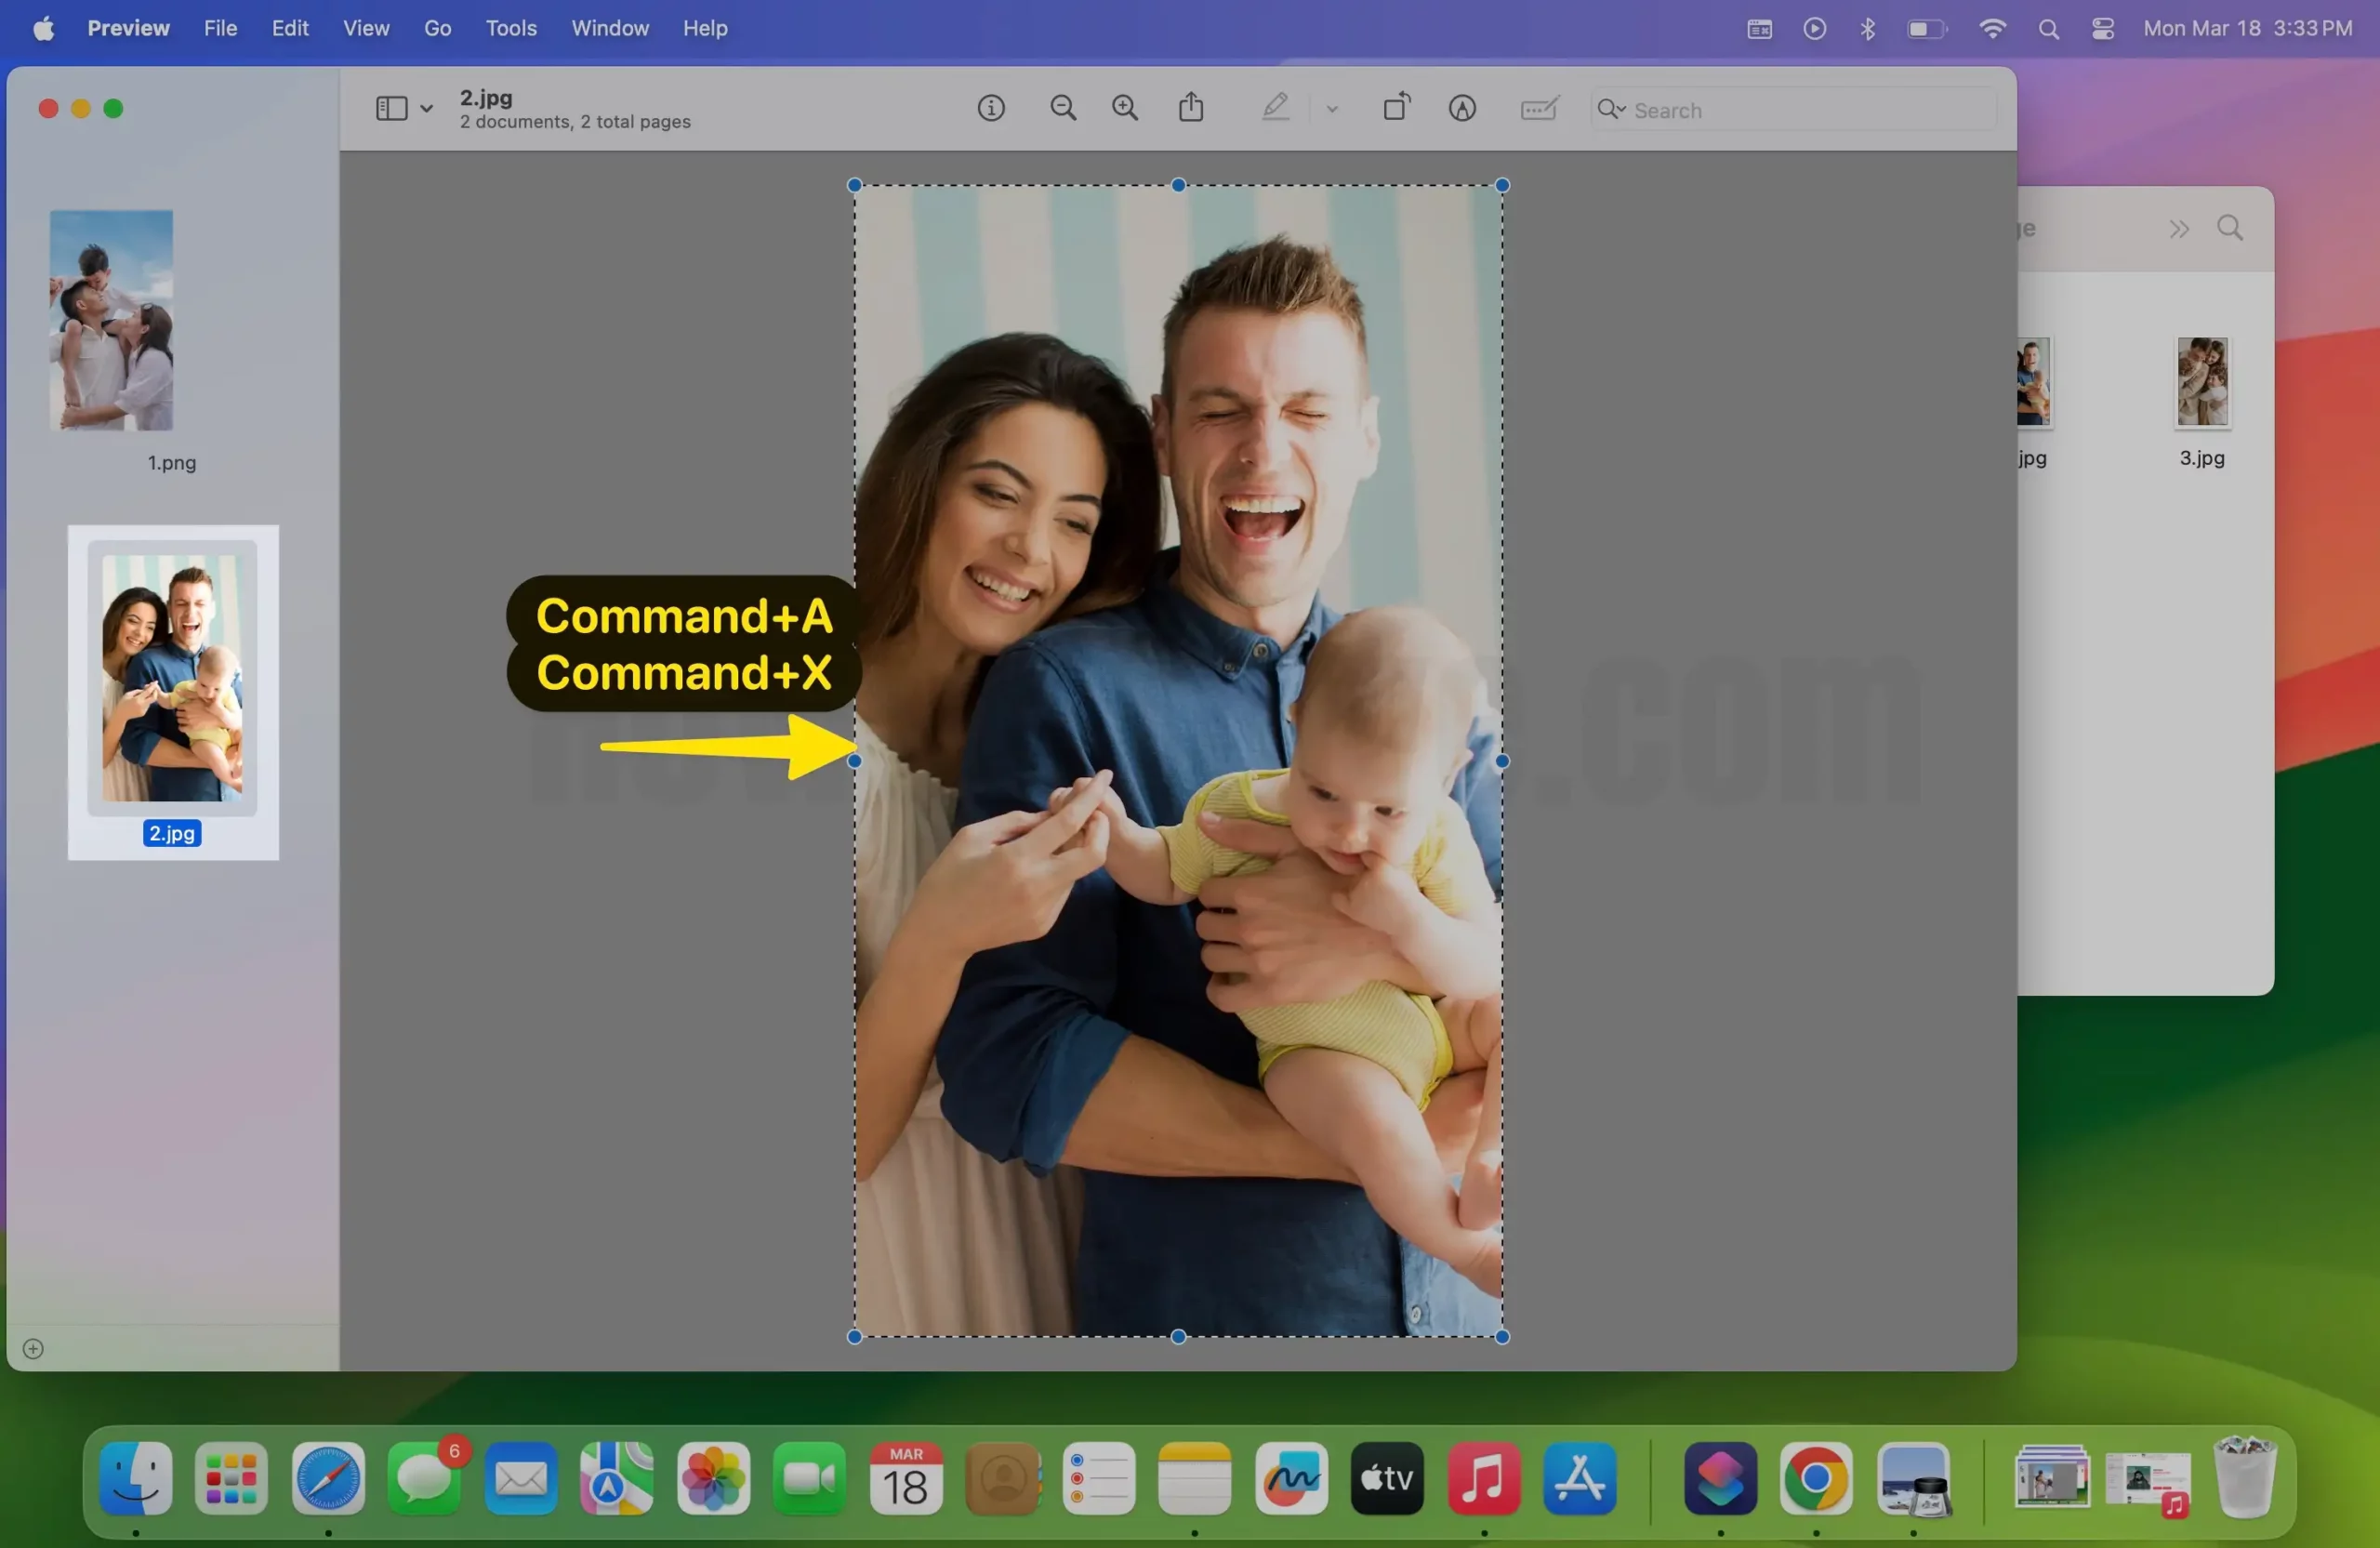
- Press the Command+A to Select the First image. Then, Press the Command+X to Cut the image.

- Select Tools at the Mac Menubar > Click Adjust Size From the Prompted menu.
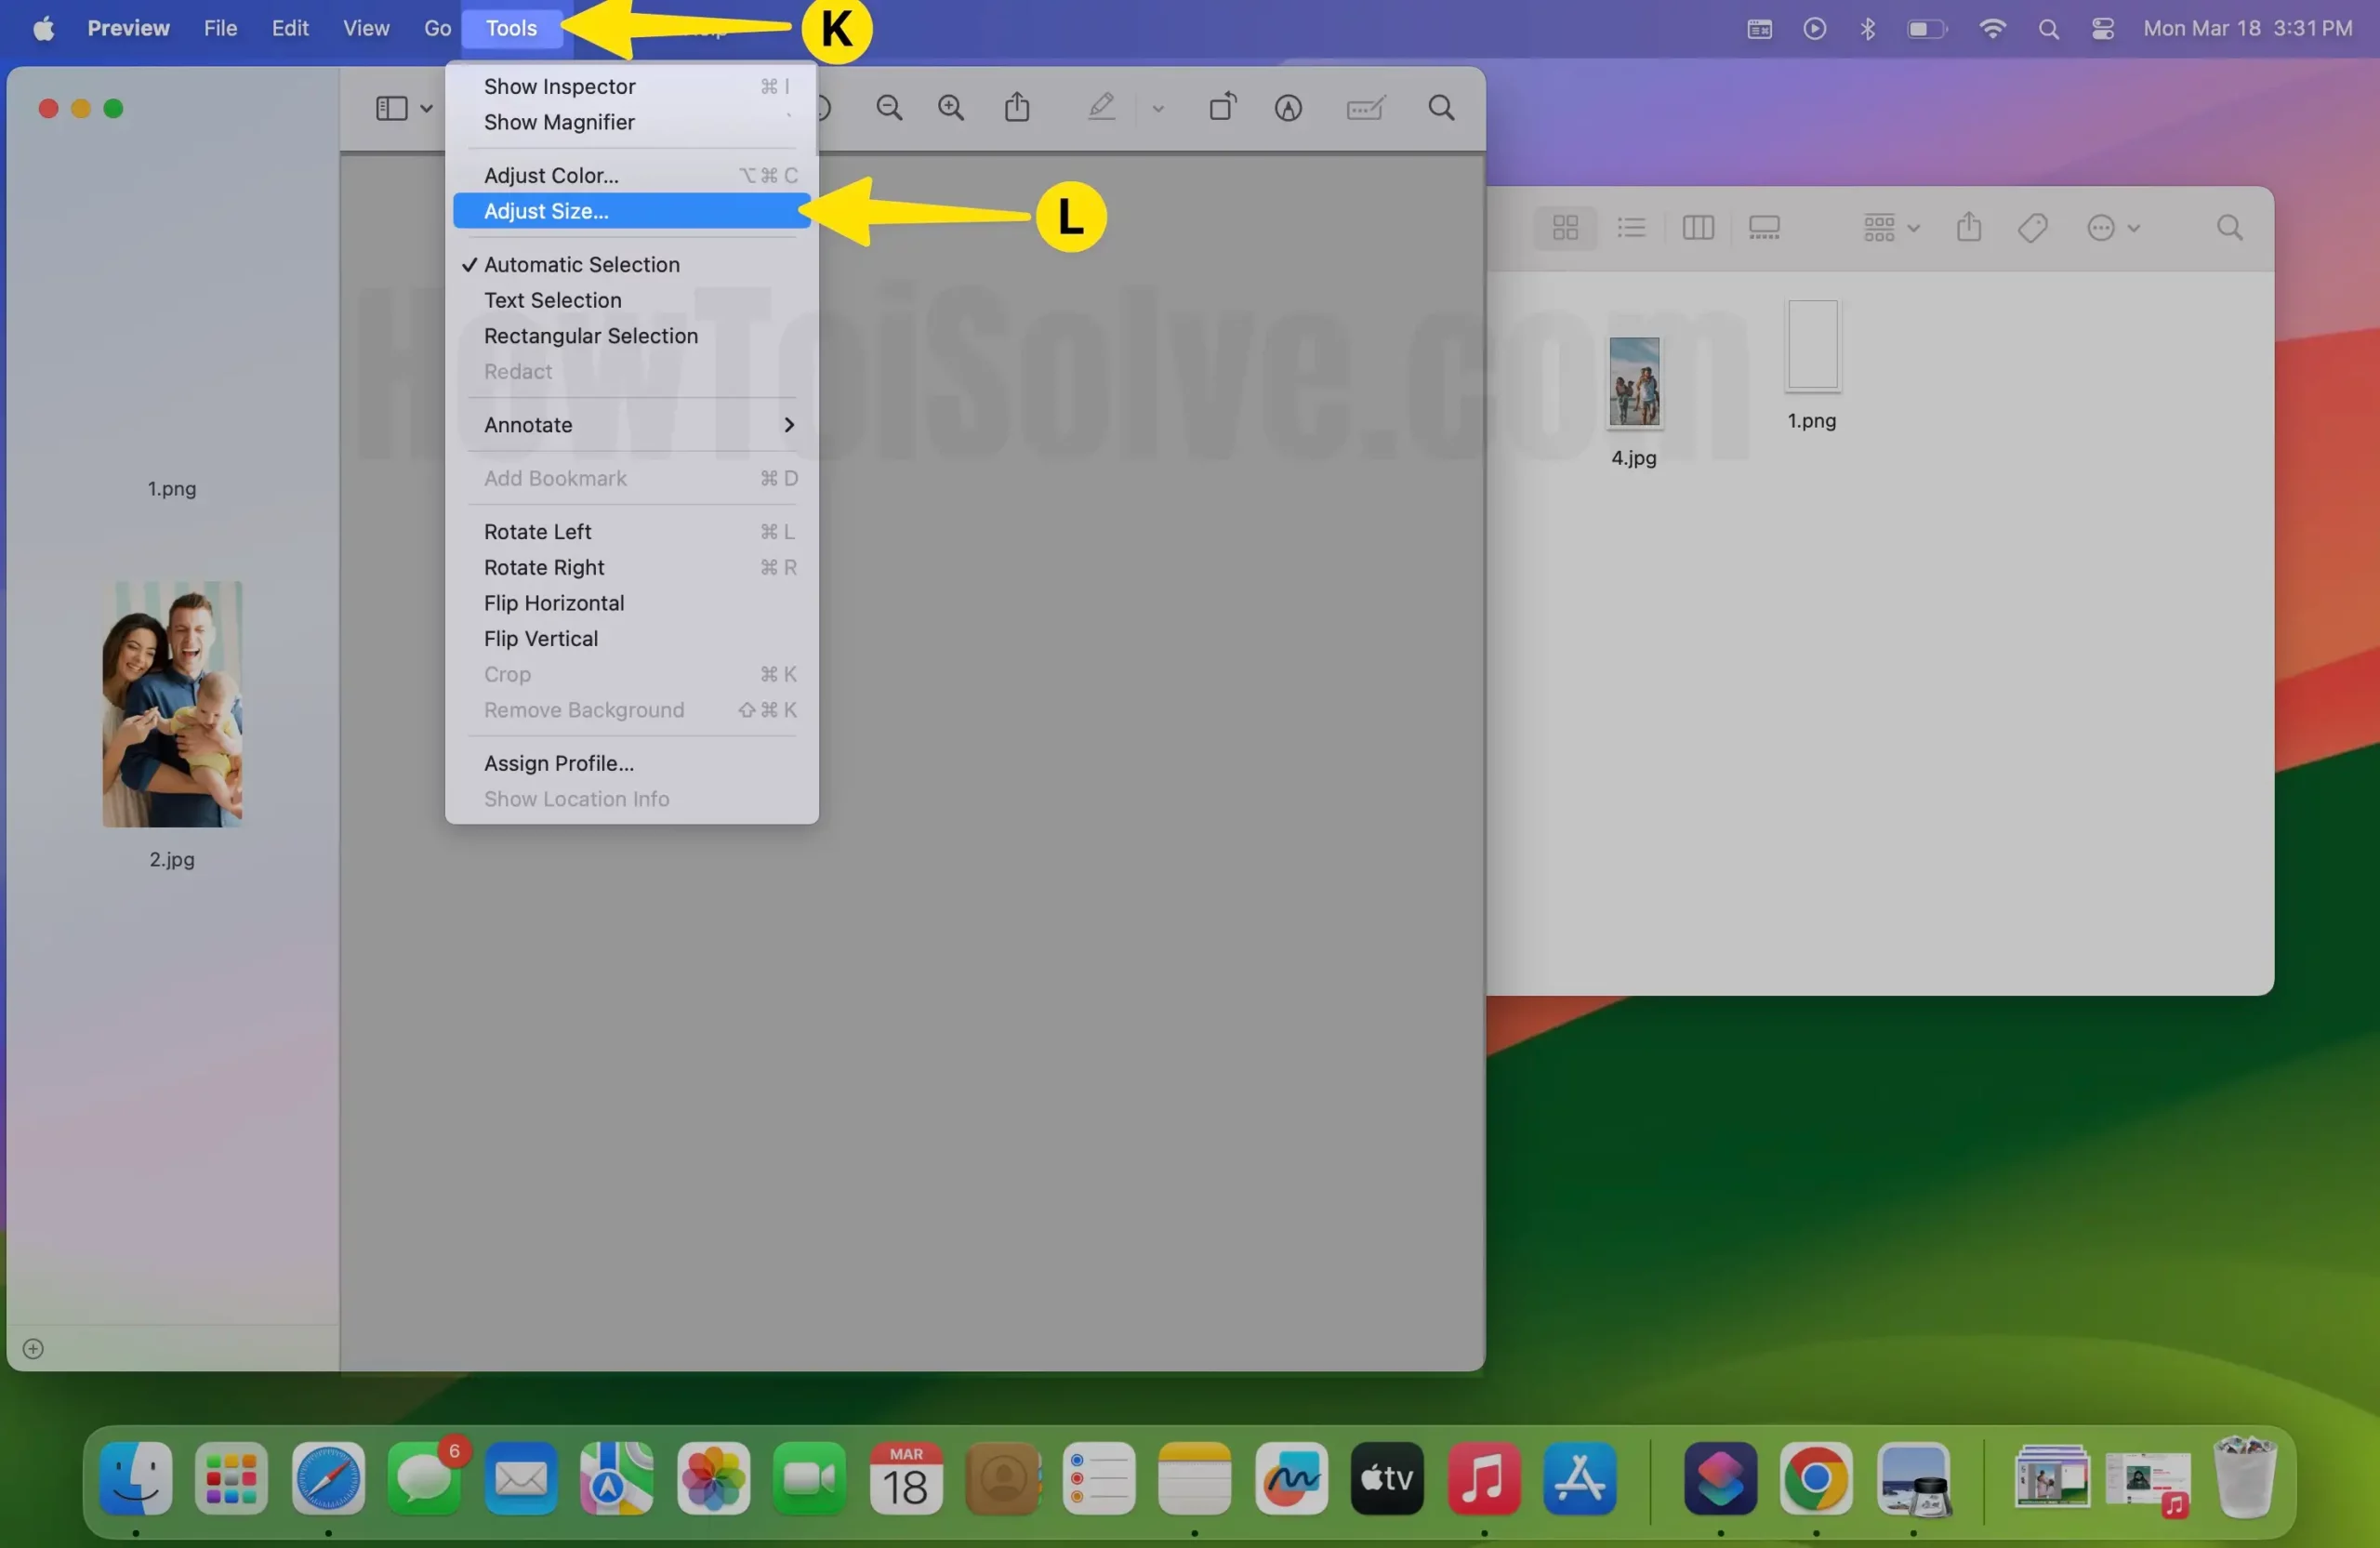
- Press the Lock icon to Unlock > Enter the sum of the width of all the images you want to combine in the Width field > Hit OK.

- Press the Command + V shortcut to paste the first Image.
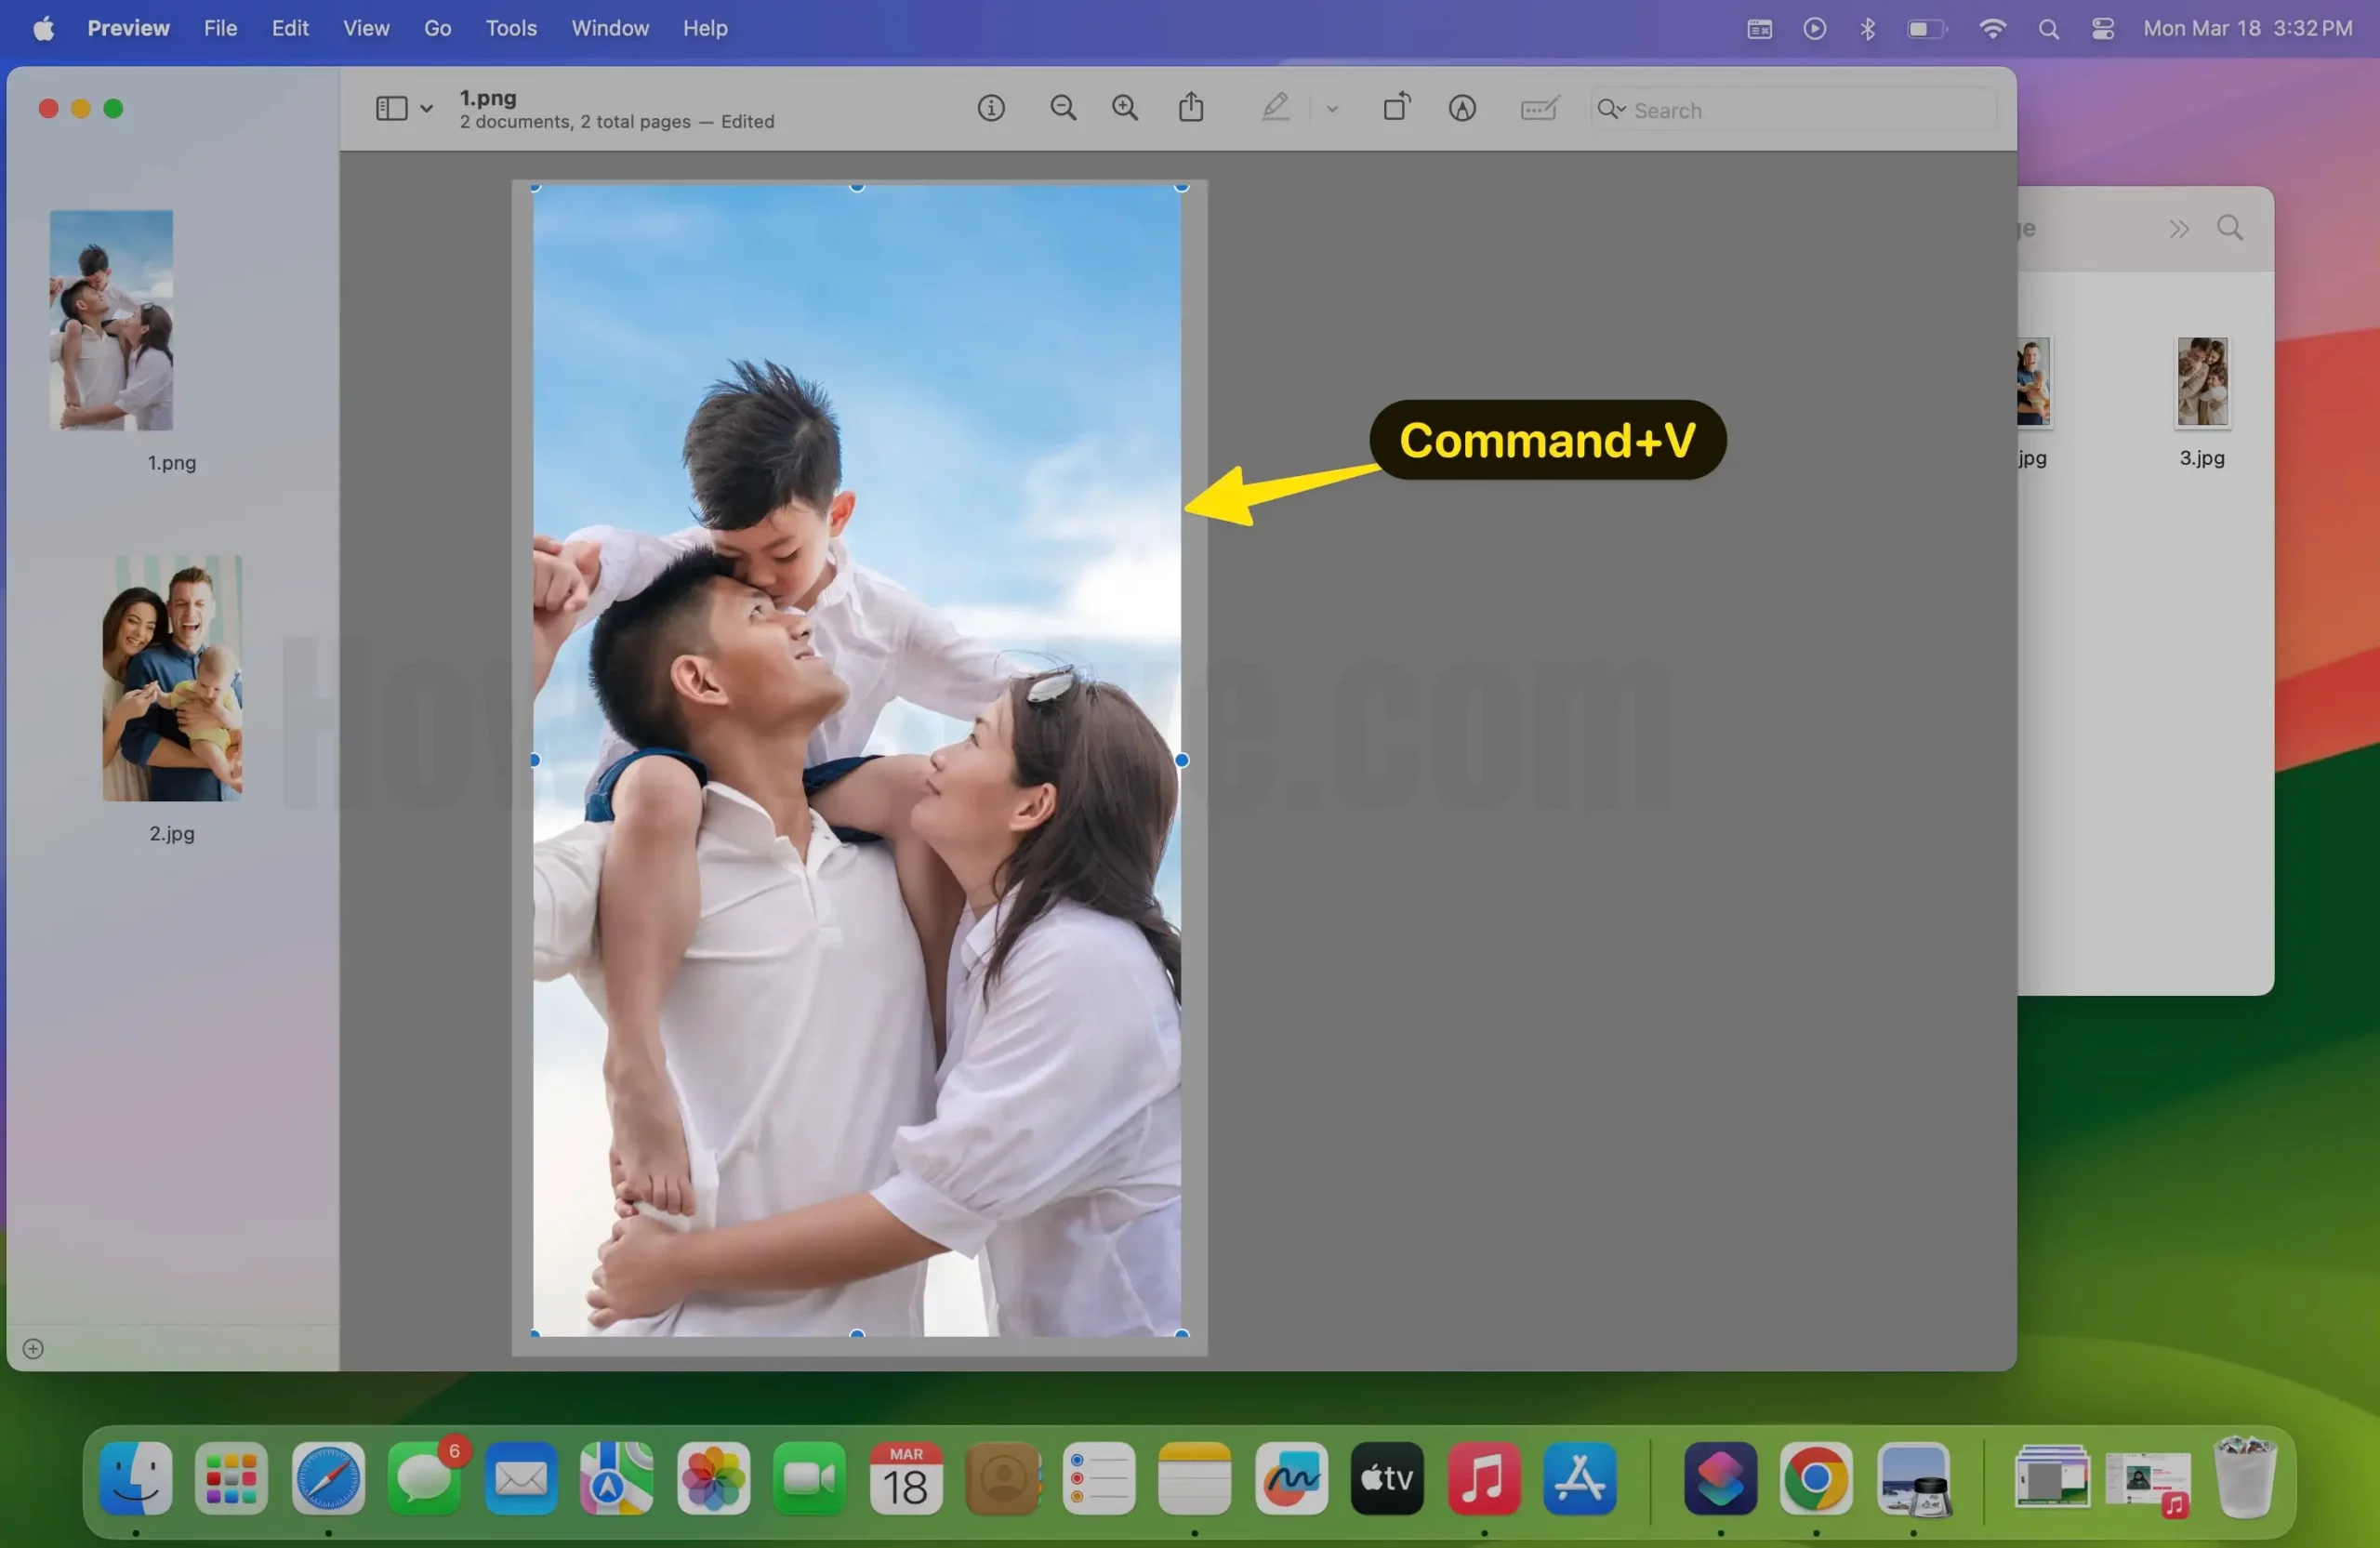
- Press the Command+A to Select the Second Image. Next, Press the Command+X to Cut the Image.
- Preview will prompt you that this action will convert the image to a PNG file (if it isn’t already). Hit Convert to proceed.

- Go back to the first image in Preview and hit Command + V to paste the Second image on it. Once done, Press the Command + S keyboard shortcut to save the file.

Settings necessary to combine photos side by side on Mac
- Click the Link to Download and Install the Combine image Shortcut and Select Add Shortcut.
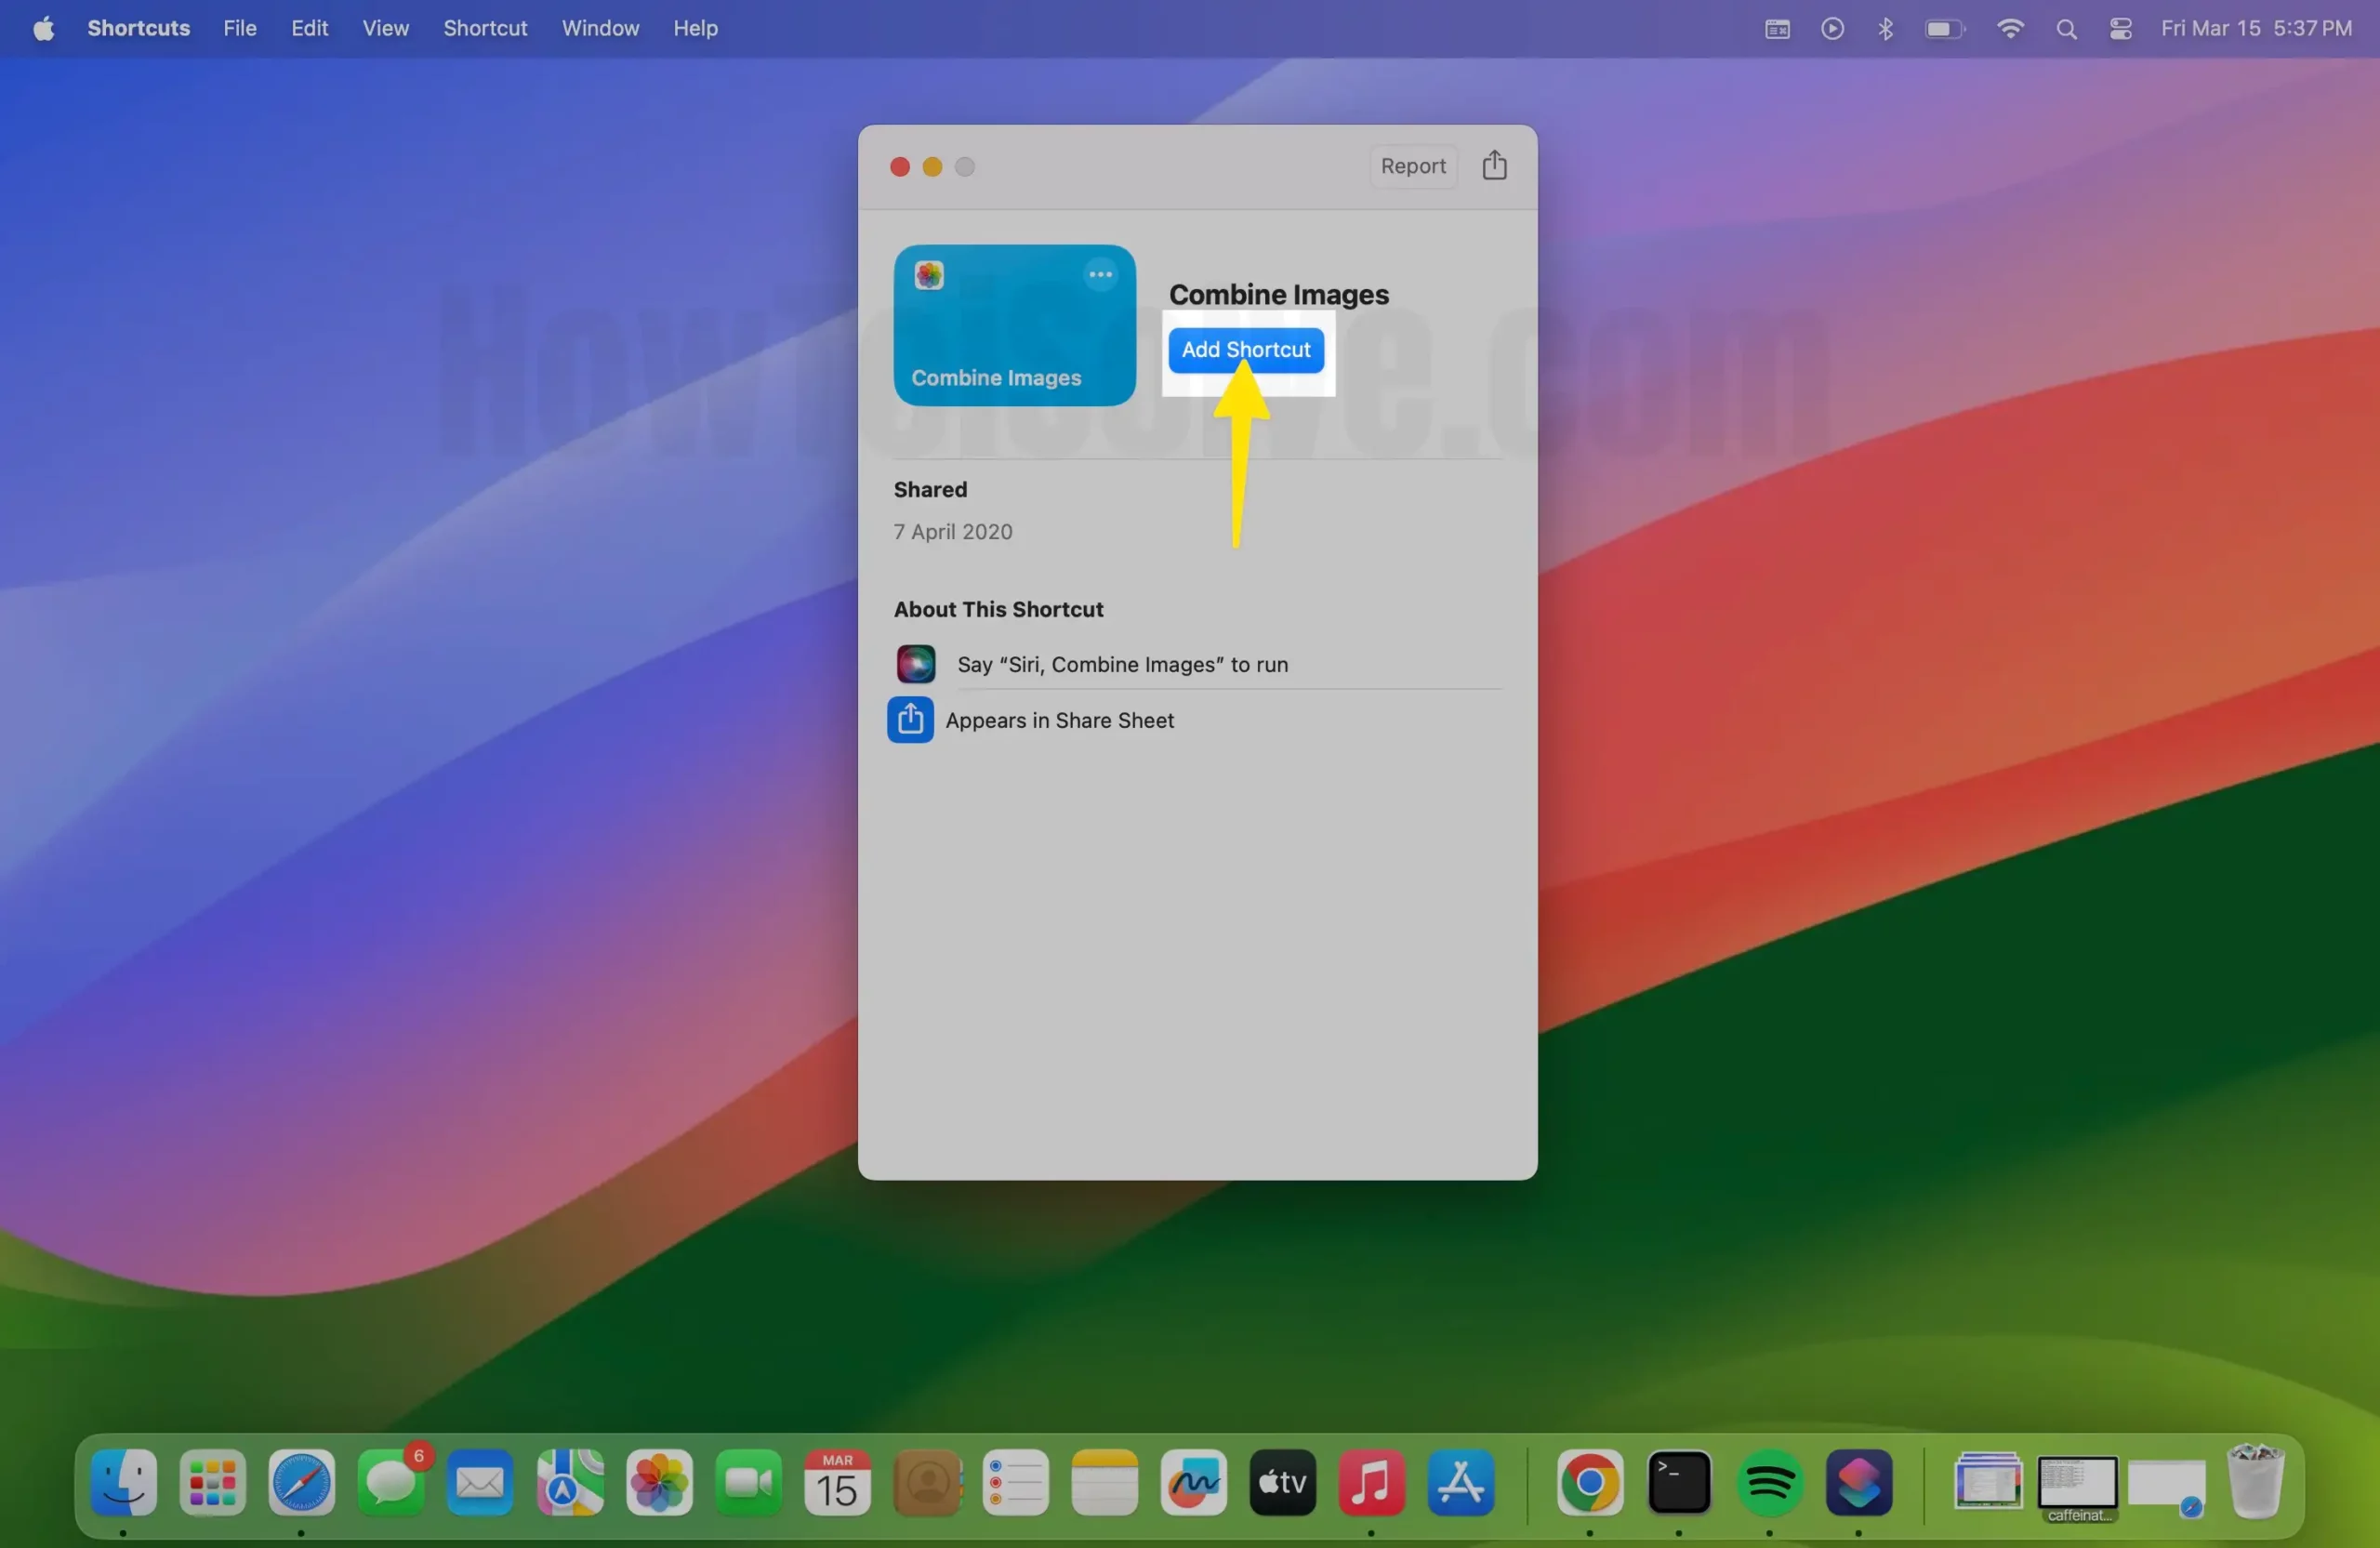
- Launch the Shortcuts App on your Mac.
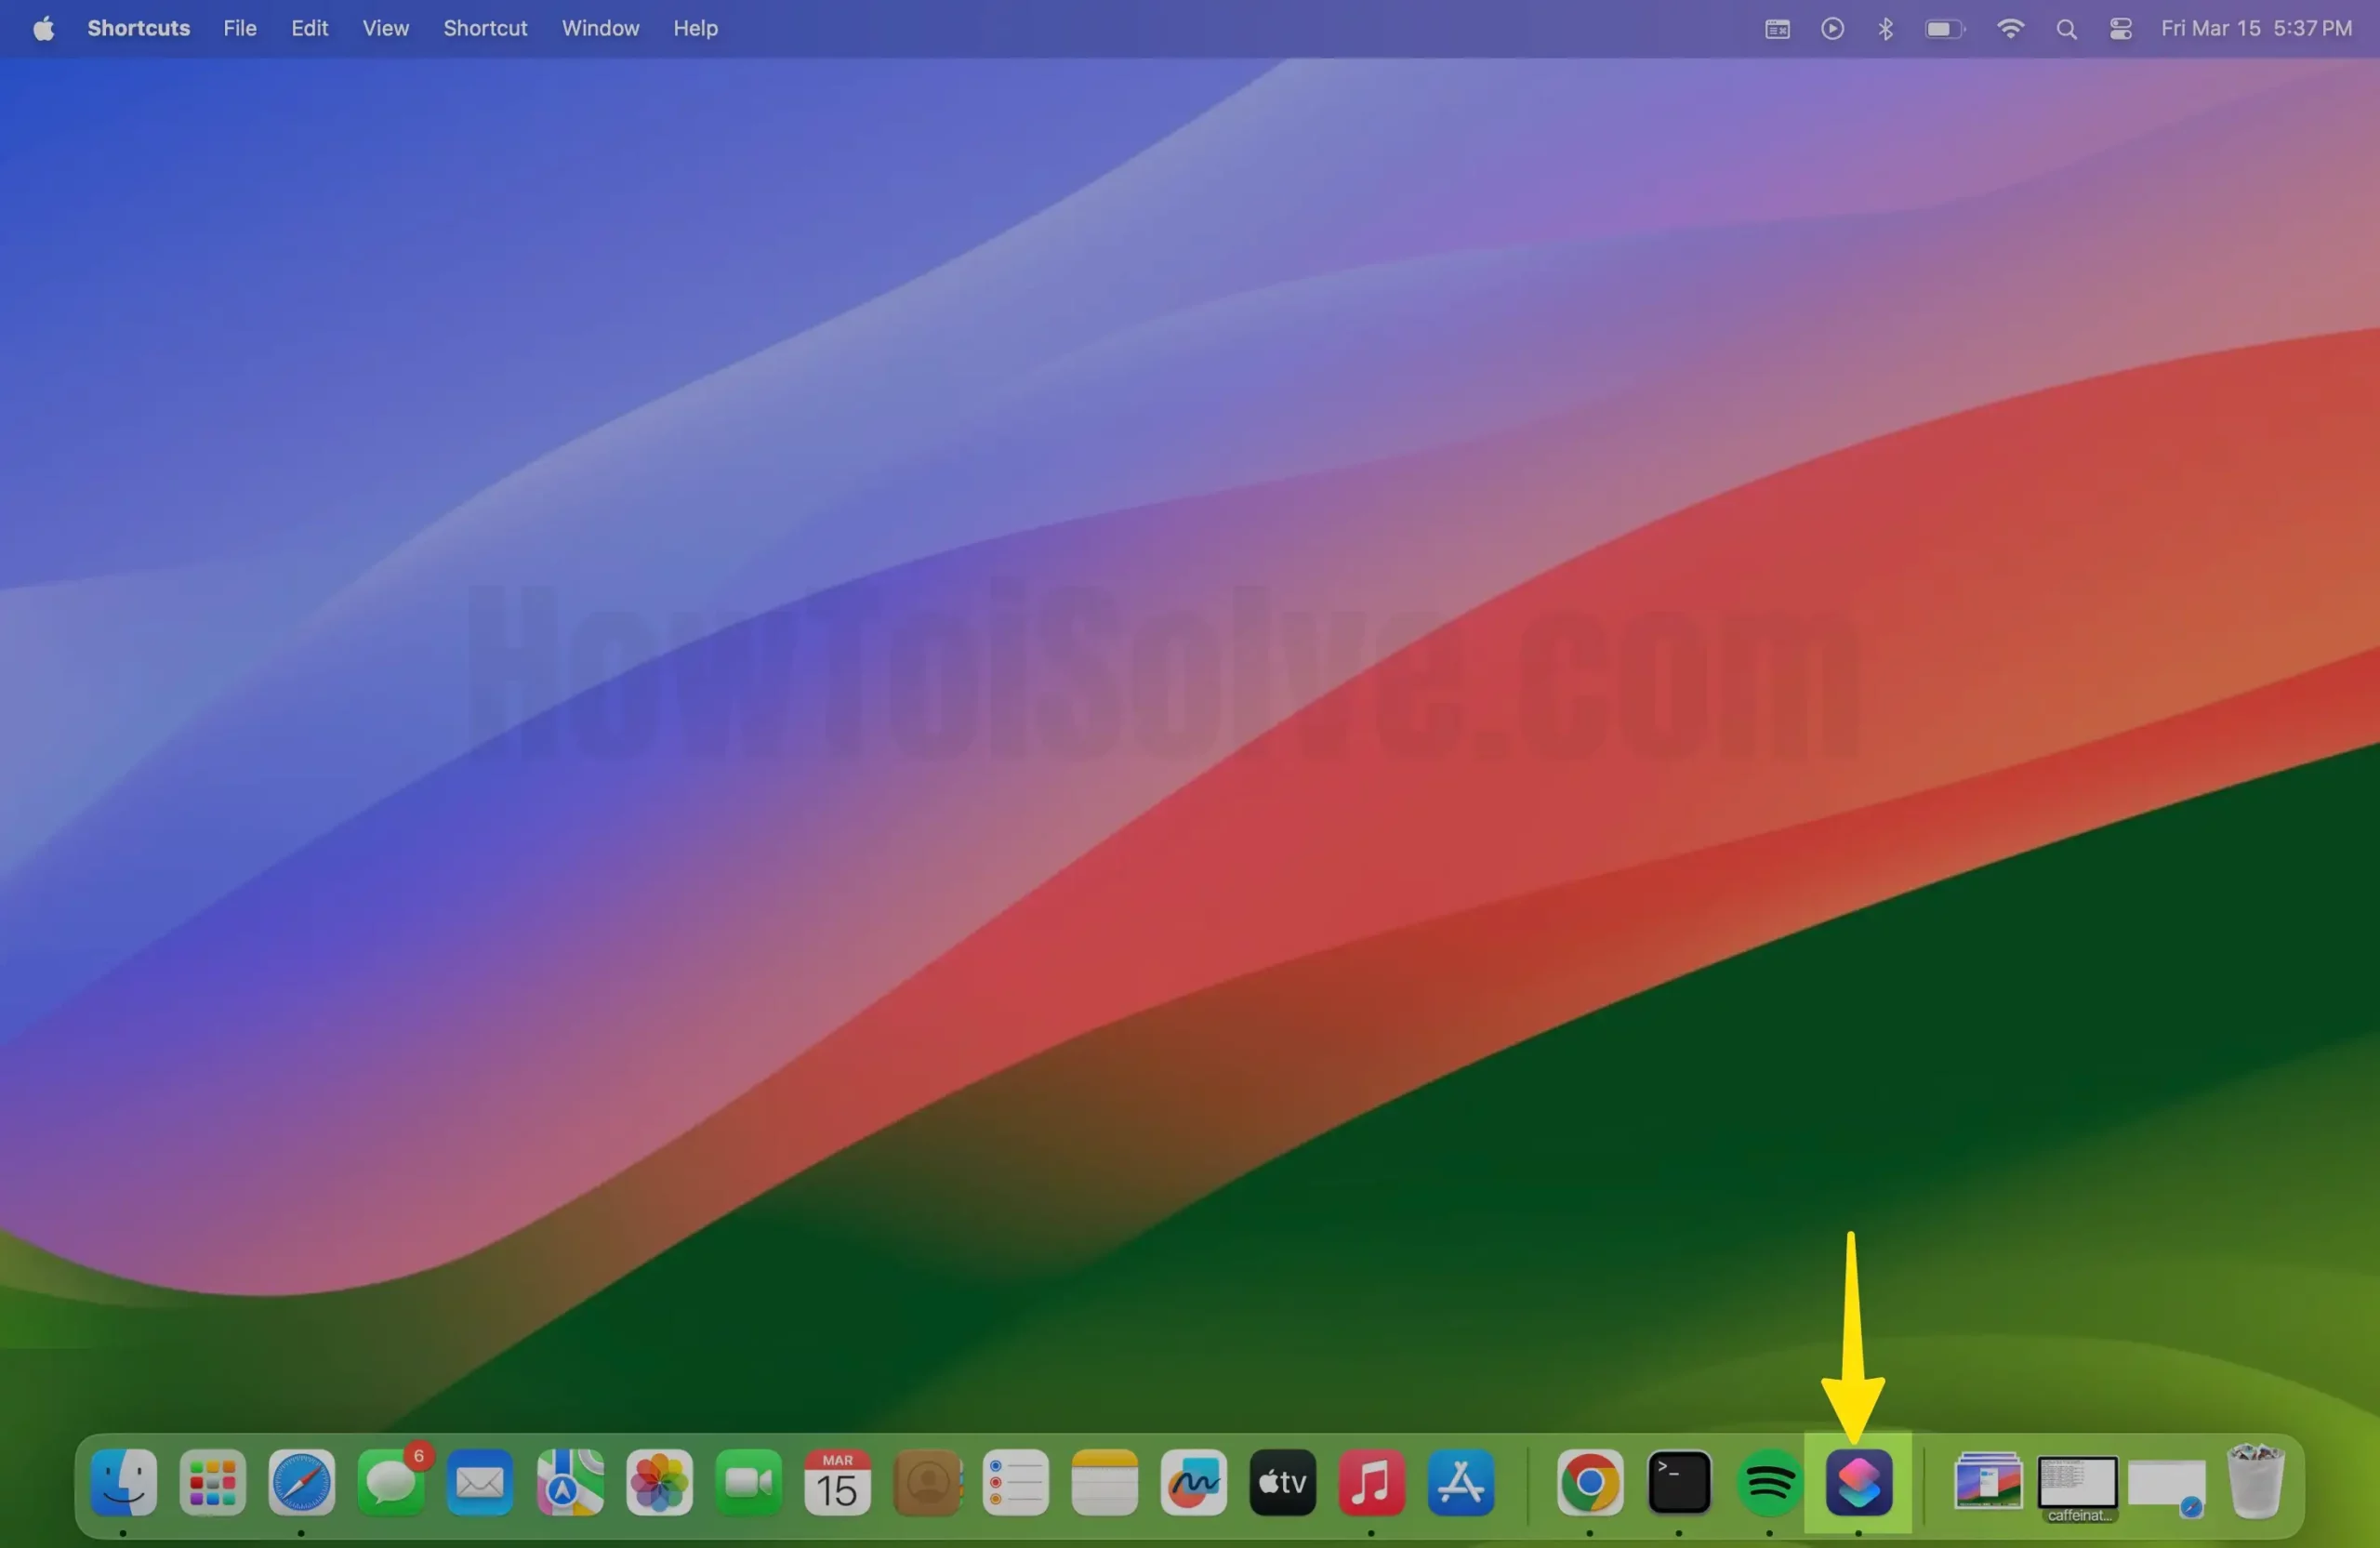
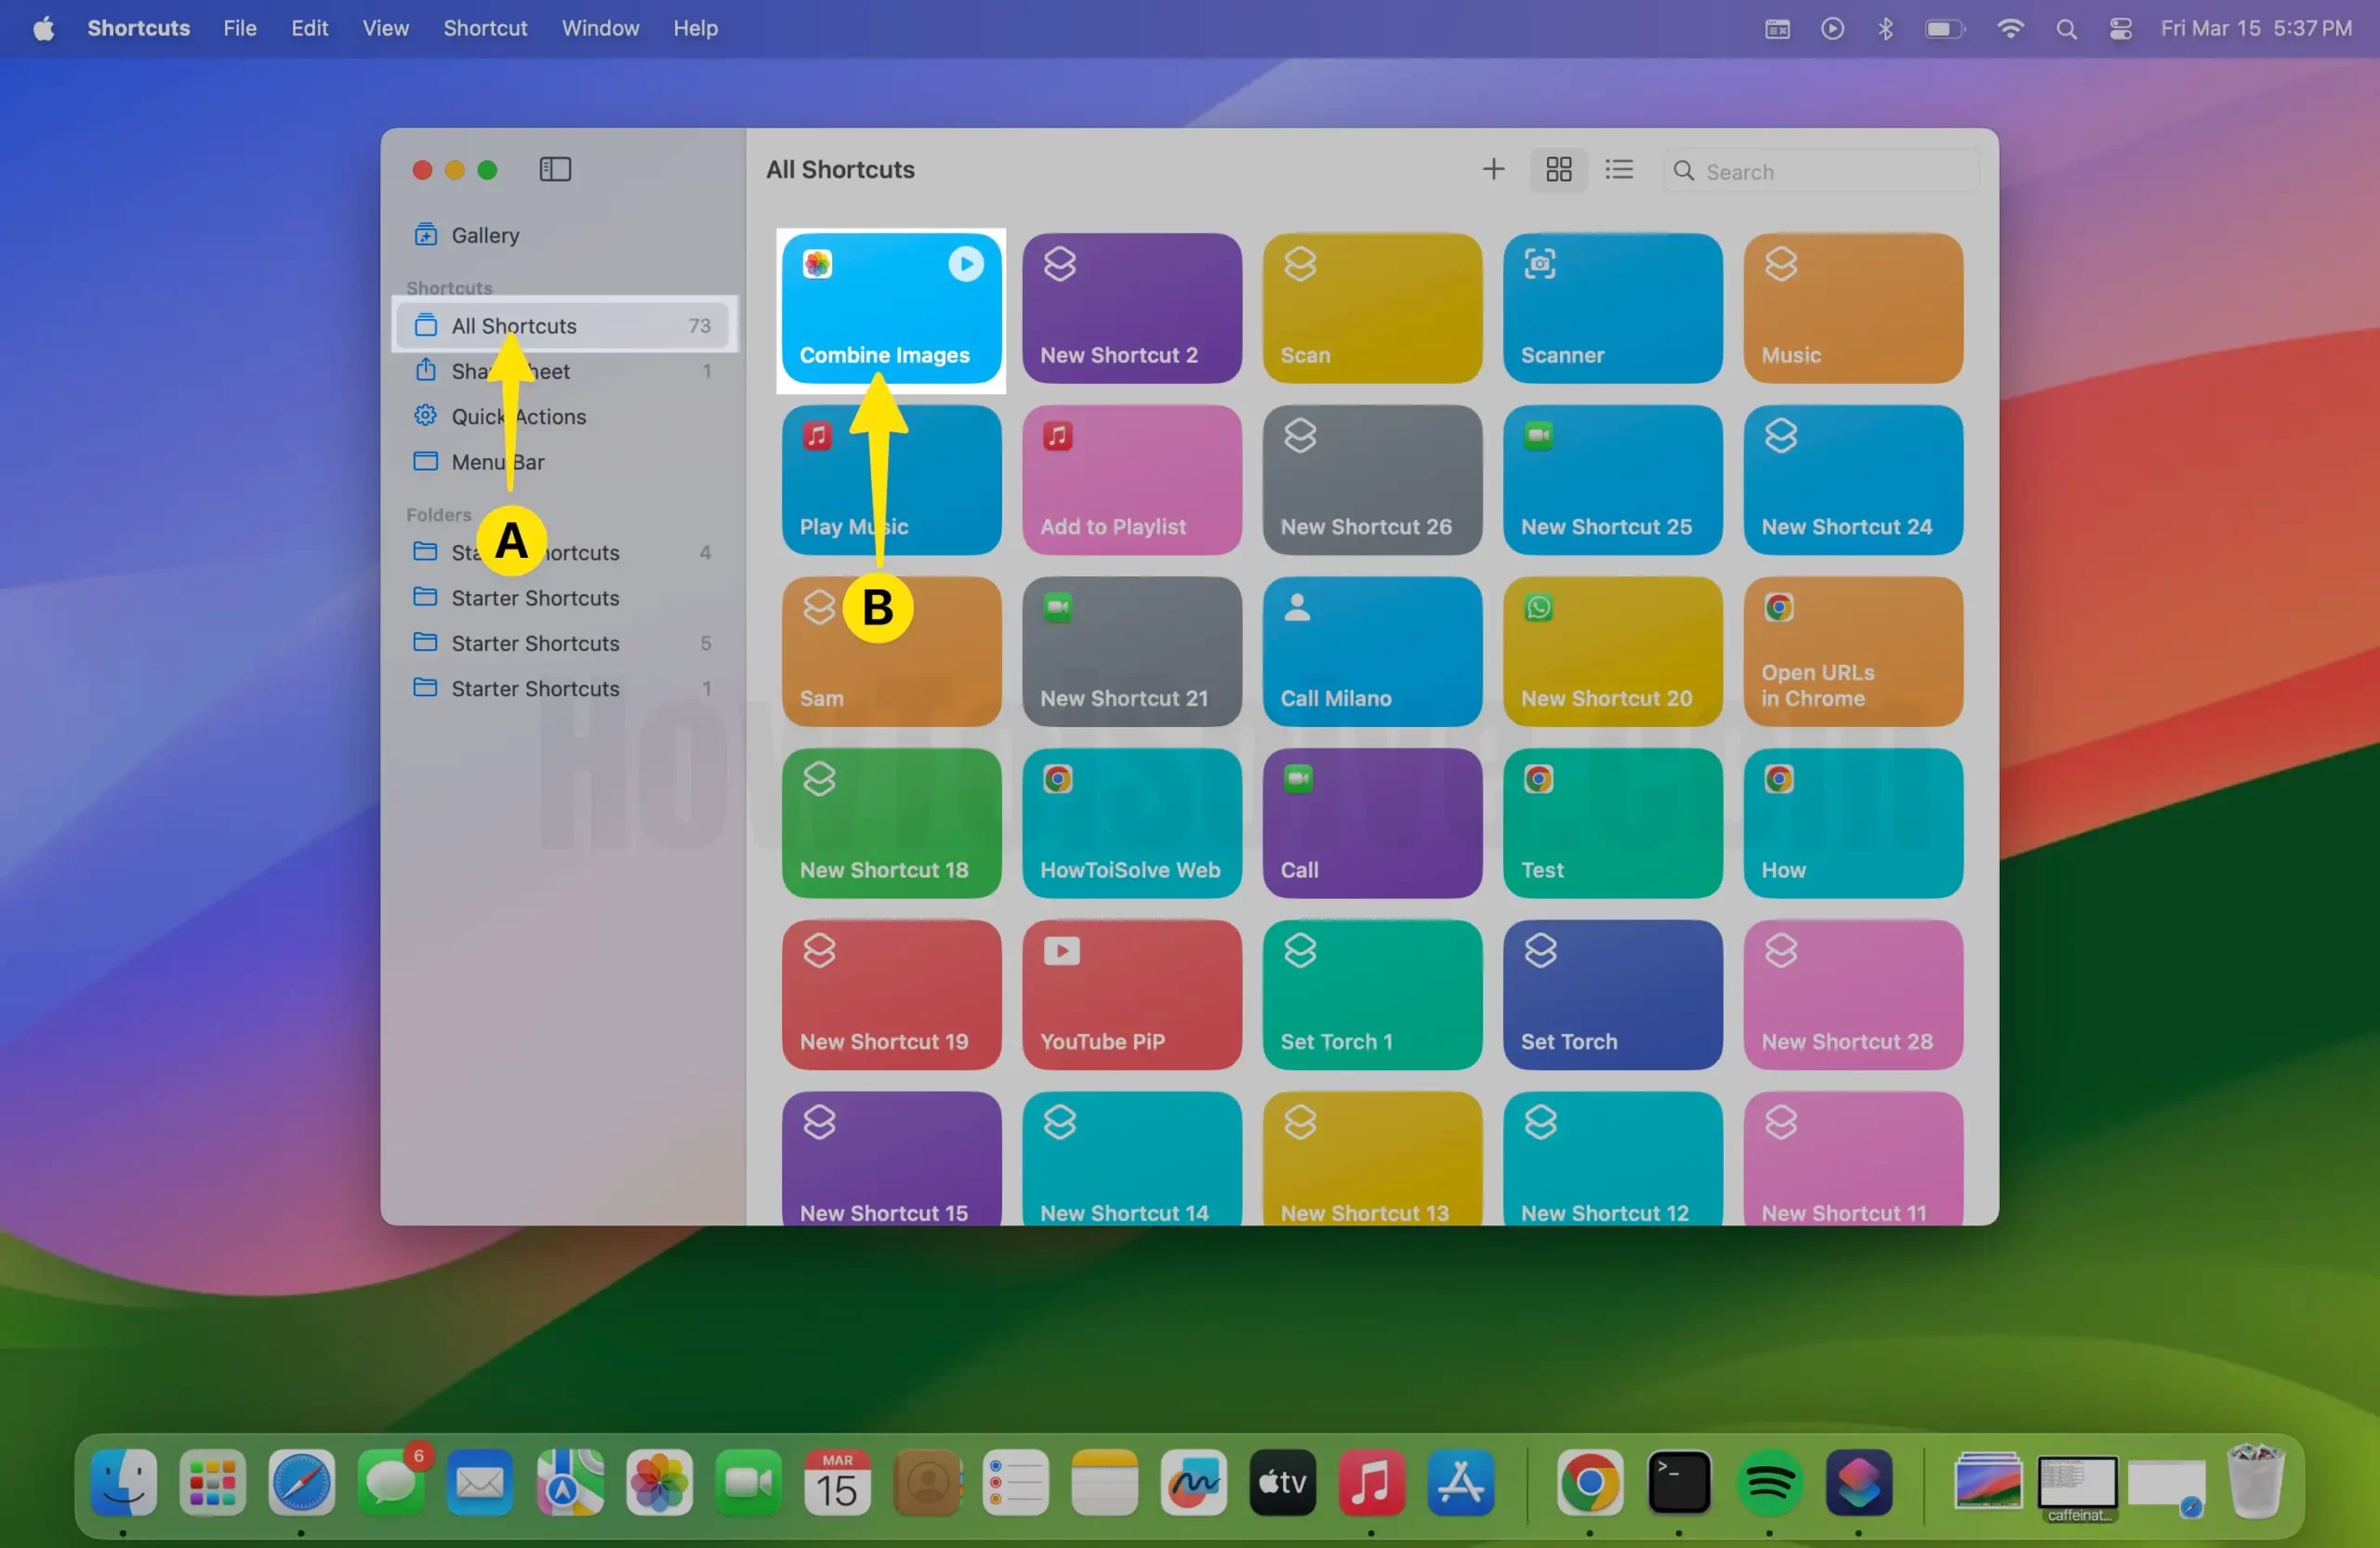
- Select All Shortcuts From the Left Pane > Click the Combine images shortcut.
- Click on the Information icon on the Right side Menu and open advanced settings > Allow the shortcut to get the photos from the finder directly. Click the checkboxes for Use as quick action, Finder and Show in Share Sheet for a more straightforward process.

Now, close the shortcuts app, and you can start editing the images directly. From a saved location in Finder Mac.
How to Combine Pictures Side by Side Horizontally or Vertically
- Launch the Finder on your Mac > Select the Download Folder > Choose the Folder of Images Where you can Select the images you want to incorporate from the finder.

- Select the Images.
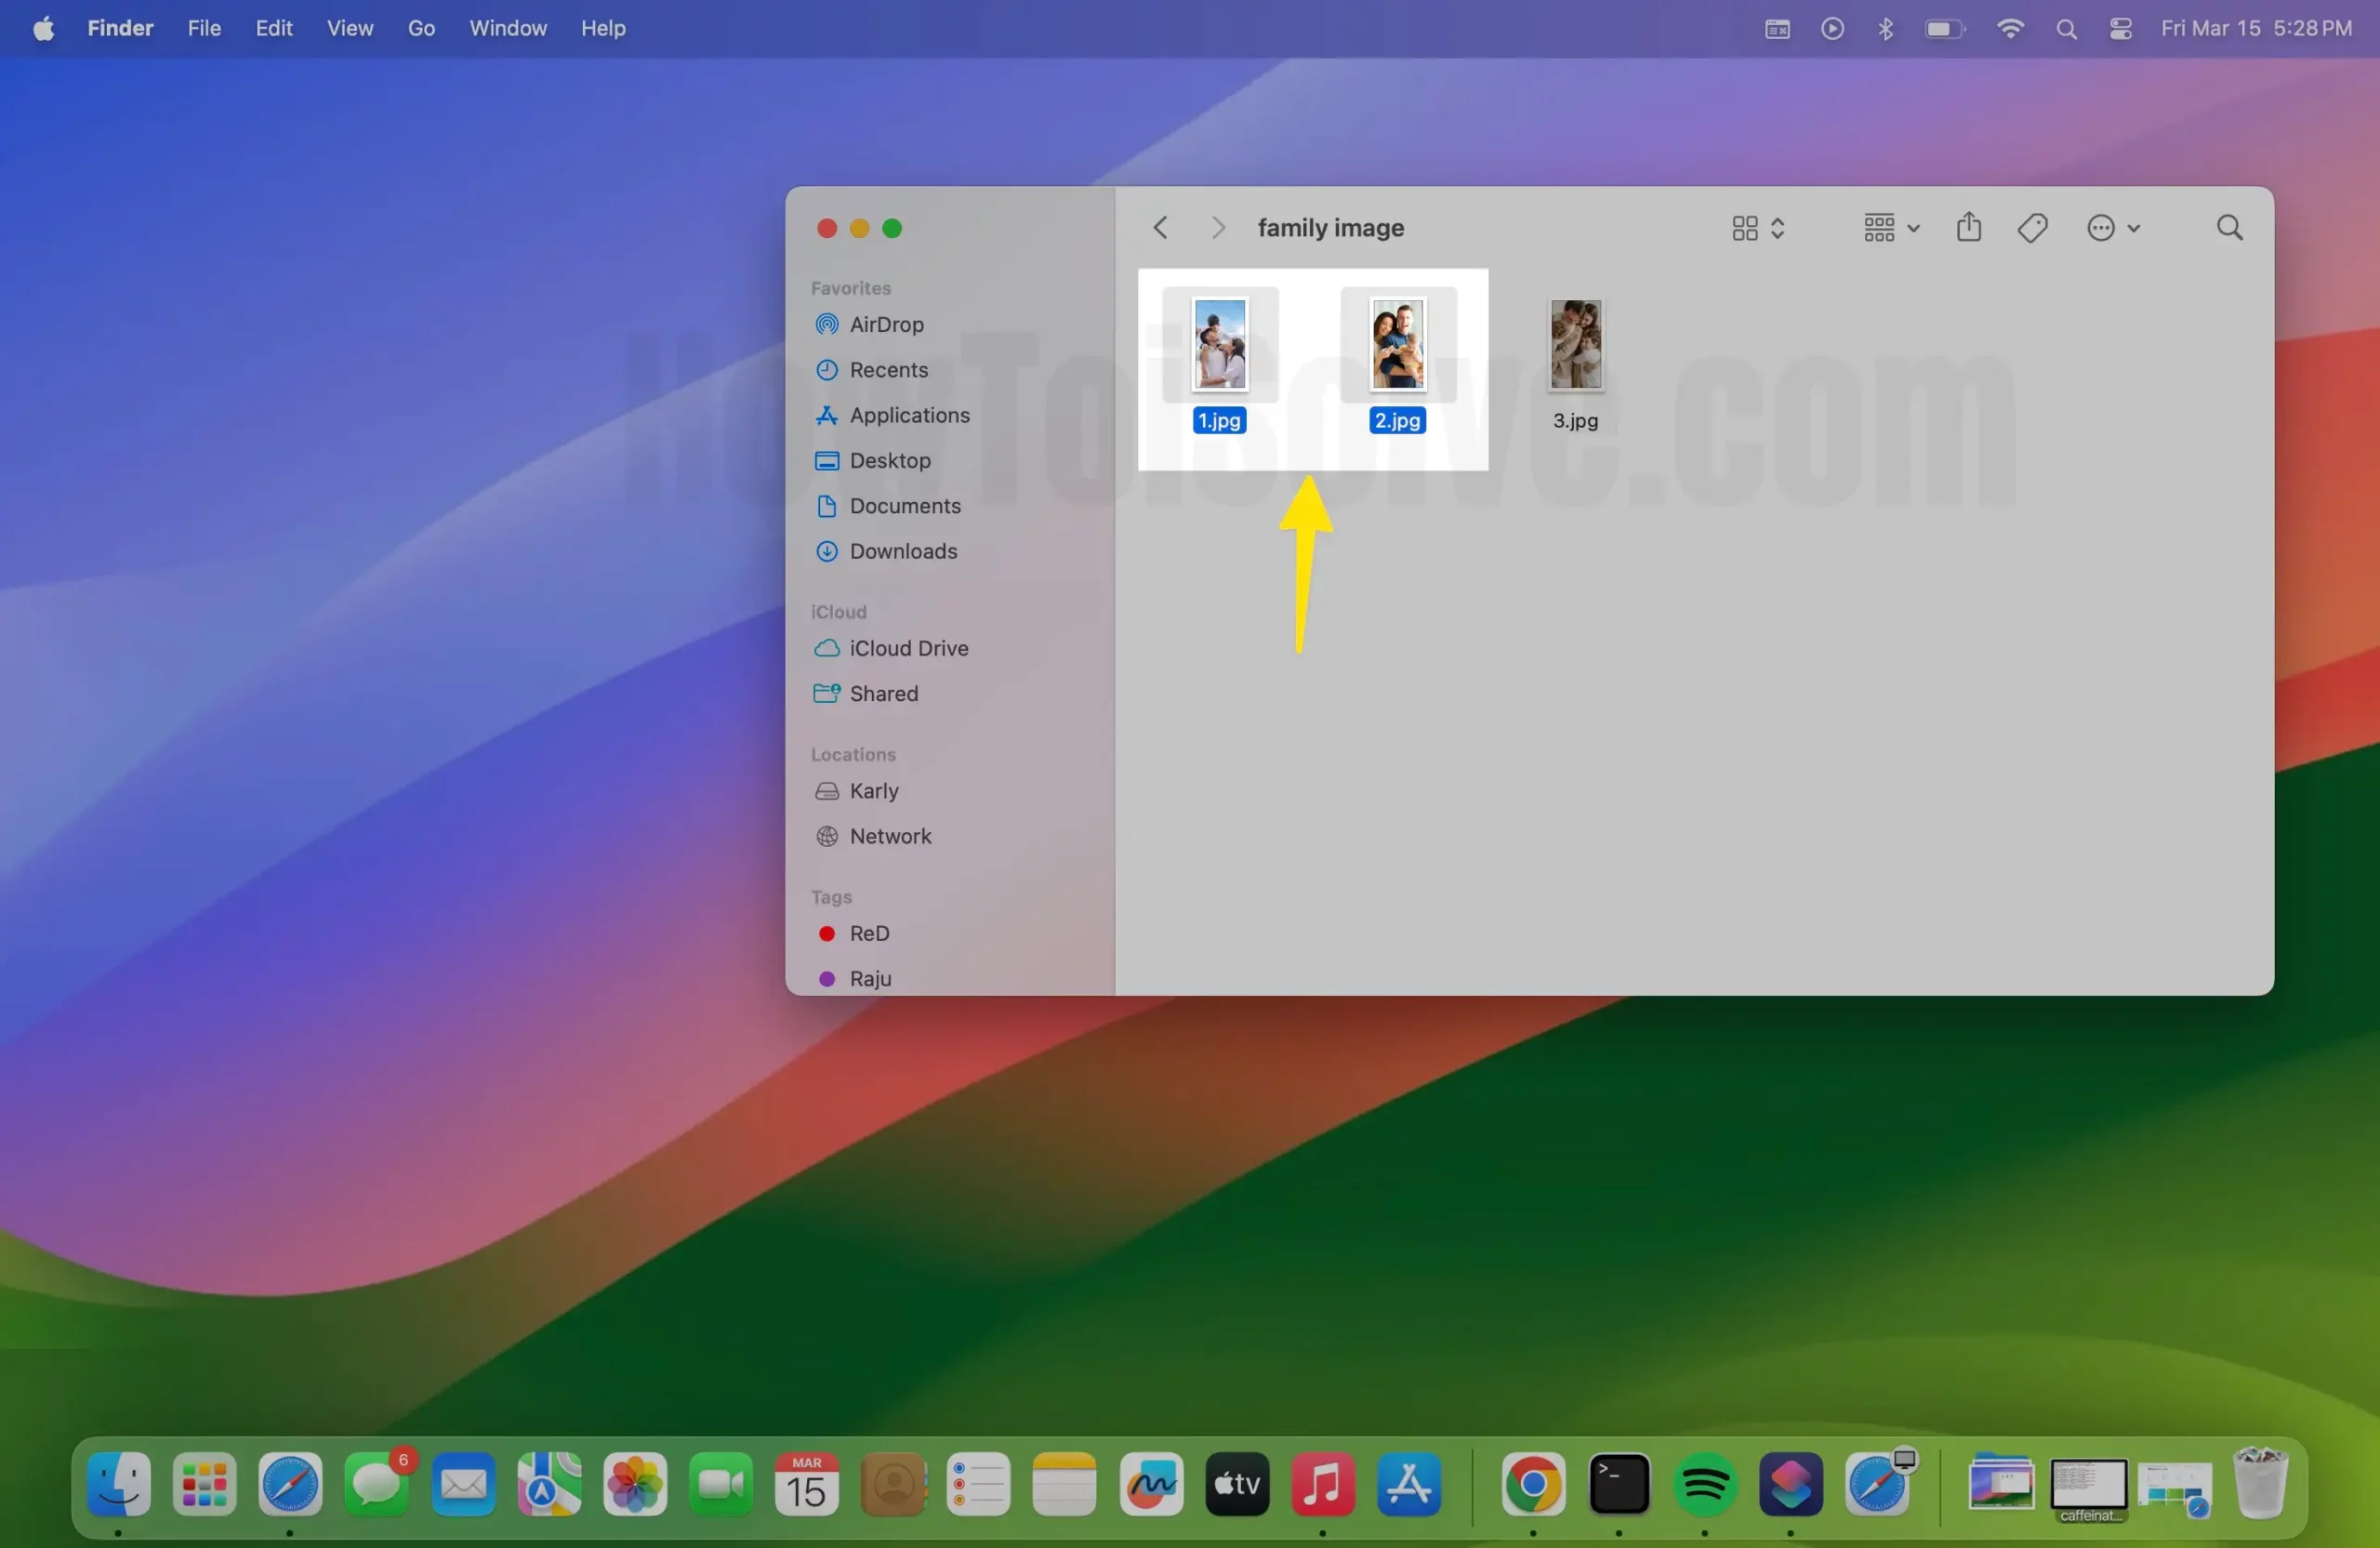
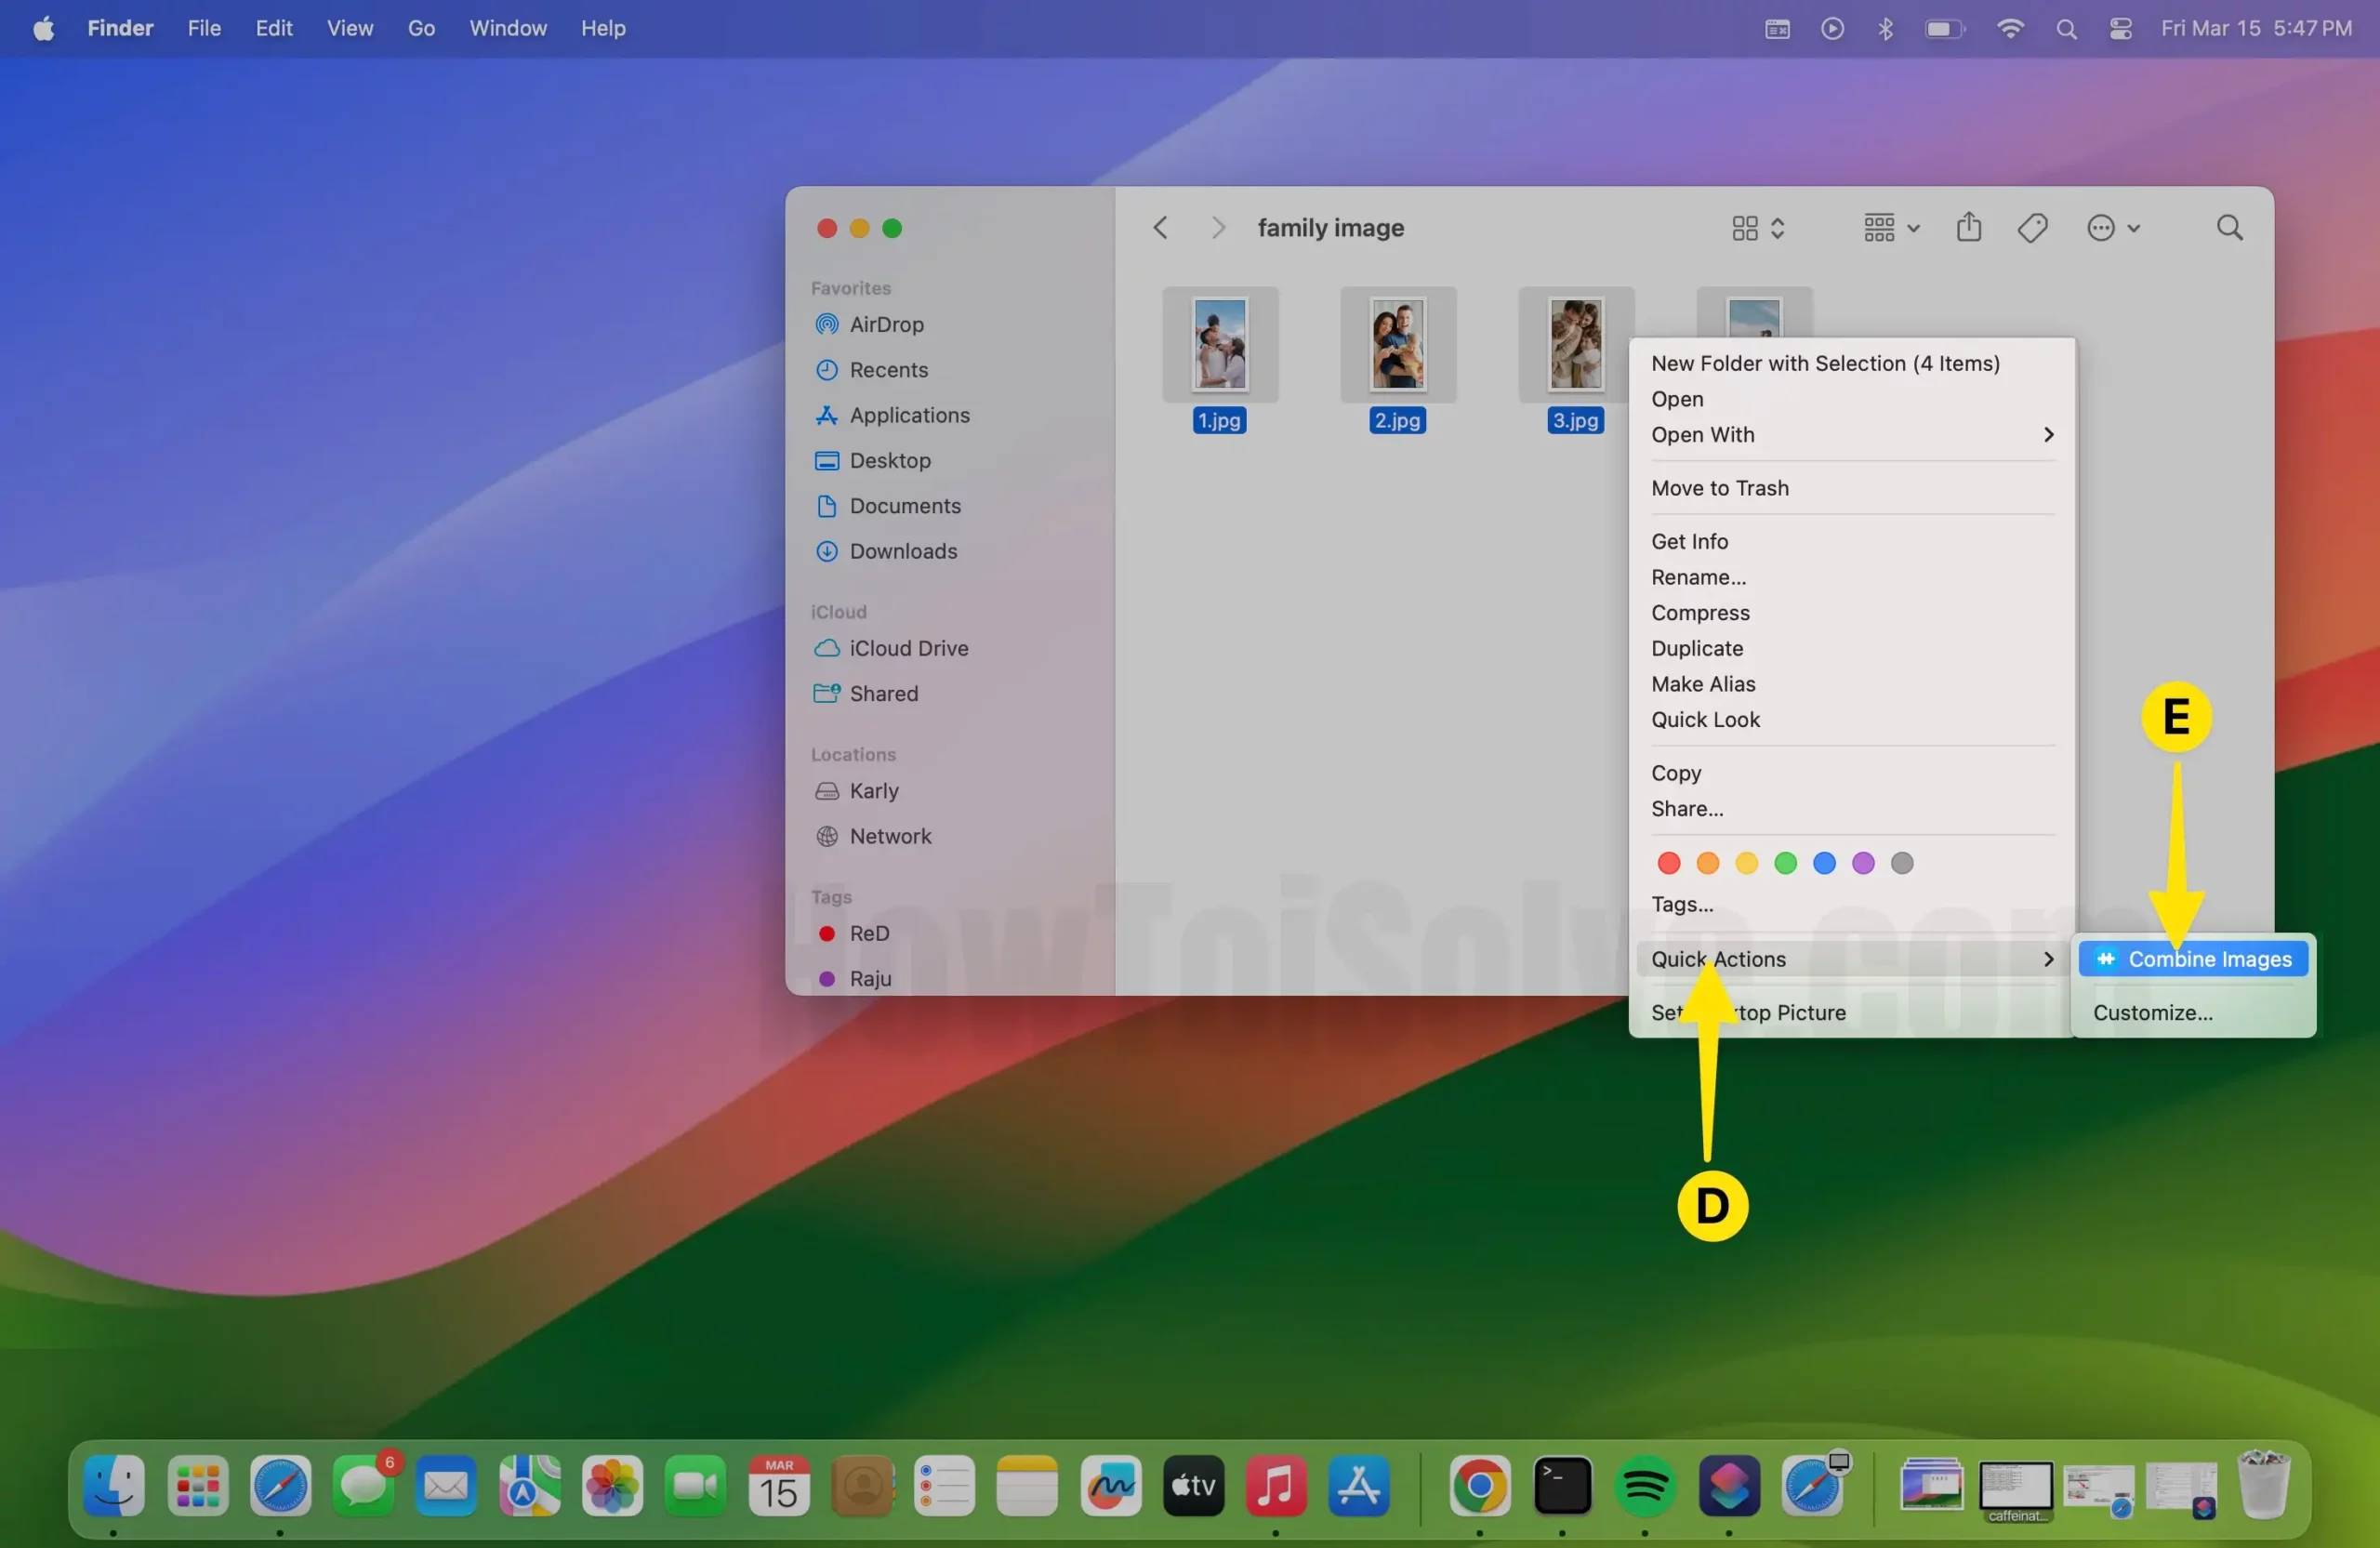
- Right-click on the selected images > Click on the Quick actions > Select Combine Images.

- A dialogue box opens on the screen for you where you need to select whether to combine the chosen images in chronological order or reverse chronological order. Choose Chronological Order > Select Done.

- Once you select either of the options, the shortcut will ask for spacing sizes. Enter the Image Spacing Size > Then, Click Done.

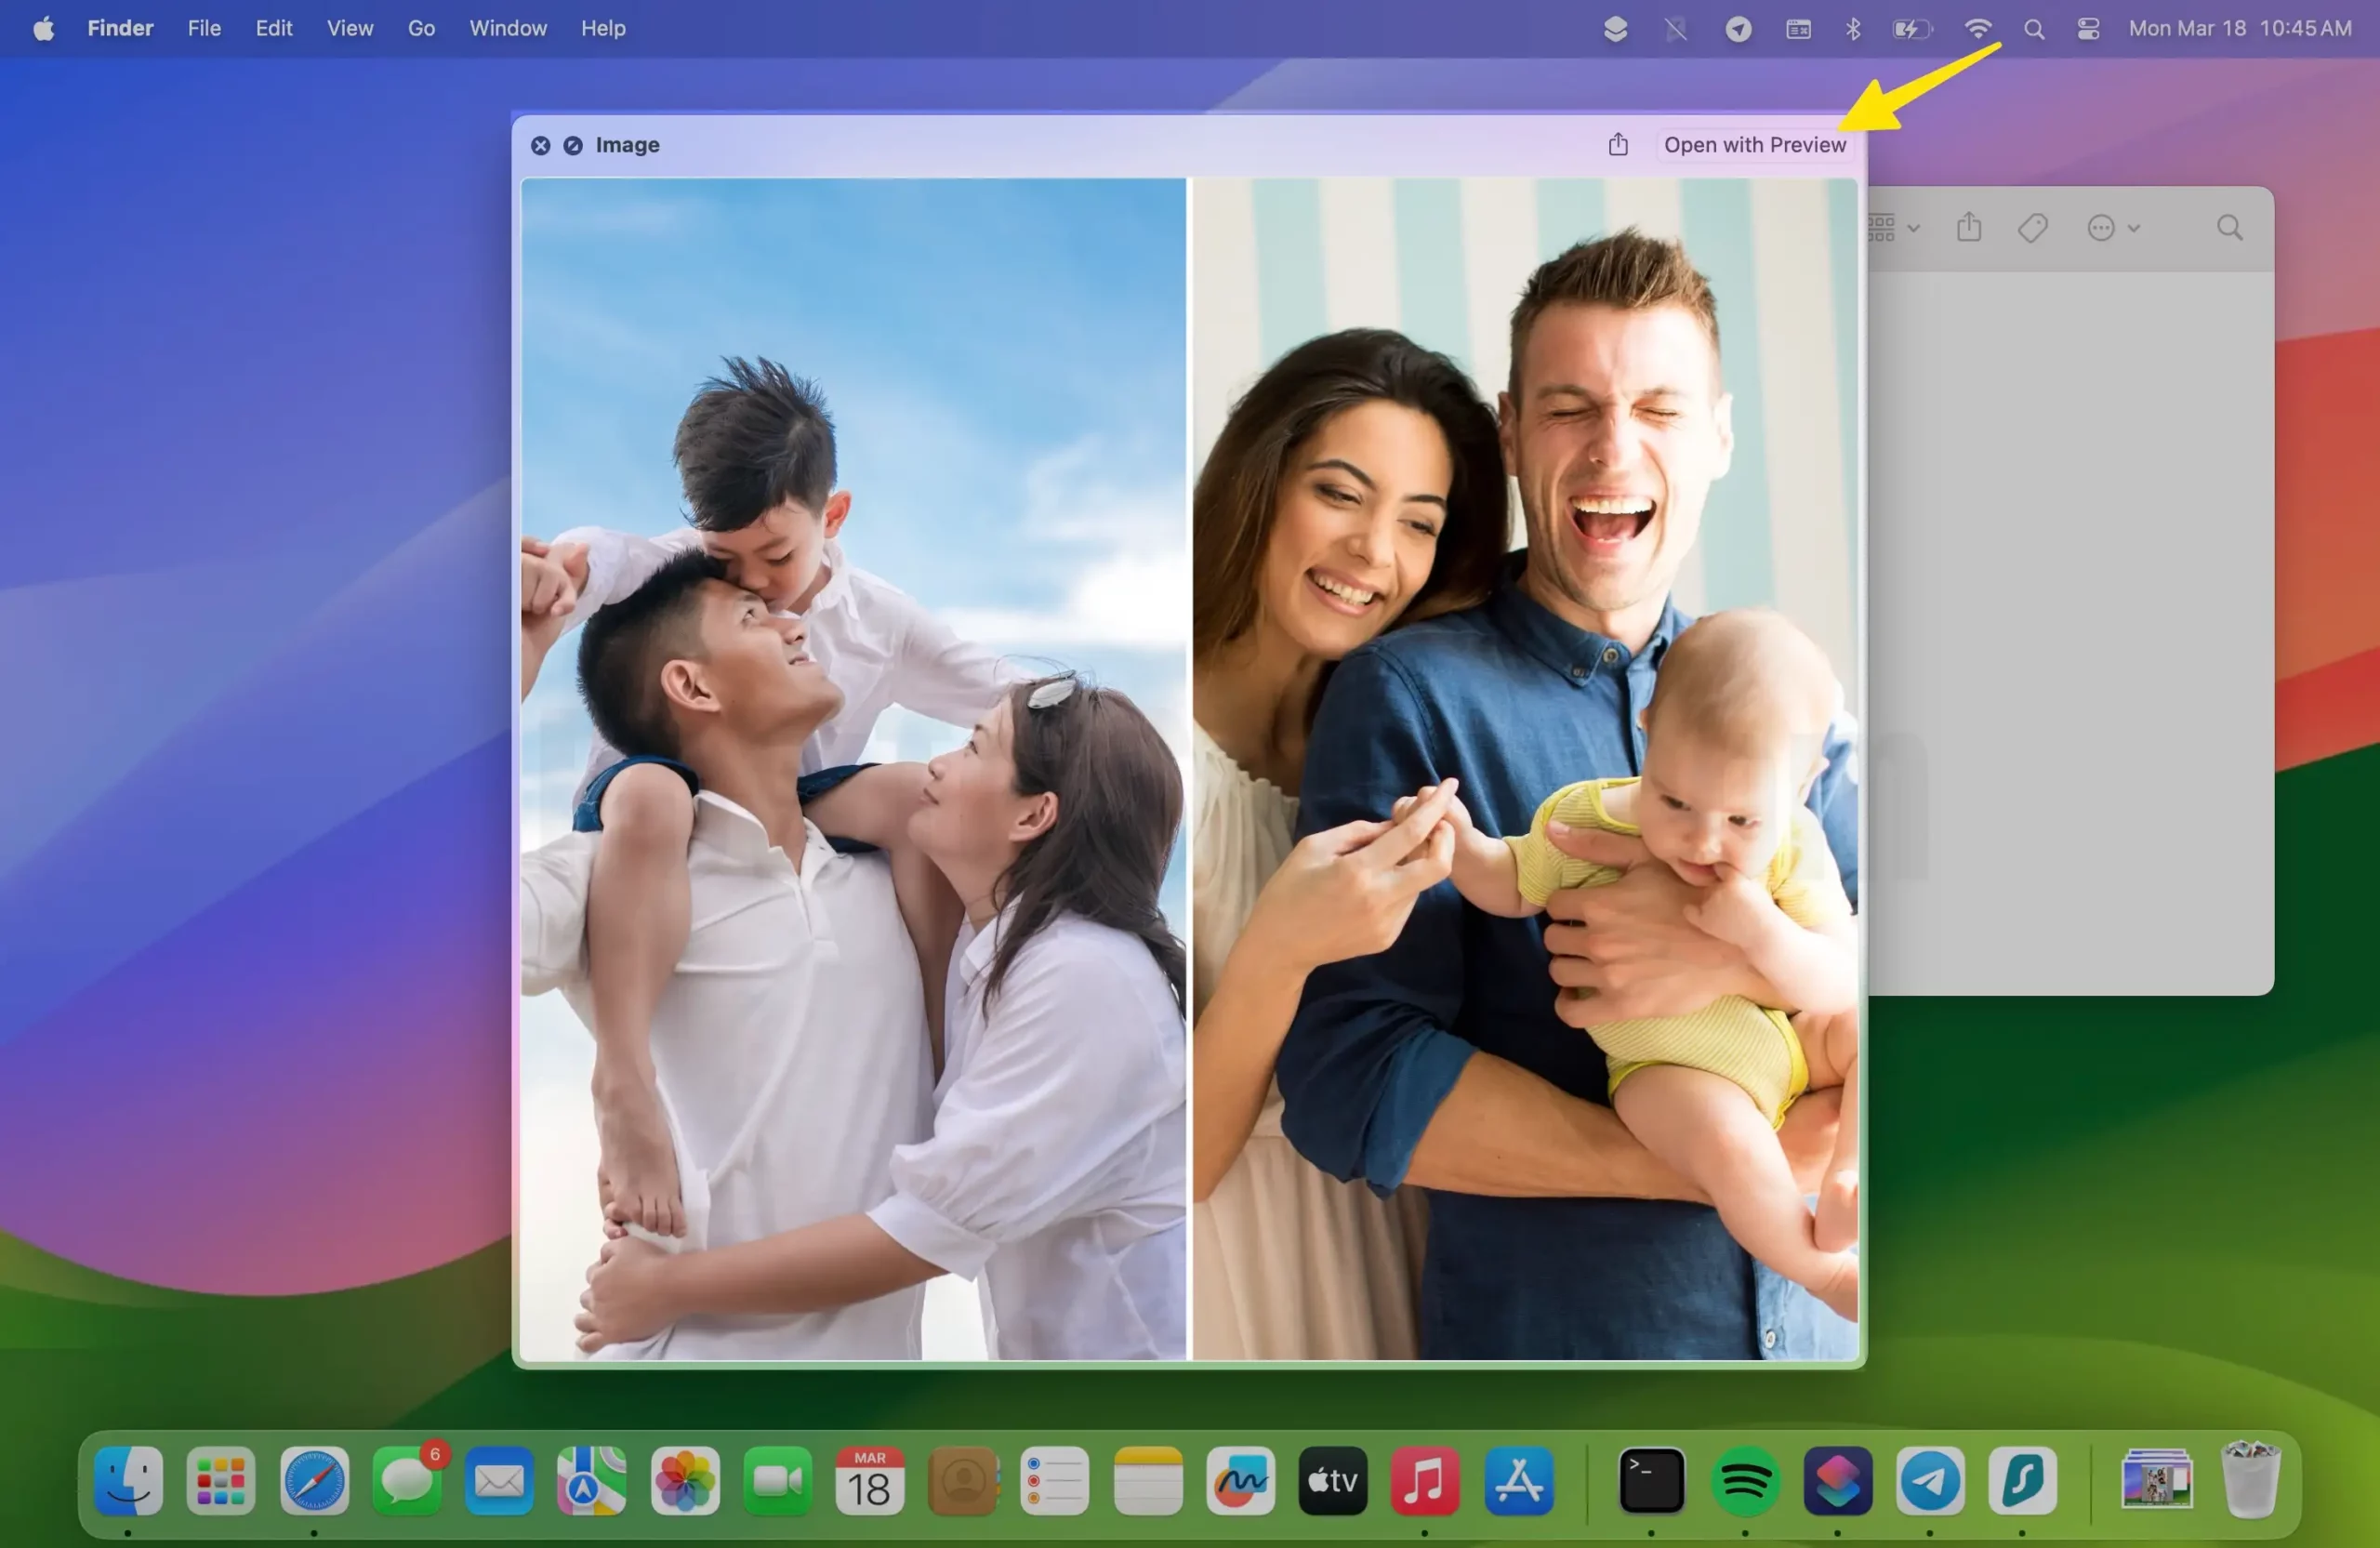
- There are three options in the menu. For instance, if you have Selected two images, then you can Choose to Combine Images Horizontally on Mac. This will automatically merge and adjust your images to fit side by side with each other > Next, Click Done to apply the changes.

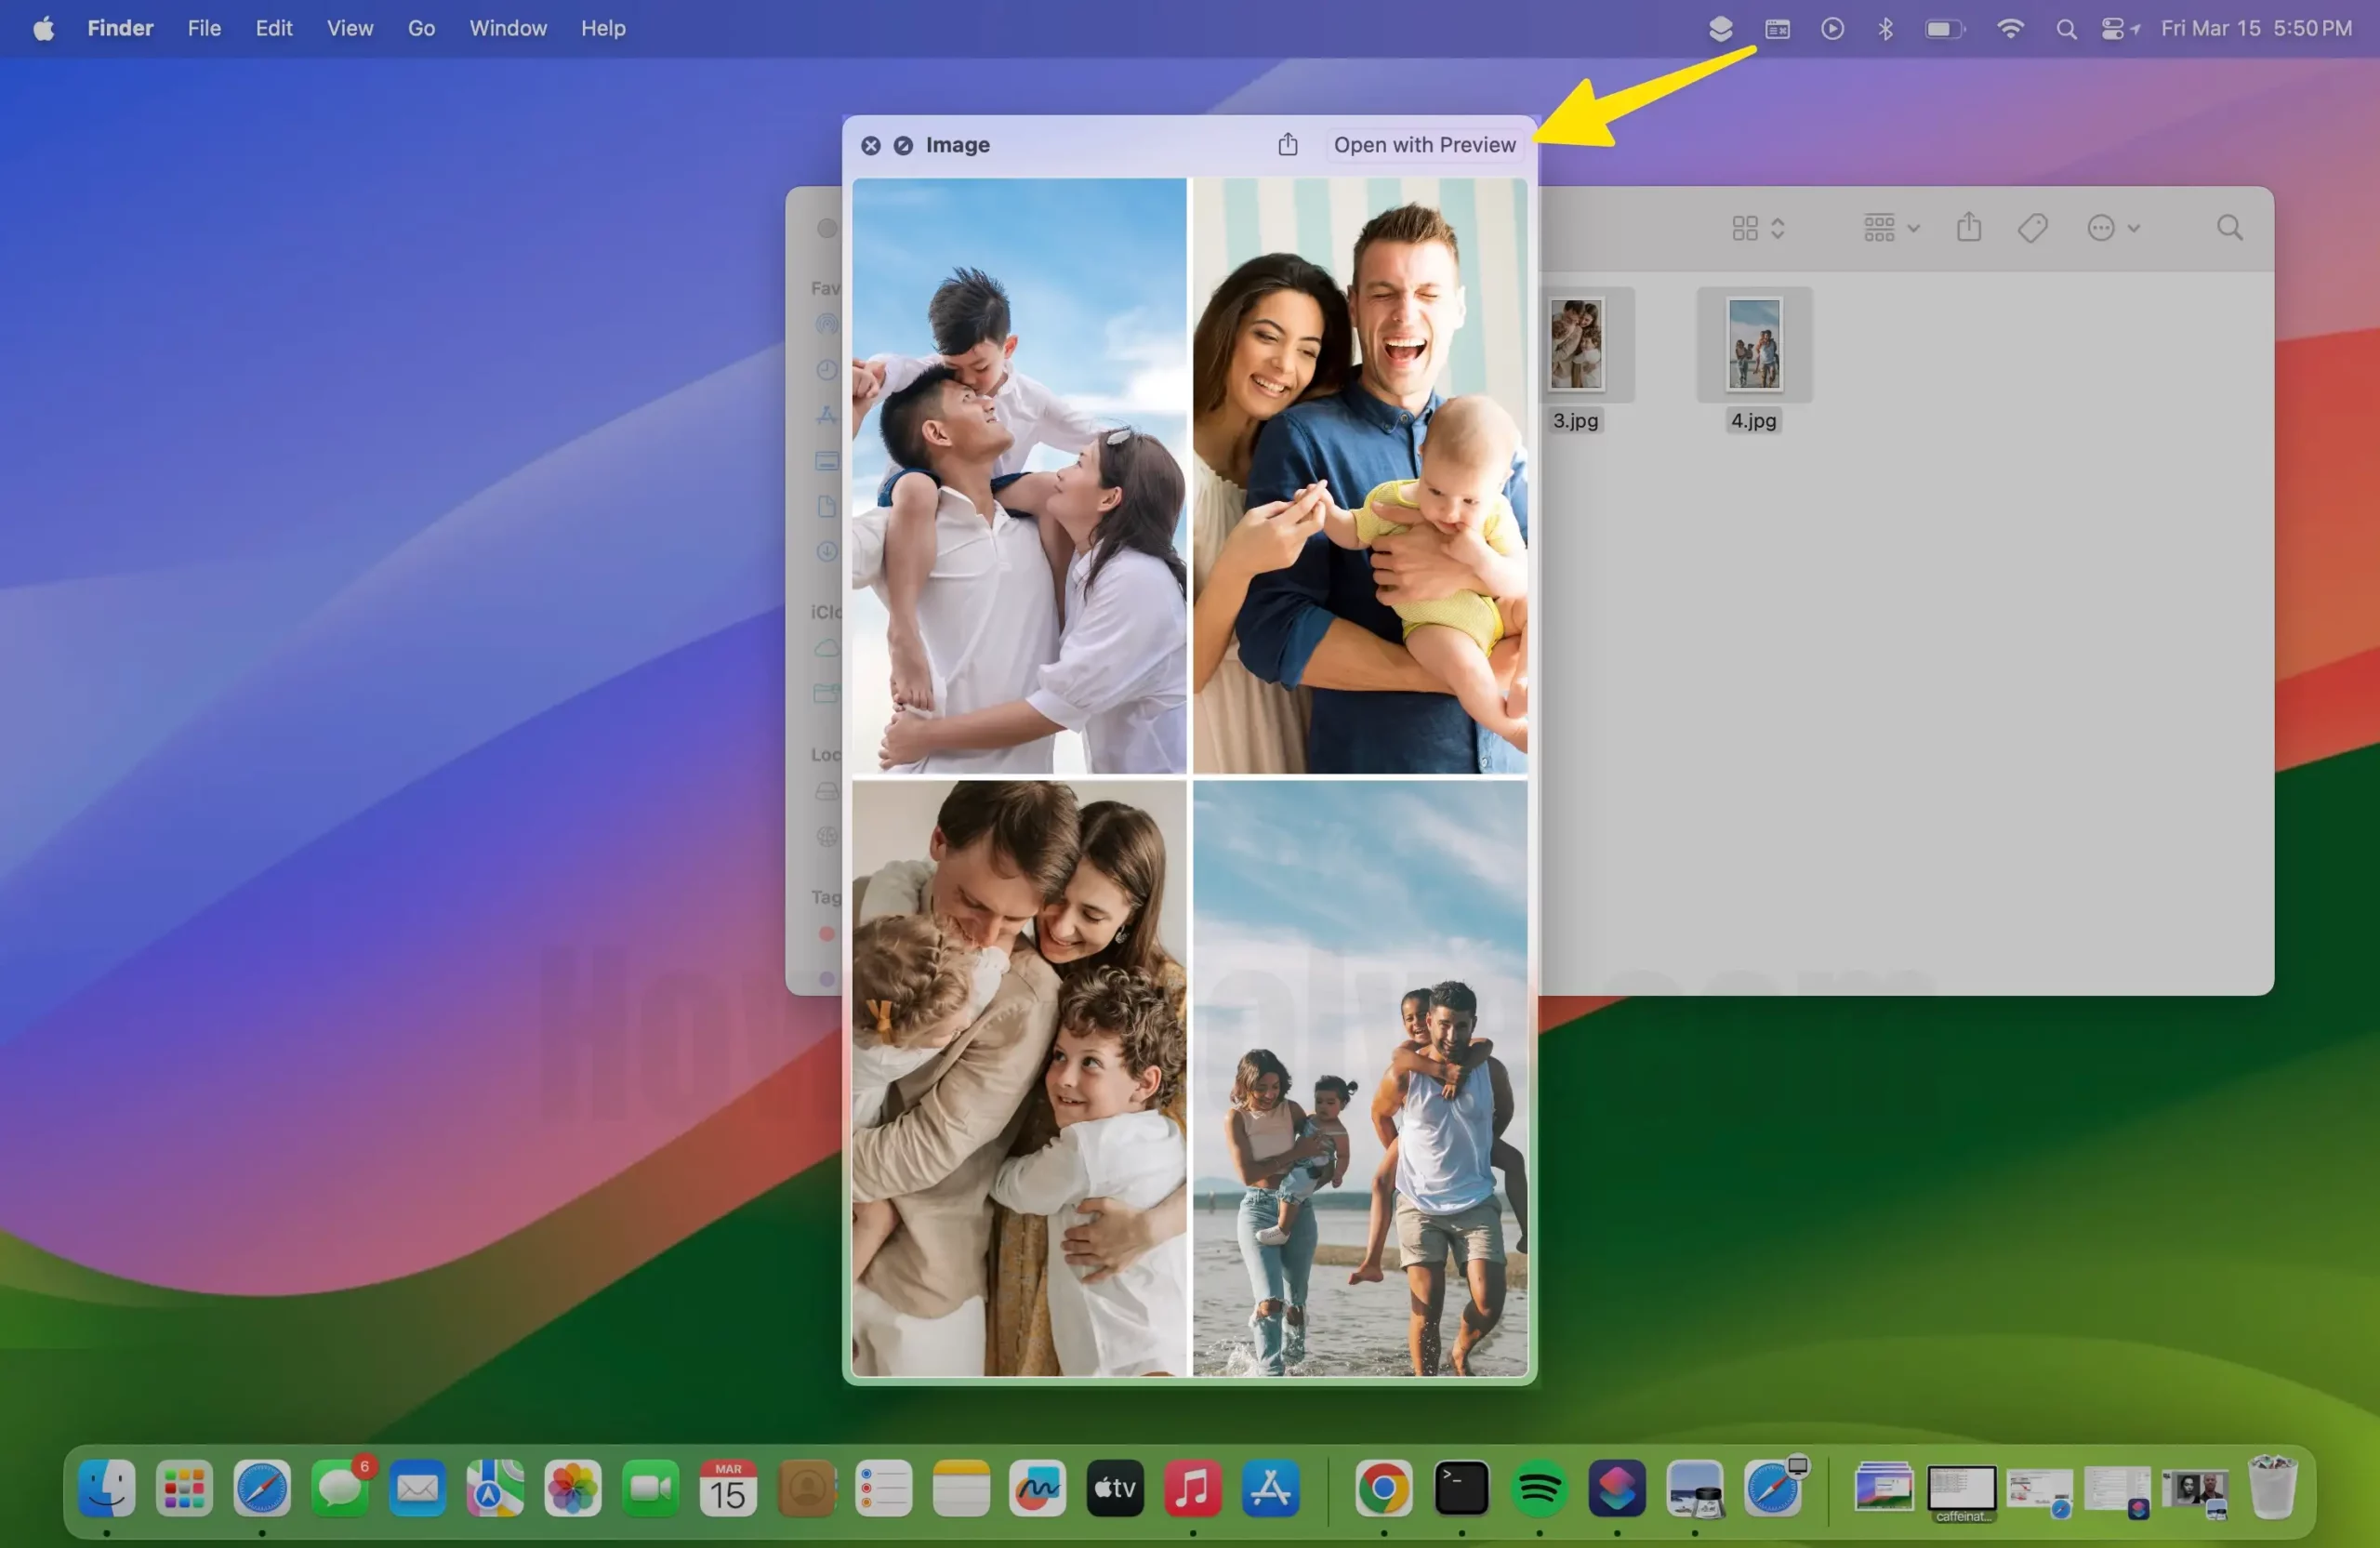
- As a result, you will have your combined image on the screen. If need to Edit then Click on Open With Preview.
How to Make Collage Photo on Mac
Without any third-party app or software, use Apple’s shortcut app and convert multiple photos into a grid using this shortcut app. Follow the below steps,
- Launch the Finder on your Mac > Select the Download Folder > Choose the Folder Where you can Select the images.

- Now, Select the 3 to 4 Photos from the finder.
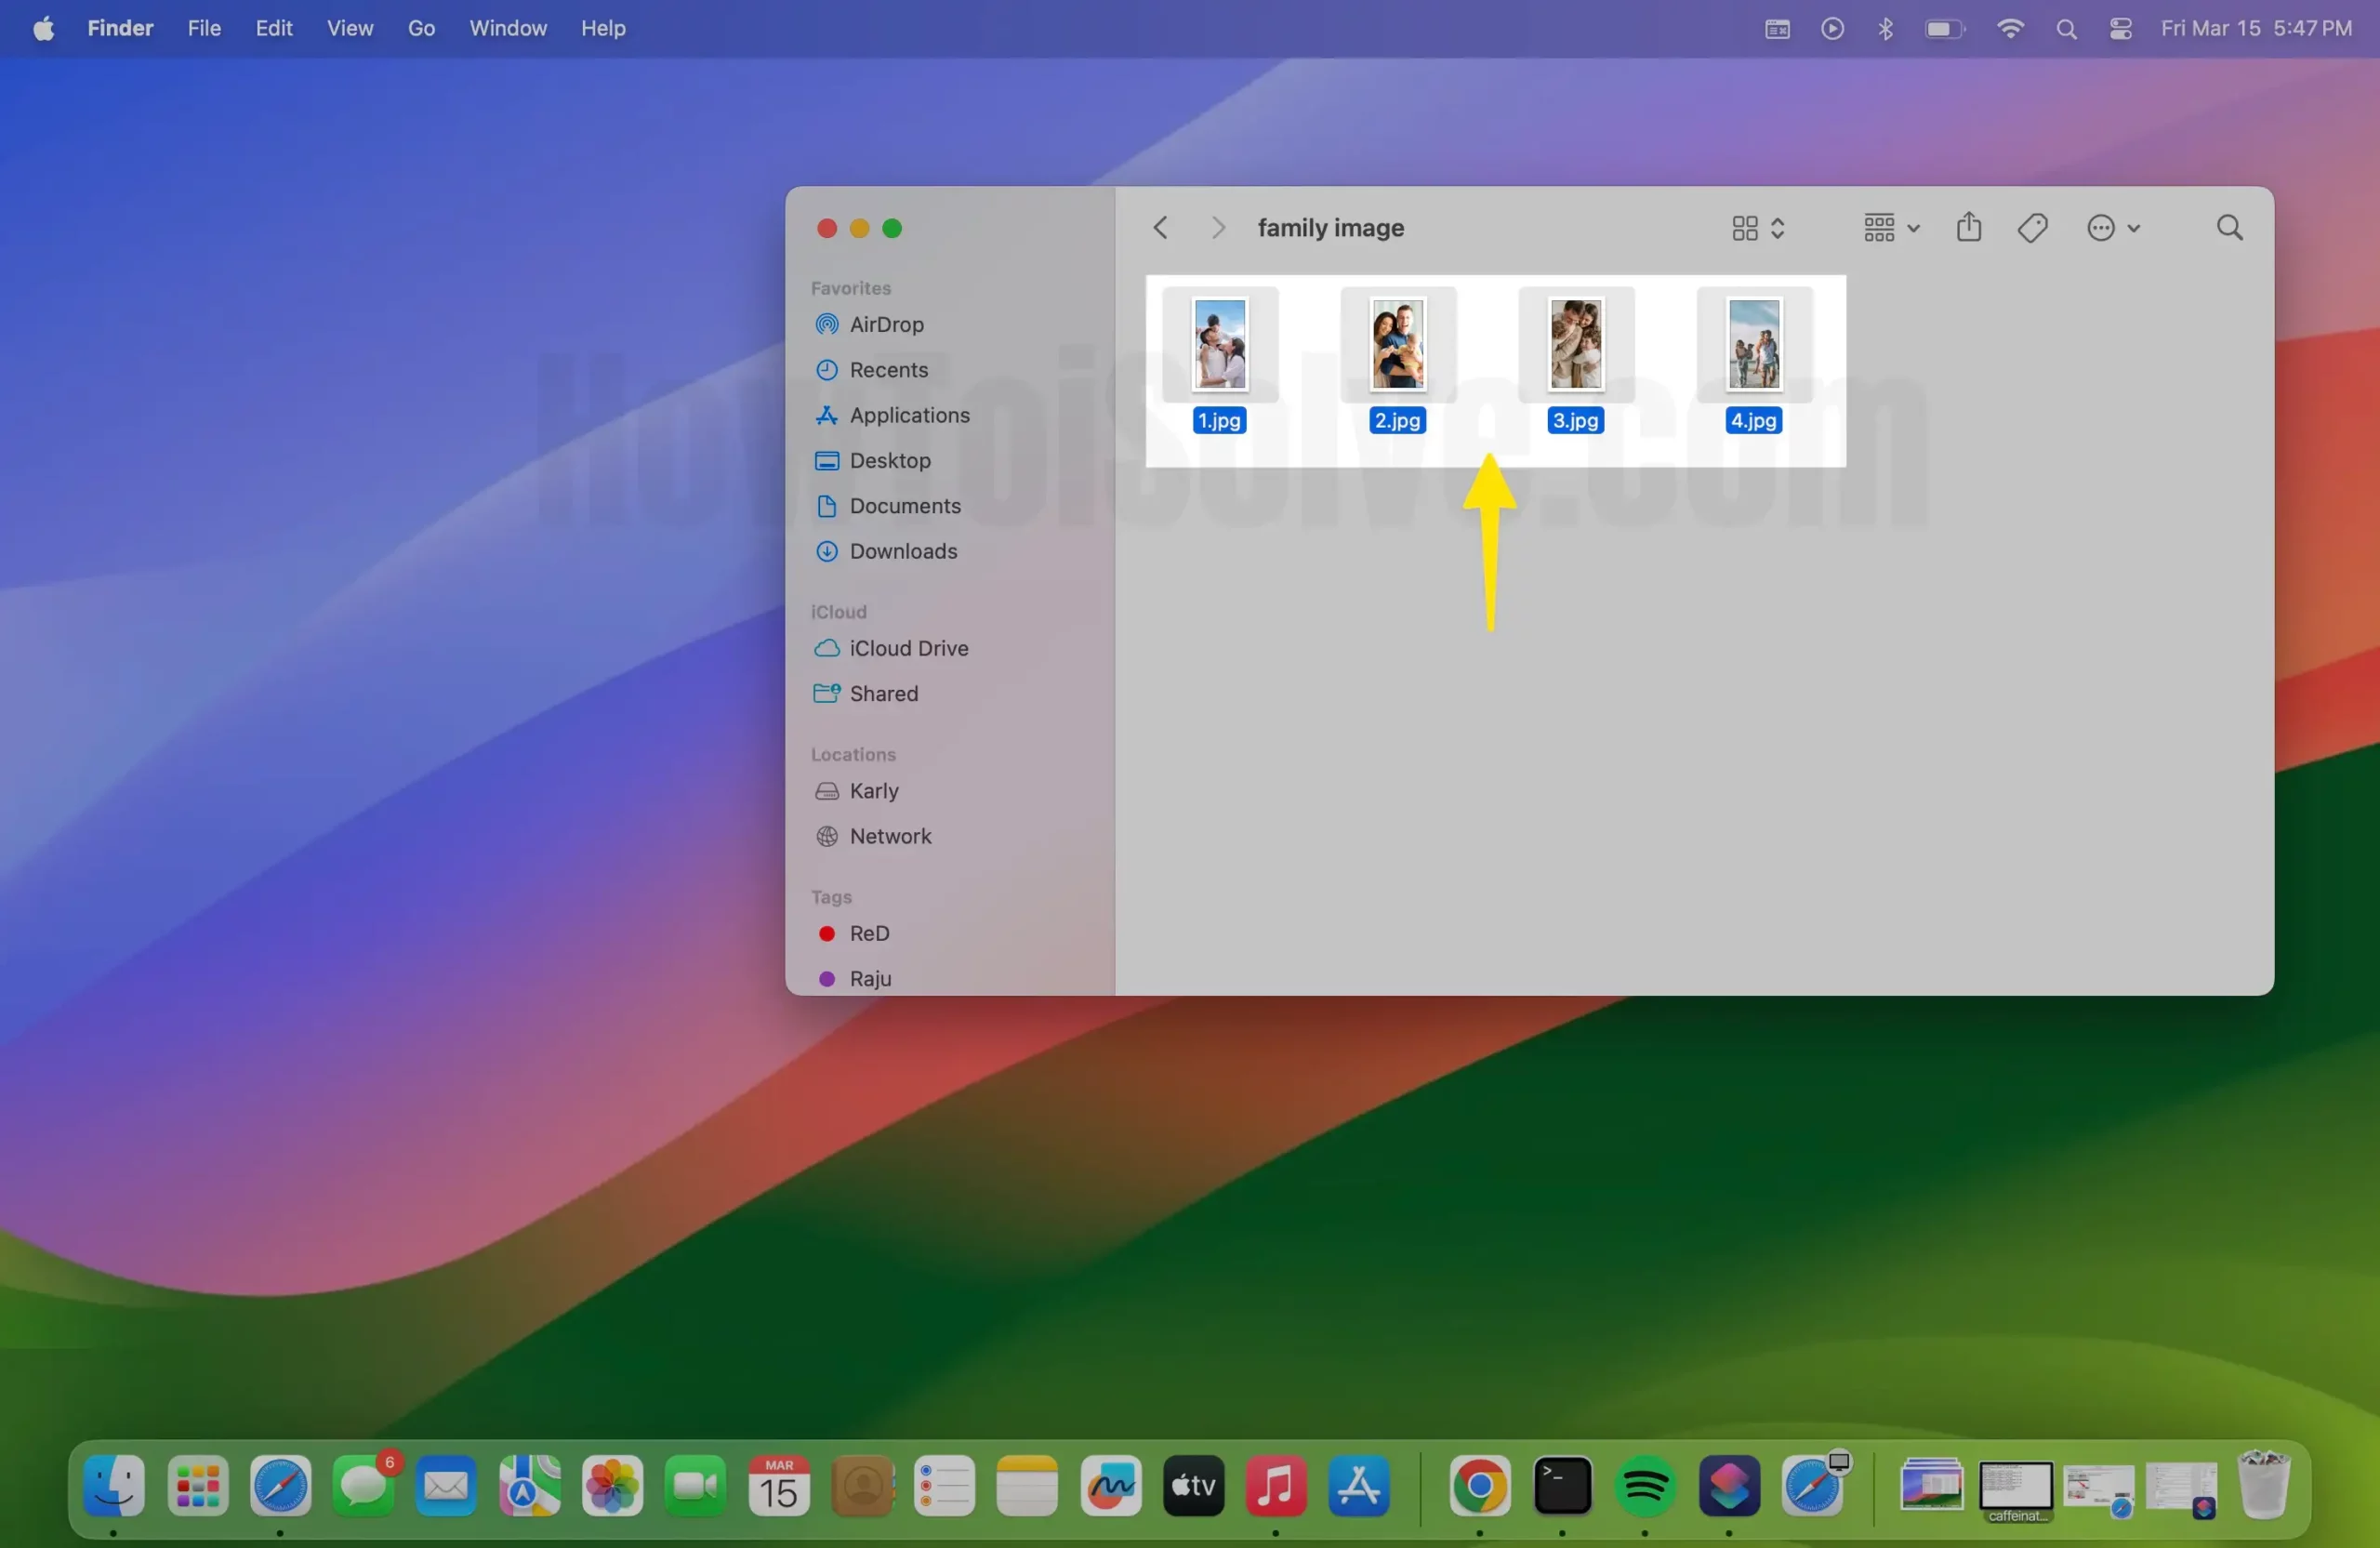
- Right-Click on the selected images > Click on Quick Actions > Select the Combine images.
- Choose Chronological Order > Select Done.

- Next, Enter the Image Spacing Size > Select Done.

- Choose the Combine Images in a Grid option to Convert those photos into Grid > Click Done to apply the changes.

- As a result, you will have your combined image on the screen. That’s it. if need to Edit then Click on Open With Preview.
Video Tutorial:-
Moreover, after combining the images, you can select the open with Preview option and start editing the same right away if you wish to edit the photo further. This simple shortcut helps save time while editing images on Mac. Like, such as adding Objects, Typing a Text, and more. Hopefully, this helps!
