
If you don’t have a lot of patience, it’s best to steer clear of beta updates. iOS and macOS betas are packed with bugs, crashes, and all kinds of glitches. The iOS 26 beta is no exception. If you’ve already tried it out and decided you’d rather wait for the stable version, rolling back to iOS 18 is definitely a smart move.
Now, officially, downgrading from the iOS 26 beta is pretty restricted. But there’s a way around it — you can restore your iPhone in recovery mode to get back to the latest public iOS. Just make sure you back up your data first, because this process will completely wipe your device.
How to Rollback to iOS Public from iOS Beta Version Using Finder on Mac

Method 1: How to Downgrade iOS Beta to Public Final Version on iPhone
- Let’s connect the iPhone to the Mac using a Lightning cable.
- Now launch Finder. (Finder for macOS Catalina users) If you’re running macOS Mojave or earlier and a Windows PC, then open iTunes.
- Keep the iPhone connected to your Mac or PC.
- Now, put the iPhone into recovery mode. Here are the steps.
- For iPhone 8 or later:
- Press and quickly release the Volume Up button.
- Press and quickly release the Volume Down button.
- Press and hold the Power button until the Recovery screen appears on the iPhone. It will look like a cable pointing to the PC.
- For iPhone 7 & iPhone 7 Plus:
- Press and hold the Volume Down button and the Side button, and release them when the Apple Recovery screen appears. Learn more in by step-by-step guide: Put iPhone 7 in Recovery mode
- For iPhone 6S or earlier:
- Press and hold the Home button and the Sleep/Wake button, and release them when the recovery mode screen appears.
- If a pop-up asks you to Restore or Update, click Restore.
- Alternatively, find the iPhone on the iTunes screen and then select Restore.
- It will take a few minutes to restore the latest iOS version.
Once the restore process completes, set up the iPhone as new.
Method 2: How to Downgrade iOS Beta to iOS Final without Losing Data
This method can delete the Messages and Phone Call Logs. However, other than that your iPhone may be stuck in the boot loop. So it’s better to back up the iPhone and proceed further. The following steps will show you how to downgrade iOS 18 beta to iOS 17 as well as when to back up the iPhone.
1→ First of all, download the IPSW File for your iPhone’s Final iOS latest version.
2→ Once the download completes, connect the iPhone to the PC using a Lightning cable.
3→ Then for macOS Catalina or later, launch the Finder, and for Older macOS and Windows PC, open iTunes.
4→ Select the iPhone from the sidebar.
5→ For the precautions, we will recommend you take the latest backup of the iPhone, and tap Back Up Now.
6→ So if anything goes, wrong, factory resetting the iPhone is the only option, and later you can use the latest iTunes backup to restore the data.
7→ Wait until the backup is completed, then move to the next step.
8→ Press the Option key and click on the Check for Update if you have Mac, and for Windows PC, Press the Option + Click the “Check for Update” key.

9→ Select the IPSW File for the iOS’s latest version.

Then, a prompt will ask you to update. Click Update.
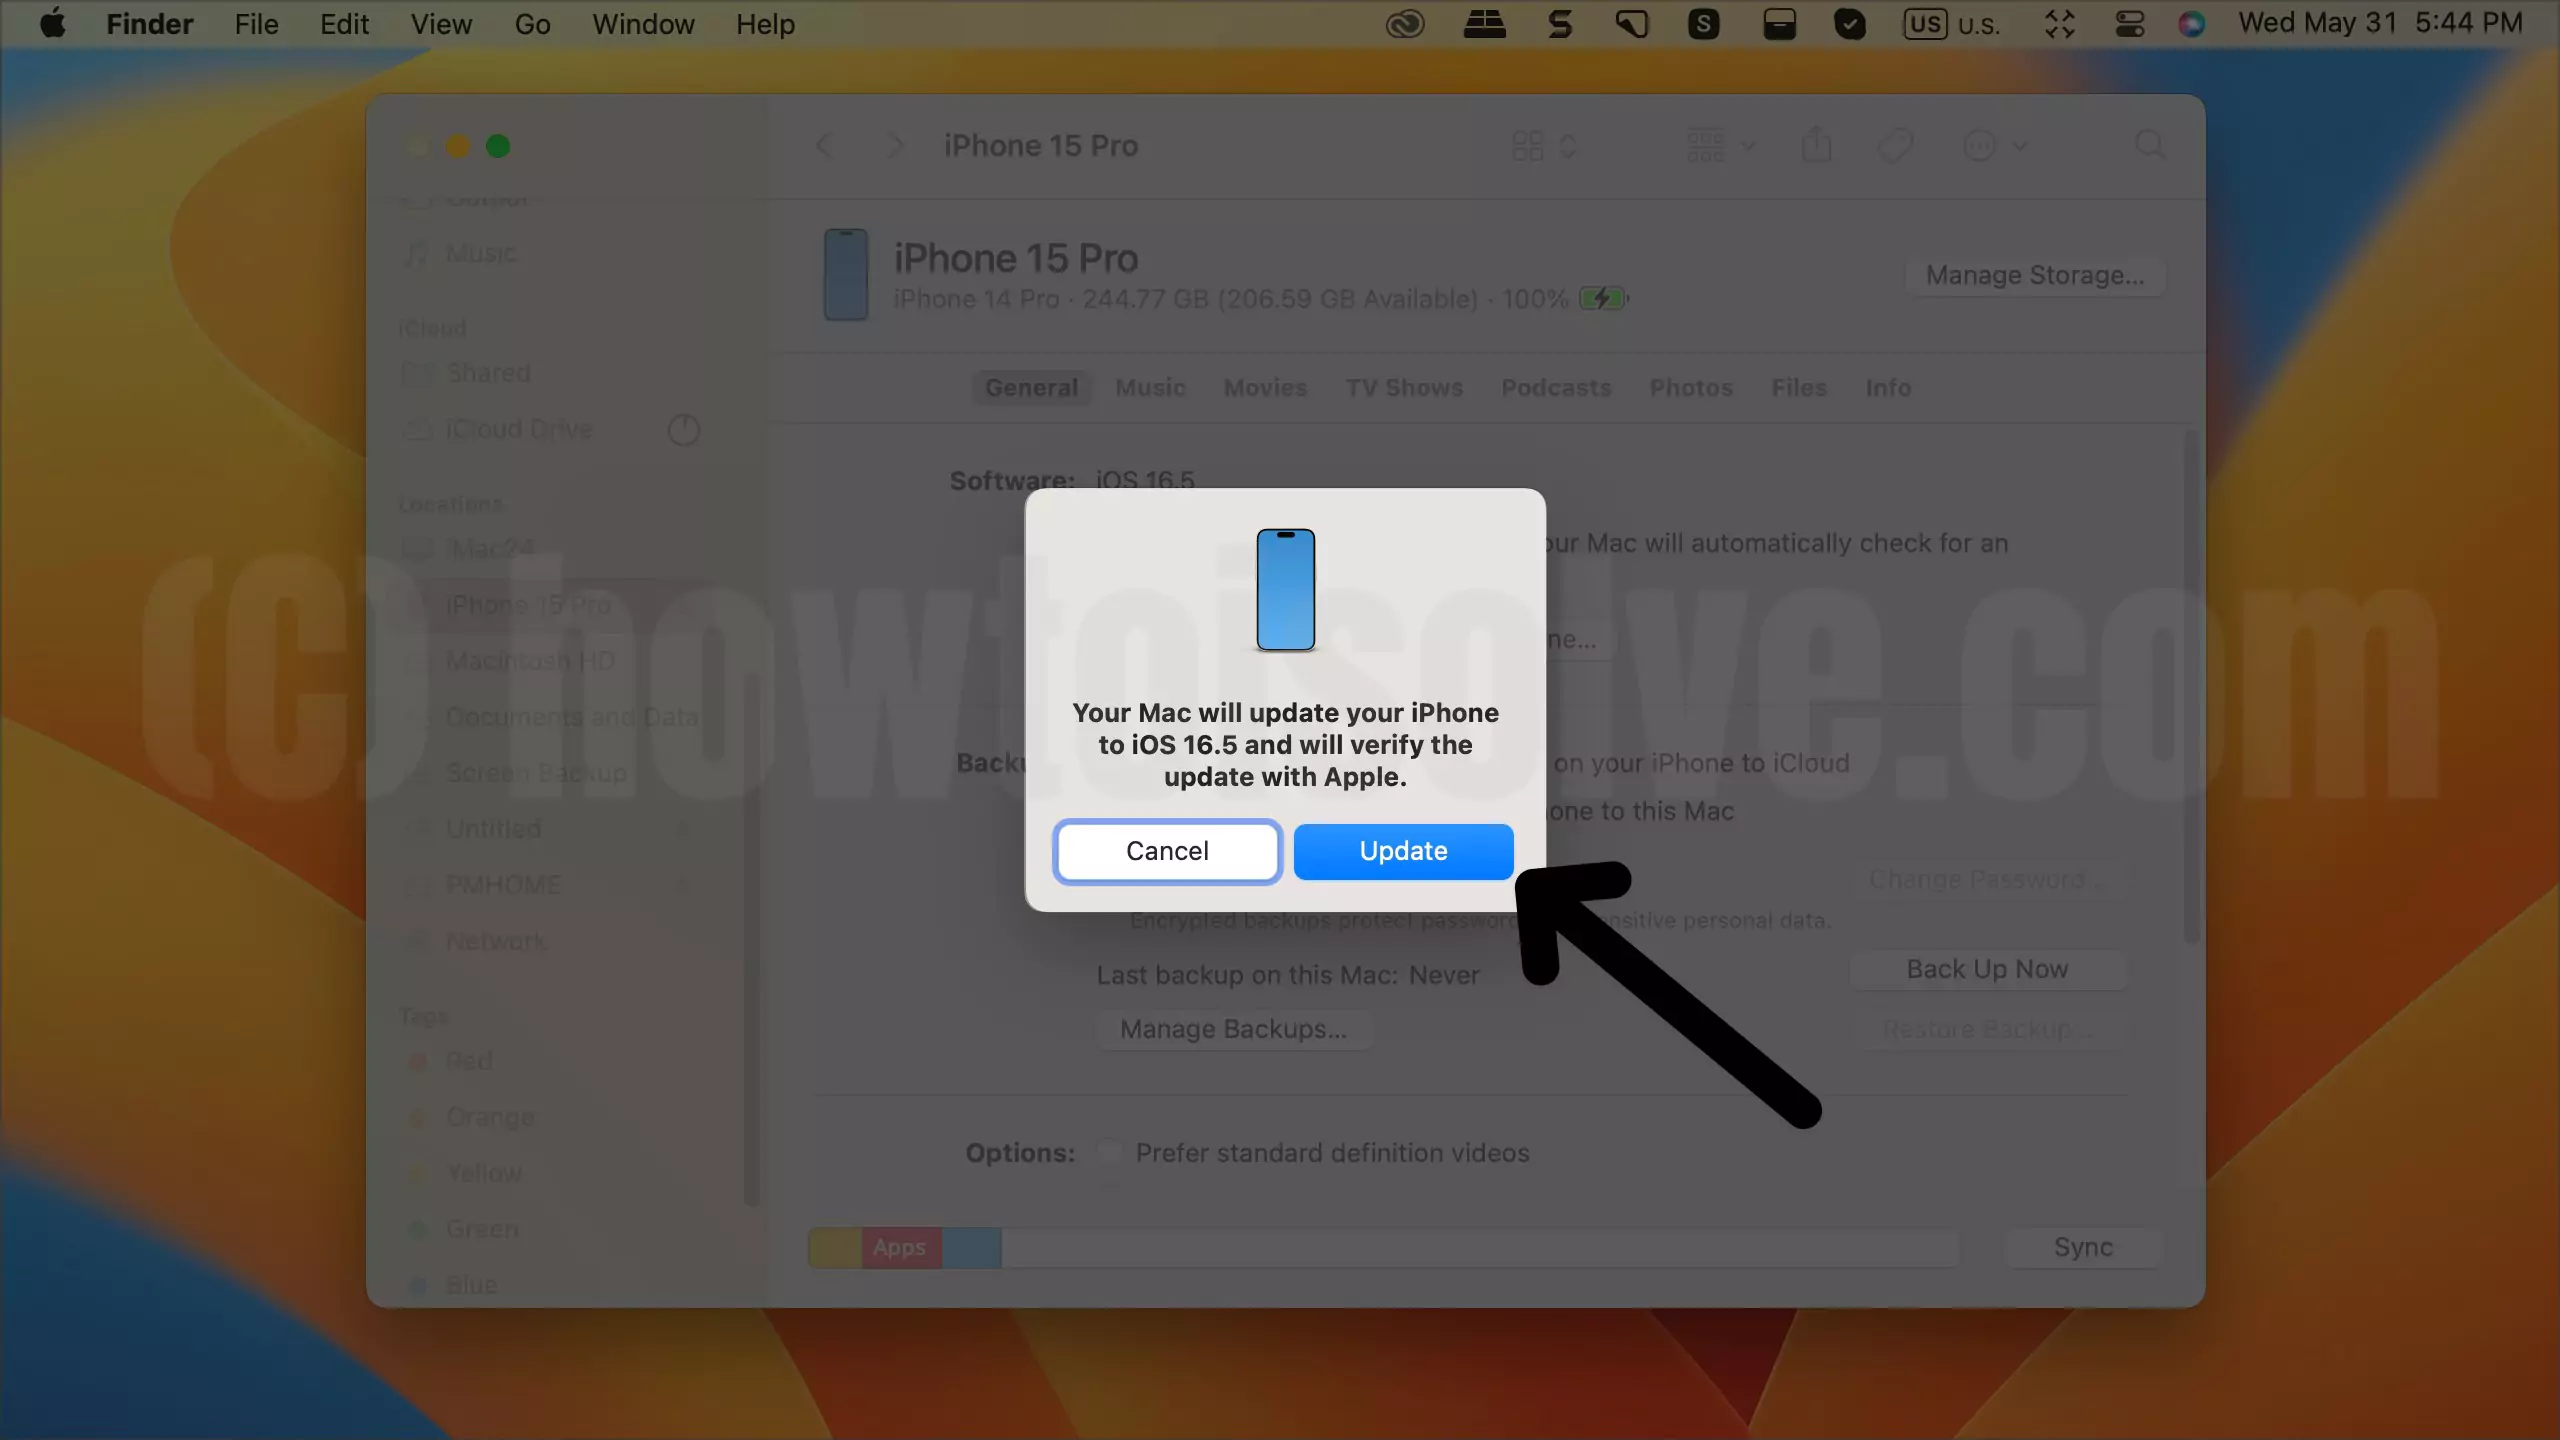
This may take 15-20 minutes.
Now set up the iPhone as new.
How to Downgrade iOS beta to iOS Public With Clean install
In this process, your iPhone/iPad will erase all the data from iPhone/iPad and install Public iOS/iPadOS on iPhone/iPad, Follow the below steps,
Disable Find My iPhone First
To restore the older iOS version, you have to turn off the Find My iPhone feature first and then only iPhone will let you downgrade the iOS.
- Go to the Settings
- Tap on your name.
- Select Find My.
- Then open Find My iPhone.
- Disable Find My iPhone.
- Enter the Apple ID Password and confirm the action.


