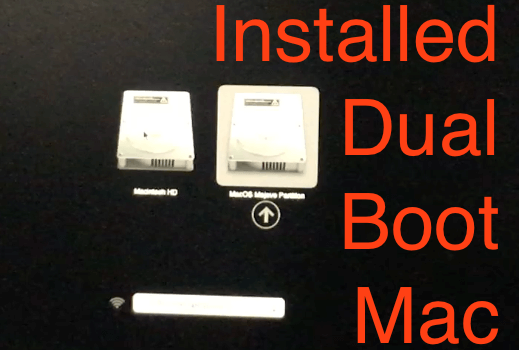
You can create a Dual boot Mac to run multiple operating systems independently. Allowing to use different software and applications that aren’t compatible with all OS. Besides this, you might have recently switched from Windows to Mac and want to continue with old projects on Windows. Luckily, dual boot macOS is a straightforward procedure. To get familiar with it, follow our guide.
- Create a new partition to install earlier macOS.
- Download macOS from app store.
- Create a macOS bootable drive.
- Install macOS on another partition created on your Mac.
- Switch between two different macOS.
- Setup macOS.
- Now you can use between macOS Mojave and macOS Catalina on your Mac.
Here is the complete video tutorial,
Note: Latest mac models Using Bootcamp (M1 or M2 Apple Silicon chip) Doesn't support Windows, We recommend the Best Virtual Machine Software for Mac.
Part 1: Create a New Partition on a Mac
Since you want to use two different macOS on the same Mac, it is necessary to create a new partition. Creating a new partition on Mac won’t affect the existing partitions and data stored on it. Here’s how to do it,
1→ Launch “Spotlight Search” (command+space) and open “Disk Utility”.
Select the Hard drive from the left panel.
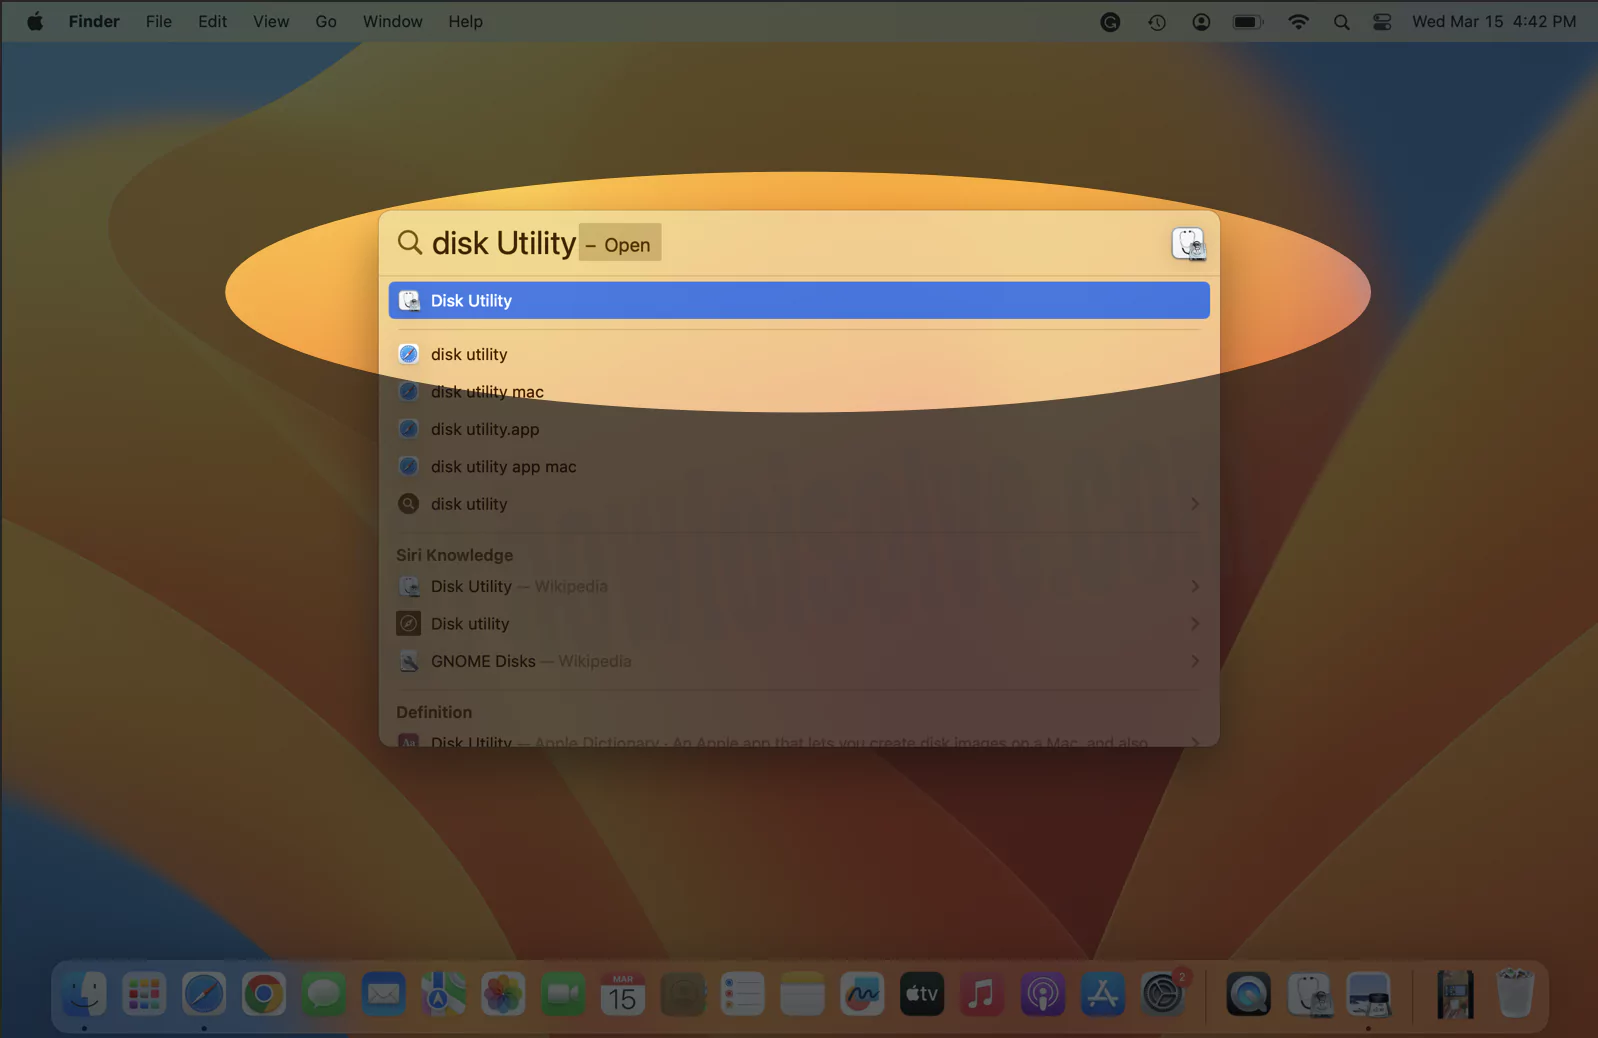
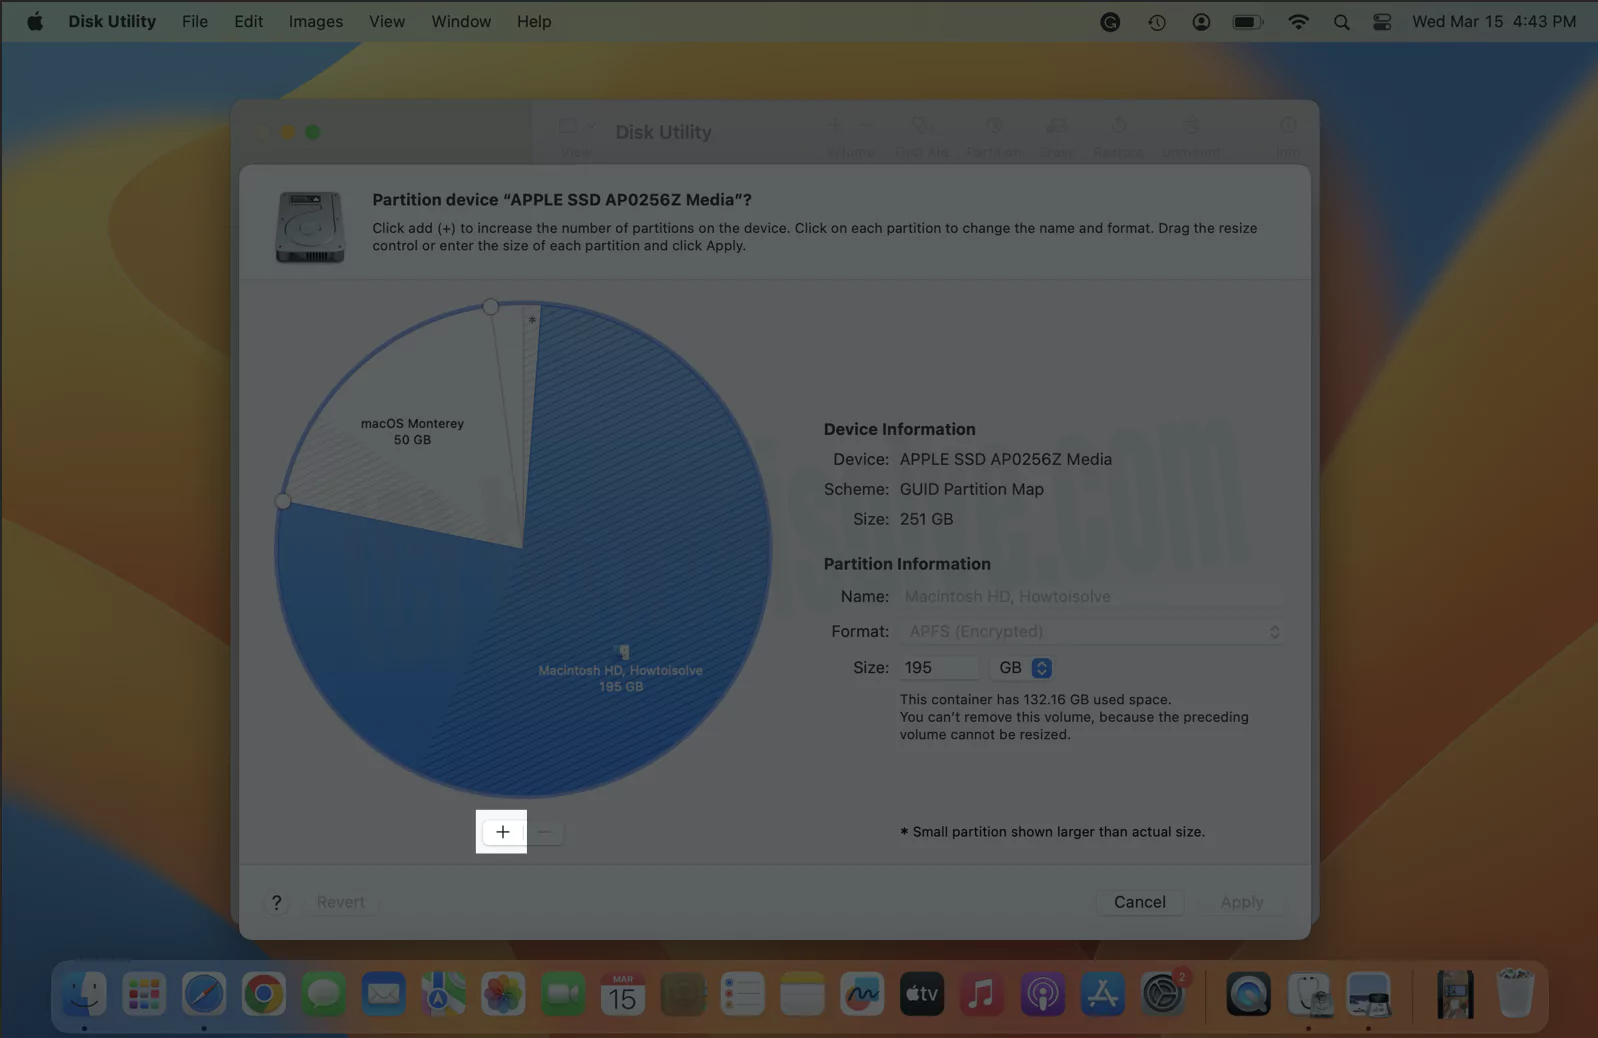
2→ Click “Partition”.

3→ Again click “+”. Name the partition and set the Disk Size of the new partition.
4→ Click on “Apply”.
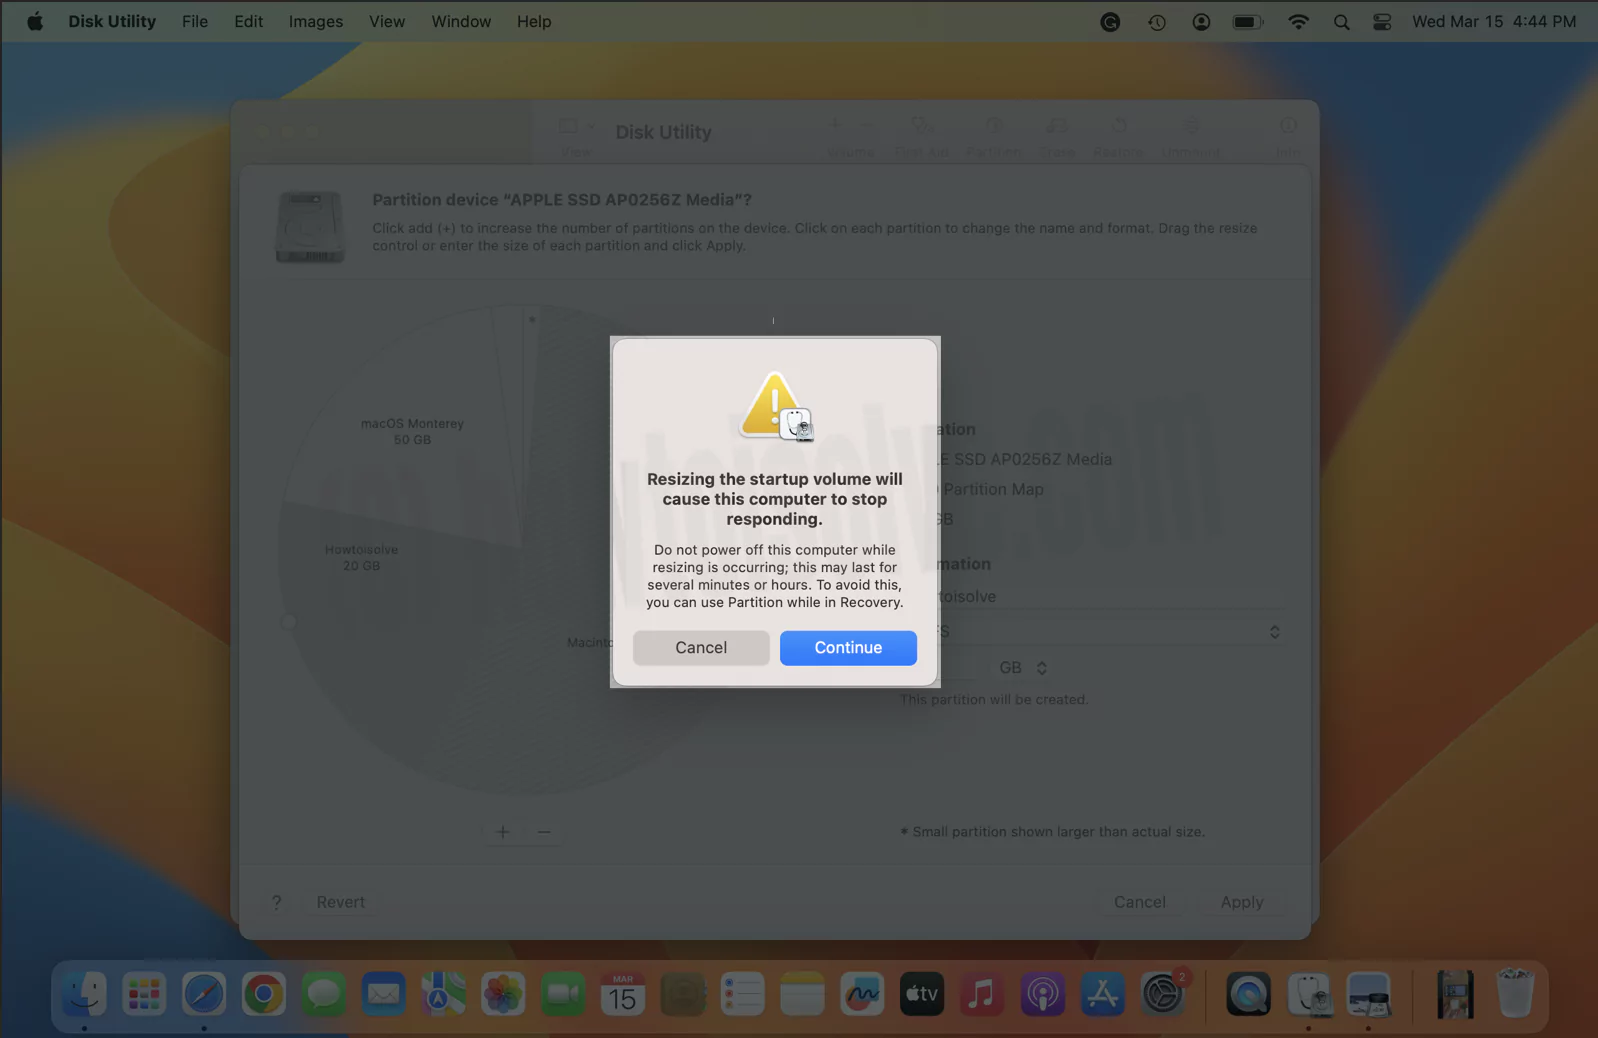
5→ A pop-up will revise to you what will happen when you create a new partition on Mac “Add Partition“.
Note: No partitions will be erased on your Mac.
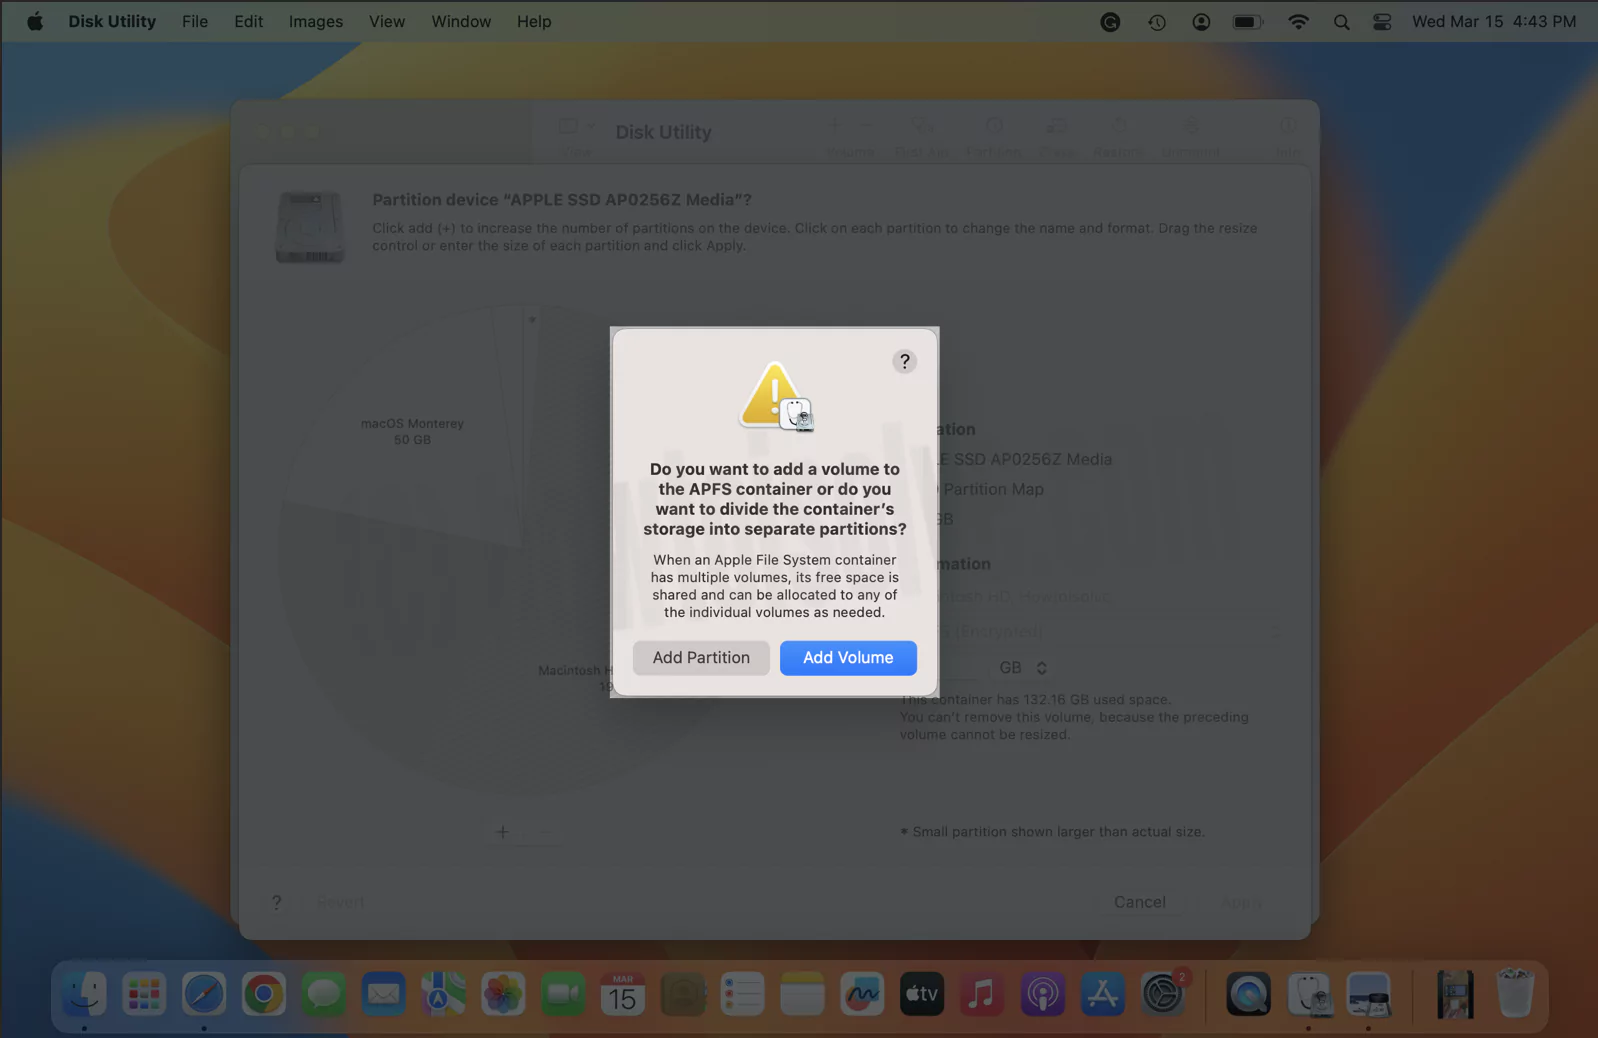
6→ Hit “Partition” > Continue. When the new partition is created, the system stops responding until the process gets completed, select “Continue”.
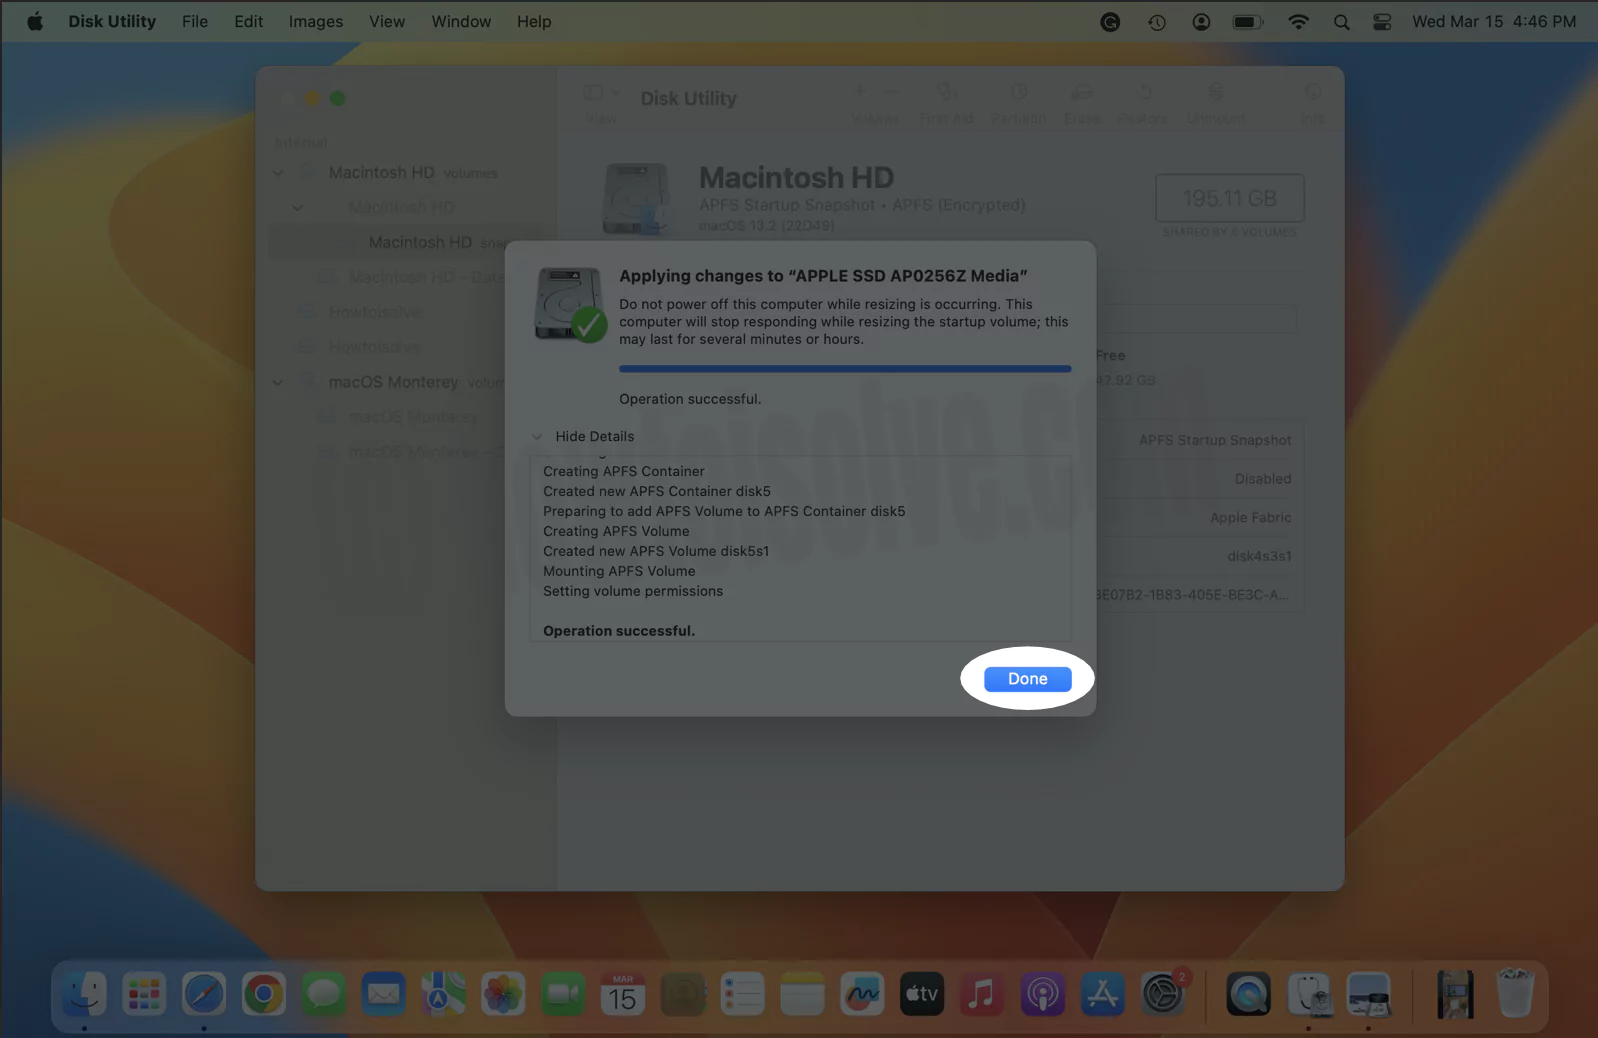
7→ Wait until you see the Done option.
Part 2: Download MacOS on Your Mac
Apple won’t allow you to download the macOS Mojave directly from the Mac App Store once you update to macOS Catalina. Therefore, we have given a direct link to download the macOS Mojave. Surely, this link will take you to the Mac App Store, but when you search for macOS Mojave in the Mac App Store, it won’t show you.
1: Click here to download macOS on Mac. or Download macOS DMG on Mac
2: The link will redirect you to Mac App Store, from there, download the macOS Mojave.
3: Go to “Applications”, using Spotlight search (command+space).
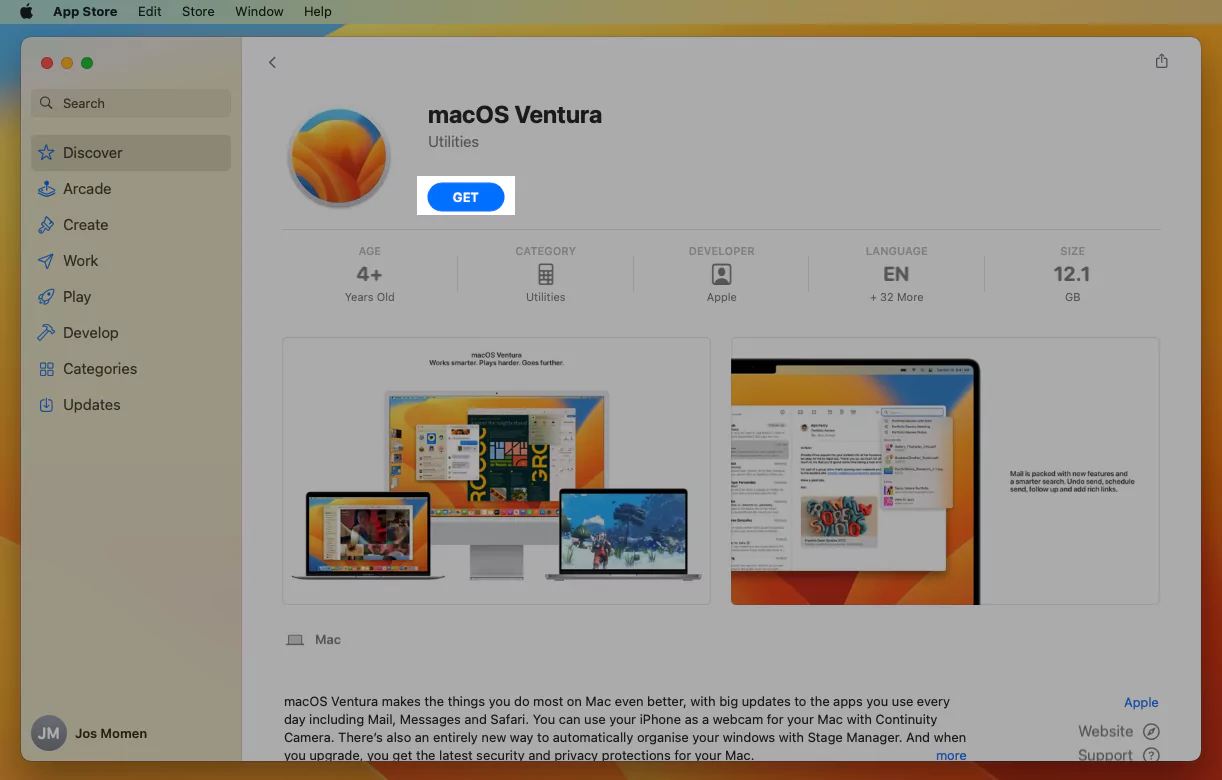
4: Click on Download Button. Make sure the Install macOS file is there in the Applications folder.
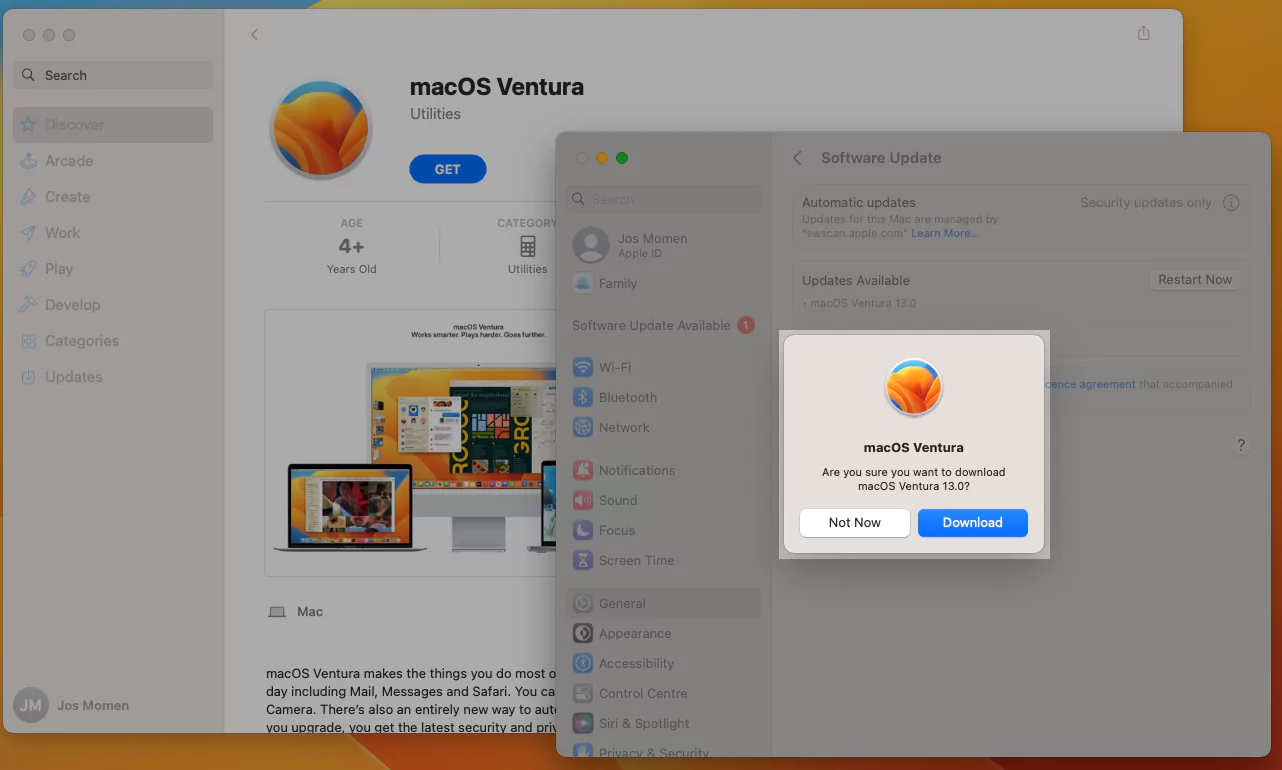
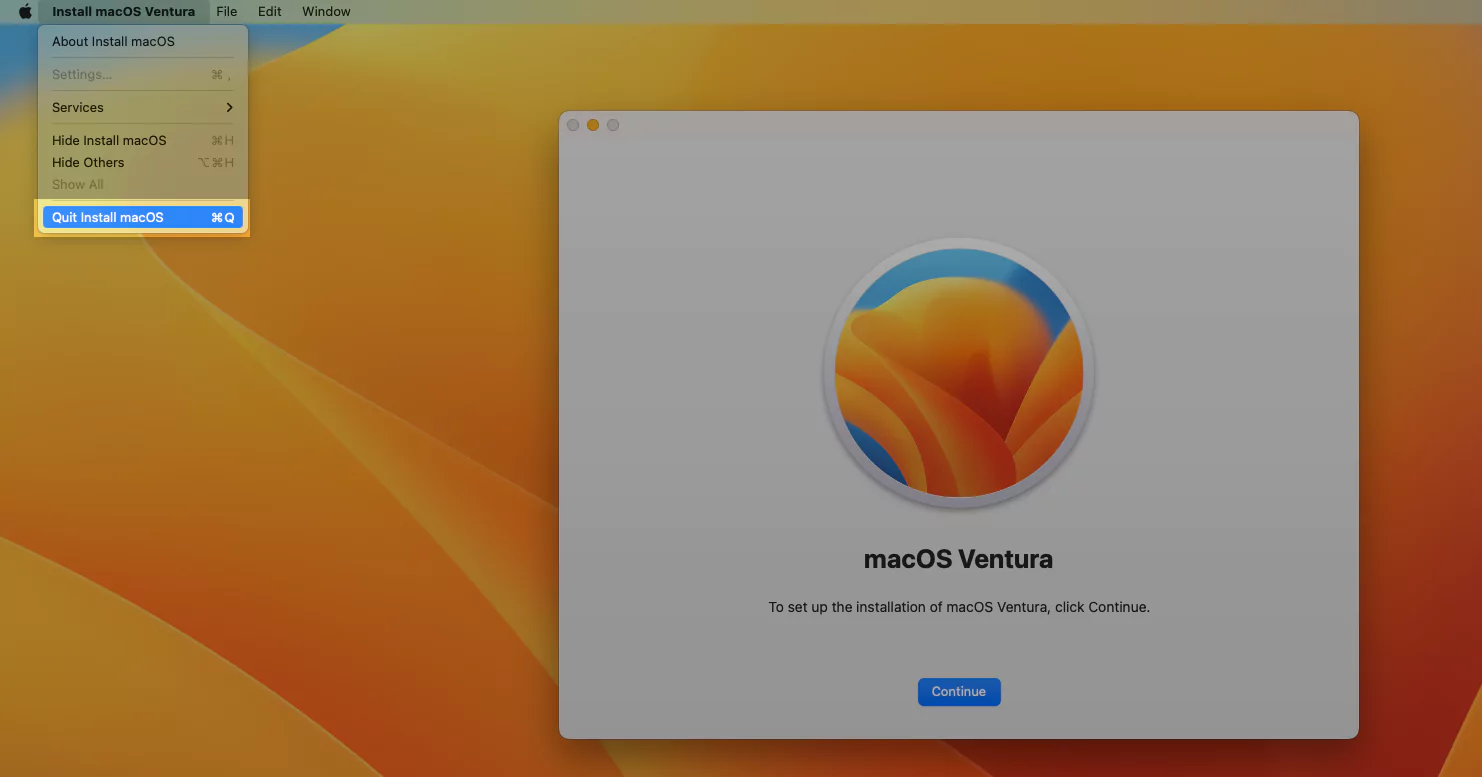
5: Wait for the download complete and Don’t run the setup. Quit setup.

6: Quit Install macOS. Start Creating a Bootable Drive of MacOS Downloaded on your Mac. Follow the next step,
Part 3: Create Bootable Drive
Next step is to create Bootable Drive to install the macOS on a separate partition. Make sure to back up the USB drive, as you will need to Erase it later.
Step #1: Plug the USB Drive on your Mac.
Note: You should use a minimum 16GB USB Drive for faster and better operations. Also, take a backup of the drive that you are using. Copy the command from here.

Step #2: Open the “Disk Utility” and “Erase” the drive.
Step #3: Launch “Terminal” from the Spotlight search (command+space).
Step #4: Type the following command,
macOS Ventura,
sudo /Applications/Install\ macOS\ Ventura.app/Contents/Resources/createinstallmedia –volume /Volumes/MyVolumeNote: Replace the USB Drive name with [Your USB Drive Name].
Step #5: Type “Y” and hit return.
Part 4: Install New macOS on Another Partition
Finally, you are ready to install macOS Monterey/Mojave on another partition of your Mac. Here’s how to do it.
Step #1: Turn off Mac, click on the “Apple” menu and select “Shut Down”.
Step #2: Know your Mac is Intel or M1.
- For M1 Mac: Press and Hold Power button [Touch ID Button], until your Mac shows startup volume on the screen. Now, your Mac will see a bootable macOS Drive. Click on start the installation.
- For Intel Mac: Turn on Mac, and after hearing the startup sound immediately hold the “Option” key until the Mac screen shows the Startup Disks.
Step #3: Click on “Install macOS” or “Install macOS Monterey” Bootable USB Drive. Wait for Few seconds.

Step #4: On the macOS Utilities tab, choose “Install macOS”.
Step #5: Click “Continue”, to begin setting up the installation of macOS.
Step #6: “Agree” to the Terms and Conditions.
Step #7: Now, you have to select the newly created partition that we have created in Part 1, to install macOS on another new partition.
Attention Note: On selecting the Primary Drive, you can downgrade So don’t interrupt primary drive.
Step #8: Click “Continue”. Follow the on screen instructions.
Part 5: Set Up MacOS
All Done! You have installed macOS on another partition of your Mac. Now, follow the on-screen instructions and set up macOS like Language, Region, Apple ID, etc. the information will be required. Besides, one option will ask you to Transfer Information to This Mac, select appropriate option.
Part 6: Switch Between MacOS Monterey/Mojave & MacOS Catalina
You cannot switch macOS without turning off. To switch between macOS, shut down the Mac and turn on by pressing and holding the Option [Alt] key. During startup drive, select between macOS Monterey/Mojave and macOS Catalina.
For M1 Mac: Press and Hold Power button [Touch ID Button] until you see startup volumes, after Restart or Start your Mac.
For Intel Mac: Press and Hold Shift Key after Restart or Turn on your Mac.
Now you can use Different software on Both the MacOS if Latest Version of MacOS isn’t compatible with [This copy of the “Install macOS” application is too old to be opened on this version of macOS.]. Some Users are getting message on install or open app but they don’t leave new MacOS that might be Beta version or Public MacOS.

