Do you face the problem of not receiving Gmail notifications on your iPhone? This can be a big issue as timely responses to emails are crucial. Several reasons can cause this problem, such as incorrect Gmail and iPhone notification settings, outdated operating system or app version, etc. In this article, we will provide you with some tips and tricks to fix Gmail notifications that are not working on iPhones running the latest operating system. Here’s a separate tutorial on Apple mail notification not working.
Gmail App Notifications Not Working: Fixes
Here below are 16 ways to fix Gmail notifications not working on iPhones.
Solution #1. Check iPhone notification settings
Before heading to high-end solutions, we suggest checking the basic iPhone notifications settings for the Gmail app. Here’s how.
Step 1: Access the Settings App on your iPhone. Tap on Notifications.
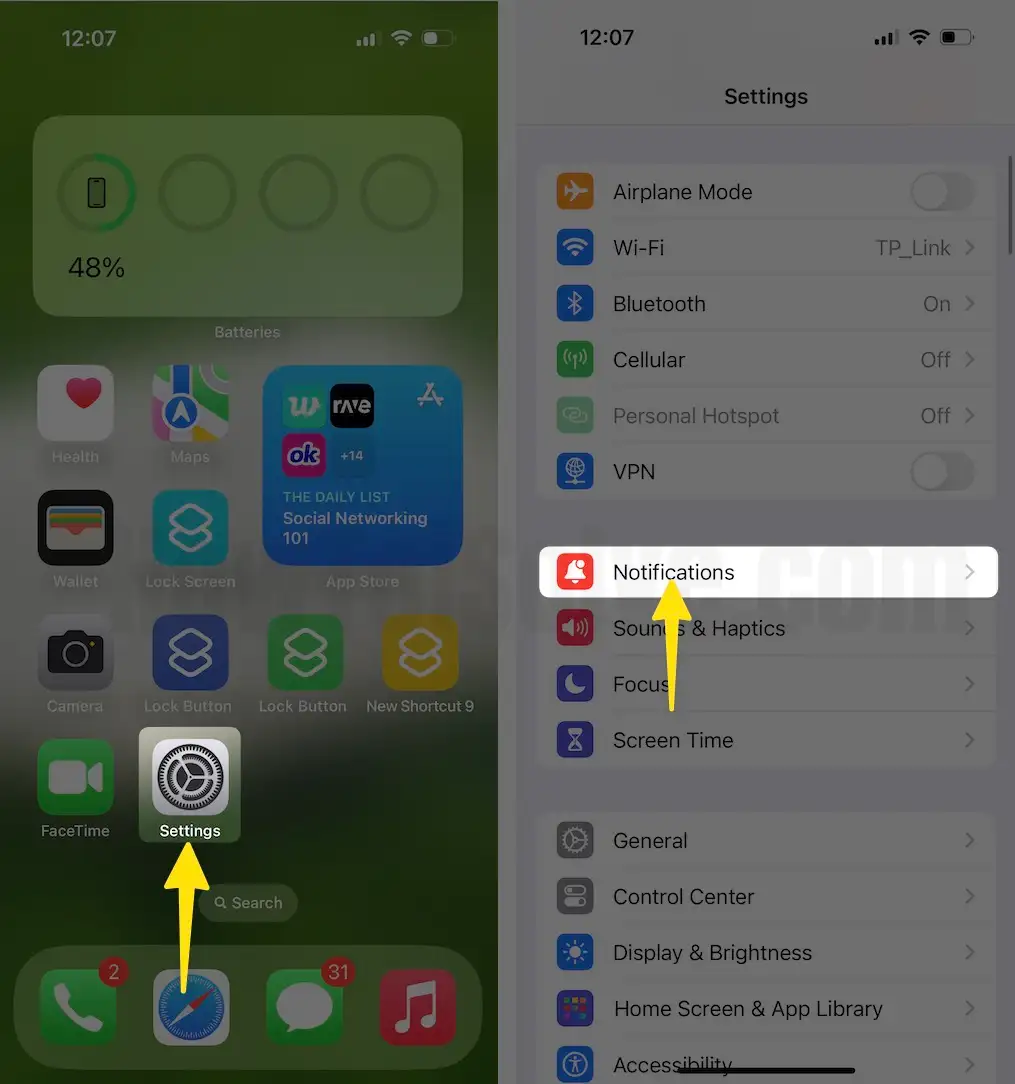
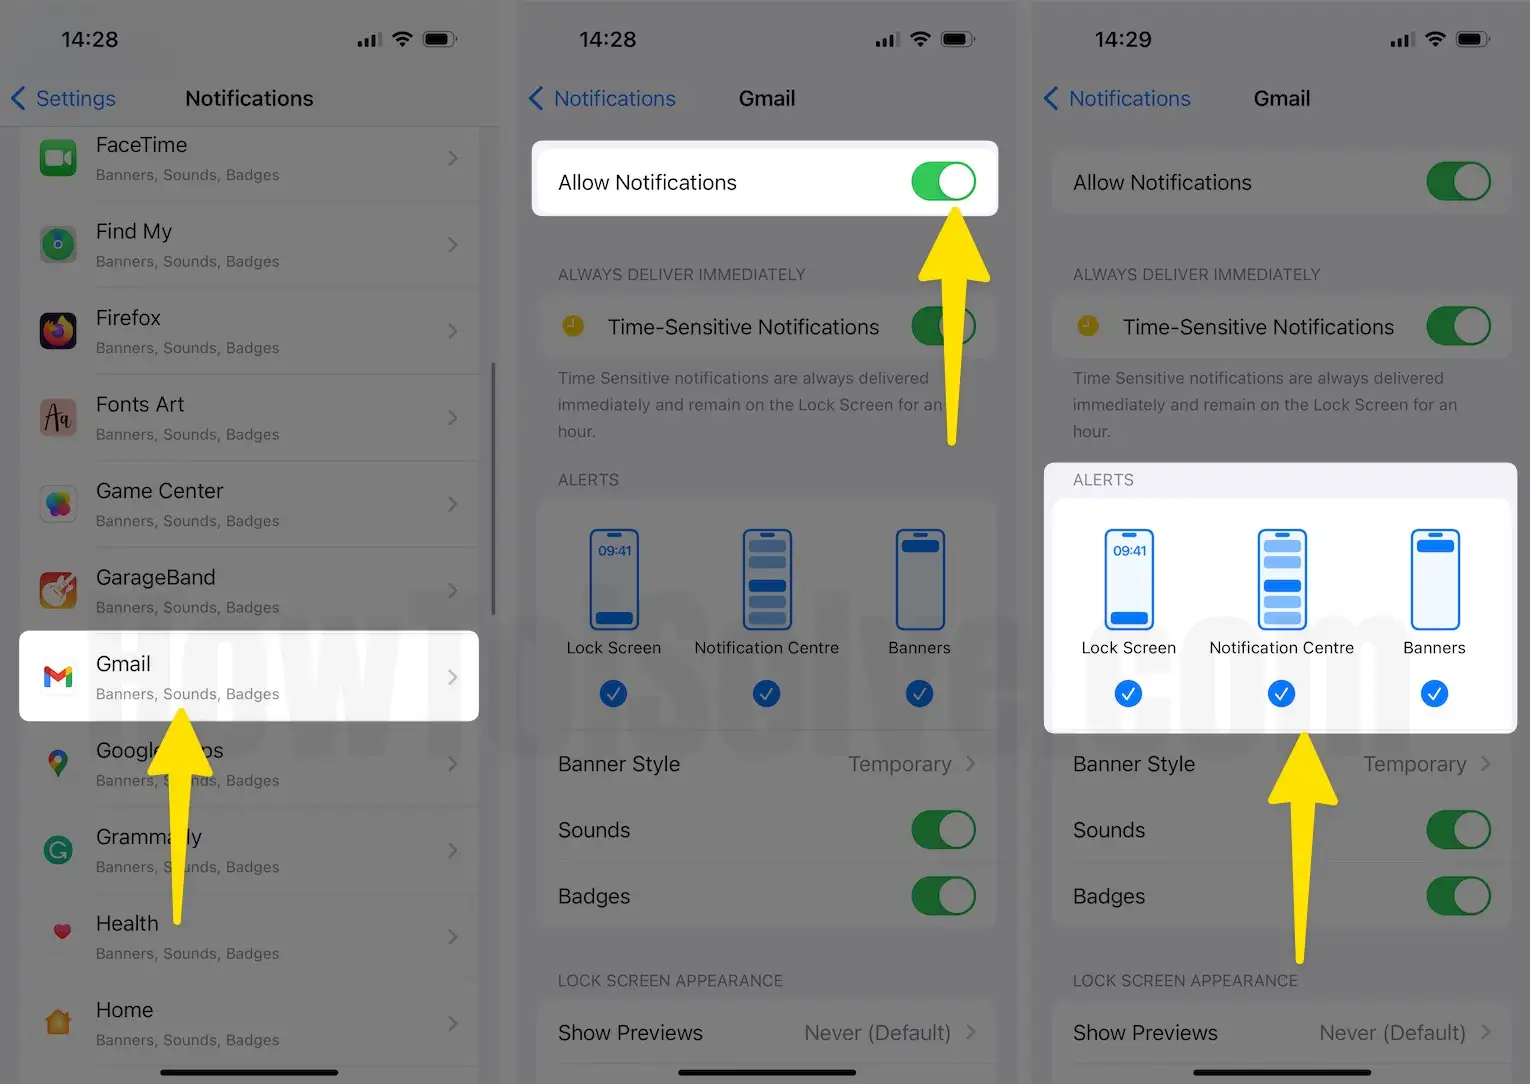
Step 2: Scroll down to the Notification Style Menu, search, and select Gmail.
Step 3: Make sure the toggle next to the Allow Notifications is enabled.
Step 4: After this, you can select how you want to receive Gmail Notifications. On the lock screen, banner, and in the notification center. Further, the banner style can be configured as persistent or temporary.
Solution #2. Turn off Focus Mode
In case Gmail notifications not working on your iPhone, you should first ensure Focus mode is disabled. It’s a simple yet helpful way to fix you should try before moving forward.
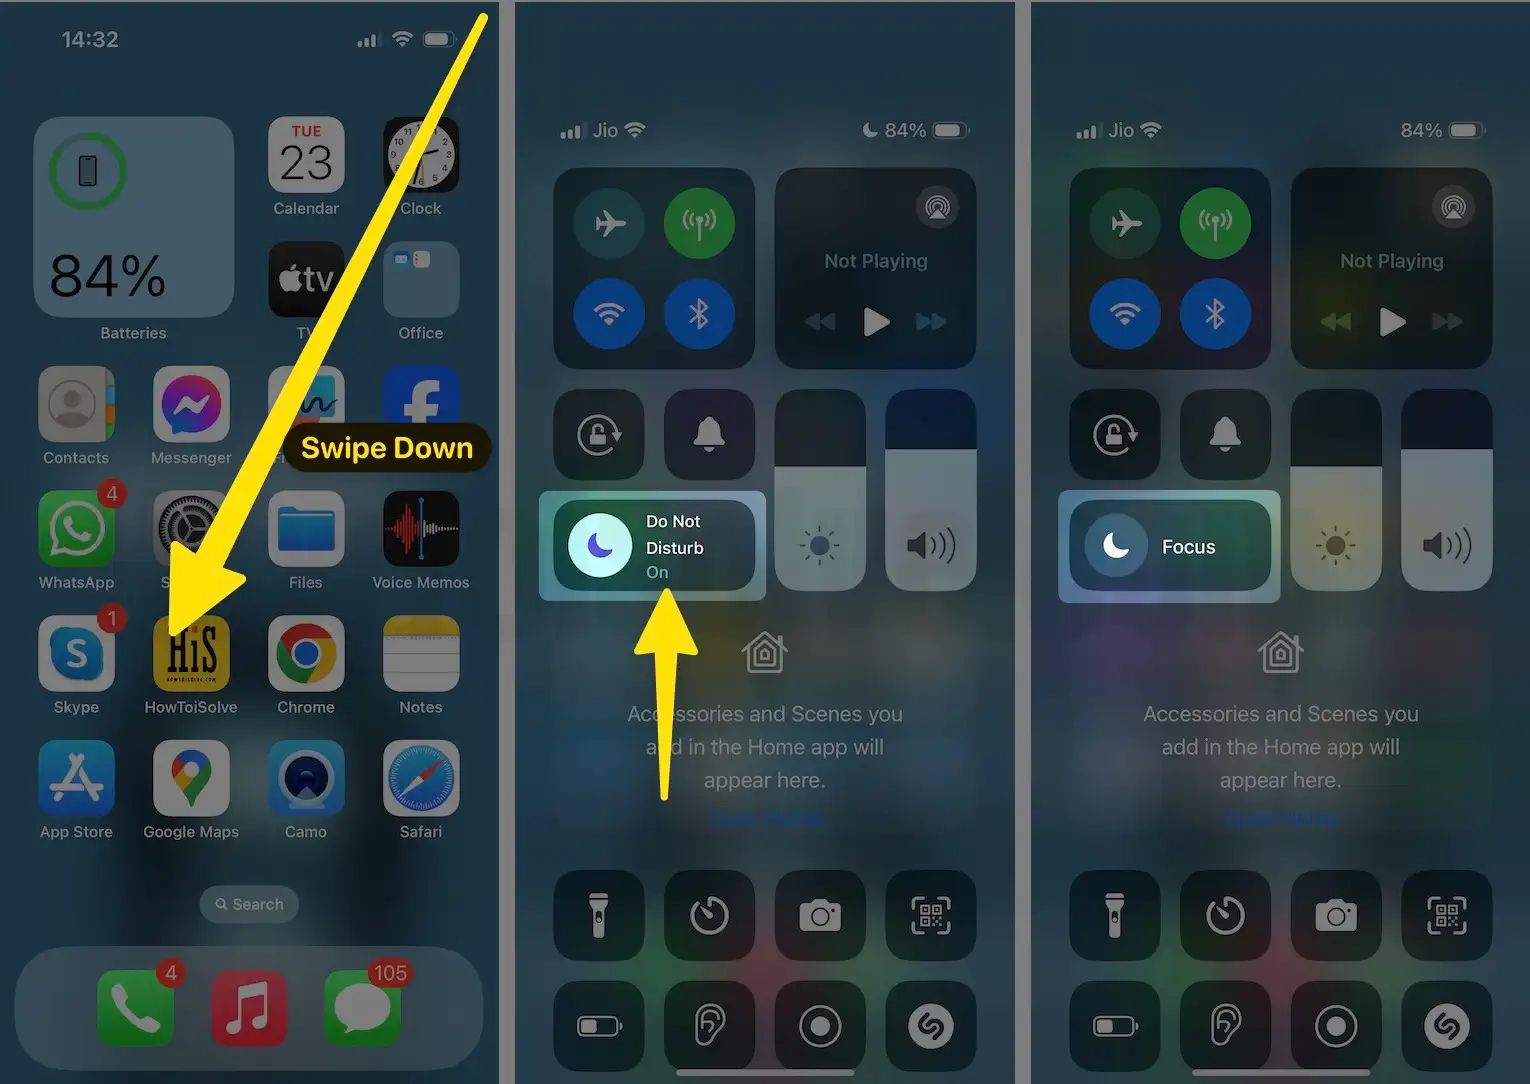
Step 1: Access Control Center on your iPhone. Choose Focus/DNS Mode.
Step 2: Tap on the Focus Mode name to turn it off.
Solution #3. Check if Gmail can access Cellular Data
The Gmail app requires unrestricted access to the internet to send push notifications on your iPhone. So, if you aren’t always connected to the Wi-Fi network, you must check that the Gmail app has access to mobile data. Here’s how.
Step 1: Access the Settings App on your iPhone. Choose Cellular/Mobile Data.
Step 2: Scroll down to the Cellular Data menu and enable the toggle next to Gmail.

Solution #4. Check Gmail Notification settings
After this, you must also check Gmail App notifications settings.
Step 1: Access the Gmail App on your iPhone. Tap on the Hamburger Icon from the left corner.
Step 2: In the Notifications Menu, tap Email Notifications. On the next screen, you will see four options. All new mail will send you a notification whenever you receive a new email in your Gmail Account. Primarily only, as the name says, will send notifications from emails shortlisted by Gmail based on your past usage. To be on the safer side, you can select All new mail. However, you can also re-configure your iPhone’s Notification Settings for Gmail.

Solution #5. Enable Background App Refresh
Enabling this feature allows the Gmail App to refresh the content even if it’s not running on your device. Here’s how to enable Background App Refresh on your device.
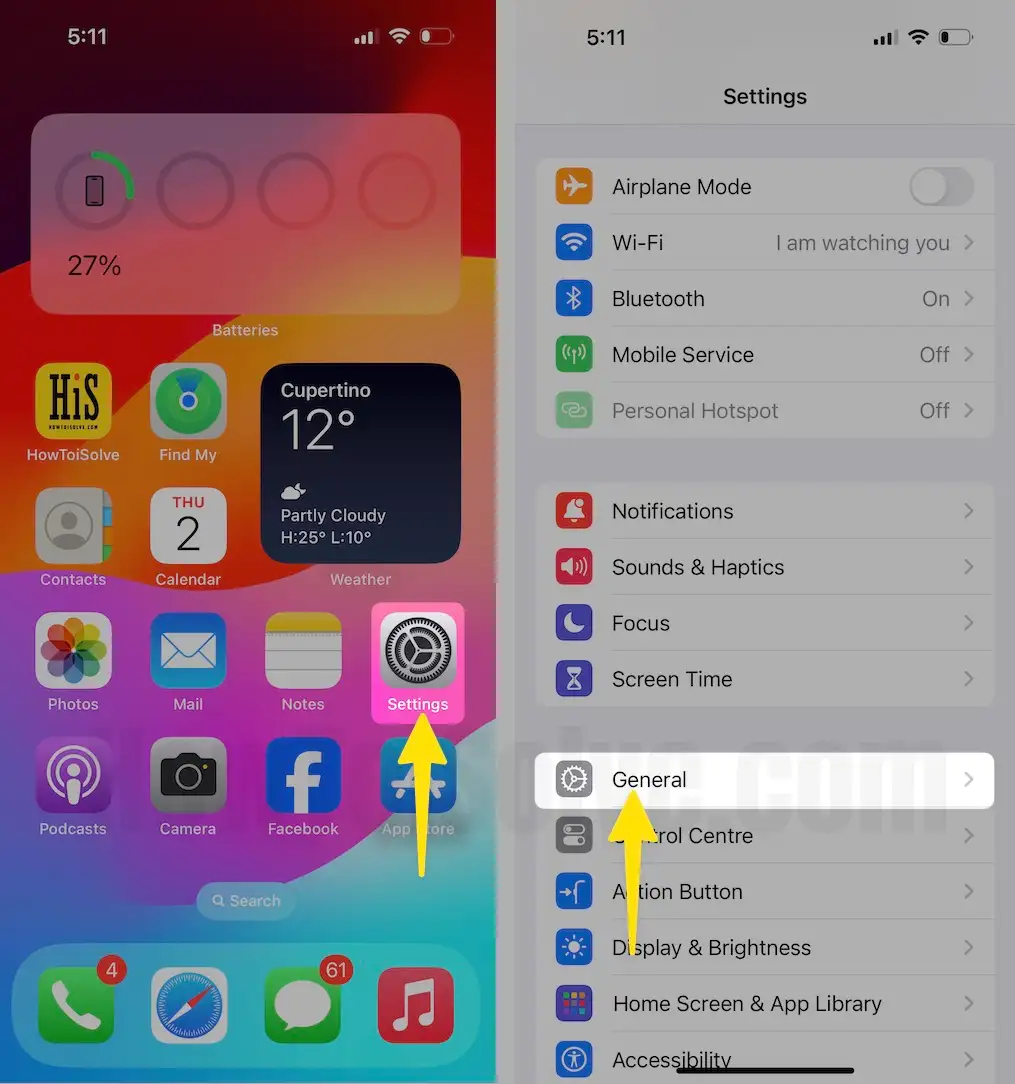
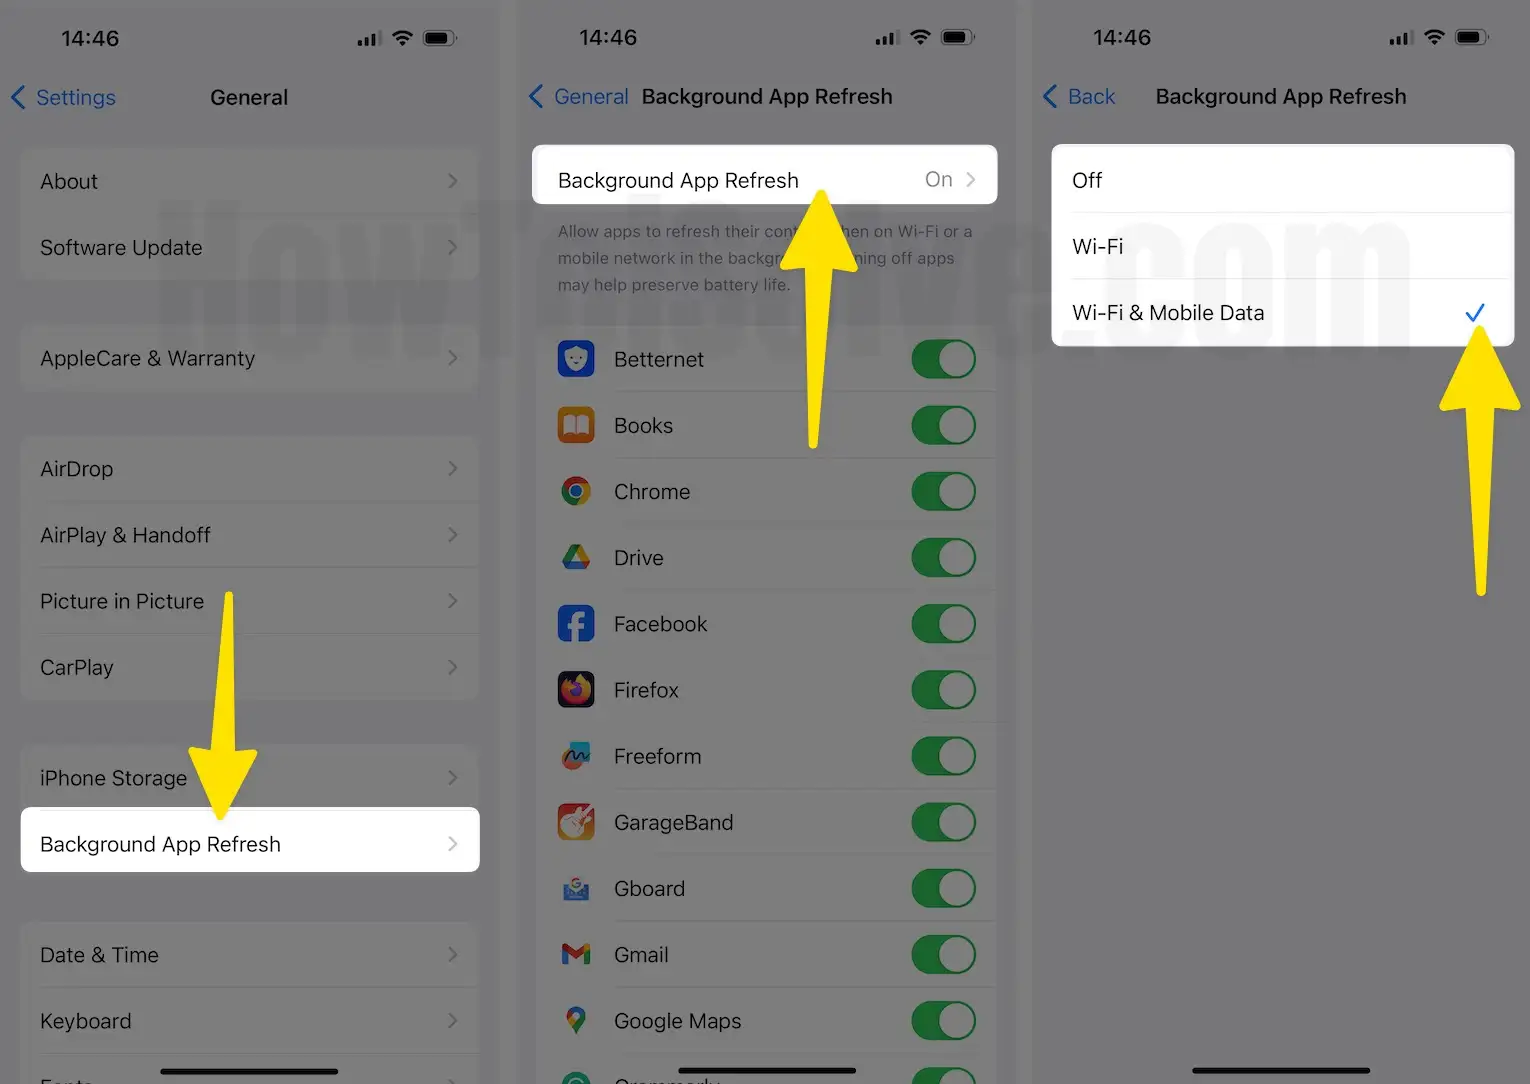
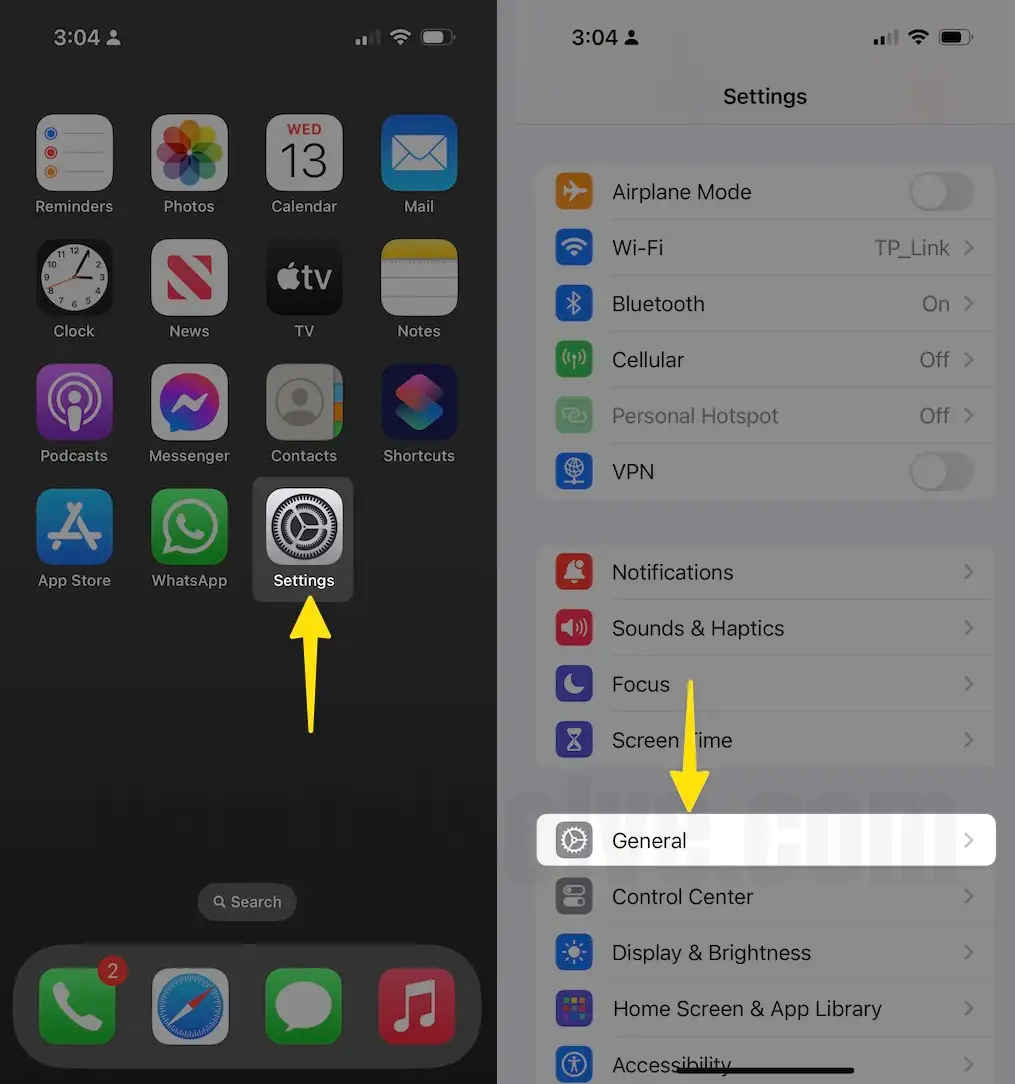
Step 1: Access the Settings App on your iPhone. Scroll down and select General.
Step 2: Tap on Background App Refresh > Background App Refresh. Then, select Wi-Fi & Cellular Data.
Step 3: Hit Back at the top left and then enable the toggle next to Gmail.
Solution #6. Unmute a mail thread
If you’re not receiving email notifications for a particular thread, you might have muted accidentally. Here’s how to unmute it.
Step 1: Access the Gmail App on your iPhone. Enter Mute in the search bar.

Step 2: Tap on Label Mute. After this, touch and hold the thread you want to unmute. From the prompted menu, select Unmute. Do the same for each thread.
Solution #7. Remove the Gmail App from the Schedule Summary
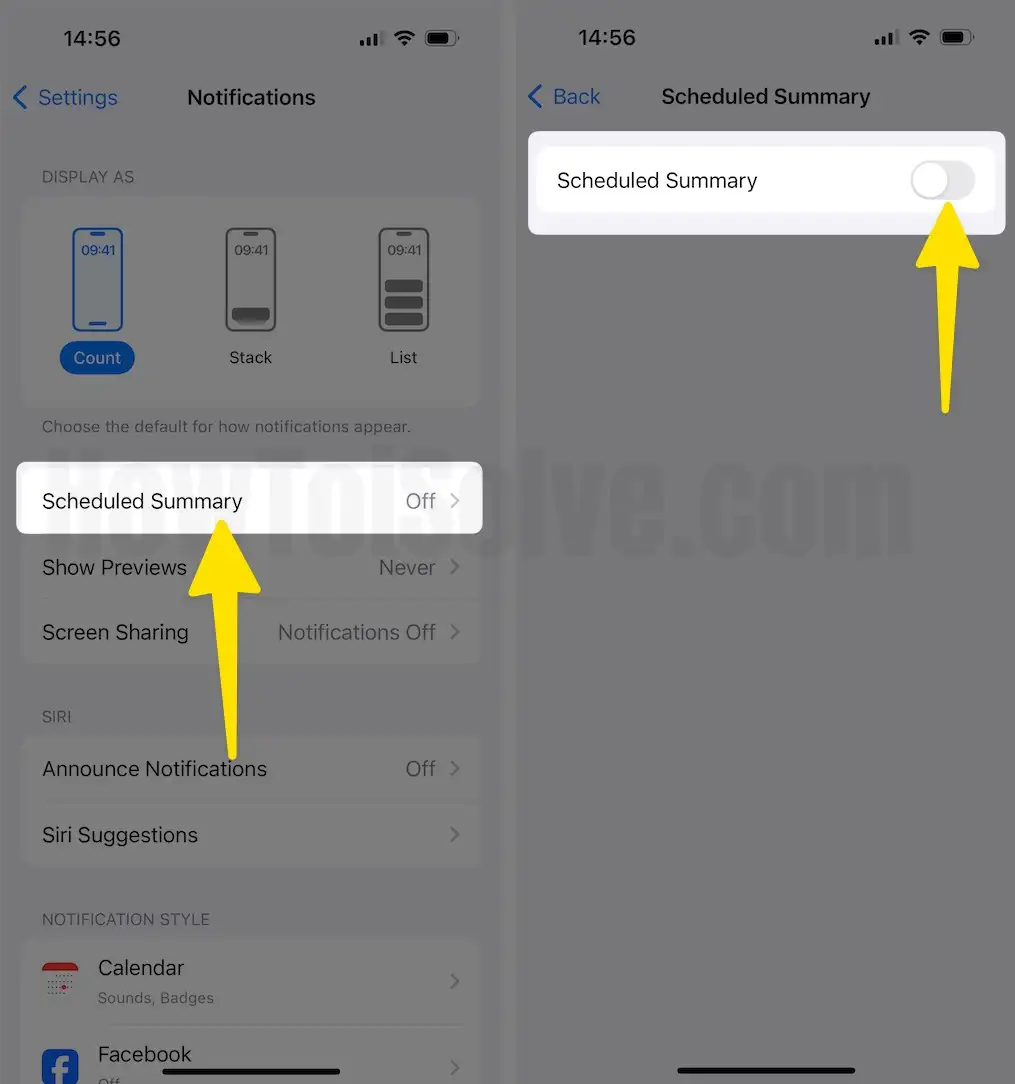
Step 1: Access the Settings App on your iPhone. Tap on Notifications.

Step 2: Select Schedule Summary. In the next screen, turn off the toggle next to Scheduled Summary.
Step 3: If you want to use this feature, turn off the toggle next to Gmail. Doing so will restrict the notification for other apps, and Gmail will reach you instantly.
Solution #8. Restart your iPhone
Delay Gmail notifications can also be due to random glitches that your iPhone catches up with during regular use—the best way to fix it is to turn off your iPhone and on. To do so, follow the steps below.
Restart iPhone with Face ID: Press either the Volume Buttons or Side Key simultaneously until the Power-Off screen appears. Drag the Power-Off Slider to switch off the device. Now, wait a while, and then press and hold the Side Key until the device turns on.
Restart iPhone with Touch ID: Press and hold the Side Key until the Power-Off screen appears. Drag the Power-Off Slider to switch off the device. Now, wait a while, and then press and hold the Side Key until the device turns on.
Solution #9. Remove and add Gmail Account again
Another effective you must try is removing and re-adding the Gmail Account on your iPhone.
Step 1: Access the Gmail App on your iPhone. Tap on the Profile Icon from the right top.
Step 2: Select Manage Accounts on this device. After this, you’ll see two options: one is a blue toggle that will turn off Gmail. This needs to be turned on. Otherwise, you won’t receive notifications. Hit on “Remove from this device” and Remove the account name. This account and any unsaved data will be removed from Gmail and other Google Apps on this device. Tap Remove.

Solution #10. Check Internet Connection
Ensure your Wi-Fi or mobile data is uncorrupted and stable. Besides this, if you are connected to mobile data, verify that your device has good signal strength. To check internet speed, you can use Fast.com.
Solution #11. Update Gmail App
Outdated versions of the application can be a reason for the app malfunctioning. Thus, updating the application can resolve such issues and broken features. Here’s how to update the Gmail App.
Step 1: Access the App Store on your iPhone. Tap on the Profile Icon from the top right.
Step 2: Scroll down and tap on the Update Button next to the Gmail App.

Solution #12. Reinstall Gmail App
As we all know, Apple doesn’t offer a manual way to clear the cache of the Gmail App. However, uninstalling and reinstalling the application might work wonders. To do so, follow the steps below.
Step 1: Touch and hold the Gmail App Icon and select Remove App.

Step 2: From Remove “Gmail”? Removing from Home Screen will keep the app in your App Library; tap on Delete App.
Step 3: Then, from Delete “Gmai”? Deleting this app will also delete its data. Select Delete. After this, reinstall the Gmail App and sign in using your credentials.

Solution #13. Disable Low Power Mode & Low Data Mode
- Disable Low Power Mode: Go to Settings > Battery > Disable toggle next to Low Power Mode.

- Disable Low Data Mode: Head to Settings > Cellular

Cellular Data Options > Data Mode > uncheck Low Data Mode.

Solution #14. Update iOS
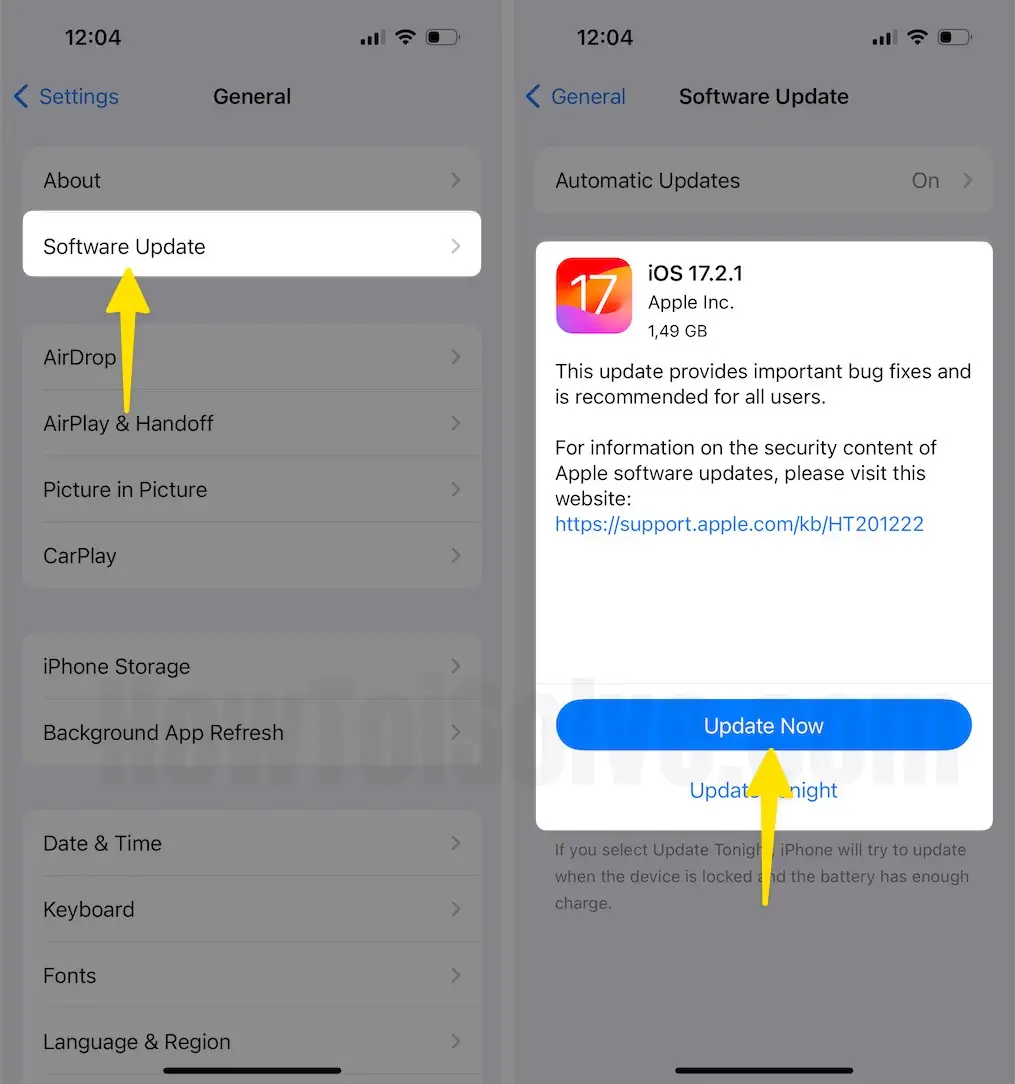
Apple frequently releases iOS updates to fix the issue and enhance the device’s performance. Thus, we suggest to check whether if there is any pending update. To check it, follow the steps below.
Step 1: Go to the Settings App on your iPhone. Tap on General.

Step 2: Hit Software Update. Now, let your iPhone check for updates. If available, tap on Download Now.
Solution #15. Is Gmail Push notification not working on iPhone? Fix it!
Step 1: Access the Settings App on your iPhone. Scroll down and tap on Mail App.

Step 2: Select Accounts > Fetch New Data.

Step 3: Select your Gmail Account. Check Fetch. After this, tap on Fetch New Data at the top left.
Step 4: Select Manually and choose Every 15 Minutes.

Solution #16. Reset Network Settings
If you’re still not receiving Gmail notifications, you must try resetting network settings on your iPhone. Doing so will bring the device back to default network settings.
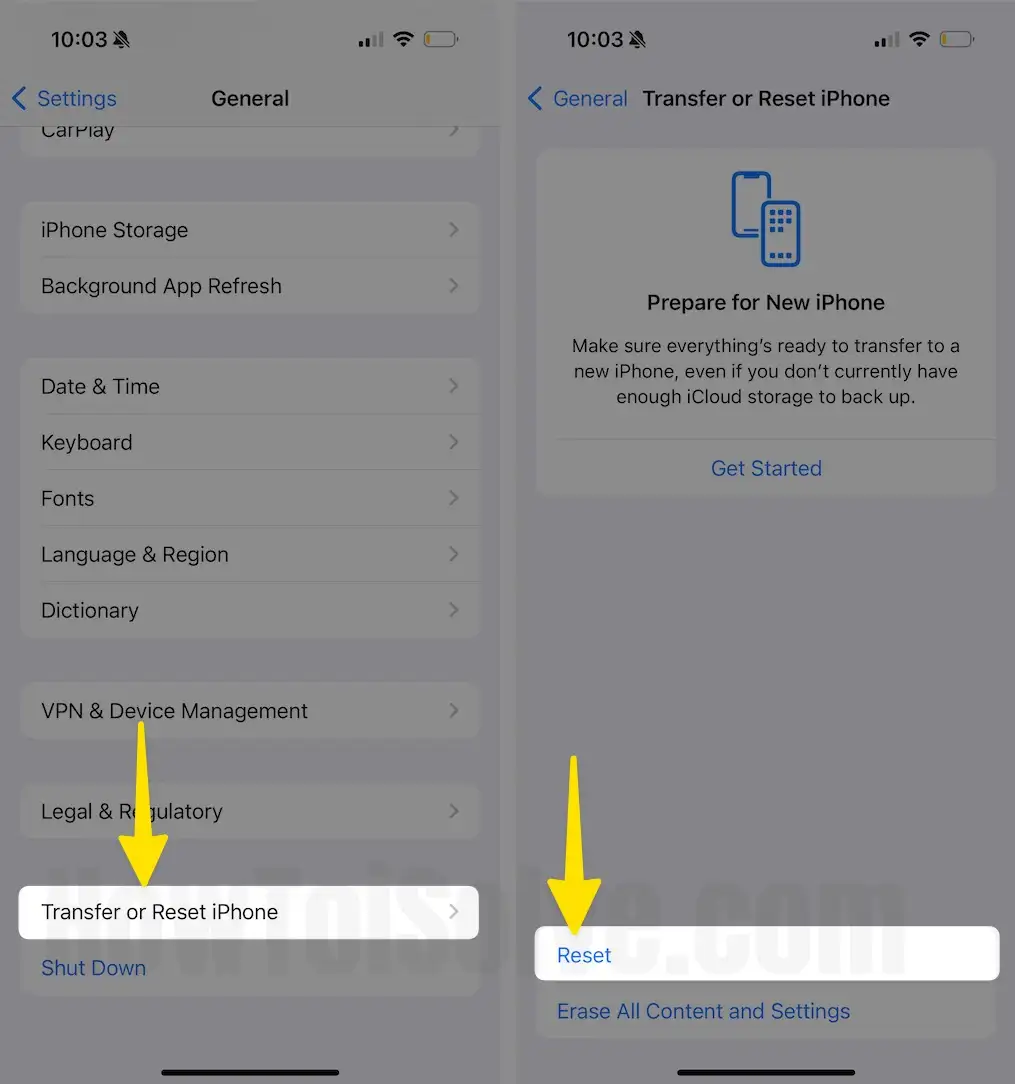
Step 1: Open the Settings App on your iPhone. Scroll down and select General.
Step 2: Again, scroll down and tap on Transfer or Reset iPhone. Choose Reset.
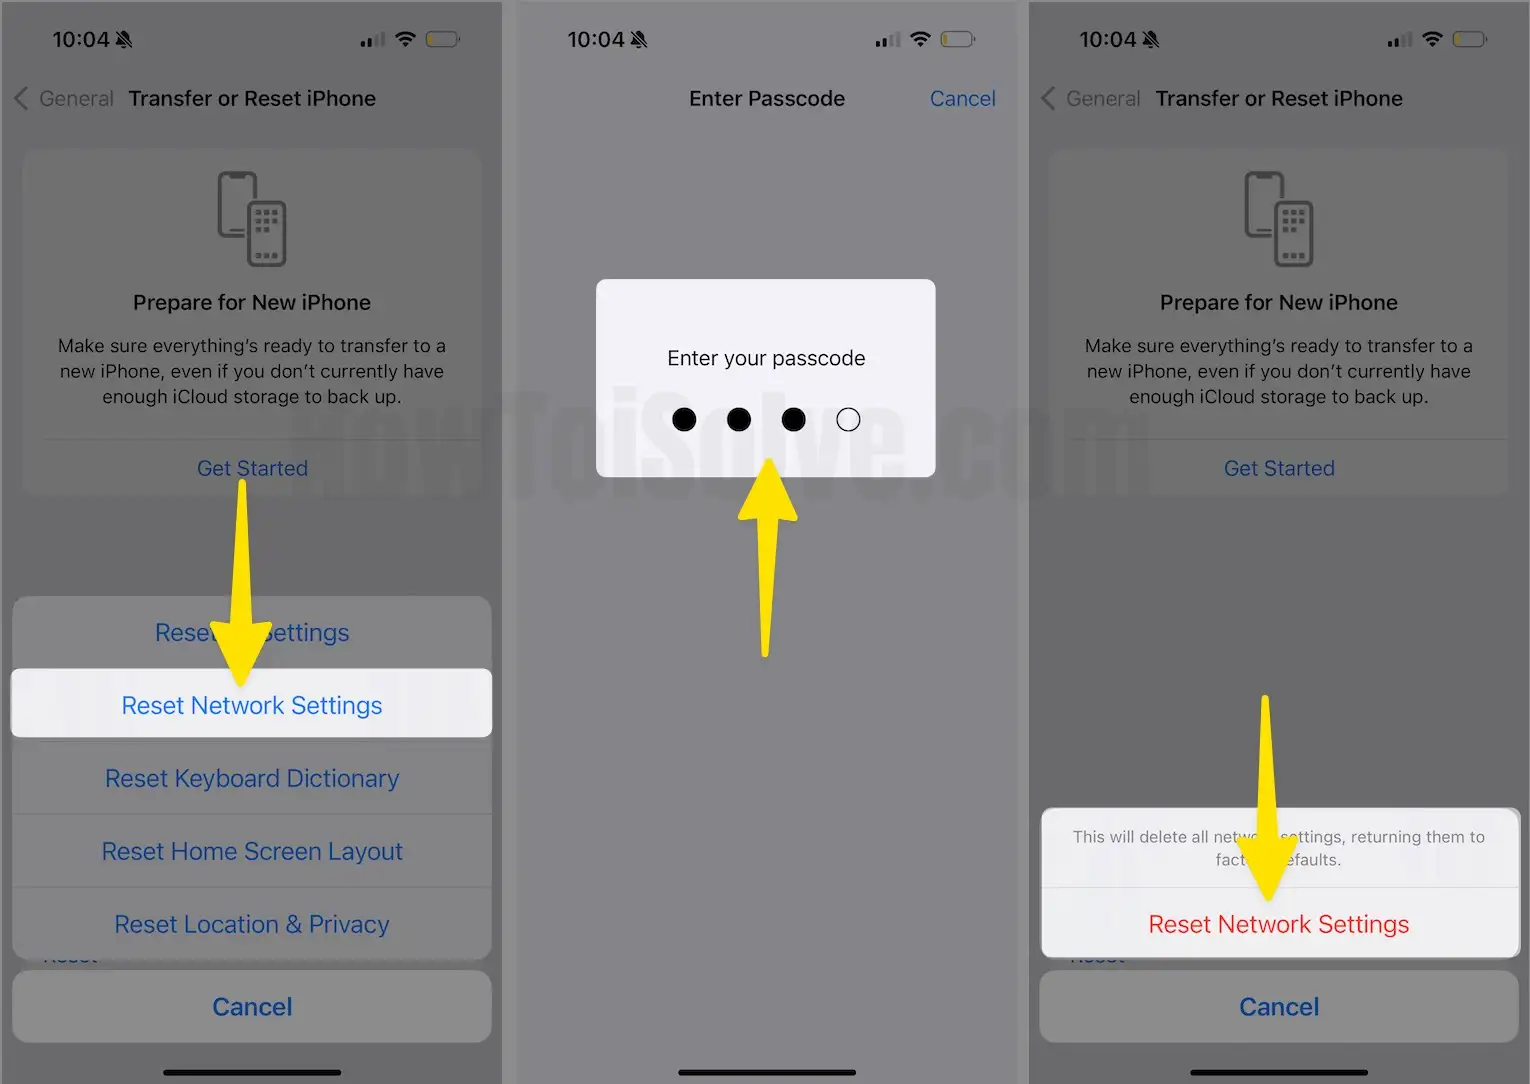
Step 3: Hit Reset Network Settings and enter your iPhone’s lock screen passcode and screen time passcode if asked.
Step 4: Tap on Reset Network Settings for confirmation.
Final Verdict!
That’s It! This is how you can fix Gmail notifications not working on your iPhone. Further, if you have any relatable query, please drop it in the comment box below.