The Preview app on Mac is a well-known image viewer tool for all Mac users. It shows all information (size, created, last modified, resolution, color space & profile, etc.) about a particular picture, and Quicklook Spacebar preview is worth using. Still, sometimes users face that the Preview app is not working correctly on Mac.
Problems like the Preview app fails to load thumbnails for pictures or won’t open an image. We have created this informative blog to cope with this issue. Preview not working on your Mac. Follow along to learn the tried-and-true methods for repairing Preview on a Mac.
Also Read: Quick Look Not Working on Mac.
Major errors in the Preview app on Mac
- Mac Preview is not displaying PDF correctly
- Mac spacebar preview is not working
- Mac Preview won’t open JPG
- It may be damaged or use a file format that Preview doesn’t recognize PNG.
How Do I Open Preview on MacBook or Mac Desktop?
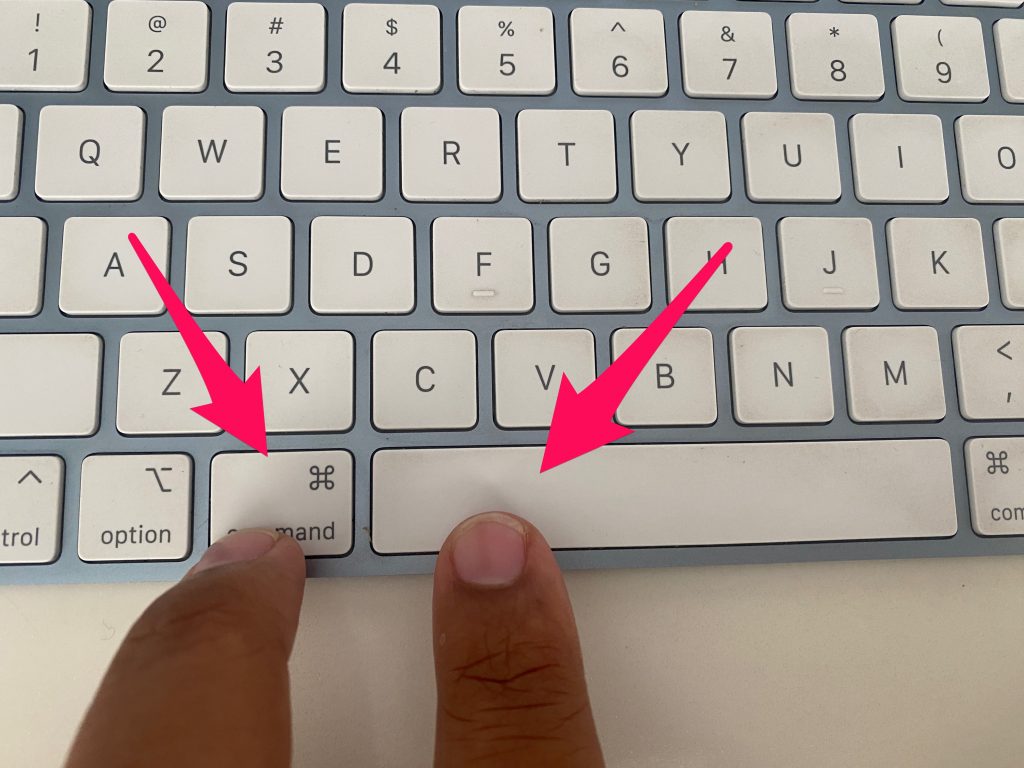
One of the effortless ways to open the Preview is just by simply holding Command and pressing the spacebar. Then, a search bar will appear where you must type in a preview and double-click on it.
One thing that is a bit confusing about Preview is that it does not open like most of the applications do. The only way to identify that this option is running is to look at the left side of your desktop right after the Apple logo. It will appear over there. You can also add it to the doc on the downside of your desktop.
What Can You Do To Fix Preview On Your Mac?
If you are right now struggling with this situation or want to ignore one in the future, then you can go for these fixes listed below:
#1. what is the latest version of the Preview for Mac
To check the Preview version, follow the bottom steps;
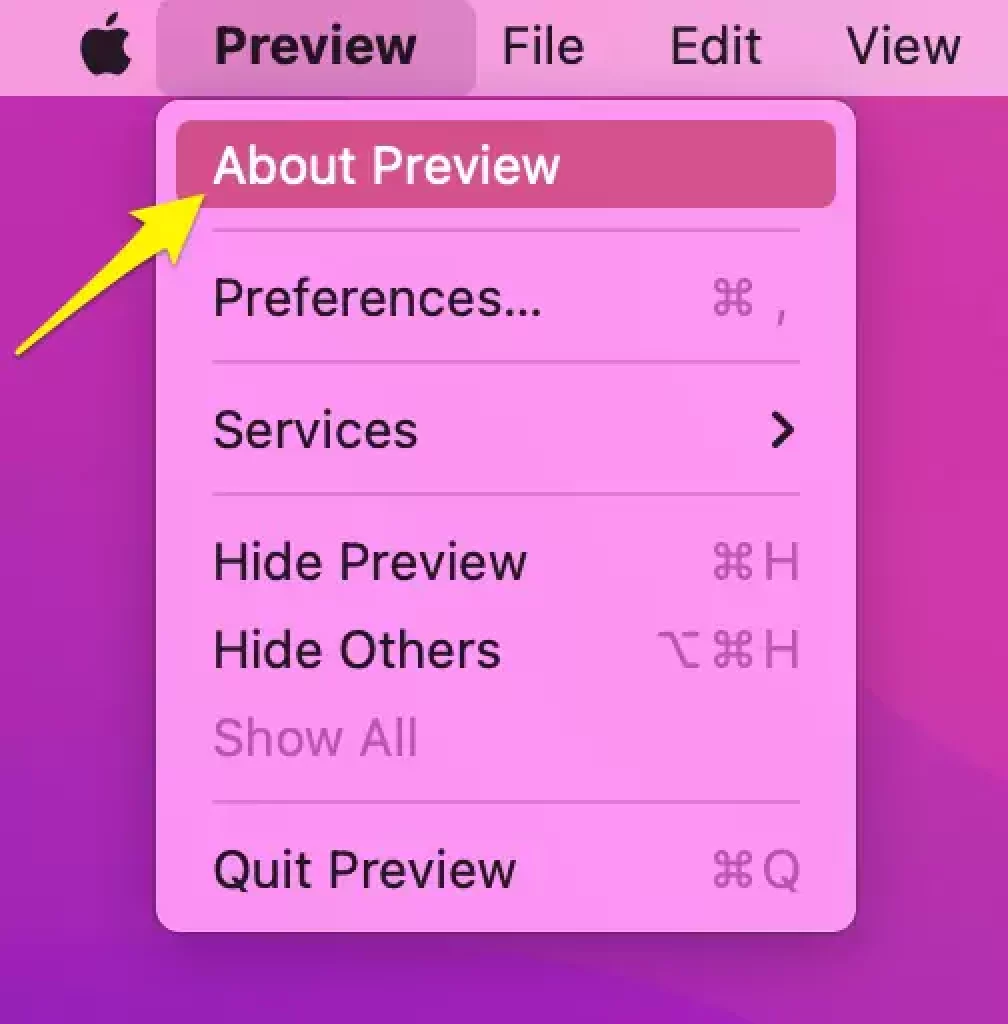
1→ Open Preview App on your Mac computer > Next, Click on Preview on the top menu bar
2→ Hit on About Preview
3→ A pop-up message will show you details about Preview App. Unluckily, you can’t update the preview App individually, it does update with a system update.
For example, if you upgrade your Mac to macOS 13 venture from macOS 12 Monterey, at the same time, all pre-install app gets updated.
#2. Try re-enabling Preview in Finder
If you are struggling to see the thumbnail of the photo that you select on finder, then there might be a possibility that your review is disabled, so you need to re-enable it again. And you can quickly do it simply by following the few steps mentioned below:
1→ First, you need to open the Finder window on your Mac.
2→ Then you will find the View option on the top right side of the menu bar. Click on that.
3→ Under the View menu, select “Show Preview.” Or you can press SHIFT + Command + P to quickly open the setting to enable Preview in the Finder app.
4→ If you do not see the option, click on “hide preview” and click on “show preview” once again.
Note: if Hide Preview & Show Preview both options appear greyed out, so you can’t click on it, then make sure that at least one Finder Window is open on your Mac desktop screen.
This straightforward tool lets you quickly and easily enable or disable Preview in Finder on Mac. It will work fine with any version of macOS.
It’s an application that lets you toggle the “Enable Preview in Finder” option on or off for all users of your Mac.
You can also choose whether it should be enabled for only the current user or if it should be disabled for everyone except the current user.
#3. You Can Force Quit The Preview And Reopen It Again
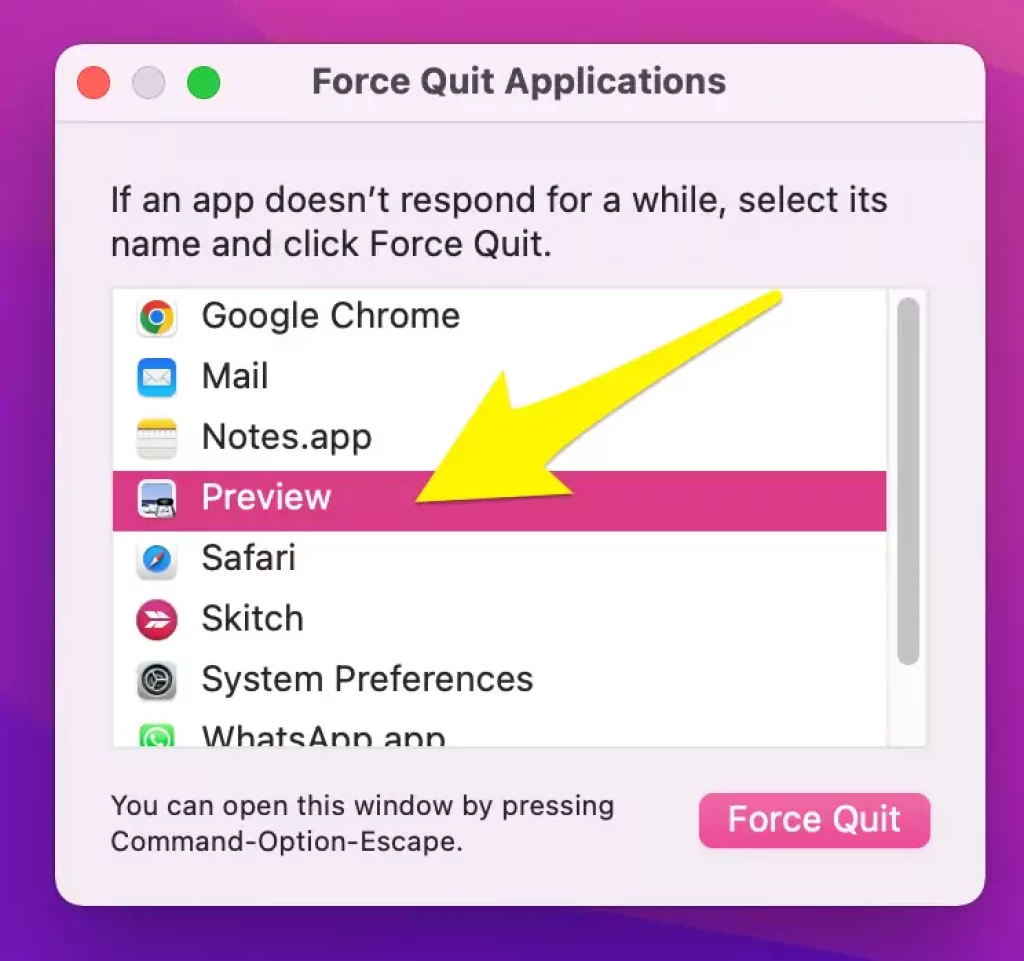
If the Preview is open and you cannot use it, you can try to force quit and reopen it again. This way, it may get a fresh start. Here are the steps to complete the process:
1→ While the Preview option is running in the background, go to the left side of your menu bar and click on the Apple logo.
2→ After clicking on it, go down, where you will find the Force quit… option. Click on that.
3→ This will open up a window with the list of the applications currently running. Look for “Preview” and click on it. Next, Click on the Force Quit button.
4→ Finally, click on Force Quit for confirmation to close the app forcefully. Now you can restart it again and check if it is working.
#4. Check If Restarting Your Mac Works
Well, this is the most common solution we all try regardless of our technical knowledge, and the best thing is that it usually works. Restart your machine in the event of any technical error or bug. So you can do the same in this case as well. If you know how to do it, it’s excellent, but if you don’t follow these simple steps,
For this, you have two options to go for. The first is to restart it, or else you can force restart it using the shortcut keys.
Let’s look at the first one:
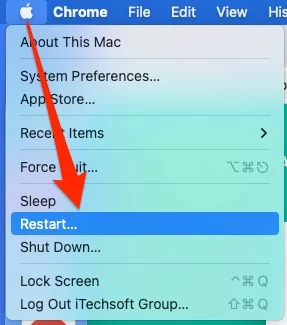
1→ On the top left of your Mac screen, you will find the Apple logo. Click on that first.
2→ Right after clicking on it, a drop-down menu will appear with the option of restarting. Click on that, and your device will restart.
The other alternative is to force a restart using the keyboard shortcuts, and the steps are as follows.
On your keyboard, simply press Control+Option+Command+Power Button (only once). This will allow you to save your file if you are currently working on something. This way, you will not lose your precious data.
Restarting your Mac should be done regularly to keep it running at its best. Restarts are required when installing new software or updating the operating system. When you restart your computer, all of the applications and files will open back up as if nothing had happened.
This can save ample time in the long run because it allows everything to load correctly without waiting for things to finish loading.
#5. Go For The Latest Mac Update
Sometimes, when things do not work correctly, it is always necessary to give them a new start, and your Mac update can be that. Updating your Mac to the latest version of the OS may solve the problem of the Preview Application and can also enhance the speed of your Mac. So give it a try and see if it works.
Here are the steps to update your Mac to the latest OS available:
1→ Go to the left section on your desktop where the Apple logo is located and click on it.
2→ It will open up another menu bar, where you will find the “About This Mac” option. Click on that.
3→ A new pop-up window will appear containing the details of your Mac and the current version of the OS that you are using. Look for the software update option on the right-hand side and click on it.
4→ You need to sit back and wait for your Mac to look for the current update available, which will be displayed to you in a few minutes.
5→ Finally, the update process will start, and you will need to wait for it to complete.
The duration of your update depends on how fast your internet connection is. It can take from 10 minutes to several hours.
#6. Clearing The PList File For Preview On Your Mac
A Plist file is a property list file format that can be used on macOS. It is also known as the Property List File Format or simply PLIST. The Plist files contain key-value pairs organized into dictionaries and arrays. The dictionary’s keys are strings, and the array’s values are either integers or floating-point numbers.
They need to be deleted occasionally to restore the proper functionality of any application experiencing any bug or error.
How To Clear The PLSIT File?
Here are the simple steps. Follow them:
1→ Start by opening a new Finder window on your Mac by hitting Command + N on your keyboard.
2→ Look for the “Go” option located on the menu bar, which you will find on the left side of your screen.
3→ Go to your keyboard and hold down the Option key. You will quickly see the Library option that will be listed in the drop-down menu. Simply click on it.
4→ You will find a folder named Preferences under the Library section. Double-click on it to open.
5→ Now, you will be seeing a list of files under it. Look for ‘com.apple.Preview.plist‘ and delete it.
6→ Finally, open the Preview application again. Your Mac will automatically create a new Plist file after clearing the previous ones.
#7. Try An Alternative Third-Party App
So you tried all of the suggested fixes, but none of them worked for you? No worries! We still have a solution for you. Although Mac’s Preview application is a great tool, you can still go for other third-party applications.
Here is the list of 4 of the best alternative applications that you can choose from according to your needs:
- Skim is a free, open-source PDF reader for Windows, Mac OS X, and Linux. With an intuitive interface, it is the fastest, lightest-weight, and most secure PDF viewer on the market. You can view PDF files and edit them using its built-in text editor or third-party applications like Adobe Acrobat Reader or Foxit Reader. Skim also supports viewing ePub books in addition to standard PDF files.
- Acrobat Reader DC: Acrobat Reader DC is a free and easy-to-use PDF viewer. It lets you view, annotate, fill out forms, and sign documents in your favorite PDF format. Acrobat Reader DC also includes security features such as password protection and secure document sharing.
- Foxit: Foxit is a PDF reader that supports the latest version of Adobe’s Acrobat Reader. It has an intuitive user interface that includes many useful features such as bookmarks, annotation support, text-to-speech reading, and search. Foxit also lets you create custom annotations for any PDF file or webpage. You can even save your favorite annotations to reuse later in other documents.
- Firefox Pdf Viewer: Lastly, on the list, we have Firefox Pdf Viewer, a free application that enables you to view and print PDF documents. Firefox PDF Viewer supports the following features:
You can view two or more pages side-by-side in a single window and zoom into any document area. You can view two or more pages side-by-side in a single window and zoom into any area of the paper if you are viewing multiple pages at once. And if you are printing from within Firefox. You can print directly from within Firefox without first opening your default printer manager.
For all Mac users, the Preview application is one of the most essential and frequently used tools. Any error or difficulty in the application you regularly rely on for most of your work can be frustrating. So here we have created an article for you to save time and effort. I hope the information shared in this blog has been helpful to you. Thank you for reading.
