If you’ve ever checked your Mac’s storage and noticed something called purgeable space, you might wonder what it is and how to clear it. In this article, we’ll break it down in simple terms and give you practical steps to free up your Mac’s storage.
Delete/Clear Purgeable Space on Mac: Clear Disk Space on Mac
Before proceeding with the steps to clear purgeable space on macOS, let’s first understand what purgeable space is on MacBooks and Macs.
What is Purgeable Space on MacBook, and Mac?
The concept of Purgeable Space on MacBooks and Macs was introduced back with macOS 26. Purgeable space is nothing but the storage taken by files and documents that haven’t been used in a while, and it targets reducing redundancy on the Mac. Whenever the Mac is low on storage or needs space, the files and documents may be removed from the Purgeable Space. However, as far as I know, it won’t delete any important files.
What does Purgeable Space Include? What Type of Files?
- Local snapshots of Time Machine backups
- Cached files
- Temporary files
- iCloud files stored locally that can be redownloaded
How to Check Purgeable Space on Mac
macOS Ventura And macOS Sonoma
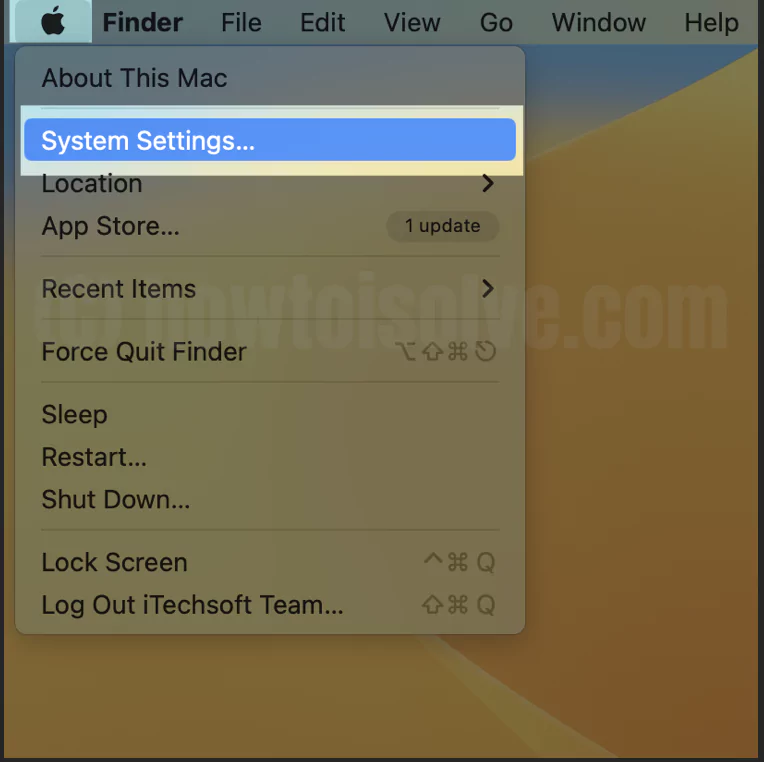
1→ Navigate to Apple Logo > System Settings.
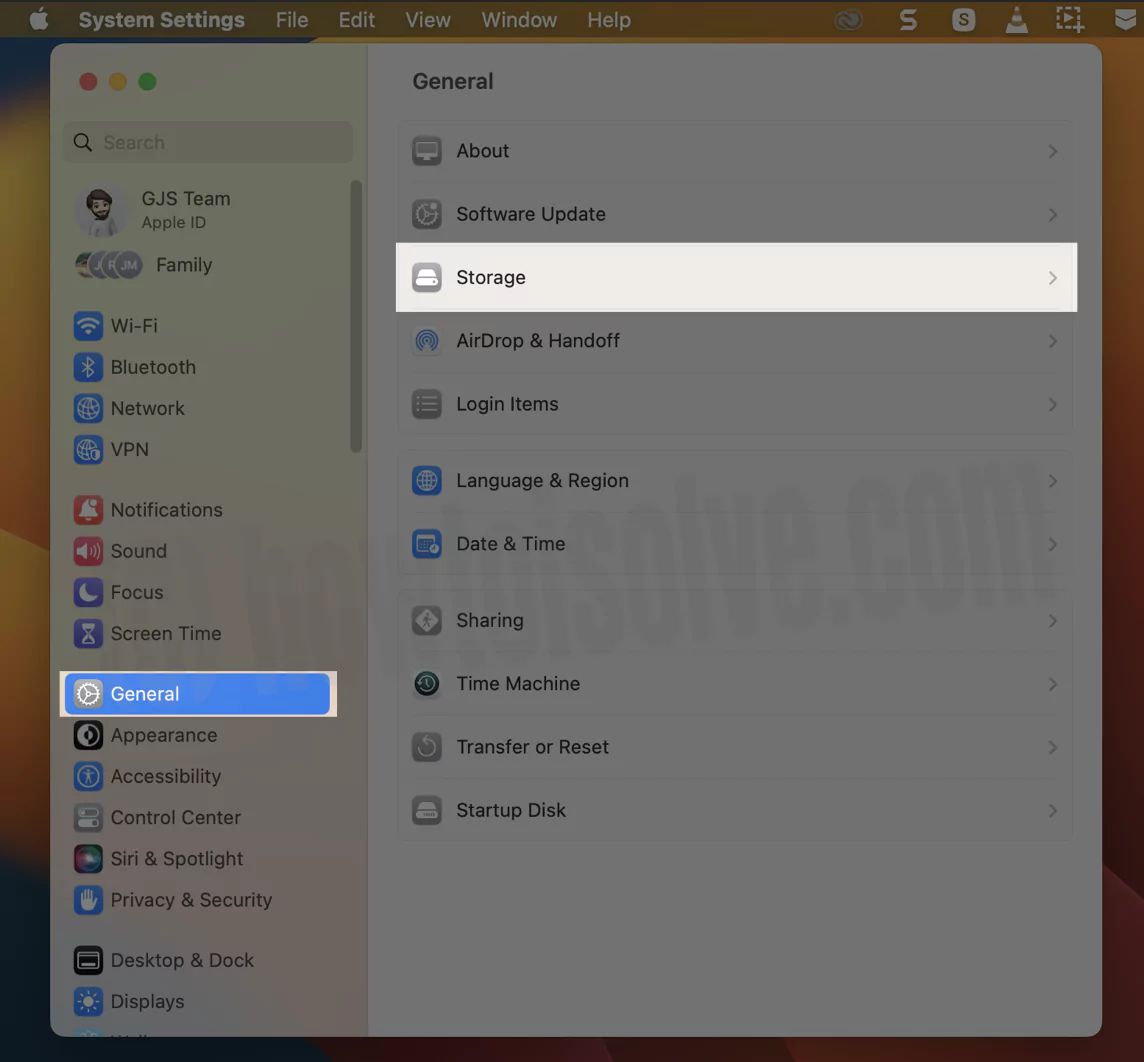
2→ Select General from the left side > Storage.
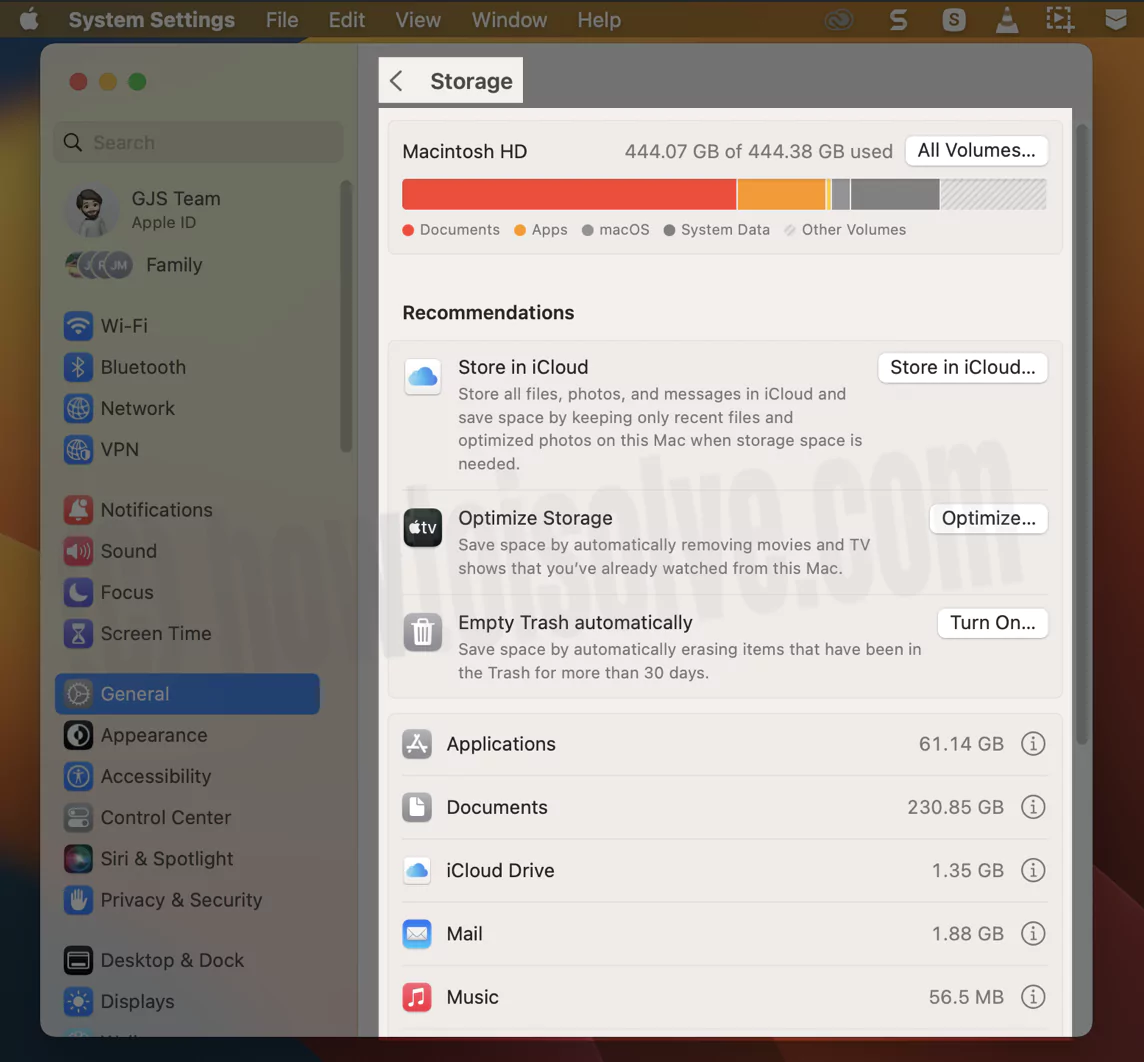
4→ Go to Storage Settings… In the storage bar, the area with a grey cross line with white background is known as purgeable, aka other volumes on latest macOS.
On MacOS Monterey & Earlier
- Step #1: Click on the “Apple” menu.
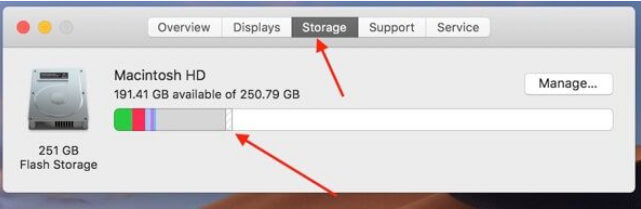
- Step #2: Open “About This Mac”.
- Step #3: There, click on the “Storage” tab. Grey Allotted space shows purgeable space. We can delete data from purgeable space Without or Using Terminal Command. Let’s check it out one by one. Also, don’t forget to share the solution that works for you in the comment box.
Optimize Mac Storage
Many folks are confused about whether Optimize Storage increases the Purgeable Space or helps you clear the Purgeable Space. Try Optimizing Mac Storage on MacBook, and see if it works for you.
macOS Ventura And Later
1→ Click on the Apple Logo from the top left corner. Next, System Settings.
2→ Select General > Storage.
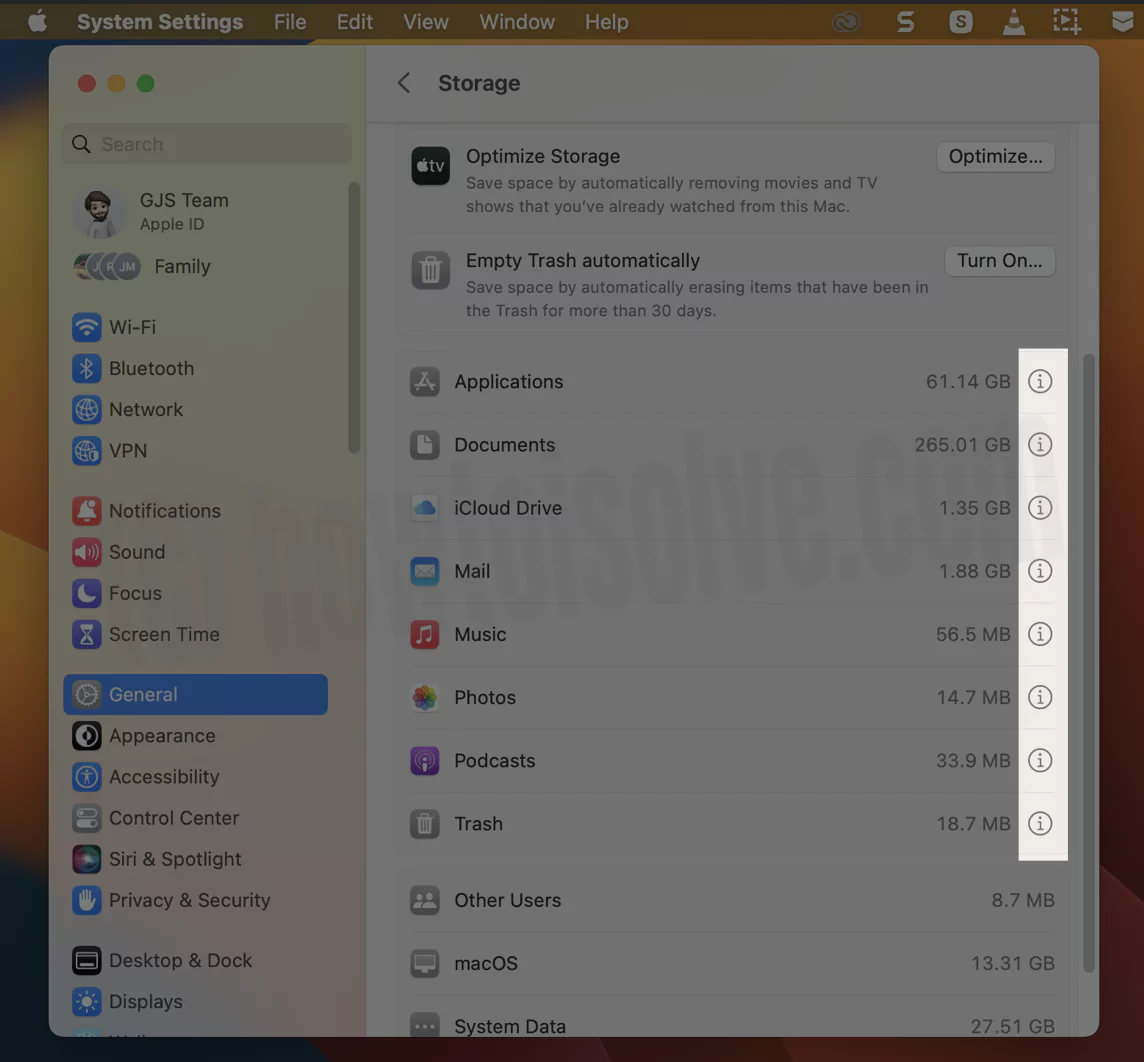
3→ In the storage screen, you will receive a Recommendation Menu. Right over there, you can optimize the Mac storage space. For instance, click “i” Button next to the Applications.
4→ Select the one you aren’t using, and click on Delete… Button.
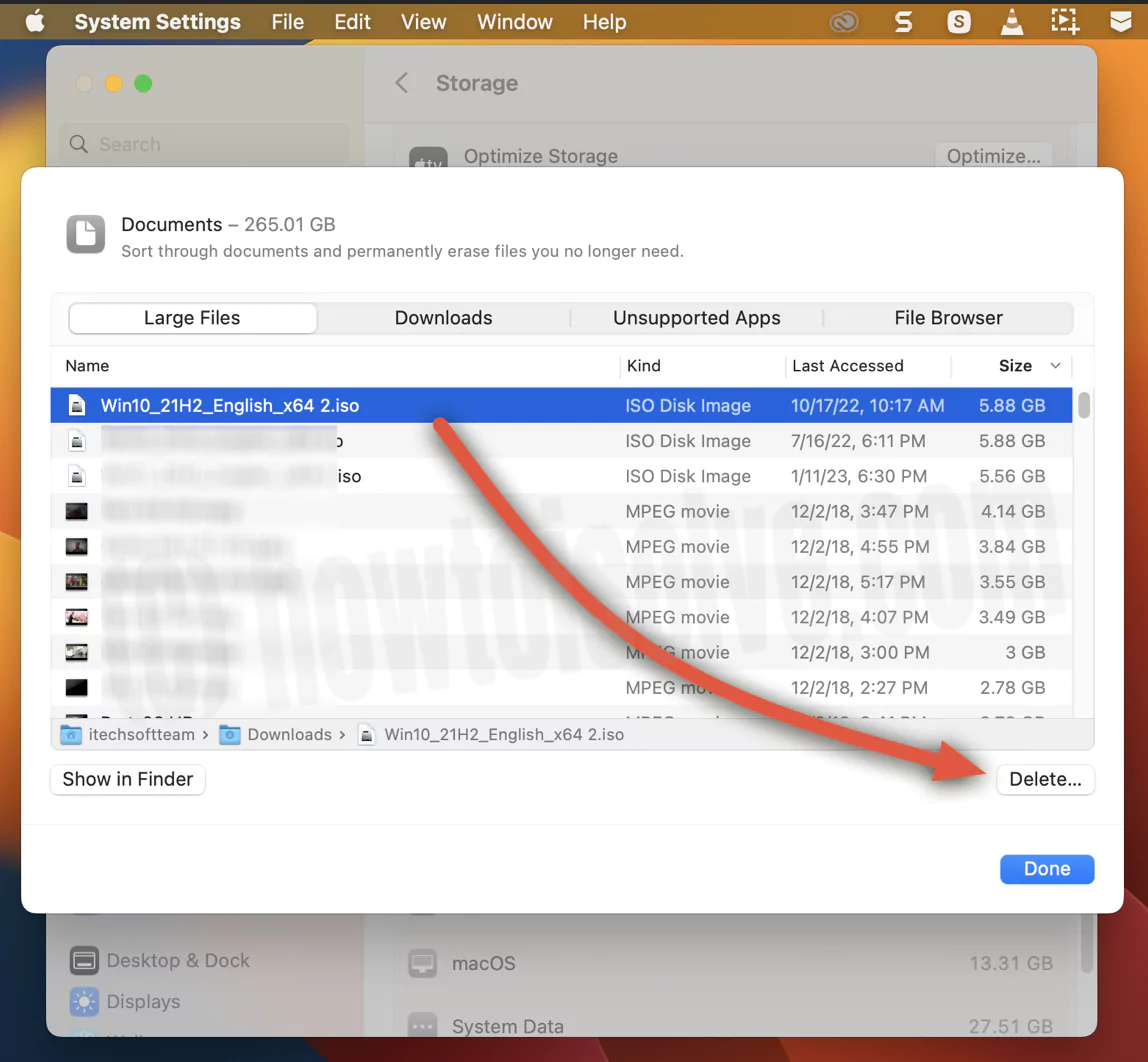
5→ Furthermore, select Delete from a pop-up. At last, click Done.
macOS Monterey & Earlier
- Click on the Apple Logo from top menu
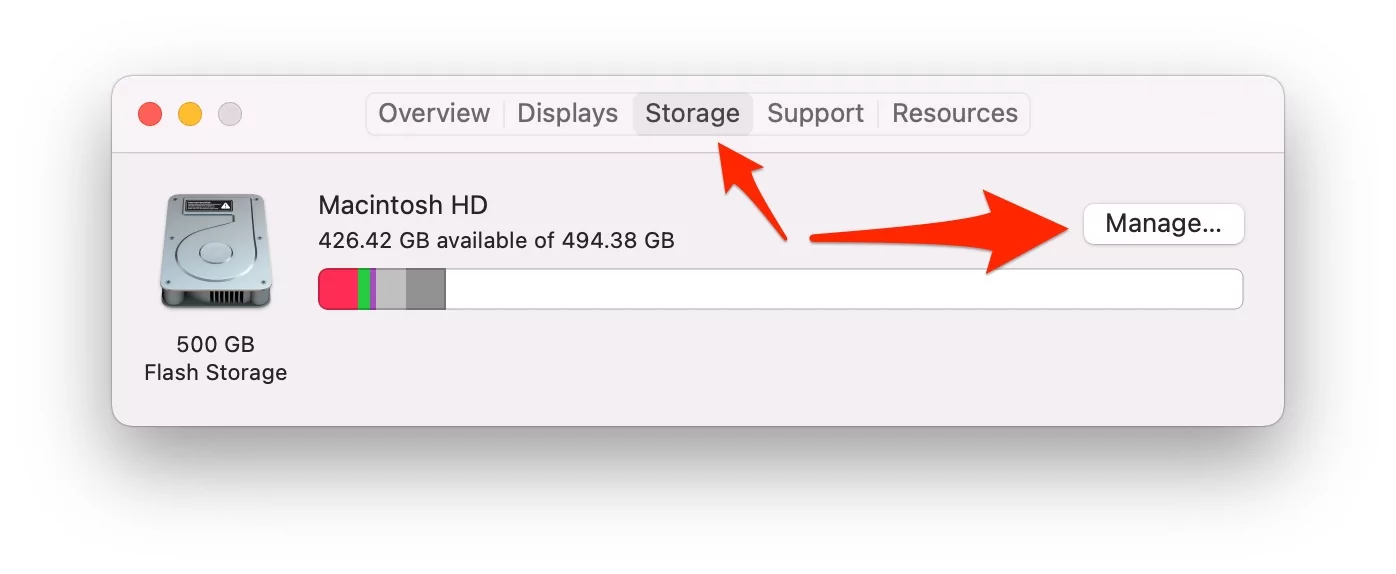
- Select About This Mac.

- Click Storage > Manage


Find out the way to optimize Mac storage in the best way possible.
Clear Purgeable Space on Mac Without Terminal Command
macOS Ventura And Later
1→ Select Apple Logo. Click on System Settings…
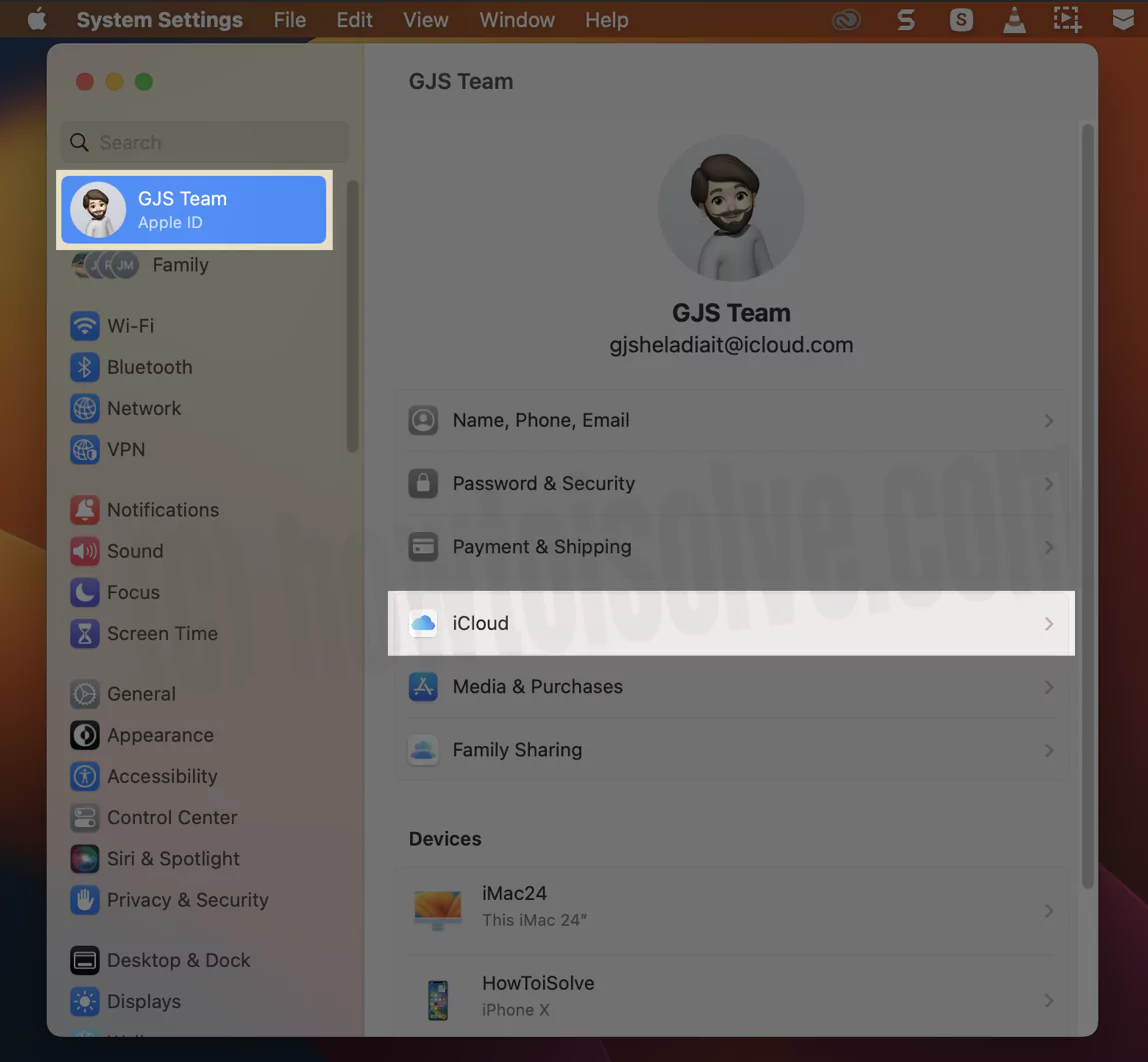
2→ Choose Apple ID[Your Name]. Select iCloud from the right side of the screen.
3→ From the next screen, click on iCloud Drive.

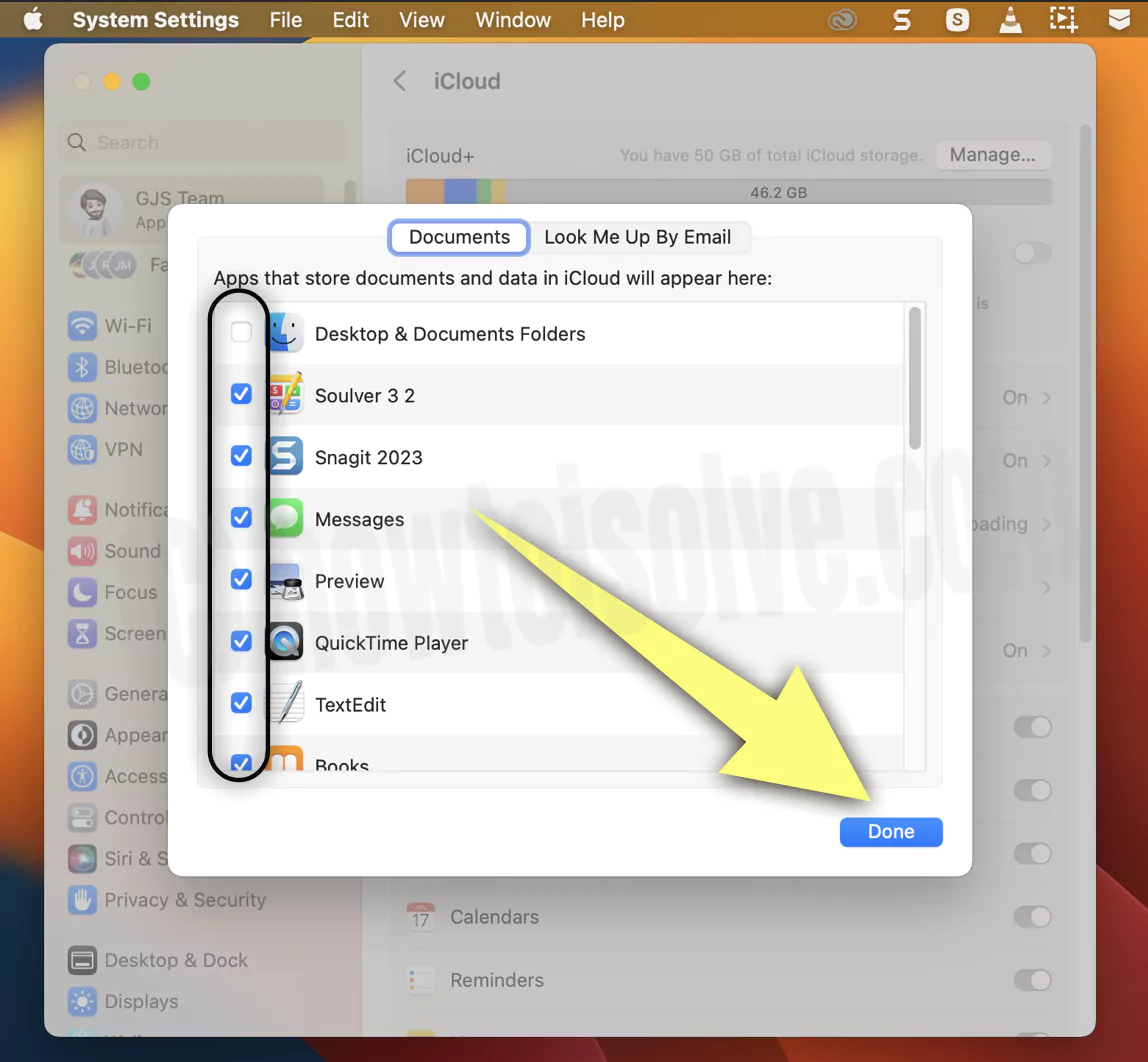
4→ Then choose Options… > Document Menu.

5→ Uncheck the box next to all applications. Hit Done to save. Again select the Apple Logo, and then click on Restart Options.
Once you are done with it, go to Apple System Settings… Select the Backup Disk Drop down, and lastly, choose Manually.
macOS Monterey & Earlier
1. Go to the Apple logo on mac menu.
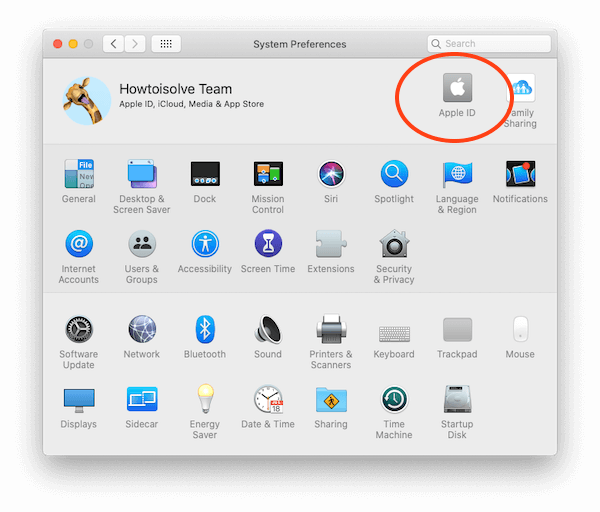
2. Now, Click on the System Preferences option.
3. Next, Click Apple ID under the System Preferences window. Click on iCloud from the sidebar.
4. Now, Nex to the Cloud Drive select options button and click on it.
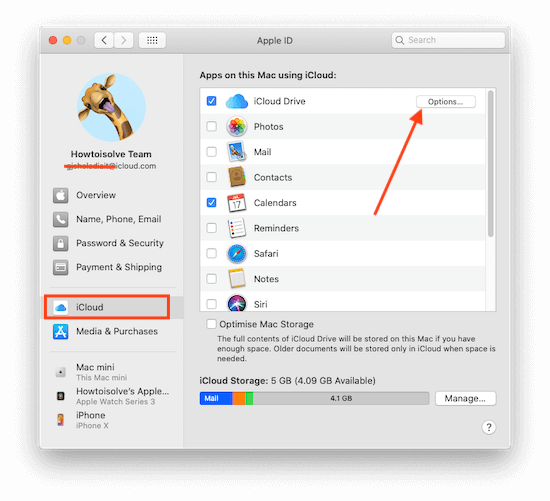
5. Next, Uncheck all Apple Service using Cloud Drive. And Tap on done to save it.

6. Now, Restart your Mac. Go to the Apple Logo > Restart.
7. Now again open System preferences [Apple logo > System Preferences] and Click on Time machine.
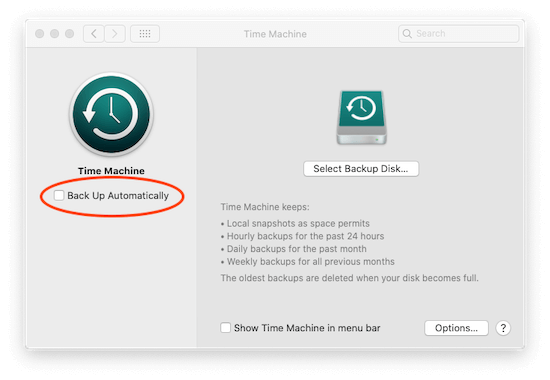
8. From the Time Machine window, uncheck Time Machine Backup automatically. Now the result is showing under the Mac Storage option. Check Purgeable Space using the above steps. Still not clear then try the second method. [Also Check Video Turorial for more help] Clear Purgeable Space Using Terminal Command line.
Clear Purgeable Space on Mac Using Terminal Command
Do you have any tricks or software to clear disk space on Mac? Then reply in the comments! You can get more ideas on the Apple website.
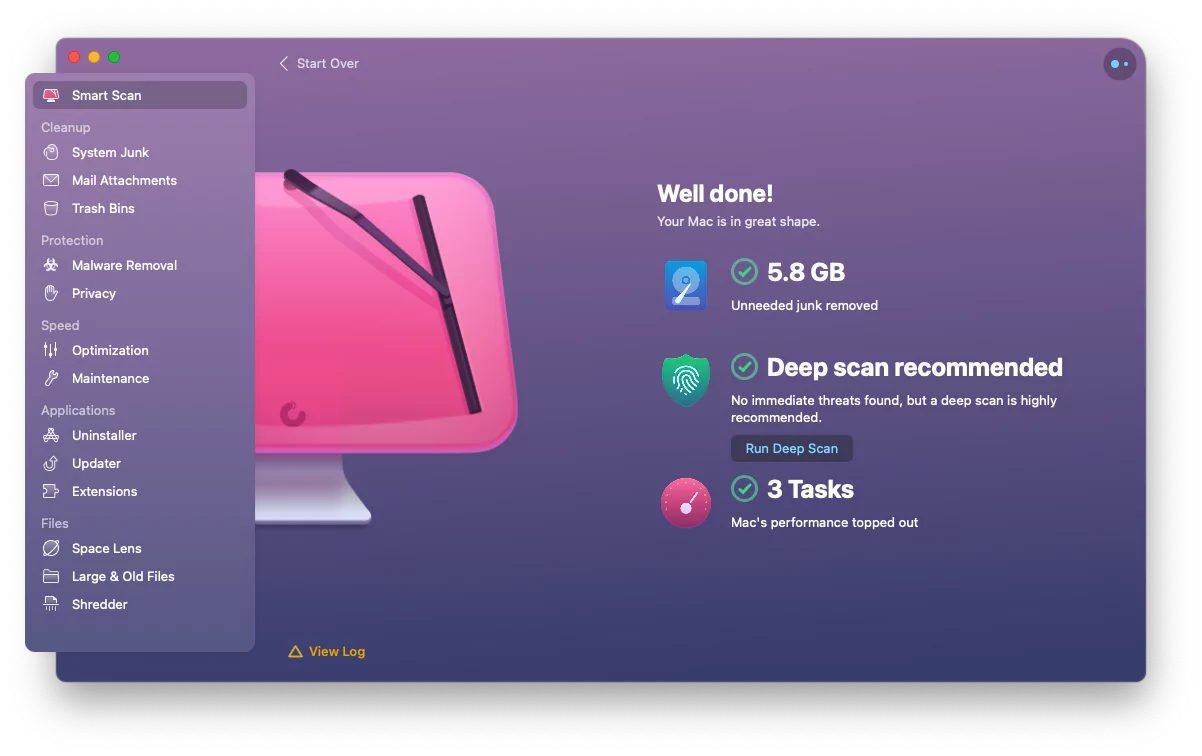
Use CleanMyMac Software
Get help from #1 Mac software to clean up your Mac and Remove all unused Junk, Trash, and Files from your Macs all around the corners.
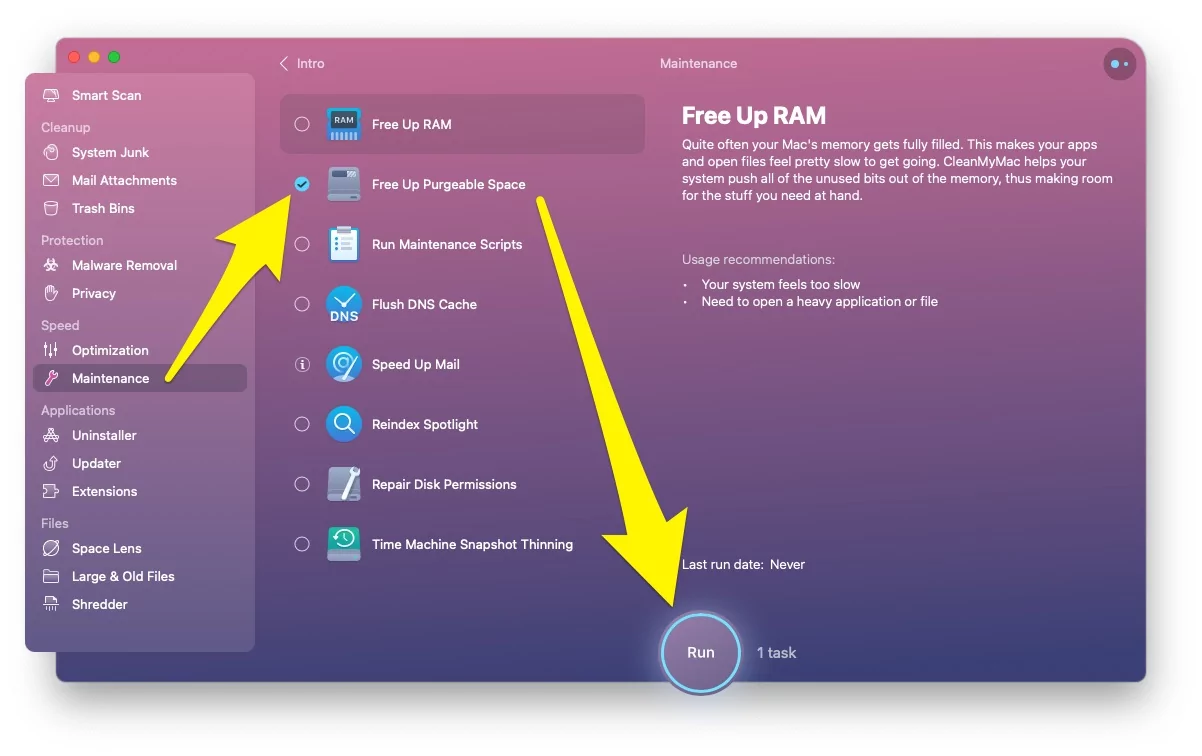
Just in a signal click, find all of Mac’s data and clean up without any important data loss.
Download and read more about Clean My Mac Review.
Note: Clean My Mac is compatible with MacOS Monterey and M1 Silicon & Intel Mac.
Also, get extra storage management, fastboot, and make your MacOS error-free with just one click.
- Smart Scan
- Cleanup
- System Junk
- Mail Attachments
- Trash Bins
- Protection
- Malware Removal
- Privacy
- Speed
- Optimization
- Maintenance > Free Up Purgeable Space
- Applications
- Uninstaller
- Updater
- Extensions
- Files
- Space Lens
- Large & Old Files
- Shredder
You can fully utilize your Mac’s smart software at Work, Home, or for Personal Use without affecting data.


