
Screenshot on Mac not working when I tried to capture the screenshot. Also, Mac plays a shutter sound for a screenshot but doesn’t appear on the screen, and even the screenshot is not saving to the desktop in macOS [Default location]. We all have alternatives to do anything, and taking screenshots has to be in macOS. However, the quickest way to capture screenshots is by using shortcuts. Though if you are stuck in the middle (Mac screenshot stuck on screen), you must go for long methods to keep going.
Here in this troubleshooting, we have mentioned the tricks to fix the screenshot not working on macOS Sonoma, Monterey, Big Sur, Catalina, or Mac Mojave. Also, there are a few other methods to capture screenshots on Apple laptops.
Complete Guide: How to take a Screenshot on Your Mac
Tips to Fix Screenshot on Mac Not Working: MacBook Pro/ MacBook Air
Different Ways to Take Screenshots on MacBook, Mac
Where are my screenshots going on Mac? Or Screenshots disappeared on Mac? It might be possible there’s no problem at all. You are just using a false combination of keys to capture screenshots on Mac. Look, at how to take a screenshot and save it on the desktop.
- Close Other Running Apps on your Mac that uses the same Keyboard Shortcut for Taking a screenshot or other task like “Skitch“. For Example, Skitch is also using the Same Screenshot Keyboard Shortcuts. Go to the top Mac menu, Right-click on Shortcut, and Force close the app.

How to Save Screenshot on Mac Desktop:
- Command + Shift + 5: Press these all keys from your Keyboard and See the Screen Capturing tool on your Mac screen,


You can see the recording options as well. Also, Find the Default save location under the option.
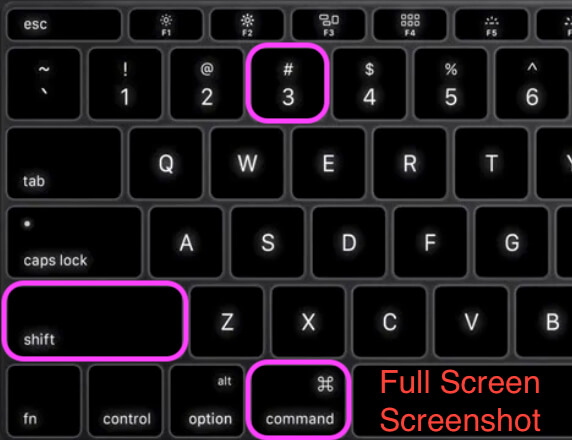
Command+Shift+3: You can take a screenshot of the entire screen and save it as a file on Mac Desktop.
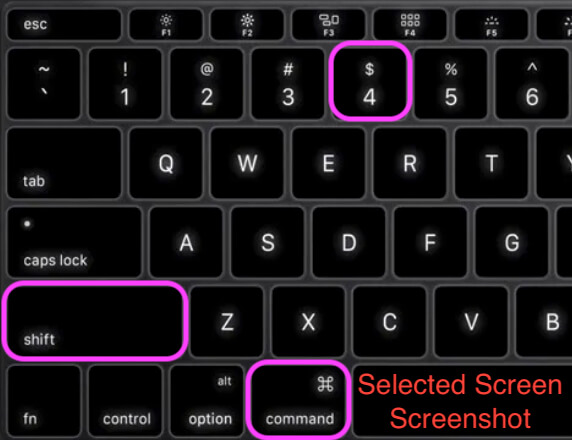
Command+Shift+4: This command takes a screenshot of a particular area of your Mac’s desktop.
How to Save Screenshot to Clipboard:
- Command+Shift+3: Take a screenshot of the entire display, but it will save to the clipboard.
- Command+Shift+4: Choose the area of the screen and save the screenshot to the clipboard.
- Command+Shift+4+Space+click on the window: Capture a screenshot of a particular window and save it to the clipboard.
For macOS Mojave or later, press the Command+Shift+5, and in the Options, Choose Desktop as a path, checkmark the Remember Last Selection, and continue taking a screenshot. It is also a potential workaround when a Mac screenshot disappears.
Solution 1: Restart Your Mac
If you haven’t force restarted Mac in a long time that it might be possible that a few functions won’t respond. So we will take our chances with this simple fix. There are three different ways to restart the Mac and MacBook.
- Hold down the Power button and select Restart. Alternatively, press “Control+Eject” and then select Restart.
- Right from the dock, click on the Apple Logo from the top menu and select Restart.
- Press the “Control+Command+Power” button or “Control+Command+Eject” and select Restart.
Solution 2: Check & Restore Default Shortcuts Screenshot Mac
Enable Screenshot on Mac if it’s disabled. There are custom settings for Disable Screenshot on Mac. Re-enable using the below steps or Restore Default Shortcut if Screenshot Shortcut changed on Mac.
To capture a full screenshot on Mac, press Command+Shift+3, and if you want the screenshot of the selected region, press Command+Shift+4/ Command+Shift+5 with Custom settings. These shortcuts will only work unless you have activated new shortcuts. Go and check,
On MacOS Sonoma & Later,
Step 1: Go to the Apple Logo () from the top menu > System Settings.

Step 2: Select the Keyboard from the left side and Click ‘Keyboard Shortcuts…‘.

Step 3: For the Screenshots Option, Keep selecting all the shortcuts or Try after restoring the default keyboard shortcuts by clicking on ‘Restore Defaults‘.

On MacOS Monterey & Earlier,
Step #1: Click on the “Apple Logo” menu and open “System Preferences”.
Step #2: Open “Keyboard”.
Step #3: Click on the “Shortcuts” Tab, and Next, click on “Shortcuts” from the sidebar.
Step #4: From there, you can check that shortcuts are activated under Screenshots and also verify that they haven’t been appointed to something different. if you changed screenshot shortcuts, Use the Restore Defaults button.

That’s it.
Solution 3: Try Grab to take a screenshot on Mac
Instead of taking a screenshot using shortcuts use Grab to capture a screenshot on MacBook. All the options are available, if you want to capture the whole screen and if you want to take a screenshot of the selected region. You can do it using Grab.
- Step #1: Open Finder on Mac > Click on “Applications” from the sidebar.
- Step #2: and then click on “Utilities”.
- Step #3: Click “Screenshot”.
You can select any option and capture a screenshot per your need.
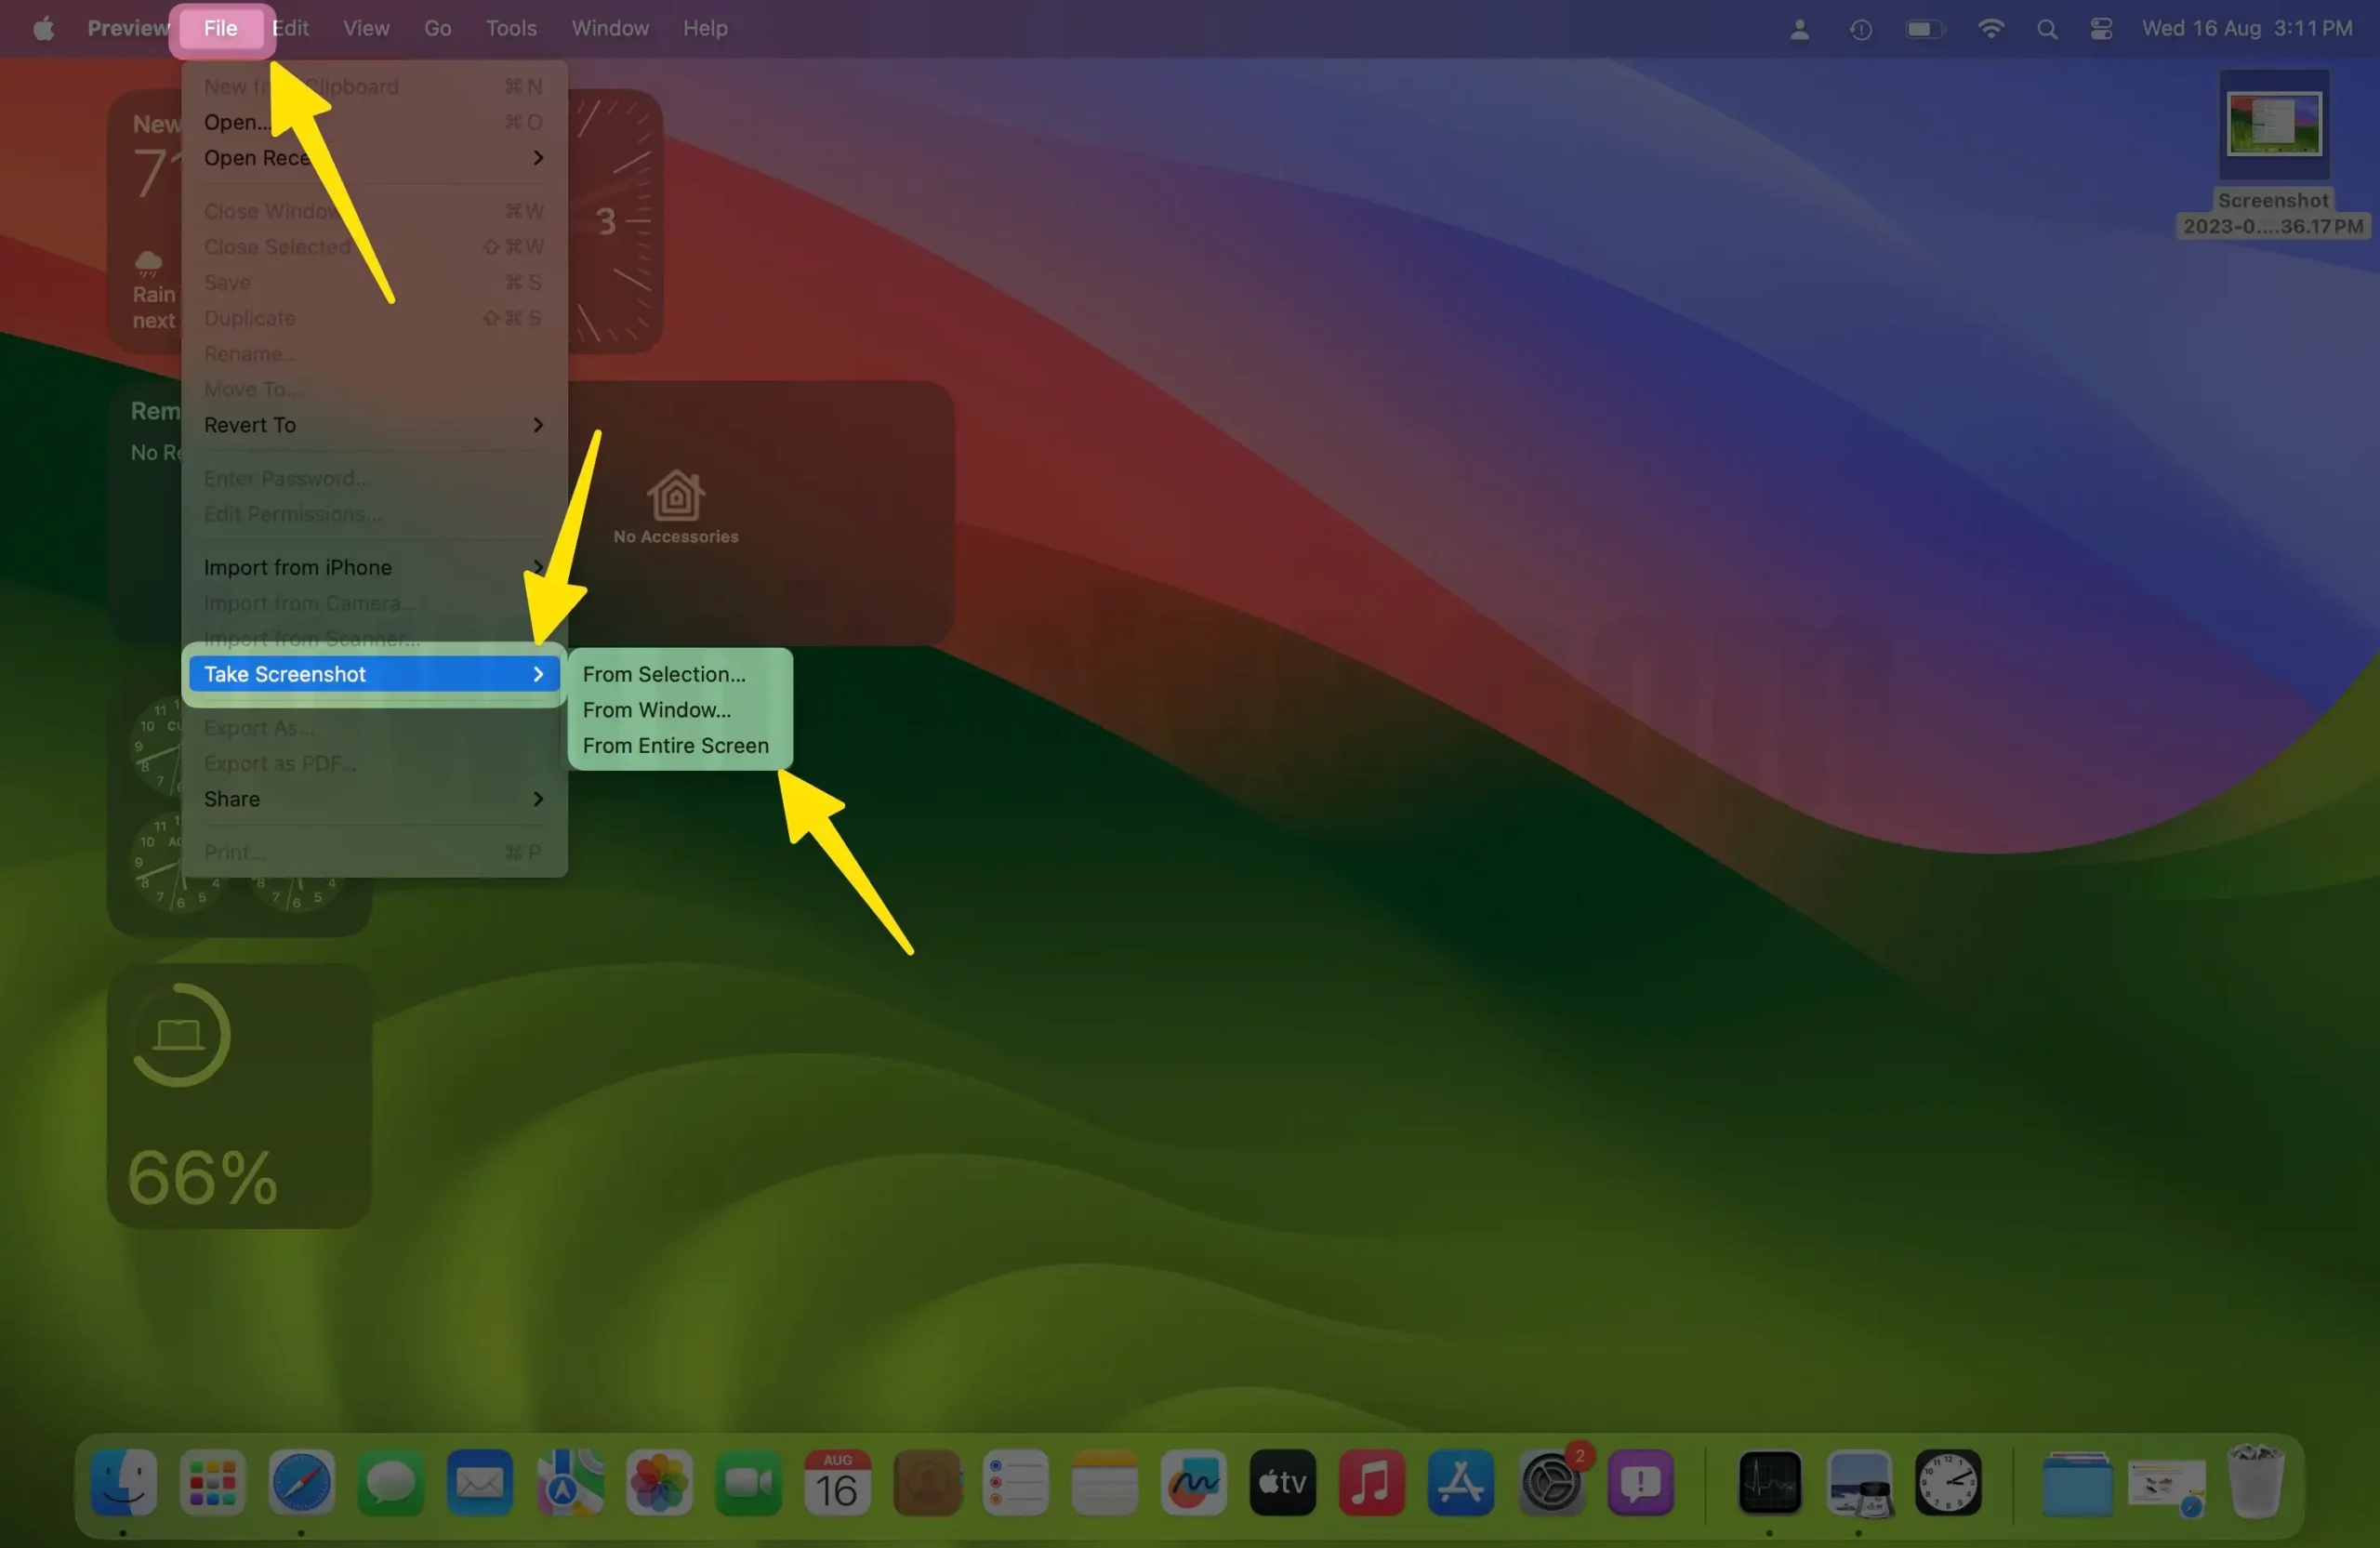
Solution 4: Capture Screenshot using Preview
If Command+Shift+4 not working on Mac, then Preview is a default tool that is available in Mac to open and edit pictures. Apart from this, you can also click the screenshot using Preview. Let me show you how.
- Step #1: Go to “Preview”.
- Step #2: Click on “File” and choose “Take Screenshot”.
- Step #3: It’s time to select any one option as per your requirement.
Solution 5: Move the Preference File
- Step #1: Open “Finder” and click on “Go”.
- Step #2: Click on “Go to Folder”.
- Step #3: Enter ~/Library/Preferences/

- Step #4: Find the file “com.apple.ImageCaptureApp.plist”.
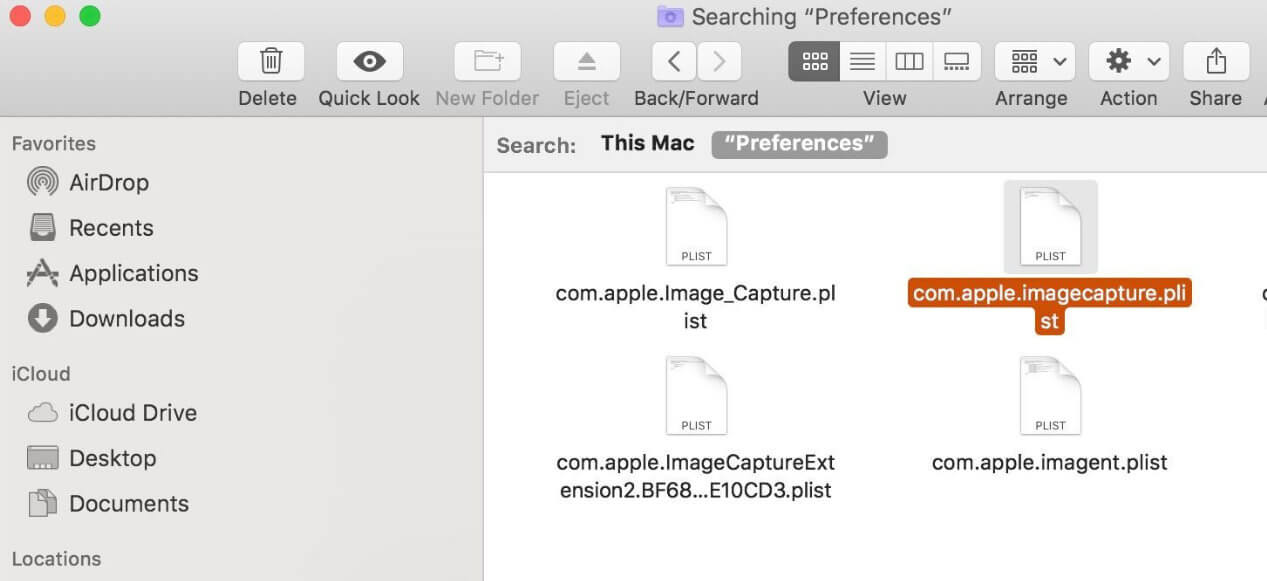
- Step #5: Move that file to the desktop and restart Mac.
- Step #6: Now check if the function is working; if yes, then delete that file.
Do you find these workarounds helpful to fix Screenshot on Mac not working in macOS Monterey/Mojave? Let me know in the comments, and share it with your support friends.
Relaunch Finder on Mac
On one of the Mac, the user has experienced the same Mac screenshot not saving to the desktop, but then after relaunching the Finder on Mac, it worked. Here’s how to do it,
- Press the cmd+option+escape on the keyboard.
- Click on Finder.
- Then click Relaunch.
Grab Not Working on Mac
Probably, after updating macOS to the latest version, grab stops working. However, we have only one solution to this problem.
- Launch Finder.
- Click Go from the menu bar.
- Then select Go to Folder and enter the following path.
~/Library/Preferences/com.apple.grab.plist
- Hit enter.
- Drag the Selected plist file to the Trash.
- Restart the Mac.
In case your iPhone or iPad doesn’t allow Print screen, then get fix Screenshot not working iOS.
Screenshot Not Saving to Desktop Mac
It might be possible that someone has changed the screenshot-saving location. Therefore, try the below trick.
macOS Mojave or later versions lets you choose the location to save screenshots. If Mac screenshot not appearing on the Desktop, then follow the below steps and take one more screenshot.
- To take a screenshot, press the Command+Shift+5.

For MacOS High Sierra or Earlier,
The older macOS works differently. Using Terminal, you have to change the screenshot path of the Mac.
- Create a folder on Mac, with whatever name.
- Open the Finder.
- Press Command+Space to launch Spotlight search and then search Terminal.
- Type the following command in Terminal,
defaults write com.apple.screencapture location
- Make sure to leave one space next to the “location”
- Next, drag the folder that you’ve created to the Terminal.
- Hit return key.
- This is it. Now all the screenshots of the Mac will be stored in the folder you created.
Still, if you can’t locate the screenshot on Mac, then restart the Mac and try again.
Can’t open screenshots on Mac
Update the Mac
The system features can go rogue due to outdated firmware. Therefore, check for the latest software update and if available, install on Mac.
For macOS Mojave or later,
- Click on the Apple menu and select System Preferences.
- Select Software Updates.
- Click Update Now
For macOS High Sierra or earlier,
- Go to the Mac App Store.
- Click on Updates
- Update everything one by one.
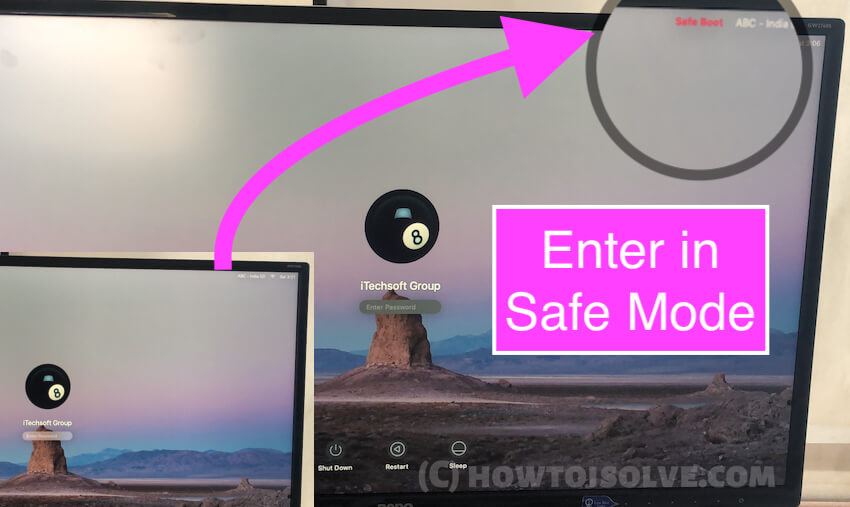
Boot Mac in Safe Mode
- Shut Down the Mac, click on the Apple menu, and select Shut Down.
- Now, turn on the Mac, and immediately hold down the Shift button until the login screen appears.
- A red-colored Safe Boot, in the upper-right corner, will be displayed.
Use Another Account for Testing
If you have two different login accounts on Mac, then switch to another login account and see if Mac Screenshot works or not. Restart the Mac and switch to a different account, or create a second user account on Mac.
- Click on the Apple menu.
- Choose System Preferences.
- Click User & Groups.
- Look for the lock, click on it to make changes. Enter the Administrator password.
- There, you’ll see Add button (+) under the list of users.
- And set it up.
Mac Screenshot Paste Not Working
Whether it is Mac or iPhone, to run apps or features, they use the cache files. In this case, if Mac screenshot copy paste not working, then delete the temporary file and then restart the Mac.
- Open Finder on Mac.
- Click on Go in the top menu bar.
- Then, select Go to Folder.
- Open the “~/Library/Preferences/”
- Find the apple.screencapture.plist and delete it.
Ensure you have enough free space on Mac and See how to Free Up Space on Mac.
Above all are the easy ways to take a screenshot on your MacBook, and Mac Running on any macOS Version.


