
Tired of cluttered desktops every time you take a screenshot on your Mac? You’re not alone—many users on Reddit ask how to organize their screenshots better. Luckily, macOS lets you change the default save location in just a few steps. Whether you prefer storing them in a custom folder or directly in iCloud, this guide will show you how to take control of where your screenshots go, keeping your workspace clean and your files easy to find.
2 Methods: Change Mac Default Screenshot Directory
Step 1: Press “Command+Shift+5” to capture a screenshot.
“First set the location to save your work. Once we set, settings will be saved until we change it next time manually.”

Step 2: A small panel will now be visible, displaying the “Custom Save Destination options to select your desired screenshot location from “Desktop”, “Clipboard”, “Documents”, “Mail”, “Messages”, and “Preview”.
Set other New Folder or Directory [macOS Catalina or later macOS users will find the options for creating a new folder from Options], And Older MacOS users have to use Terminal command, Read on Method 2, Change Screenshot Default save location on Mac using the terminal.

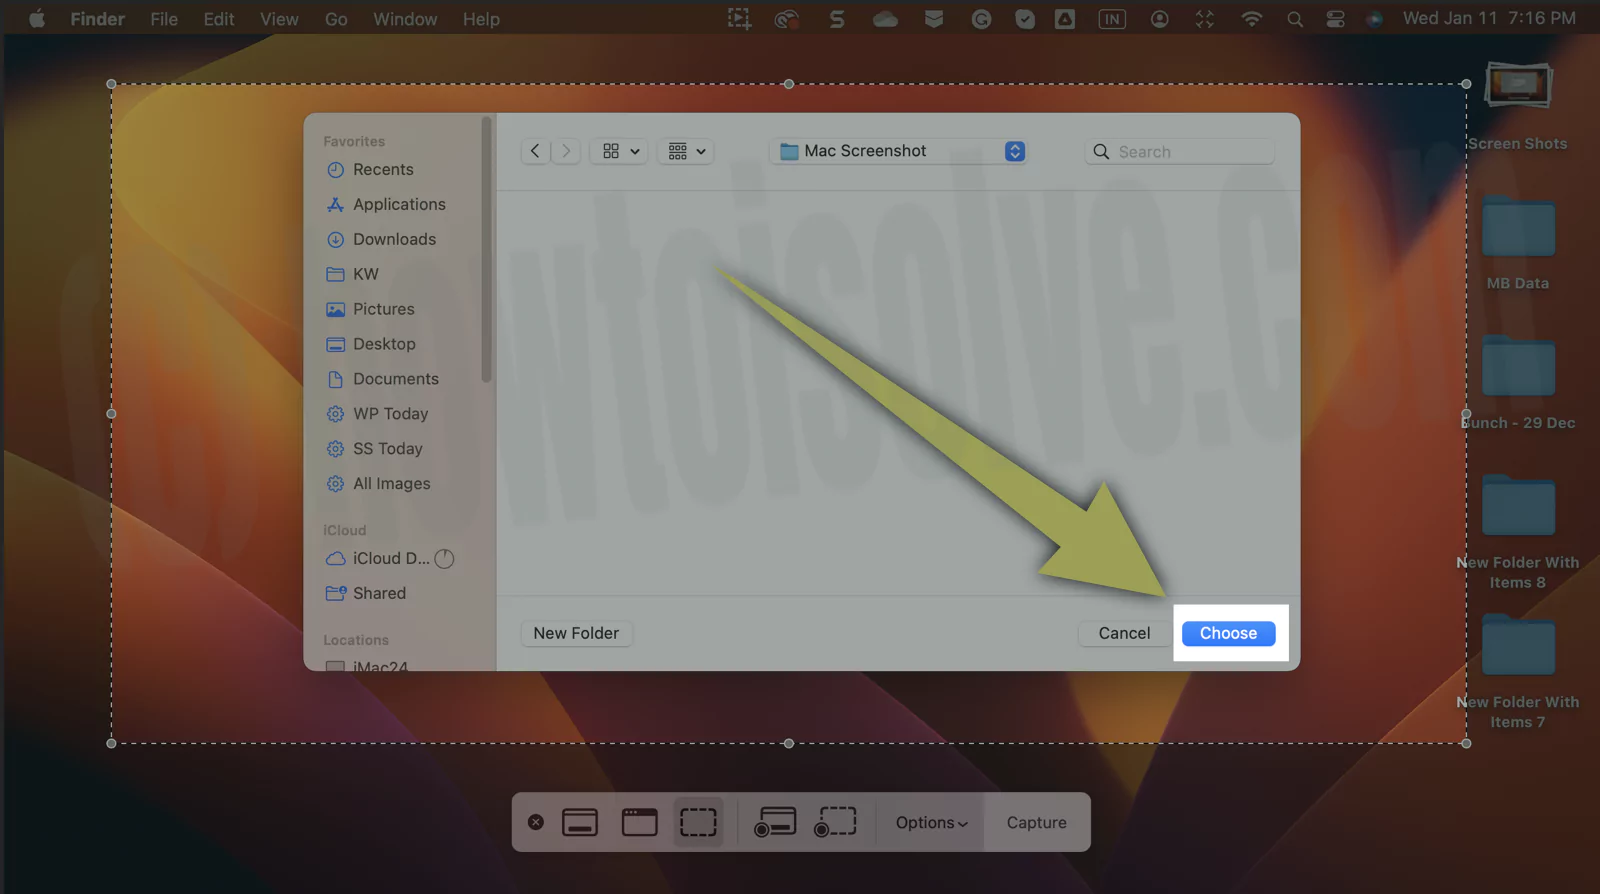
Step 3: Create a New Folder or Select the desired location from the sidebar. Once you create a New Folder or select a Drive, select the Choose option. That’s it.

Choose the New or Existing folder.
Step 4: Next, you will see three different options on the similar panel, “Capture Screen”, “Capture Window” or “Capture Selection”, “Record Screen”, “Record Selection”. Choose any one as per your requirement. Any time we can change the default screenshot save location on a MacBook or a Mac under the Options.

Step 5: If you choose to Capture Selected Window or Capture Selected Portion then you need to select the required part of the screenshot and once you made a selection screenshot will be taken immediately and saved to the selected location.
Quickly Open & Edit Screenshots in Markup
“Right Click” on the Preview Screenshot that will stay in the corner of Mac’s screen for a few seconds. See the image below and select/choose the location.

AlSO READ: MacOS High Sierra or Earlier Mac can change the Default location, How to Change Screenshot default save location on Mac.
Method 2: Change Screenshot or Recording Save on Mac with Terminal Command
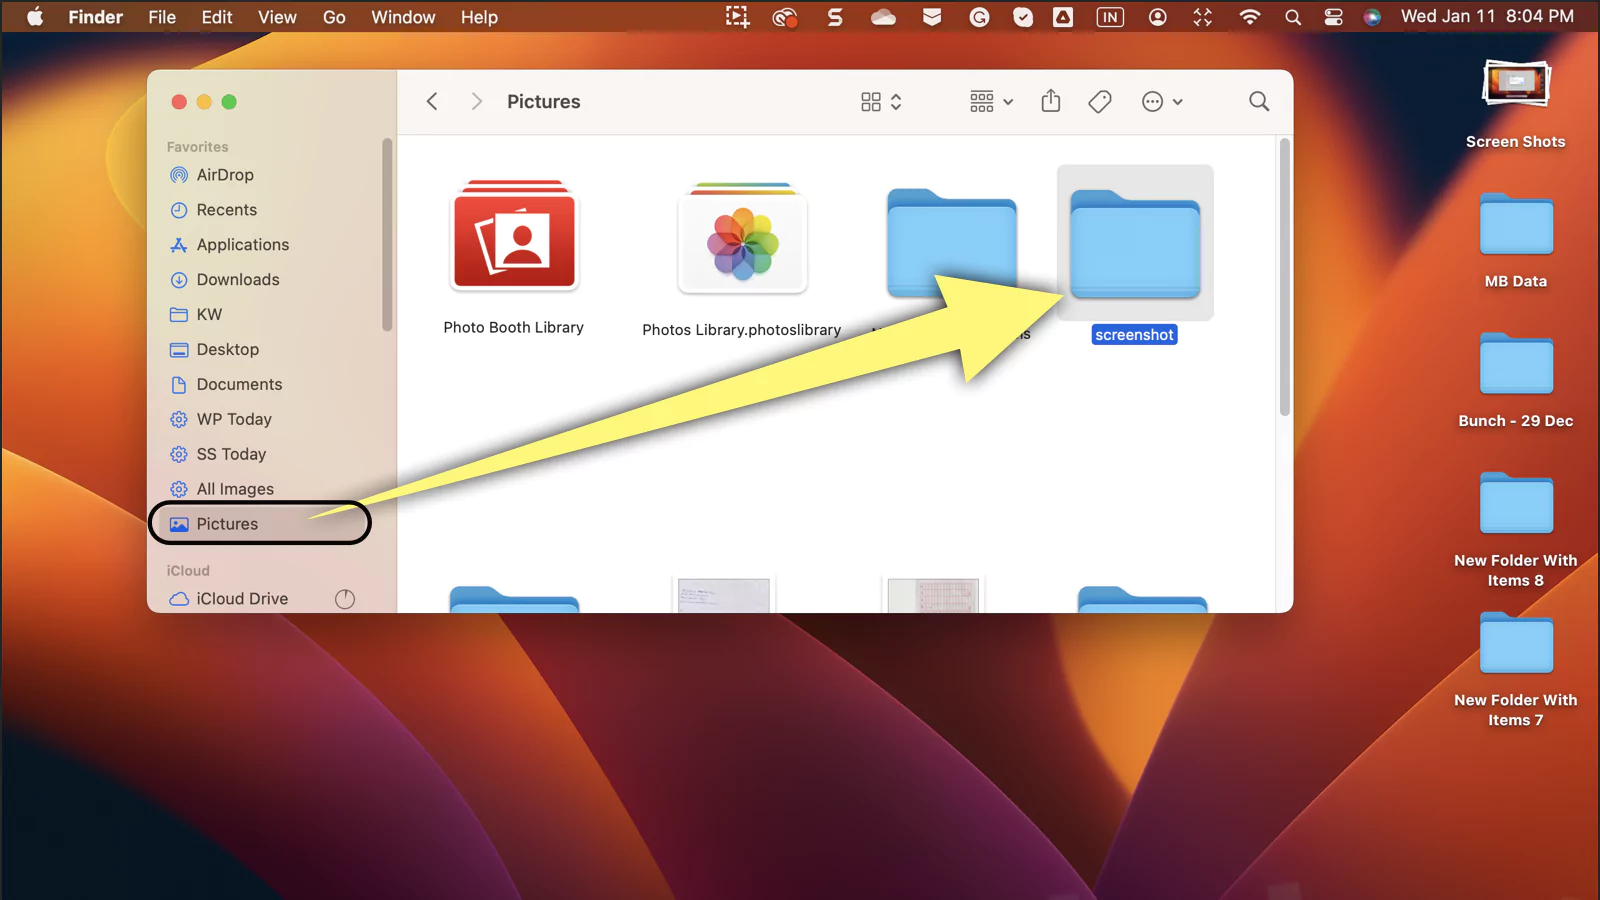
- Open the Finder window on a Mac.
- From the sidebar panel, select the Location. Here I am giving an example for creating the Screenshot folder under the Pictures folder. If on your mac Picture folder is not showing then go to the Finder Preferences from the top menu.
and select the Picture option to show up on the Finder sidebar panel. Here I am done.

Once you have done this, create another folder named ‘screenshot’.
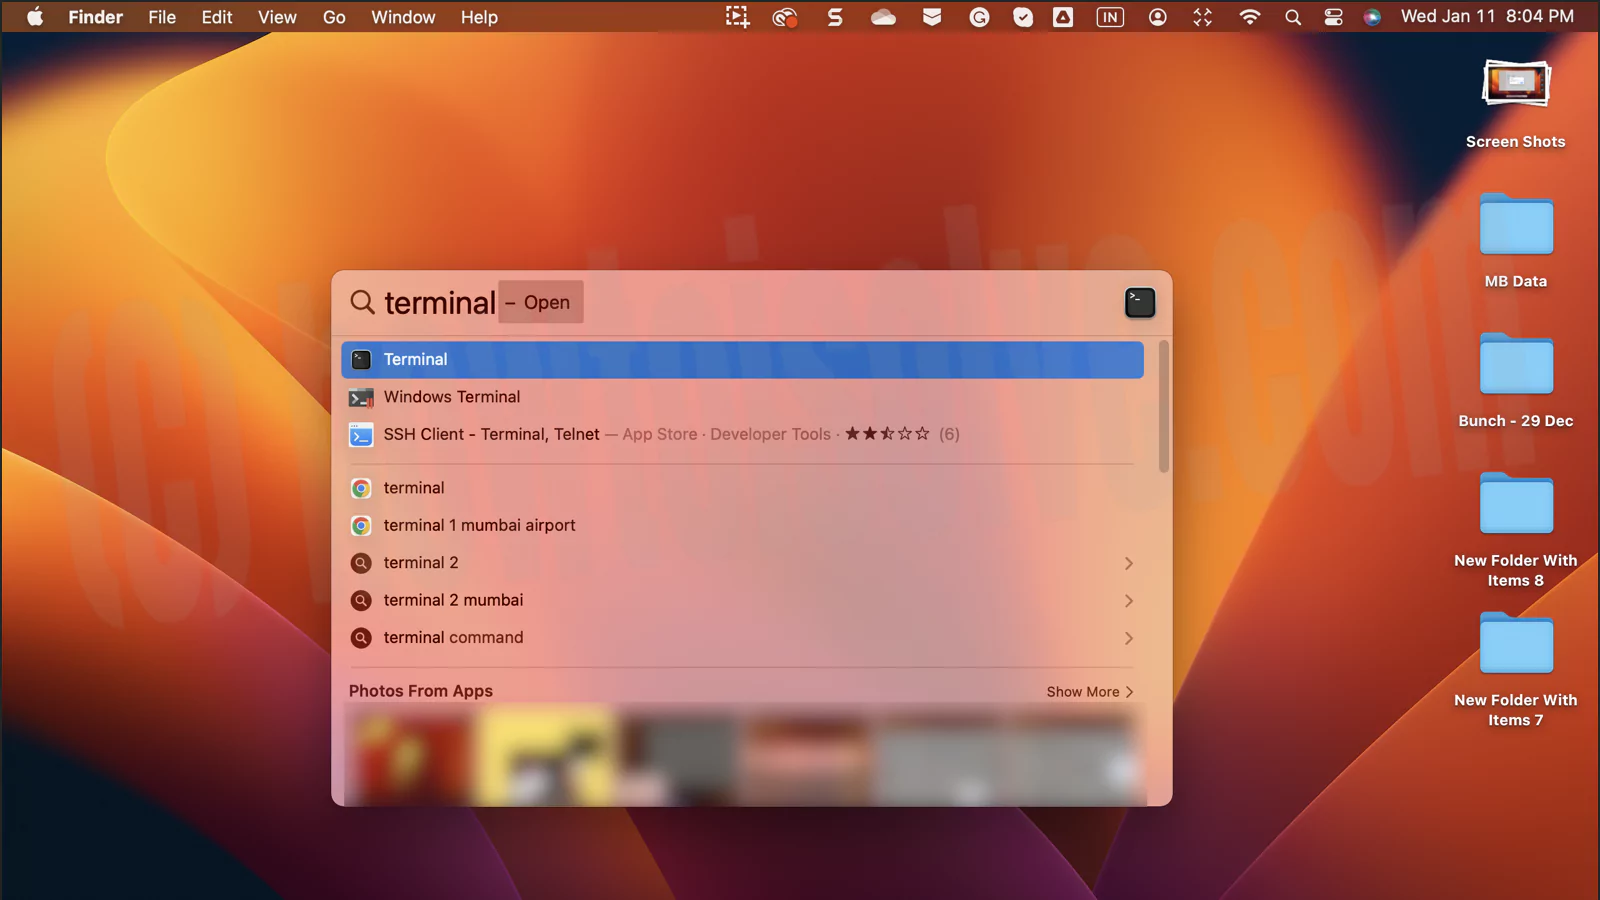
Now run this command in your Terminal window. Open the Terminal on your Mac from the Spotlight search.
Copy and paste this command on your Terminal and hit return to run.
defaults write com.apple.screencapture location ~/pictures/screenshot
Once the command is executed, take a sample test. Here, my Mac is saving my screenshot to a new location.
That’s it.
This will also work on macOS on a MacBook.
NOTE: Once you selected the screenshot location in macOS from that moment all the screenshots will be saved to that location until you change it.
Get more tips and help from us for free by commenting in the box below. I hope you find the correct guide on changing custom screenshot save locations on your Mac.


