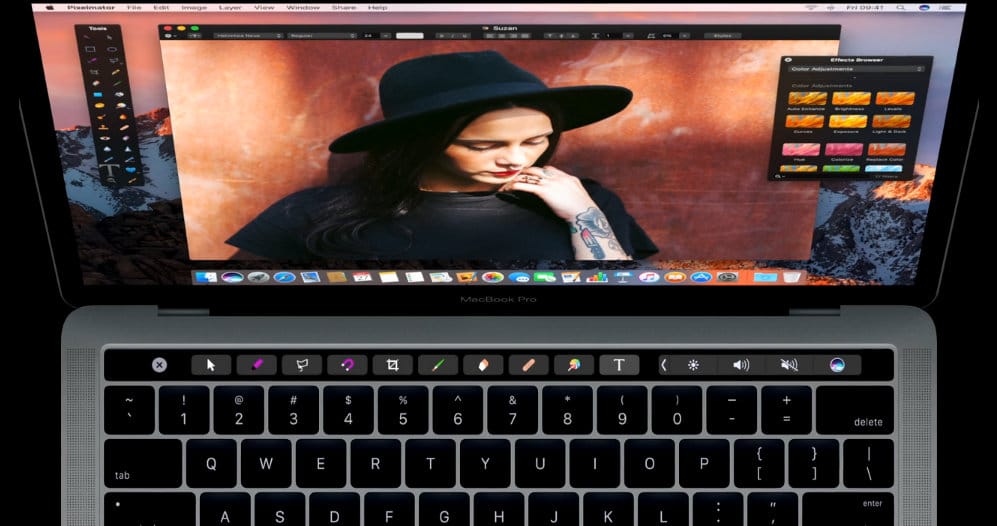
The Tech giant Apple.inc introduced brand new MacBook Pro with touch bar on 2016. The Touch bar is a completely new way to use and controls Apple Apps (Finder, Safari, Mail, Photos, Maps, Notes, calendars, and Facetime) and third-party apps like Pixelmator 3.6 Cordillera and much more. You can now easily use Mac image editing app use Pixelmator with Touch bar. We offer here gimmicks to customize Touch toolbar in them you can remove default tabs from the touch bar and add your favorite tool tabs into the touch bar. As an example, here I’m showing your customize Pixelmator App tools on the touch bar.
Do you want to edit/ add/ remove tools in image editor Pixelmator into the Touch Bar on Mac? To do that follow my underneath given instructions to customize the Touch bar strip and access quickly that in your next design and improve productivity and save time. Do you know the way to adjust the Esc button on MacBook Pro with Touch Bar?
Guide to Customize and use Pixelmator with Touch bar MacBook Pro: macOS Sierra or above
Step 1. Go to the View tab appear next to the layer at the top of the menu bar on your MacBook Pro with touch bar.
Step 2. You have to choose Customize Touch Bar … (you appears customization windows on your display).
Step 3. Now simply remove a tool by dragging and take it into the trash in the left of the touch bar. Next, you have a space to add a new tool on the touch bar.
Step 4. To add a tool (add your favorite tool), just drag a tool from the list at down from the bottom of the screen and into the touch bar and tap on Done on touch bar at left side.
That’s it.
We hope, all your favorite app tools, you can easily keep right at your fingertips when you need them.
As the above mentioned guide you can also adjust other applications (including Adobe Photoshop CC, Affinity Designer, Affinity Photo, djay Pro, Final Cut Pro and iMovie, Logic Pro X and GarageBand, MindNode, PDF Expert, PicFrame, Sketch, and Ulysses) controls on touch bar tabs on your MacBook Pro with touch bar.
To access function keys on the touch bar, you have to need press and hold on Fn key on the physical keyboards. Just use and then release function key to go back on default touch bar tools.
If by default, you want to add Function keys all time for individual Apps. Then you can do that from Keyboard preferences, next click on Functions keys and then go to + sign and add application then done.
Do you find this trick helpful? Let share your feedback in the comment box. Like on Facebook, and follow on Twitter.
