Apple’s motto is to make the iPhone secure as much as possible, but it depends on you how to cover your privacy, and secure your iPhone. Apple can only help to some extent, like securing the iPhone from random attacks, but being the owner, it’s up to you to make sure your iPhone is in safe hands. In this tutorial, I’ve covered the most common mistakes that we made while using the iPhone and tips to increase the security of the iPhone. Though if you follow the entire article and do as we recommend, you may have to compromise with a few features to secure the iPhone, I assume you won’t mind that.
Our team has collected the best possible ways to increase iPhone security and prepared a guide on how to secure your iPhone from hackers. If you have any tips regarding iPhone security that we missed including in the piece of content, kindly let us know. We’ll update our article with your suggestion if it is suitable.
Easy Ways to Protect Your iPhone and Privacy in 2022
Do I Need Extra Security on iPhone
Do you mean anti-virus? Well, the iPhone doesn’t need any antivirus application or software. Apple has already included all the possible security features to protect your iPhone from malware and cyber-attacks. Still, if you are searching for, what is the best security for the iPhone? Look into our special guide on the best antivirus software.
How to Secure iPhone from Theft?
The most convenient way to secure the iPhone from thieves is to keep the iPhone always in your hands or pockets. Leaving the iPhone anywhere makes it easy for thieves to steal your phone. The Find My App is a convenient app to find out misplaced or stolen iPhones; only if you set up, Find Me for your iPhone. Nevertheless, if you end up losing your iPhone and don’t know what to do, the Find My App will be helpful to find the iPhone or remotely wipe out the iPhone. Continue to read the post, you’ll learn how to set up Find My on iPhone.
#1. Set Strong Passcode
This is the first step where most users get cheated by their stalkers, friends, cousins, and colleagues; want to know how? Well, humans have a tendency to use the Password that we use in our daily lives or the digits that are associated with our lives, for instance, the date of birth, the phone number, sometimes the Vehicle registration number, or anything else.
The point is that all this common data is known to our friends and stalkers. Also, don’t use a 4-digit Password; instead, go for a 6-digit Password for higher security.
1. Open the Settings app on iOS.
2. Scroll down and tap Touch ID & Passcode or Face ID & Passcode.
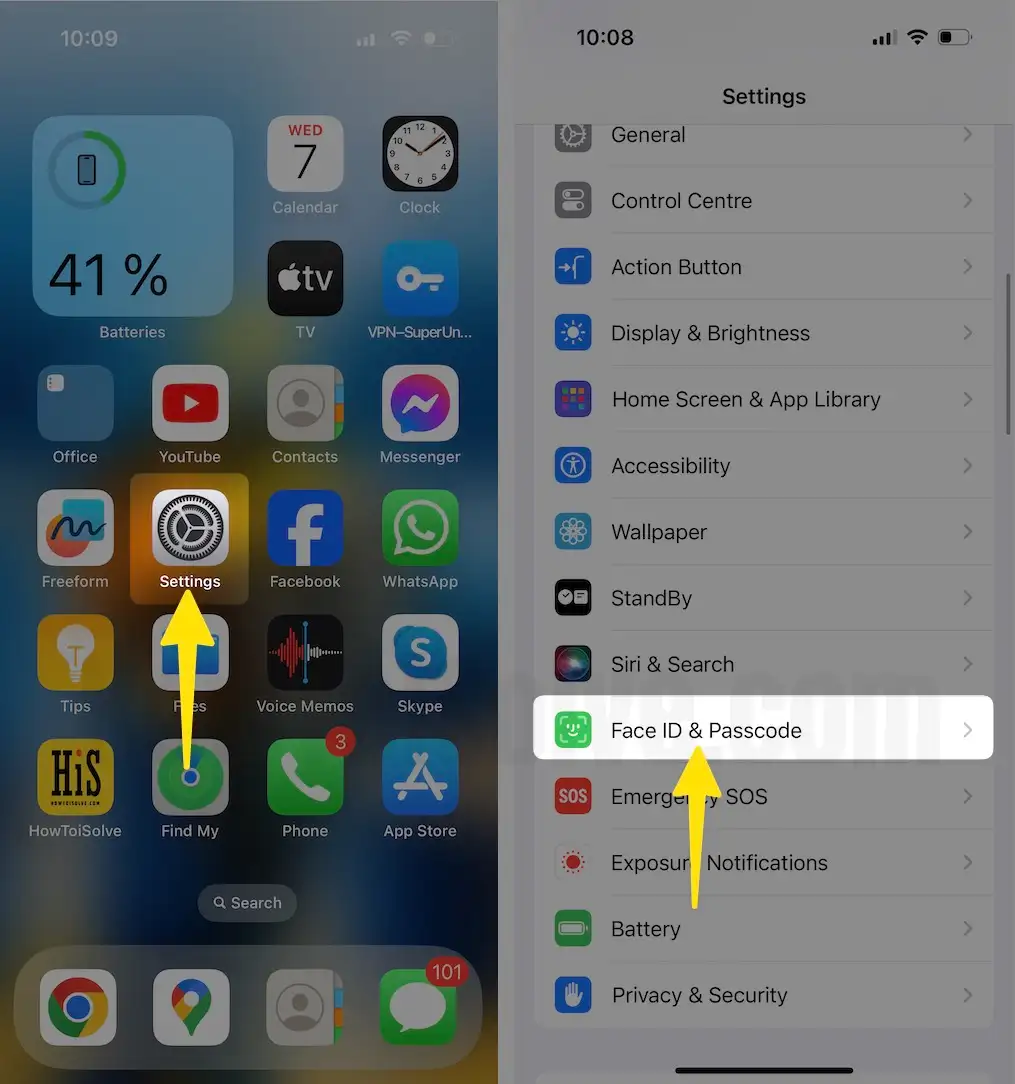
3. Tap to Turn On Passcode. If you’ve already set the Passcode, then enter the Passcode to access the passcode settings.

4. Next, type the 6-digit that no one can guess but is easy to remember for you.
5. Follow the on-screen instructions and set the passcode.

#2. Disable Lock Screen Notifications
Eventually, the lock screen notifications are much appreciated only if you are in a safe environment, we can easily read the messages, get to know who sent an email, access the OTP, and more. But if you feel like you are stalked by someone or are used to staying in public places, or forget the phone every time at a desk, then turning off the lock screen notifications is highly recommended.
Once you do this, the iPhone will only show the “Notification” word followed by the app name. Later, no stranger can see what messages or OTP have you received on the lock screen.
1. Go to the Settings App on your iPhone.
2. Tap Touch ID & Passcode or Face ID & Passcode.
3. Tap Enter your passcode.

4. Turn Off the Notification Center View under ALLOW ACCESS WHEN LOCKED.

#3. Turn Off Siri on the Lock Screen
If the world has one of the best personal assistants, then it is Siri by Apple. I’ve seen many people buying iOS devices because of Siri. The way Siri responds to our questions helps us with information, lets us control our iPhone over Voice, and many more things Siri can do for you. What’s the downside of Siri? Anybody can operate your iPhone by just saying Hey, Siri. Which ultimately results in data theft or gaining your secrets with Siri.
So, how do you prevent Siri from extracting information from the iPhone? It’s pretty simple: Disable Siri on the Lock Screen, so no one can access Siri when the iPhone is locked.
1. Navigate to the Settings App on your iPhone.
2. Go to Face ID & Passcode or Touch ID & Passcode.
3. Tap Enter your passcode.
4. Disable Siri under the list of ALLOW ACCESS WHEN LOCKED.

5. And, from the Settings App on your iPhone.
6. Click on Siri & Search.

7. Tap on Listen for under the list of ASK SIRI.
8. Turn Off Allow, Hey Siri.

#4. Always Download Apps from Trusted Store
If you don’t find an app in the App Store, then it’s a signal from Apple itself that the app is not safe for use and for your iPhone. Application developers have to fulfill the requirements to launch their app in the App Store; if they fail, Apple won’t let them add the app to the App Store. Basically, what I’m saying is that downloading apps from untrusted sources can lead to data theft, or anyone can spy on you from your iPhone.
Try to avoid downloading apps from untrusted sources.
#5. Don’t Connect iPhone to Random Wi-Fi Network
The same goes for Wi-Fi. We’d love it when our iPhone automatically connects to the open Wi-Fi of Cafes, Restaurants, Hotels, and public networks. Have you thought, is it safe to connect to a random Wi-Fi network? When your iPhone is near any open Wi-Fi network, it will switch from Cellular Data to that Wi-Fi network without even asking you. In that case, you don’t have any idea which Wi-Fi network is safe and which one is not.
Open Wi-Fi networks can be accessed by anyone, and they can easily push malicious content or viruses into your iPhone through Wi-Fi. But if you disable automatic Wi-Fi connections, you’ll have to connect to the Wi-Fi network manually every time, which is quite boring. But to keep safety first, you’ll have to sacrifice the automatic Wi-Fi connections.
1. Open the Settings App on your iPhone.
2. Tap Wi-Fi.
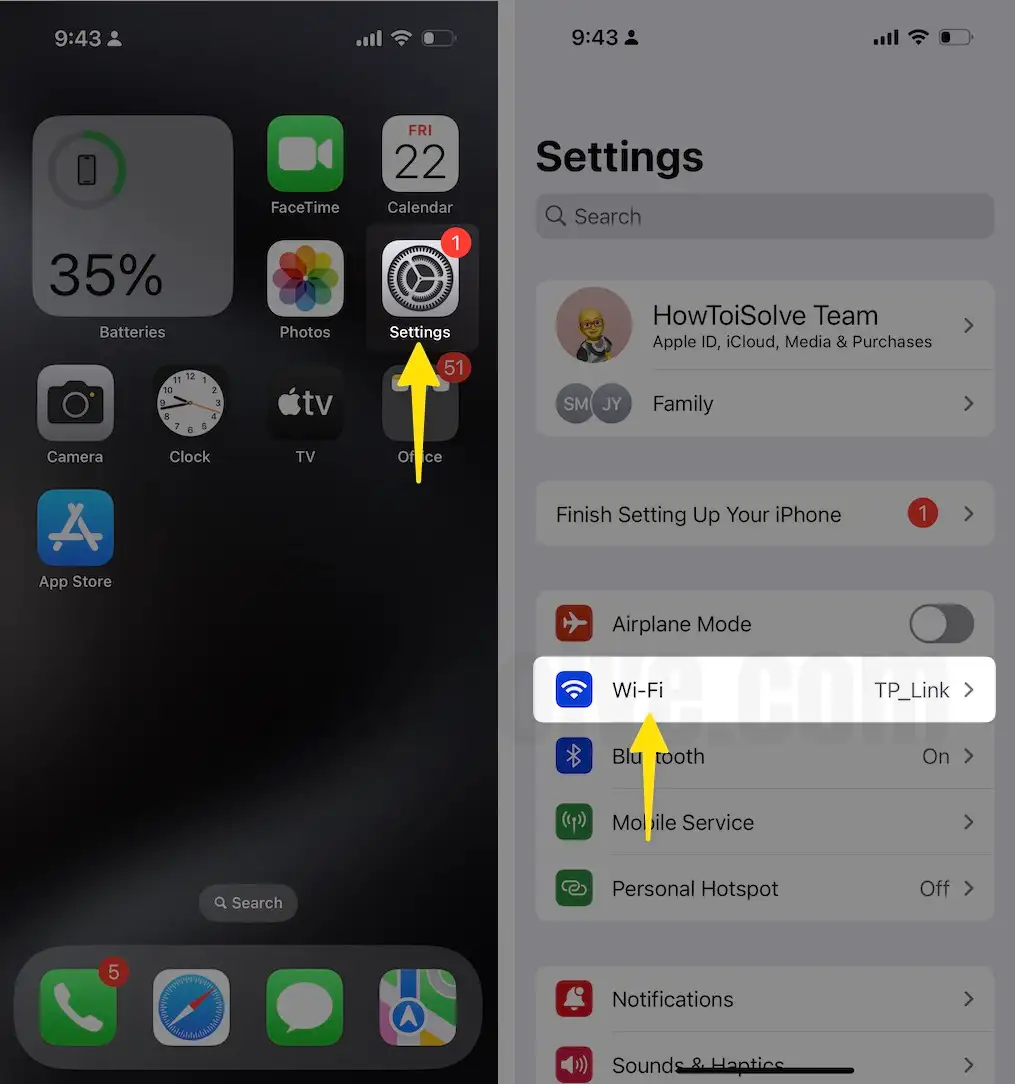
3. Set Ask to Join Networks to ON.

#6. Use Two-Step Verification for Apple ID and iCloud
Your Apple ID is as important as the iPhone. Nowadays, many iPhone users rely on iCloud and Apple ID to send personal and confidential Emails. Aside from this, iCloud is a bumper place to hack all of your iPhone Data at one location, as you backup your iPhone to iCloud.
Once you set up Two-Step Verification for Apple ID and iCloud, Apple will send you a 4-digit verification code and only give you access to the Apple ID when you enter the correct code. The verification code can be received via SMS or the Find My iPhone app.
1. Visit the appleid.apple.com.
2. Click Manage Your Apple ID.
3. Go to Password & Security.
4. Select Two-Step Verification and follow the on-screen instructions.

#7. Activate Find My iPhone
Find My iPhone is used in many ways, but mainly, if your iPhone is stolen or misplaced, the Find My iPhone feature comes into the picture. After setting up Find My iPhone, you can easily locate your iPhone from another iPhone or using the web browser. Besides, if there is no hope of getting the iPhone back, then the Find My iPhone app lets you wipe the iPhone remotely from anywhere.
Even though the thief stole your iPhone, he/she is not going to get anything from the iPhone.
1. Go to the Settings App on your iPhone.
2. Tap on Apple ID.
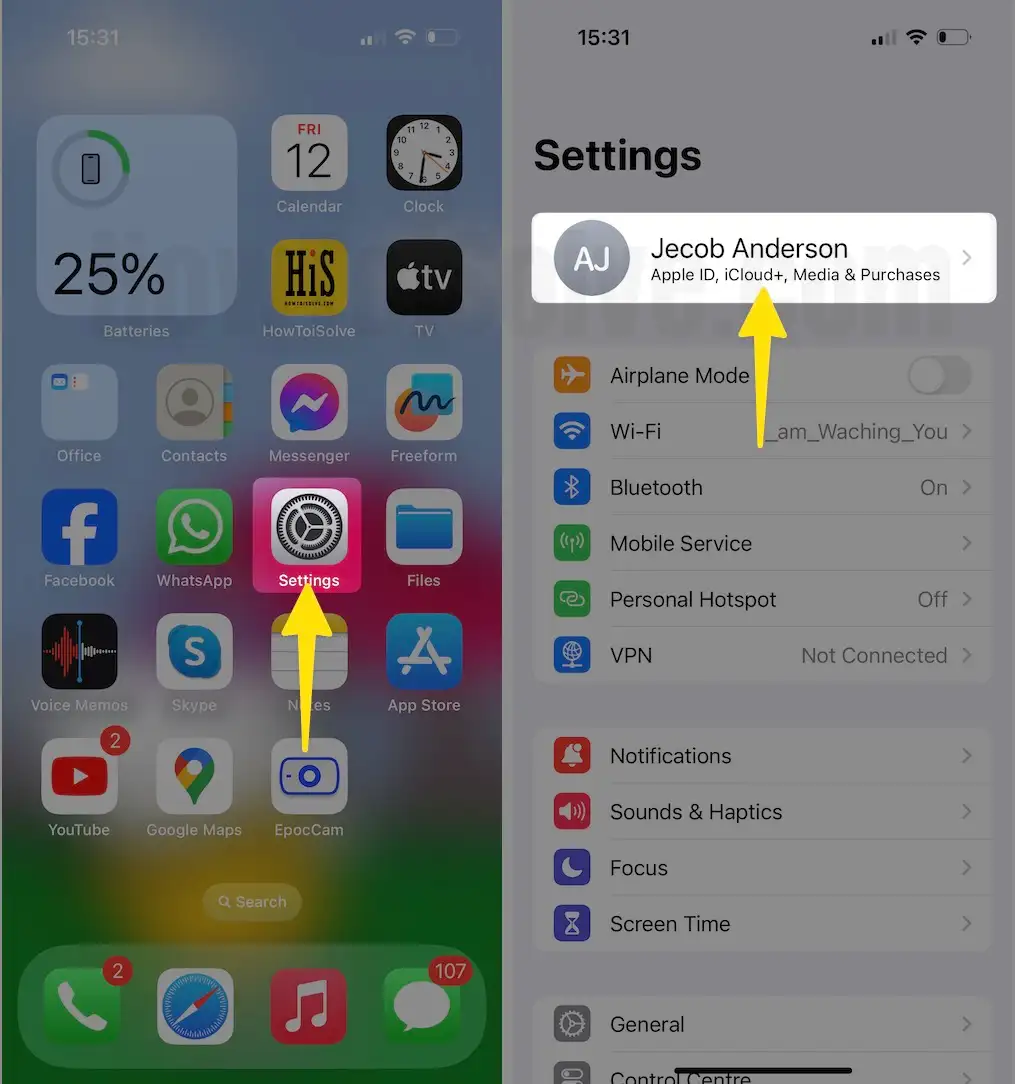
3. Tap on Find My iPhone.
4. Turn On the Find My iPhone.

These settings are the same for all the iOS versions. However, the iOS 13 iPhones have got new add on to Find My App, even if your iPhone has no active internet connection, it can still be accessible by you, with the Bluetooth beacons. So, if you find this feature helpful, then Turn On Offline Finding from the Find My iPhone.
To wipe out the iPhone using the Find My App remotely, here’s how it can be done.
Note: You can only wipe the iPhone using Find My iPhone if the lost or stolen iPhone has still active internet access. However, if you trigger the wipe feature, the iPhone will automatically be erased the next time it is connected to the internet.
1. Open the iCloud.com or Find My App.
2. Tap Devices at the bottom of the screen.

3. Choose the iPhone that you want to wipe out remotely.
4. Select the Erase This Device and Confirm.

#8. Enable Auto-Erase iPhone Content
The Auto-Erase iPhone Content triggers when anyone fails to unlock your iPhone after ten unsuccessful attempts. It is a bit risky for the forgetful personality or the ones who have kids because they enter random passcodes, which can cost you the entire iPhone data.
As a result I’m not recommending this feature for the parents with small kids, and for others decide yourself, it has benefits as well as its own detriments.
1. Go to the Settings App on your iPhone.
2. Scroll down to Touch ID & Passcode or Face ID or Passcode.
3. Enter the iPhone passcode to access the settings.
4. Enable Erase Data.

#9. Don’t Give Permissions when not Needed
No matter which app you download from the App Store, when you open it for the first time, it will ask you to access several iPhone features such as Camera, Contacts, Location, and more. Thankfully, you can revoke all the permissions later. The conclusion is that you should only give permissions you think are necessary; otherwise, choose Don’t Allow.
Here’s how you can revoke the app permissions,
- Open the Settings
- Scroll down to Privacy.
- Go through all the options and revoke permissions for the apps if not needed.

#10. Turn Off AutoFill Password on Safari
Apple has introduced Apple Keychain to store all of your passwords and website logins. So when you try opening the same website, you don’t need to enter the username and password; Safari will show you a pop-up to add the password and details. This feature is really appreciated because we don’t have to enter the password again and again, but it can be destructive for sensitive accounts.
Like the websites on which you’ve added personal details like Credit Card or Debit Card, then using the AutoFill Password for that website is no less than jumping in a well. Anyhow, if one can access your Safari browser and open that website full of your private information, you can think how much it can cost you.
Better disable the AutoFill feature;
1. Open the Settings App on your iPhone.
2. Scroll down and tap Safari.

3. Tap AutoFill and disable it.


