Apple’s AirDrop is a Bluetooth-powered network that allows Apple devices to share quick files and easily wirelessly. Unfortunately, it also allows an unknown device to send questionable files. In this scenario, it’s advised to disable AirDrop, and if you don’t know the procedure – here’s how to disable AirDrop on Mac, iPhone & iPad.
How to Turn off OR Disable AirDrop on Apple Device
Below are steps to turn off AirDrop on your iPhone, Mac, & iPad. But let’s know the possible reasons why to turn off AirDrop.
Why Turn off AirDrop
Privacy: If you’re in a public place, turning off AirDrop will make your device undiscoverable and ensure you don’t get unsolicited AirDrop requests for receiving unwanted files.
Less confusion amongst multiple devices: If there are Apple devices surrounding you, choosing which device to send a file may get confusing. In this scenario, you can disable AirDrop on one of your devices where you don’t want to send and receive files.
Steps to Turn off AirDrop iPhone & iPad
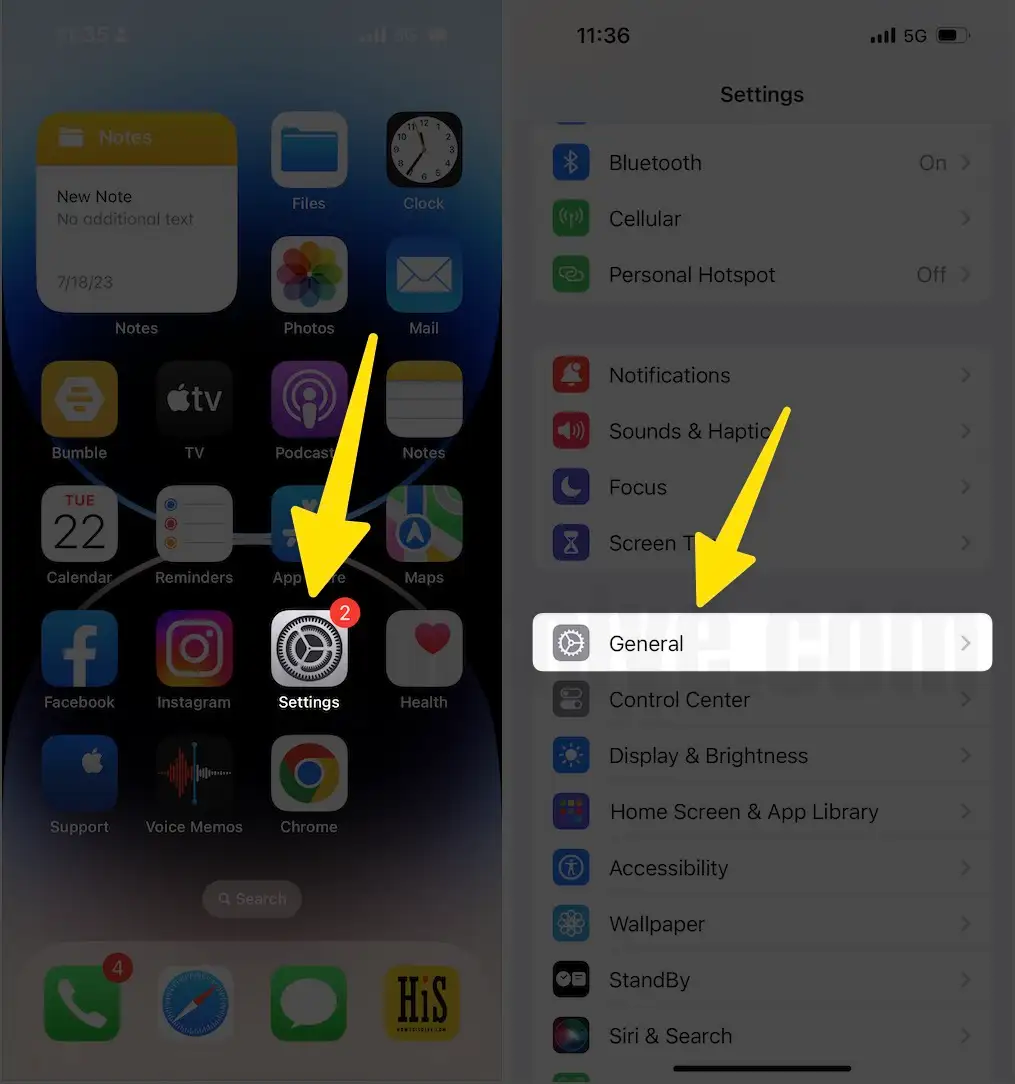
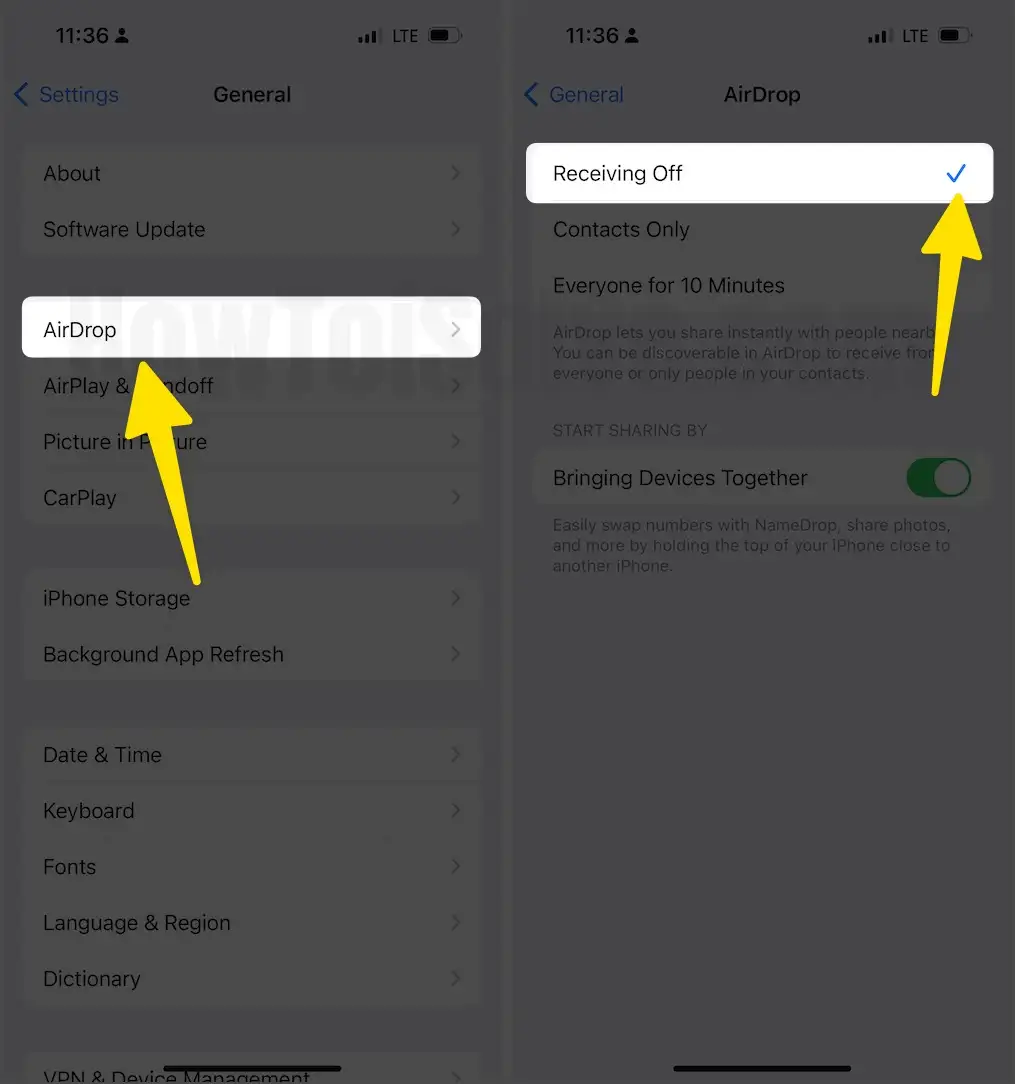
Step 1: Go to the Settings App on your iPhone or iPad. Search and select AirDrop.
Step 2: On the next screen, select Receiving Off, which will turn off AirDrop on your iOS & iPadOS.
Alternative method,
Step 1: Swipe down from the top of the screen and hold in-between to access Control Center.
Step 2: Hit AirDrop and select Receiving Off.
Steps to turn off AirDrop Mac
Step 1: Go to the Apple Menu on your Mac computer. Select System Settings…
Step 2: Click General from the left pane. Now, select AirDrop & Handoff.

Step 3: From the right side, select the AirDrop drop-down. Choose No One.

Alternative method,
Step 1: Click on the Finder Icon from your Dock. Select AirDrop from the left pane.
Step 2: Choose Allow Me To Be Discovered By and select No One, which will turn off AirDrop on this Mac.
Completely restrict AirDrop on iPhone, iPad & Mac
The steps mentioned above will disable AirDrop. But what if you want to completely turn off AirDrop on your Apple device? Luckily, it’s easy to do so. Here’s how you can do it.
Steps for iPhone users
- Go to the Settings App on your iPhone.
- Search and select Screen Time.
- Tap Content & Privacy Restrictions.
- Enable the toggle next to the Content & Privacy Restrictions. Select Allowed Apps.
- Disable the toggle next to the AirDrop.
Steps for Mac users,
Step 1: Go to the Apple Menu on your Mac. Select System Settings…
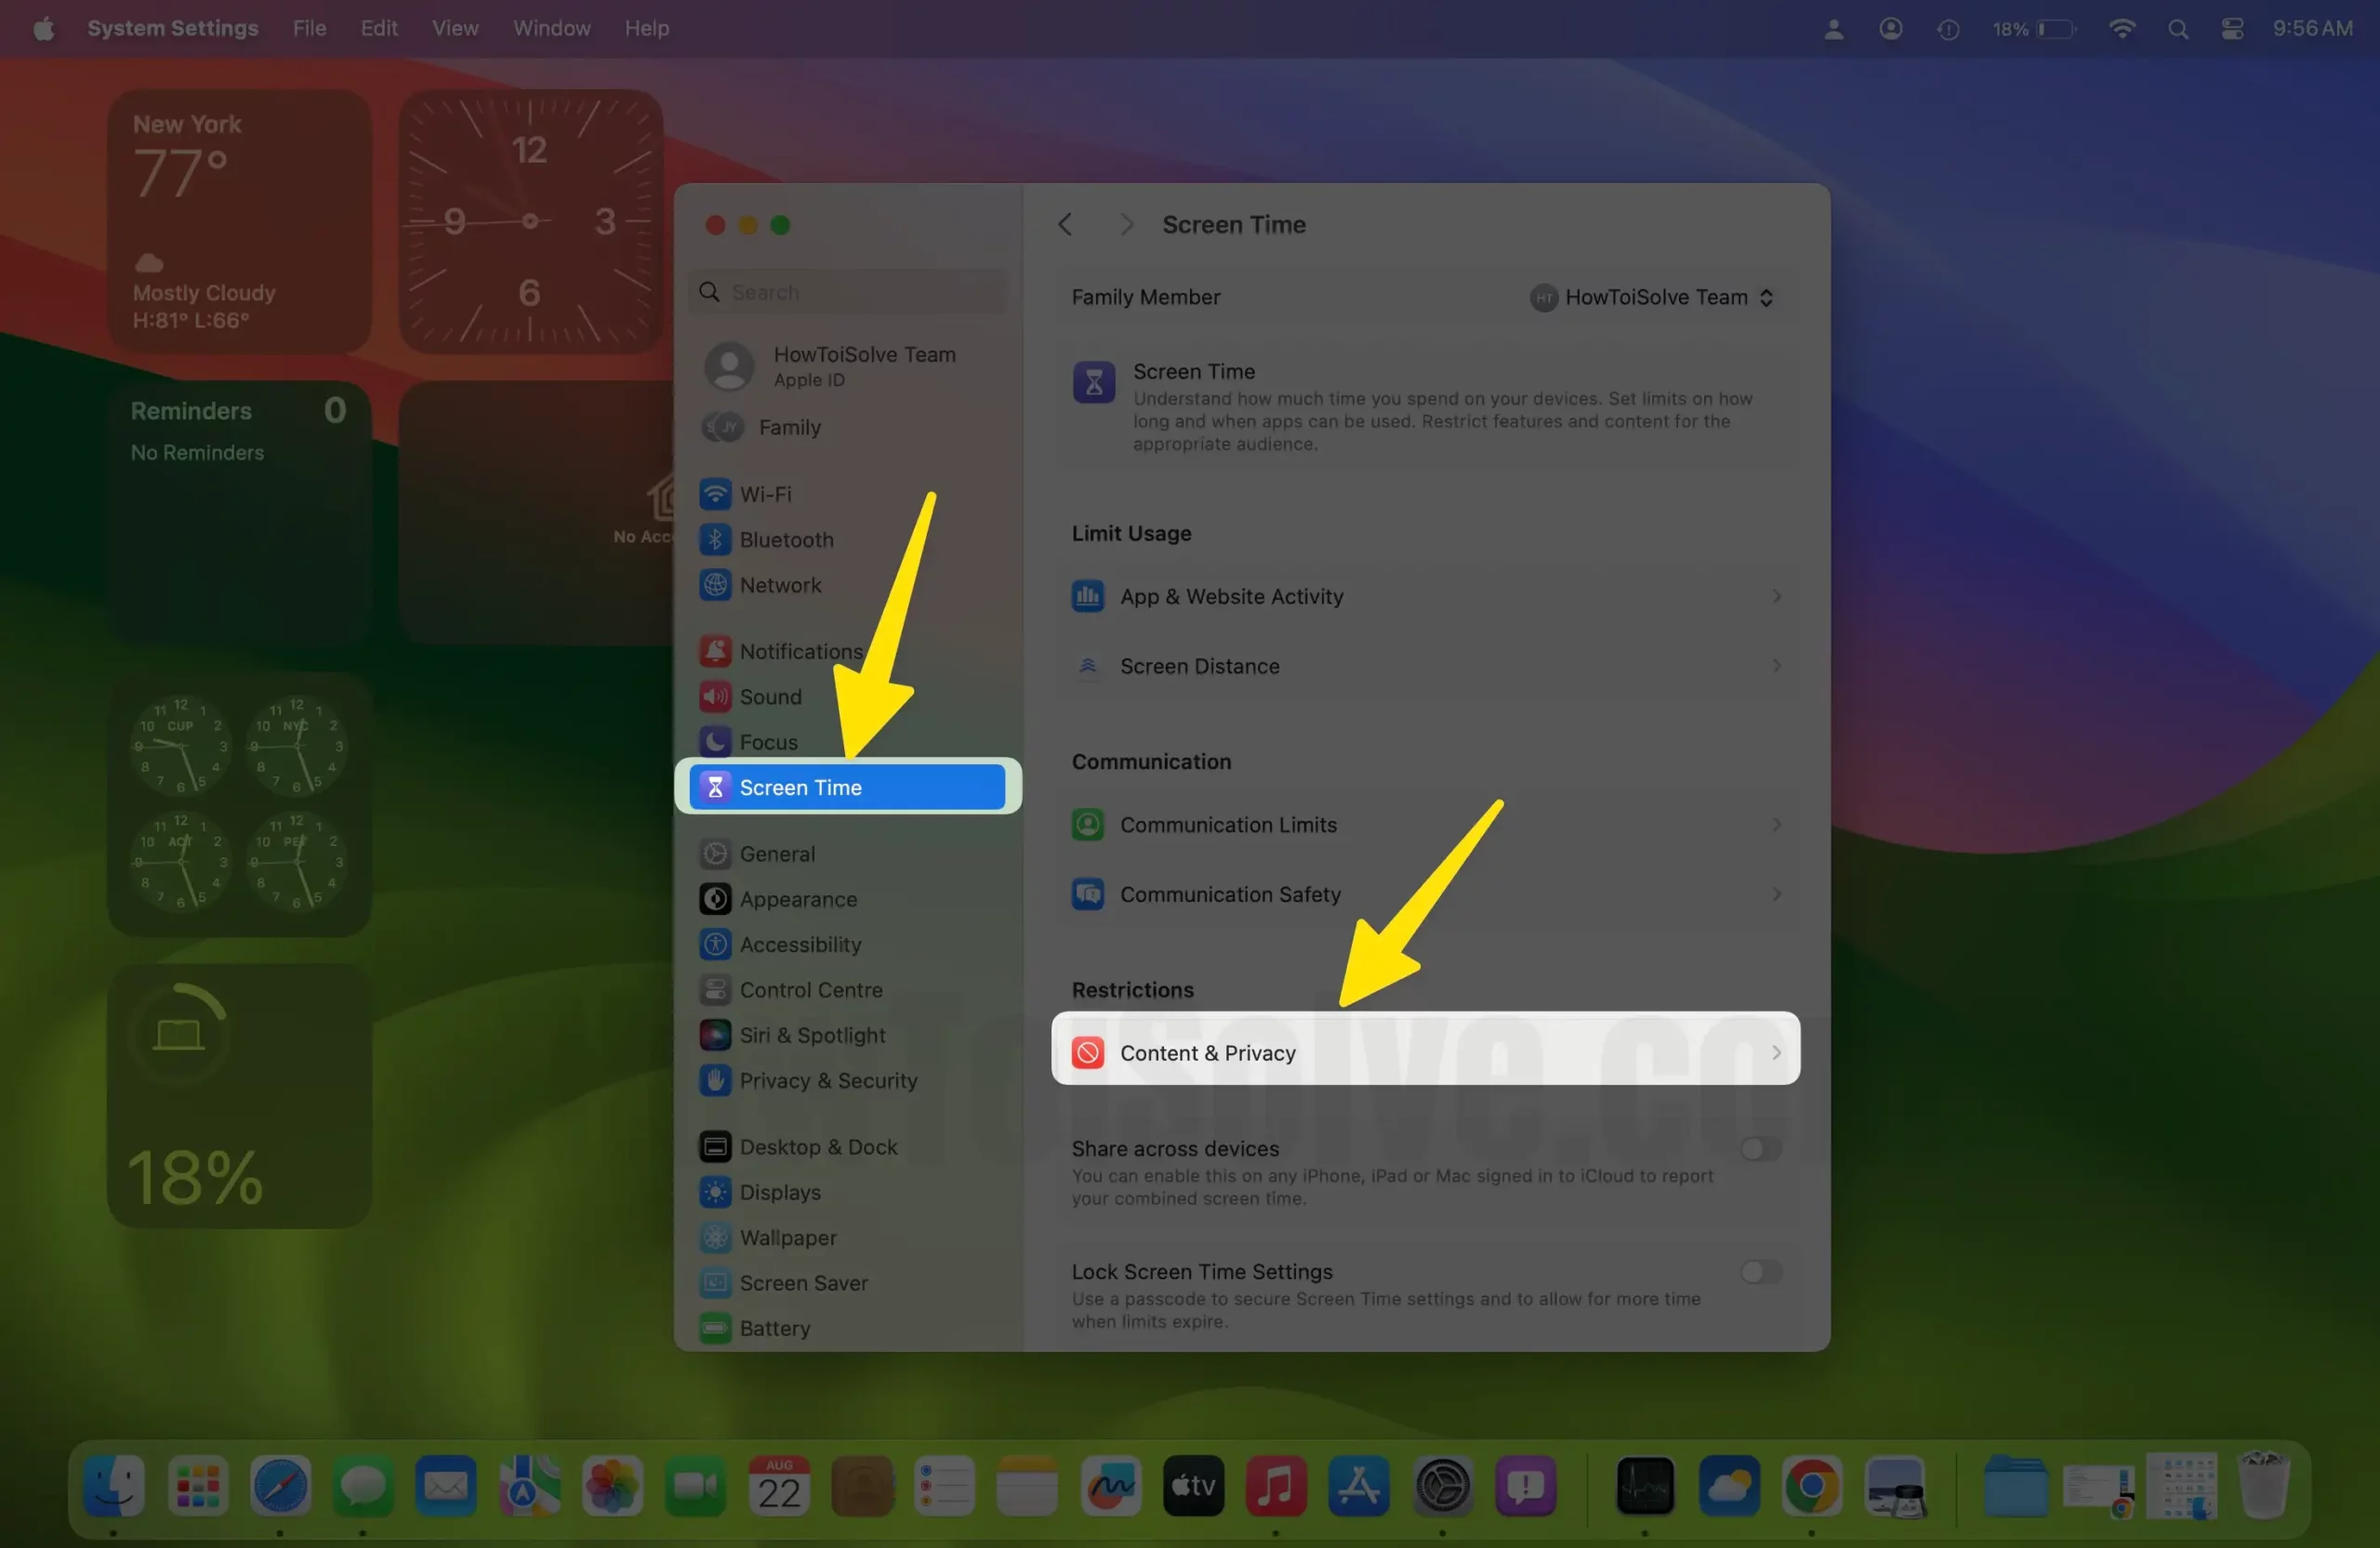
Step 2: Click Screen Time. Choose Content & Privacy.

Step 3: Click on the toggle next to the Content & Privacy. Go to App Restriction.

Step 4: Disable the toggle next to the Allow AirDrop. At last, select Done.

That’s It! This will block AirDrop on your iPhone, iPad, & Mac.
Final Thought!
This is how you can turn off AirDrop on your iOS, macOS, & iPadOS. It’s pretty simple to do so. If this guide is helpful to you, share as much as you can.


