
In today’s digital age, a screen recorder is an essential tool for effective communication and collaboration. You have a Mac and Android phone. Android phone works just as well. Here’s how to record your Android screen on your Mac.
If you’re not comfortable recording on your Android device, use a free Mac tool to record your screen on your Mac computer. You can effortlessly record all screens in HD Quality. Developers and tech enthusiasts can use the ADB Tool to access the Android framework on macOS.
2 Ways to Record Android Phone screen on Mac
These tricks support all android mobile phones SAMSUNG GALAXY S22 ULTRA, SAMSUNG GALAXY Z FOLD 3, SAMSUNG GALAXY Z FLIP 3, REALME GT 2 PRO, SAMSUNG GALAXY S21 FE 5G, ONEPLUS 10 PRO, XIAOMI 12 PRO, ASUS ROG PHONE 5 or all other androids Smartphone with android 9, android 10, android 11 or android 12, android 13, and android 14.
1: Using Android Tool on your Mac
Among the different strategies for getting your Android gadget completely associated with the Mac, utilizing the SDK tool is the most solid and thorough. With the help of this tool, you can change everything from the system software parts to ROMs, and you can likewise root it. Also, if you need a thorough handbook on how to modify your Android system, this will be a detailed guide for you.
Firstly, you need to take care of certain things with your cellphone before you work with the SDK tool. The major is to turn on the USB debugging option on your Android smartphone. You can do so by following the below-mentioned steps:
Step 1: Open the Settings app on your Android mobile. Scroll down to last for Options About Phone.

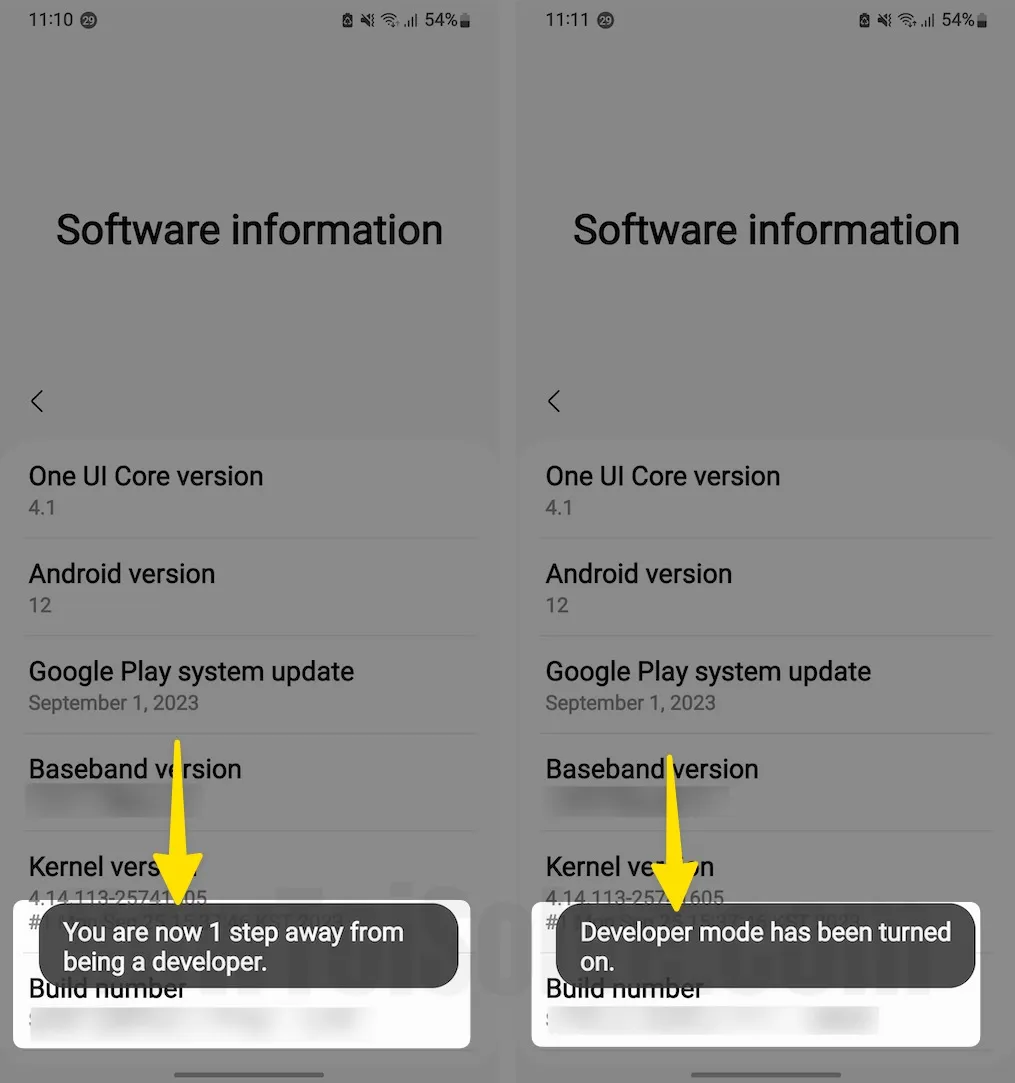
Step 2: Again scroll to Software Information > Build Number.

Step 3: Tap the Build Number option seven times. Until you see the message “Developer mode has been turned on.”
Step 4: Go back to the previous screen, and Under the settings app, Find the Option “Developer Options” > Enable USB Debugging toggle.

Step 5: Click OK to Allow USB debugging.

Step 6: Open the Downloaded setup file On Mac,

Step 7: Now, Connect your Android mobile to your Mac, or MacBook. Now, Your Mobile asks to “Allow USB debugging? > Allow and Then in the Next Popup Ok.

As you connect your mobile to Mac, for Other Permissions Tap on allow and Ok with the popup.

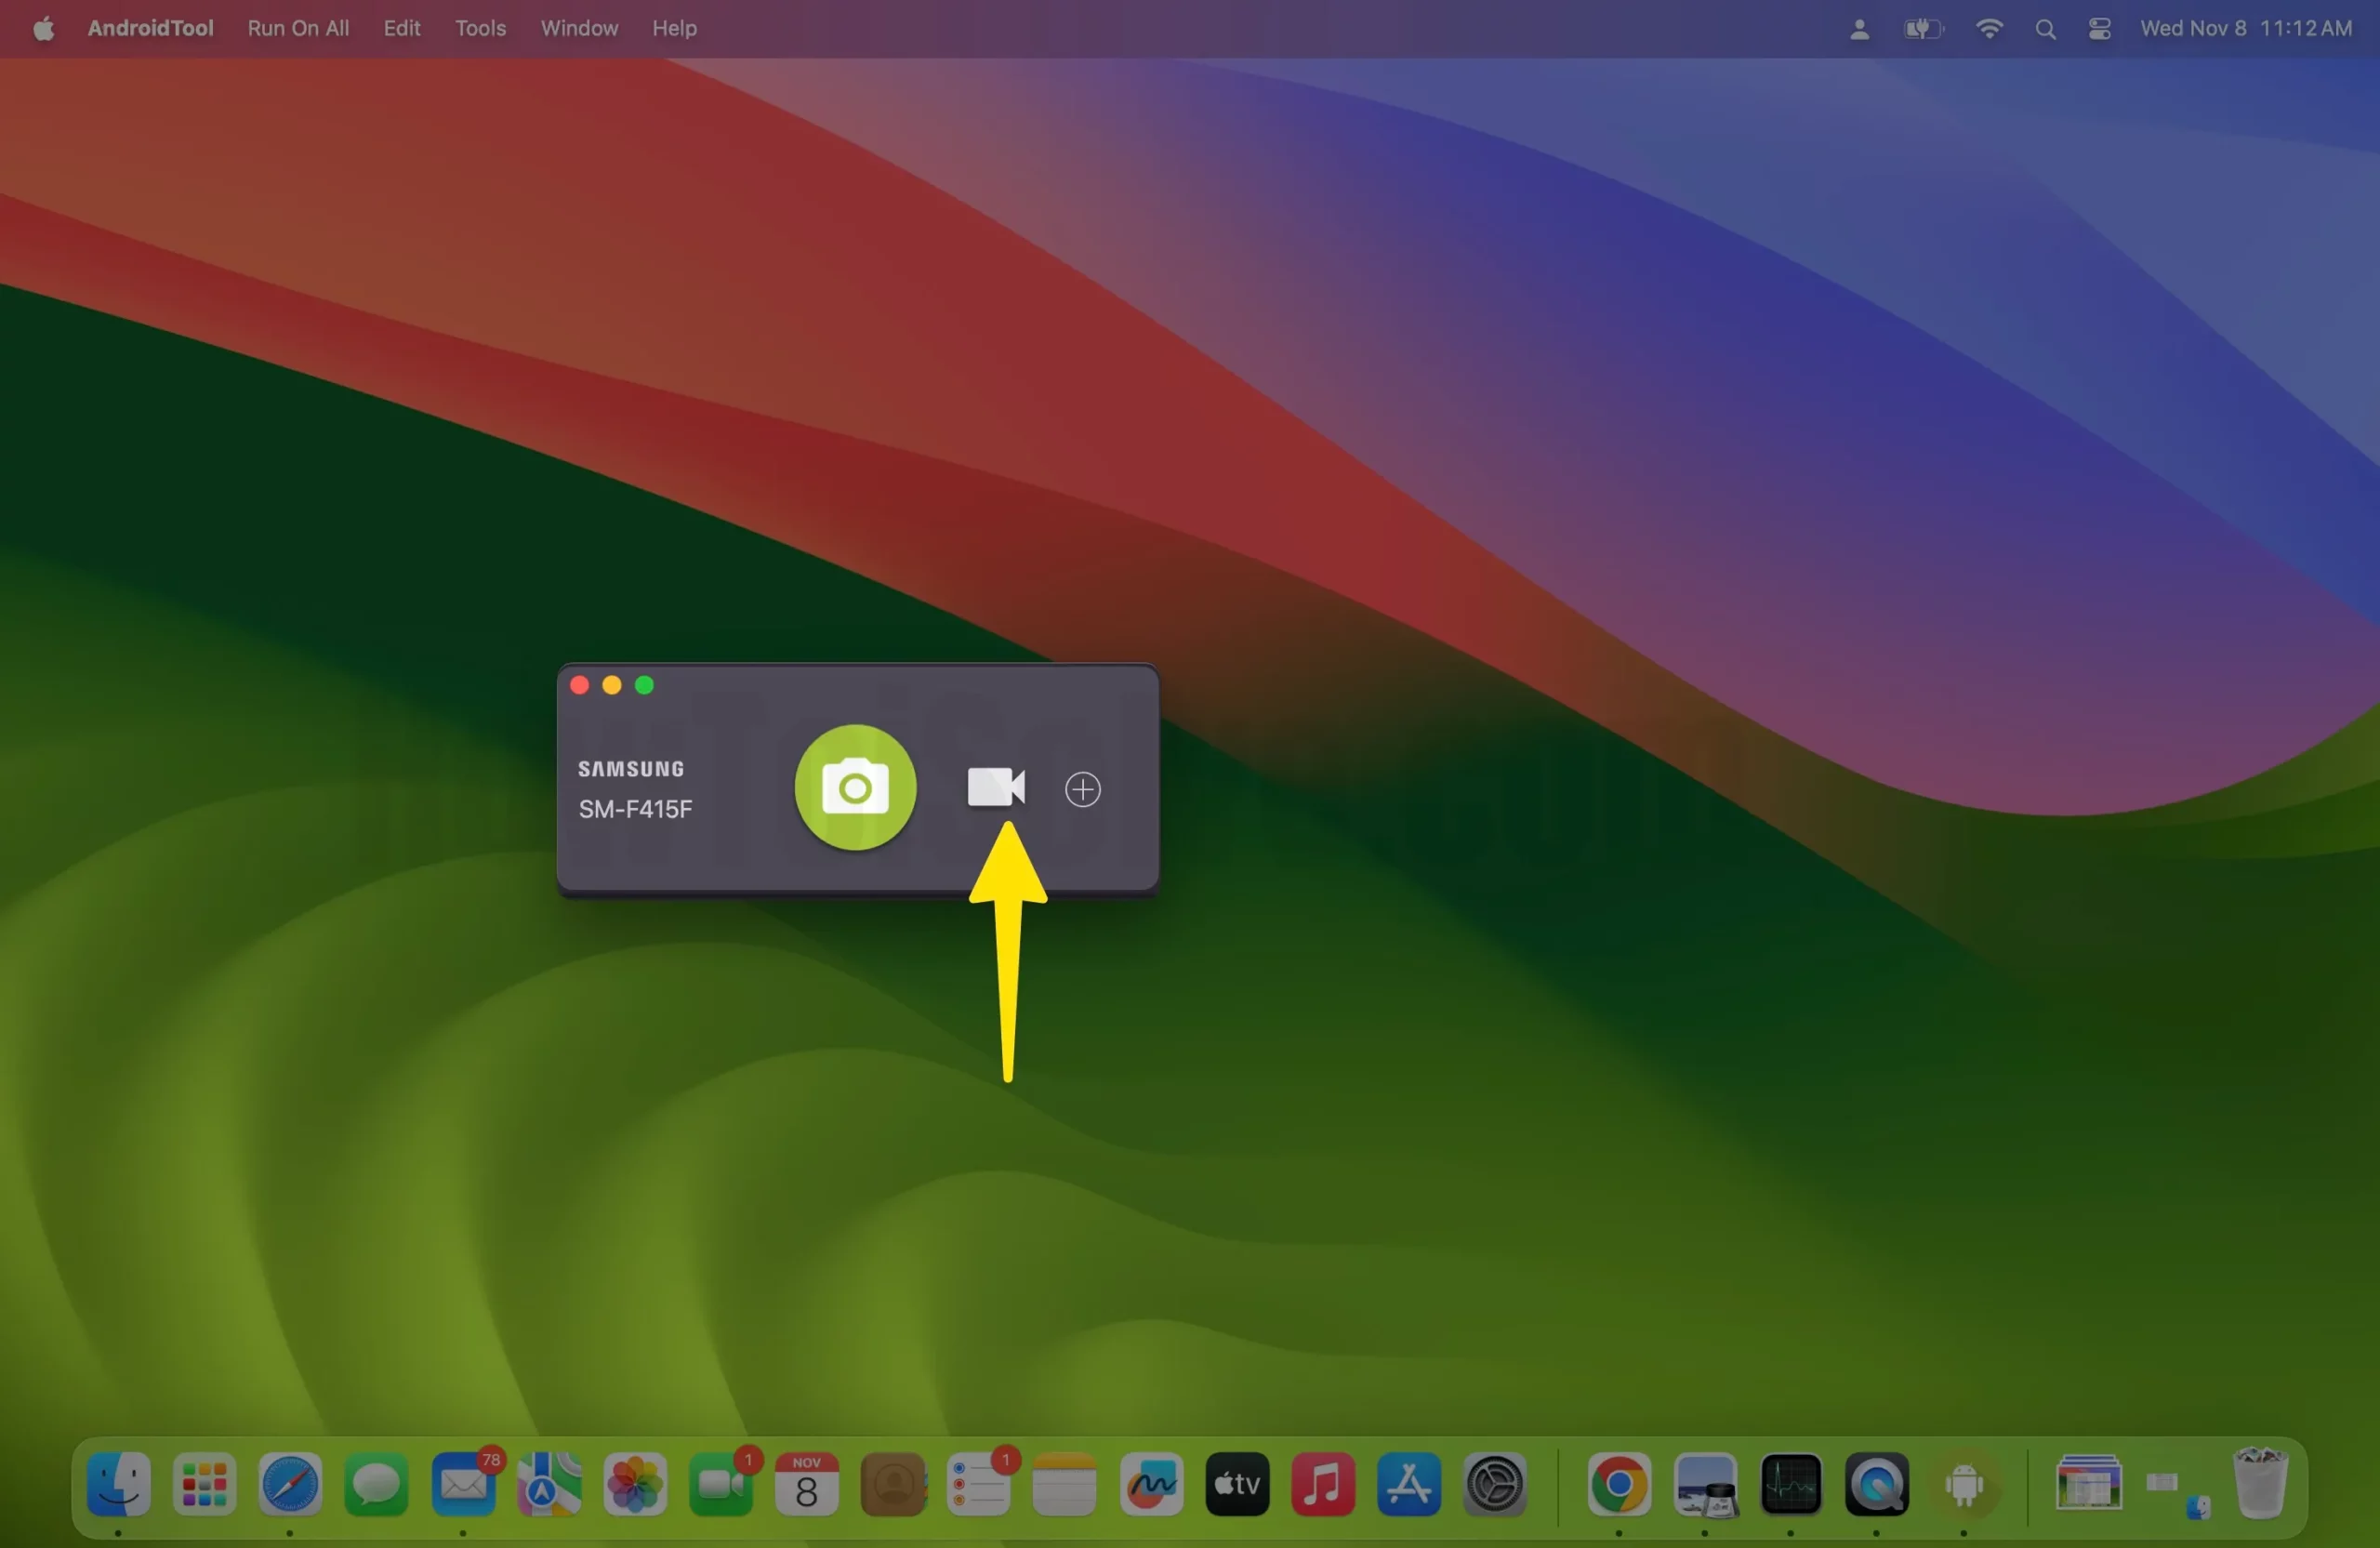
Step 8: On Your Mac screen, Tap on the Camcorder Record Button to Start the screen recording of your Android mobile screen.

Step 9: Once the Recording is complete, Stop Recording on Mac.

Step 10: At the same time, see the recorded screen in Quick Time preview.

That’s it.
2: Reflect Android Screen to Mac
The most straightforward method for sharing the screen for Mac clients is to reflect the Android screen to Mac with the assistance of a third-party application. Among distinct ways that can be used to do screen mirroring, this one offers you an admirable quality. We will discuss an exceptionally basic stepwise guide for you to follow to reflect your Android screen on Mac handily. It would be best to have the Android cellphone connected with the MAc with the help of a USB wire given in your cell phone box. Later on, you can go through the following steps.
- Go to the Settings application on your phone and find the Build Number. Tap the Build Number option seven times.
- A pop-up window will appear on the screen, confirming that you have access to the developer options now.
- Tap on it. You will see a switch to enable the developer options. Under the Developer options section, you will find many alternatives to help you make changes as needed.
- Locate the USB Debugging tab. Turn on USB debugging.
- Once, you are through with the debugging part, You can connect the phone with the Mac using the USB cable and select the action item for transferring files.
- You can opt for the application Vysor. It tends to be downloaded from the website, and it is fairly straightforward to install.
- Open the application on your Mac, and if your cell phone is still connected to the Mac, it will instill a complimentary application on your Android.
- In a rare scenario that installation doesn’t begin right away, reconnect the USB link.
- Once it is connected, it will begin reflecting the smartphone screen within a split second.
These are all the steps you should go through to reflect the screen initially. Following that, the application would auto-detect and mirror your screen in a flash. However, if you need to record the screen once it is mirroring, you would need to follow a few additional steps.
- Open the QuickTime player, and you will be able to see a control center to begin recording. Tap the button meant for recording command and choose from the few alternatives that present it later to begin the recording.
- The application will likewise enable you to choose a specific screen part. Then you can select the region where the screen is reflected.
- There’s nothing left but to adjust the pointer and begin recording. It would allow you a delay or buffer of almost 3 seconds.
There’s a flood in the market for screen recording devices as everybody has moved to web-based mode. These applications offer a wide variety of choices, and you will get to share the screen. Many people use a Mac as a virtual PC and an Android cell phone. The QuickTime recording utilizing the Vysor is likewise a respectable choice.


