Save the life by pre-register (Setup Organ Donation to iPhone/ iPad) or become a donor yourself. For that, you don’t need to go anywhere, in just a few finger taps you can do officially on registerme.org (Life America Registry) via health app. Mind changes have also a good option for removing her/ Himself using a health app. Apple’s announcement for this registration: Your information setup on Donate organ not sent to apple, it bypasses to Donate Life America from your iPhone/ iPad or iPod Touch.
Let’s join to become a useful piece of someone’s life. Newly updated health app cover organ donate as the central portion for help.
Steps for Setup Organ Donation on iPhone, Manage it or Remove your Self
How to Register as an Organ Donor in iOS 13 and Later iPhones
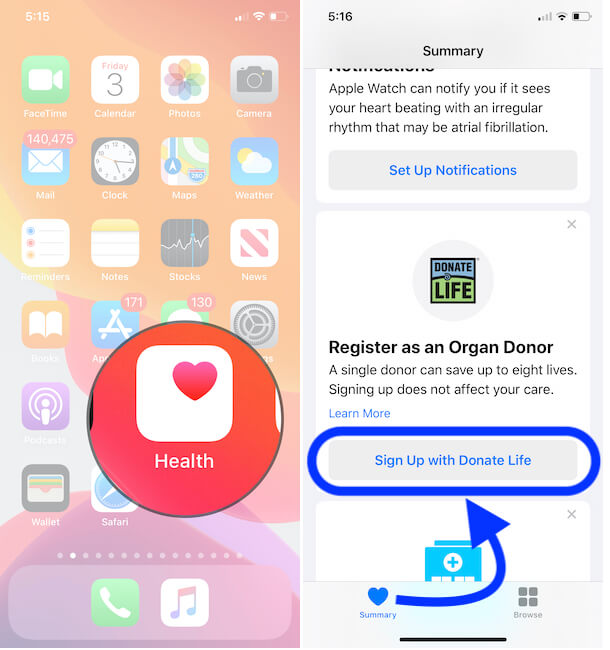
- Step #1: Open the Health App. iOS 13 users have just two tabs, Summary and browse that appear lower on the screen.
- Step #2: Tap Summary.
- Step #3: Scroll the screen tap Sing Up with Donate Life (you can get this under the Get More From health section) to read more about Register as an organ Donor button, click on Learn more link.
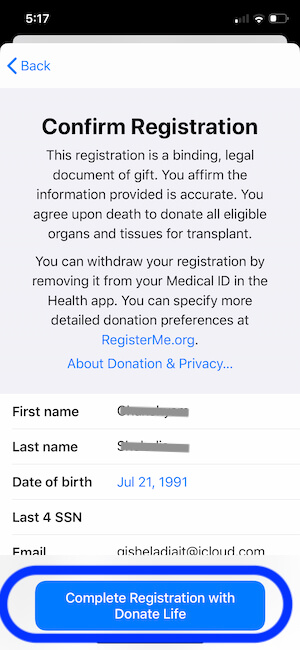
- Step #4: Next, on the screen, you get a form, so fill up the detail such as

Continue after Enter the Details - First name
- Middle name
- Last Name
- Date of birth
- Last 4 SSN
- Address
- City
- State
- Zip
- Sex
- Step #5 click on Continue tab
- Now follow the on-screen instructions and terminate the process [This Feature Doesn’t support in All Countries].
- That’s it.
Note: Apple says This Information is sent to Donate Life America and is not shared with Apple.
Process for iOS 12 and Earlier Users
Follow the quick guide with the necessary details and confirm yourself after the declaration. Here I set up after iOS update, You find any changes give us to report on the comment box.
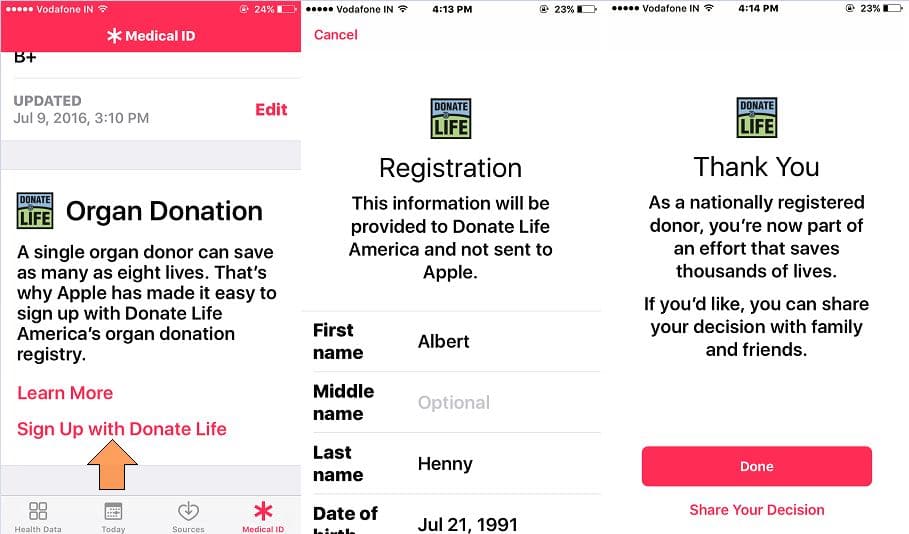
- Step 1: Go to the Health App on iPhone/ iPad.
- Step 2: Tap on the “Medical ID” tab from beneath Tabs.
- Step 3: Scroll down the screen to bottom, Tap on Sign Up with Donate Life.
Fill your Profile details and address correctly within the USA. Once you complete Full Details, Tap on Complete Registration with Donate Life.
- Step 4: Now you Medical ID home screen likes to look in below.
Related Article – How to update iOS Medical ID on iPhone
Edit or Remove Donor identity in Health App in iOS
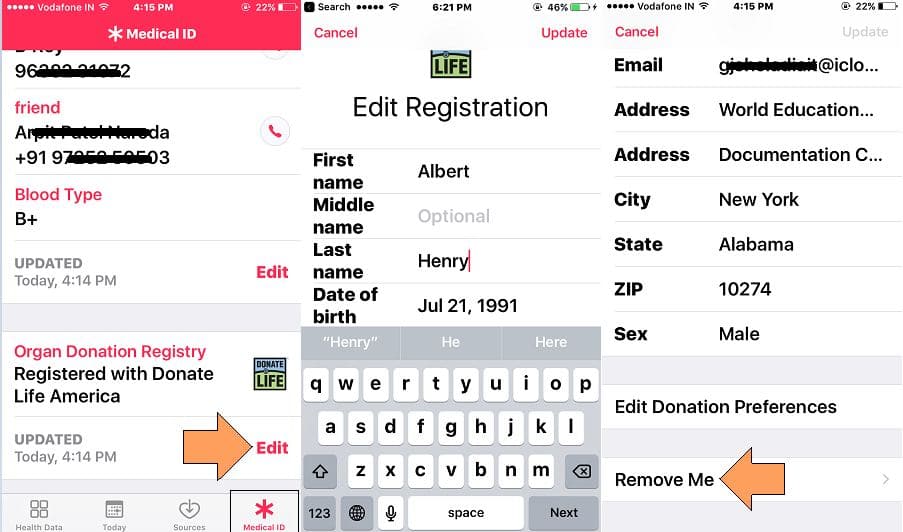
- Step 1: Go back to Health App
- > Medical ID screen,
- Step 2: Scroll down, Tap on Edit Option below Organ Donation Registry.
- Tap on Field to enter or update information > Update at the top right corner
Else, Remove Me of completely sign out yourself as an organ donor.
Future time your register from the same repeat steps explained above. Save other’s life by sharing this message or Apple’s new health app feature by Setup Organ Donation in iPhone/ iPad.


