The deleted files get stored in the Trash on your Mac same as recycle bin for windows. Thus, deleting a File on Mac won’t delete the file permanently but save it in the Trash or bin. Because if you accidentally delete some important file, you will get it back from Trash. However, eventually, Trash will get full and occupy a large portion of space on your Mac. Therefore, the only remedy is to Empty Trash on your Mac, which will permanently delete the file.
Read along to learn different ways to delete the file permanently to Empty the Trash on Mac. The method to Empty Trash is the same for intel, M1 or M2-based Mac, Mac Air, and Mac Pro. In addition, we have also mentioned how you can Force delete the file.
Where is the Recycle Bin on a Mac?
Suppose you are new to Mac and wondering where’s recycle bin is on Mac. In Mac “Recycle bin” is known as a “Trash bin.” The Trash bin is where deleted files are temporarily stored so that you can get them back if you delete any file by mistake. The Trash bin is located at Dock on Mac.
How to Delete Item On Your Mac
Before learning different methods to empty Trash, look into how to delete the item. There are several ways to delete the file from your Mac. Here are the ways to delete an item on your Mac.
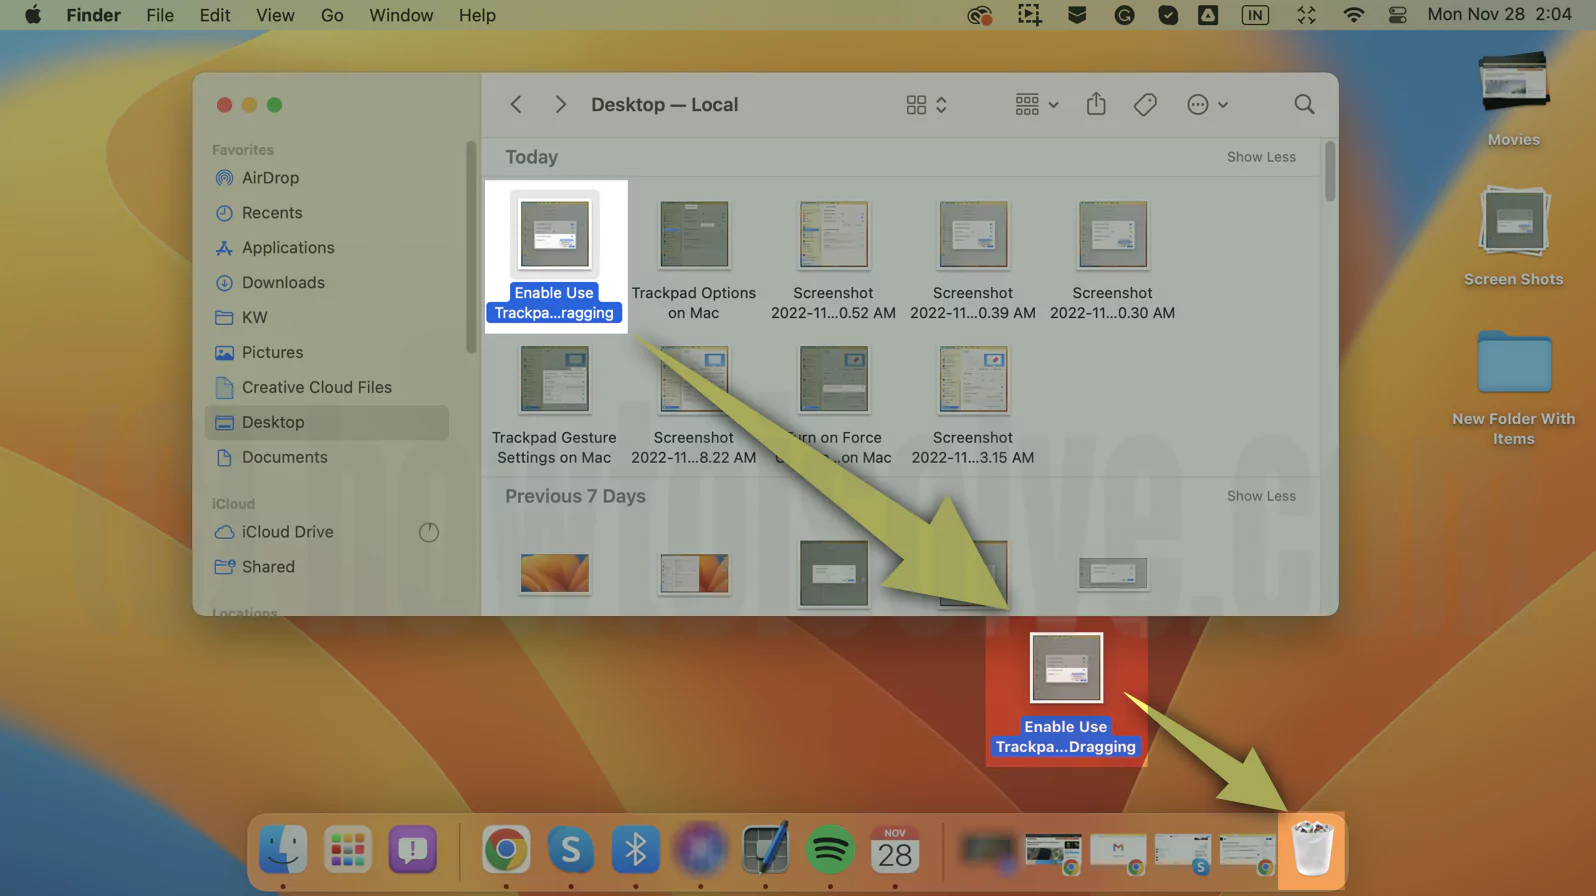
1→ The easiest way is select the file, Drag and Drop it in the Trash icon at Dock.
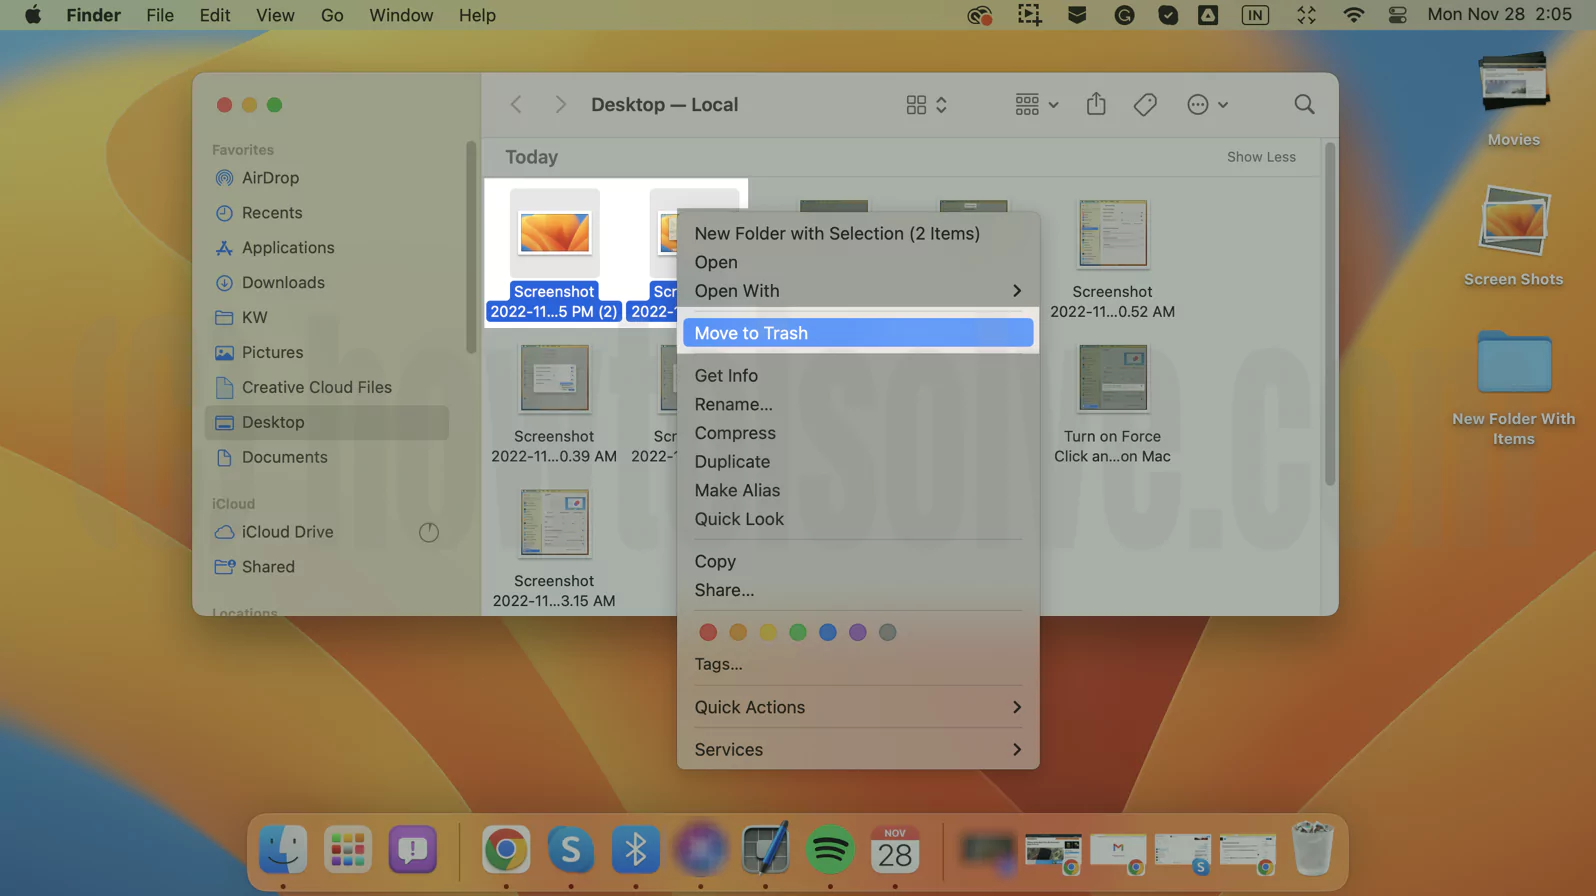
2→ Select File “Right Click” on it and select the “Move to Trash” Option.
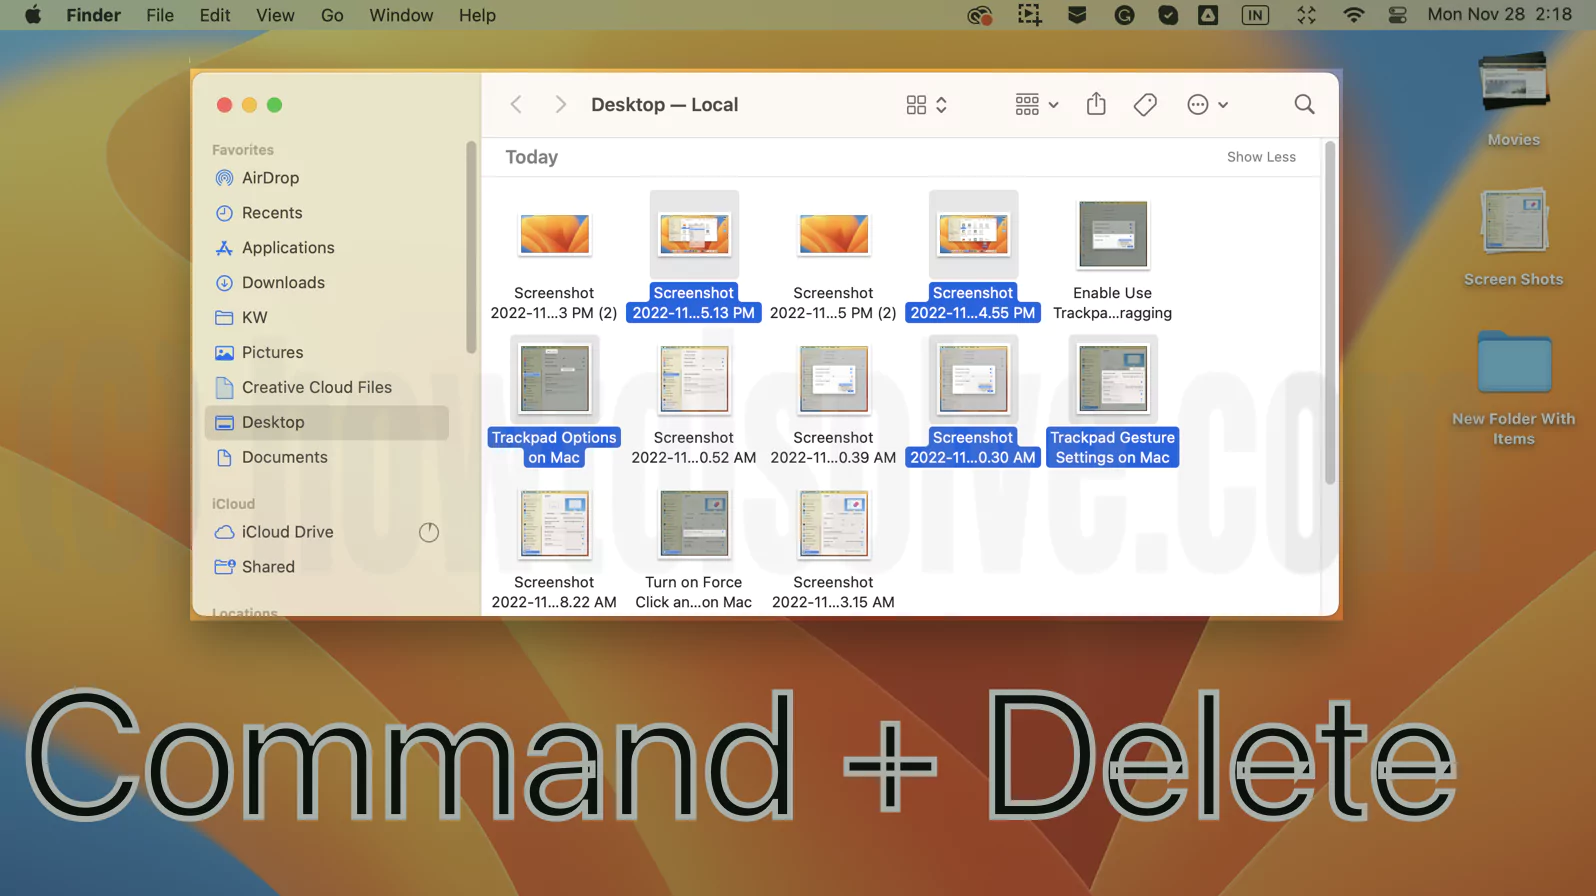
3→ Select File and Press “Command + Delete” on the keyboard to move the file into Trash, To select multiple file, Press Shift + Click to select File or Folder at once.
How to Empty Trash on a Mac (Manually)
There are Five different ways to Empty Trash on Mac. Read Further to know each method in depth.
via “keyboard shortcut.”
You can empty Trash in a few seconds using keyboard shortcuts. Hence press the key “Command + Shift + Delete” on the keyboard to permanently delete all items from the Trash folder. A confirmation box will appear.
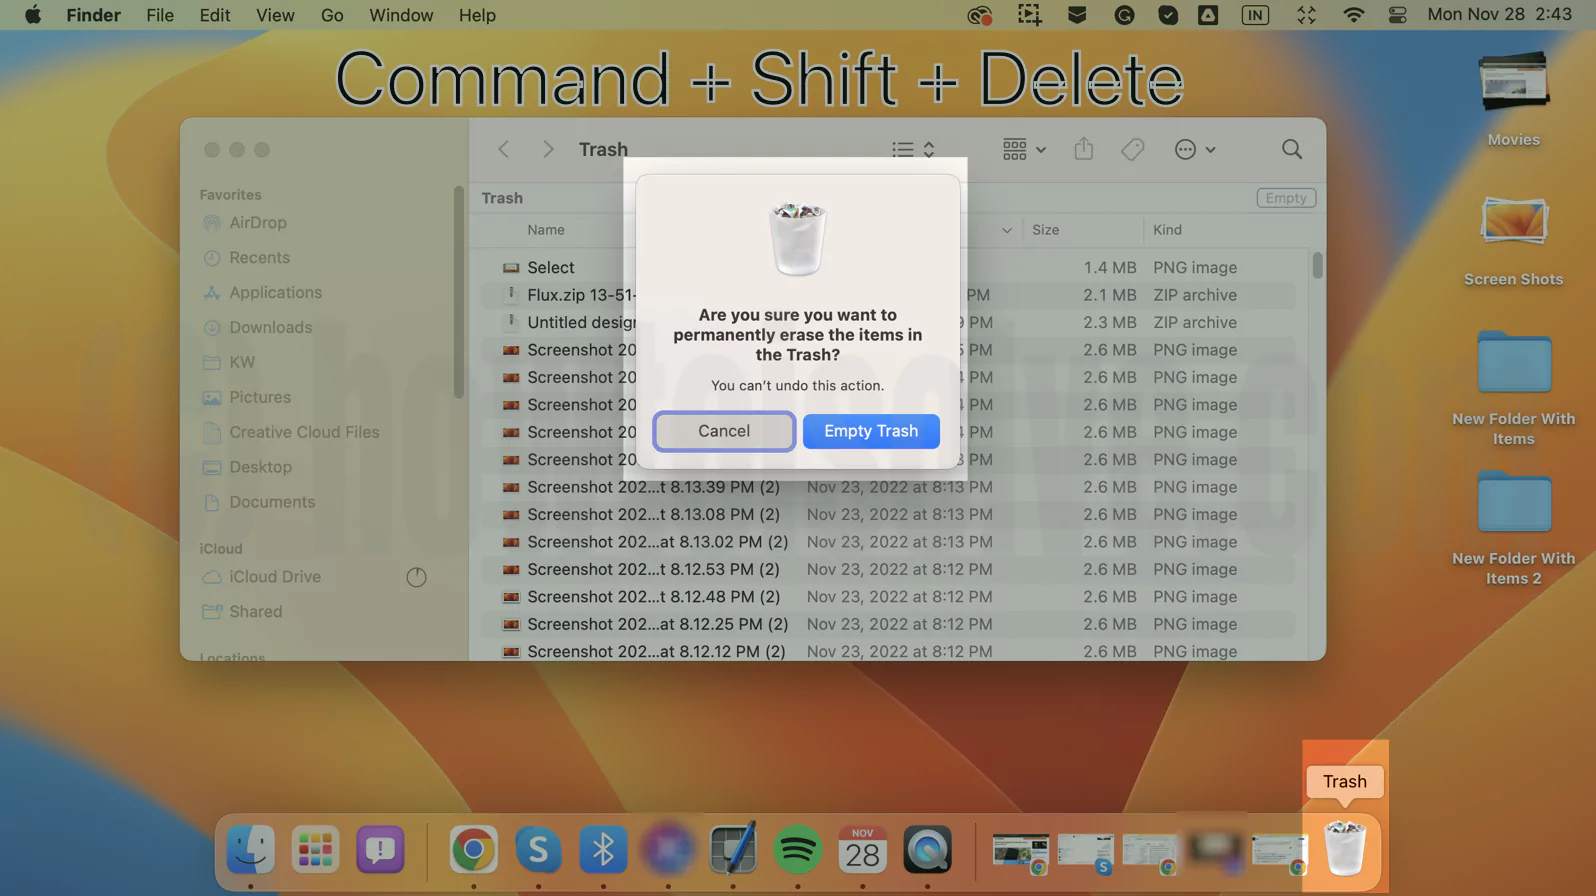
Finally, select the “Empty Trash” option.
Tip 1: Via “Trash Icon”
The quick method to “Empty Trash” without opening the Trash Folder.
- Right Click the Trash icon at Dock and Select “Empty Trash.”

- A confirmation box with the message “Are you sure you want to permanently erase the items in the Trash?” appears.
- Select the “Empty Trash” Option to continue.
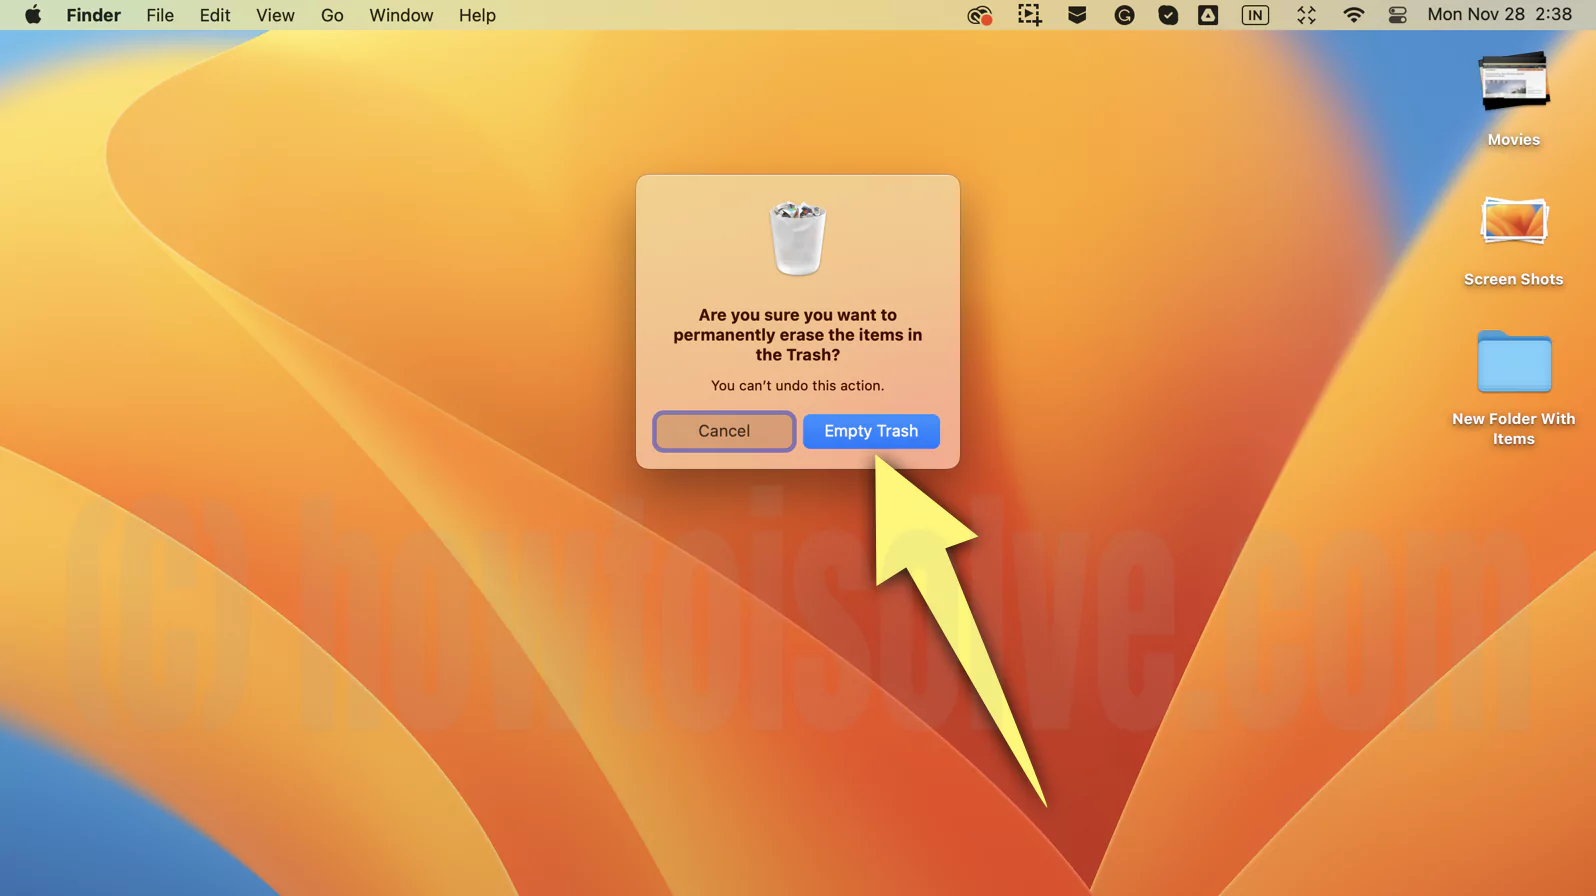
Tip 2: Via “Empty Button”
Suppose your Trash is full, and you want to delete the item. Follow the steps below.
1# On Mac, click on the Trash icon at the Dock to open the Trash folder. Now, you will see the Trash folder with all deleted items.
2# Select the “Empty” Button at the upper right corner of the Trash folder.

3# Confirmation box with the message “Are you sure you want to permanently erase the items in the Trash?” appears.

4# Select the “Empty Trash” Option to continue.
Tip 3: Via “Finder”
1# Click on the Trash icon at the Dock on Your Mac. Next, you will see the Trash folder with all deleted items.
2# Go to Finder and Click on Finder from the Menu bar.
3# Select the “Empty Trash” Option.

4# Confirmation box with the message “Are you sure you want to permanently erase the items in the Trash?” appears.

5# Select the “Empty Trash” Option to continue.
Tip 4: Via Anywhere in Trash Folder
- Right, Click anywhere in the trash folder.
- Now Choose the “Empty Trash” Option.

- A confirmation box appears. Select the “Empty Trash” Option.
Using any of the abovementioned five methods, you can completely empty Trash on Mac.
Delete Single or Multiple Items from the Trash
Suppose you don’t want to Empty Trash; instead, you want to delete single or Multiple items permanently. Then Follow the below steps.
1# Click on the Trash icon at the Dock to Open it.
2# Select a Single item OR
Press and hold Command and Select multiple items.
3# Right Click on the selected item and choose the “Delete Immediately” Option.
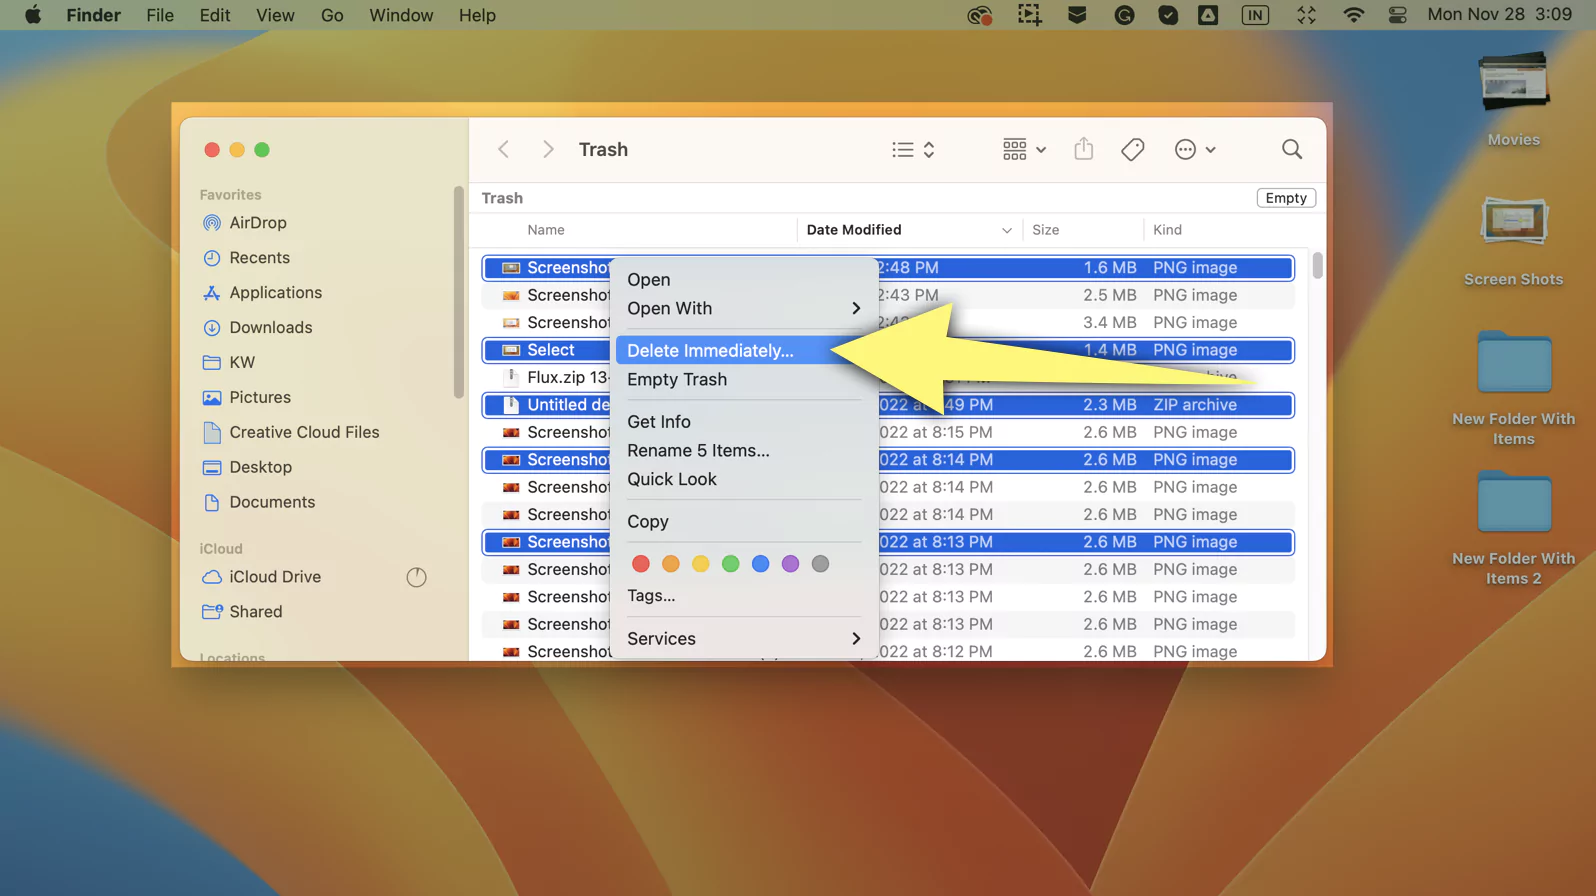
OR Press the “Option + Command + Delete” keys on the keyboard.
4# Confirmation Box with the message “Are you sure you want to delete “ABC file”?
5# Click on “Delete” to Permanently delete it from your Mac.
In the above steps, we use the “delete immediately” option instead of Empty Trash. After selecting an item in the trash bin and if you choose the Empty trash option, it will delete all items from the Trash folder. Therefore, we choose to Delete immediately for the selected item.
How to Automatically Empty Trash on Mac
You need to Empty the Trash occasionally. Else it will take up a large chunk of space. However, you often forget to do so; hence automatically emptying the Trash after 30 days is perfect for you.
Follow these steps to automatically empty Trash after 30 days.
1# In a Finder, Go to Finder and select Settings/Preferences from the drop-down menu.

2# Under the “Finder Preferences” Window, Select “Advanced” at the top right.
3# Mark tick in the box next to “Remove items from the Trash after 30 days“.
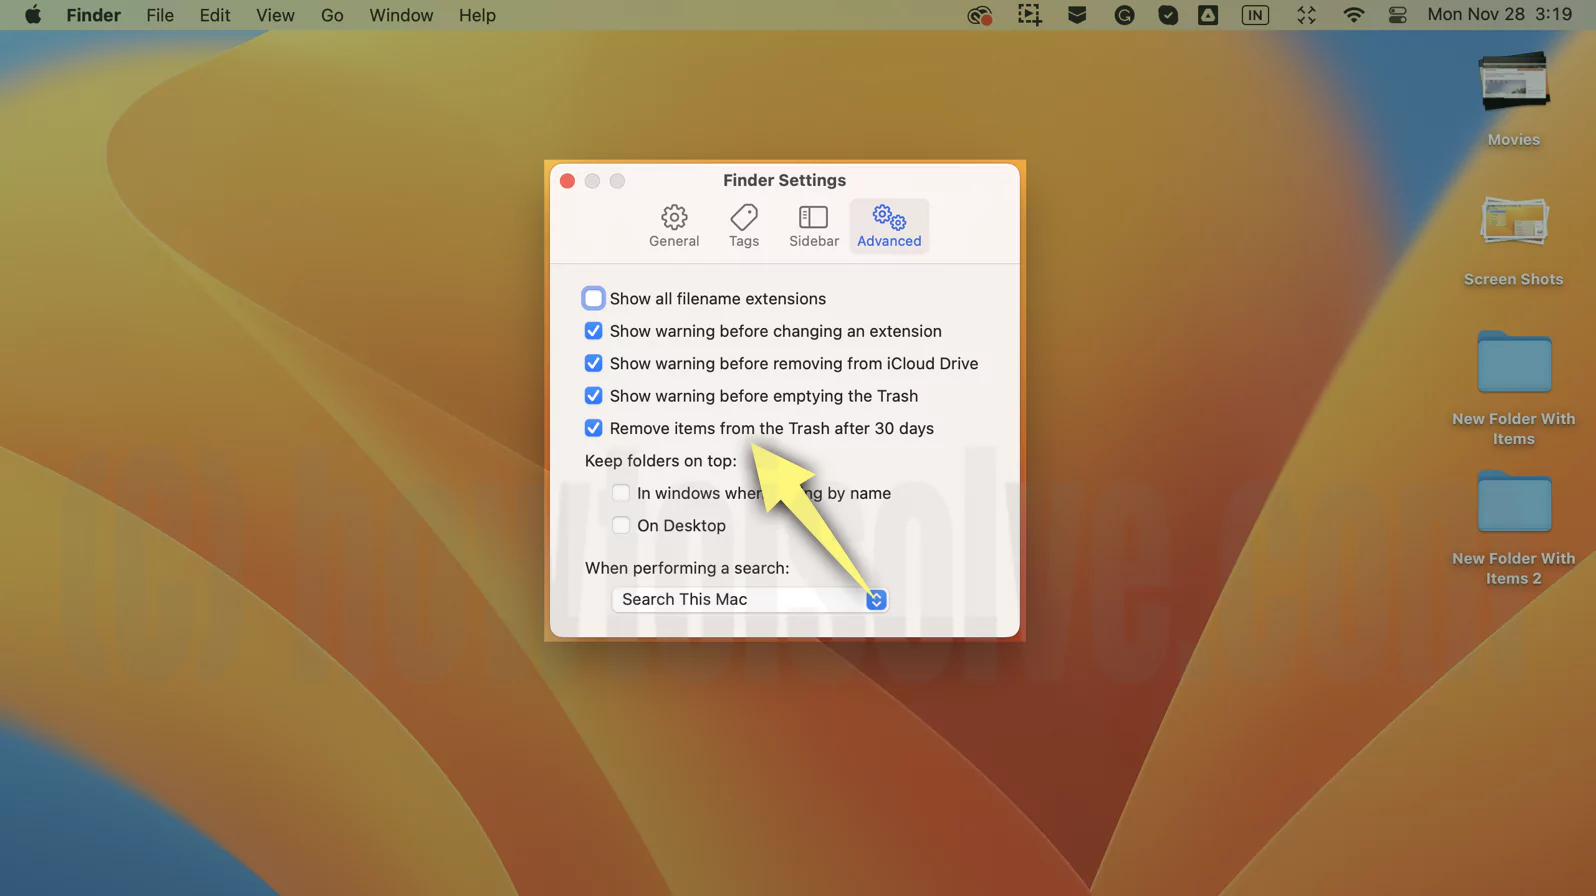
Using the above steps, you need not worry about manually emptying the trash bin. However, you won’t be able to Empty Trash either way; then here is Fix cannot Empty Trash.
How to Force Empty Trash on Mac?
Many times, it happens that you try to Empty Trash, but you won’t be able to do so. Don’t worry. We will show you how to force empty Trash on Mac. Further, you can Force empty Trash using several ways; read further to know the in-depth tutorial.
1. Restart Mac and Try Again
Even after deleting data from the Trash, data won’t get deleted from the Trash folder. So the first basic troubleshooting is to restart your Mac. Because many times applications are running in the background restrain to empty Trash. Hence, Restart will remove temporary files and help force empty Trash on Mac.
To Restart/Reboot your Mac Go to the Apple logo and select Restart from the drop-down.
2. Using Terminal
Using a terminal, the Force Empty Trash on Mac is a little complex. But don’t worry, we will make it easy for you. Follow the below steps to force empty Trash via “terminal.”
1# Open “Spotlight search“(Press Command + Space) Search “Terminal“. Alternatively, Utilities > Terminal.
2# Once Terminal on Mac is Open, Type Command “sudo rm”(without quotes) followed by Space and “-R“(without quotes). The final command is “sudo rm -R.”
Don’t press return; instead, follow the next step.
3# Open the trash folder, then drag and drop files from the Trash folder into the Terminal window.
4# Once the file is dropped into the terminal, Press return. Enter your Mac Password if it asks to proceed.
5# Press “Return” after entering a password. Please wait a while till it force empty Trash.
That’s it! If uncomfortable with the terminal method, you can jump to the next.
3. Using Safe Mode
Mac Safe mode lets you find if any software or app conflicts with the normal Empty Trash function. Because Safe mode will not load some software or app at startup, this will create some space. So that you can check Empty Trash; if it works perfectly, then the culprit is some app/software.
The Intel-based Mac and M1 mac have different loading procedures in safe mode.
Boot Apple Silicon Mac in Safe mode
1# On your Mac, Goto Apple Menu and select Shutdown.
Please wait a while till Mac is completely shut down. It means the screen is black. All lights on the Mac are off.
2# Next, Continuously Press the Power button until “Loading startup options” appear.
3# Now select Volume.
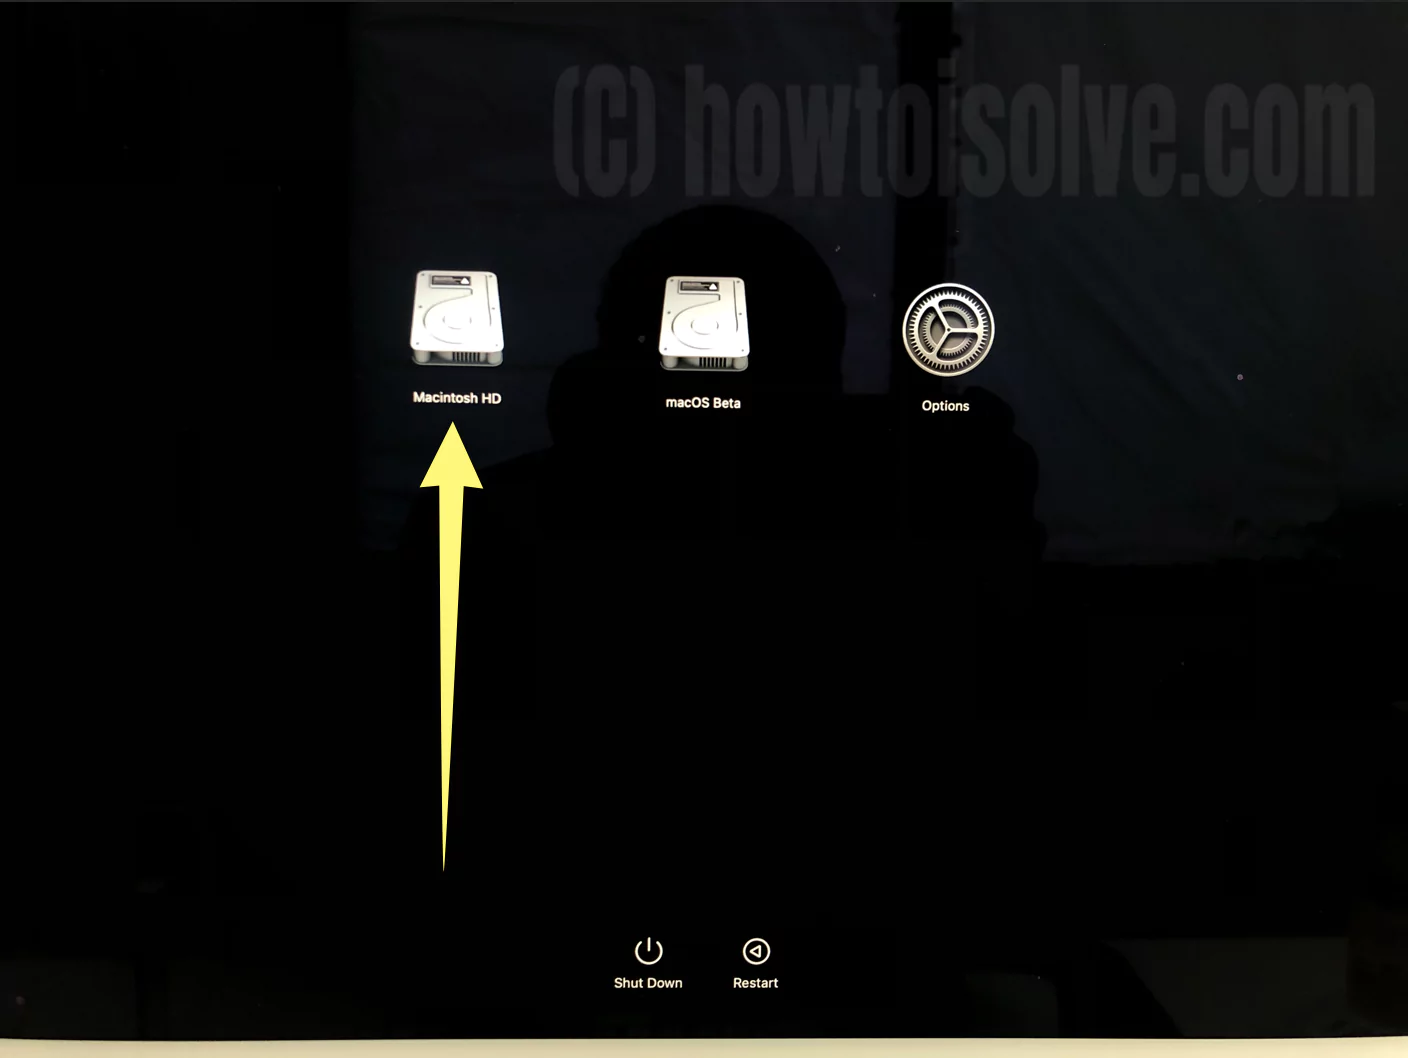
4# Further, Press and hold the Shift key and Select “Continue in Safe Mode.”
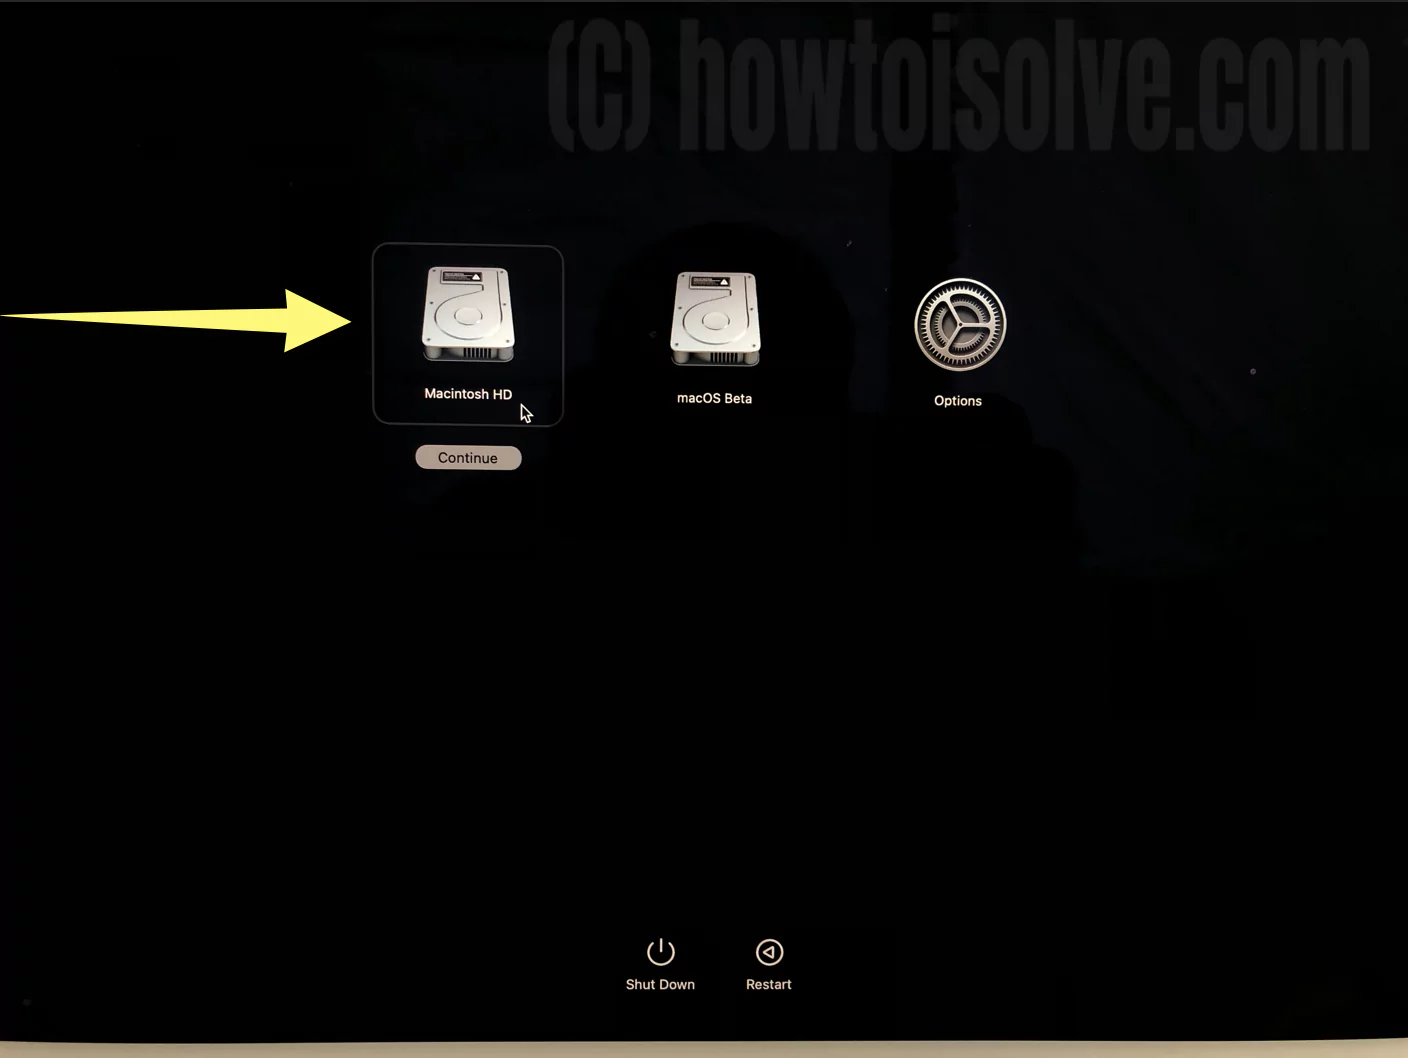
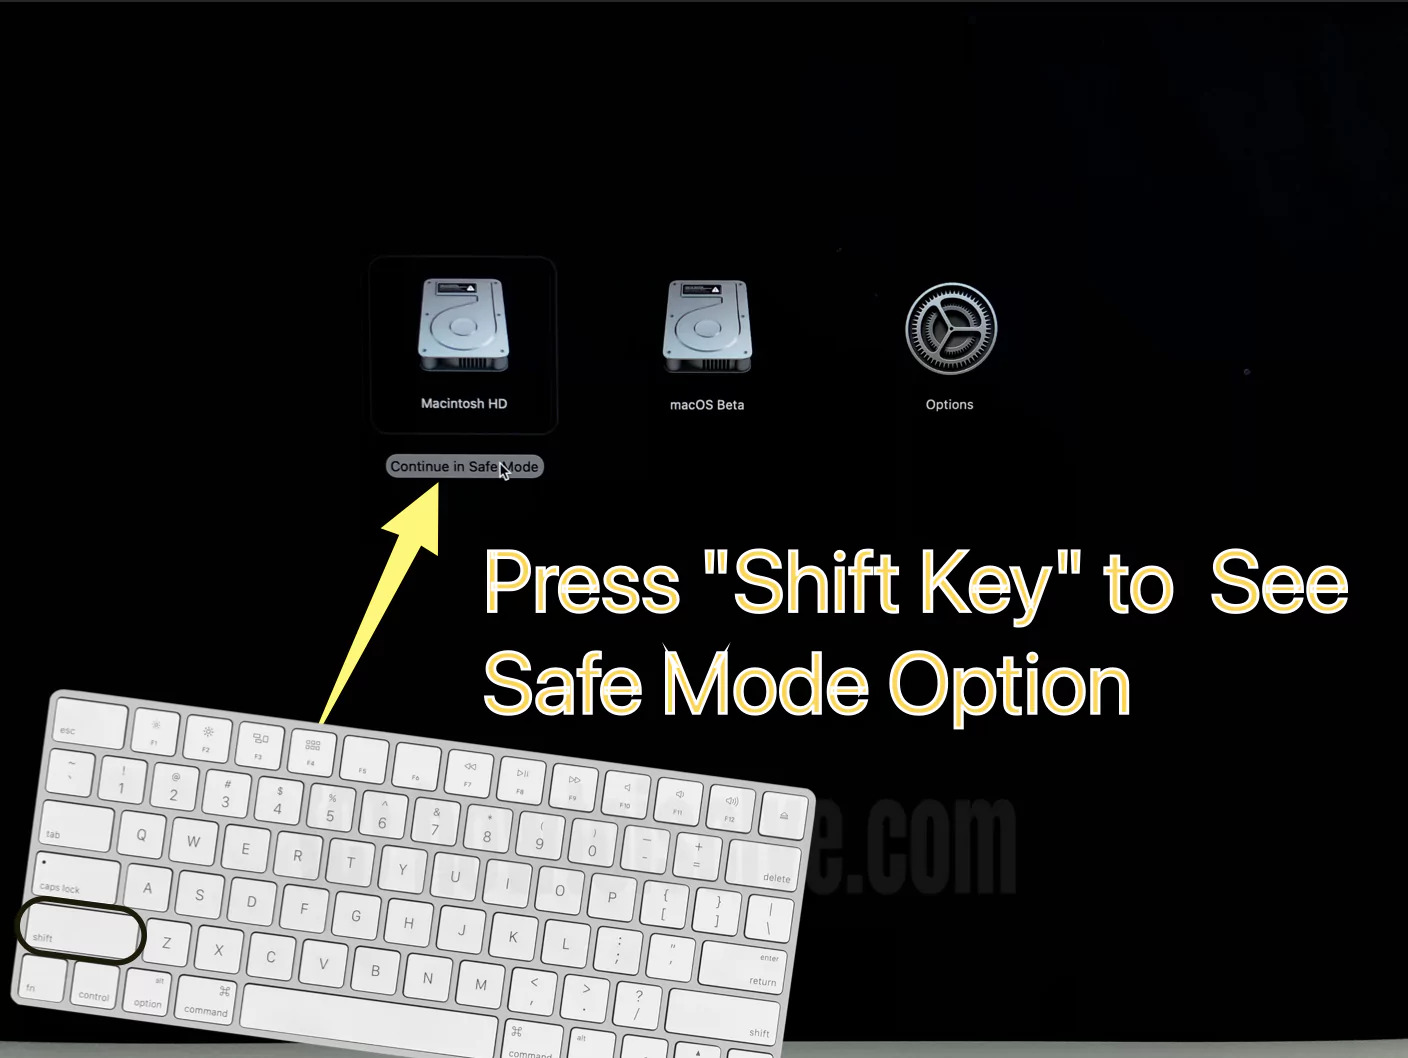
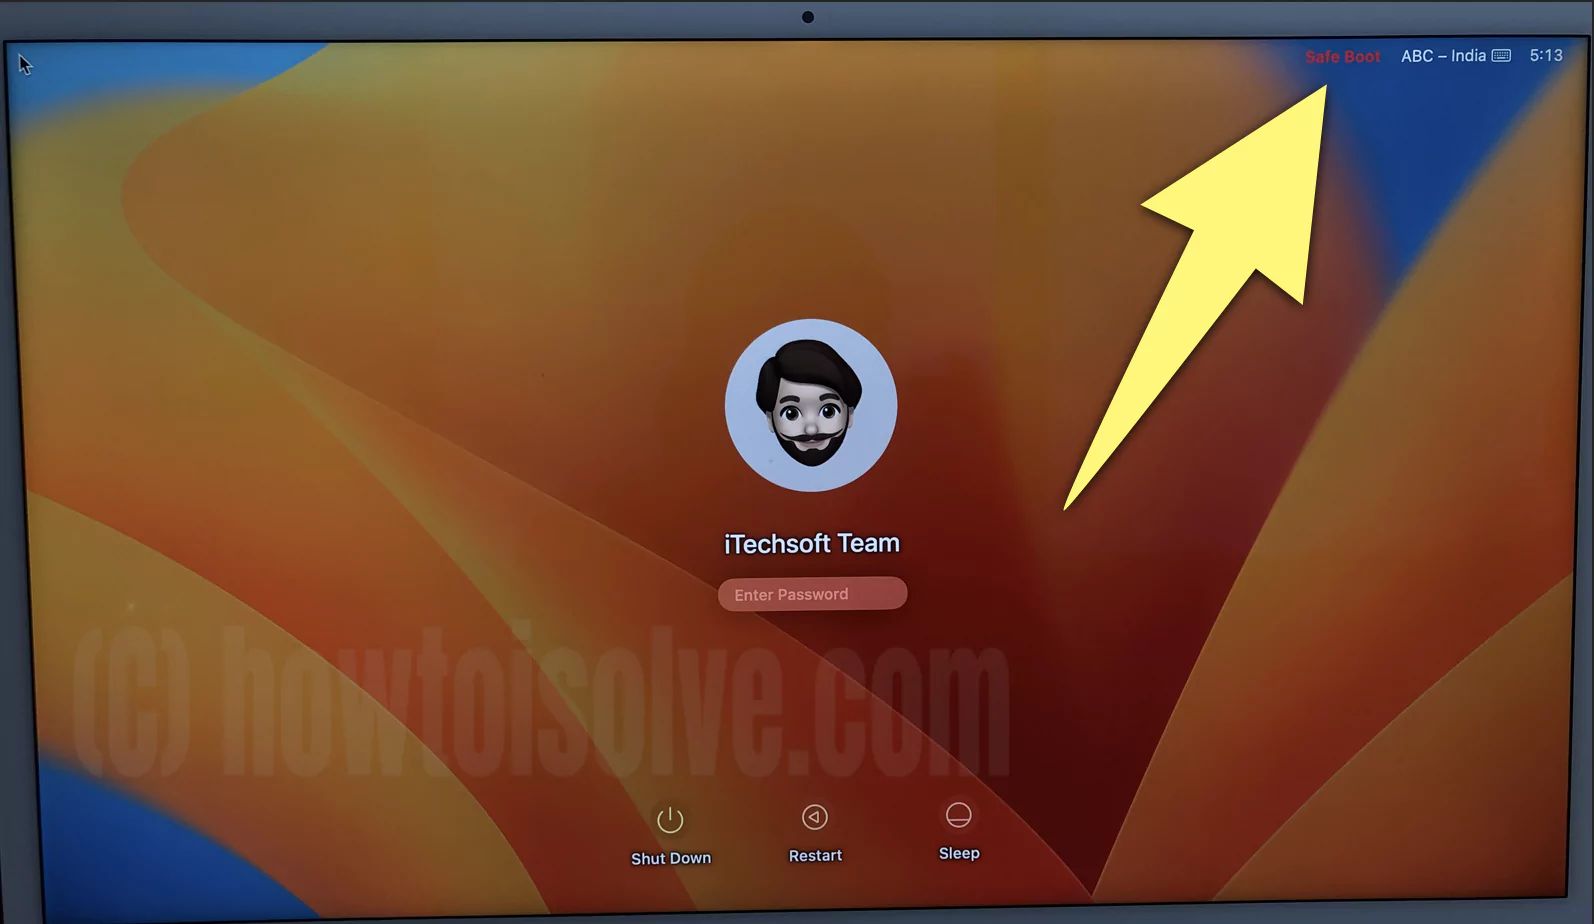
At last, automatically, Mac will restart. You can see “Safe Boot” in the menu bar in the login window. Next, try Empty Trash in safe mode and check whether it works.
Boot Intel-based Mac in Safe mode.
1# Restart or turn on your Mac, then instantly press and hold the shift key on the keyboard until the login window appears.
2# Now log in to Mac.
3# Maybe you will ask to log in again. Then you will see “Safe Boot” in the menu bar.
Now try emptying the trash bin on Mac in this safe boot mode.
FAQs
1. How to empty Trash on Mac that won’t delete.
To empty Trash on Mac that won’t delete, you need to “force delete” it. There are various solutions to fix cannot empty Trash. You need to restart your Mac, empty Trash in safe mode, or by using the terminal; you can empty Trash. For a detailed method to force empty Trash, kindly check the above article.
2. How to empty Trash on Mac when disk is full.
Mac needs space to run a program/ process or even Empty Trash. Hence if your disk is full, your Mac won’t work properly. So, you will try to delete some files or empty Trash and make some space. However, you won’t be able to empty Trash due to the unavailability of space. Don’t worry. Try any of the following methods to empty Trash.
Empty Trash in safe mode
Safe mode will not load some software or app at startup; this will create some space. So that Mac can Perform Empty Trash tasks. Here are steps on how you can perform safe mode.
Boot in Safe mode (Apple Silicon Mac)
1# On your Mac, Goto Apple Menu and select Shutdown.
Please wait a while till Mac is completely shut down. It means the screen is black. All lights on the Mac are off.
2# Next, Continuously Press the Power button until “Loading startup options” appear.
3# Now select Volume.
4# Further, Press and hold the Shift key and Select “Continue in Safe Mode.” At last, automatically, Mac will restart. You can see “Safe Boot” in the menu bar in the login window. Next, try Empty Trash in safe mode.
Boot in Safe mode (Intel-based Mac)
1# Restart or turn on your Mac, then instantly press and hold the shift key on the keyboard until the login window appears.
2# Now log in to Mac.
3# Maybe you will ask to log in again. Then you will see “Safe Boot” in the menu bar. Then you will see “Safe Boot” in the menu bar.
Now in safe mode, try to Empty Trash on a Mac.
Bypass Trash bin
To run a process to “empty trash,” Mac needs space. But your disk is already full; hence you need to delete some files. However, when you delete the file, it will move to Trash and not be permanently deleted. Therefore, deleted items in the Trash bin are also taking up space. So, you have the option to permanently delete files by bypassing the trash bin.
However, you must be careful before permanently deleting any item because you won’t get it back. You can bypass the trash bin and permanently delete an item in two different ways.
Caution: Bypassing the Trash bin means permanently deleting items that you can’t get back or restore.
Via Keyboard shortcuts
- Attentively Select an item to delete permanently.
- Press the “Option + Command + Delete” key on the keyboard.
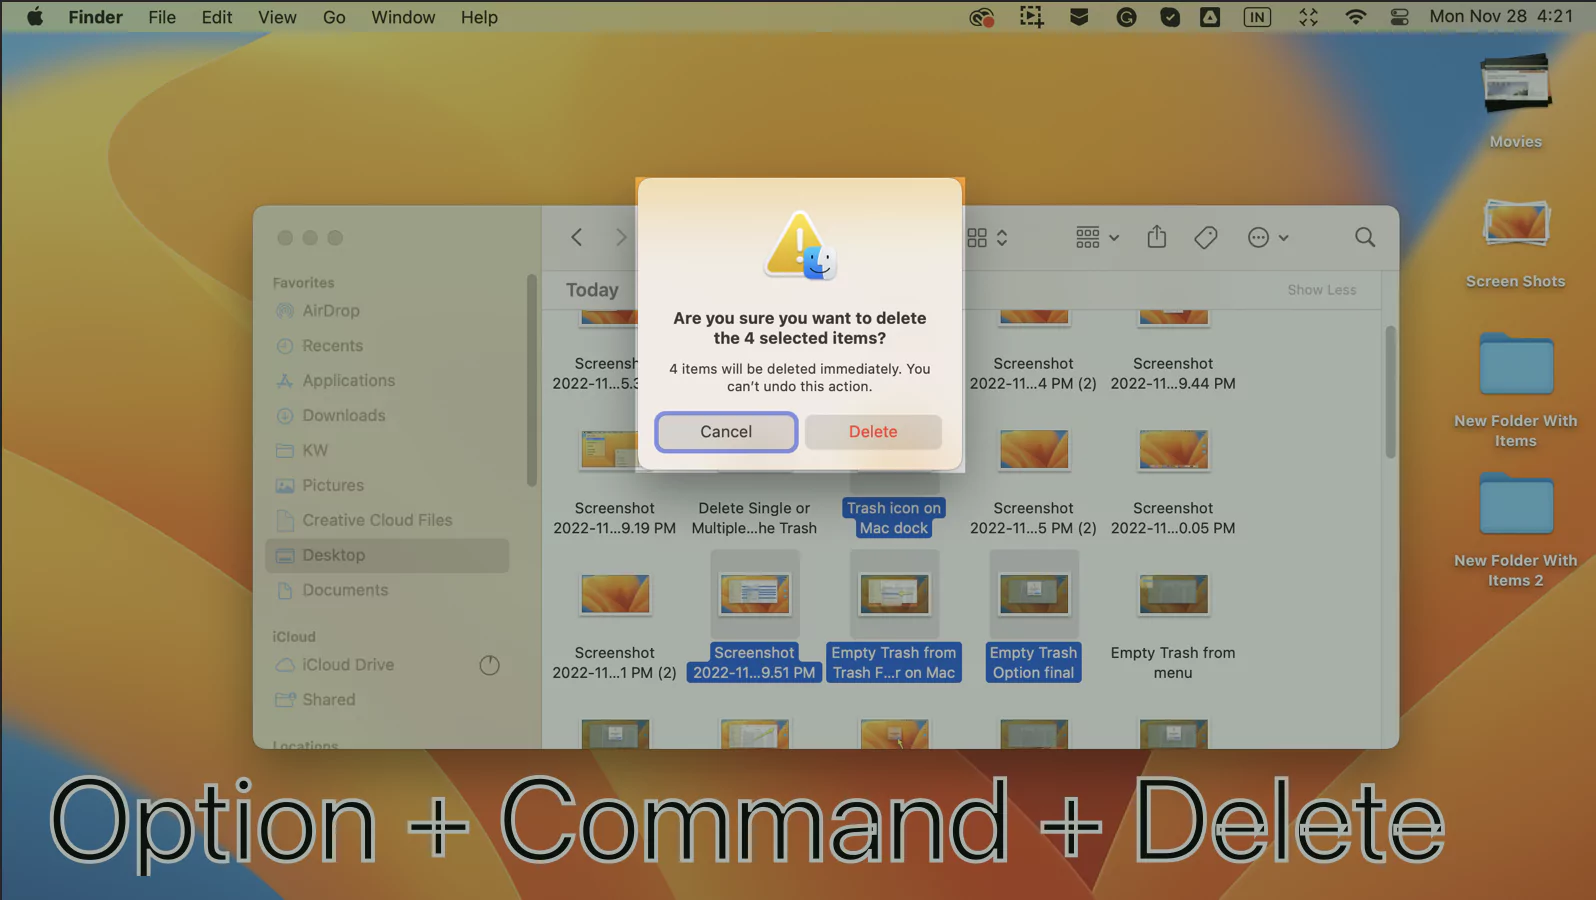
- A confirmation box appears; Select Delete.
Using File Menu in Finder
- Goto Finder Window and select the item you want to delete permanently.
- Hold Option Key on the keyboard and select “File” menu > “Delete Immediately.”

- A confirmation box appears; Select Delete.
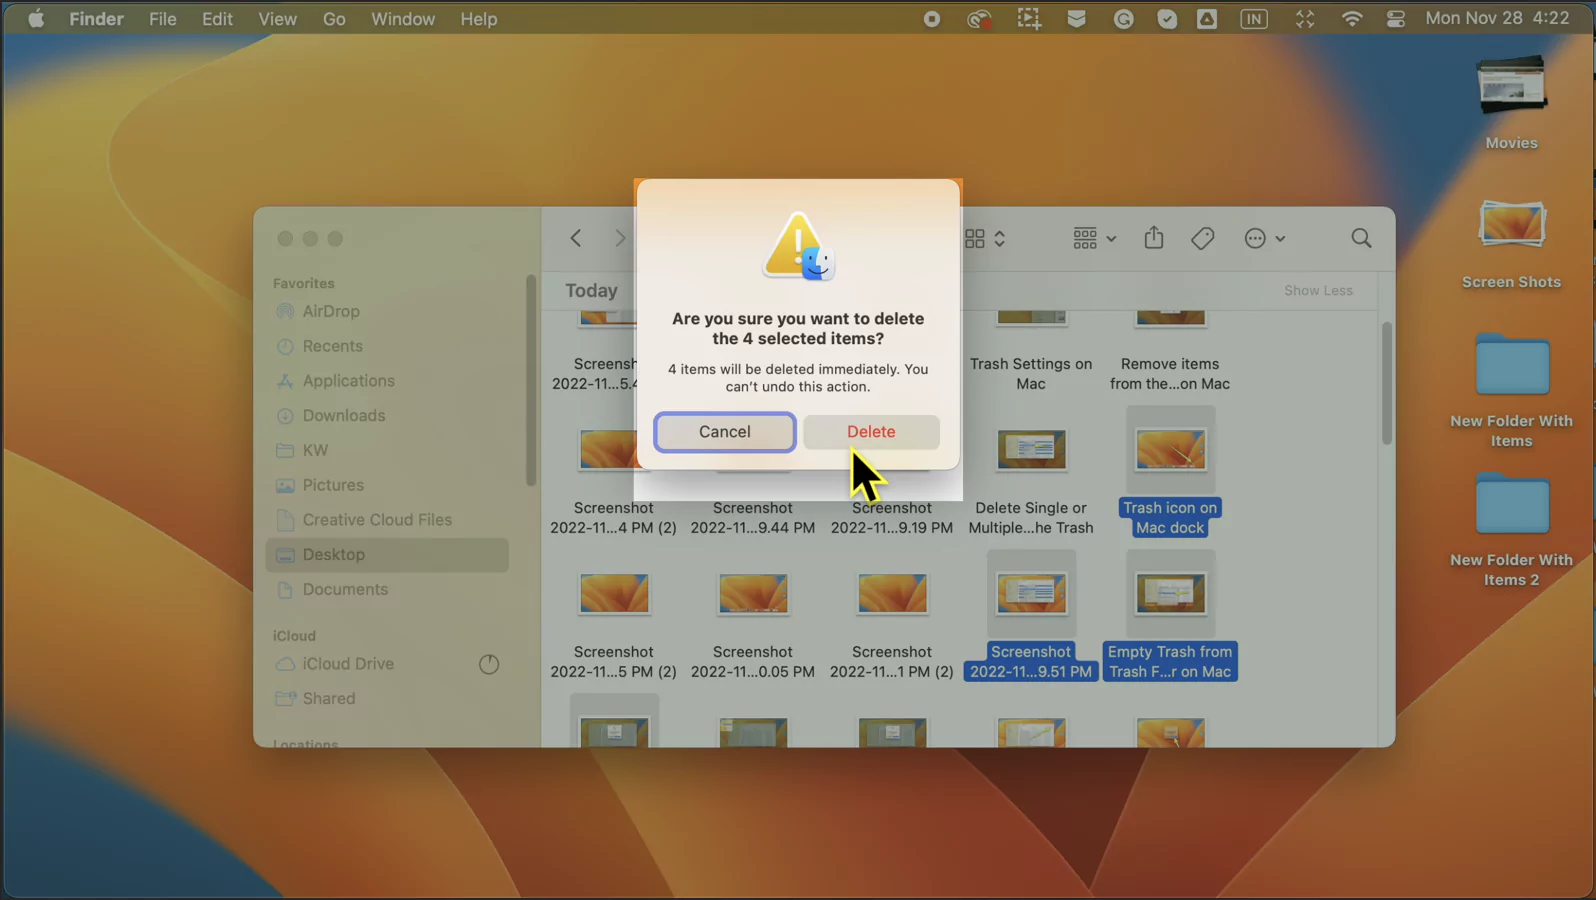
Using the above method, you can skip Trash altogether and directly delete items to free up space on the disk.
3. How to secure empty Trash on Mac.
The secure empty trash feature is available for the earlier version of macOS. Unfortunately, the latest macOS Ventura, Sonoma don’t have such a feature.
4. How long does it take to empty Trash on Mac?
It depends on the number of items in your Trash folder. If you have so many files in the trash bin, it will take longer than a few files.
Suppose you want to know after how many days it empties Trash. Then you can set automatically empty Trash after 30 days. Here are the steps to do so.
Go to Finder > Preferences >Advance> Check the box next to “Remove items from the Trash after 30 days“. For detail, steps go through the above article.
5. How to empty photo trash on Mac
The Photos you delete on Mac will not Goto the Trash bin; instead, it goes to the “Recently Deleted” folder. Further, it stays in a recently deleted folder for 29 days. So that you can recover it, but if you are sure and don’t want photos, then you can permanently delete it before 29 days.
Follow these steps to delete photos from the Recently Deleted folder.
1# Press Command + Space to open Spotlight search.
2# Search Photos. app.
3# select the “Recently Deleted” folder from the left side.
4# Click on the “Delete All” button at the top right to permanently delete all photos.
Alternatively, you can select Single photo and click on “Delete 1 Photo” at the top right.
5# Confirmation box with the message “Are you sure you want to delete All photos permanently? you cannot undo this action” appears. Click Delete to proceed.
The above steps will help you delete your Photos permanently from your mac.
6. How to empty Trash on an external hard drive mac
To erase data on an External hard drive, you need to connect your hard drive to a mac. Then follow the steps below to erase data on an external hard drive.
1# Open Spotlight Search (Press Command + Space).
2# Type Disk Utilities and hit Return.
3# Under Disk Utilities Window, select External hard drive from the left side.
4# Next, Click on the “Erase” option at the Top.
5# Confirmation box with the message “Erasing “YOUR HARDDRIVE NAME” will permanently erase all stored data. You can’t undo this action”.
6# Select Erase to delete data on a hard drive permanently.
You can permanently delete data on your hard drive with the above steps, so be careful.


