If the iPadOS update is not showing up on your iPad, you can try the following steps to resolve the issue. Trouble updating your iPad? Follow these steps to fix the issue and get the latest iPadOS update. Check compatibility, restart, and check network settings.
Most Helpful Solutions to Update Your iPad
Solution 1: Check System Status

Visit Apple’s System Status page to ensure there are no outages affecting software updates.
Solution 2: Check Compatibility
Ensure that your iPad is compatible with the latest iPadOS version. Apple provides a list of devices that support each update.
| iPad Model | Generation |
|---|---|
| iPad Pro | All models |
| iPad Air | 3rd generation and later |
| iPad | 5th generation and later |
| iPad mini | 5th generation and later |
Solution 3: Restart Your iPad
Sometimes, simply restarting your device can help make the update appear. To restart, hold the power button and Volume button together, slide to power off, and then turn it back on after a few seconds. Watch this video.
Solution 4: Check Network Settings
Make sure you are connected to a stable Wi-Fi network. Updates usually don’t download over cellular data.
Solution 5: Free Up Space
Updates often require a good amount of free space. Check your storage by going to Settings > General > iPad Storage and free up space if needed.
Solution 6: Check the Network Connection
Not to mention, software updates require a stable internet connection. For example, you may encounter iPadOS 18 not showing up due to unstable or buggy internet. So check the internet speed and refresh it by turning ON and Off Airplane mode.
Suppose your iPad is not connecting to a wi-fi network, Or your iPad is connected to Wi-fi but has no internet connection. Don’t worry; try these solutions to fix it.


Solution 7: Update from iTunes or Finder

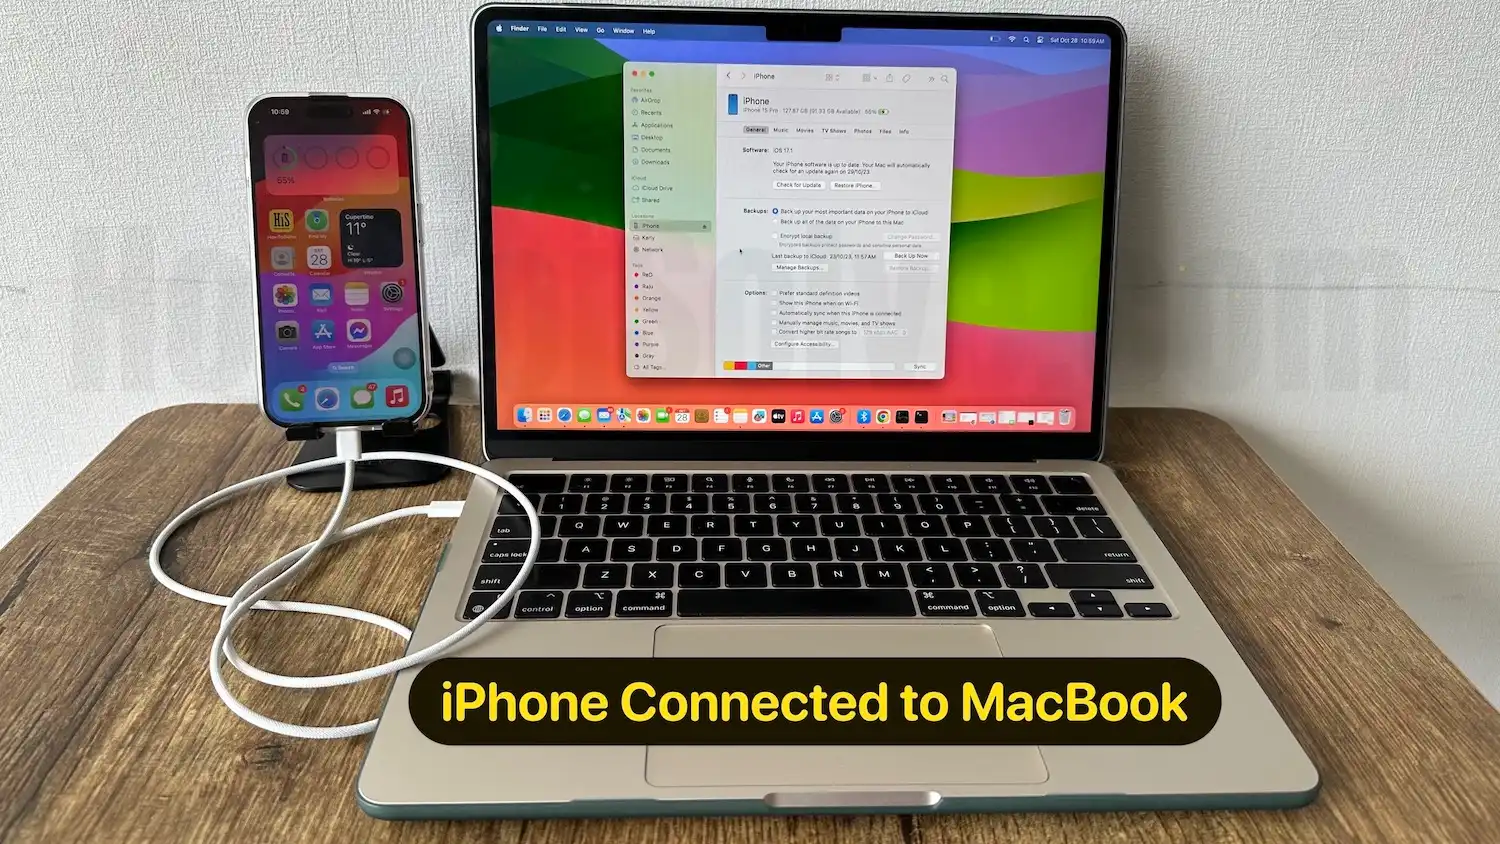
Step 1 → Navigate to iTunes on Windows or Mac with macOS Mojave or earlier versions.
Step 2 → Connect your iPad with your computer.
Step 3 → Select the Device Option present toolbar of iTunes.
Step 4 → Right in the Summary Menu, choose Check For Update.
Select Download And Install and follow the on-screen instructions. If prompted, write down the Password.
If the update still isn’t showing up, try updating through a computer. Connect your iPad to a computer, open iTunes (or Finder on macOS Catalina or later), select your device, and check for updates.
Solution 7: Reset Network Settings
Note: Resetting Network Settings will restore the device to its default network settings; there will be no data loss, but all Wi-Fi and Bluetooth devices will be forgotten.
This will reset all network settings, including Wi-Fi passwords, so make sure you know them before doing this step.
Step 1 → Go to Settings App on your iPad
Step 2 – Navigate General.
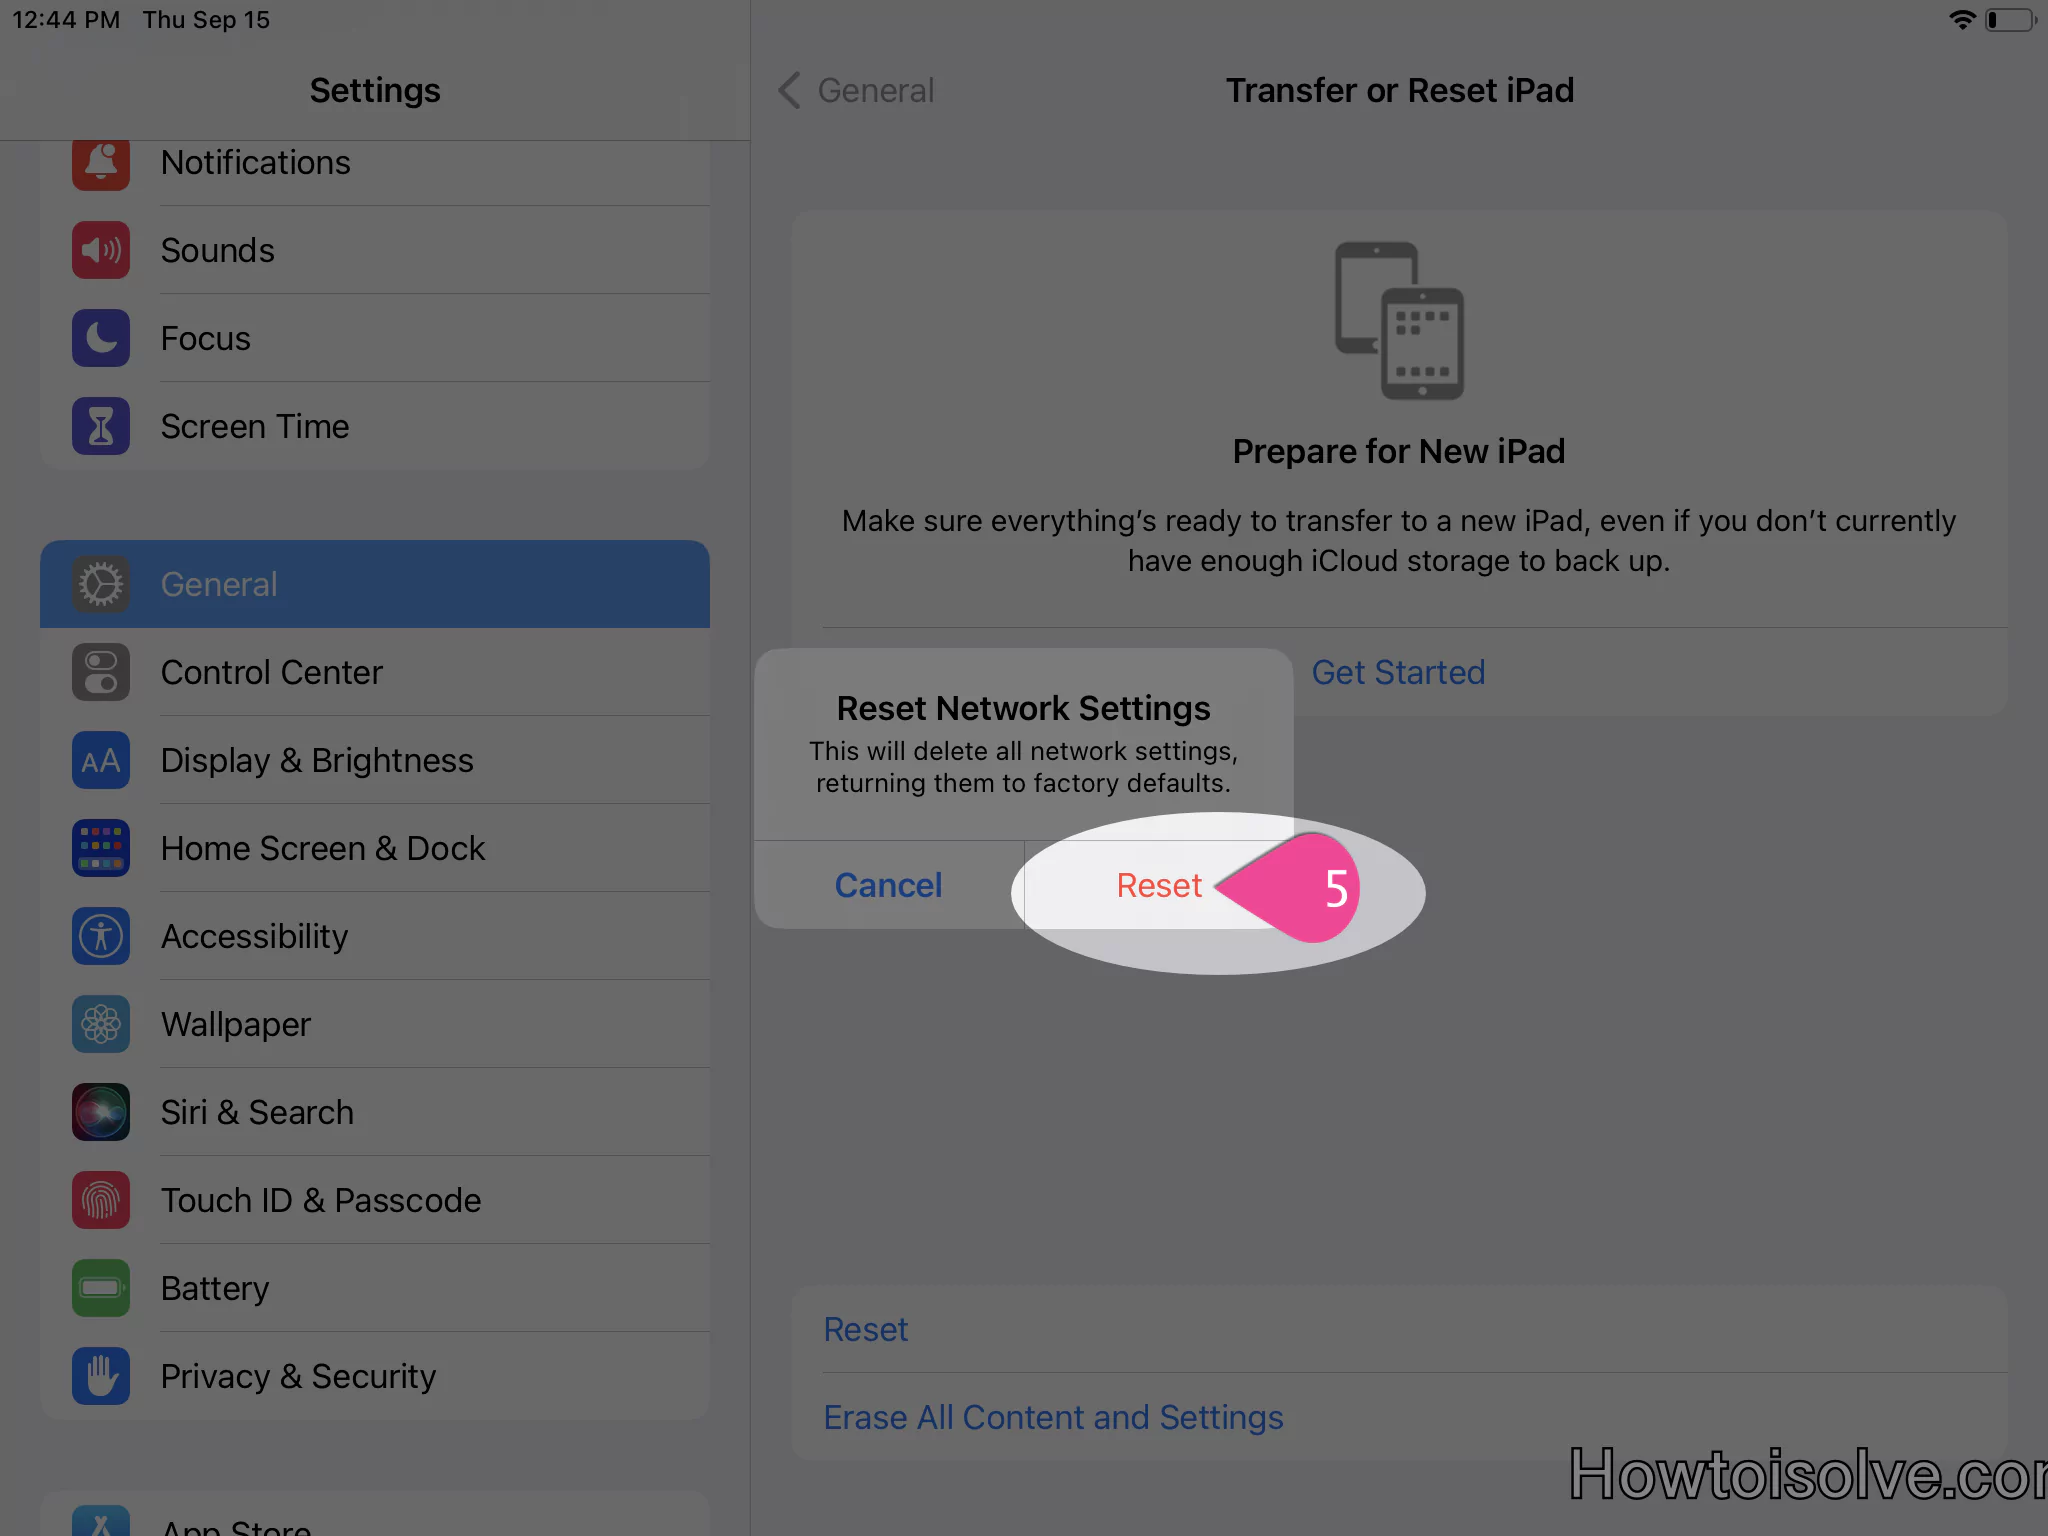
Step 3 → Now scroll the right side pane screen to the end, Choose Transfer or Reset iPad.
Step 4- Click on Reset
Step 5 → Tap on Reset Network Settings. Now, Enter Your Passcode to move to the next screen.
Step 6 → A -pop-up asks you to Reset Network Settings – This will delete all network settings, returning them to factory defaults. Choose Reset.
Here’s- What Happens When you Reset Network Settings
So your iPad screen will boot with the Apple logo and loading bar screen. Wait for a while till your iPad start again.
Now, you will have to enter your passcode Touch ID or Face ID required your Passcode when the iPad restarts. Please enter your numeric and alphabetic passcode to access your iPad home screen.
Solution 8: Force Refresh the Update Screen
On the iPad, Go to Settings > General > Software Update And pull down the screen to refresh it.
On the next screen, it will begin a search for the update. For example, if iPadOS 18 is available, tap on Download And Install. Then, follow the on-screen instructions to upgrade your iPad’s Operating system successfully.
Solution #9: Remove The iPadOS Beta Profile from Your Device
Have you installed the beta version? If yes, then remove it! As there is a new update available on your iPad device.
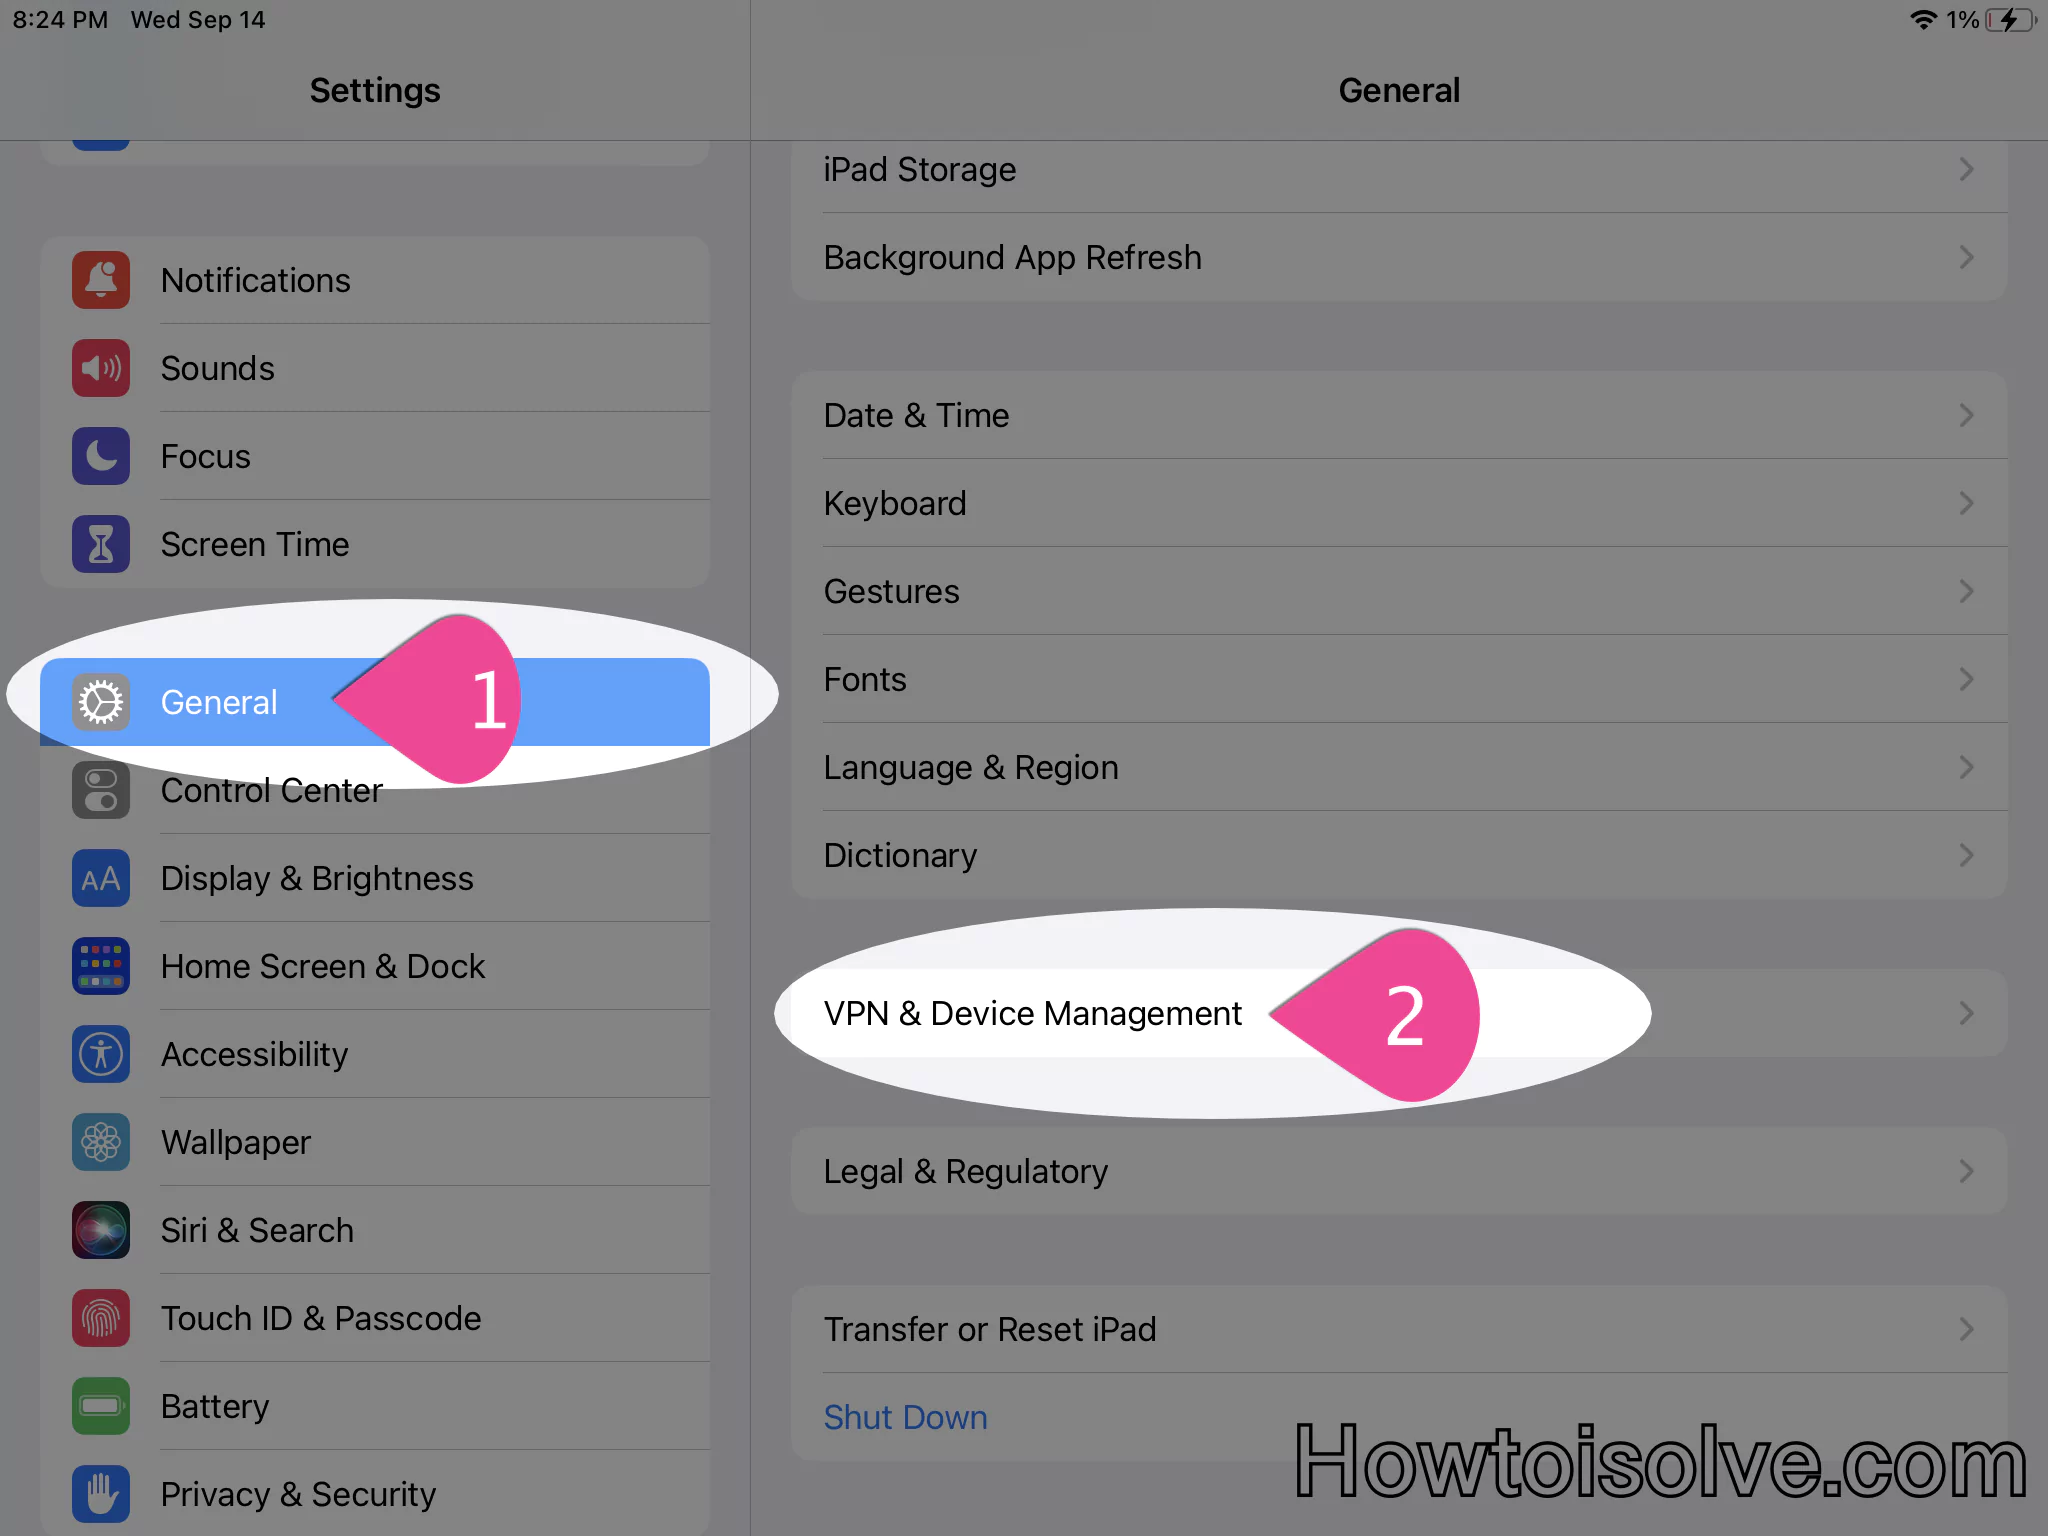
Step 1 → Go to Settings App.
Step 2 → Choose General and Swipe down to and select VPN & Device Management.
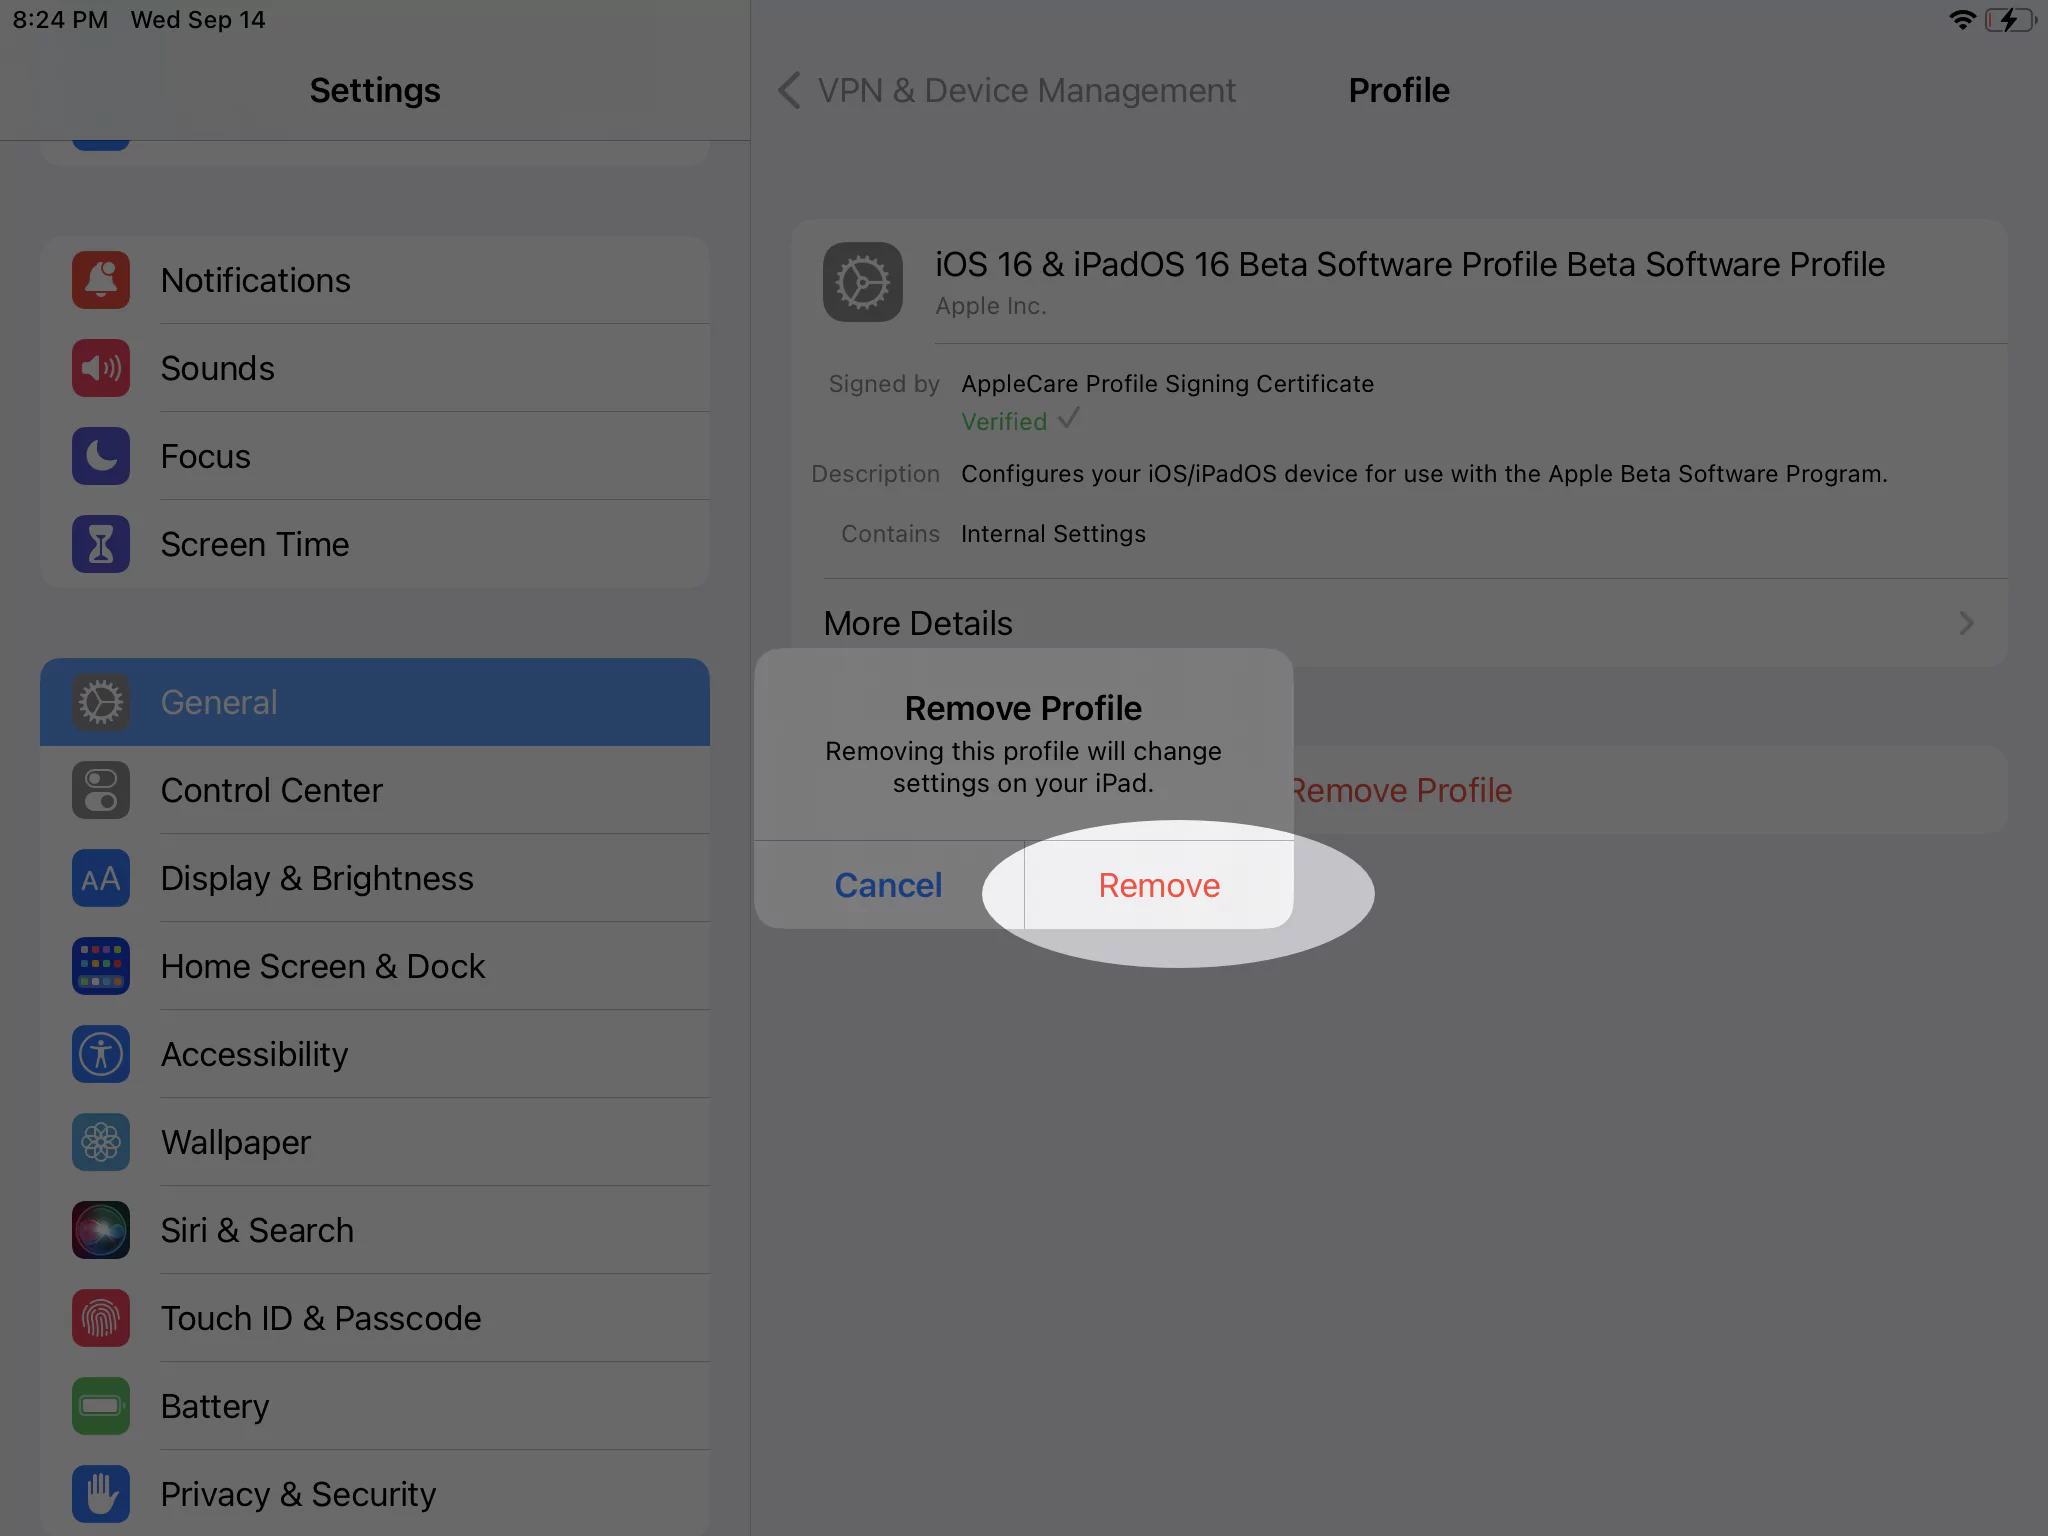
Step 3 → Now click on iOS 18 & iPadOS 18 Beta Software Profile.
Step 4 → On the next screen, choose Remove Profile.
Step 5 – A Pop-up will ask you Enter a Passcode to delete the beta profile. in the end, confirm Remove Profile – Removing this profile will change settings on your iPad. Choose Remove. So next, your iPad will auto-restart.
After removing the iPadOS beta, go back to the General, next Software Update, and see if iPadOS 18 is available on your device.
If none of these steps work, you might want to consider reaching out to Apple Support for further assistance


Was very helpful