
Setup parental control on Mac can be pretty beneficial. First, it offers an ability to manage and control how their children use the Mac computer. Similarly, it provides peace of mind that children are safe from the internet.
Therefore, it is of utmost importance to be a guardian to enable parental control on Mac first. This article will help you how to set up controls on Mac. So do read it before missing any critical points.
How to Restrict App Usage, Content and Subscription on Mac with Screen Time
Prevent your child from the accessing the adult contents using the parental control on macOS. Here in this article we will show you how to set it up.
Step 1: Configure The Child Account
First thing first, what you need to do is to create a separate account for your child. Doing so will not apply changes to your app and browsing usage. However, steps to create a dedicated child account vary from macOS.
macOS Ventura And Later
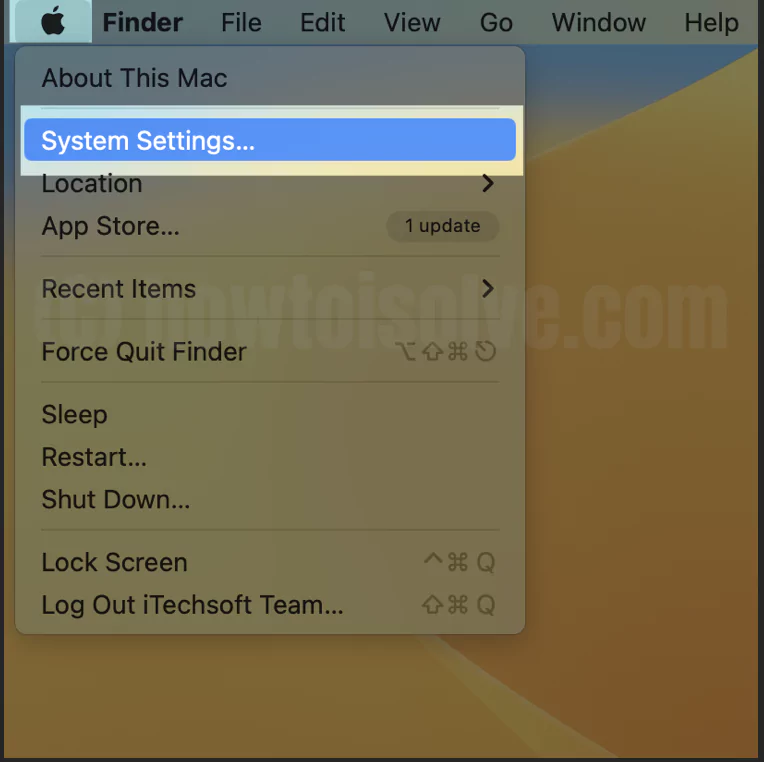
1→ Navigate to the Apple Logo.
2→ Select System Settings…
3→ From the left sidebar, click on Users & Groups.
4→ Click on Add Account.

5→ Enter the Administrator Name And Password.
6→ From the next window, click on the New Account Drop down and set it to Standard.
7→ Enter the Full Name, then Account Name. Create a Strong Password and verify it.
8→ Jot down the hint for the password. And then click on Create Users.

Now, your child is ready to log in to your Mac into his/her account.
macOS Monterey And Earlier
- Select Apple Logo.
- From the dropdown, click System Preferences…
- Click on Users And Groups.
- Choose Lock Icon from left bottom corner.
- Enter the Administrator Name And Password.
- Choose + Icon.
- Click on the New Account Drop down from the next window, and set it to Standard.
- Enter the Full Name, then Account Name. Create a Strong Password and verify it.
Jot down the hint for password. And then click on Create Users.
Step 2: Now Setup Family Sharing
The most numerous and efficient way to safeguard your child is Family Sharing Aspect. This aspect allows it to administer the settings for up to five people from any Apple Peripherals.
However, family members will need to sign-up with their Apple ID. It’s one of the easiest ways to restrict your children.
macOS Ventura And Later
1→ Go to Apple Logo.
2→ Click on System Settings… (System Preferences…)
3→ In the next window, click on Apple ID[Your Name] (Family Sharing for macOS Monterey And Earlier).

4→ Select Family Sharing from the right side of your screen.
5→ Choose Setup Family Sharing from the bottom right corner. Or click on the Add Member…

6→ From the following pop-up, click on Create Child Account.

7→ You will receive a Create A Child Account pop-up. Read the helpful information and then click on Verify You’re An Adult.

8→ In the Parental Consent Terms And Conditions window, check the box next to the I Have Read And Agree With These Conditions > Agree Button.


9→ Now add the First Name, Last Name, and Birthday information. Choose Next.

10→ You will get your child Apple ID. Create a Strong Password and verify it.
11→ Select Next Button.
If you want an alternative number, click Use Different Number. Or if you want to continue with same number, select Next Button.

12→ Read Terms And Conditions and accept them. Select Agree Button.
13→ Accept your child to ask to buy. Click Continue.

14→ Agree to share your child’s location if you want as per the location assigned to them; click Share Location.
That’s It! Your Child account was added to Family sharing on Mac.

Control Family Sharing settings for Members under the Family sharing option.

Step 3: Setup Parental Controls If You Are Using Family Sharing
Once you are done with family sharing configuration, follow the steps below. Before that, ensure you log in with your Apple ID.
- Go to Apple Logo.
- Select System Settings…
- From the left side, click on Screen Time.
- Click on the Family Member Dropdown and select the child you want.

- And then enable Screen Time.
- Click on the toggle next to the Include Website Data.
- Then after allowing the toggle next to the Use Screen Time Passcode.

macOS Monterey And Earlier
- Navigate to Apple Logo.
- Choose System Preferences…
- From the left bottom corner, select Options…
- Check the box to the Share Across Device.
- Now click the dropdown below the picture and choose the child you set up in the Family Sharing.
- From the right side, click on the Turn On Button.
- Choose Include Website Data.
- Enable Use Screen Time Passcode.
For further configuration, read through the complete guide.
Step 3: Setup Parental Controls Without Family Sharing
Without setting up family sharing, you can still set up parental control. The approach varies from macOS; if you don’t know how to, follow the steps below.
macOS Ventura And Later
- First of all, you need to log in to the Child Account. To do so, click on Apple Logo > Log Out. Then Log-in in to the child’s Account.
- Select Apple Logo.
- Choose System Settings…
- Search and select Screen Time.
- Enable the toggle next to the Screen Time.
- Next, turn on the toggle next to the Use Screen Time Passcode.

macOS Monterey And Earlier
- Select Apple Logo > System Preferences…
- Choose Screen Time.
- Click on Options button from the bottom left corner.
- Enable the Screen Times.
- Next, turn on Use Screen Time Passcode.
Advanced Parental Control Settings
There are many insights settings; App Limits, Downtime, and Content Privacy. Follow the steps below to know what they aim for and how to set up.
Downtime: The downtime feature lets you set up the time for the situation when your Mac isn’t available to you. This is a valuable feature to prevent the child from accessing unauthorized data late at night.
- Select Downtime.
- Enable the Downtime, and if prompted, enter the passcode.
- Now, select the Schedule Dropdown. And choose Everyday.
Then schedule the Downtime for each week. That’s it!
App Limit: With these settings, you can set up the App Limit for the desired application.
For macOS Ventura And Later
- Select App Limit.
- Enable the toggle to App Limit.
- Up next, Add Limit… Button.
- You will receive the categories of applications. Check the box next to the desired category.
- Then choose Everyday. Or select Custom > Edit…Then set up a daily app to limit time. Click Done > Done.
macOS Monterey And Earlier
- Select App Limit.
- Click on the + Icon on the bottom left corner of the screen. If prompted, enter a passcode.
- You will encounter a list of categories. Select the box next to the app you want to set the Limit.
- Now, select Everyday. Or click Custom. Then you can configure the day and time as per your need.
Communication Limit: This setting lets you configure the contacts to which children can talk. You can restrict it to anyone or existing contacts. There is also a configuration when Downtime is in force. Select Communication Limit and the setup to Everyone or Specific Contacts.
Always Allowed: Another practical setting that reverses Downtime and App Limit. This feature lets the child use the application all time. Select Always Allowed and check or enable the toggle next to the desired application.
Set Website Restriction And Bans on Mac
Content And Privacy is the most valuable setting that lets you prevent your child from accessing unauthorized websites or content on the internet.
All the earlier aspects aim to work on degrading the timings. But this completely restricts the children from accessing the adult’s website.
- Select Content And Privacy. Enable the toggle next Content And Privacy (click on Turn On Button for macOS Monterey And Earlier).
- Now go to each menu one by one; Content, Stores, Apps, Preferences Restriction( Other) and configure the settings as per your need.
Bottom Line
If you give your Mac computer to another or a child, it is worth familiarizing yourself with restriction features on macOS. And hope so, the above article has done work for you.


