Learn how to improve your WiFi speed by adding a proxy DNS address. Follow the steps in the post below to change the default DNS server settings on your iPhone or iPad. This can help you access sites faster and improve your browsing experience on all search engines.
What is the best DNS server for iPhone & iPad?
I hope you have an idea. What does configuring DNS iPhone mean? Use public or private DNS using the steps below on your iPhone, iPad, or Mac. Here’s a list of useful Open-source DNS addresses we can use on your smartphone or Mac/PC.
| DNS Provider | DNS Address |
|---|---|
| OpenDNS | 208.67.222.222 |
| Google Public DNS | 8.8.8.8 |
| Cloudflare | 1.1.1.1 |
| 1.1.1.1 with Warp | 1.1.1.1 |
| Comodo Secure DNS | 8.26.56.26 |
| Quad9 | 9.9.9.9 |
| Verisign Public DNS | 64.6.65.6 |
| OpenNIC | 13.239.157.177 |
| UncensoredDNS | 91.239.100.100 |
| CleanBrowsing | 185.228.168.168 |
| Yandex DNS | 77.88.8.7 |
| UltraRecursive DNS | 156.154.70.1 |
| Alternate DNS | 198.101.242.72 |
| AdGuard DNS | 176.103.130.130 |
How to Change DNS Settings on iPhone /iPad
A full guide on changing my DNS to 1.1.1.1 (Cloudflare) or other public DNS on your iPhone.
- Launch the Settings app, from your iPhone or iPad home screen
- Tap on the Wi-Fi menu
- Find out your WI-FI networks from the available networks on your iOS devices
- Now tap on the “i” button on the right-hand side corner
- Next, scroll down the screen until you don’t see the DNS section screen, now tap on the number on the right side in the DNS Text box.
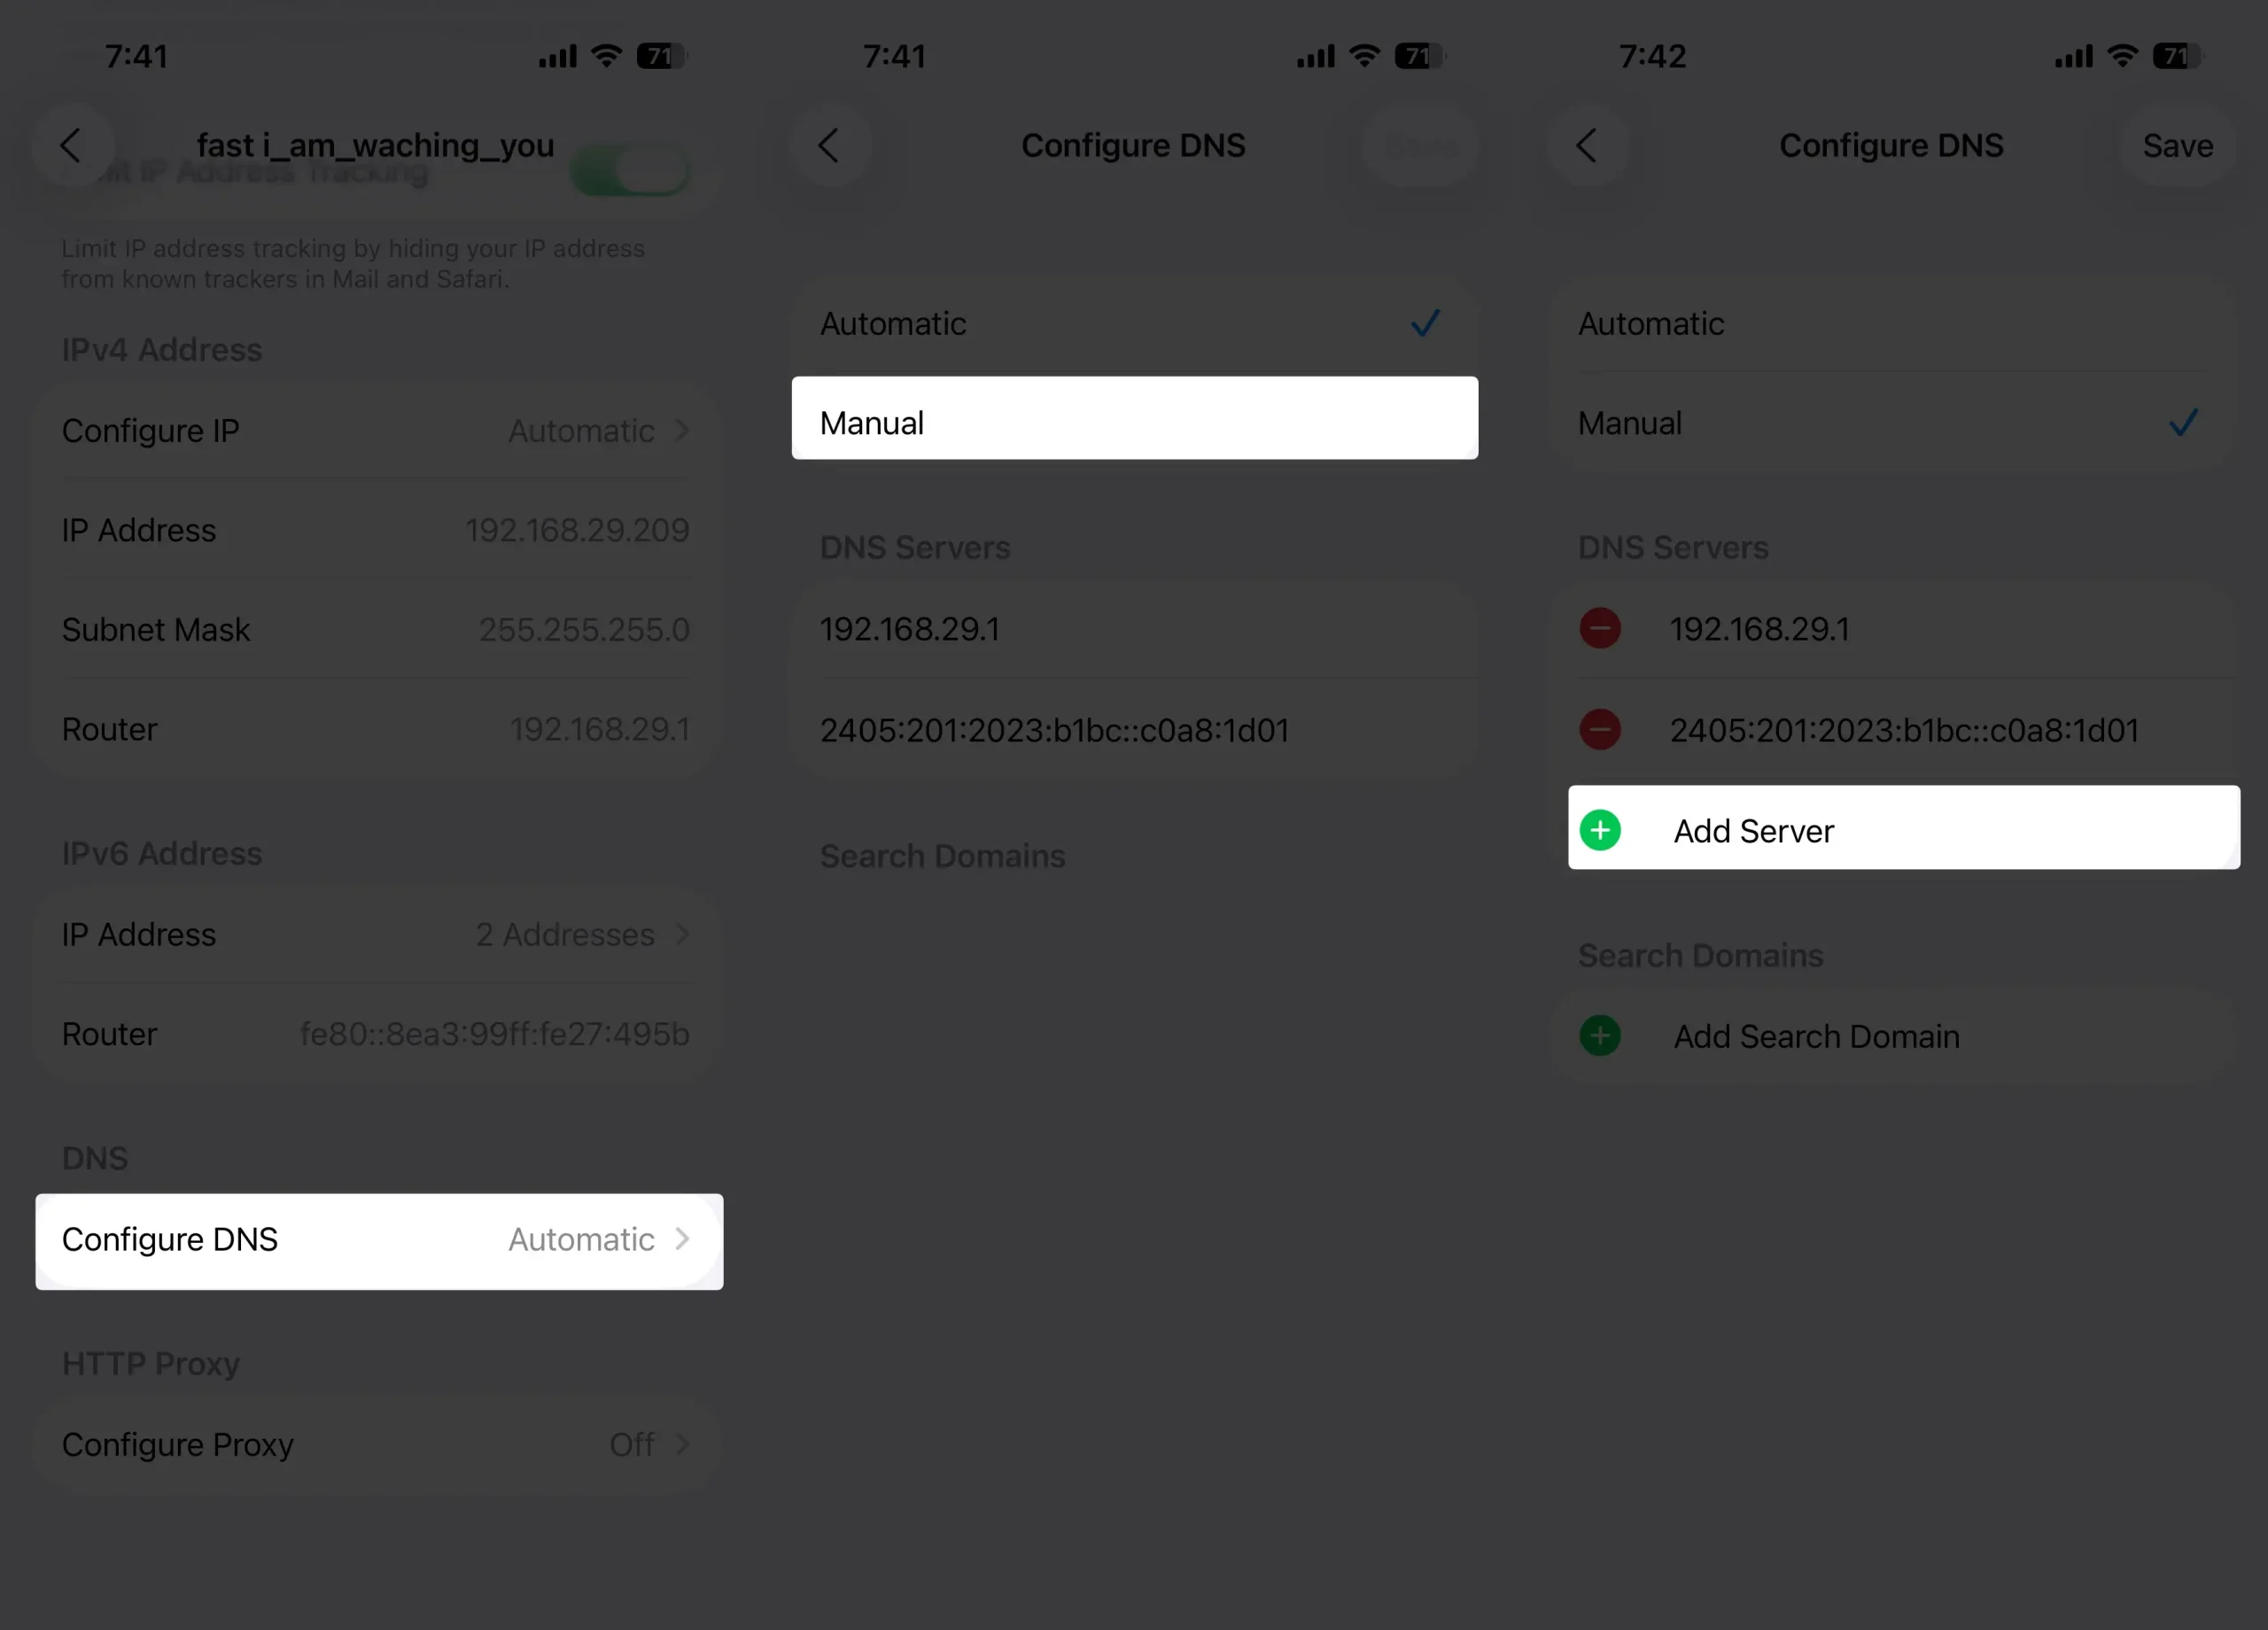

- You should have a keyboard on the bottom screen so that you can easily enter the new DNS server address. Lastly, tap on WI-FI to go back to the main screen
Important!
Here’s a table detailing the information you provided:
| Aspect | Detail |
|---|---|
| Scope of DNS Changes | For custom DNS, repeat the process for each network individually. |
| Benefits of Using Public DNS | – Potentially faster browsing speeds – improved security – bypassing content restrictions |
| Important Consideration | Choose reputable DNS (Google, Cloudflare) providers to ensure safety and reliability. |
That’s it. If you follow the above steps correctly, then you can easily change the DNS server.
Don’t miss– How to Change safari’s default search engine on iPhone
Leave your reply; have you ever changed DNS Server settings on your iPhone or iPad? If not, then tell us what this post helped change the default DNS Server settings on iPhones and iPad.


