
Sometimes, you want a text app to be smaller so you can fit more content on the same screen. Conversely, you want the app UI (User Interface) to be bigger for more convenient usage. But until today, if you had a Mac computer, you had to pick the same text size as standard for all your applications.
Not anymore. From macOS 14, you can adjust the text size of specific apps. So, for instance, if you want to keep the text small for Apple Mail but want a bigger text for Finder, here’s how you can do so.
Make Text and Other items Smaller, Default to Bigger on Mac Apps
Before proceeding with the procedure, ensure your Mac computer is updated to macOS Sonoma & later versions. For this, you can read our article on how to update a Mac computer.
Which Apps allow you to adjust Text Size on a Mac?
Unfortunately, this feature is limited to a handful of apps. Following is the list of supported apps.
- Finder (Change Text Size of Finder Fonts & Sidebar Items)
- Calendar
- Messages
- Notes
How to increase or decrease an individual Mac app’s text size
Once you have updated your Mac computer to the latest macOS, then follow the steps below.
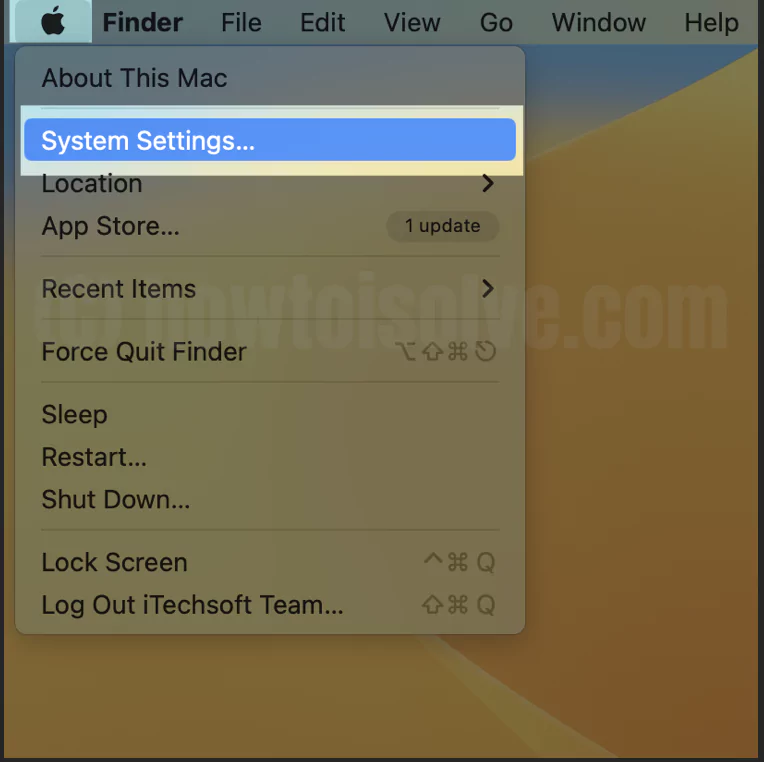
1→ Go to Apple Menu. Select System Settings…
2→ Click on Accessibility from the left pane. Choose the Display from the right side.

4→ Click Text Size (Default).

5→ You will see a drop-down next to the Calendar, Finder, Mail, Notes, & Messages on the next screen.
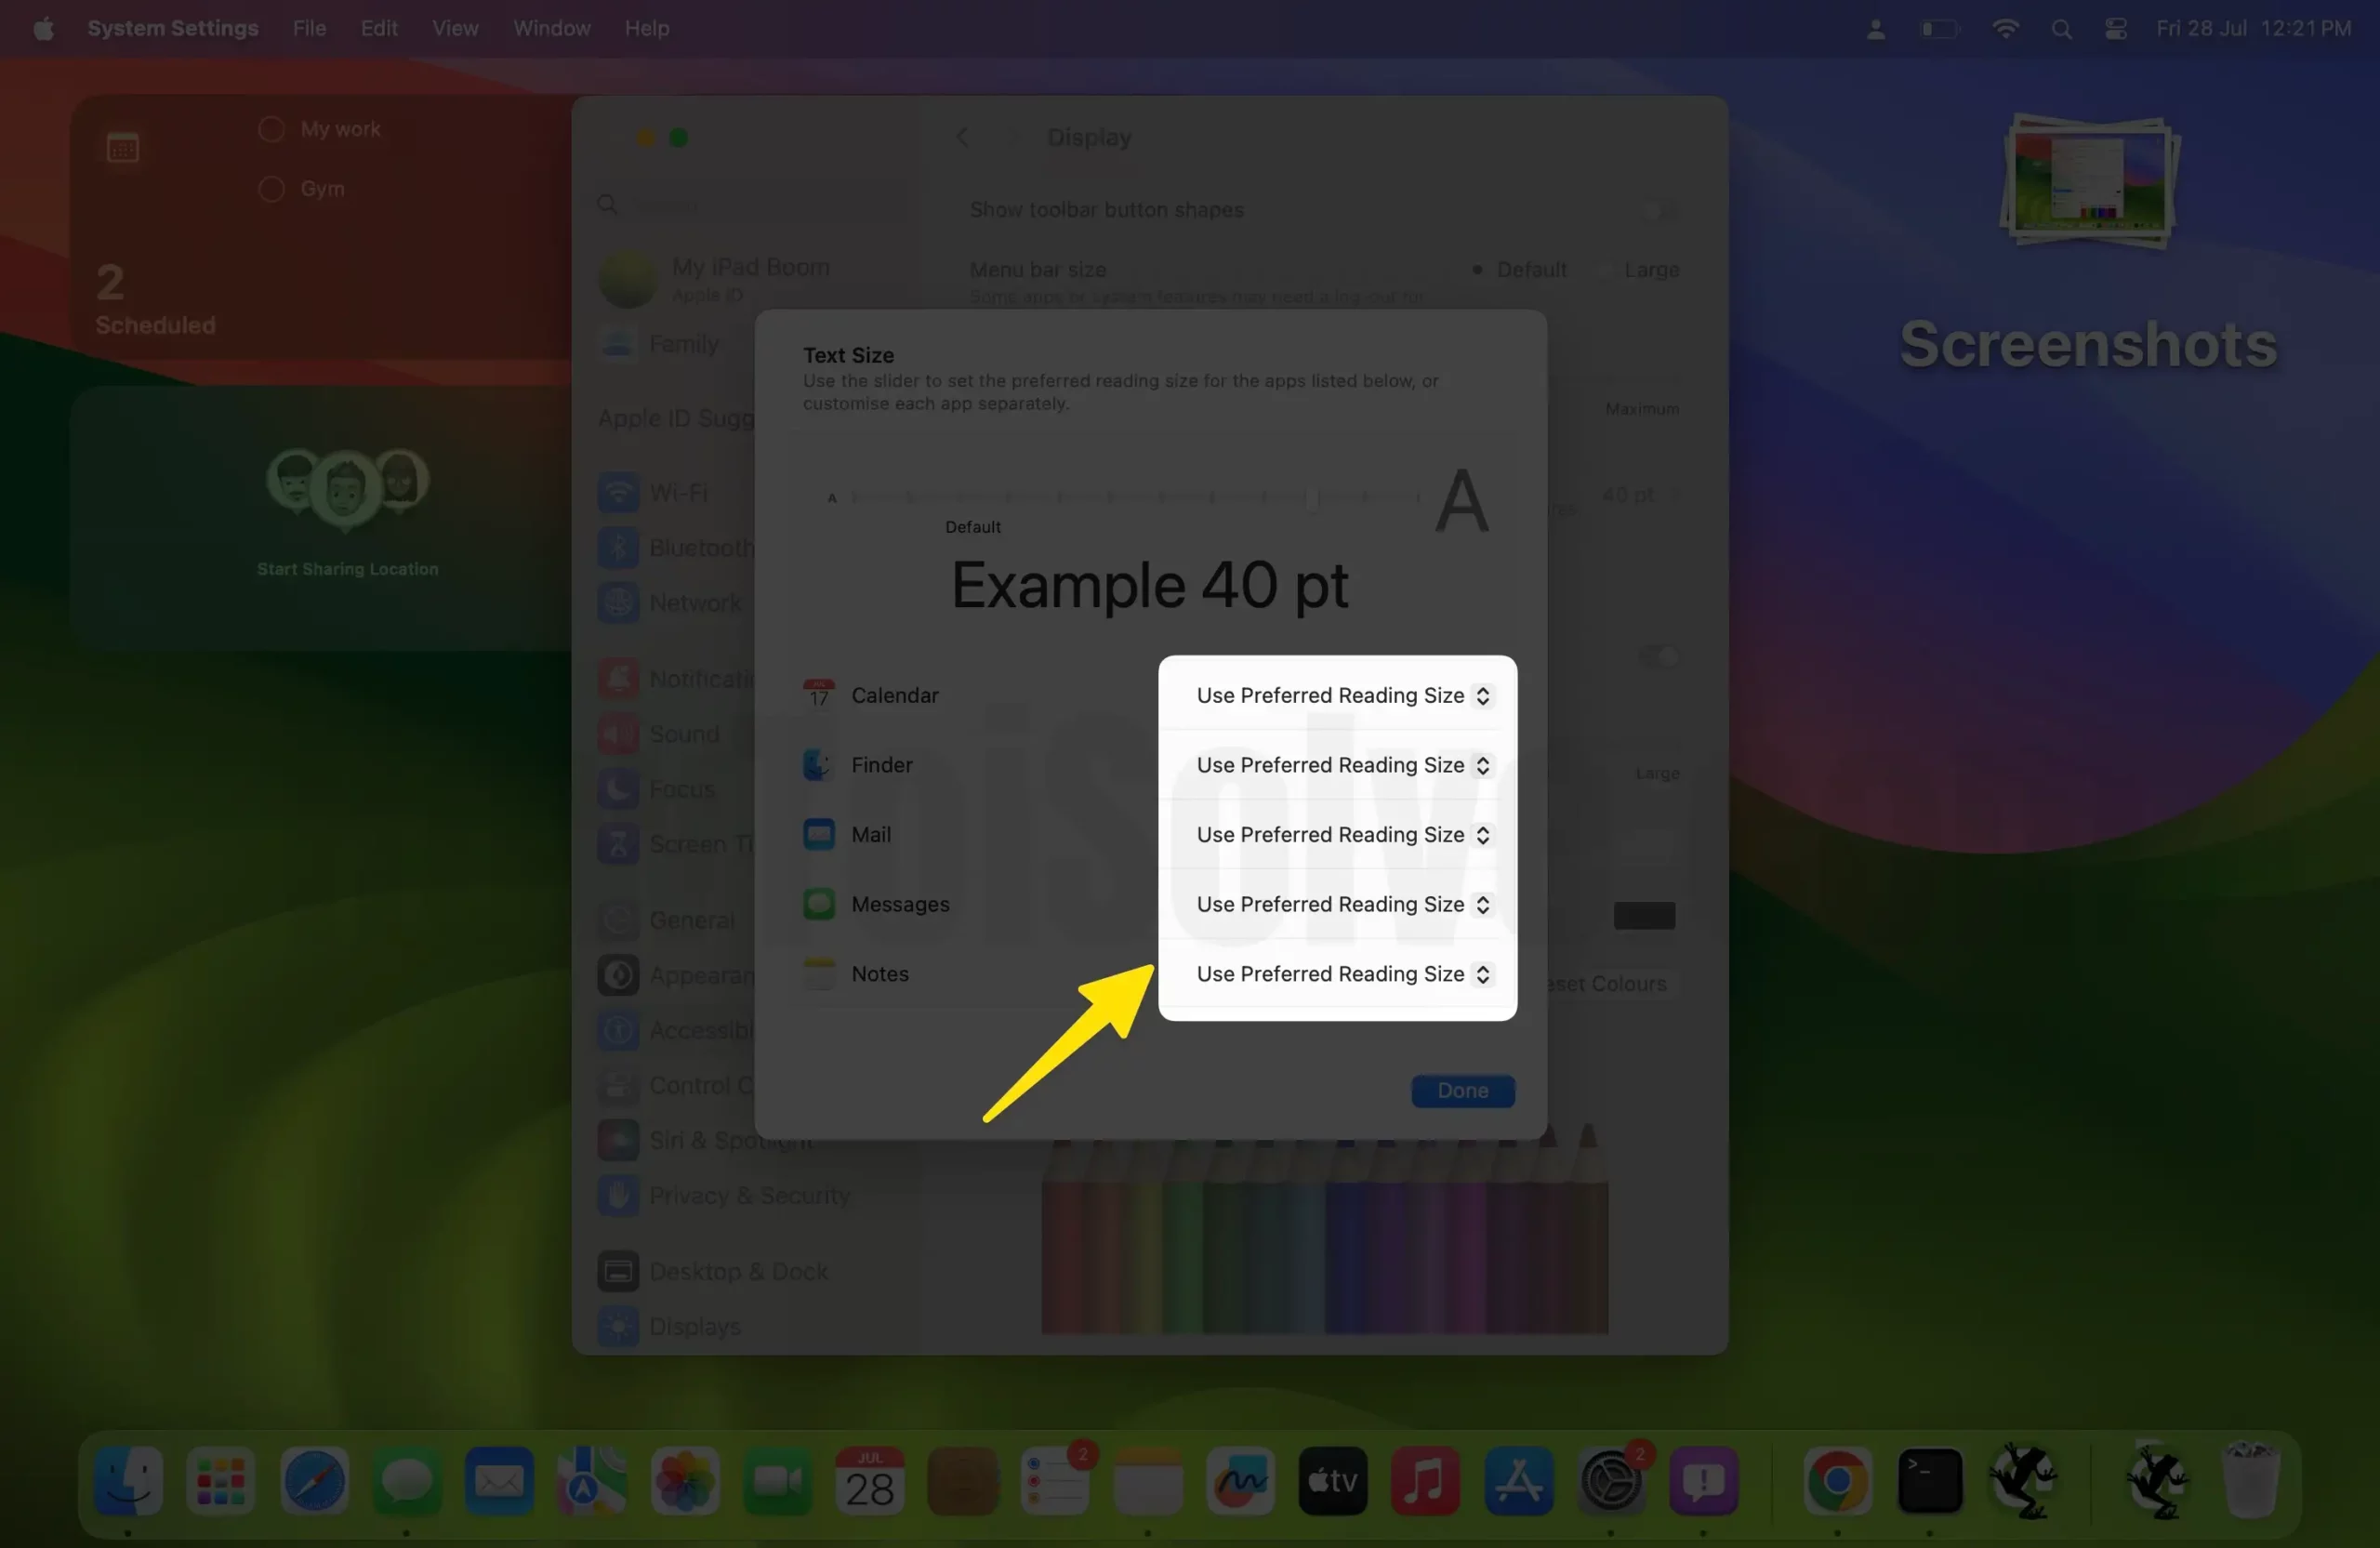
6→ Click on the drop-down next to the app one by one and choose the desired size.

7→ At last, click Done.
That’s It!
How to increase or decrease an individual Mac app’s text size at once
If you want compatible apps to have the same text size, you can use the text slider to adjust it perfectly. Here is how you can do so.
- Go to Apple Menu.
- Select System Settings…
- Click on Accessibility from the left pane.
- Choose the Display from the right side.
- Click Text Size.
- On the next screen, you will see the Text Slider. Drag the slider to the left to decrease the Text Size. To increase Text Size, drag the slider to the right.
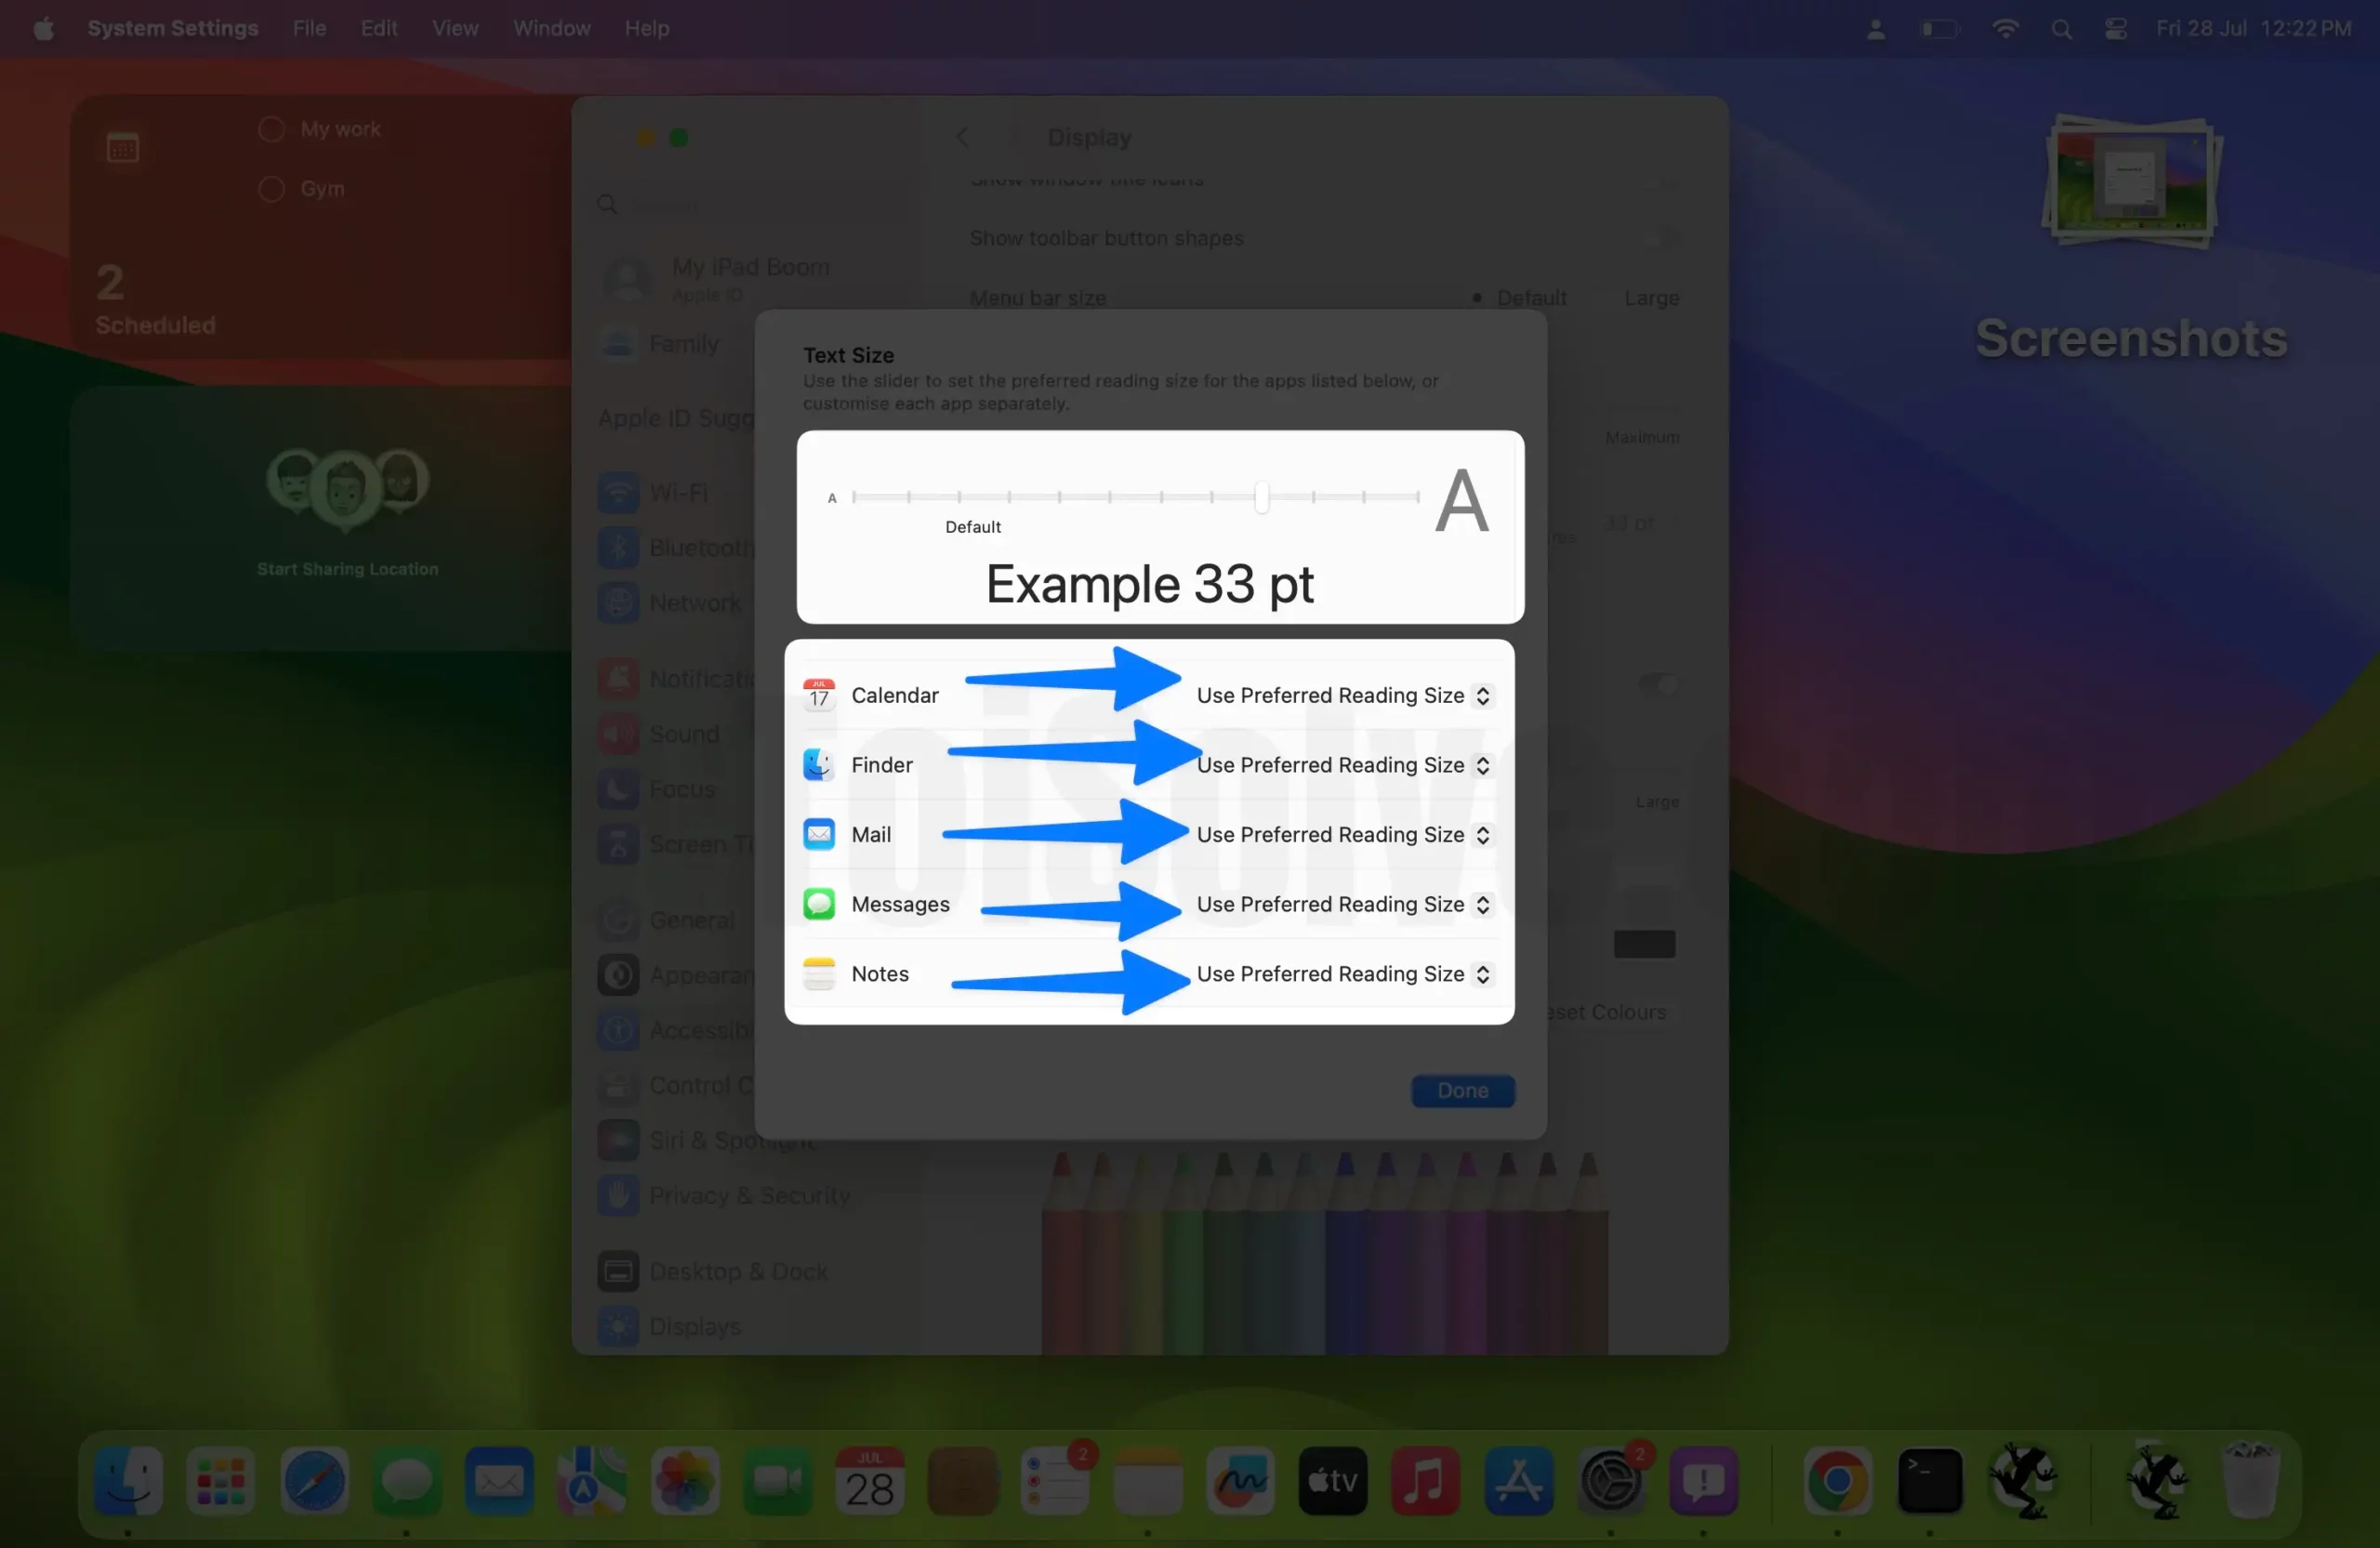
- At last, click Done. To Reset Text size to Default, Set Slider Value to Default position (See below screen).

Final Thought!
This is how you can adjust the text size of individual apps in macOS 14. The process to revert the Text Size is the same as well. I hope you find it helpful. If you have any related queries, please drop them in the comment box below.


