Keep all your Siri requests off from Apple’s server by deleting Siri History and Dictation on all Apple products: Mac, iPhone, iPad, and Apple Watch.
However, Apple won’t access your search history, but the information is yet stored in the Apple Server and accessible by the Apple Contractor. Knowing this, most users prefer to Delete Siri And Dictation History. Your Apple product allows you to do it by just performing an array of steps. Let’s find out how to delete Siri history on Apple products in the article below.
Delete Siri & Dictation History On Mac, iPhone & iPad
Note: This “Delete Siri & Dictation History” option under settings is only to delete your data recorded on the Apple server, But not delete sampled Siri and Dictation command to help & improve Siri and Dictation. Below are the individual settings for deleting Siri and Dictation recordings from Apple’s server.
Delete Your Siri History & Data on iPhone
- Access the Settings App on your iPhone. Tap on Siri and search.
- Tap on Siri & Dictation History.
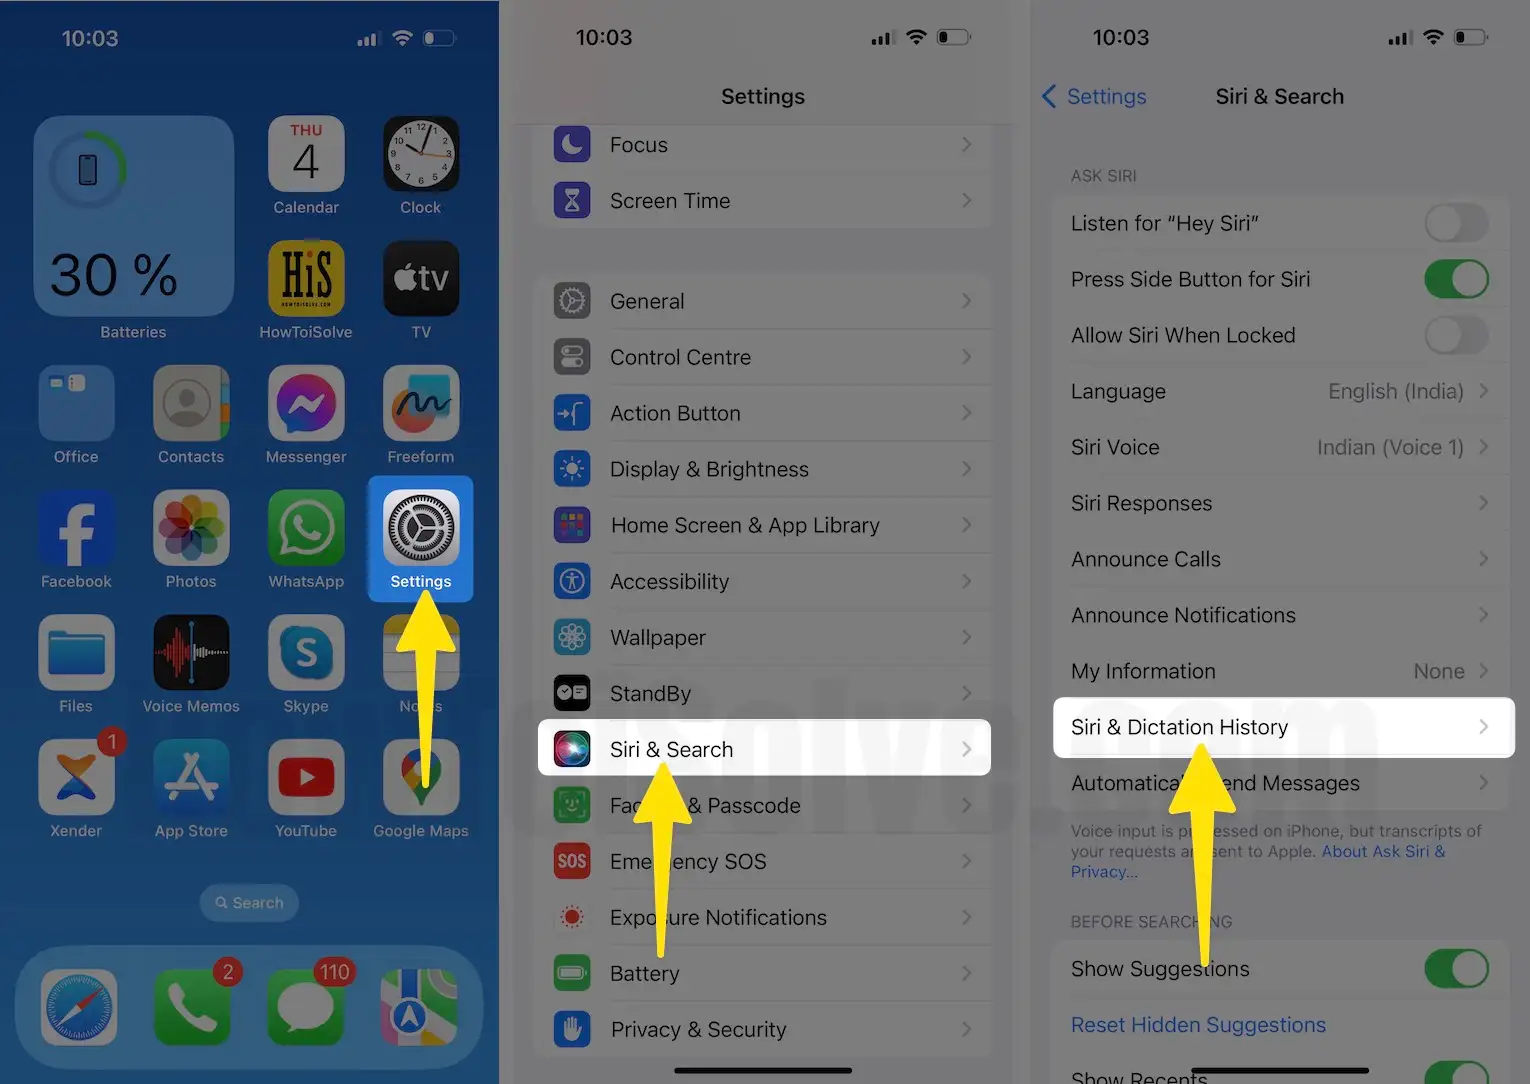
- Click Delete Siri & Dictation History.
- You will receive a pop-up saying, Delete Siri & Dictation History. Siri and dictation interaction currently associated with this iPhone will be deleted from the Apple Server.
- Tap on Delete Siri & Dictation History for confirmation. Choose OK.

Delete Your Siri History & Data On Apple Watch
- Go to Settings App on your Apple Watch.
- Search and select Siri.
- Tap on Siri History.

- Select Delete Siri History.
- Follow the on-screen instructions to finish the procedure Delete Siri History tap Dismiss on apple watch.

Delete Siri & Dictation History on HomePad
- Access the Home app on your iPhone and iPad.
- Select HomePad card from the main screen.
- Choose the Cog Icon from bottom right corner of the HomePad card to navigate to device’s settings.
- Choose Siri History
- Tapping on Delete Siri History.
Delete Siri & Dictation History on Apple TV
- On your Apple TV, go to Settings.
- Select General.
- After this, tap on Siri History.
- From here, hit on Delete Siri & Dictation History.
Steps to disable Siri Analytics
Disabling this feature will prevent Apple from storing and reviewing audio of your Siri and Dictation. To turn it off, follow the steps below.
- Access the Settings App on your iPhone.
- Scroll down and choose Privacy & Security.
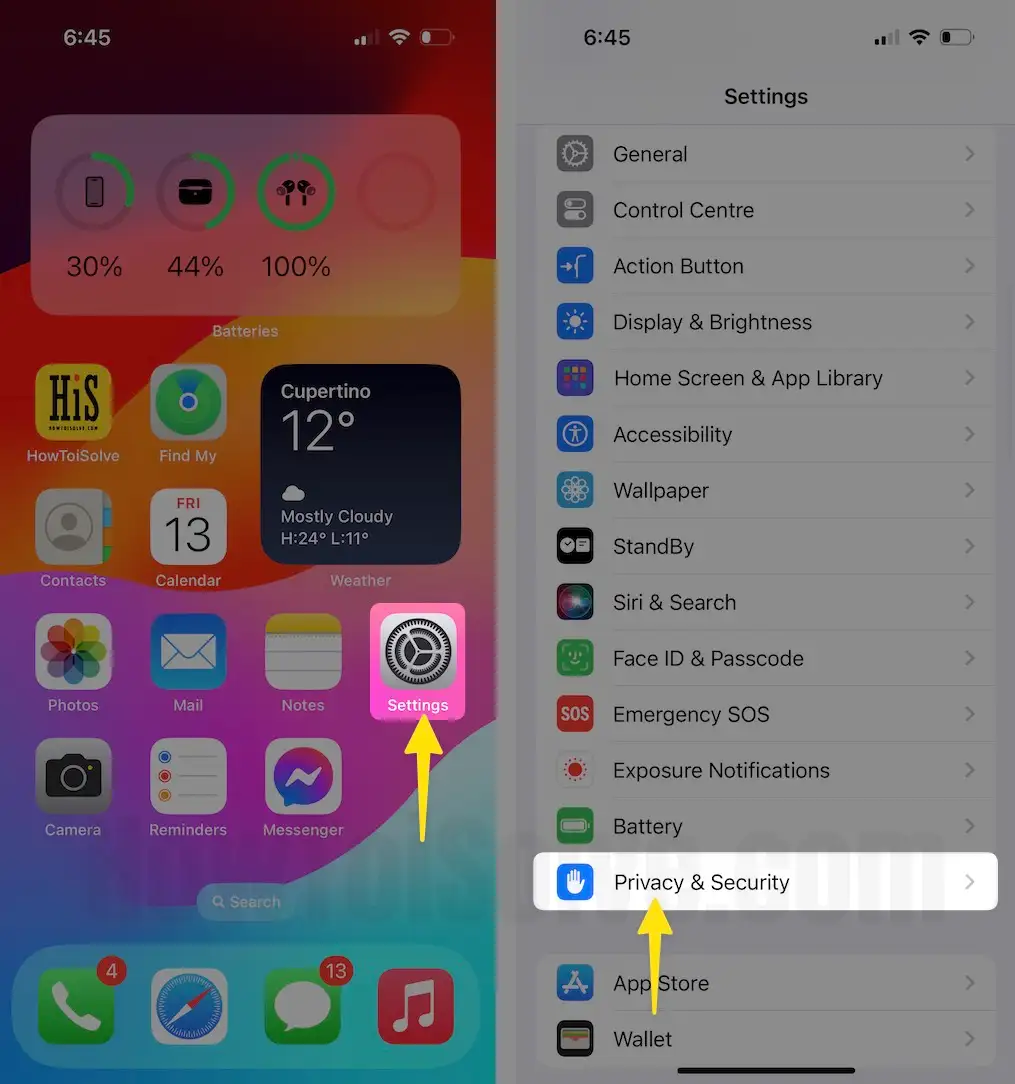
- Scroll down and tap on Analytics & Improvements.
- Now turn the toggle left side next to the Improve Siri & Dictation to disable it.

Trick to Delete Siri And Dictation History On macOS
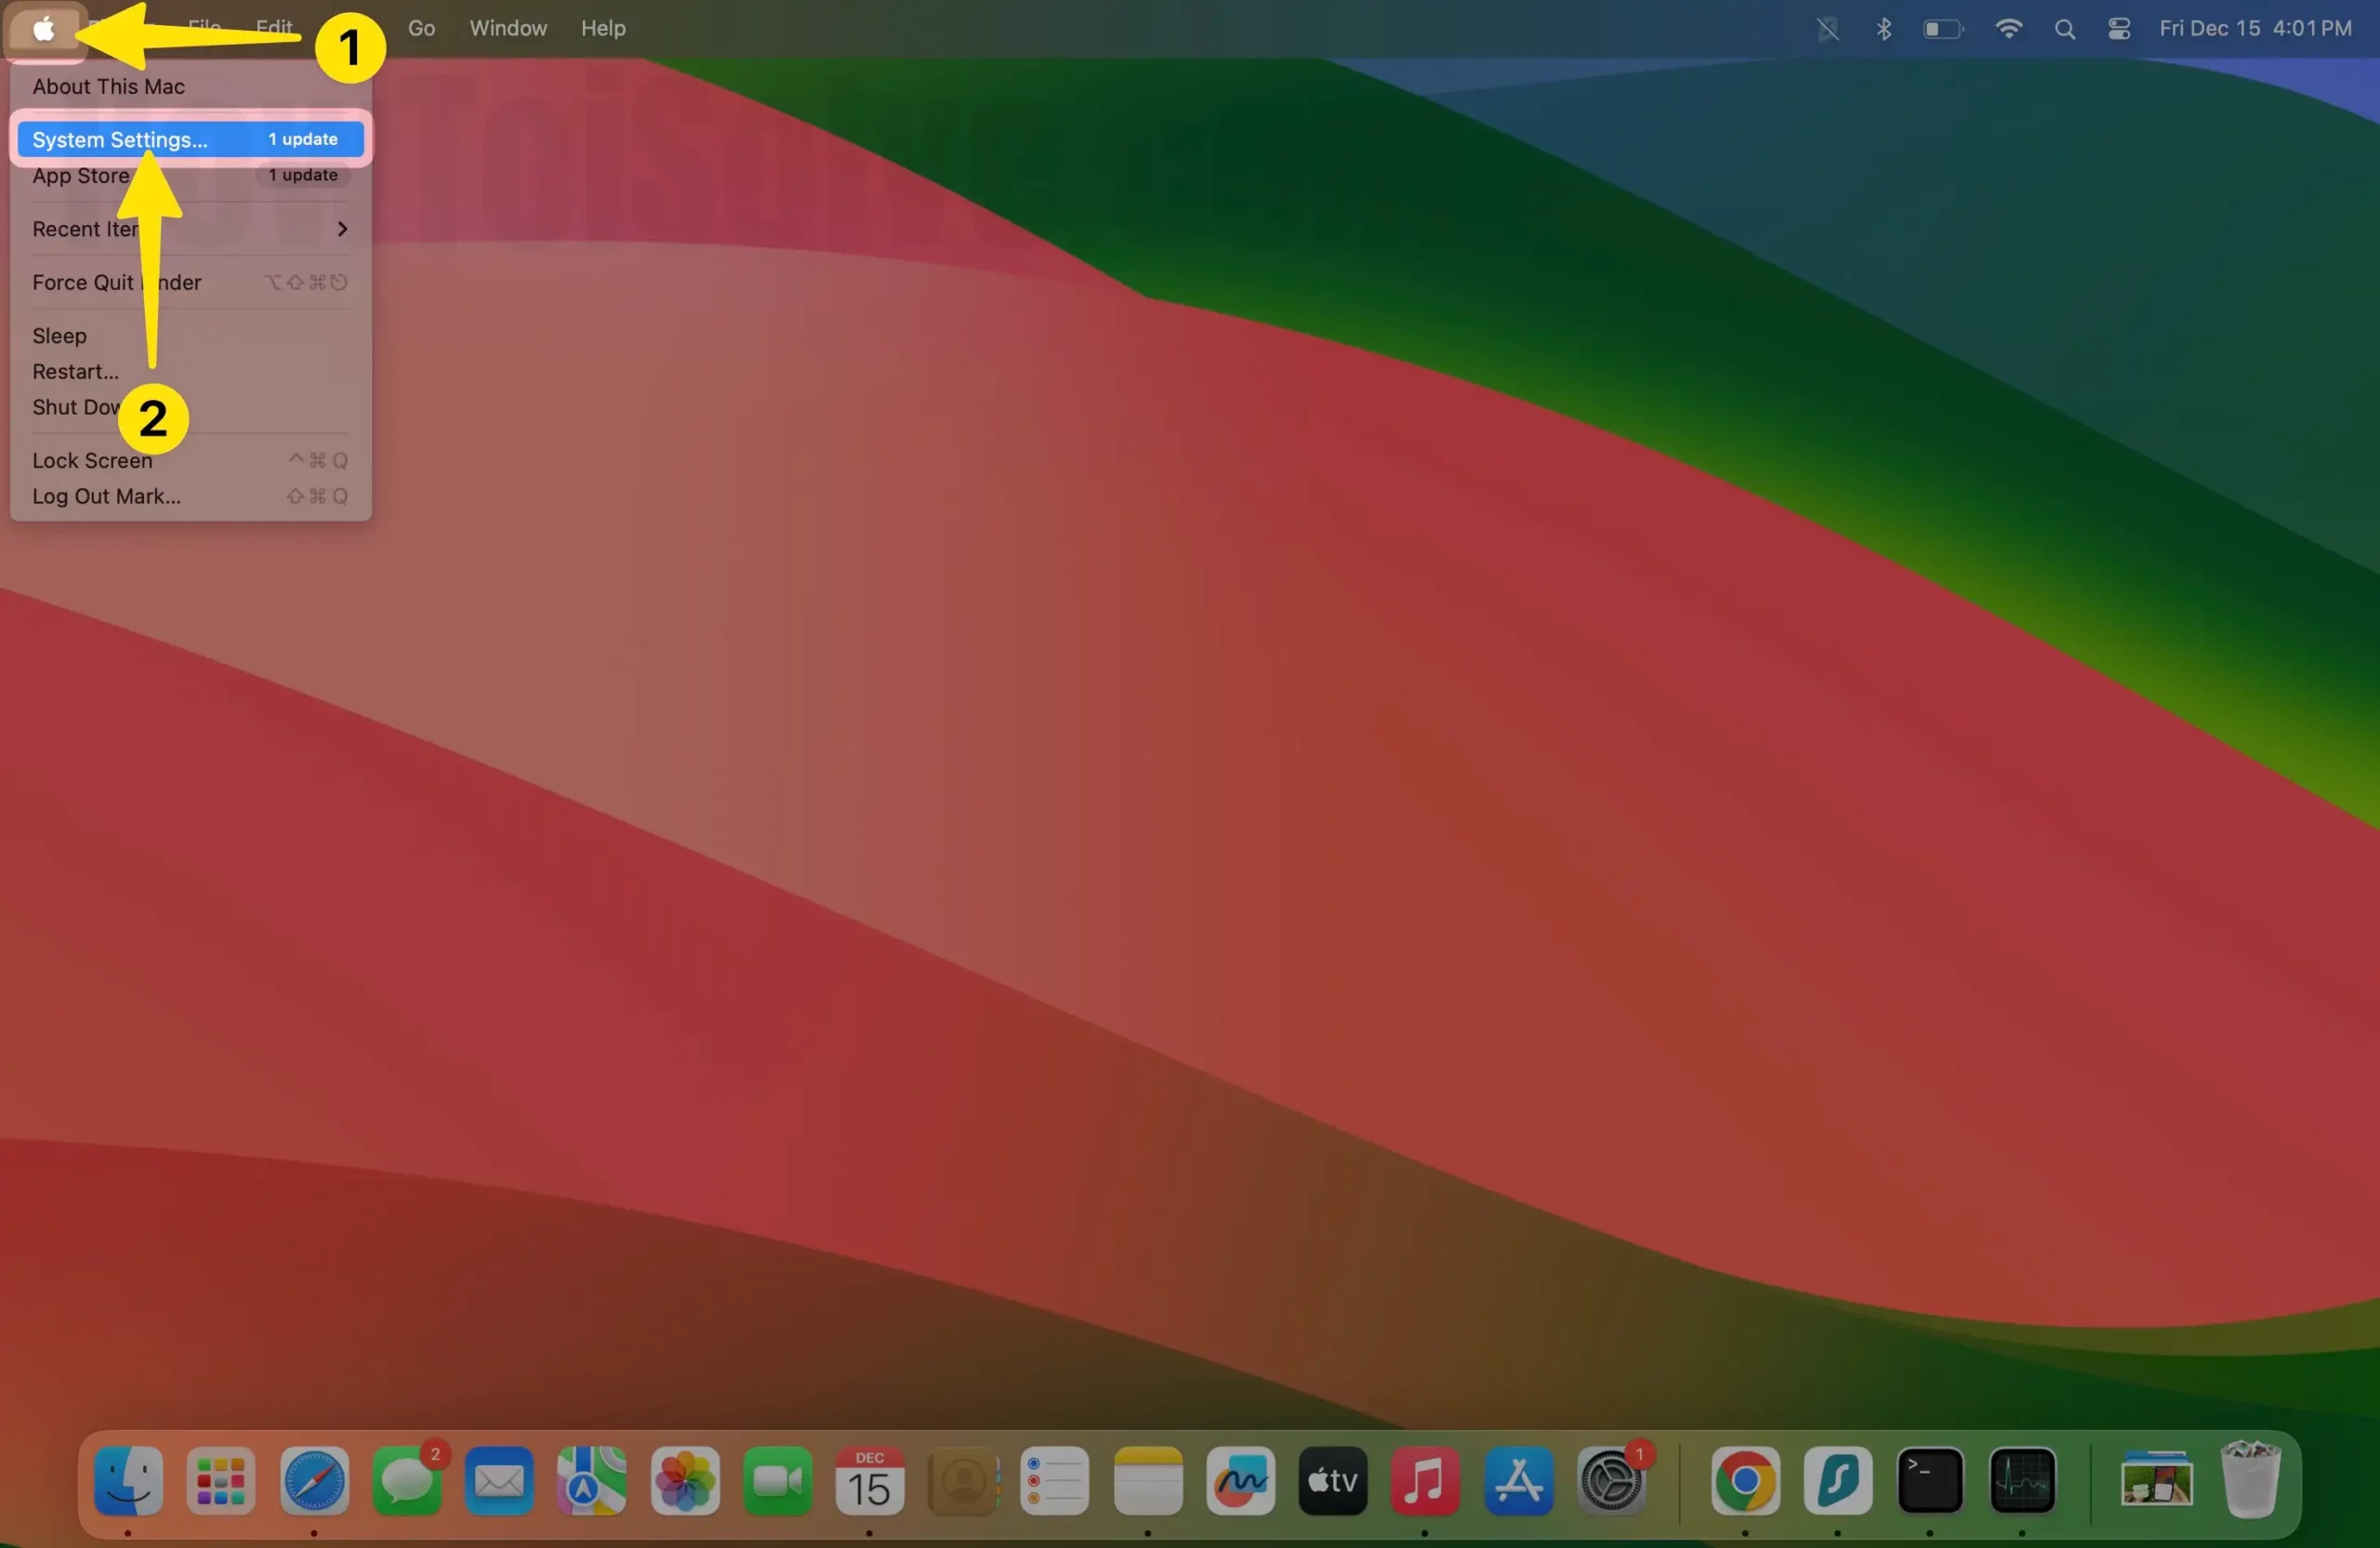
- Go to the Apple Logo.
- From the drop-down, select System Settings…
- Next, choose Siri and Spotlight.
- Click on Delete Siri & Dictation History.
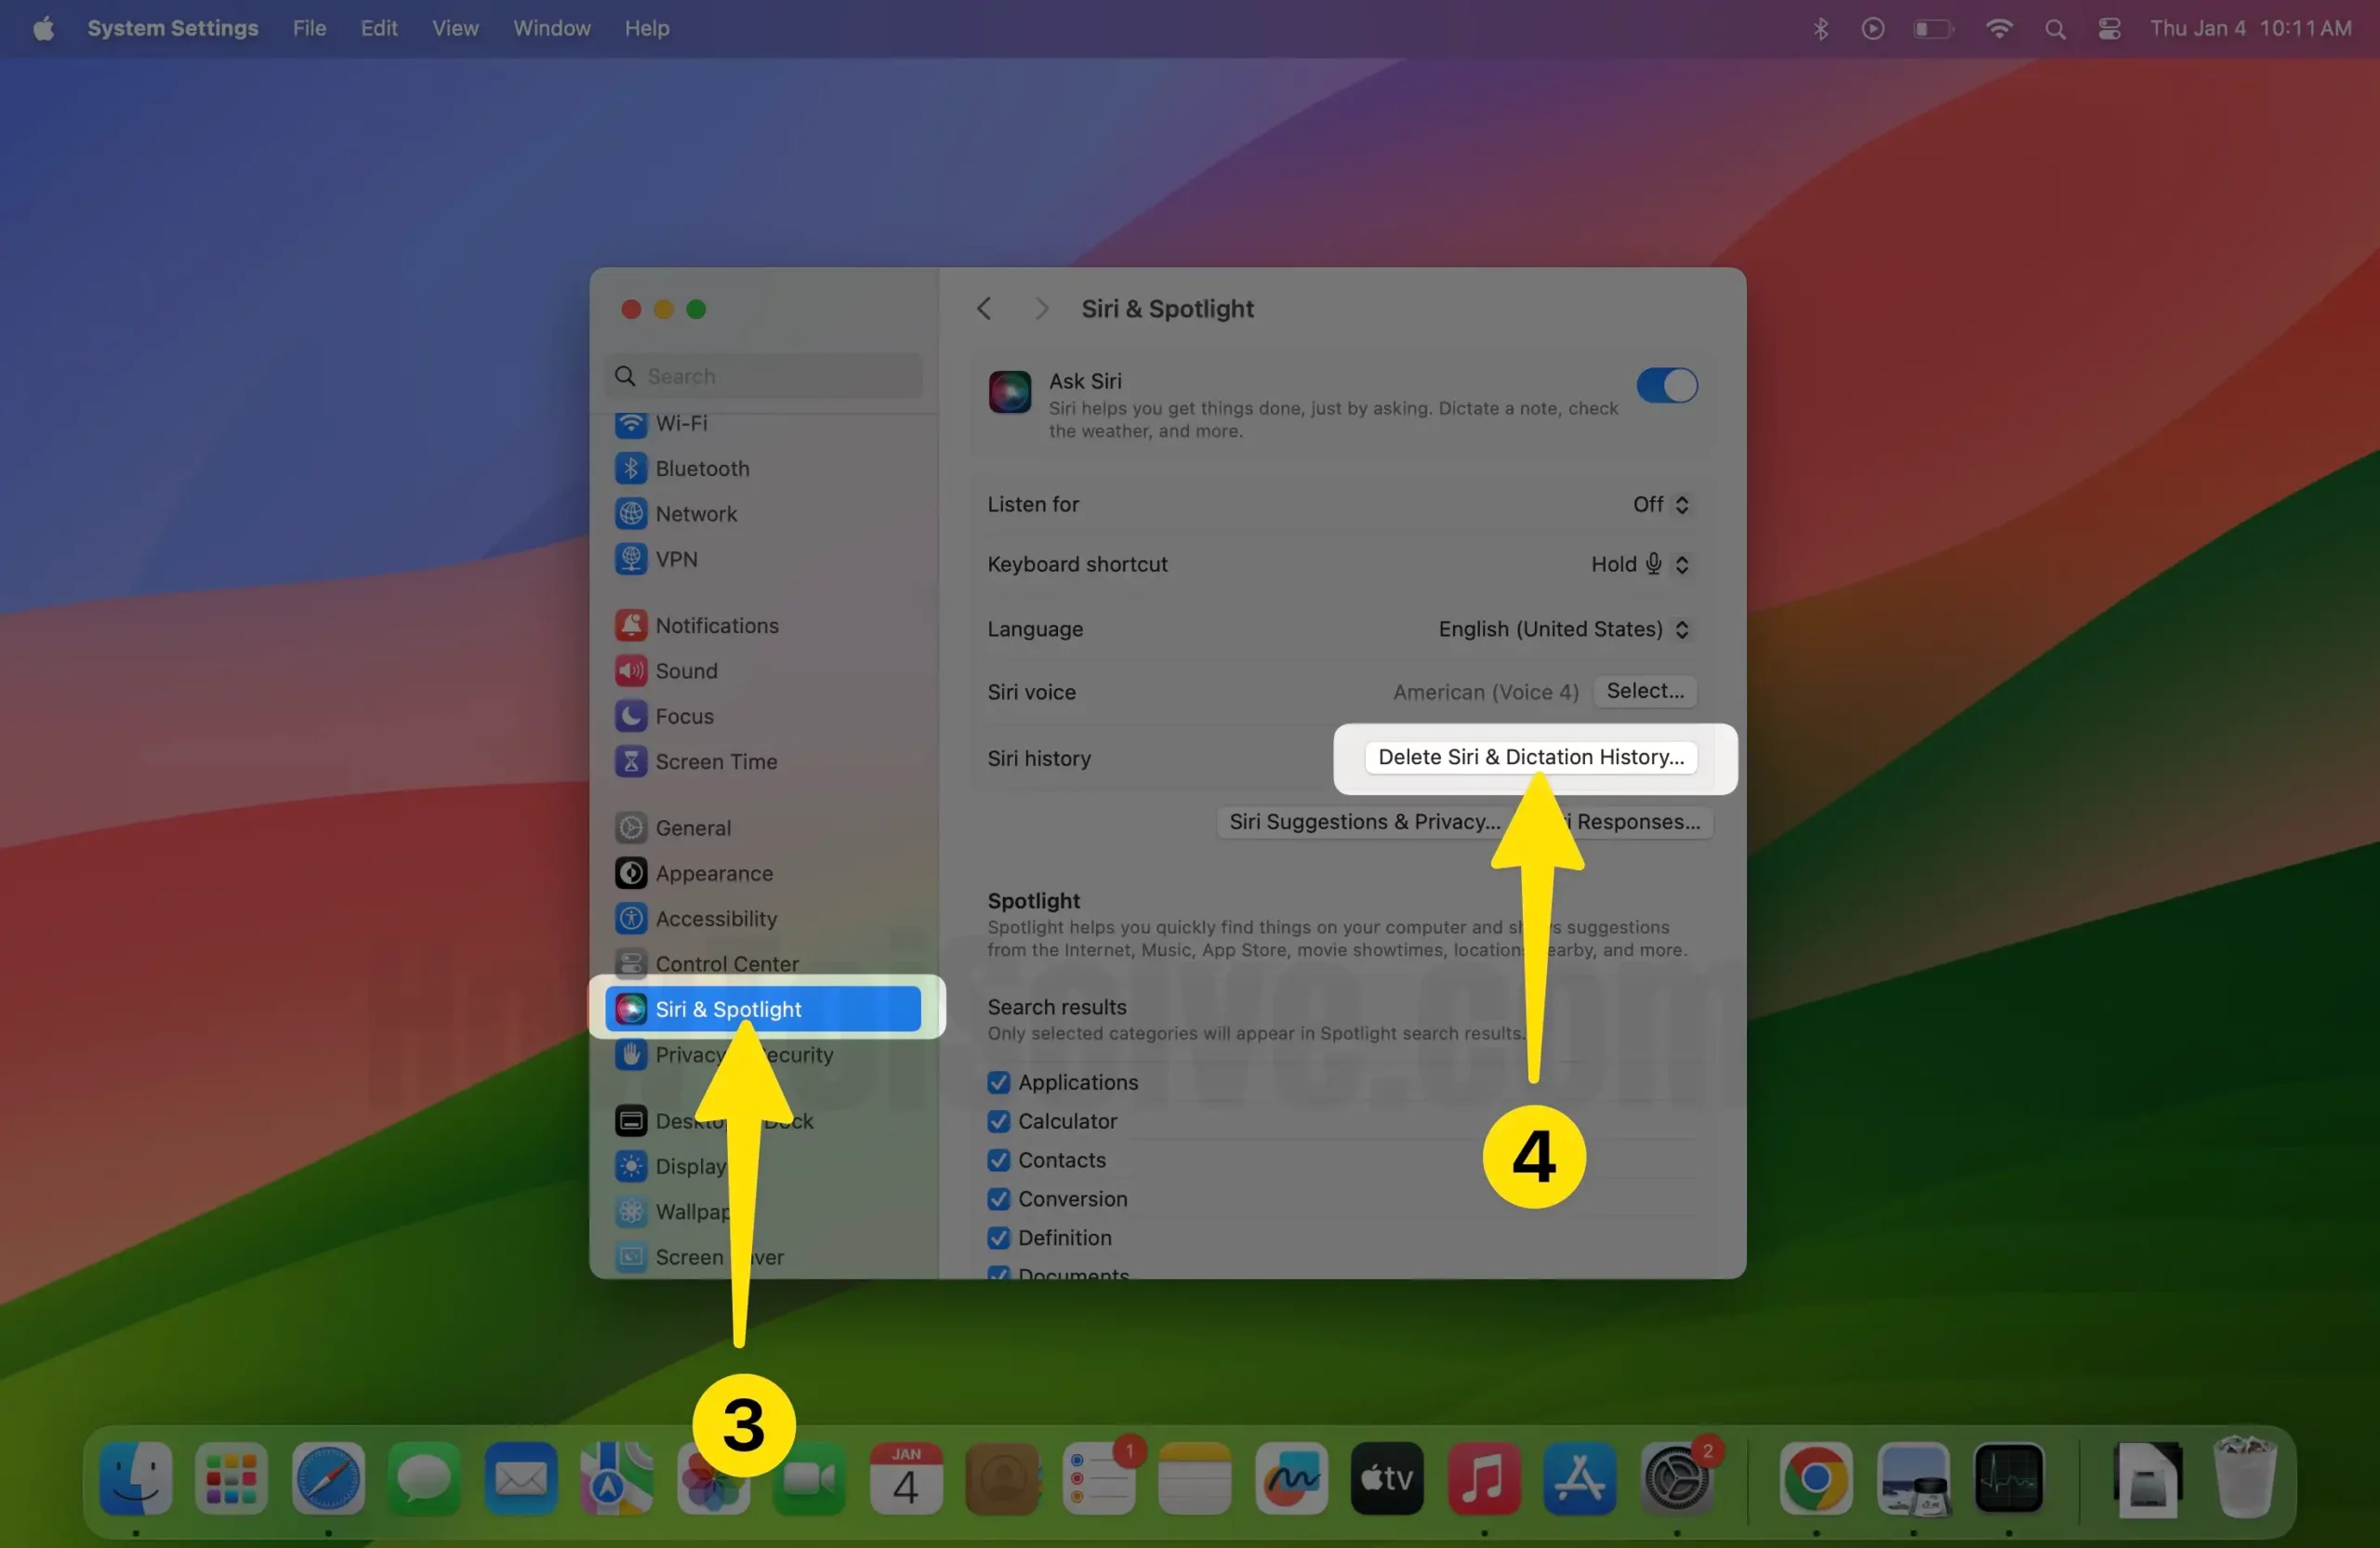
- A pop-up asks you Delete, Siri, and Dictation interactions currently associated with this Mac will be deleted from Apple servers. Click on Delete.
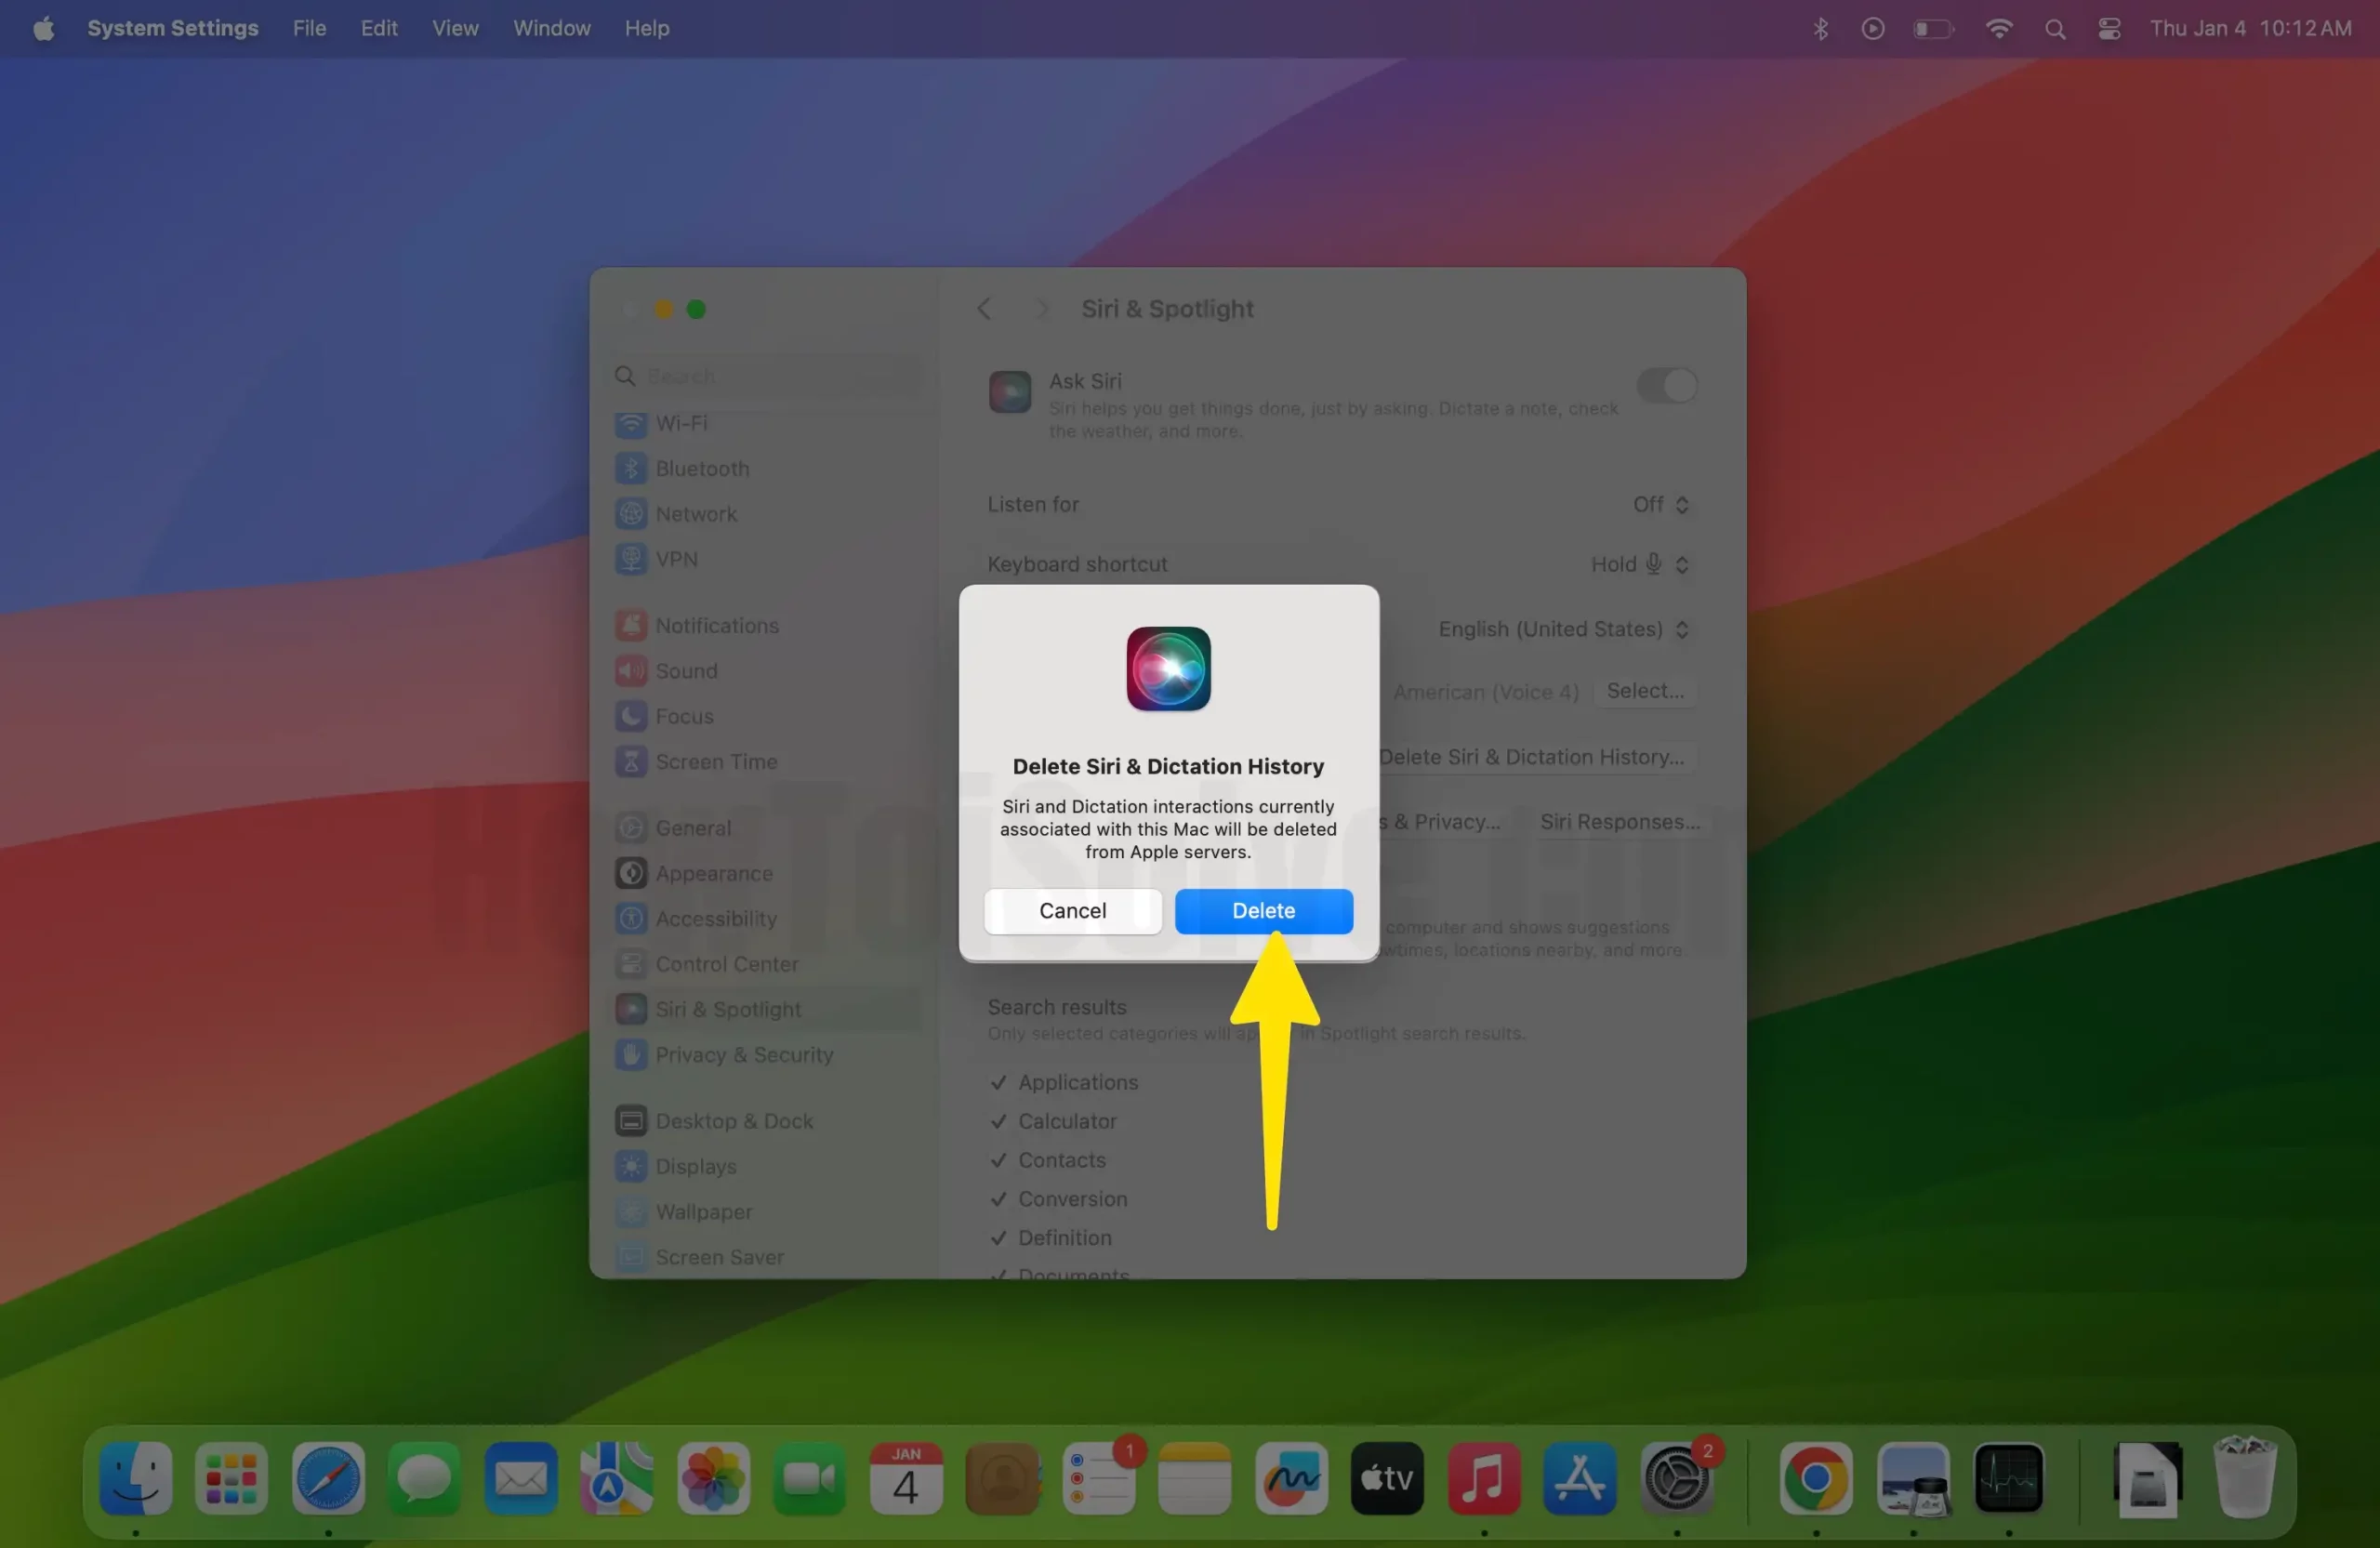
Note: – if you face error like my mac screen, Your Siri and Dictation history was unable to be deleted. Please make sure you are connected to the Internet and try again.

Bottom Line
Apple always keeps its user protection and privacy as a top priority. That’s why it introduced the feature Delete Siri And Dictation History. Ensure you are familiar with How To Use Siri and, similarly, how to protect your data.
This feature is only available in iOS 13.2 on iOS/iPadOS and later. Start Cleaning Siri History from Apple Server on your Lateset iPhone/iPad, – iPhone 14 Series, iPhone 13 Series, iPhone 12 Series, 11 Pro, iPhone 11 Pro Max, iPhone 11 , iPhone 8(Plus), iPhone 7(Plus), iPhone 6S, iPad that Support iOS 13.2/iPadOS 13.2 or later.
These settings for Siri and Dictation Search recording can interrupt the user’s experience while using Apple Device after that User has more power regarding privacy. Above are three alternate methods to Delete Siri History on iPhone/iPad or Mac.
