Apple’s new iCloud Private Relay ensures your original IP Address is never revealed to the website you visit in the Safari browser and Apps. Private Relay feature means to enhance your privacy by hiding your actual IP Address, Location, and Browsing Activity, by connecting your Safari & App to the virtual network. The Apple Servers completely encrypt the traffic from your device, even hidden from the network you’re connected to. With Private Relay, your traffic is routed to Apple’s ingress servers, and from there, it will go to the Content Provider’s Egress Servers and, in the end, to the website you want to visit.
Hopefully, this will secure your surfing across the browser, won’t track as much data as it is tracked now, and of course, your personal information is safe with you. Private Relay is available with an iCloud+ subscription, which comes with an existing iCloud subscription and needs to be set up from the profile. This article will show you how to enable and set up Apple’s VPN-like feature Private Relay on Mac and iPhone running the latest software version.
🆕Also Read: Create Random Address using Hide My Email
How to Enable and Setup Private Relay on iPhone and Mac
Make sure to update your iPhone to the latest iOS 15 or later and your Mac to macOS Monterey or later to use Private Relay.
How to Turn On Private Relay on iPhone
1. Head to Settings app.
2. Tap on your name.
3. Go to iCloud on iPhone.

4. Scroll the iCloud+ under Private Relay and click on enable toggle Private Relay on.

5. Launch the Settings App and tap on the Safari Tab.
6. Tap on Hide IP Address and check the Trackers and Websites settings app.

7. Select the IP Address Location, then check for Maintain general location.

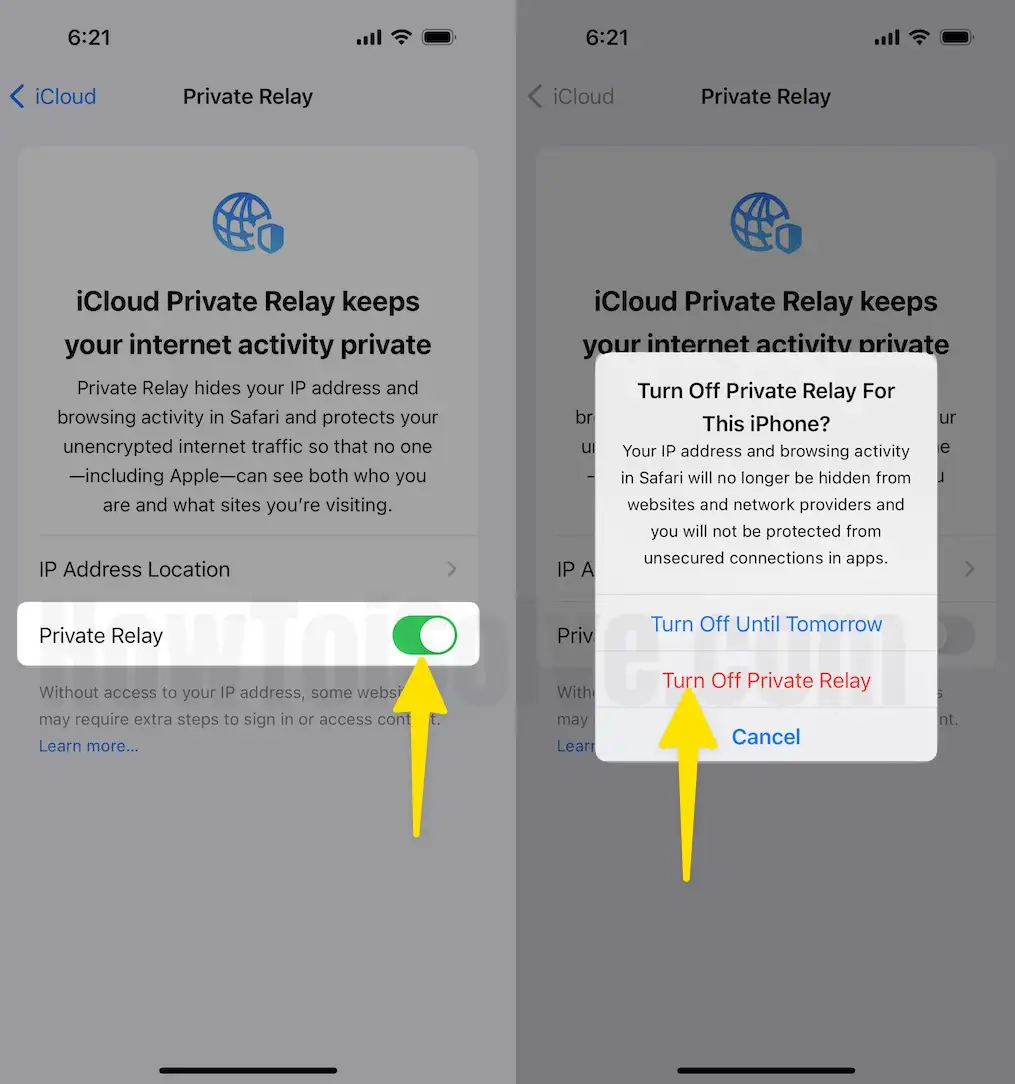
Turn off Private Relay from iPhone settings
Turn on and Turn off private relay is Device specific only if your Account is signed in with the same Apple ID as on iPhone, iPad, Mac, or MacBook. So, while we turn off Private Relay on your iPhone, from the below settings, Your iPhone will ask to Turn off Private Relay on This iPhone.
Open Settings app on iPhone > Tap on Profile name > iCloud > Private Relay > Turn off Private Relay Toggle > And Verify “Turn off Private Relay”.

That’s it. Now, All Websites and Network Providers will be able to view and monitor your internet address and activity in Safari, and you will not be protected from unsecured connections in apps.
if you are looking to turn off private Relay on your Mac then follow the below steps.
Turn On/Turn Off Private Relay for Specific Mobile Data & WiFi Network on iPhone
Private Relay for WiFi on iPhone:-
1. Launch the Settings App and tap on Wi-Fi on your iPhone.

2. Connect the Wi-Fi in (I) icon and click on turn on Limit IP Address Tracking.

Private Relay for Cellular Data on iPhone:-
1. Launch the Settings App, then tap on Cellular Data.
2. Click Cellular Data Options to enable the toggle Limit IP Address Tracking on it.

How to Setup Private Relay in Mac
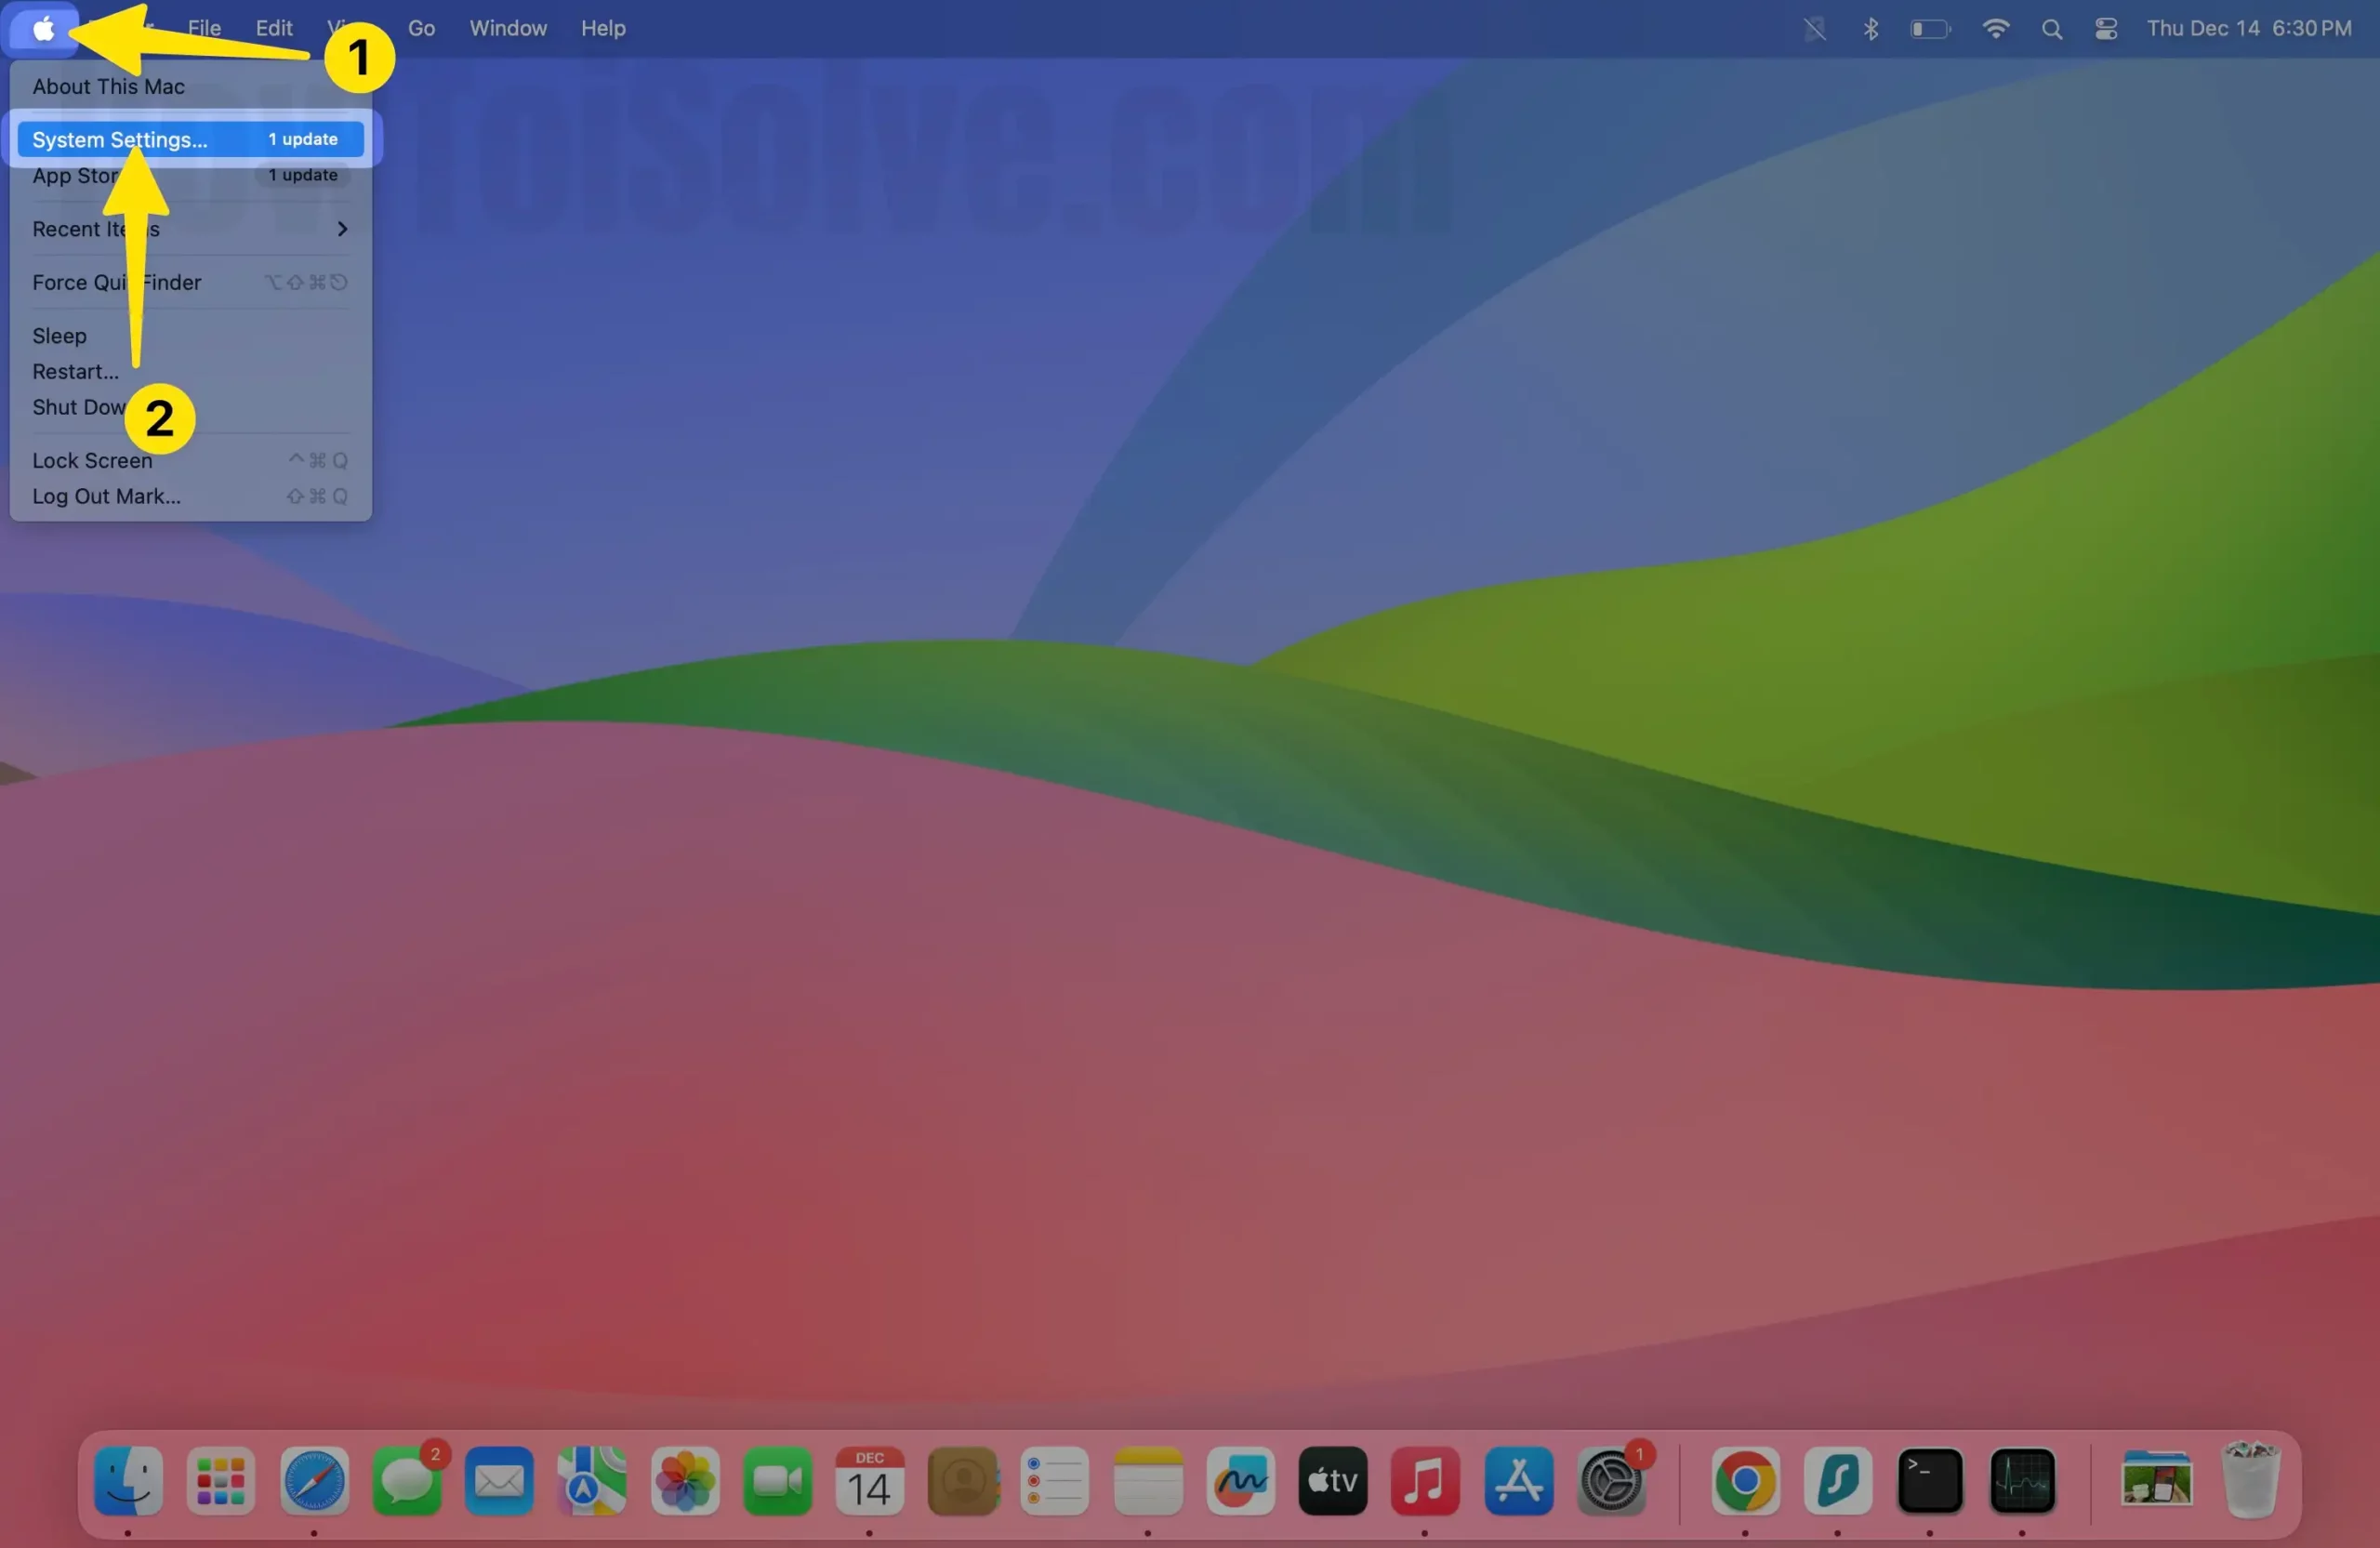
1. Click on the Apple icon in the top menu bar.
2. Select System Preferences on Mac.

3. Choose the Apple ID option.
4. Click on iCloud, located in the sidebar.

5. Scroll the iCloud+ under in private Relay.

6. Enable toggle Private Relay on click IP Address Location tap the maintain general Location under the IP address location section click Done Button.

Turn On Private Relay for Safari.
The Broader Location might not deliver accurate search results from your local area, while Approximate Locations work just fine.
1. Enable toggle Private Relay on it.

How to Turn off Private Relay on Mac for Mac
This is Device-specific settings; you are doing Private relay from Mac settings, then follow the below steps.
1. Click on Apple Logo, then System Settings… > Apple ID Profile Name and iCloud right panel on Mac iCloud+ under Private Relay.
2. Enable toggle Private Relay on it.

3. And then choose the Turn on Private Relay on Mac.

That’s it.
How to Turn On/Turn Off Private Relay for Specific WiFi Network
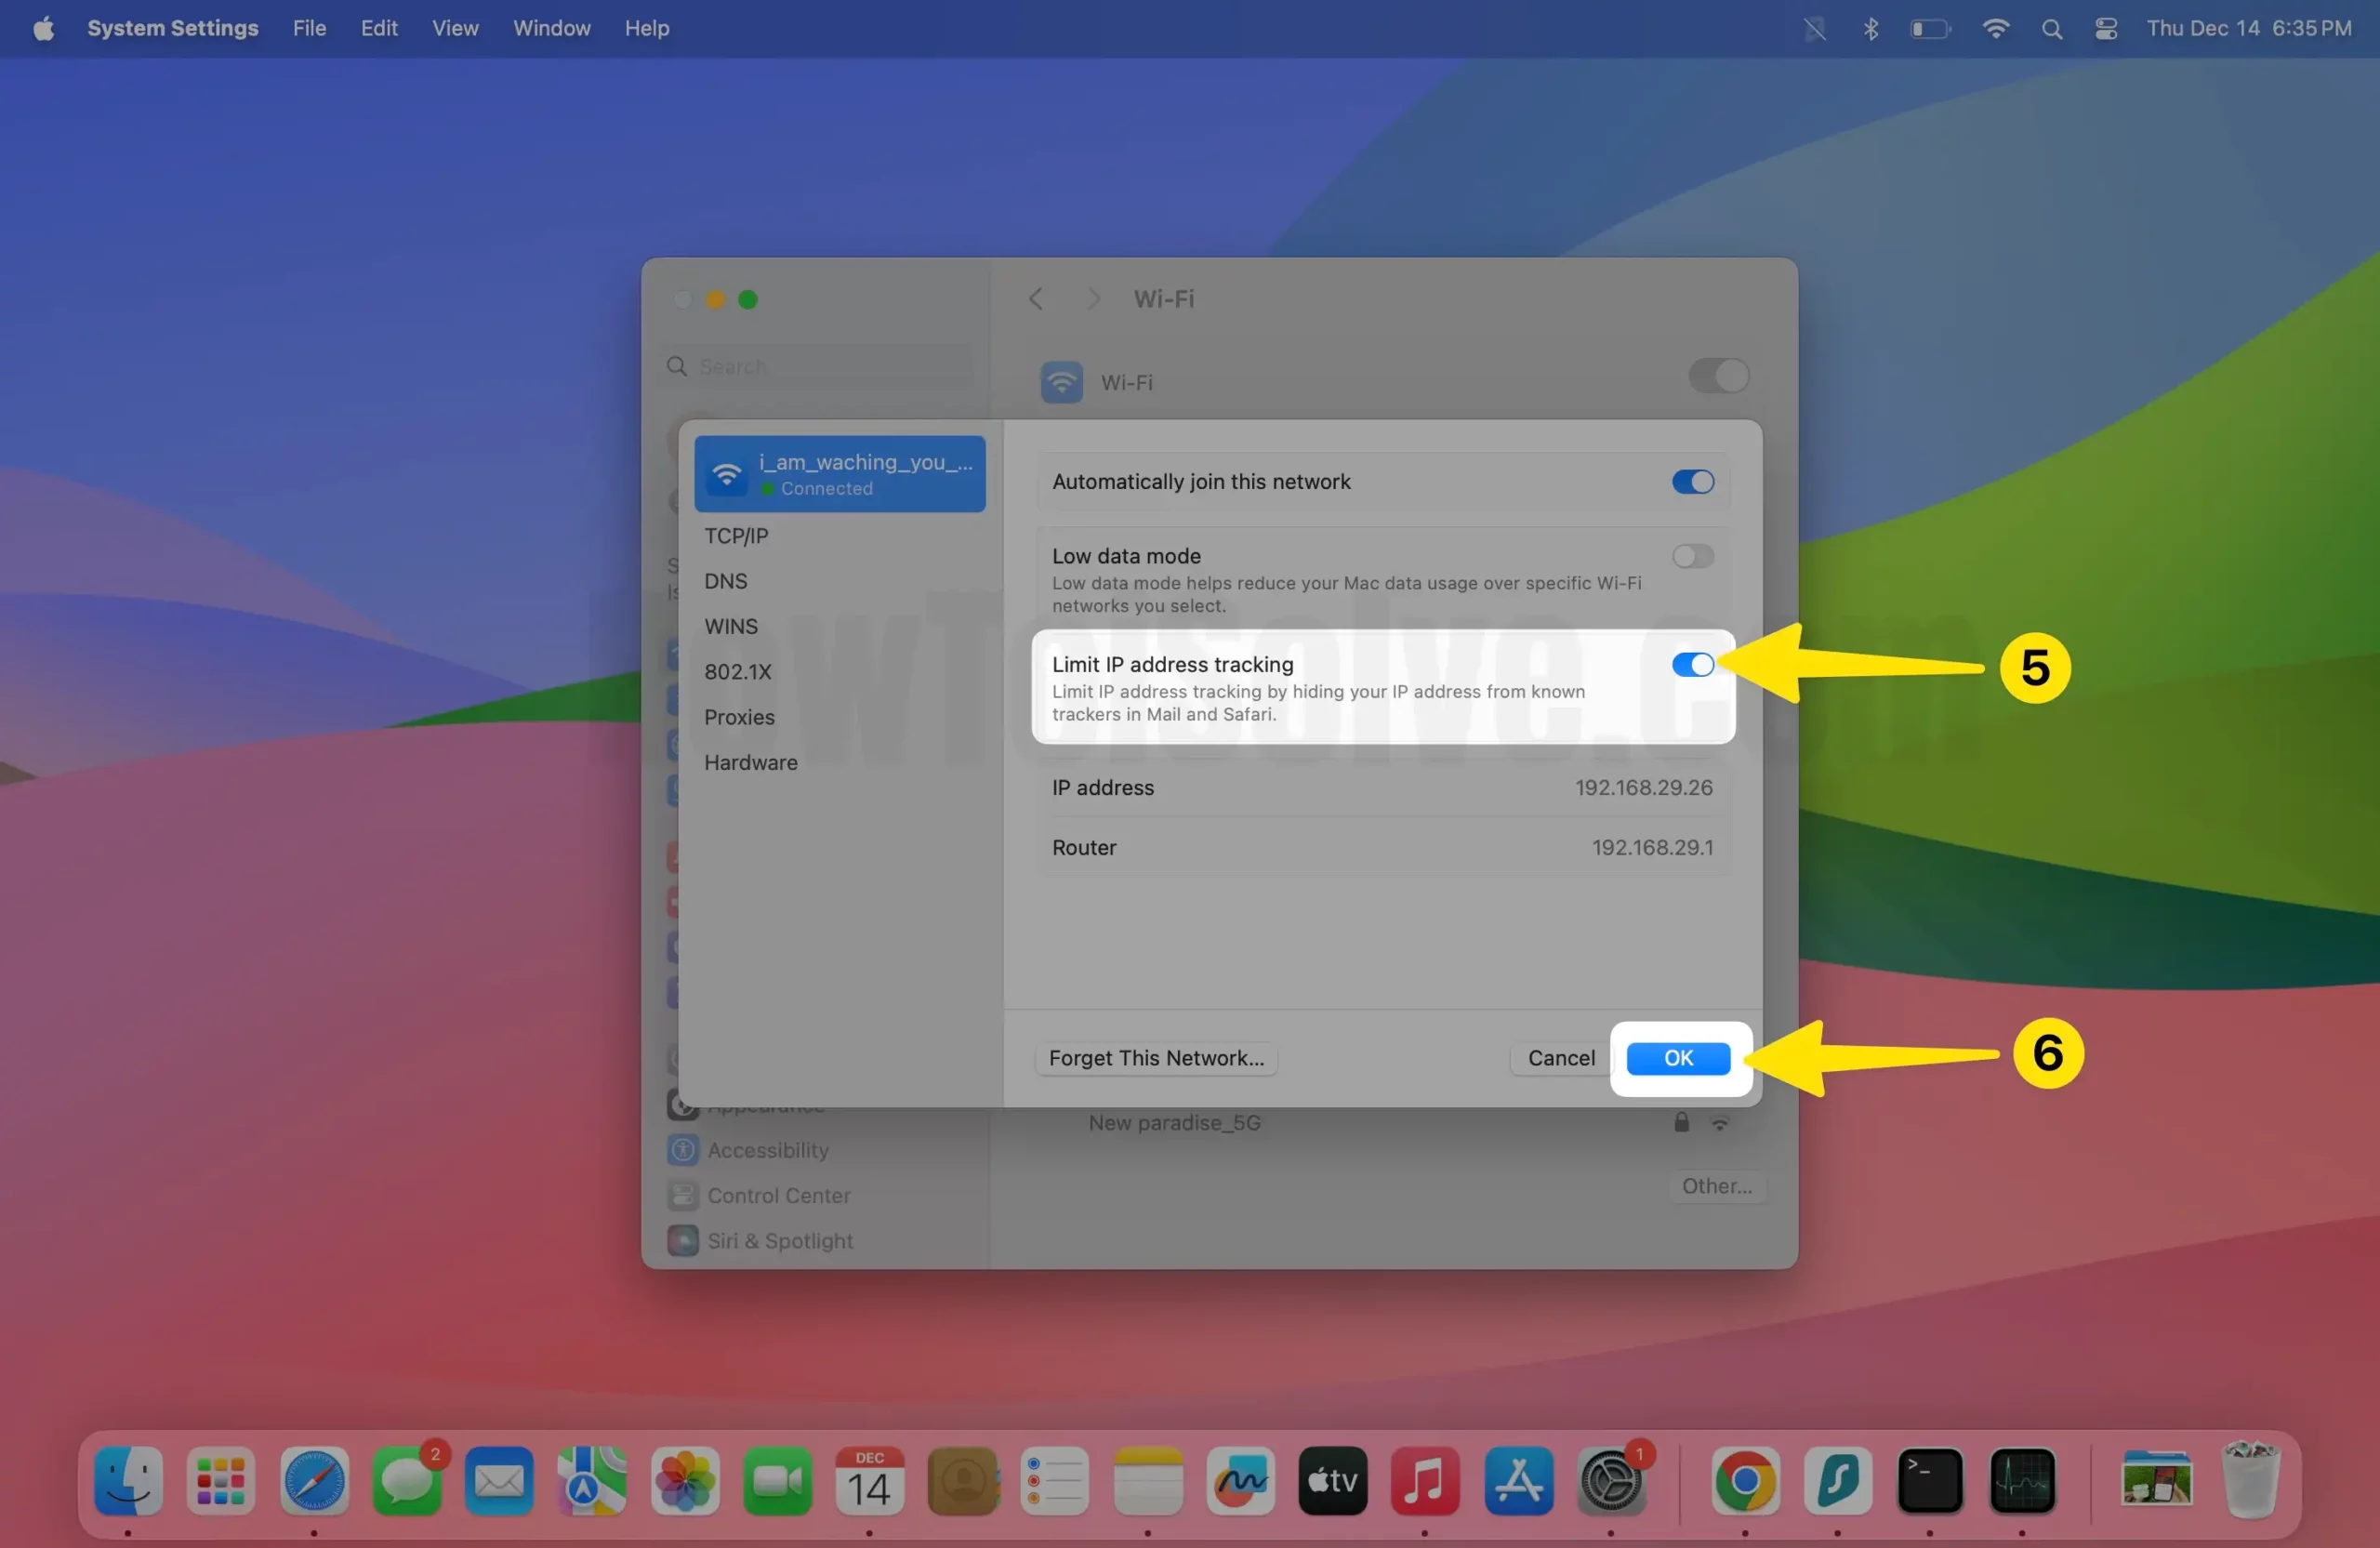
We can turn on and Turn off Private Relay for specific WiFi networks under the System Preferences on Mac. Follow the below steps to manage Private Relay for a Specific network [Home, School, Office, or Public Place].
1. Click on the Apple Logo from the top Mac menu System Settings… Option.

2. Next, Click on the Wi-Fi Option. and then connect Wi-Fi in Details.

3. Then, Select Wi-Fi from the turn-on Limit IP address tracking and click on the Done Button on Mac.

That’s it.
Conclusion:-
First, Enable Private Relay for your Account from Mac, or iPhone settings. Follow the above steps to turn on Private Relay. Then Manage the Private Relay setting for the individual networks from network settings.
