Here’s a quick and easy method for installing the latest Windows OS on your Mac or MacBook (both M1 and Intel models). You can use this approach to set up or install Windows 11 on your Mac for free using the Boot Camp option. This official Windows installation allows you to create a separate partition and is compatible with all versions of Windows OS, including Windows 11, Windows 10, Windows 8, and earlier versions.
Switch between Windows and macOS anytime and install Windows apps on your Mac. Simply boot your device and select the desired operating system on your MacBook, MacBook Pro, Air, or Retina.
Yes, we can install Windows 11 On Mac with intell Processor Chip only, until it’s officially available and make Change by apple in System. Windows 11 Available Now! on Officill website: Officially. Download iSO file, and Setup on your Mac’s Bootcamp assistance on Intel Mac Using External USB Drive.
Important for M1 Mac user
Sorry for M1 Mac users, M1 iMac, M1 MacBook Pro, M1 macBook Air – “Becuase Boot Camp Assistant cannot be used. This Mac does not support Boot Camp. Hope you understand!” So Download and Try for M1 Macs.
Install Windows on Mac using Boot Camp,
Bootcamp Supported Intel Mac Models,
- iMac introduced in 2012 or later1
- iMac Pro (all models)
- Mac Pro introduced in 2013 or later
- MacBook introduced in 2015 or later
- MacBook Air introduced in 2012 or later
- MacBook Pro introduced in 2012 or later
- Mac mini introduced in 2012 or later
Be Ready With!
- USB drive (Minimum 8 GB free storage capacity) or Windows Disk with Disk drive. Let’s see the prerequisite condition for install windows OS on Mac OS X on your MacMini, MacBook Pro, MacBook Air, MacBook, iMac.
- Active Internet connection on Mac.
Steps to install Windows 11 on Mac: With Any MacOS (Also Use for Install Windows 10)
Step 1: Are you trying to install Windows using a USB drive? First, you need to make your USB drive bootable using Boot Camp.
Clean your USB drive (Format USB drive)
Step 2: Open Finder on Mac > From the top Mac Menu Go > Applications. Findthe Bootcamp app on Mac.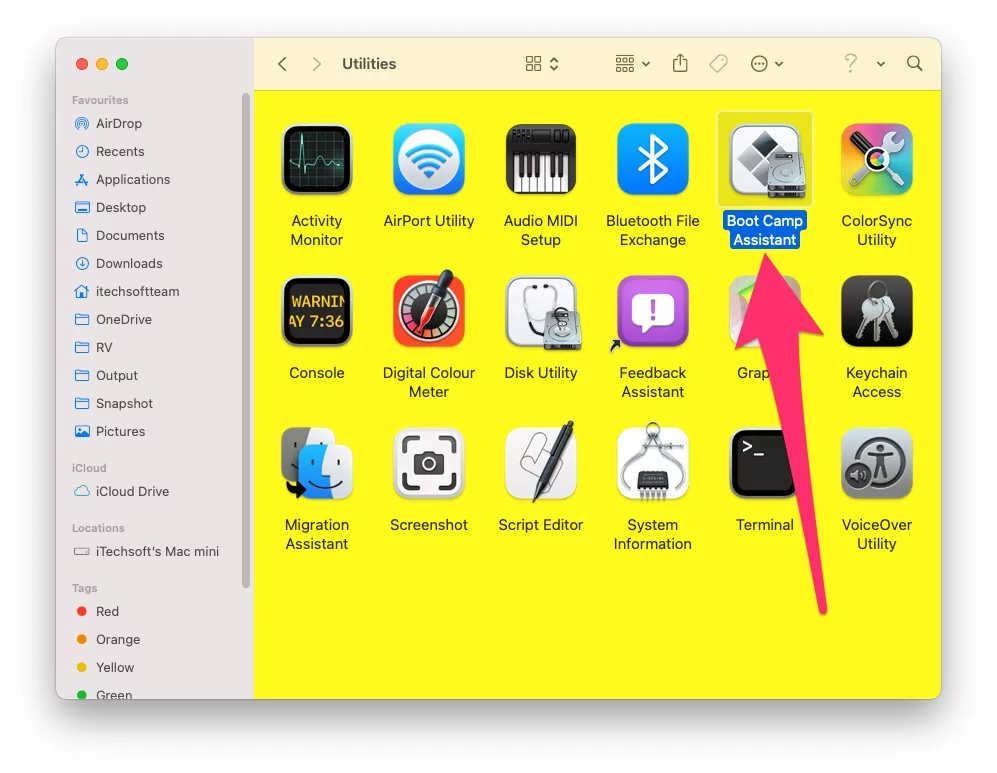
Step 3: Launch boot camp assistance on your Mac, Click Continue > Disable First and Third option on Screen > Then Continue > Now Verify your USB inserted drive > Continue > Wait for a time it will take time depends on your internet connection.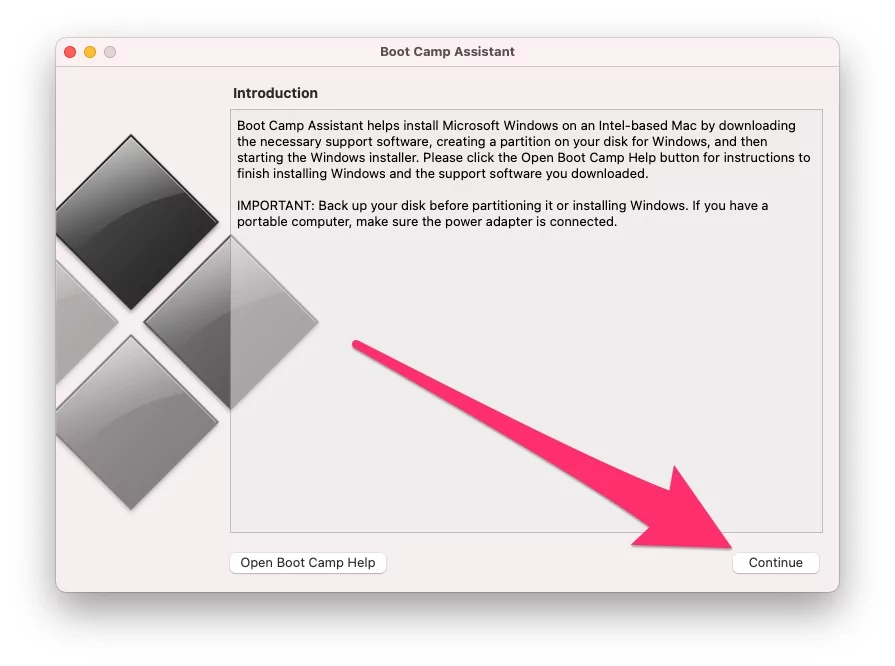
After successfully installing the Windows support software on your External USB drive, tap on Quit.
Open the USB drive and cut the entire folders (Total 3) and keep them in a Safe place on your desktop.
Step 4: Again, launch Bootcamp Assistant and click on Continue > Disable the second option (Not the first and third) > Continue > Find the Windows ISO file from the Mac drive where you downloaded it from the Microsoft Windows site.
And install on an external USB drive by clicking the Continue option.
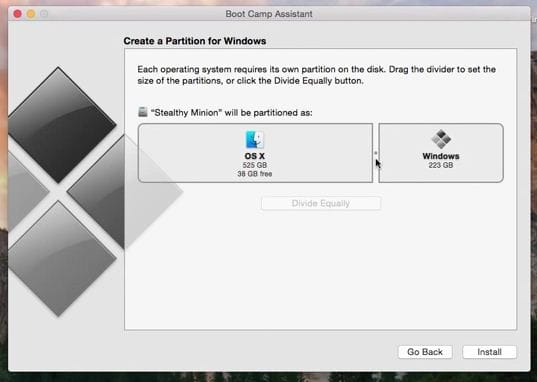
Step 5: Now you can see the OS X partition and the Windows partition on a single drive. From there, enlarge the Windows disk partition by dragging its region.
Step 6: Finally, click on install.
The message will appear as follows: “Booting from the Bootcamp Assistance-created USB drive.”
Step 7: Choose Boot Camp drive option when you have to install Windows 8 on a Mac
Setup your profile on Windows OS.
Useful: Reset forgotten Mac password without disk or Boot Drive [How to].
Installing Windows on a Mac is easy with Boot Camp. If you face any issues during the installation of Windows 10 or 11, please reach out to us for assistance with the setup process.