Know the essential customizations on Manage Notification on Mac to Look, Feel, Group by App or name, Shorting, Banner Style or Show notification style on the Lock screen, Badge App icon, Play/Stop Notification Sound. Keep your Mac up-to-date with the latest version of macOS. Sometimes, People keep most of the notifications off because hundreds of notifications from different apps will hang up your Mac on startup.
Follow the steps to turn on notifications for the helpful app. If you do not know how to manage notifications on Mac, you can get a guide about that below. Steps for Manage notifications on Mac, MacBook Pro/Air read carefully and follow that.
Step-by-step guide on How to Manage Notifications on Mac
Focus: Automatically filter notifications based on what you’re currently doing
macOS Monterey or later macOS update and parallel iOS 16/ WatchOS 9 Support Focus notifications. So we can manage notifications across all of your Apple devices. and Breakup focus rules using the urgent notification option in the focus setting.
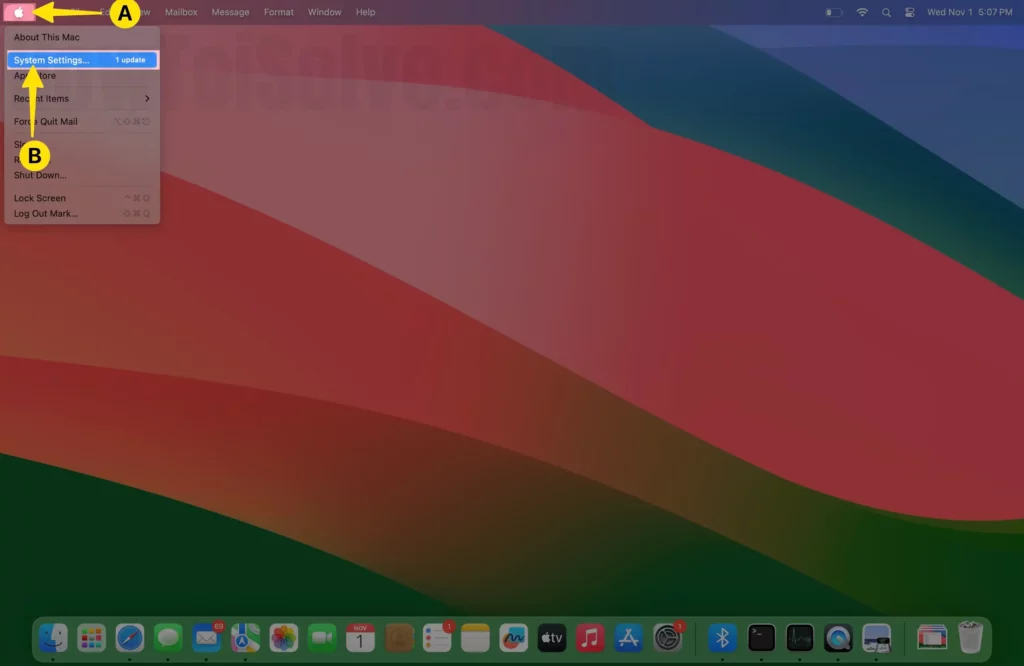
On Mac, Under System Settings/Preferences > Notifications & Focus > See the Focus Tab and Manage it for selected Apps and contacts.
1. Under Apple Logo, click System Settings… on Mac.
2. Select Focus then tap and Driving system settings.
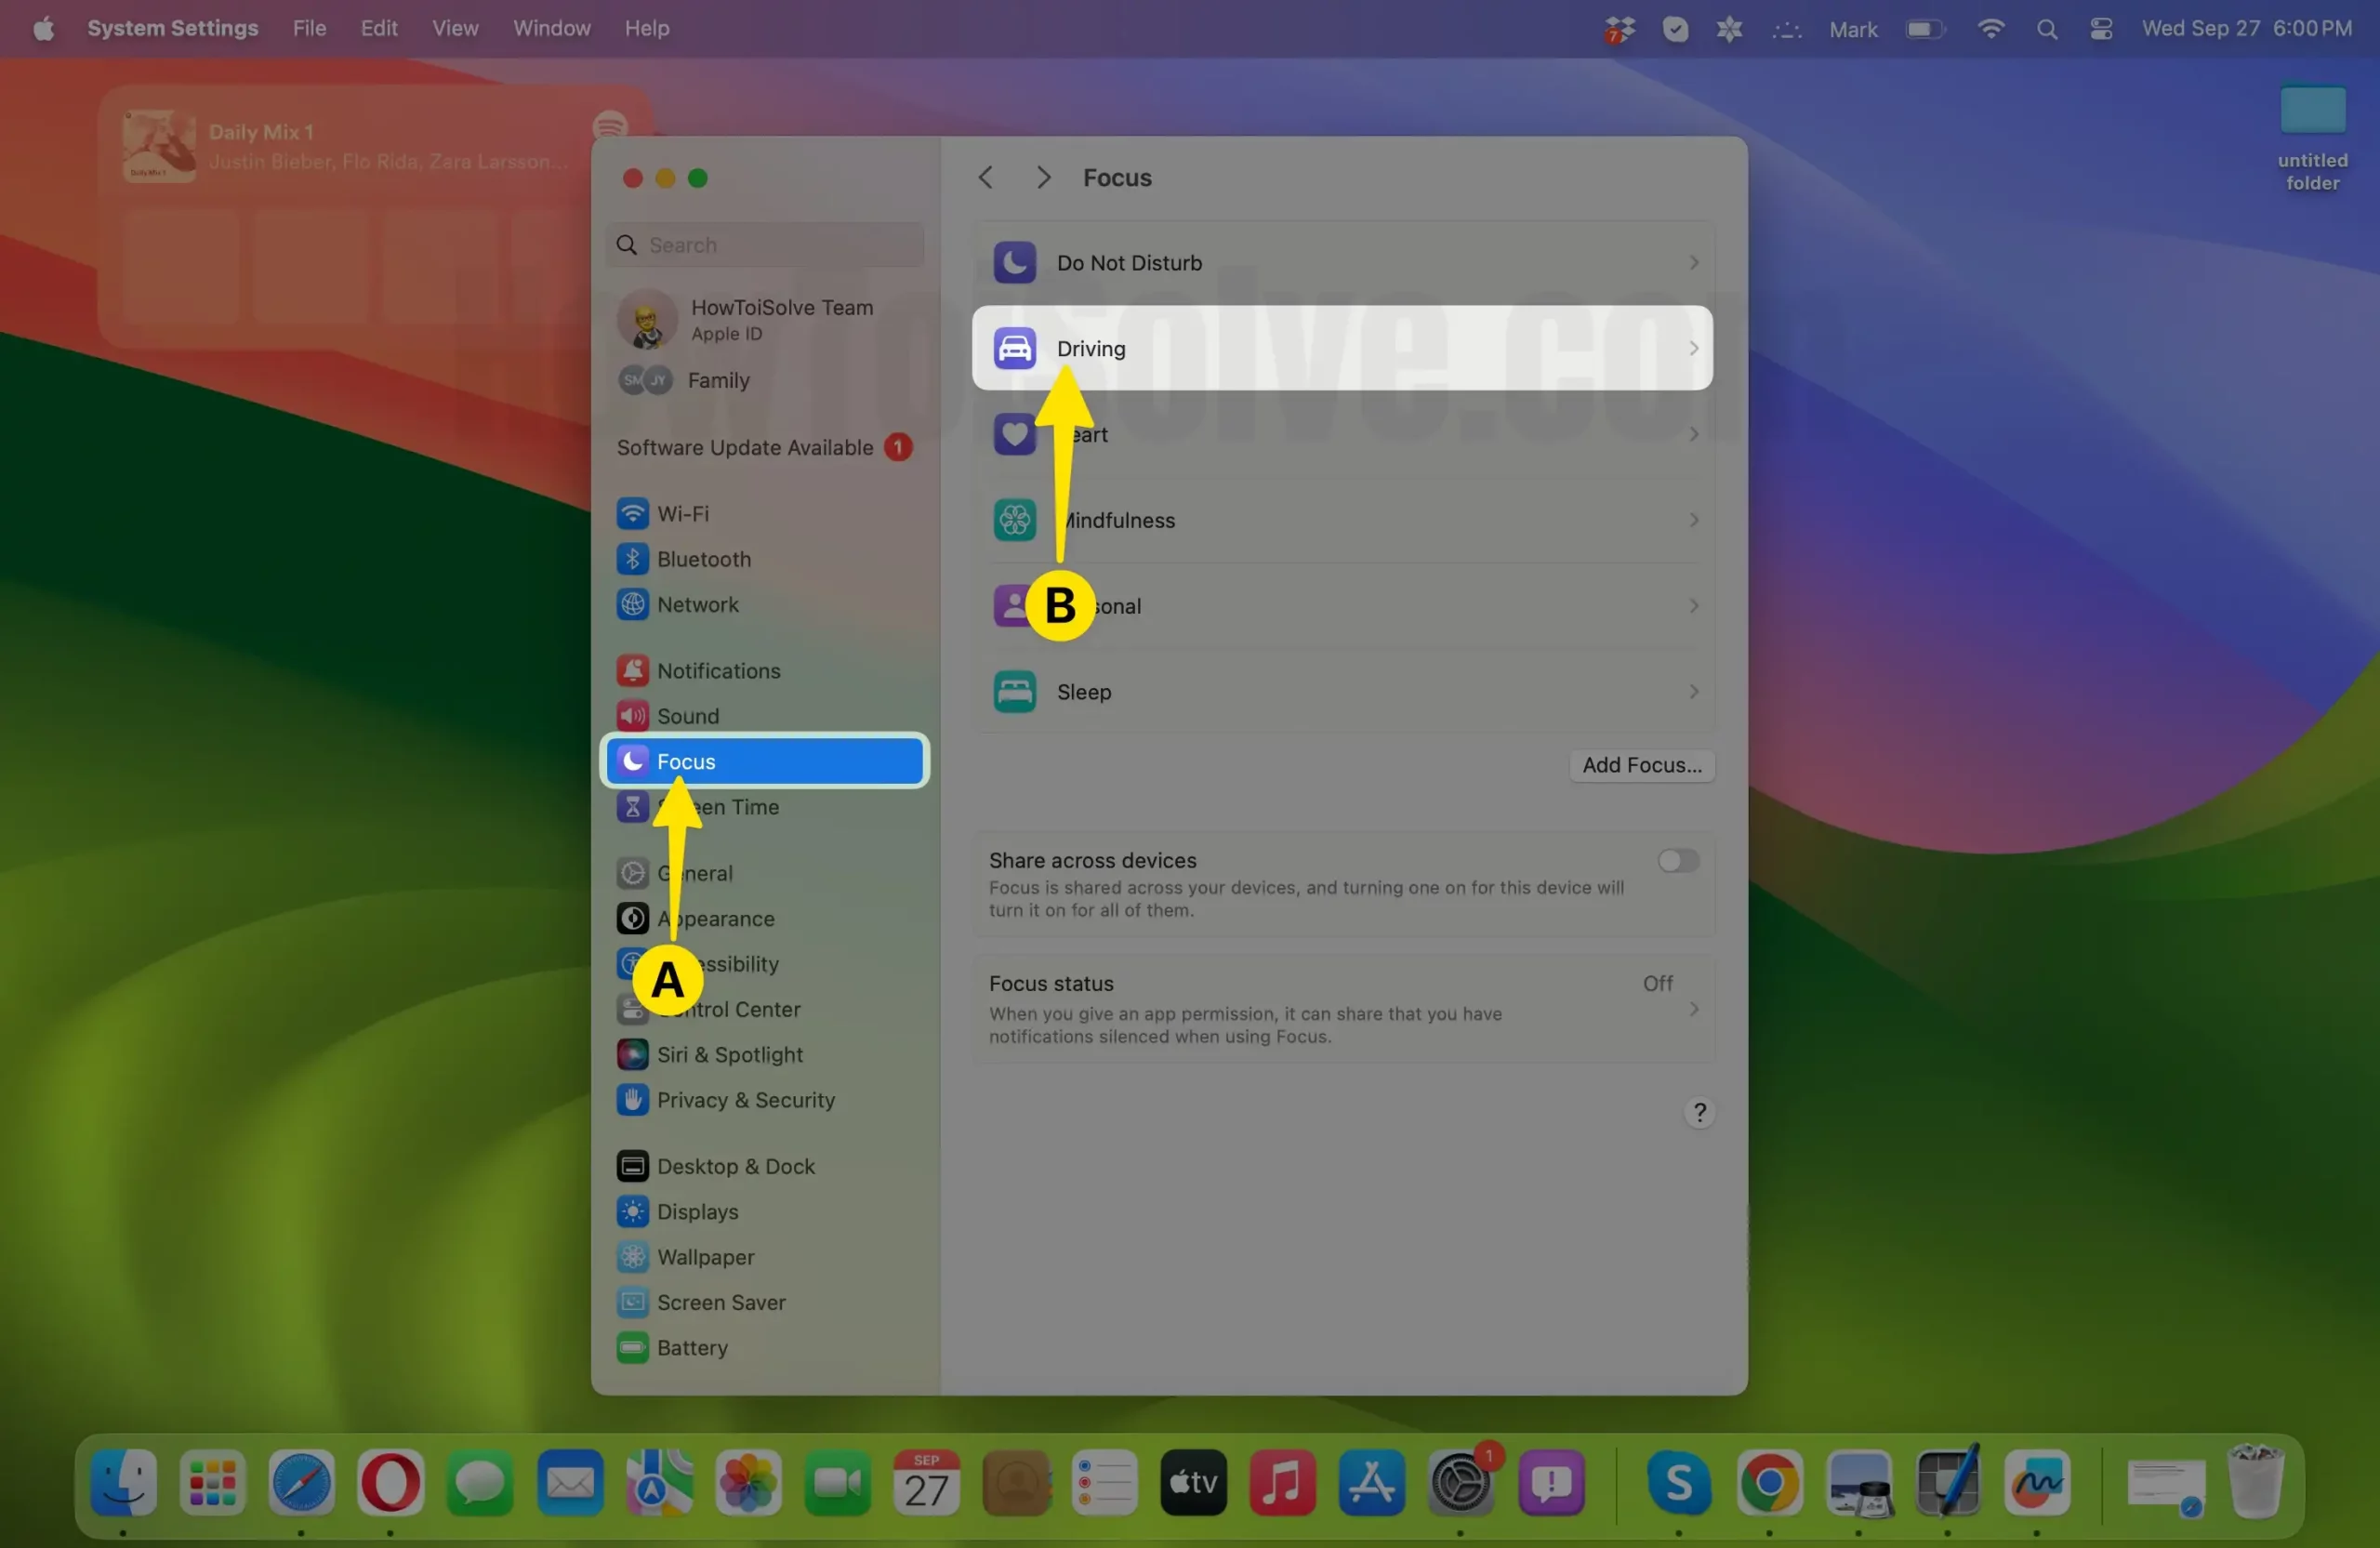
3. Click on Allowed People system settings.

4. Choose the (+) Plus icon Add People on driving.

5. Select the Number, then choose the Add button.

6. And tap the Done button.
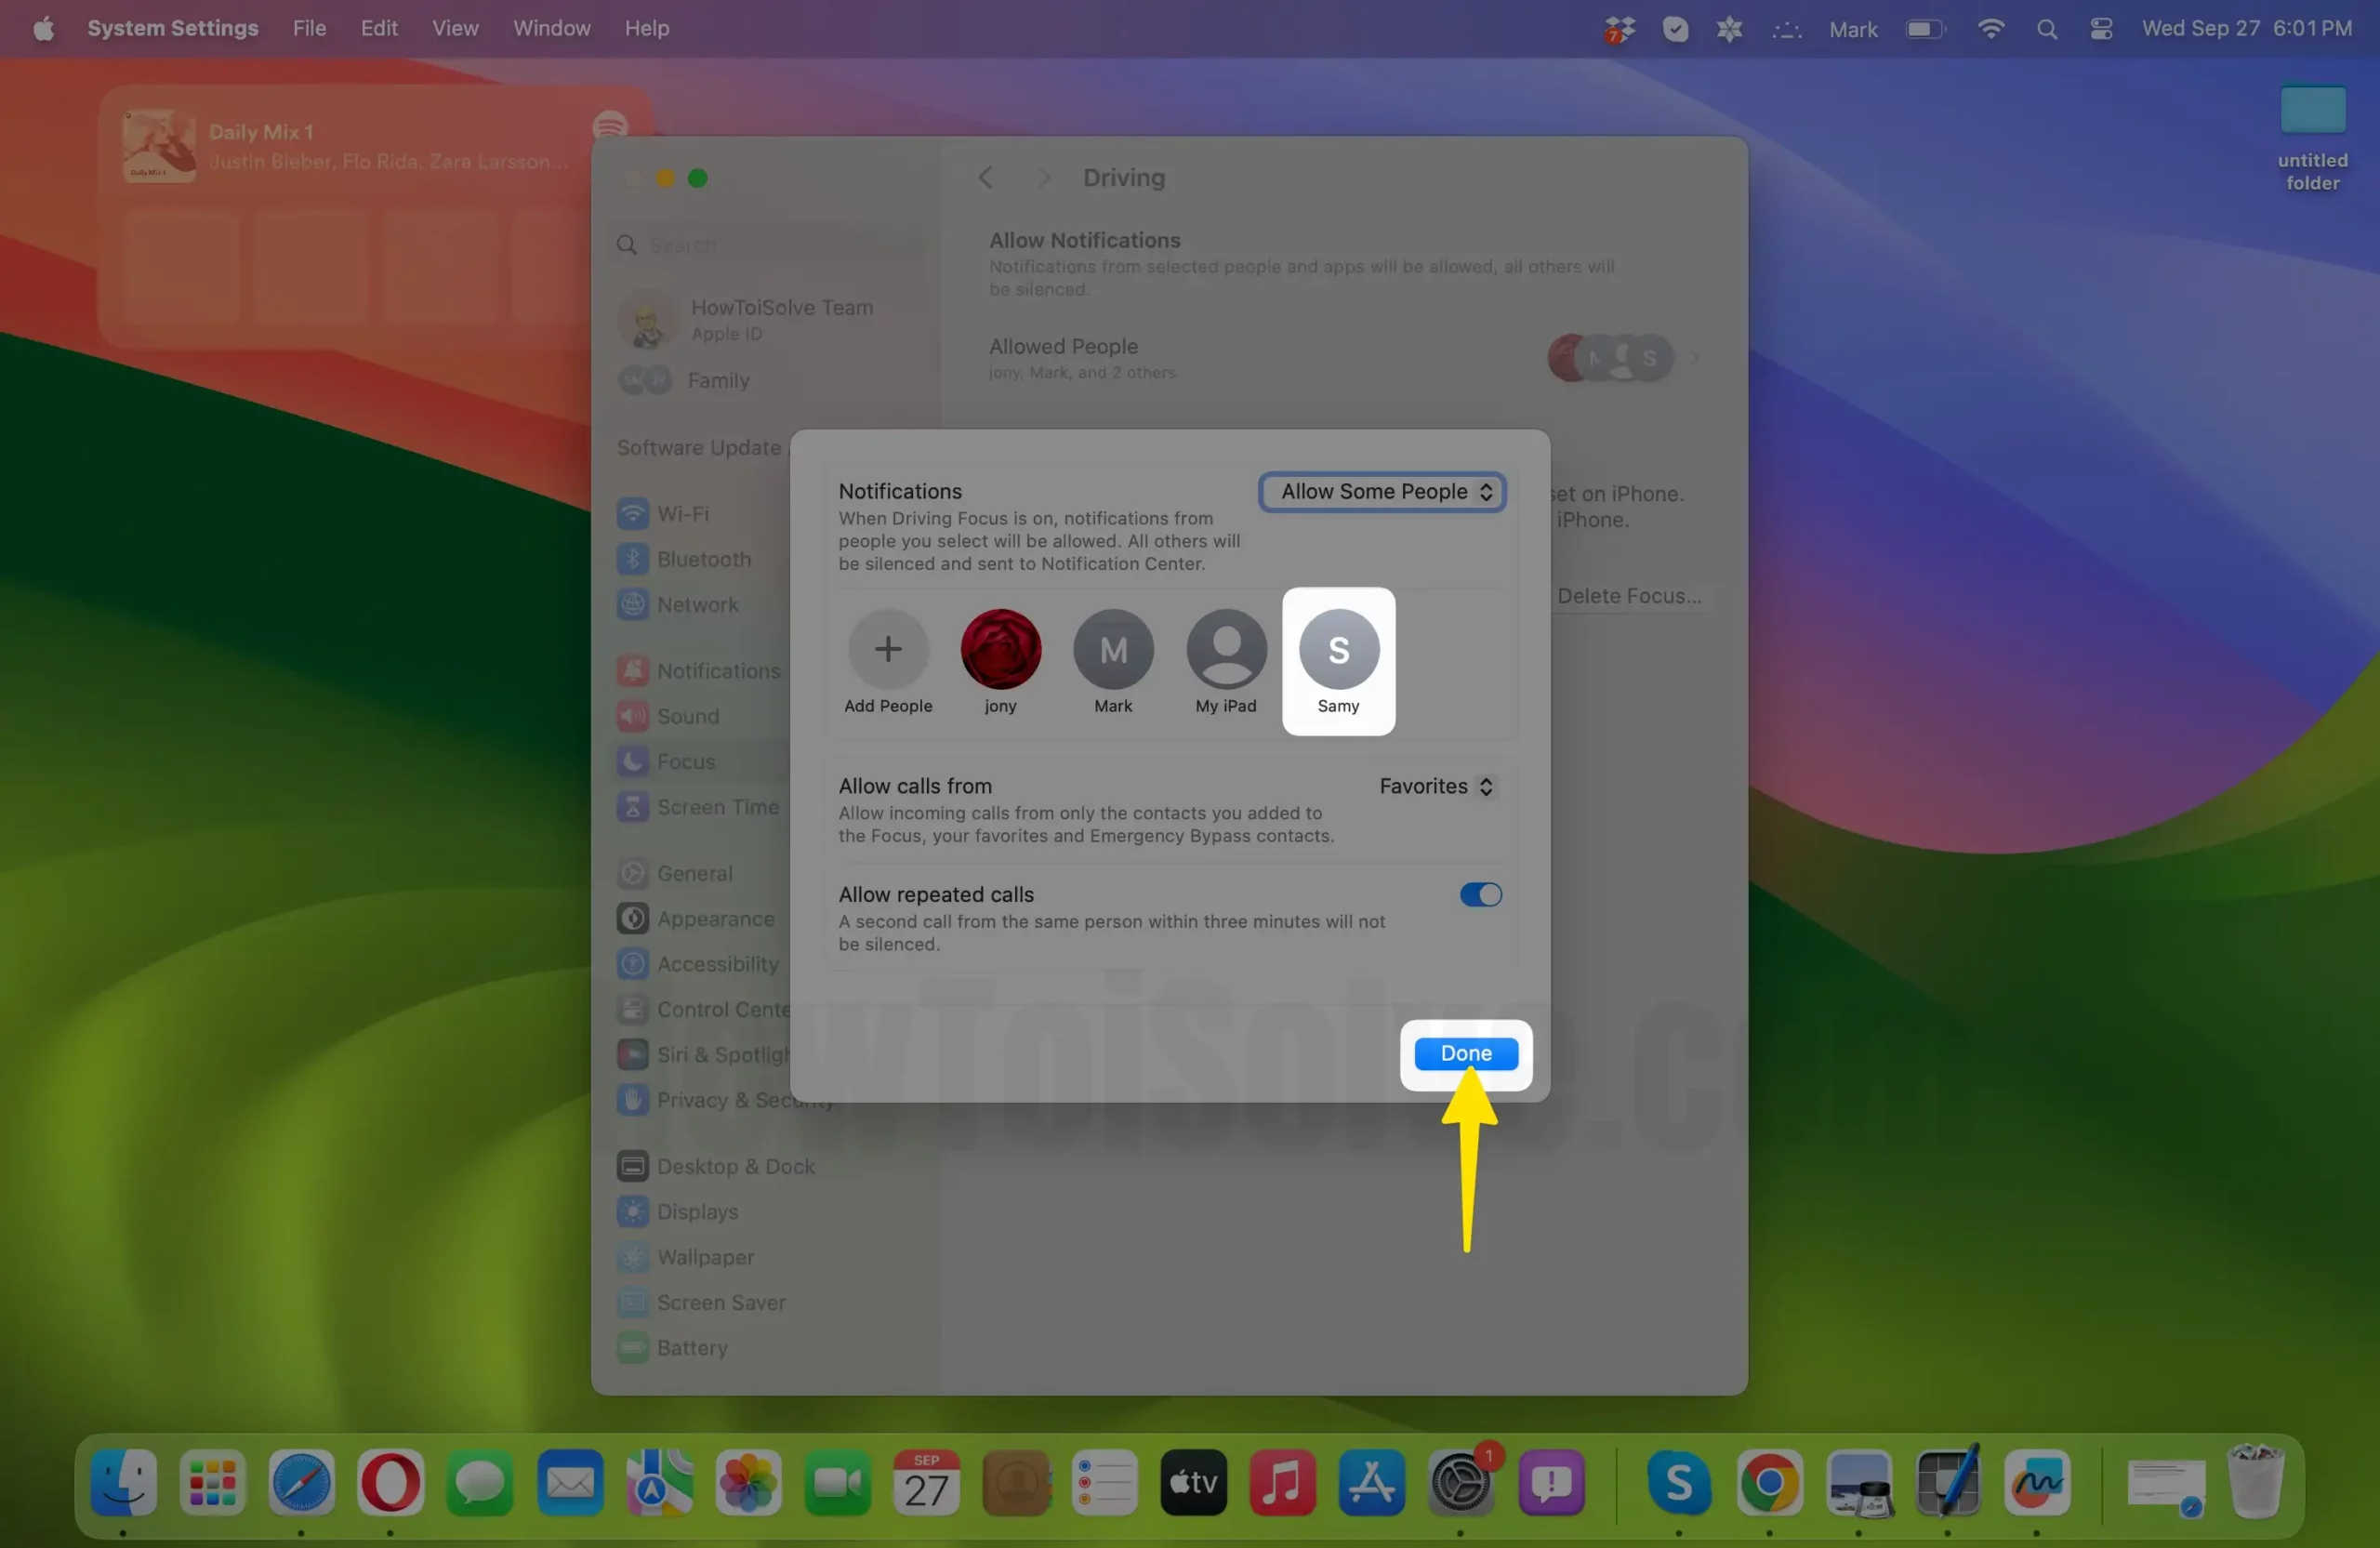
- Focus is also accessible from the Mac control center.
➡️ Know more about Focus on Mac.
How To Quickly Clear All Notification On Mac
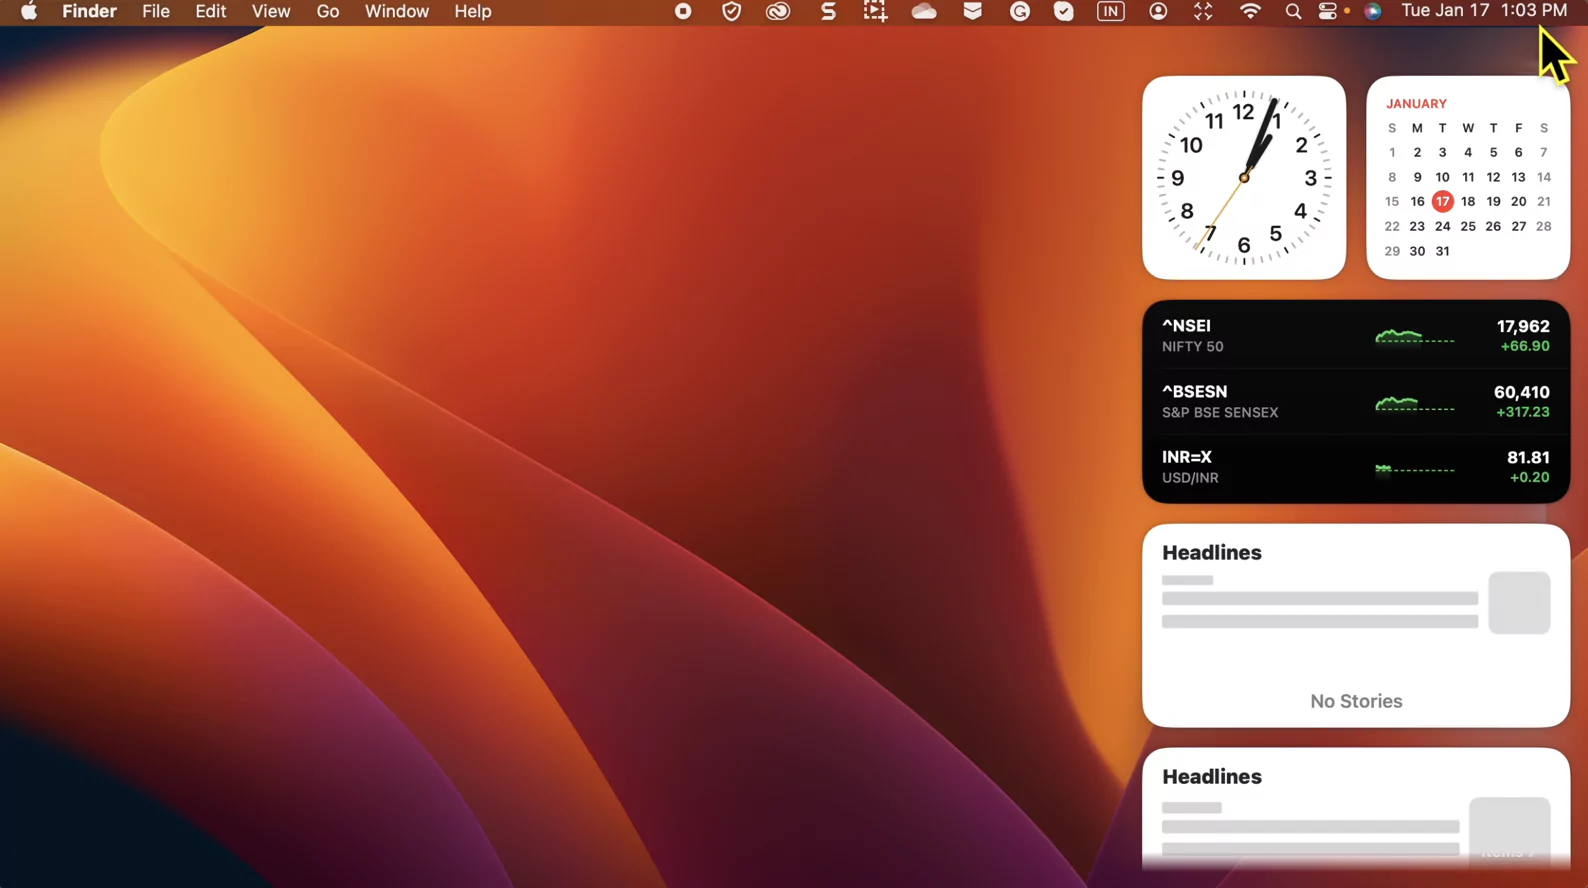
Quickly Clear all notifications from Mac is always considered to be helpful. As it firmly degrades the load on the Mac Battery. At the same point, keep everything organized inside the Time Menu. Do follow the steps below if you aren’t familiar with the procedure.
1→ Click on Time at the top right corner of the screen. All your notifications will appear on the Left side.
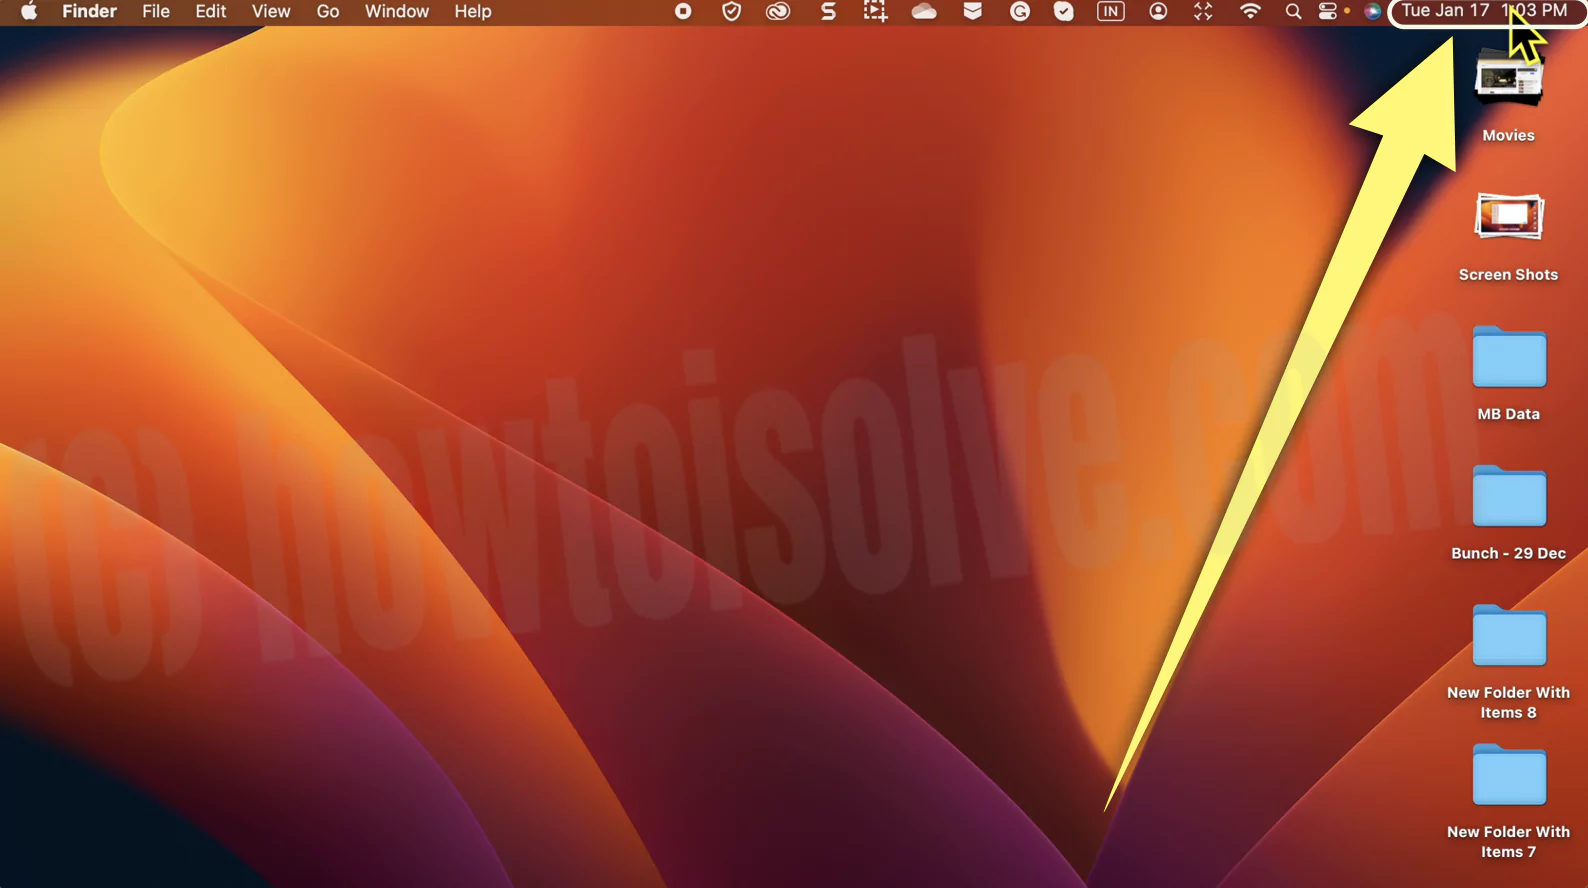
2→ Next, click on [Number] More Notification to glance at all notifications.

3→ Furthermore, choose More Icon(Circle Filled With Three Horizontal Dots).
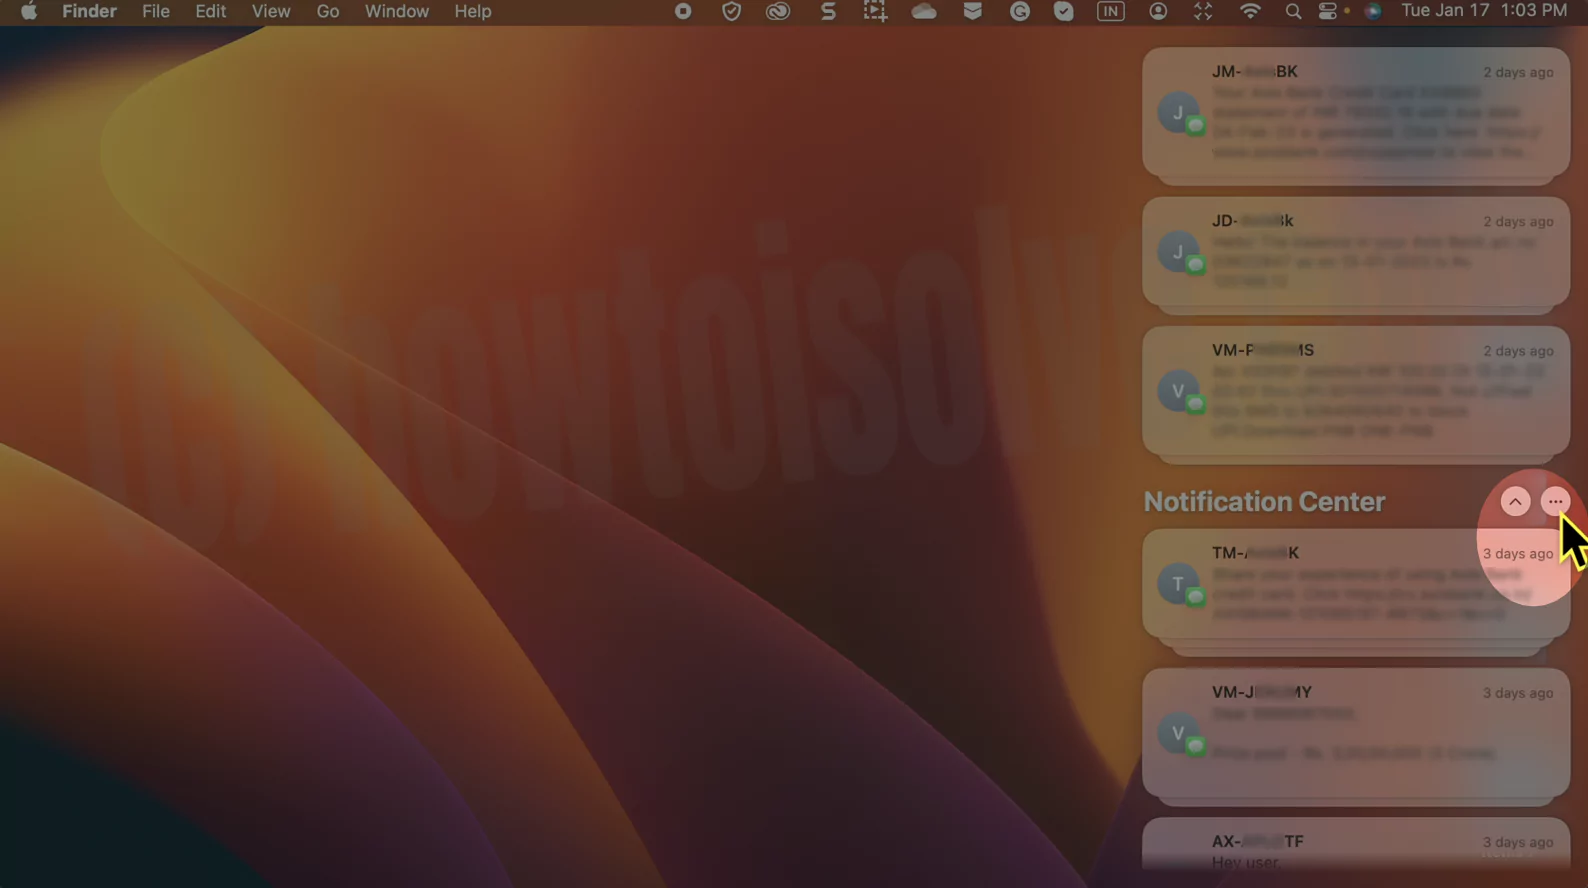
4→ And from the drop-down menu, select Clear All.
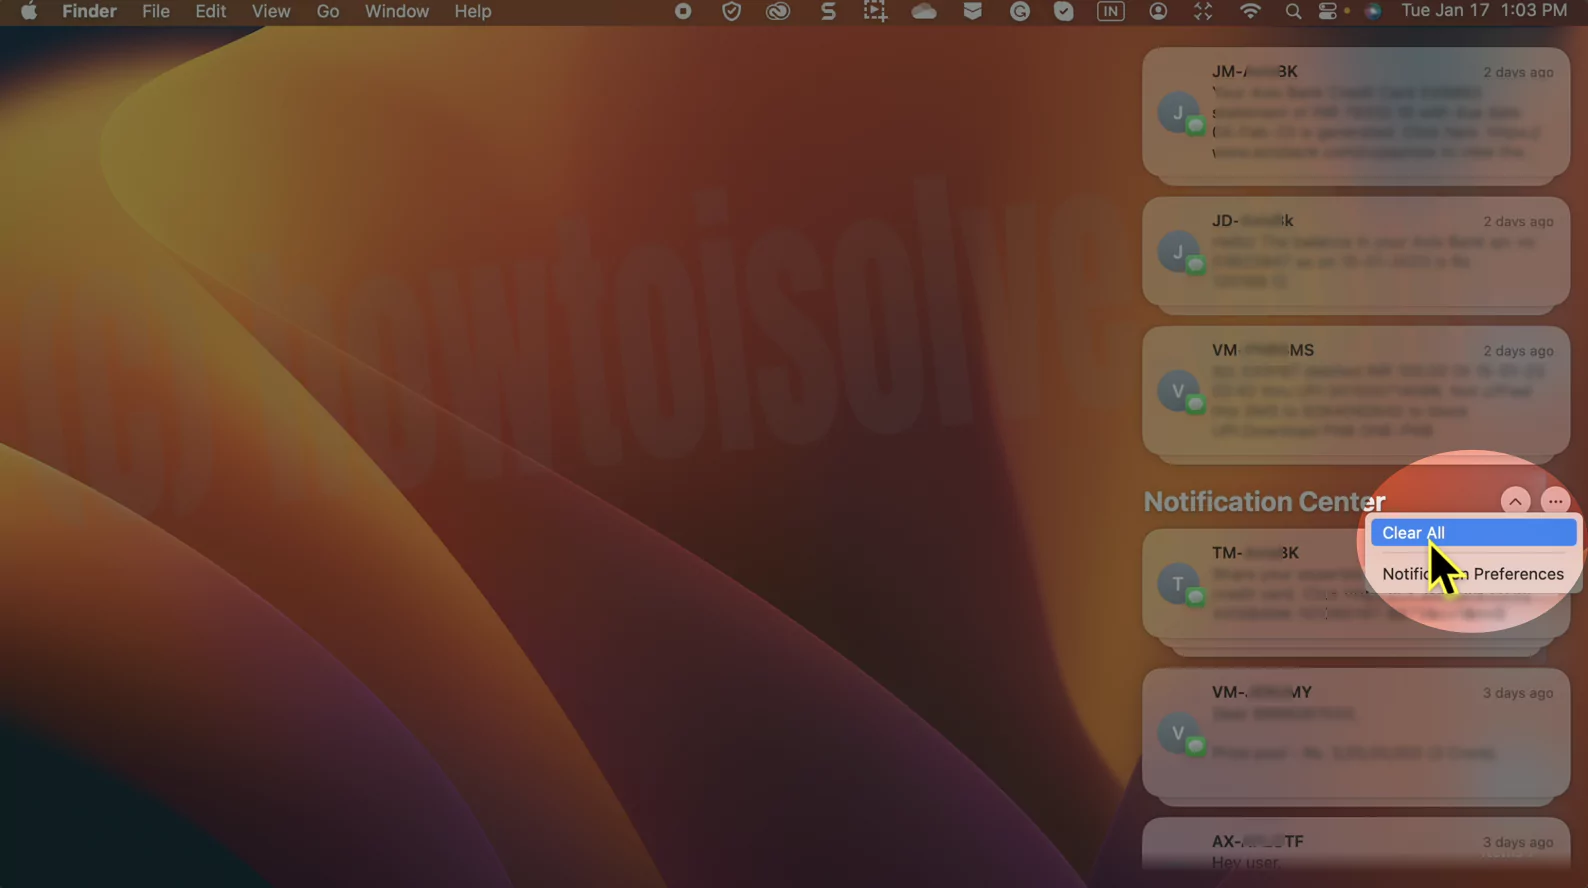
That’s It!
How to Use Group Notifications on macOS
A little improvement by Apple lets you group notifications on Mac and MacBook. You’ll be given three options to choose from, learn what they are, and how to use Group Notifications on MacBook and Mac.
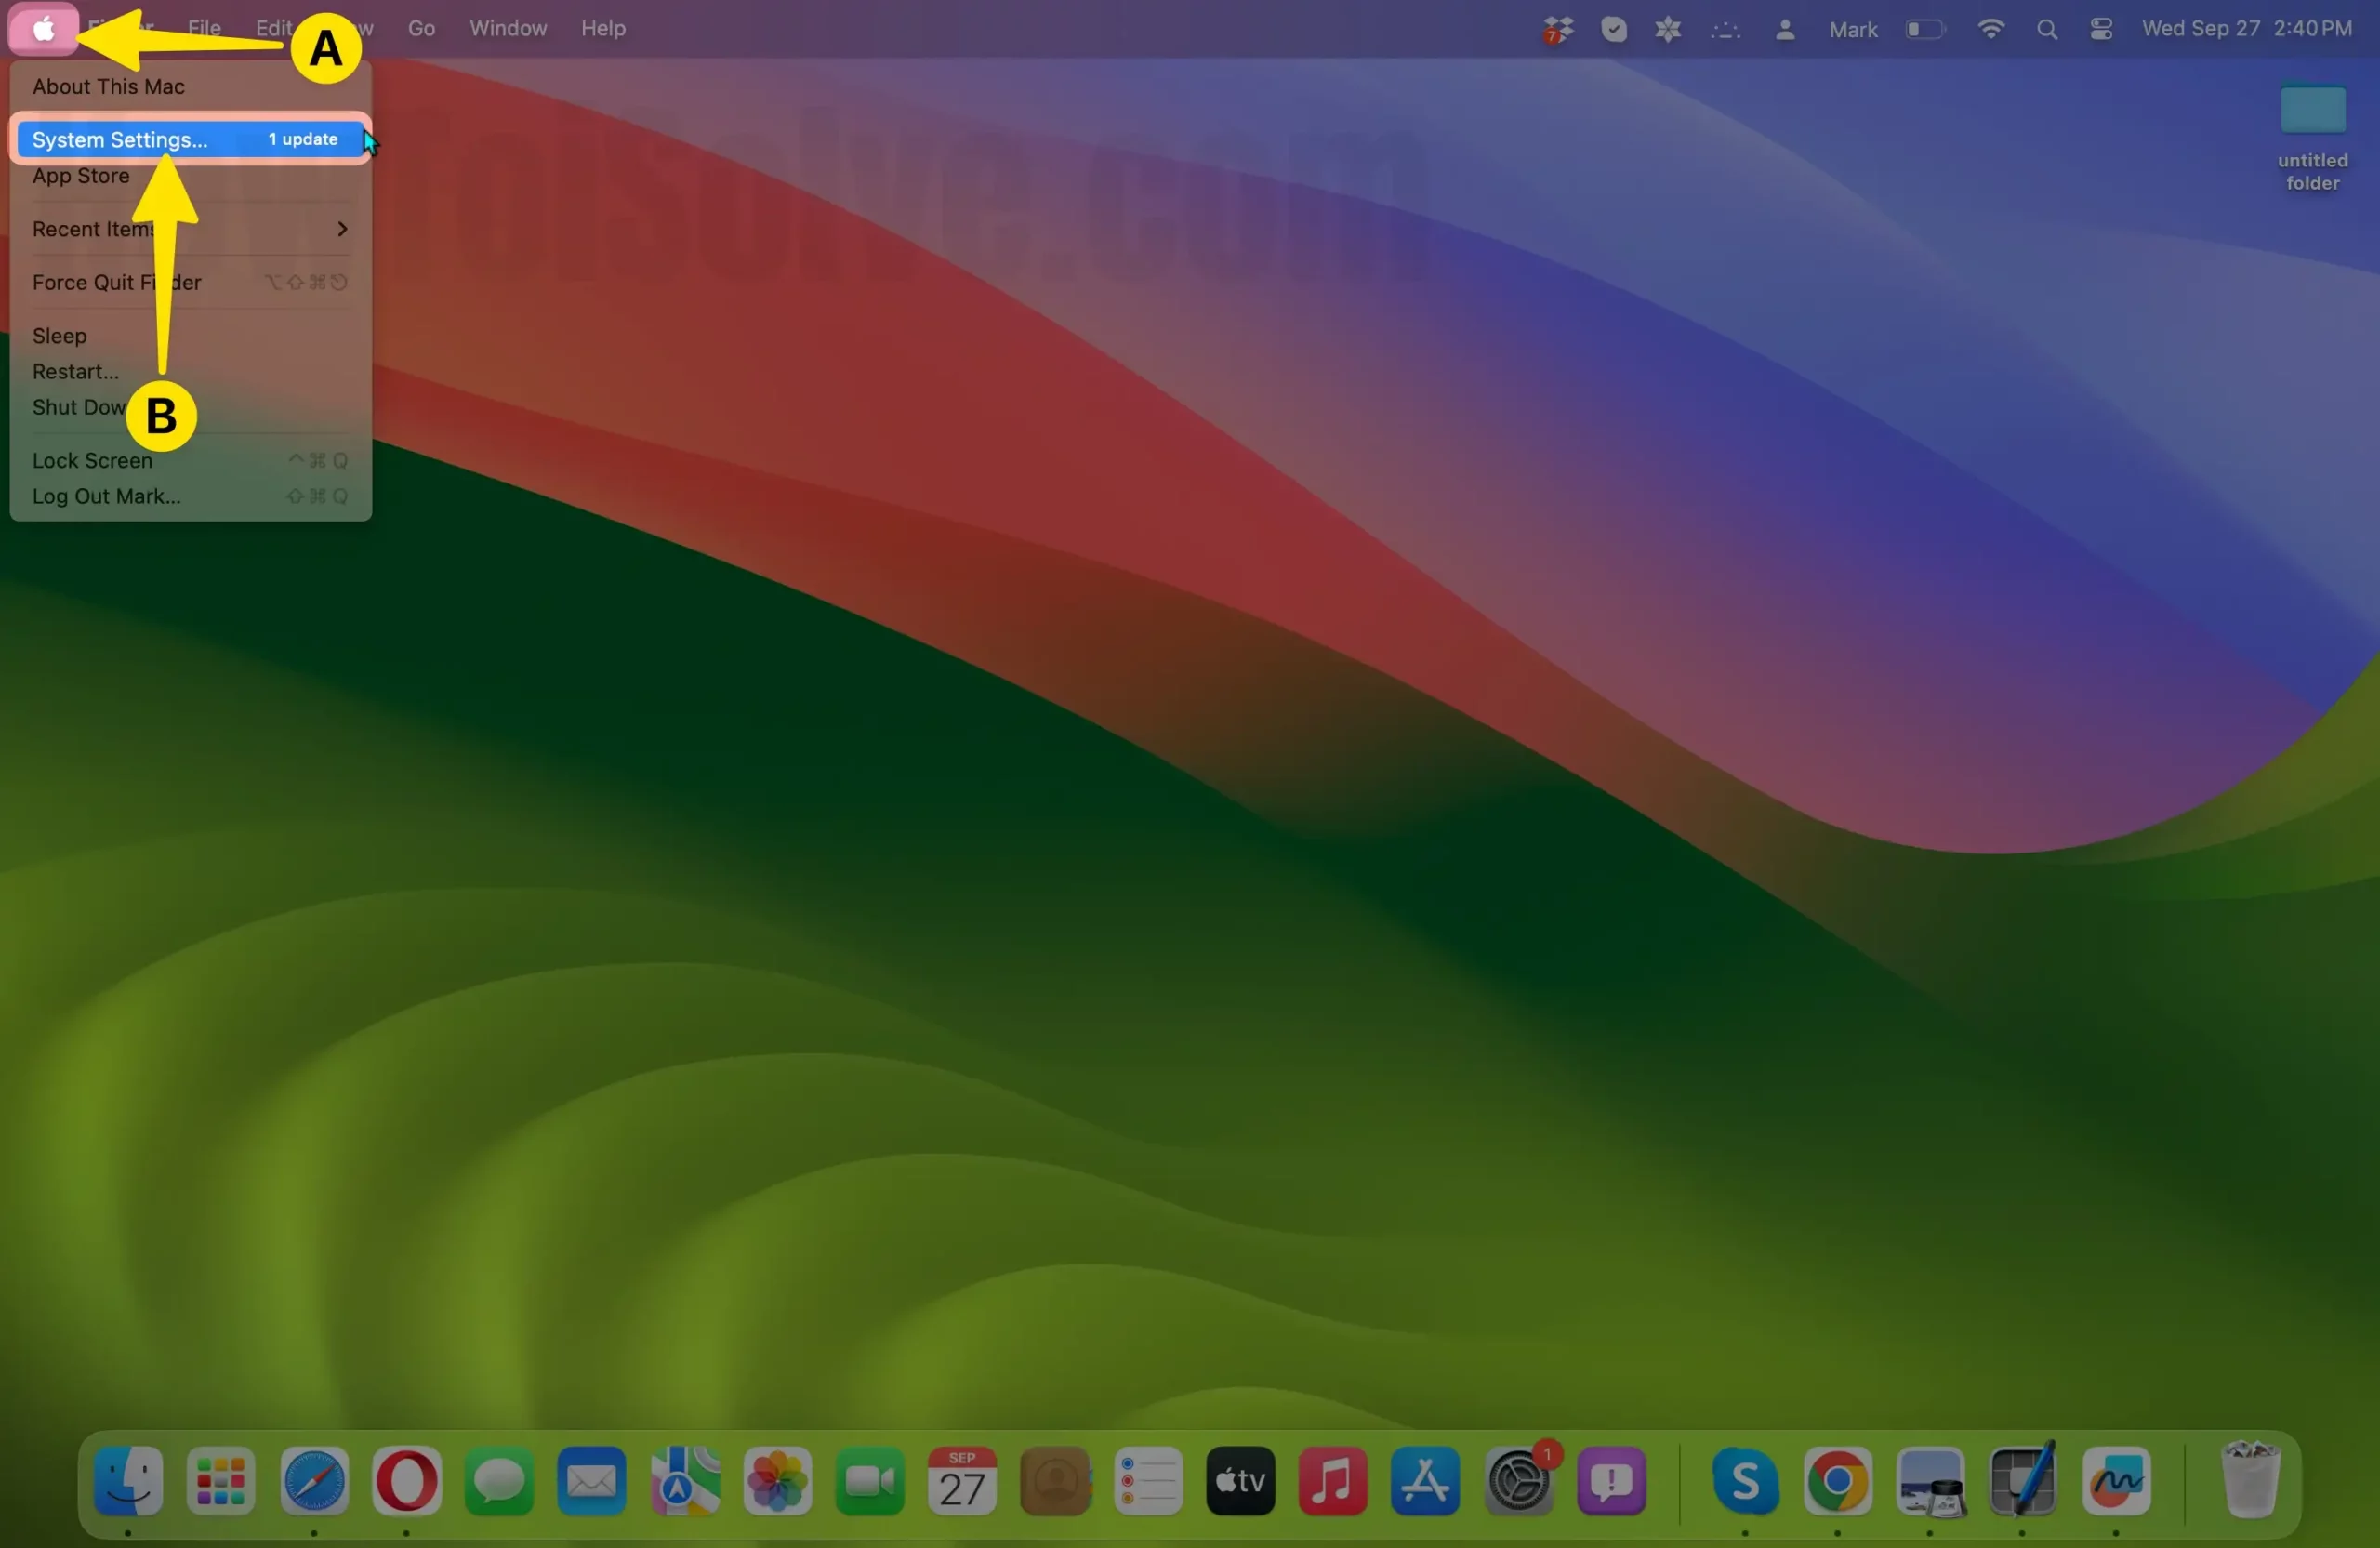
1. Go to the Apple Logo from the top menu System Settings.
2. Select Notifications, then Select the app to keep all the notifications in a group.
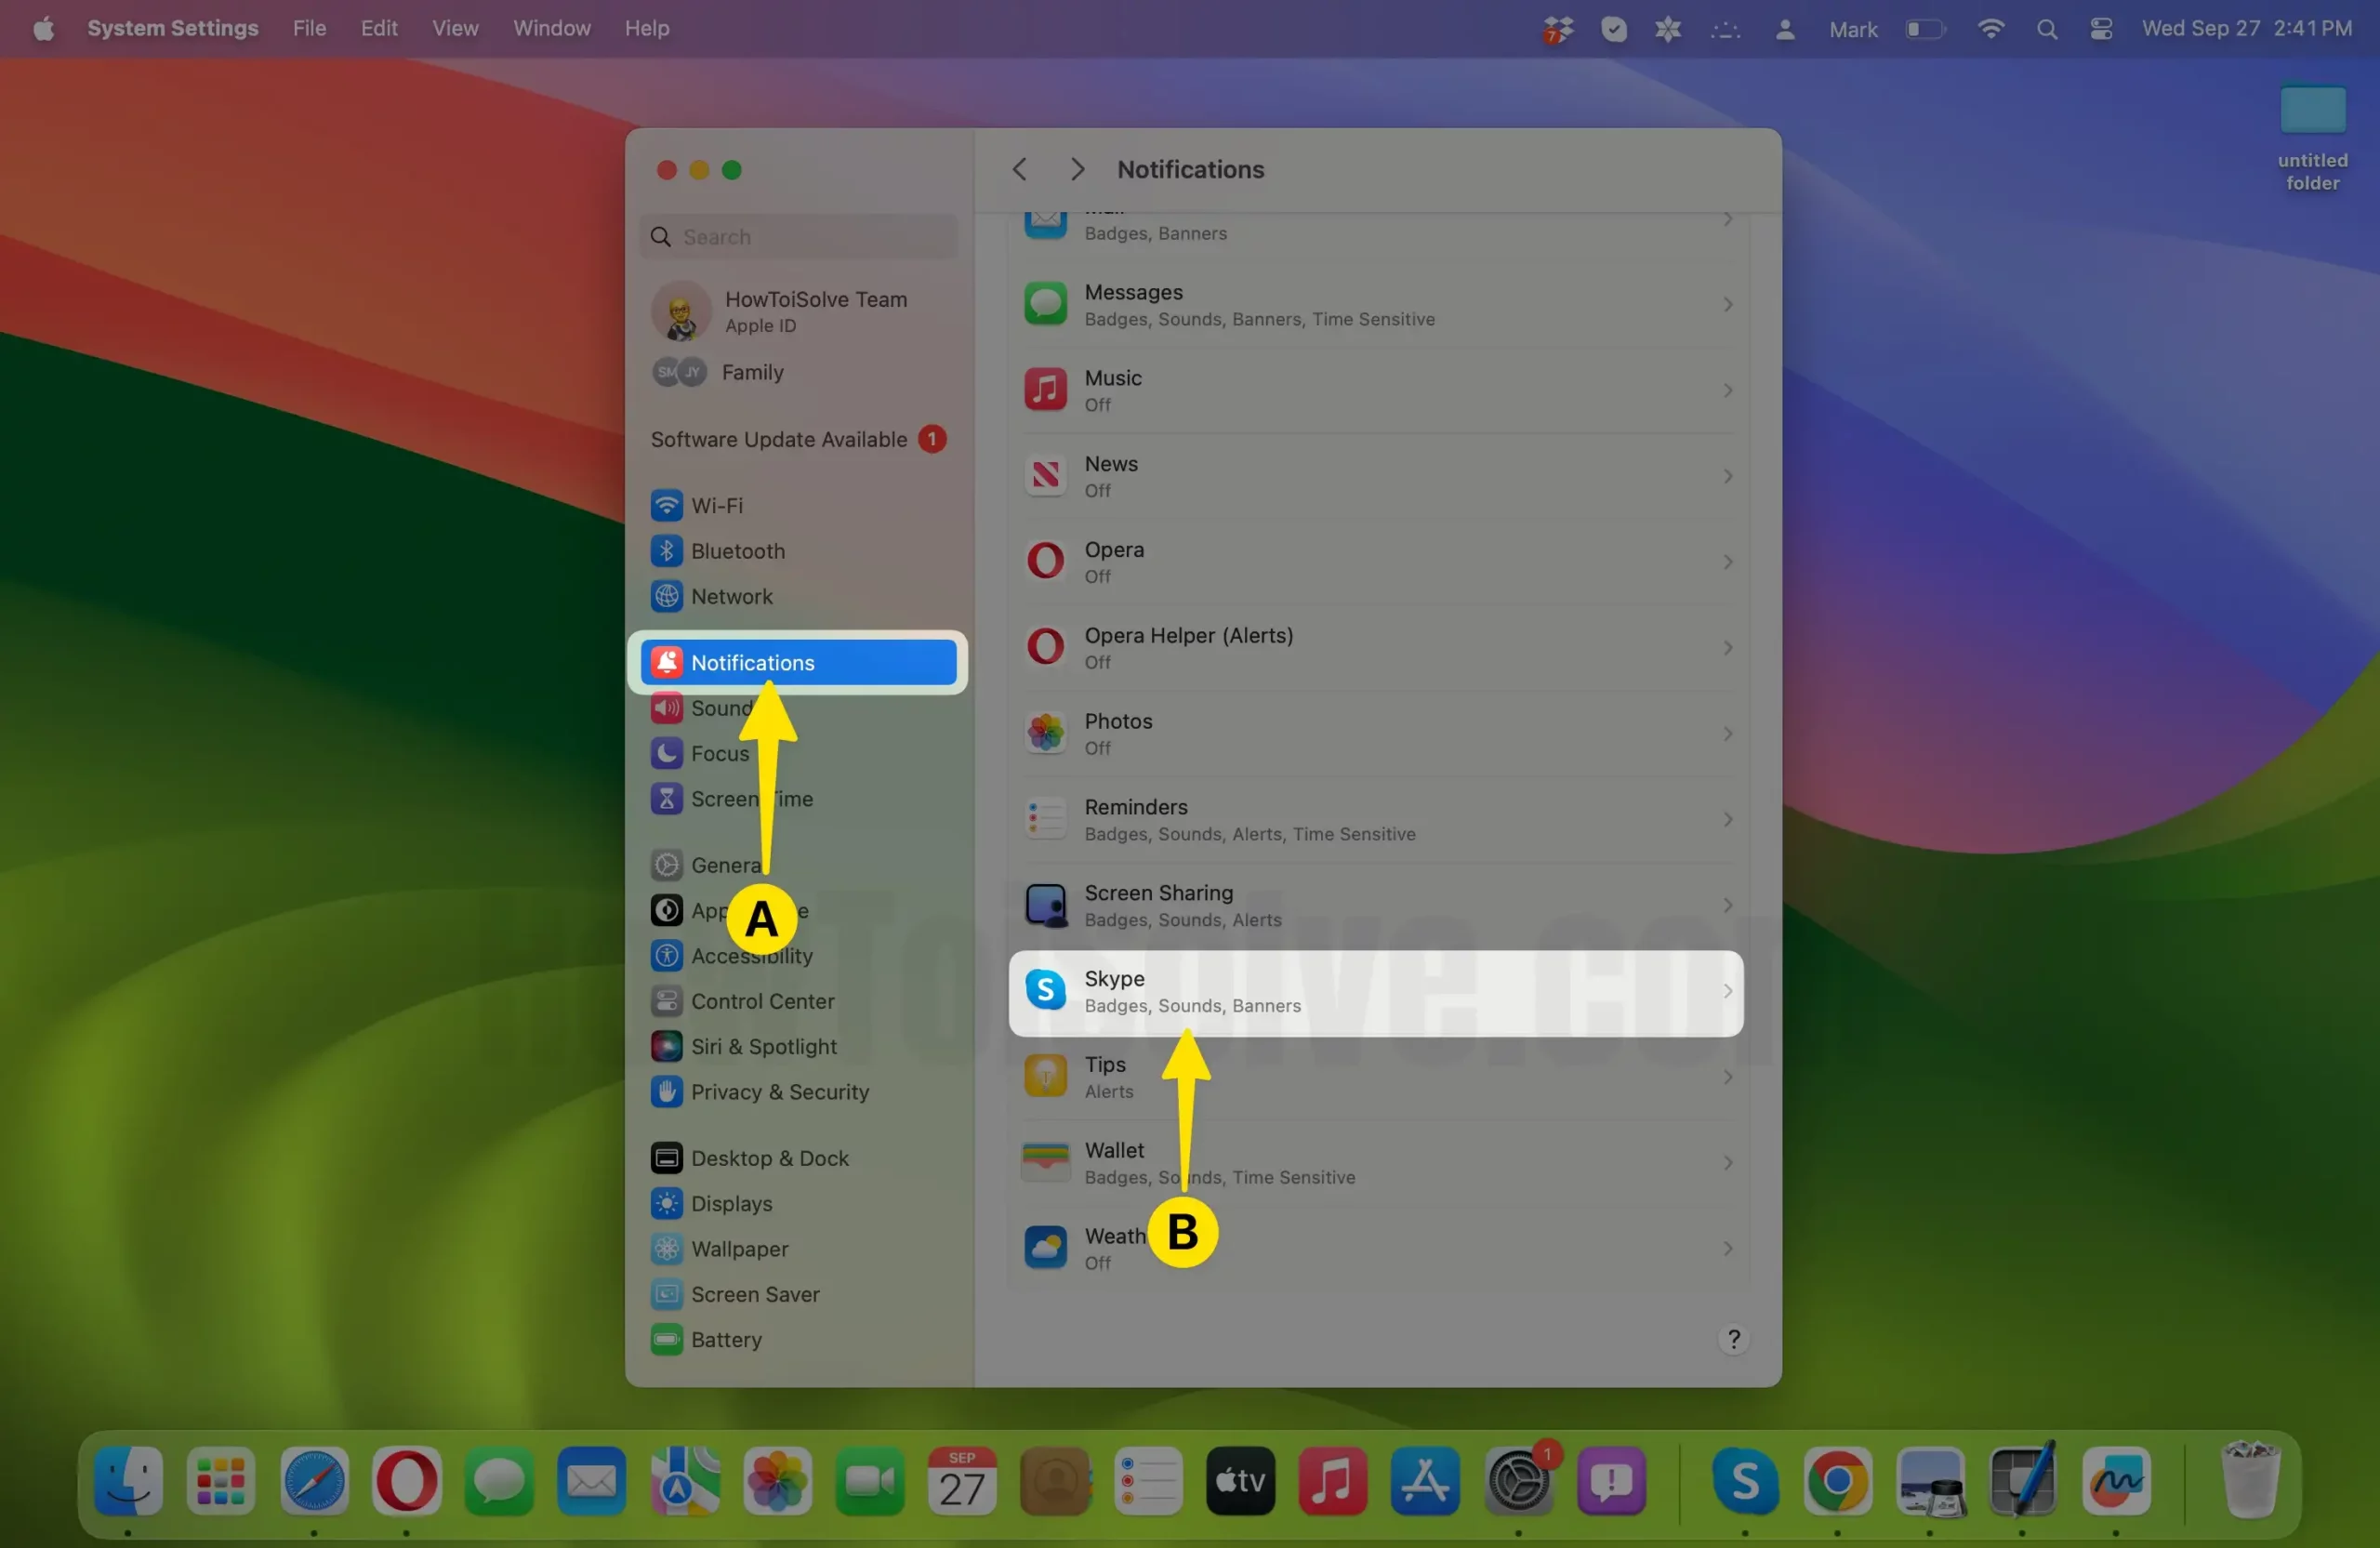
3. For the Notification grouping option, Choose the Option from
- Automatic
- By Application
- Off
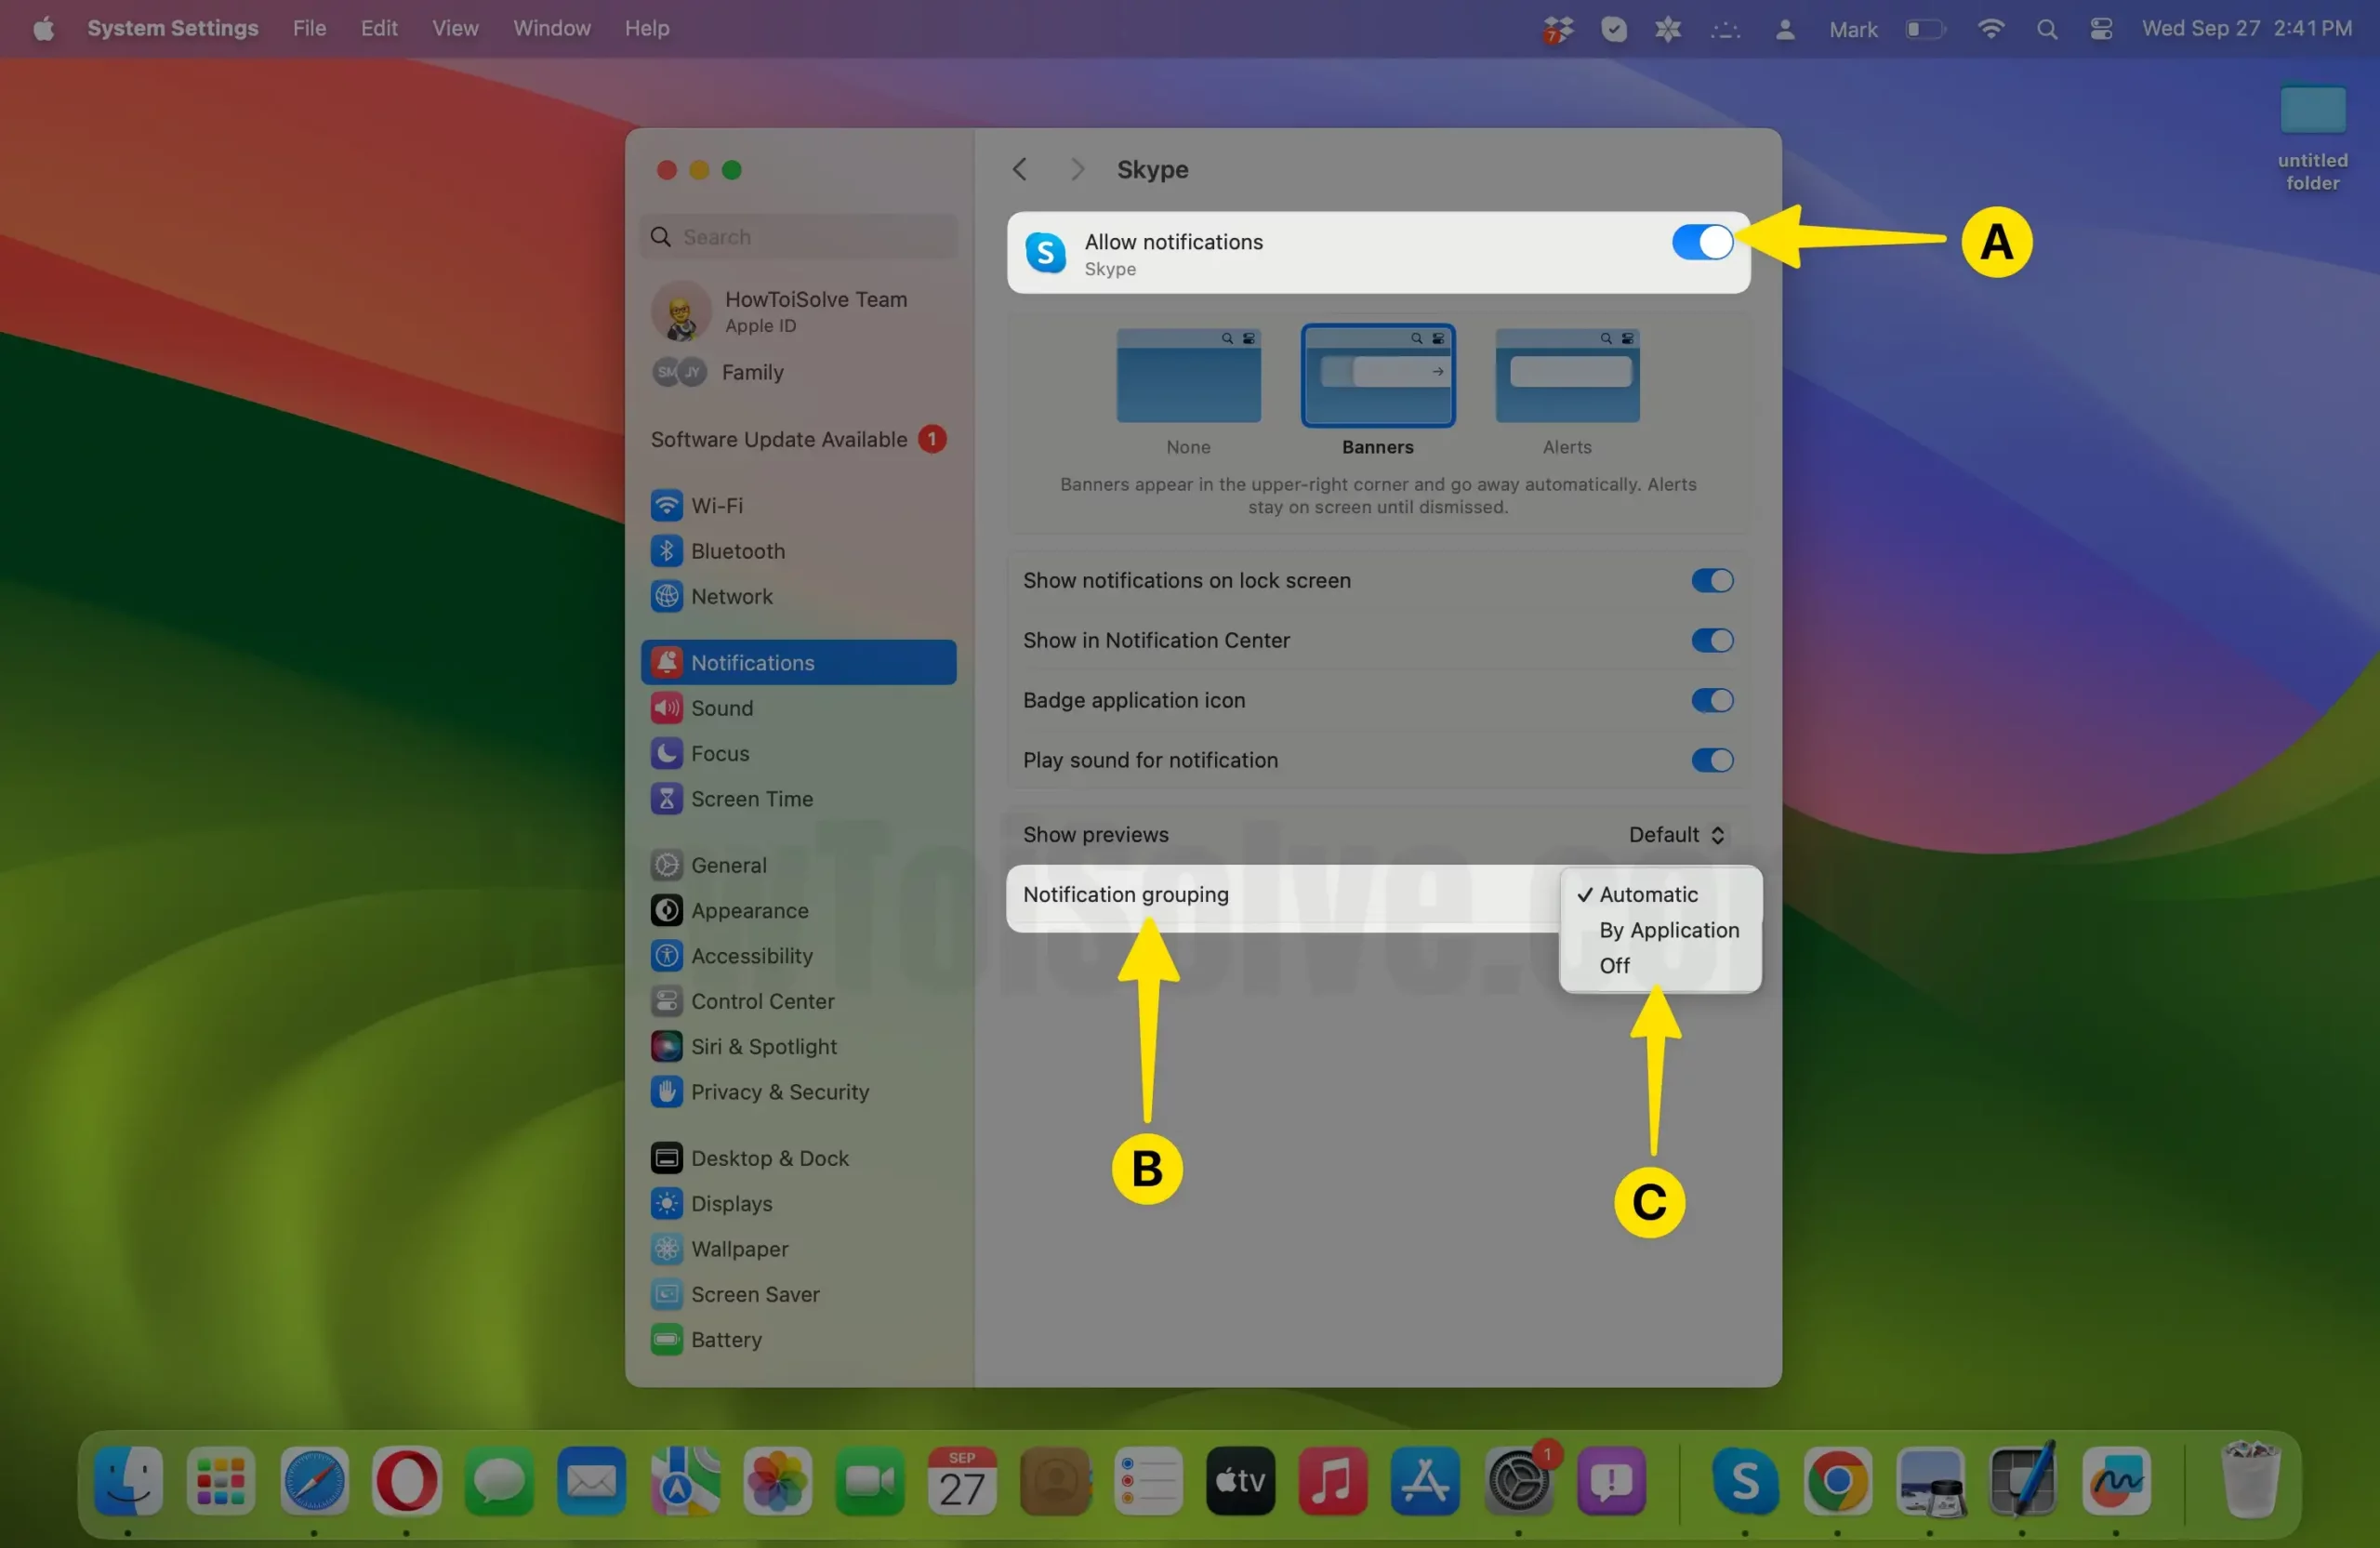
That’s it.
Also read: Send an audio text in iMessage from Mac.
