Apple has worked notifications to be simply accessible on Mac – right from the control center at the top right corner; it becomes easy to access. Unfortunately, although it sounds the best in theory but practically, it leads to hardening from notification overload.
Besides this, too many notifications can lead to battery-draining issues on Mac as it keeps the screen activated. But the best part is it’s easy to quickly clear all notifications on Mac. Here is how you can do so.
Quickly Clear All Notifications On Mac & Ways to Stop
Here in this guide, we will first introduce you to quickly clearing all Mac notifications. After this, we will let you know how to turn off message notifications on Mac.
How To Quickly Clear All Notification On Mac
If you want clear individual notifications, you can click on the Time from the main screen. Then, hover the mouse to the left top corner of the notification badge to make Cancel (x) Icon appear. Once you do so, click on it to clear individual notifications. But in case you want clear all notifications on Mac, follow the steps below.
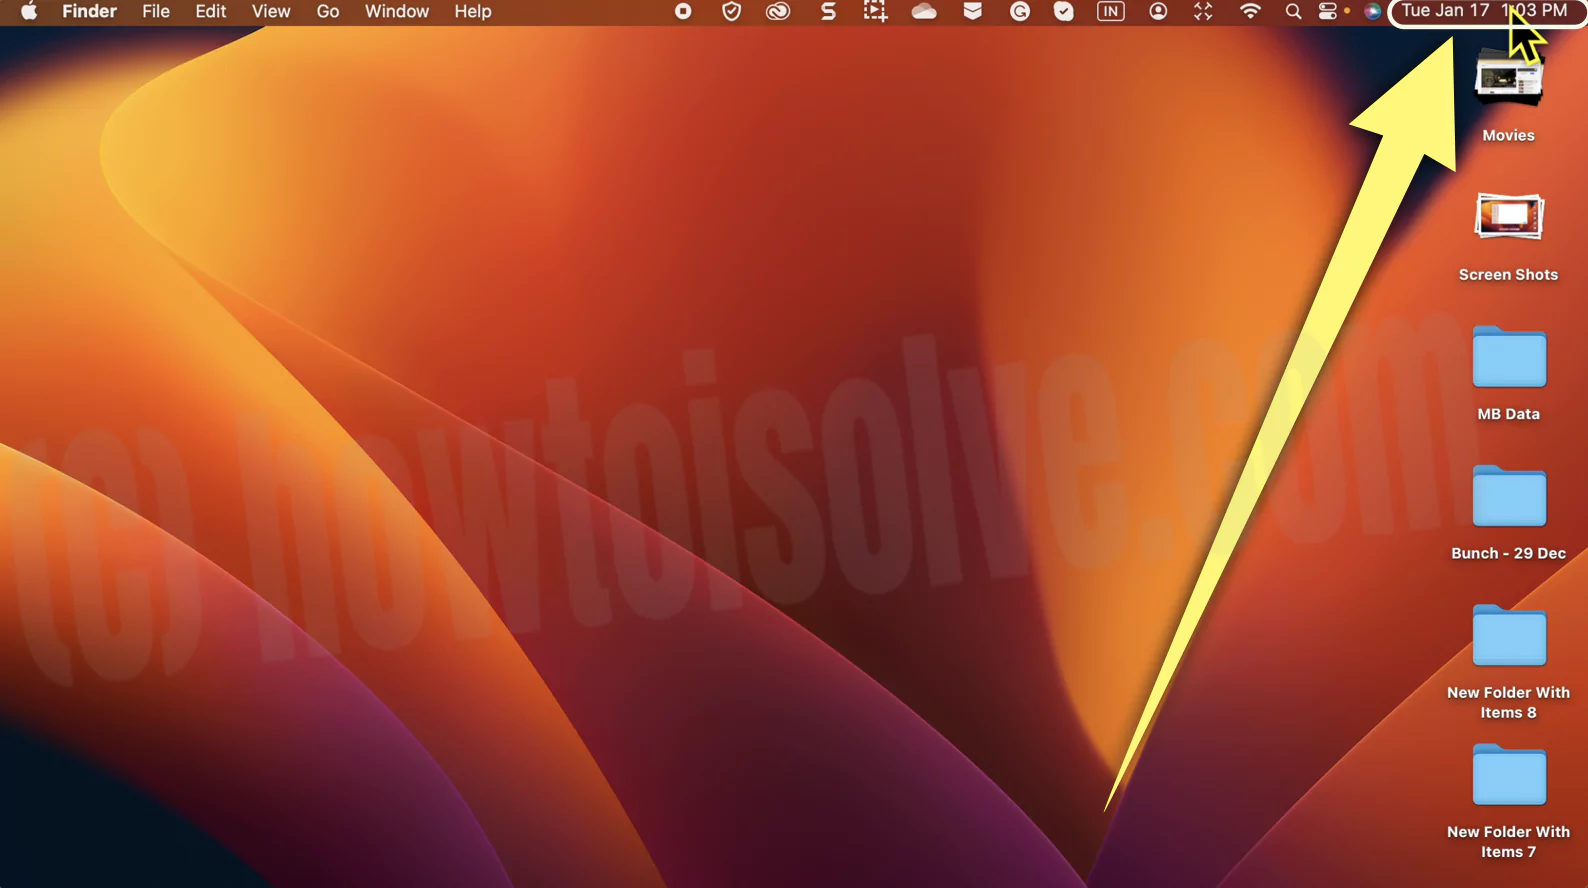
1→ Click on Time at the top right corner of the screen. All your notifications will appear on the Left side.
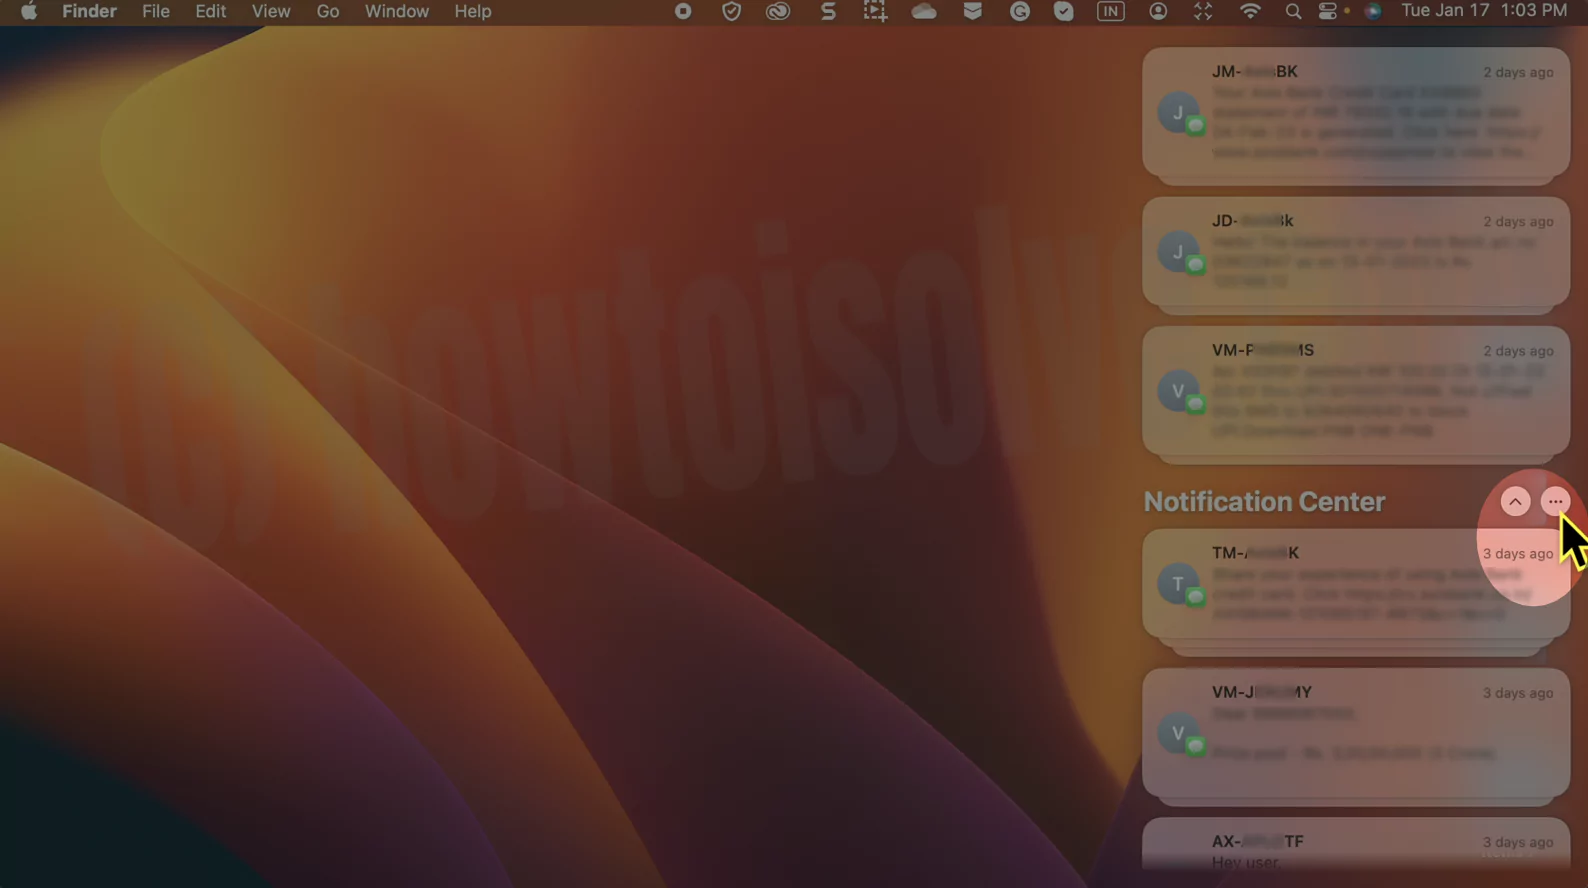
2→ Next, click on [Number] More Notification to glance at all notifications.

3→ Furthermore, choose More Icon(Circle Filled With Three Horizontal Dots).
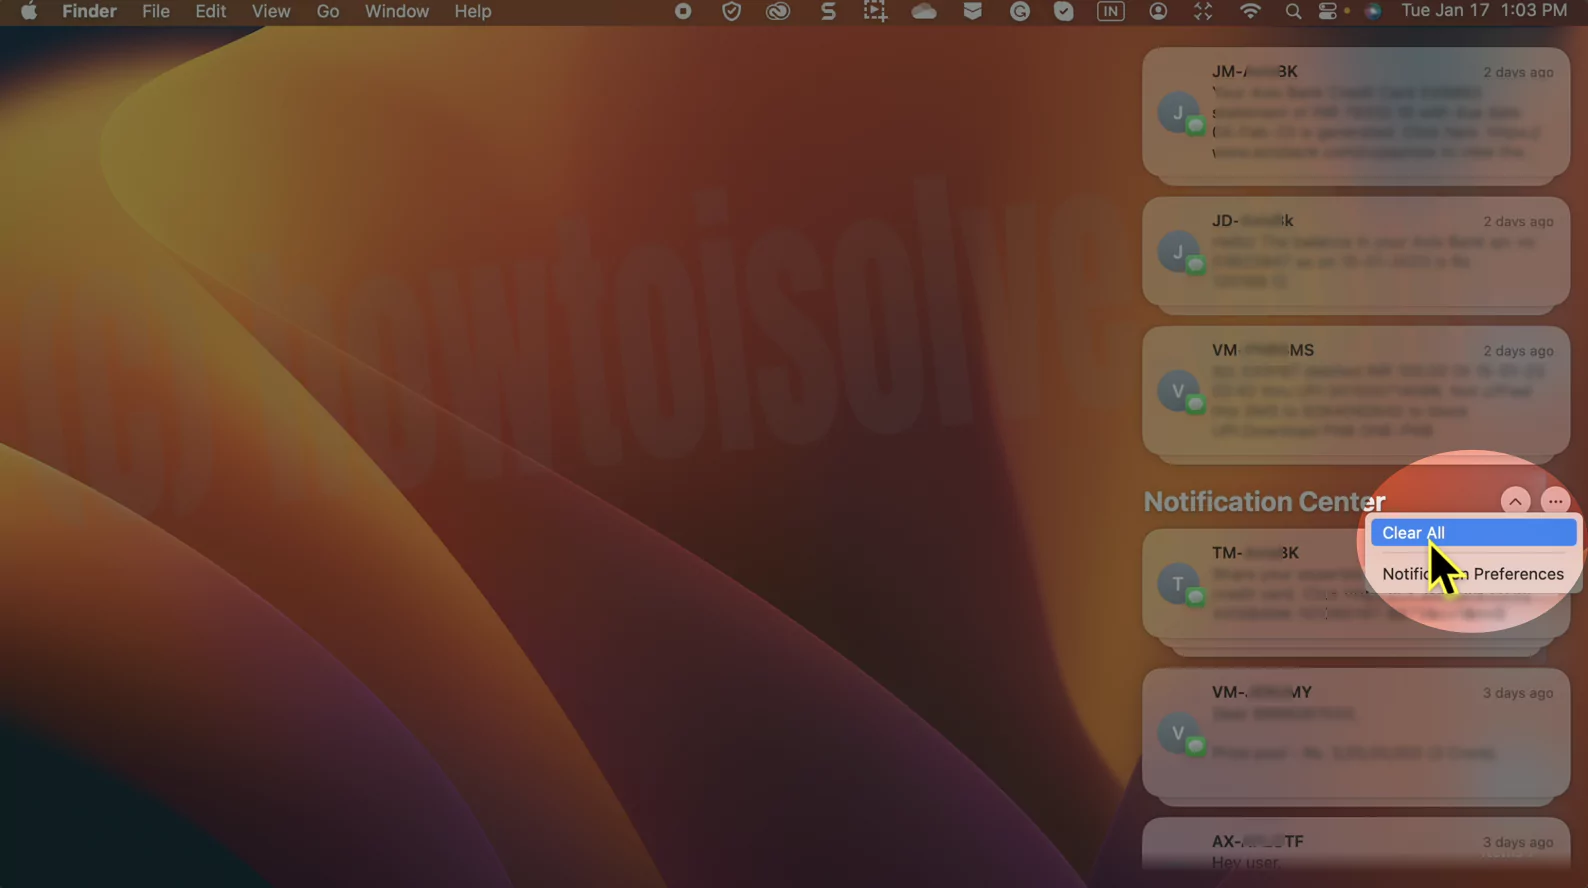
4→ And from the drop, select Clear All.
That’s It!
Different Ways To Turn Off Message Notifications On Mac
Too many notifications during working hours can indeed frustrate you. And especially those useless promotion notifications are pretty annoying. However, using a Focus on macOS isn’t the best to go since it can lead to missing important notifications. Here is how you can manage notifications on Mac.
Option 1: Disable Text Message Forwarding On Mac
First thing first, disables text message forwarding on iPhone.
- Navigate to Settings App on your iPhone.
- Choose Messages.
- Search and select Text Message Forwarding.

Turn off your Mac Computer from the following list. Once you do so, your iPhone will not forward unimportant messages on Mac.
Option 2: Turn Off Messages Notifications Show in Notification Center
You can completely let out the notification on Mac. Keep note this setting will disable both normal and iMessages on Mac.
- Click on the Apple Icon from the top left corner.
- Choose System Settings…(System Preferences…on macOS Monterey And Earlier).
- Click on Notifications (Notifications & Focus).
- Select Messages and disable the toggle next to Show in Notification Center.


Option 3: Disable iMessage On Mac
As of now and forever, Apple offers more control to users to use Mac. You can disable iMessage on Mac, but you will still receive messages on iPhone and iPad.
- Open the Messages App on Mac.
- Choose Messages from the top menu bar.
- Click on Settings…(Preferences…for macOS Monterey And Earlier).
- Select iMessages > Sign-Out.
Option 4: Disable Messages Notifications From Selected Contacts
Do you receive too many spam messages from specific contacts? Do follow to disable messages notification from particular contact on Mac.
- Open Messages App on Mac and access the conversation you want to get rid of.
- Click on (i) Info Button from the top right corner.
- Enable the toggle next to Hide Alerts.
Option 5: Block Contacts In Messages App
If you want to disable the contacts altogether to send messages on your Mac, you have to block it, nothing more!
- On Mac, open Messages.
- And click on Messages from the menu bar.
- Select Settings…(Preferences…for macOS Monterey And Earlier).
- Choose iMessages.
- Click on the + Icon on the bottom left corner of the screen. And select Contact from the list.
That’s It! You will not receive any messages from the contact you configured in the Blocked Contact list.
Bottom Line
It’s fair to say that having a long array of notifications can drain Mac’s Battery Faster, at the same point, can lead to too many annoying messages. I hope so; the guide mentioned above has worked for you.


