
A new and Handy feature of macOS is a split view, Using these features, you can do your work on different applications or documents side by side on the same screen easily. Split view automatically arranges your space equally when you put running programs or apps in split view mode. Now Mac can show Top Menu Bar Full-screen windows or Split Window to access app options quickly.
You can also do your job by drag and drop from one app to another. If you don’t want split-view features, you can remove/Disable split-view on your Apple Mac, in this tutorial. First, I show how to use a split view on an Apple computer, if you don’t like then you can disable or re-enable again in the future for use on the same device.
Split view Compatible device: The Split view is available on all devices, Running on the latest macOS. (M1 Mac mini, MacBook Pro, MacBook Air, iMac).
You can put your apps in split view, most users use Browser (Safari, Chrome, Mozilla), Documents, image editing Apps, Developers tools, and more.
Keep your apps updated with the latest updates, Because new app updates will improve and be compatible with a Split view.
How to Split Screen on Mac, MacBook Pro, MacBook Air, iMac, Mac Mini
Step 1: Go to the top right corner of the program, and Hover your cursor for seconds or Click(hold/ Pressed) on the full-screen green icon until you see the split-screen. Suppose ‘Tile Window Option is not Showing’, Split View Not Working on Mac. 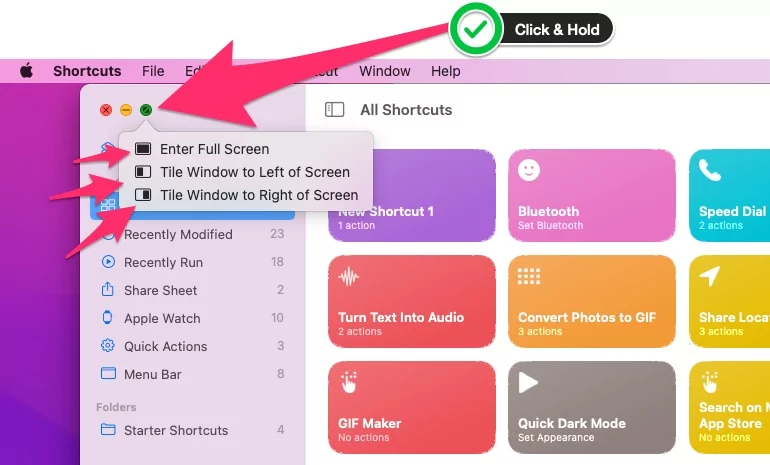
Step 2: Leave windows in the region by dragging into. For the other view, you can set any of them. Select One Program in another split window.

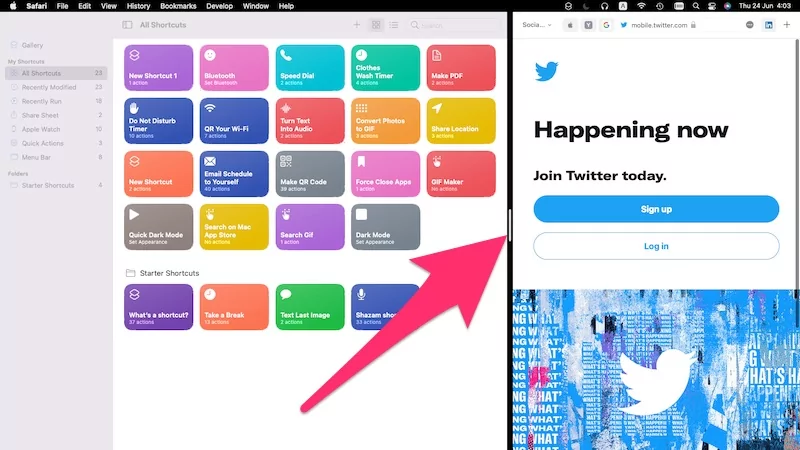
Step 3: Now, you can easily view apps/ Programs side by side on a single screen. Also, we can Resize and split the window using Slider.
Replace or Change Program in Split Window
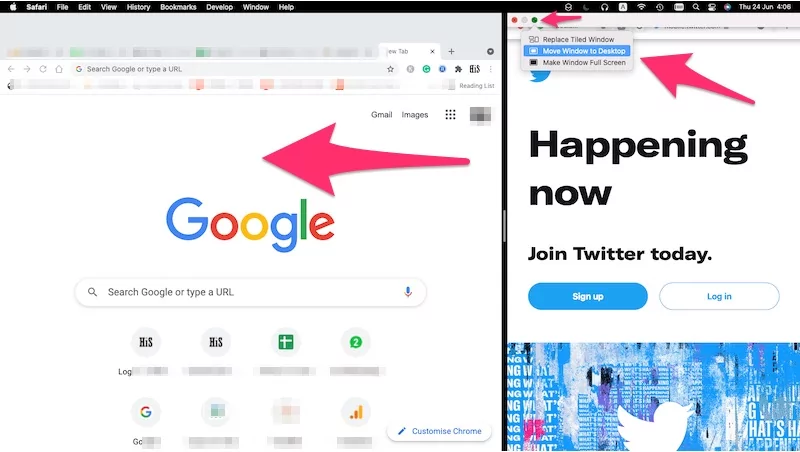
Step 1: To change the Program in split windows, Click and Hold on the Green icon from the App minimize bar, and see the option for Replace Tiled Window.

Step 2: Select another program for the Tilled window and use the side-by app on Mac.
We can Preview all the Windows on Mac using the App Switcher Key from the Keyboard.
💡 Mac Split screen Without Fullscreen
Should I use a Split-screen With a top Menu Bar, By Default Top Menu Bar hidden on full screen, and split-screen mode on Mac? Here are the settings for unhiding or showing the Top Menu Bar in macOS Monterey or later macOS.
Step 1:
- For macOS Sonoma: Apple Logo > System Settings > Control Center > Automatically hide and show the menu bar > Never.
- For macOS Monterey & Earlier: Apple logo > System Preferences > Dock & Menu Bar > Dock and Menu Bar from sidebar > Uncheck “Automatically hide and show the menu bar in full screen”.
Step 2: See the Below screen with a Split screen with the top menu bar.
That’s it.
Cons: in Split screen we can show Top Menu Bar only in Split screen but not Dock.
Tip 2: If you need the Top menu Bar and Dock on a Mac Desktop in Split-screen, Resize the app window screen using the mouse pointer, Put both windows side by side, and start working on side by side window without a split-view option.
Open Split View on the Mac in With Shortcuts?
Now, Dreams come true with the Apple Shortcuts app on your Mac. So, MacOS Monterey or later macOS users can create Split Screen Shortcuts for Split apps in a Screen in the Shortcuts app. Here’s how to create a Shortcuts on Mac Shortcuts app.
Step 1: Open the Shortcuts app on Mac > Click on the Plus sign to add a new shortcut.
Step 2: Search ‘Split‘ in the correct search box in Search for apps and actions > Double click on “Split-Screen Apps“.
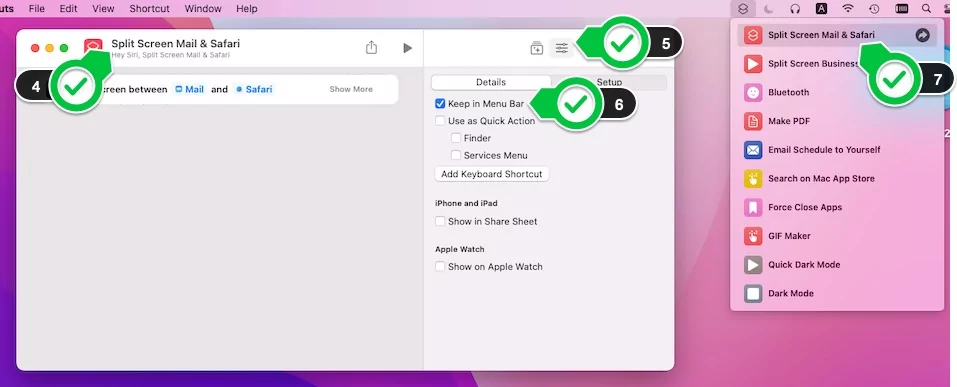
Step 3: Now, the Script added in Shortcut, Select Two apps from a drop-down menu or select Ask Each Time.

Step 4: Give a New name to quickly identify or also add This shortcut in the top Menu Bar. To run, Click on Shortcut Name from the top Menu Bar. Two Apps will be arranged in split view without a full screen.
That’s it.
How To Turn Off Split Screen on Mac
As we know, we can change or Replace Windows in Split Screen, but we can’t Turn off split-screen automatically on Mac.
- To Exit the Split-screen and move both Applications to the Desktop, Click on the Close Red button, and your Split App moves to the Desktop.
- Another Split App becomes full-screen, Press ESC Key from the Keyboard to move another full-screen app onto the desktop.
That’s the Easy method to turn off the split screen view on Mac and Exit both applications from the split screen window.
How to Disable Split View on Your Mac
- From the settings, you can remove the split view feature from your Mac
- Go to the Apple logo() > System Settings/Preference.
- Now, Select Desktop & Dock. (Mission Control in macOS Monterey & Earlier).
- Uncheck/Disable ‘Displays have a separate space’ option. To disable Split View on Mac.
- For MacOS Ventura & Later

- For MacOS Monterey & Earlier
- For MacOS Ventura & Later


To apply changes, you must log out of your system.
Pro Tips: Show Top Menu Bar in Full-screen window
If you have any confusion or Problems, you Won’t need help in using a split view in MacOS, or the Split view not working on Mac. Kindly share with us in the comment box.


