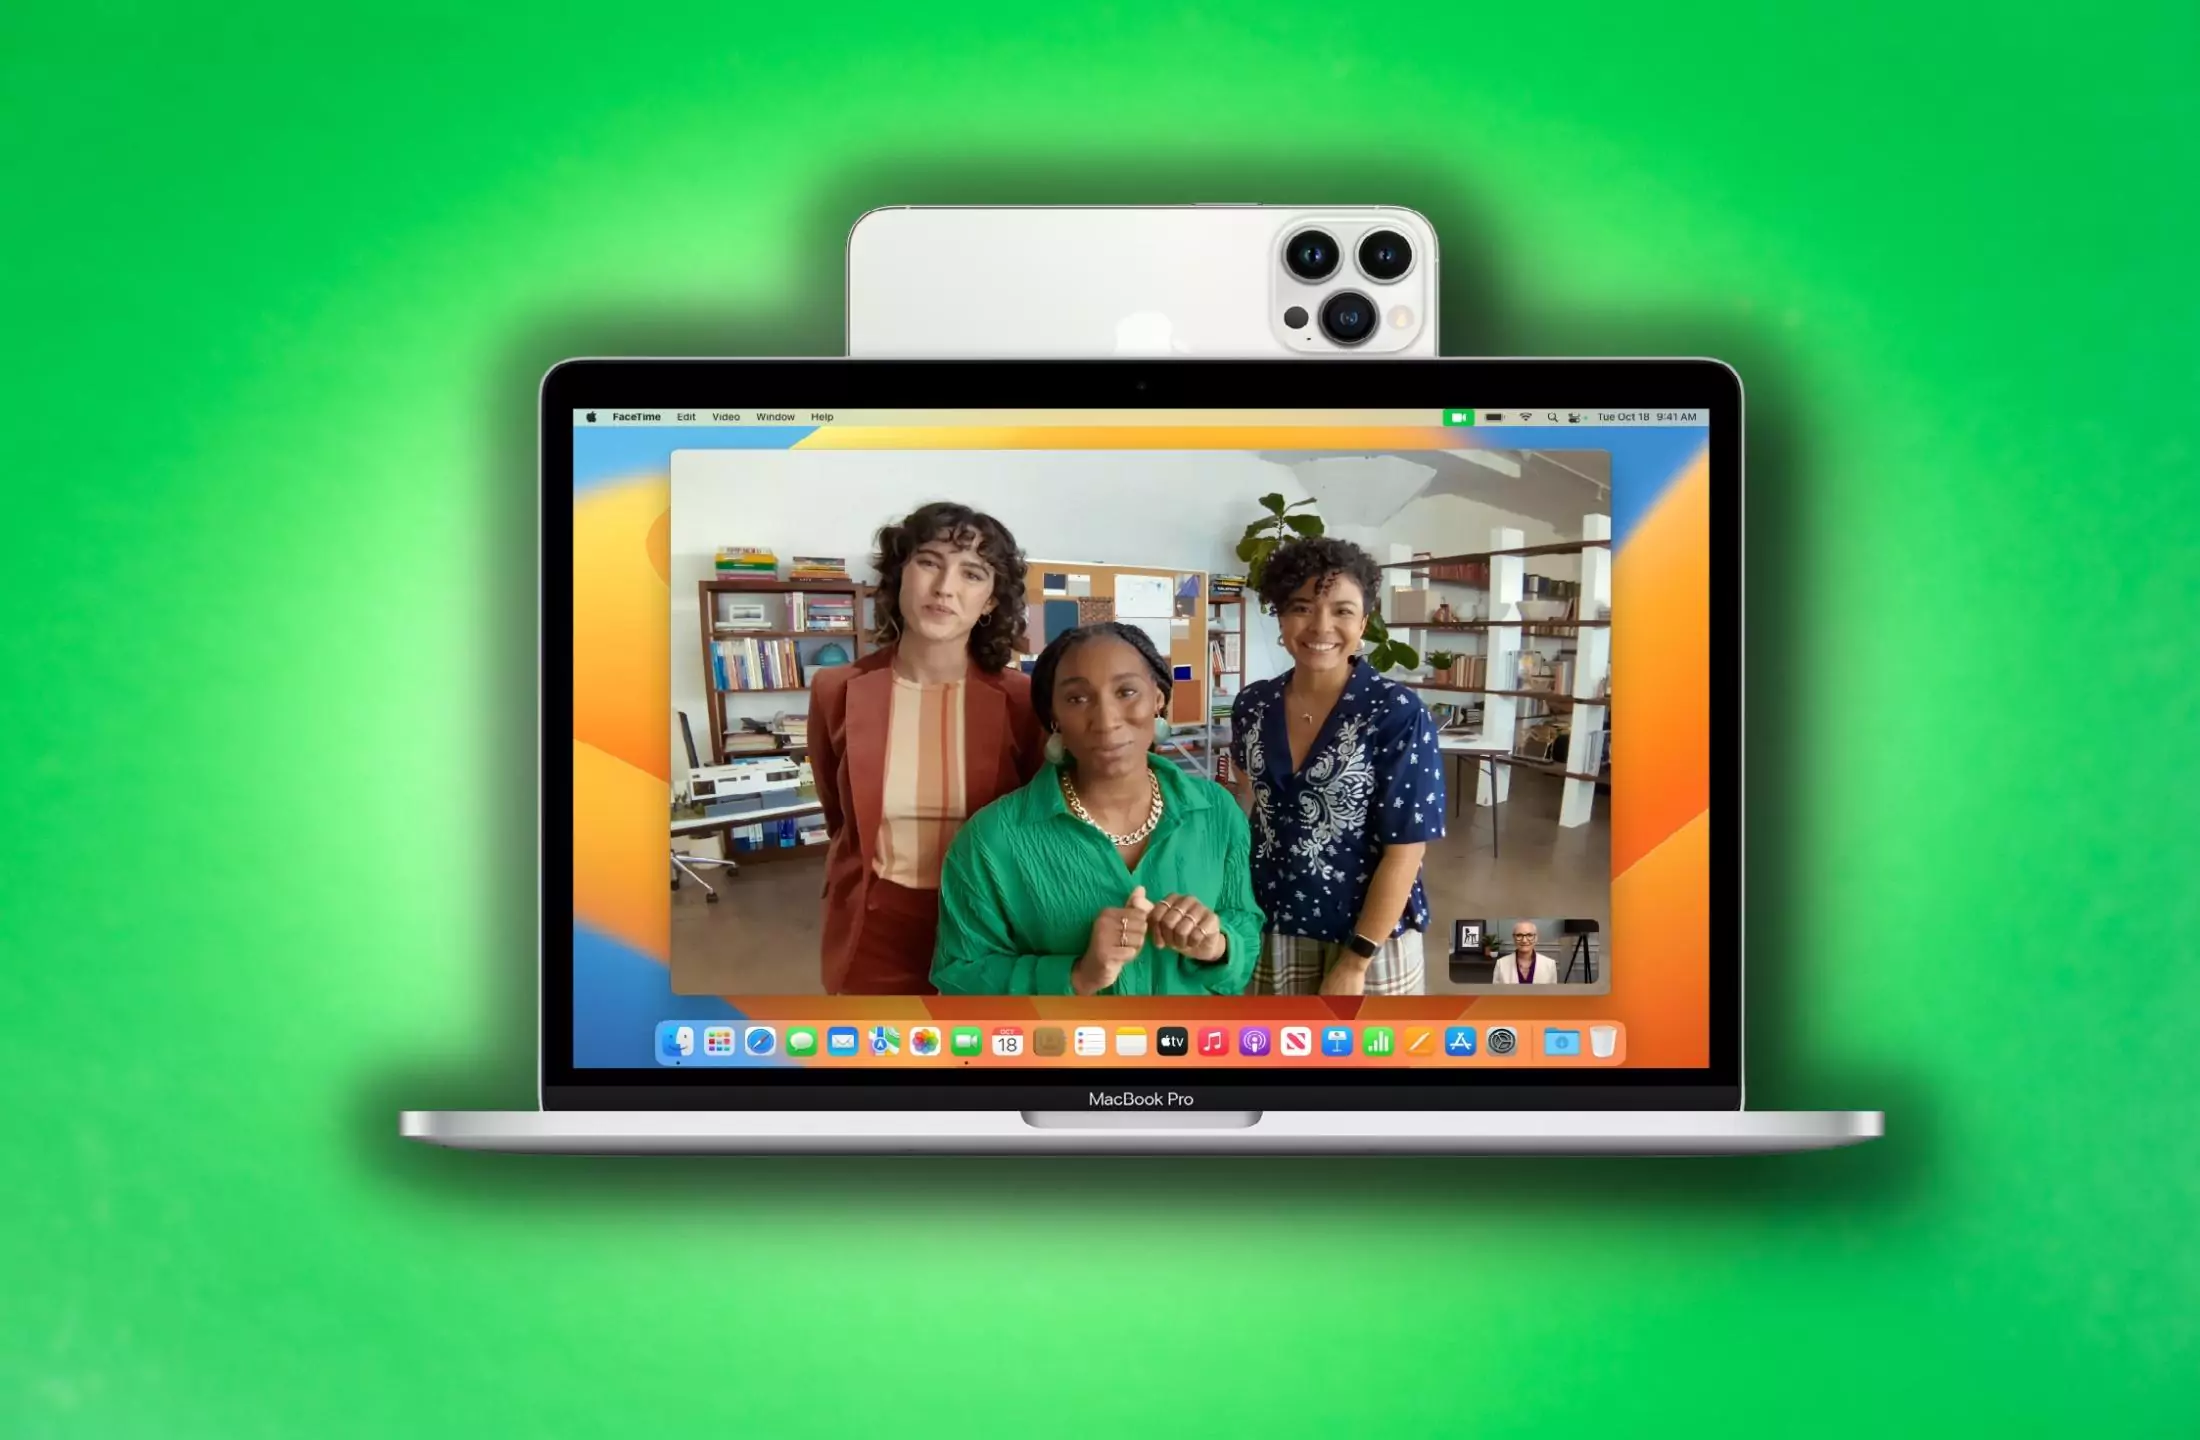
Stay centered all the time on Video Calls or Video Meetings on Mac, When you move around. Use your iPhone as Mac Webcam using the Continuity camera feature in macOS Ventura.
Stage feature uses smart machine learning to adjust iPhone or iPad’s front-facing ultra-wide true depth camera on video-supported apps like Facetime, Zoom, Microsoft Teams, Google meets and more.
Further, Center Stage Follows you or someone with you when you move around on video call or video conference. Therefore, the name “Center Stage” implies that it keeps focusing on you or with you in the center of the frame.
Additionally, Compatible iPhone and iPad users initially supported the center stage feature. However, now you can use the “Center stage” feature on a mac using an iPhone as a webcam or with a Studio display.
Now you got an idea of what Center Stage is. But you must be thinking about how to use Center Stage on mac using an iPhone as a webcam. Or how to enable center stage on mac. Therefore, read along to learn the same with quick and easy steps.
How To Setup Center Stage On Mac Computers
Unlike the Desk View with Continuity Camera, you can now use the Center Stage feature.
What Are The Requirements To Use Center Stage Feature On Mac?
Now to use the Center Stage feature, there are some service requirements you need to fulfill.
- Must have Mac Computer with macOS Ventura & Later Versions.
- Ensure that Wi-Fi and Bluetooth must enable on both iOS and macOS devices. Or you can connect an iPhone to a Mac using Best USB-C Lightning Cable.
- iPhone 11 or later devices (iOS 16 and later) or an external Apple Studio Display needs to attach to Mac Computers.
Important Note: If the Mac encounters an issue while connecting wirelessly, you can still set up it using Best USB-C Lightning Cable.
After reaching out all needs to collaborate on iPhone as a webcam to make you remain in the center of the camera frame while roaming around in the room during video meetings or calls on Zoom, Google Meet, Facetime, Microsoft Team, etc.
Enable The Continuity Camera Webcam To Use Center Stage
1. On iPhone 11 and later models, navigate to the Settings App.
2. Choose General > AirPlay & Handoff.
3. Select toggle next to the Continuity Camera Webcam.
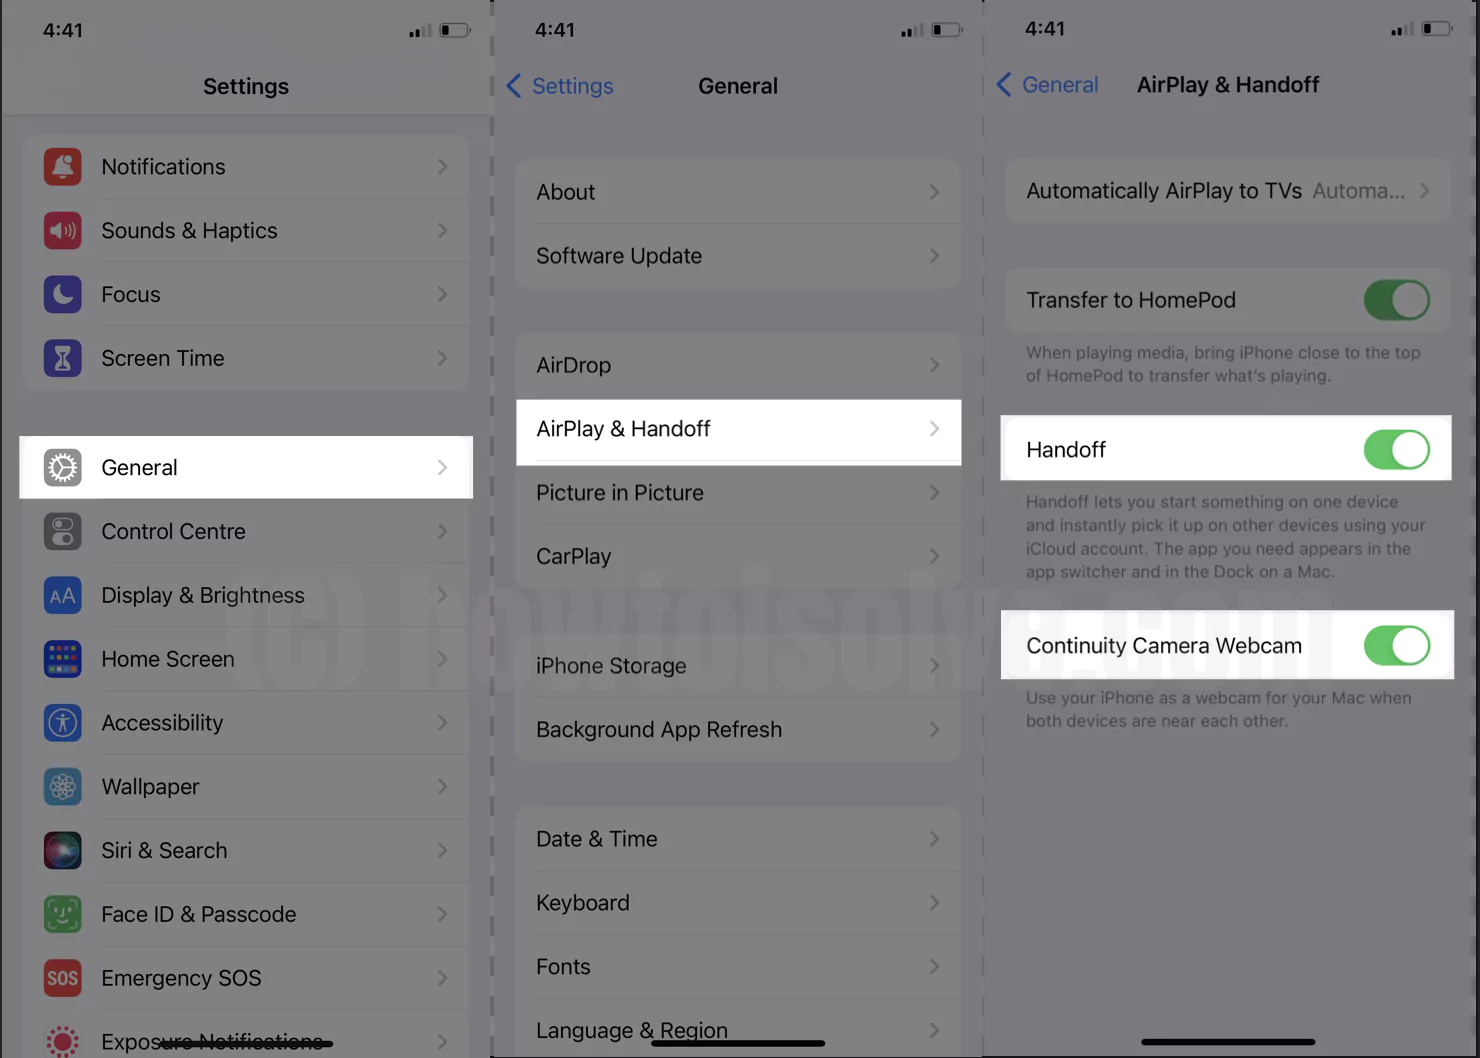
Now bring both Mac and iPhone together within the range of 40 Ft. Start Using Center Stage after connect your iPhone as a Webcam (Continuity camera)
Use Center Stage Effect
You can use the Center Stage with Zoom, Google Meet, Facetime, Microsoft Team, etc. For instance, we will take FaceTime.
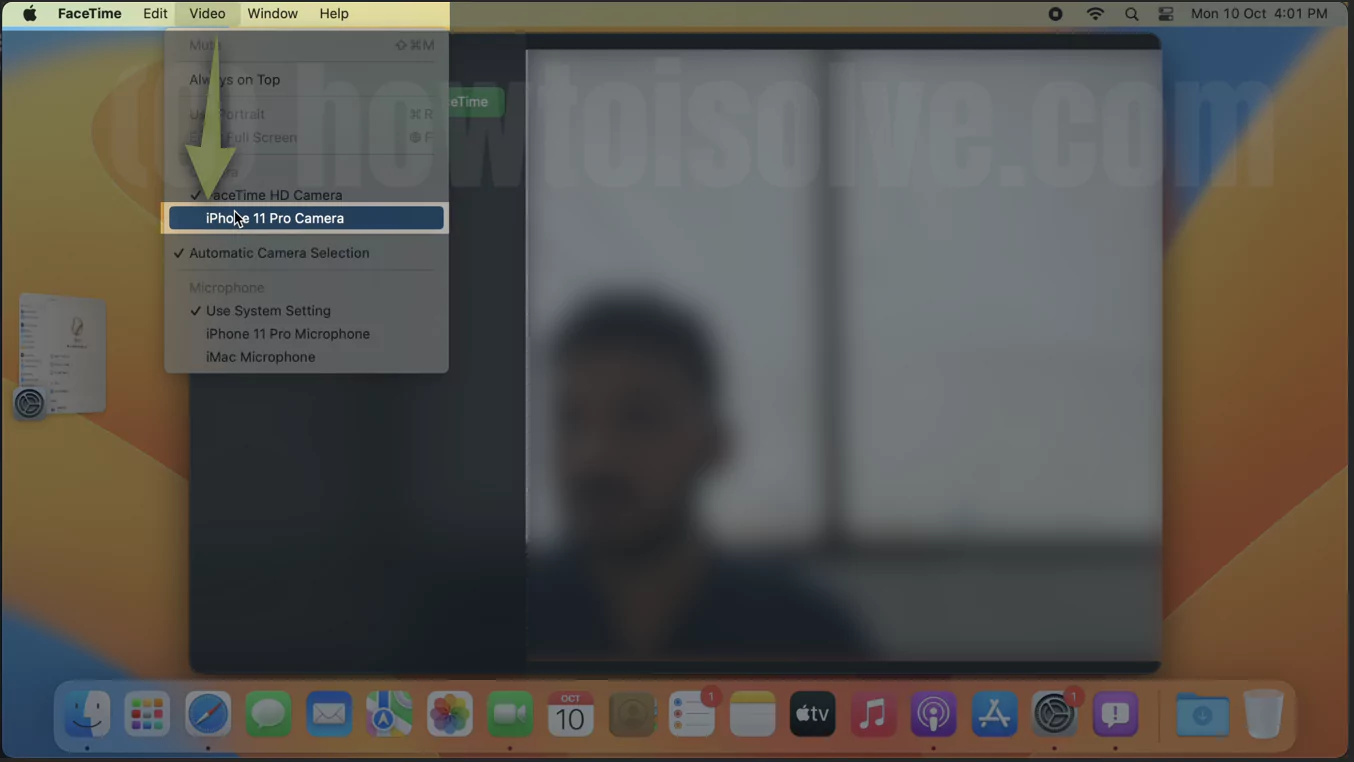
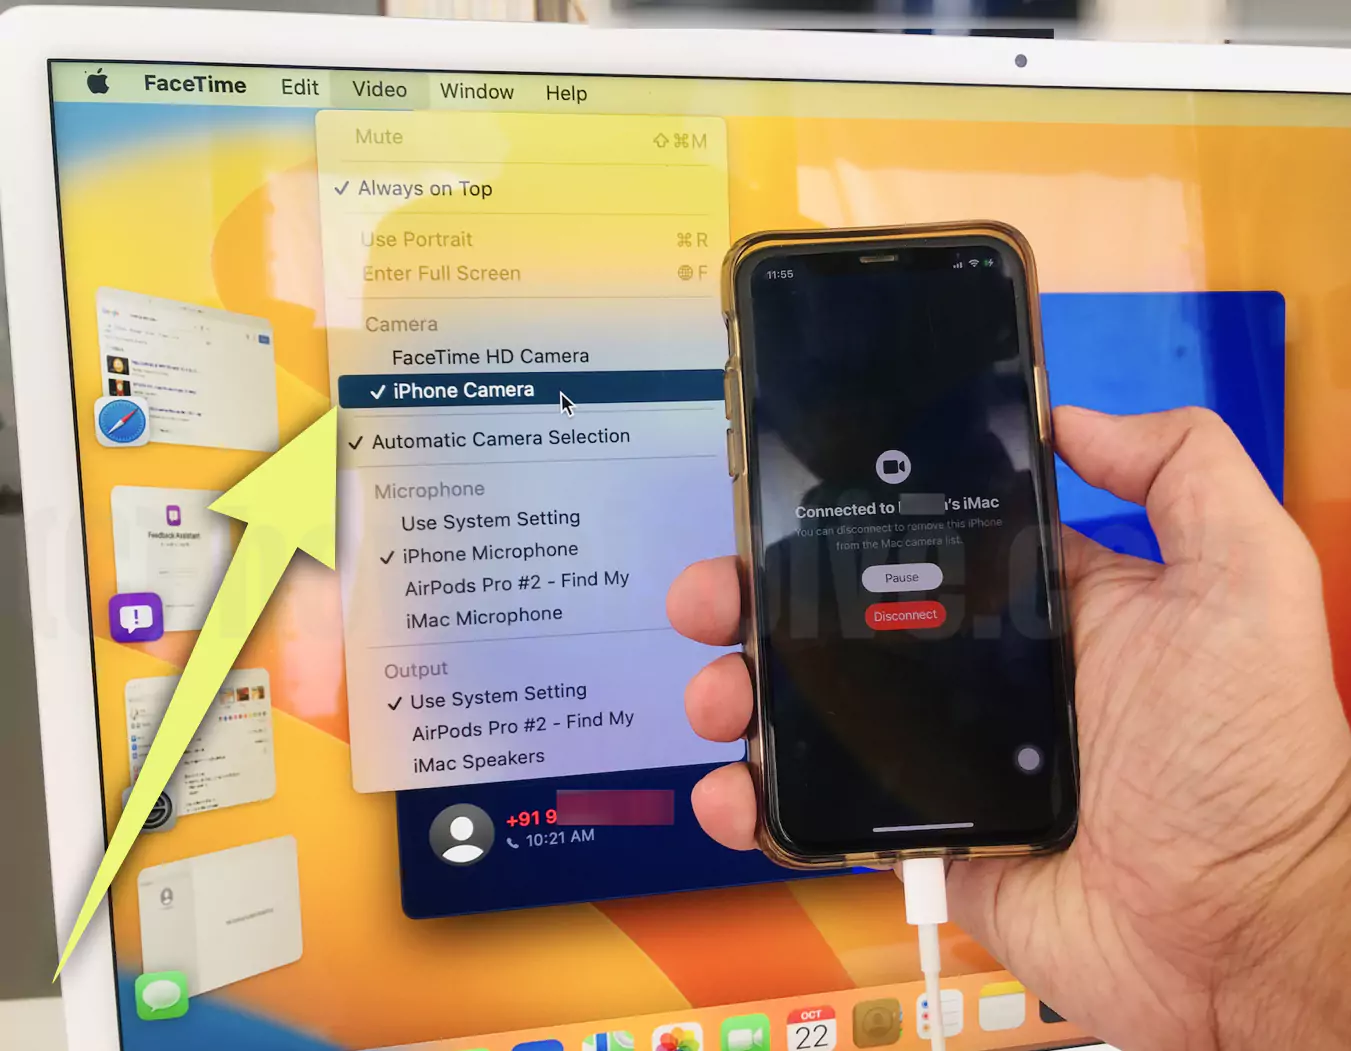
1. Open the FaceTime App. Ensure Bluetooth and Wi-Fi on both Mac and iPhone screen is unlocked. From the FaceTime Menu Bar, select Video. Next, choose the corresponding iPhone As Camera.
Or connection using the USB-Cable is accurately configured (Connect iPhone to Mac using Lightning cable).
2. Now, Move to Control Center at top of the mac menu > Video Effect.
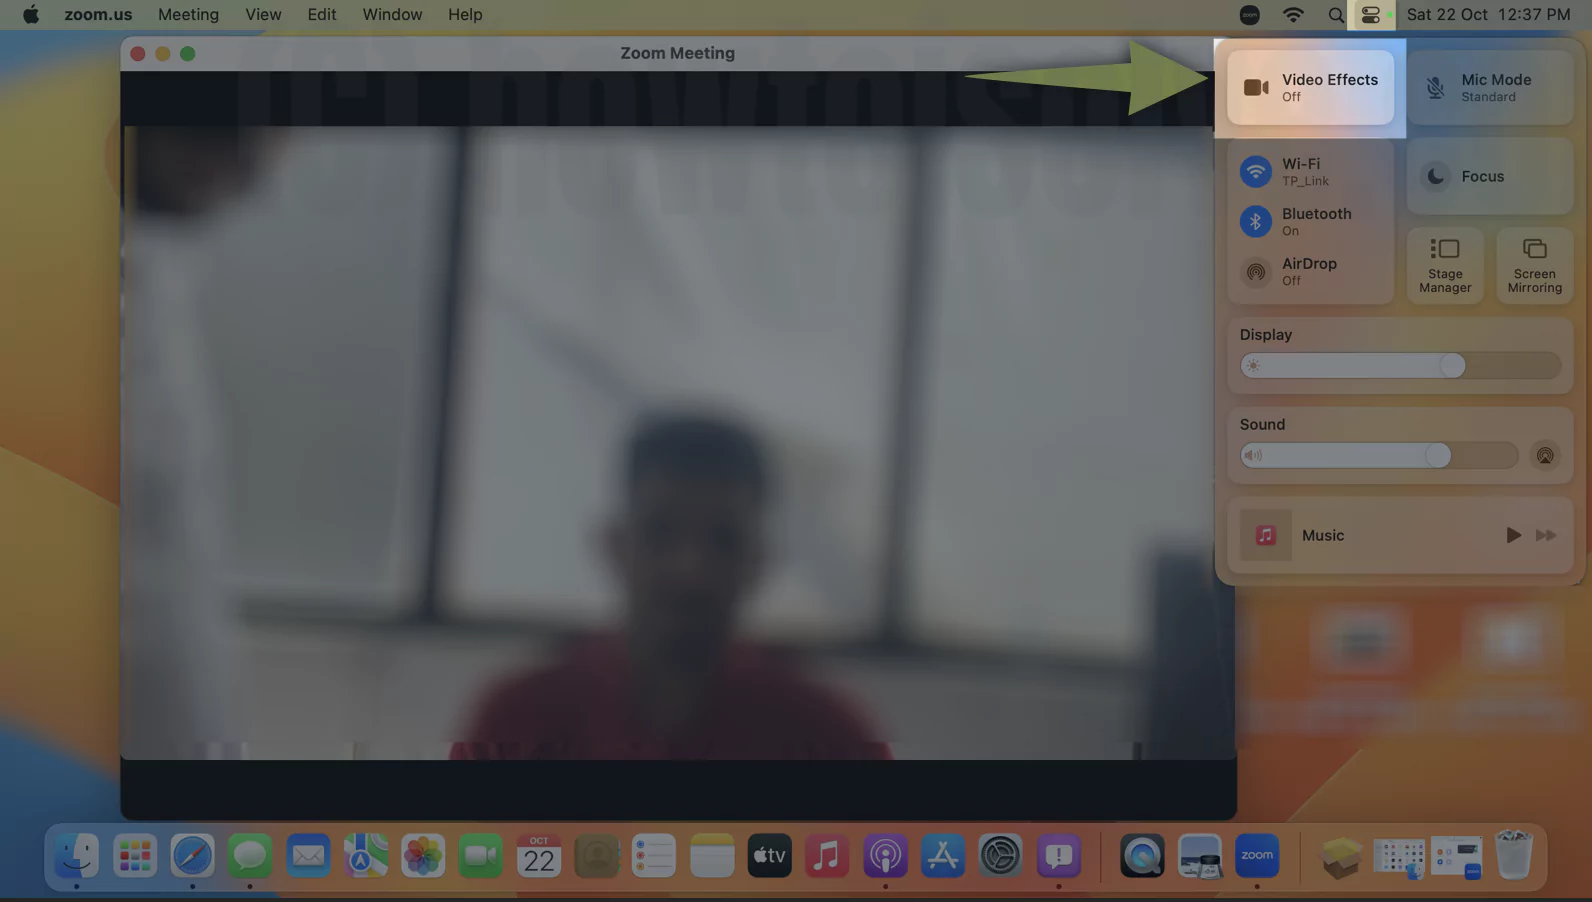
3. In the Video Effects menu, there will be various options Center Stage, Portrait, Studio Light, and Desk View.
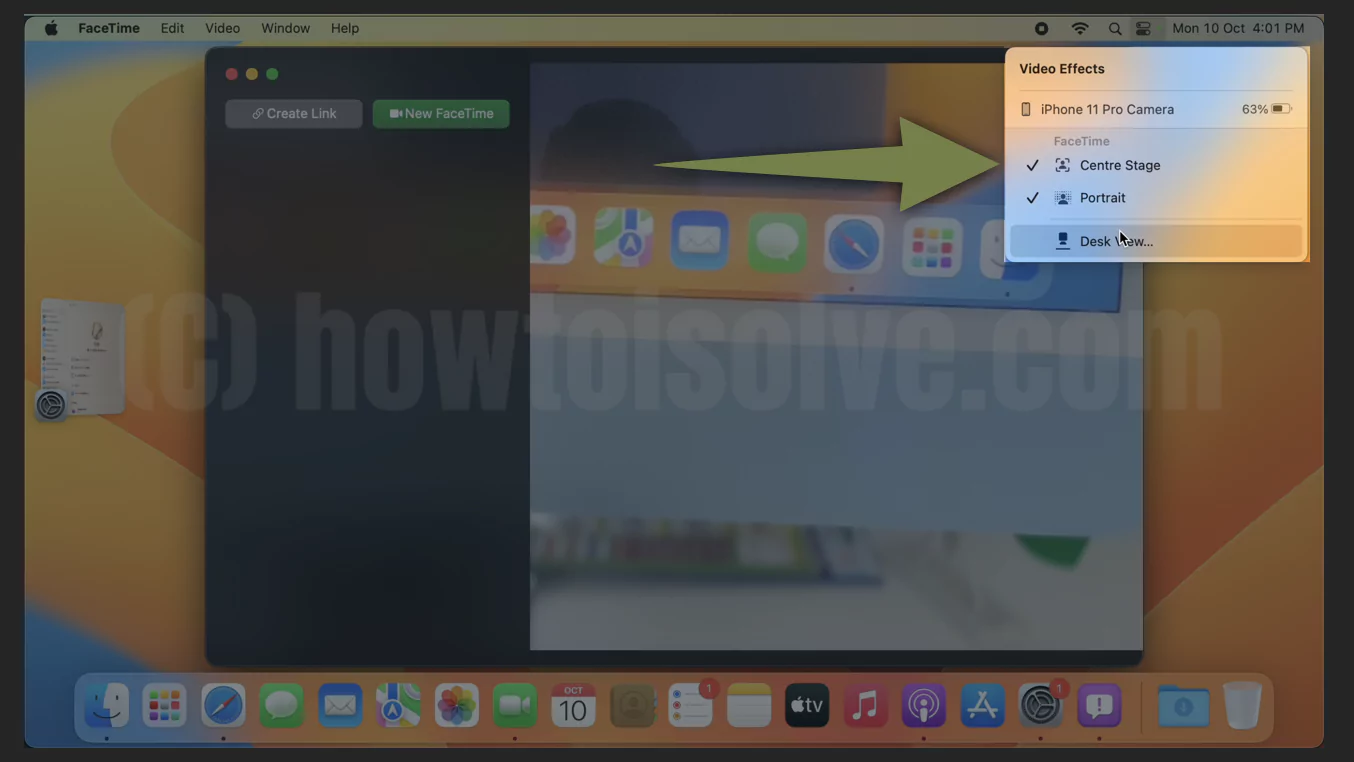
4. Select Center Stage.
That’s It! Now you can use the center stage feature for endless video calls and meetings.
How To Turn On/Off Center Stage On Mac
While using FaceTime or any other Video Calling application like Zoom, Google Meet, Facetime, Microsoft Team, etc., if you want to disable Center Stage, select the Control Center > Video Effects.
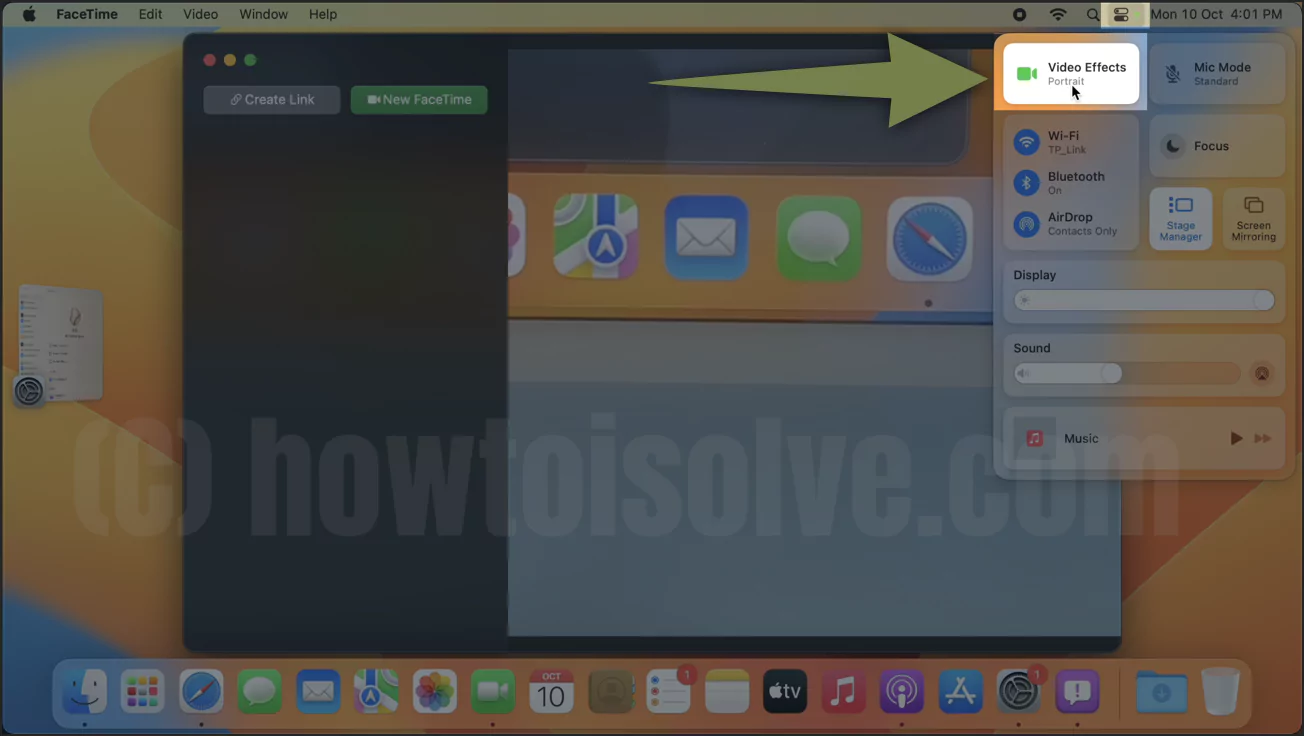
Click on the Center Stage to turn it off. To re-enable it, follow the same steps.

How To Use Center Stage On Zoom or Other Mac apps
As of now, the Center Stage is compatible with the vividly used Zoom video conference app. So here are the steps to use the Center Stage On Zoom.
1. Open the Zoom App, and then create or join the meetings.
2. Now select Share Video ˆ and then iPhone from the list. or use (Shift + Command + N) to Switch Mac camera.
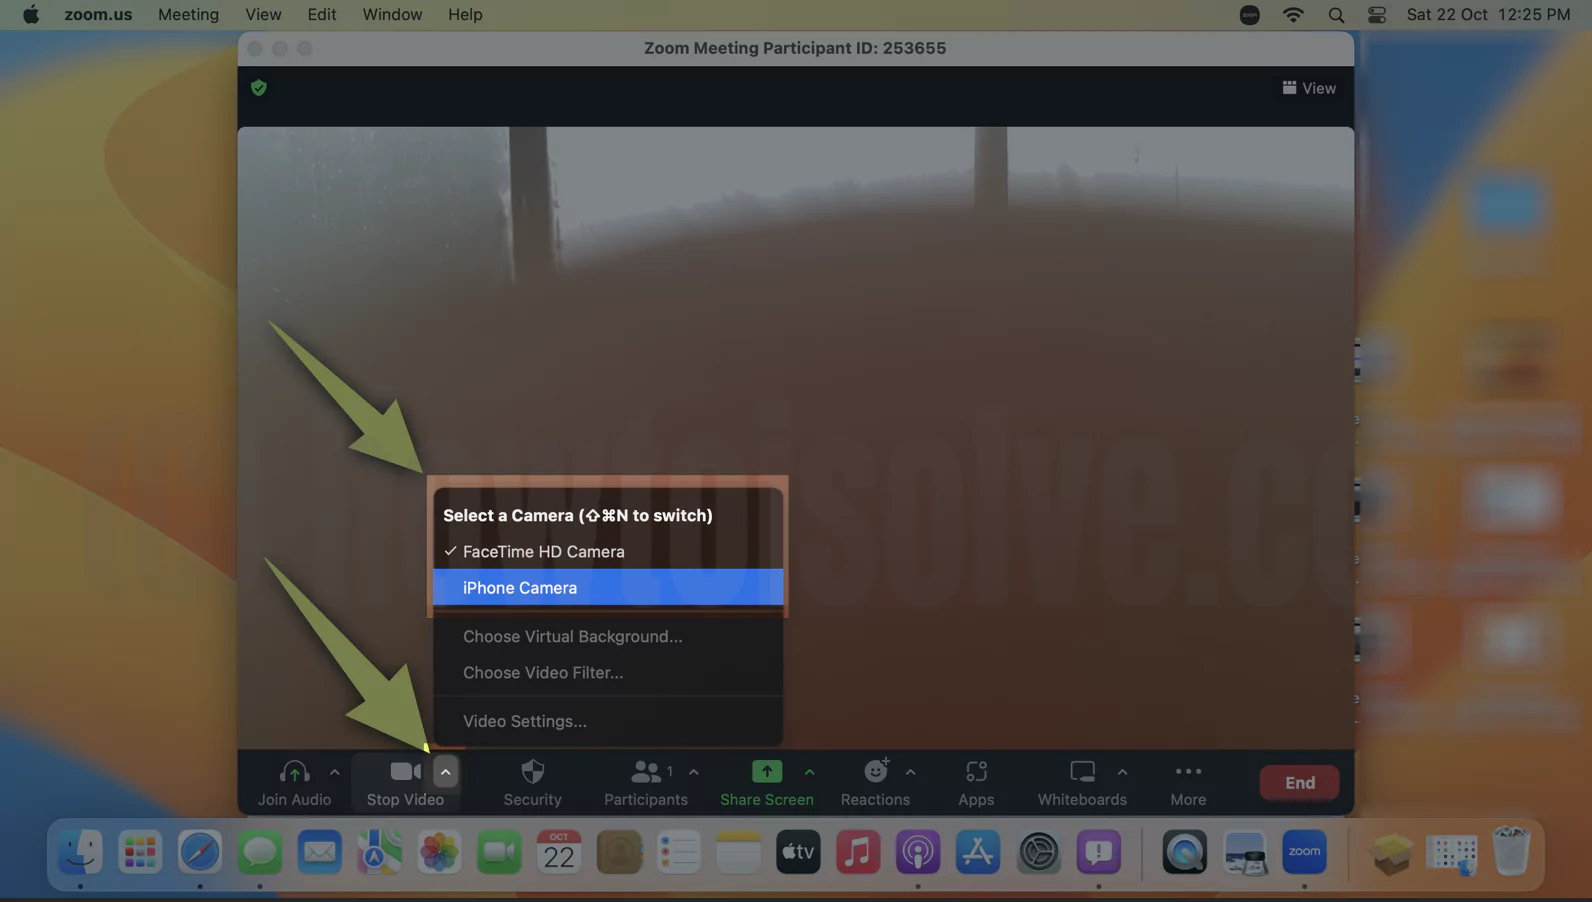
3. Now, navigate to the Control Center from the Menu Bar. Choose Video Effect.

4. From the Video Effect Menu, Center Stage, Portrait, Studio Light, Desk View, select Center Stage.
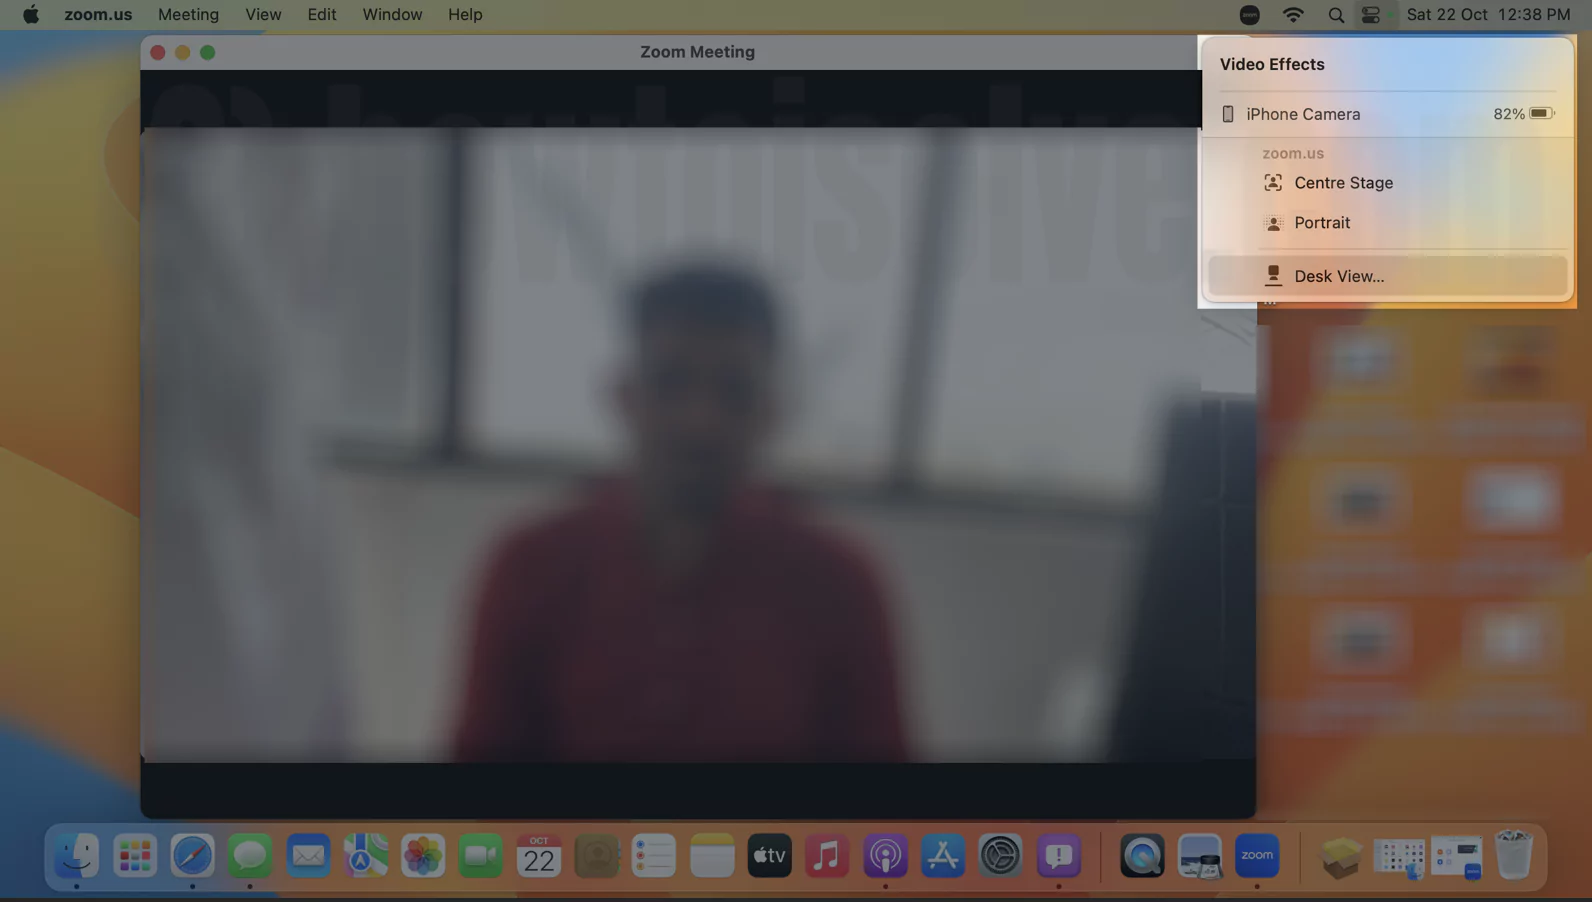
Now, Zoom app use the Center stage for video call.
Use Center Stage in Microsoft Teams
1. Open the Microsoft Teams app on Mac. Click on More options > Choose Change Camera Option or iPhone camera.
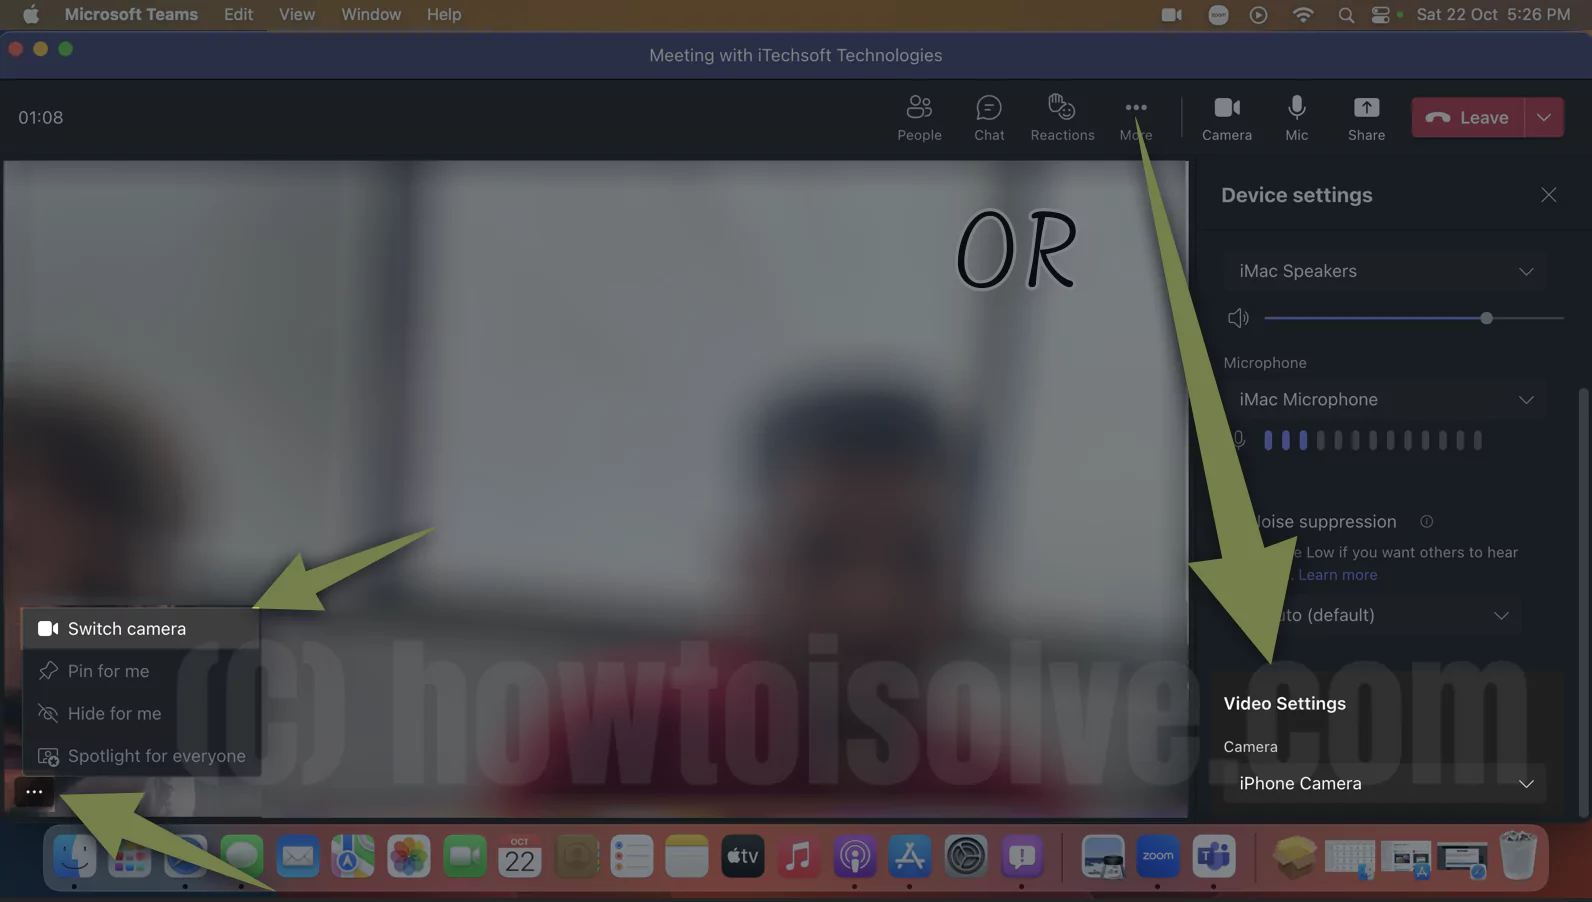
2. Next, Under the Video Effects from control center > Center Stage.
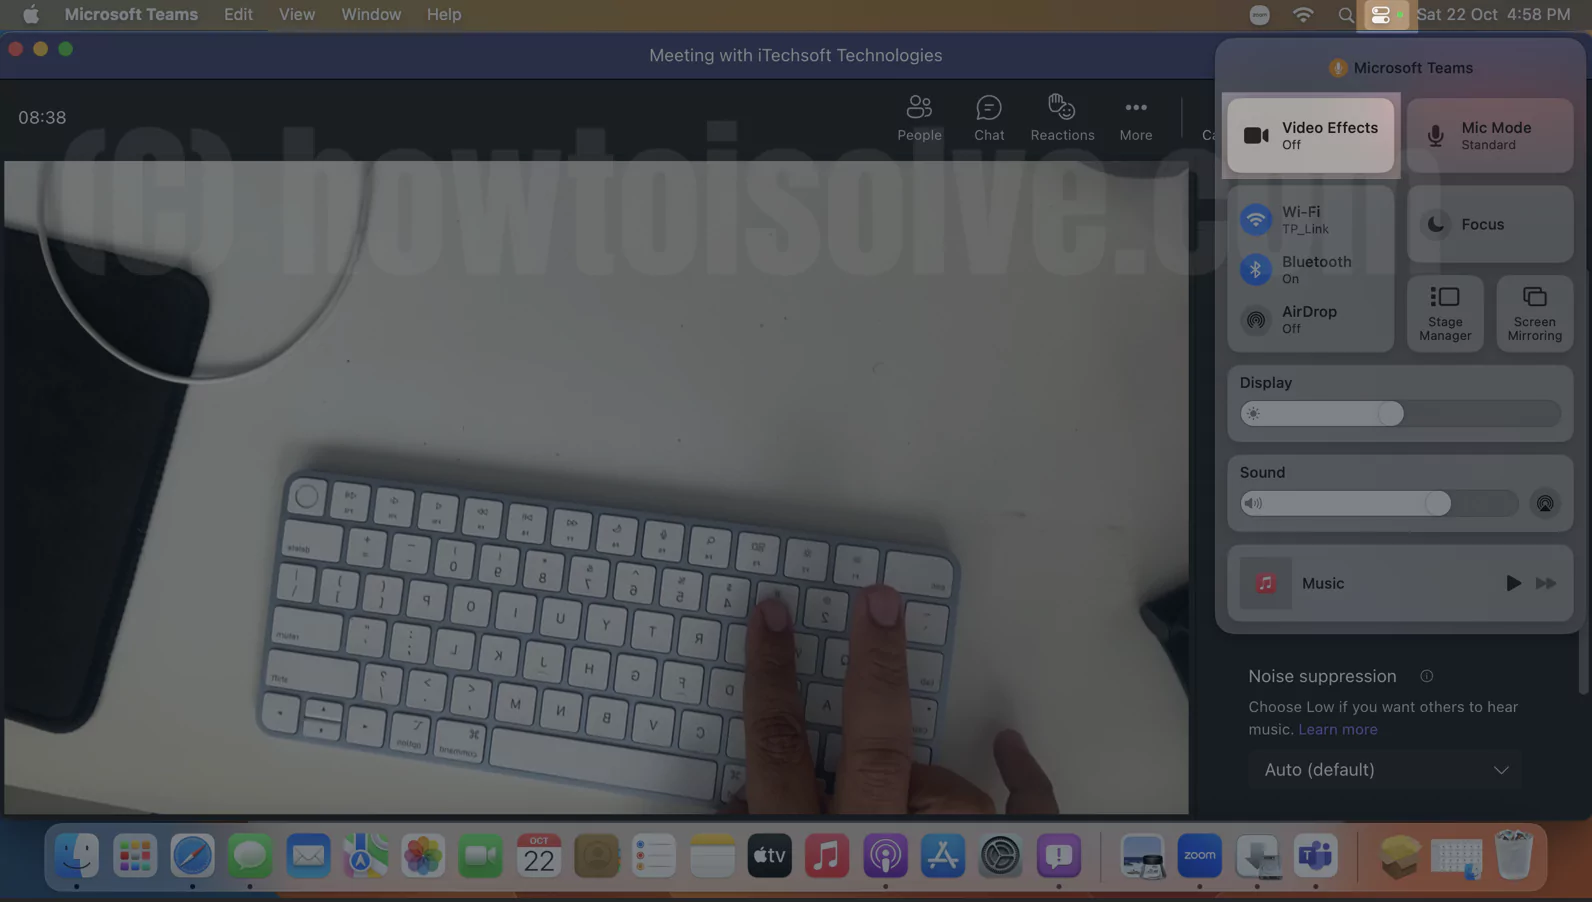

That’s it.
CONFIGURE CENTER STAGE!
When the center stage is enabled, you can always be in the camera frame while attending the meeting using FaceTime, Zoom, or any other video conferencing app. But it can only be used when all its requirements are fulfilled, as mentioned above in this article.
