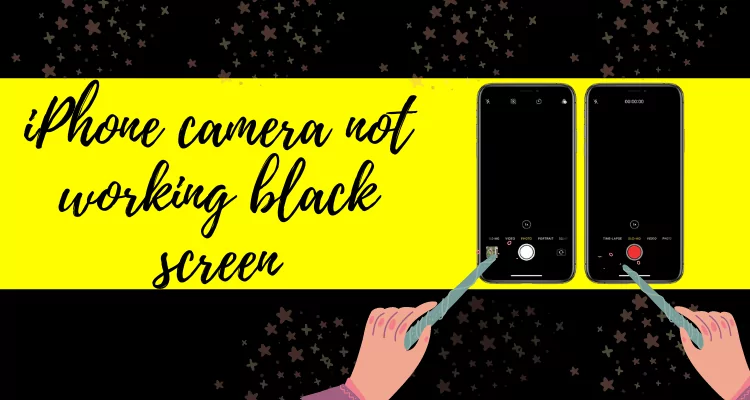
After updating to iOS 18, many iPhone users experience issues with the camera not working. This can range from a blank screen to app crashes. In this article, we’ll explore 12 effective fixes to get your iPhone camera functioning properly again, ensuring you don’t miss any moments.
iPhone Camera not working -Troubleshooting tips
1. Close the camera app from the app switcher on the iPhone screen
Double-tap on the home button to see the multitasking screen, Swipe up your finger on the app to close it completely.
Helpful: Close the app without the Home button.
2. Restart or Reboot your iPhone to get rid of the iPhone Camera not working
Simple reboot or Force restart iPhone,
Restart the Press Sleep/ Wake button until you see the Apple logo on the screen.
Force Restart or Hard Reboot/ Hard Reset
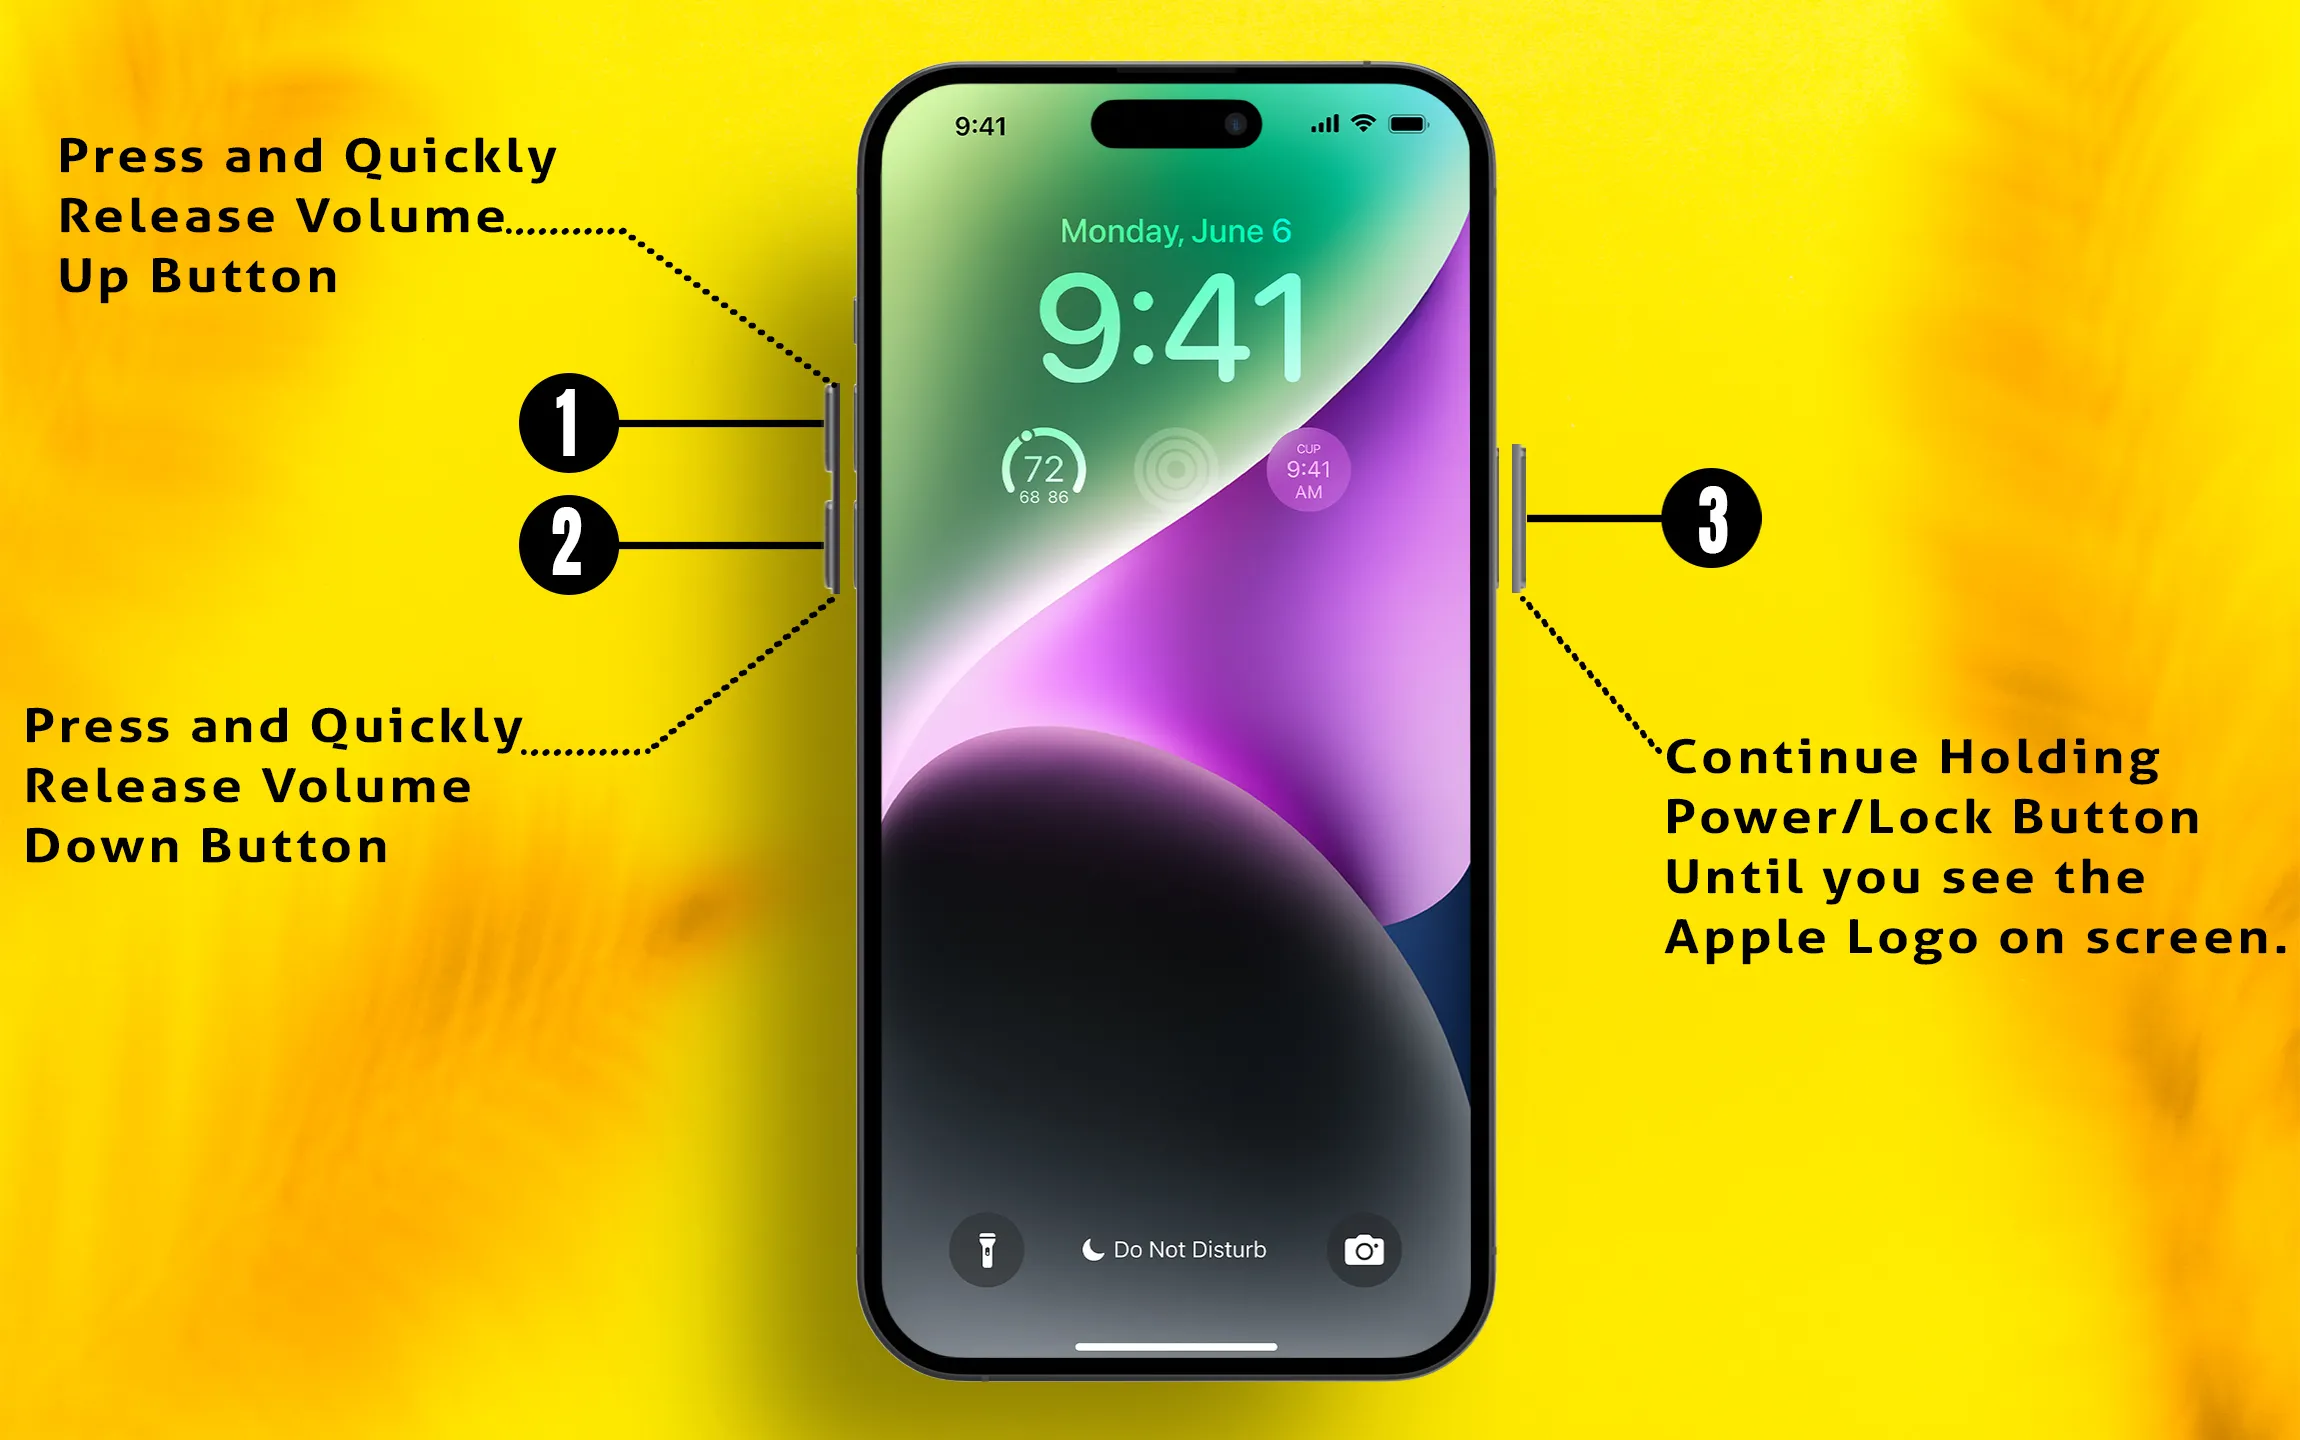
1: Press and Quickly Release the Volume Up button,
2: Press and Quickly Release the Volume Down Button,
3: Press and hold the Side Button until you see the Apple logo on the Screen.
To start the iPhone, press the power button again until the startup Apple logo appears on the screen.
3. Check the New iOS Update
To get the latest updates available from the Settings app, go to the Settings app > General > Software Updates and check for new updates.
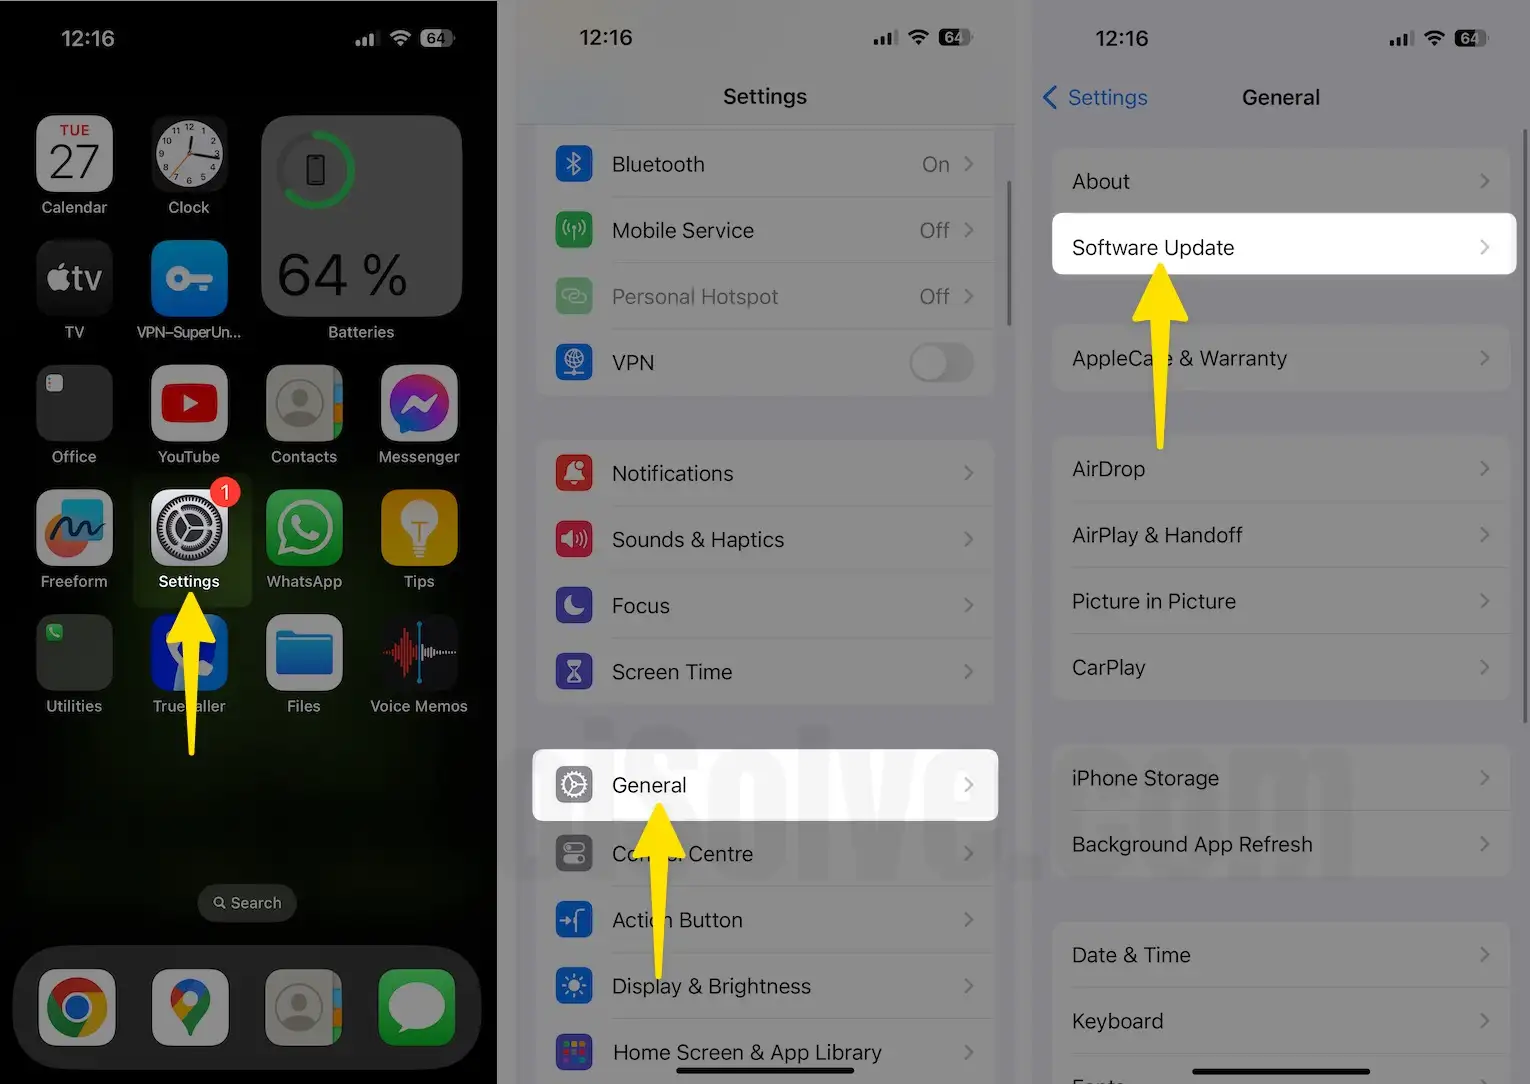
Please update your iPhone operating system and try again to use the Camera App for mobile photography.
These tricks also work most of the case like a live photo not working, Unable to switch between different camera mode (TIME-LAPSE, SLO-MO, Video, PHOTO, SQUARE, PANO, PORTRAIT MODE).
4. Reset iPhone Settings to Fix iPhone Camera Not Working
Auto-fix internet settings error and wrong setup, restriction to the default settings automatically after Reset Settings only,
- Go to the “Settings” app.
- Tap “General.”
- Find and open the tap “Transfer or Reset iPhone”
- Tap “Reset”
- Lastly, tap on “Reset All Settings”
- For security reasons, you will be asked to enter the iPhone Passcode.
- Tap Confirm Reset All Settings.
- After that, the iPhone will reboot.
5. Check for enough storage space for Save Photo, and fix the iPhone Camera not working
The error message is like this: “Cannot take a picture,” There is not enough available storage to take a photo. You can manage your storage in settings.
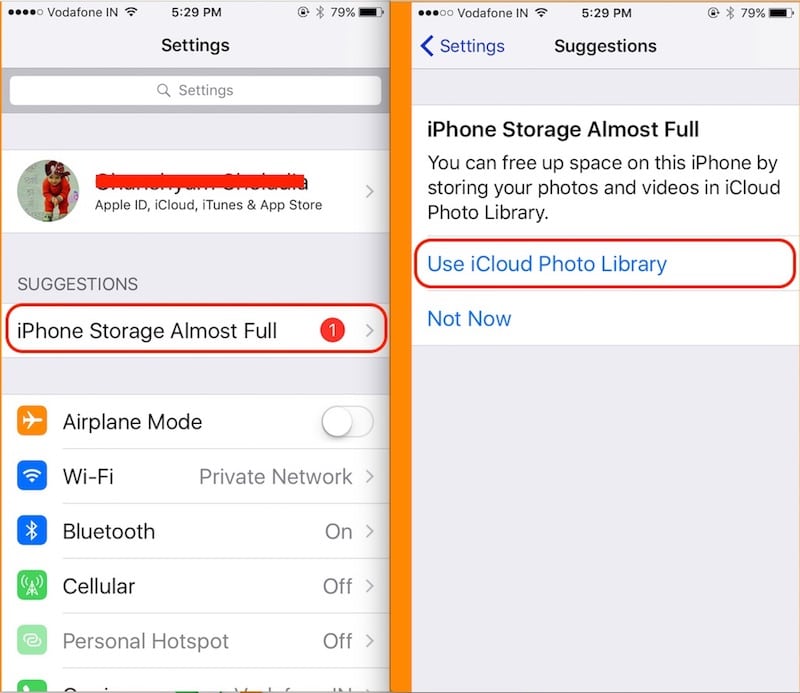
Quickly release memory by deleting the unused app, Photos (Screenshots under Photo Albums).
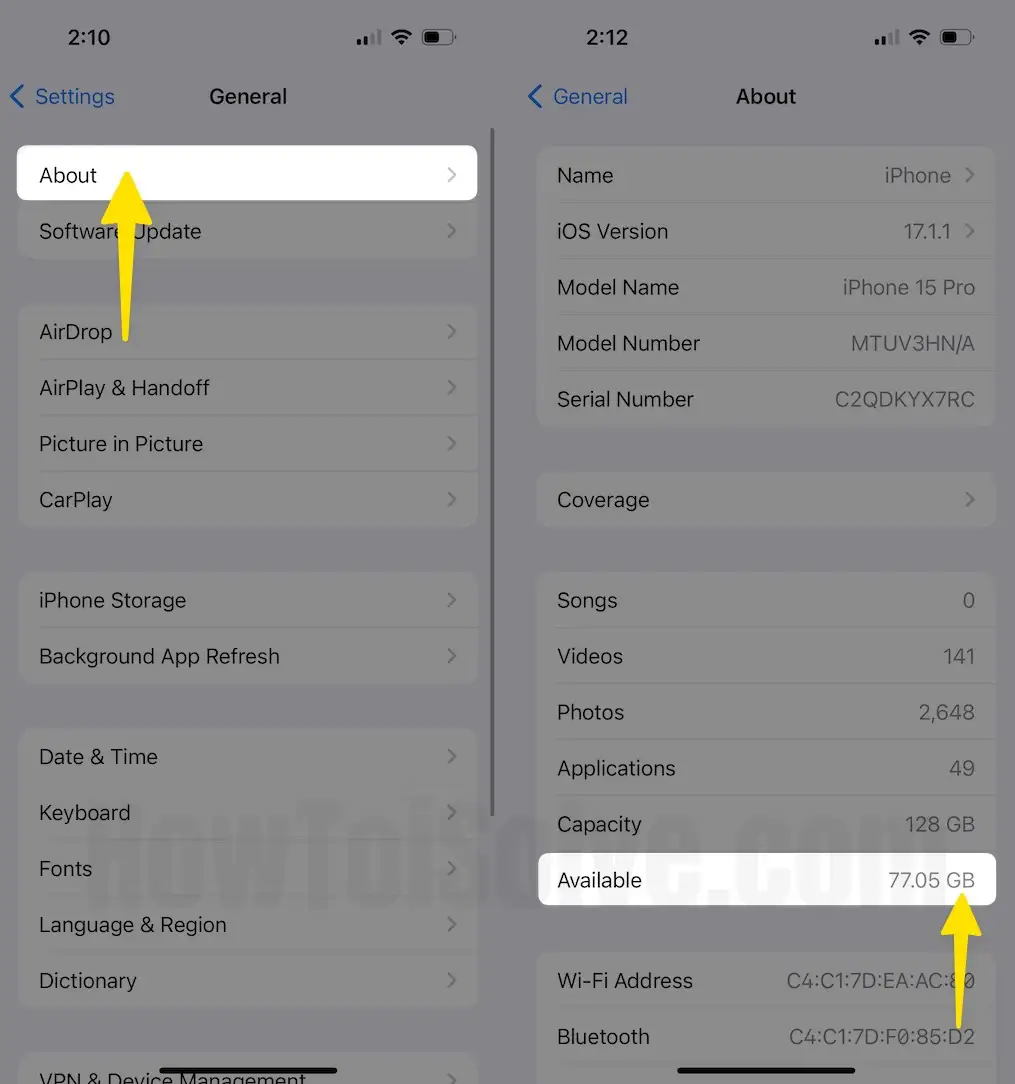
This time, check that your iPhone has enough space for taking a new photo and saving it. You can check this from the iPhone settings: Go to Settings > General > About > Available.
Make free space in iPhone using Different techniques like Delete Documents and Data or iOS other data.
iPhone Storage Almost Full: See the new optimization option under settings app, Tap on Settings app > iPhone Storage > Use iCloud Photo Library.
Change Camera Settings: Go to Settings > Photos & Camera.
1. Change the Photo resolution or fps rate
2. Enable Keep Normal Photo
6. Unable to take Live Photo in Camera
Capture a Live photo directly after launching it. Allow Live Photo from Preserve Settings.
- Go to the Settings App
- Scroll to Apps
- Tap on Camera
- Choose Preserve Settings
- Turn the toggle green next to Live Photo.
Otherwise, you need to tap on three concentric circles in the camera app. Always turn on a live photo. A yellow circle means Live Photo is turned on.

[Important] Live Photo icon is only available & seen in Photo mode. See the image above,
After that, you can use and convert the other four Live photo effects (Live, Loop, Bounce, Long Exposure).
Related: Bounce Effect Not Working.
7. 3D Touch Not Working in Camera App
On 3D Touch Compatible iPhone, iPad model, we can directly turn camera mode from the 3D Touch pop-up. You are unable to use it, then make Sure 3D touch is enabled on your iPhone and convenient 3D touch Sensitivity for your finger to easily use. (3D touch work unexpectedly, a restart will fix in most of cases)
8. iPhone cover or Sleeve covering the rear camera lenses
Look at the back of the iPhone, check the iPhone case covering the camera, or part of the camera.
9. Enable Flashlight in the Dark area
Open the camera app and find the flesh icon on the top tab of the screen, And select “on.” That’s it
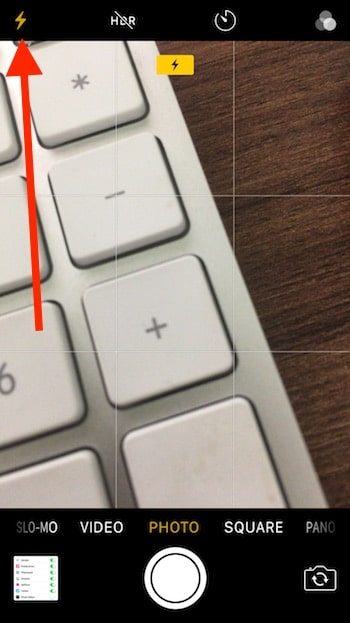
The flesh icon should be yellow, indicating that the back LED will flash when the photo is clicked.
10. Camera not Accessible or turn on via Third-Party App
Mostly Camera use on third-party video calling, Scanner apps. For privacy reasons, if any of the apps disable access to the camera. Check it here and enable it.
Go to the Settings > Privacy & Security > Camera > Available Apps to access your Phone camera. Above all the helpful troubleshooting tips and guides on the iPhone Camera not working.