What to Know
- Connect the External Hard Drive > Open Photos Library on Mac > Find the Current Photos Library > Close Photos App > Copy the Photos Library > Hold Option and Open Photos > Choose the New Library Location > Set as System Photo Library (Optional) > Verify the Library > Backup.
- Before disconnecting your external hard drive from your Mac, make sure to safely eject it to prevent any data loss.
Have you been struggling to find the best and easiest way to move your Apple photos library to an external hard drive? Don’t worry; your wait is over.
MAC has always been a helping tool in our life, regardless of our profession. But with this, it has also proved to be mysterious for us. It has numerous tools and the best-updated software that is beneficial for all the people around the world. But don’t worry, we can do it for free.
Go fast and try this out. There is no need to wait anymore. We can also use an SD card or USB flash drive, for quick backup of your Photos without any Data loss.
Don’t miss: Best SSD Drive With High-Speed Data Transfer
Navigation to Apple Photos Library & External Hard drive of MAC
When we talk about the Apple Photos Library, which is another significant feature of MAC that stores photographs and videos. But if you are from the field of Photography, Vlogging, Photo Editing, etc., then Apple Photos Library will capture all the storage in your MAC.
The antidote to this problem is an External Hard drive. There are two kinds of hard drives, external and internal; the internal hard drive is the one that is already existent in your Mac; on the other hand, an External Hard drive is a kind of USB that you insert externally into your MAC.
Important points to remember while moving your Apple Photos Library to External Hard Drive-
One of the most crucial aspects to keep in mind while moving your apple photos library to an external hard drive is the storage of your external hard drive. If you have ample storage of photographs, it is essential to have an external hard drive with more storage than your Apple Photos Library. If the storage of the external drive is less, all the data will not be copied from your Apple Photos Library to your external hard drive.
East Steps to move Apple Photos Library to External Hard Drive
- If you don’t have free space in External Drive then make a free space or Erase first or Move to step 4.
- Insert your External Hard Drive to MAC.
- Next, you need to format your External Hard Drive-
- Go on Spotlight Search and type Disk Utility.
- Select your External Hard Drive
- Click on Erase option.
- Then select the format; it is better to choose the same file format you have for your Internal Drive.
- After, selecting the format, you can just go back and start ahead with the next steps.
- Open the Finder bar.
- After this, Navigate to Pictures [Add Pictures on Finder Sidebar]. Then you can see the Apple Photos Library folder.

- After this, open another Finder bar.
- Select External Drive
- After this, click on Apple Photos Library and select Copy.
- Then click on your External Hard Drive and select Paste.

- After this, your Apple Photos Library will be moved to your external hard drive. The time of copying the folder depends on your Apple Photos Library storage.
How to Open Moved Photo Library on Mac from External Hard Drive
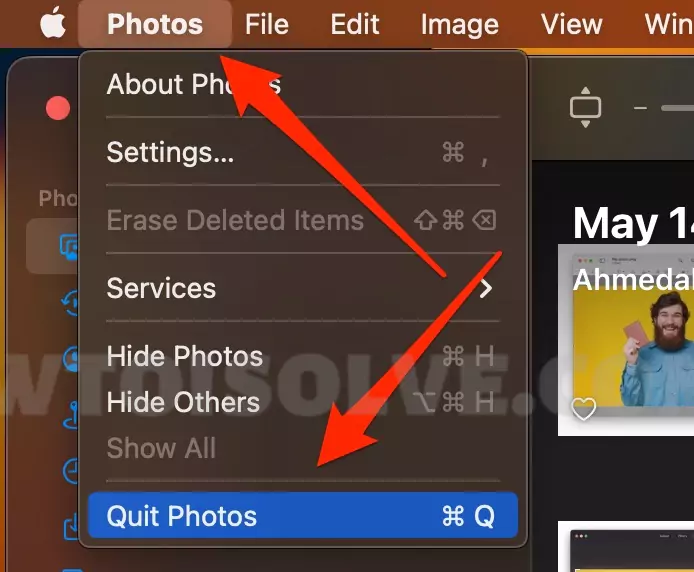
- First Force Quit Photos app on mac. In the last.

- click on the option key; present on the left side of the spacebar of your MAC keyboard, Hold down the key, and don’t release it.
- Continue to hold the option key and go to the Photo’s app.

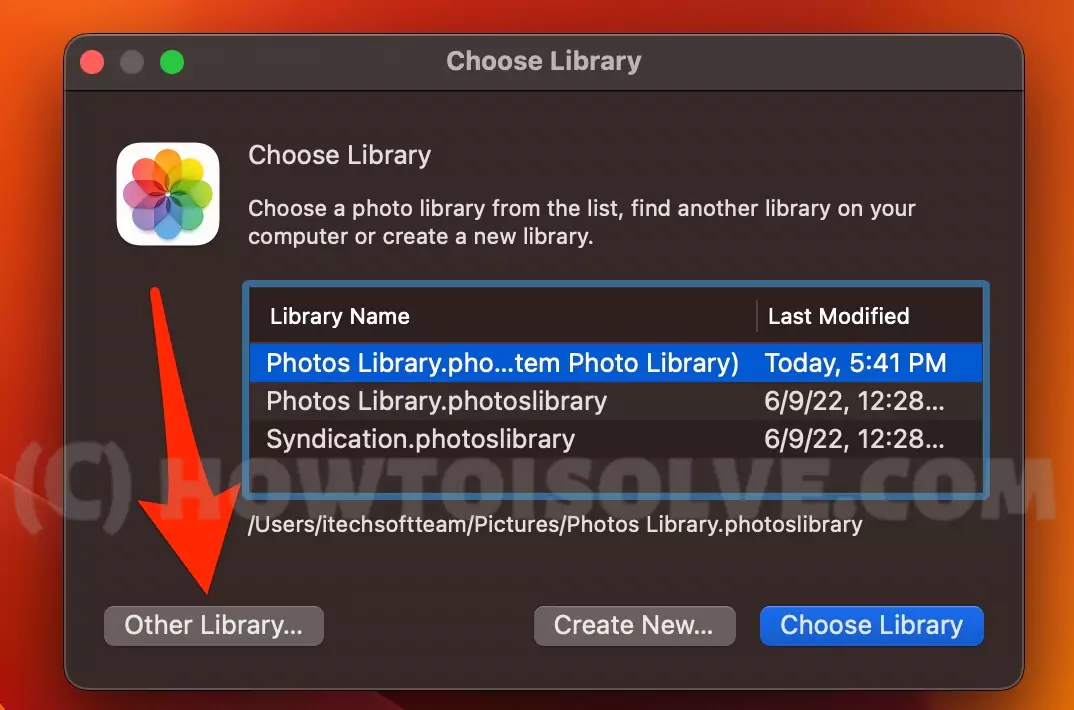
- Then the command Box “Choose Library” will appear, named; Choose Library.
- Select the Other Library option,

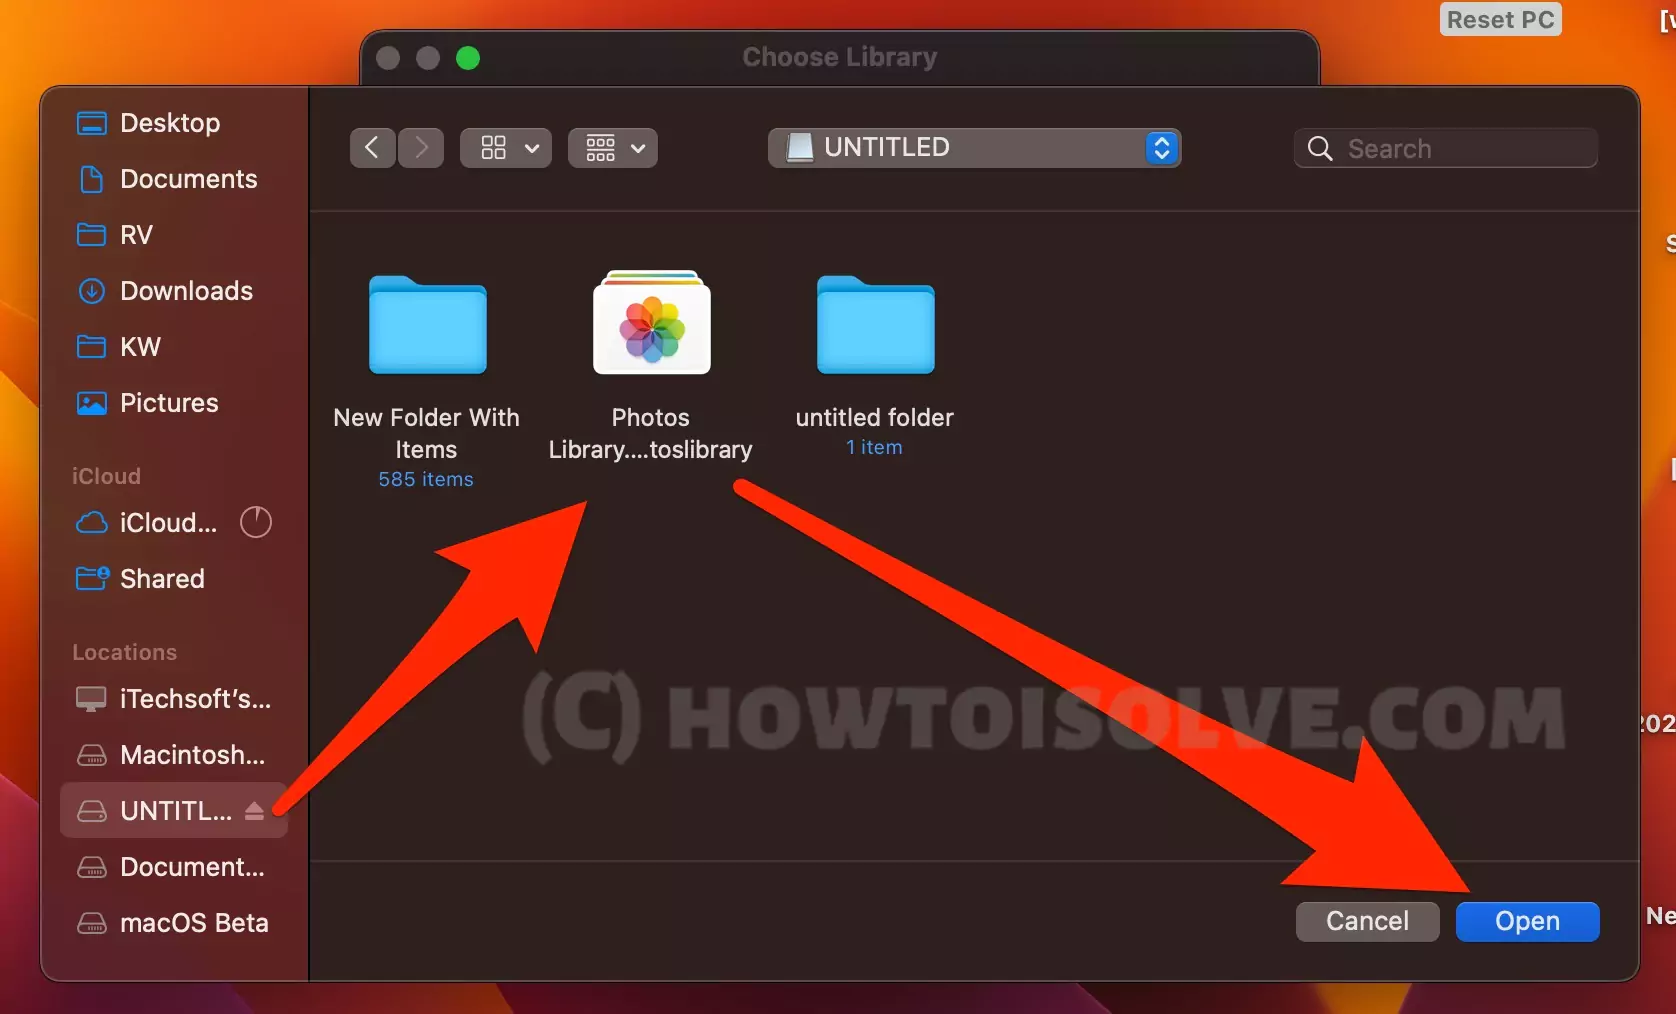
- Then another command box will open; select your external hard drive.
- Click on Apple Photos Library
- And then select Open.

- The Configuration process will happen and get completed in some time.

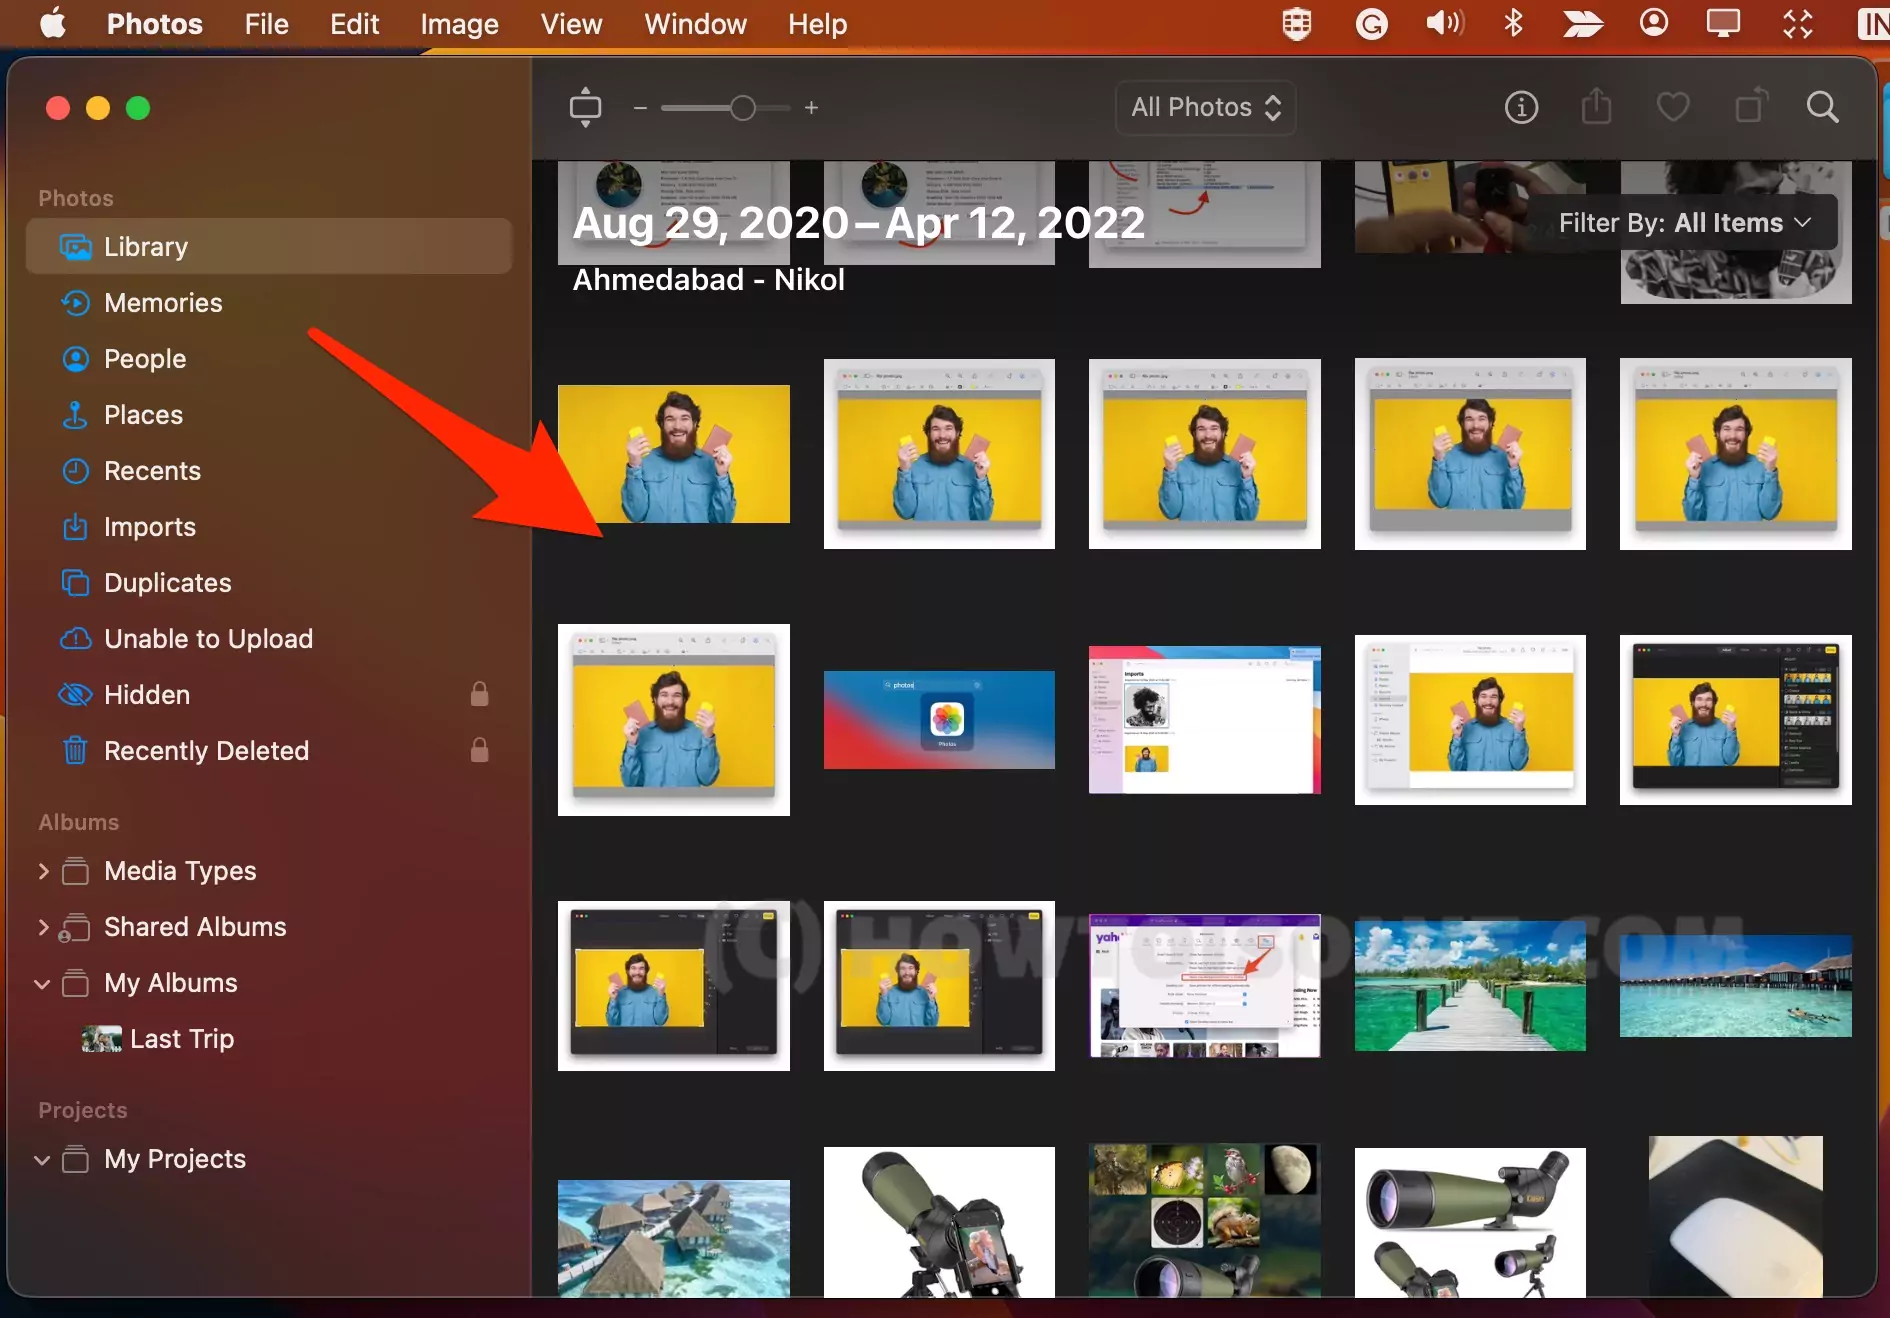
- Now, Photos app will see all the Photos saved in Photo Library.
How to Open Photo Library on Mac
You must know, How to reopen copied Photo library backup from an External Hard drive or SSD on Mac. Also, we can open another Photo library in the same way on any Mac. Copy the Photo Library source on your Mac or the External drive and View photos.
Follow the below steps,
- You must force quit the Photos app on Mac. [If opened, to Force quit, From the top menu > Apple Logo > Force Quite > Select Photos and Force Quit].

- Now, From Launchpad or Finder application folder, Press and Hold on Option key, and Open Photos app.

- You will ass the Popup screen with the option, Choose Library, Select Library name or Open new Library from External Drive, using the Option, Other Library…

- Select the Library from the External drive and open it. Now, Choose Library to view All photos on the Mac photos app.

That’s it.
Conclusion:-
That’s the solution to make free space on Mac without Taking the whole Mac Backup using Time Machine.
After completing all these steps, you can put your Apple Photos Library in Trash as it is saved in your External Hard drive. And Free up storage on your Mac.
Check Available Storage on Mac Monterey: Go to the Apple Logo > System Settings > General > Storage > Free space.
These simple and easy steps can help you move your Apple Photos Library to your External Hard drive and save the storage of your MAC, Old and Latest Mac [Apple’s Silicon M1-series, M1 Pro (MacBook Pro), M1 Max (MacBook Pro & Mac Studio), M1 ultra (Mac Studio), M2 chip of 2022 (MacBook Pro & MacBook Air) Or Intel chip Mac computer].


