Some Mac users found the issue ‘ethernet connected but no internet‘, and They disconnected the internet connection when the ethernet connection was in use. Sometimes it looks like Either hardware or MacOS Software version issues, we have fixes for the issue that happens because of a software glitch, and the RJ45 Ethernet port is damaged, and how it’s making is re-usable without spending more.
The ethernet connection is more speedy than the wireless connection, but still, we have an alternate option as well, WiFi. Here’s a solution for WiFi not working on Mac. Follow this article. Until that, let’s fix the Dropping Ethernet Connection on Mac Models (Intel or M1 iMac, Intel or M1 Mac Mini, MacBook Pro, MacBook Air – Supported Ethernet Connection)
Tricks to fix Dropping Ethernet Connection Automatically on Mac
Primary Investigation
- Check your Ethernet Cable or Replace & Check the Ethernet cable and RJ45 Clip.
- Ethernet Port is tightly connected, In Router and Mac’s Port at both ends.
- Make sure the Internet is working and Up. You can contact your ISP. Run an Internet speed test on Browser like fast.com.
- Reboot your Mac once.
1: Plug-Out Ethernet Cable and Plugin
In most cases, remove RJ45 Connector from Mac and Plugged in again to fix the issue for all time. Press down the Small clip to unlock and remove the cable from Ethernet Port.

So, there are too many reasons behind that. Diagnose ethernet cable first.
As a time to go, Your Crimping might be loose, or your Ethernet cable damaged from somewhere. Or Do Re-Crimping the new RJ45 Connector.
I highly recommend the above suggestion on your RJ45 Dropping internet connection. If so, the internet is working again after doing Re-Plugin.
Furthermore, Try after restarting the router.
If you know that, use the Spare RJ45 Cable with a new Router. Or Buy a new RJ45 Cable.
2. Remove and Add a New Ethernet Profile in Network Preference
Internet bug and software issue in macOS, can’t connect to the internet using an ethernet connection. Add a new Ethernet profile and remove the old one to help you start the internet using an Ethernet connection. follow the steps below, for an Ethernet cable that is plugged in but no internet on Mac, Know macOS Version and Follow the below steps,
On MacOS Ventura, Sonoma
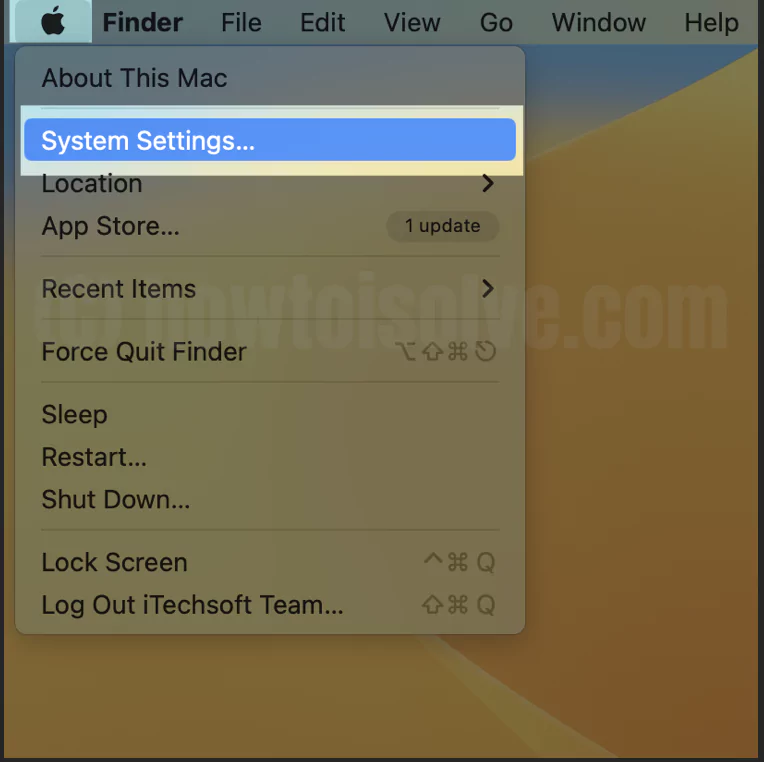
1→ Go to the Apple Logo from the top menu > System settings.
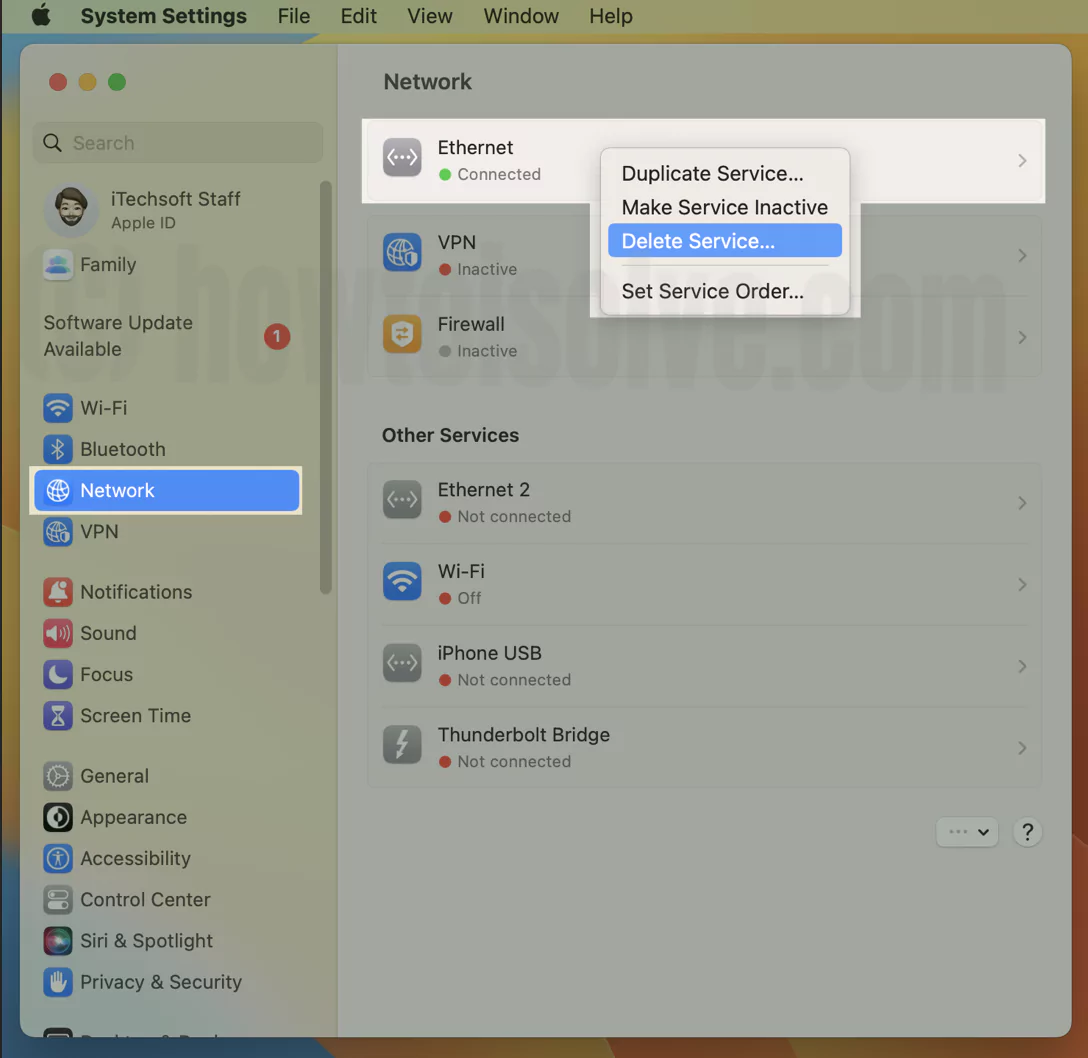
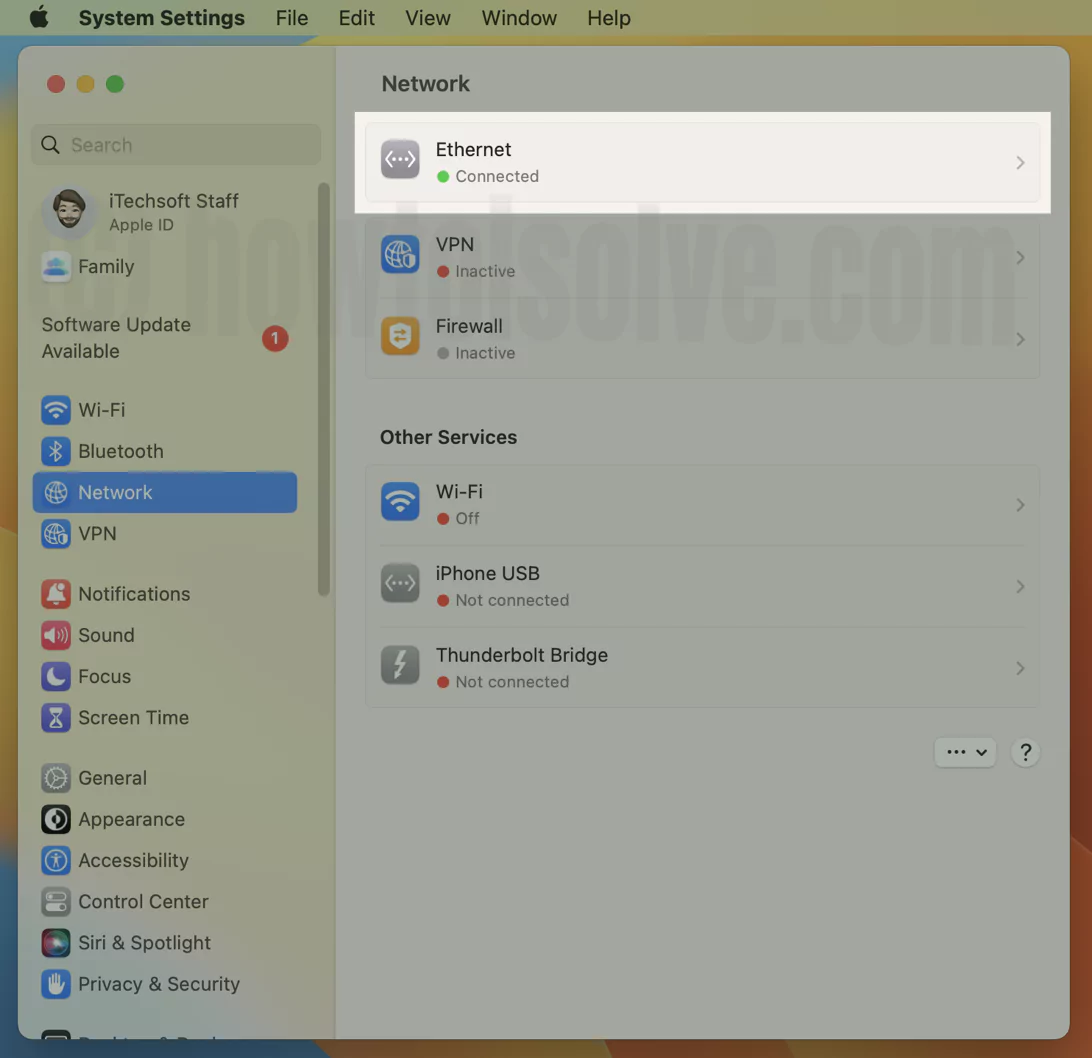
2→ If there is Ethernet Service added to your Mac Network settings, Delete the old ethernet and add a new one. Select Network > Right-click on Ethernet and Delete Service.
Confirm Delete, and the Ethernet profile will be removed, Don’t worry. You are not deleting anything.
To Add a New Ethernet Service,
Click on More Option at last on the Right space > Add Service…
3→ Select Interface: Ethernet Interface. Give a New Ethernet name. Click on Create.
4→ That’s it. Also, Make it active. Click on Ethernet Option, Sometimes, it will take time to activate automatically. Otherwise, Activate the Ethernet service manually.
5→ Click on Ethernet, And Choose, Make Active.
6→ Now, the Ethernet service is up & Connected. If your Ethernet automatically switches with a WiFi connection, then Keep WiFi deactivated or turn off it from the Mac control center.
To Remove & Add a New Ethernet Service on the old macOS Version, follow the below steps.
On macOS Monterey & Earlier
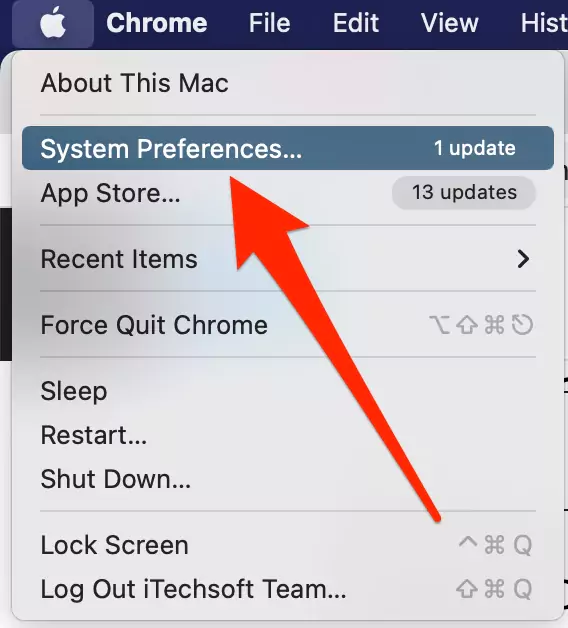
1→ go to the Apple logo from the top Mac menu > System Preferences.
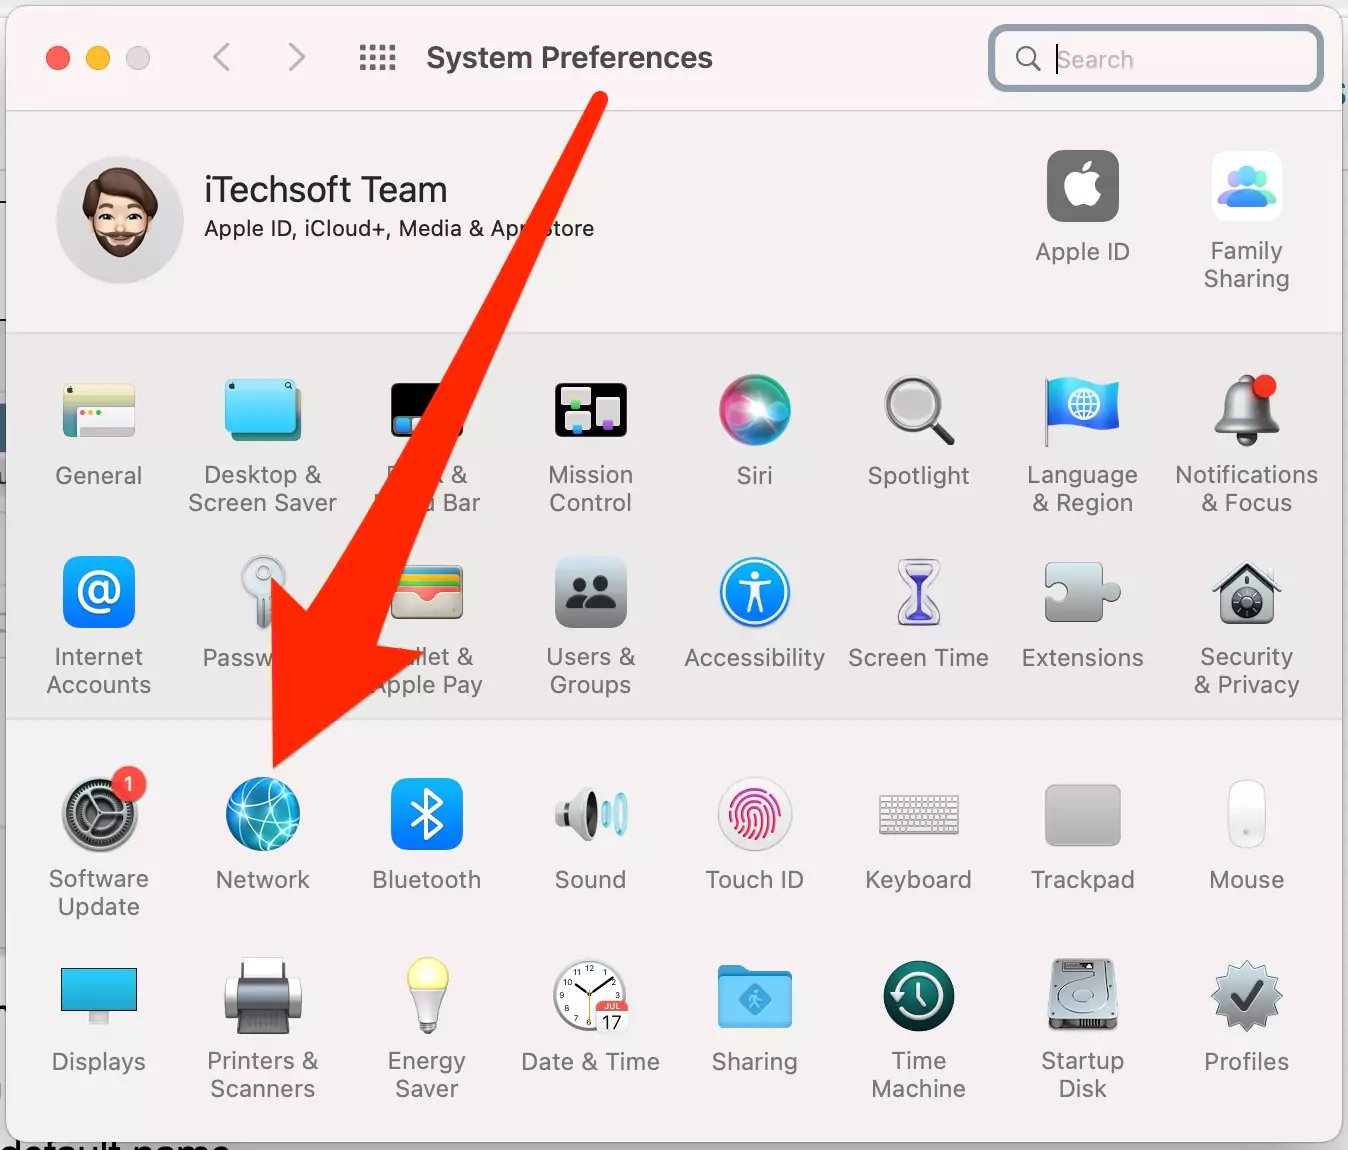
2→ Open the Network Preferences,
3→ And click on the Plus icon to add a New Profile,

4→ For Interface, select “Ethernet“. Also, Give your Ethernet name or keep the default name.
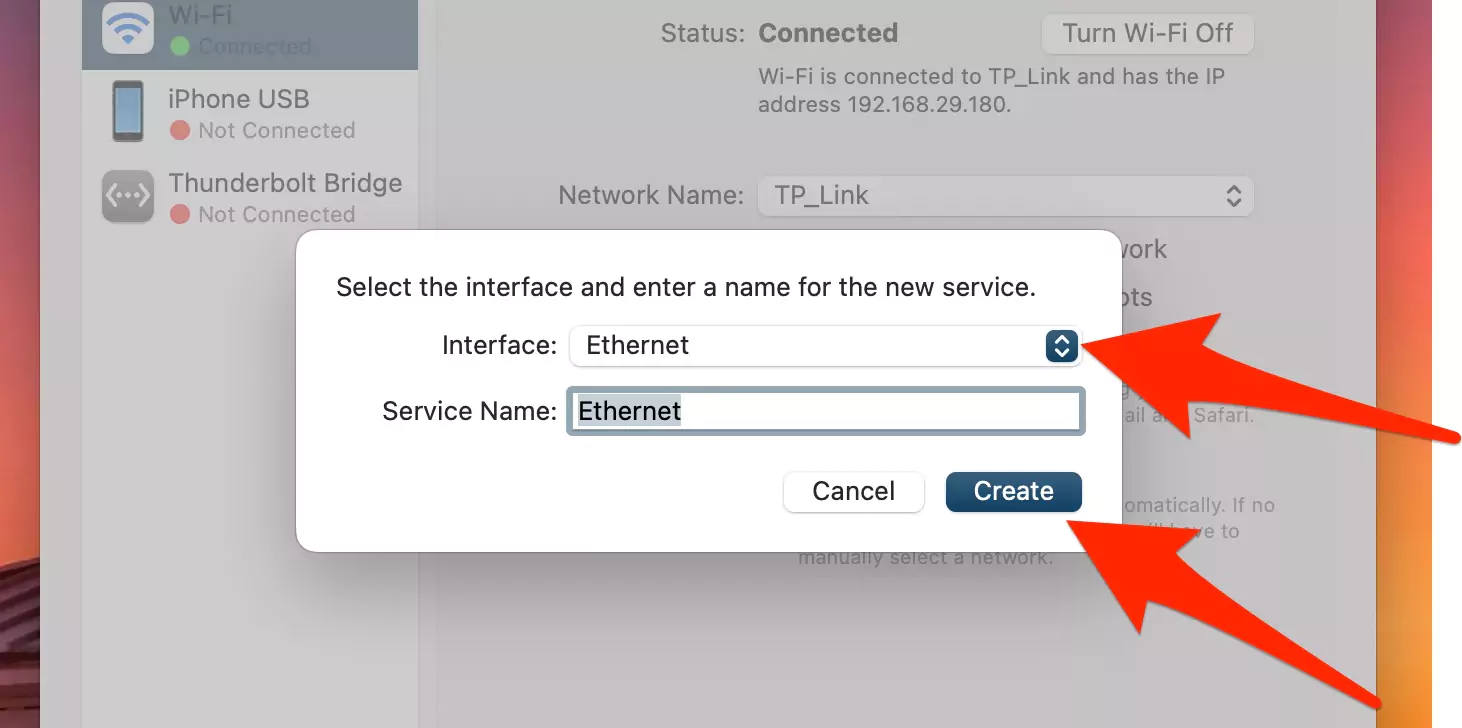
5→ Click on Create button to add a New Profile…
6→ Now, Click on Apply the changes and Wait for 5 to 10 seconds to sync the settings on Mac and start the internet with an Ethernet connection.
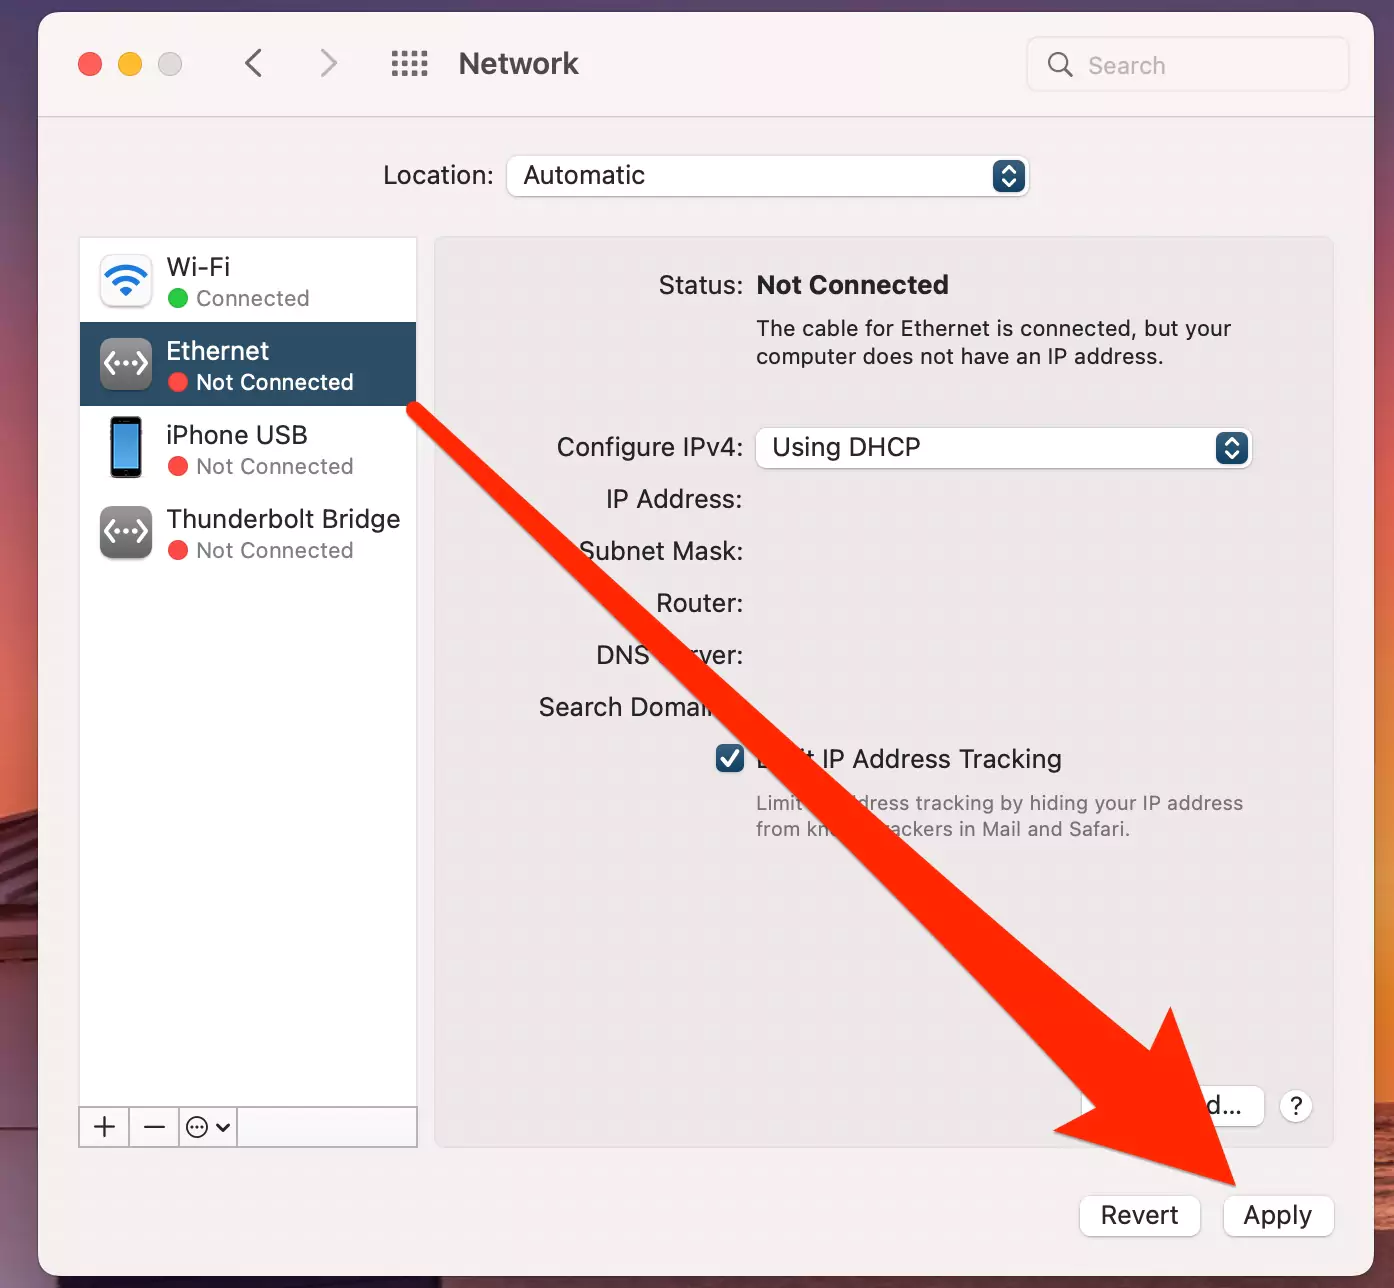
7→ That’s it. Ethernet is connected.

3: Create a New User Account or Ethernet Profile
Please create a new User Account to fix the issues related to a corrupted file system, and I recommend creating a new administrator account from Mac System Preference.
Create a New Administrator Account:
Step 1: Click on the Apple logo from the Top Mac menu > System Settings/Preferences > Users & Groups > Unlock the lock with your Mac login password.
Step 2: ‘Add User‘ to add a new account.
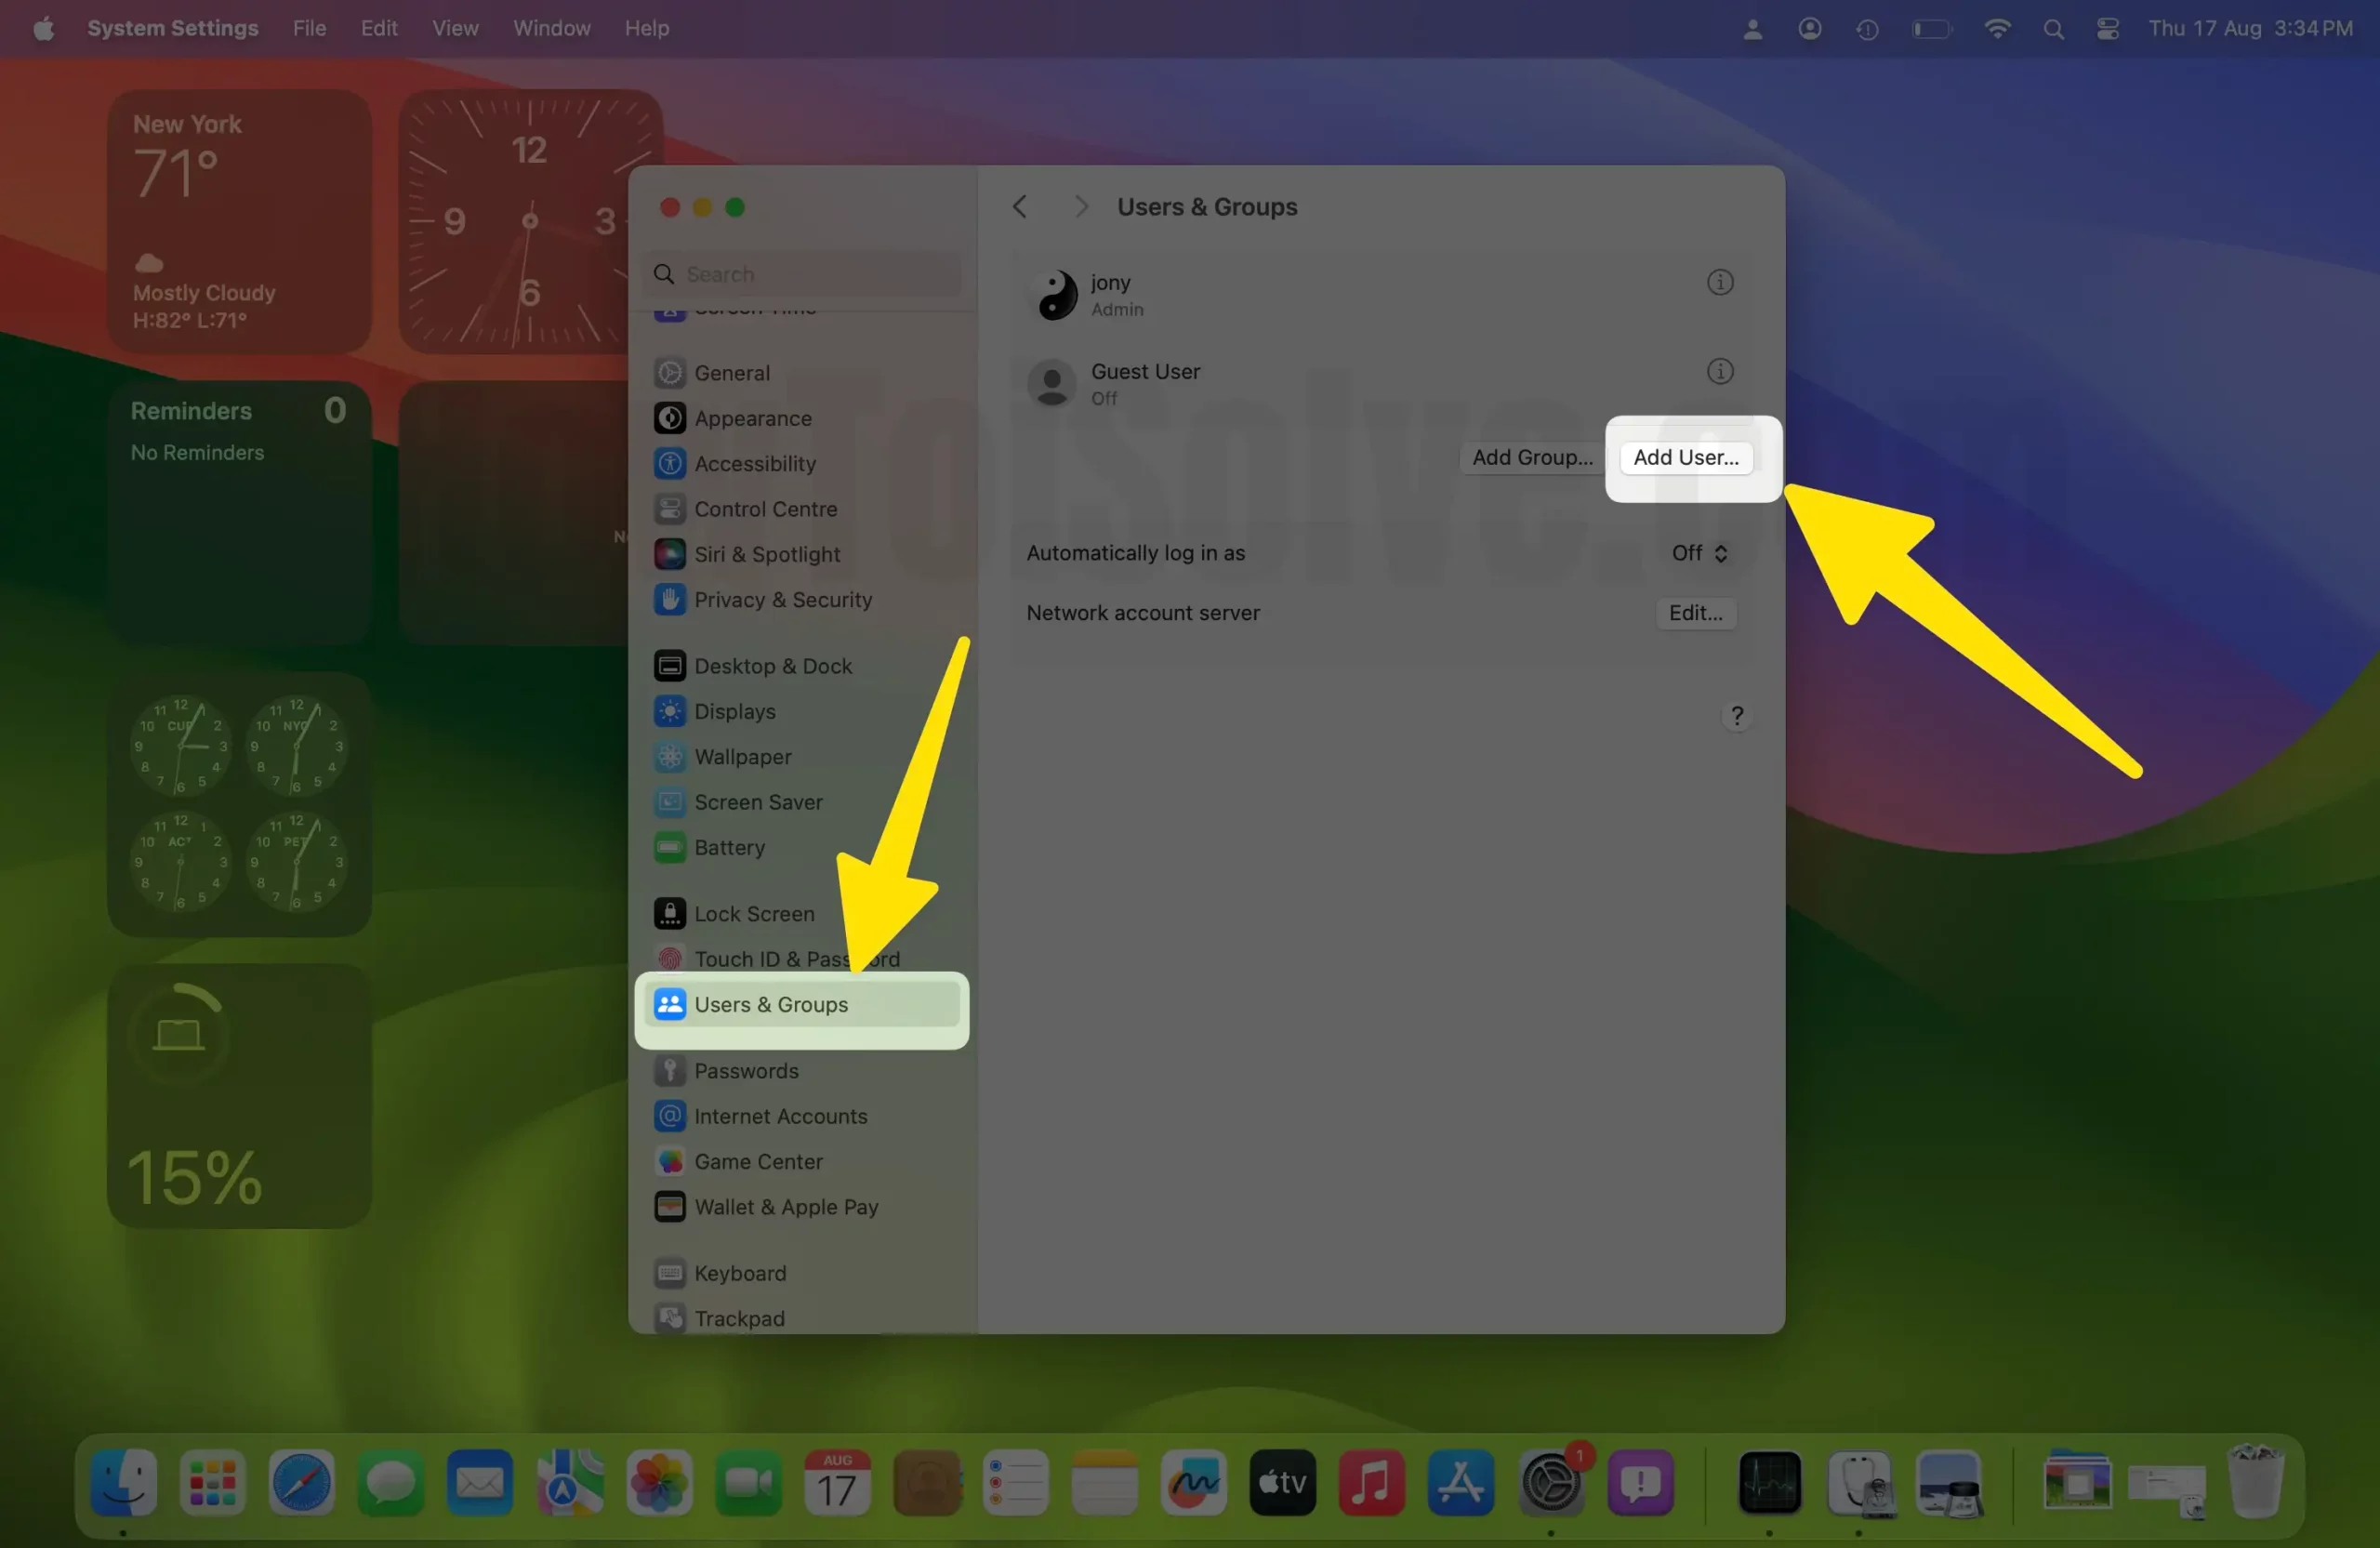
Step 3: Select Administrator in the New Account dropdown menu. And fill in the other details.

Now login into the newly created account and check whether the Ethernet works. If it is still not working then, create a new Ethernet profile and check.
4. Create a New Location
Create a New Location For Network Profile and settings on your Mac. After that new Network location settings will be overridden with the old setup and we can use an Ethernet connection on Mac.
On MacOS Ventura, Sonoma,
1→ Go to the Apple Logo from the top menu > System Settings.
2→ Next, Select Network Options > Click on More option.
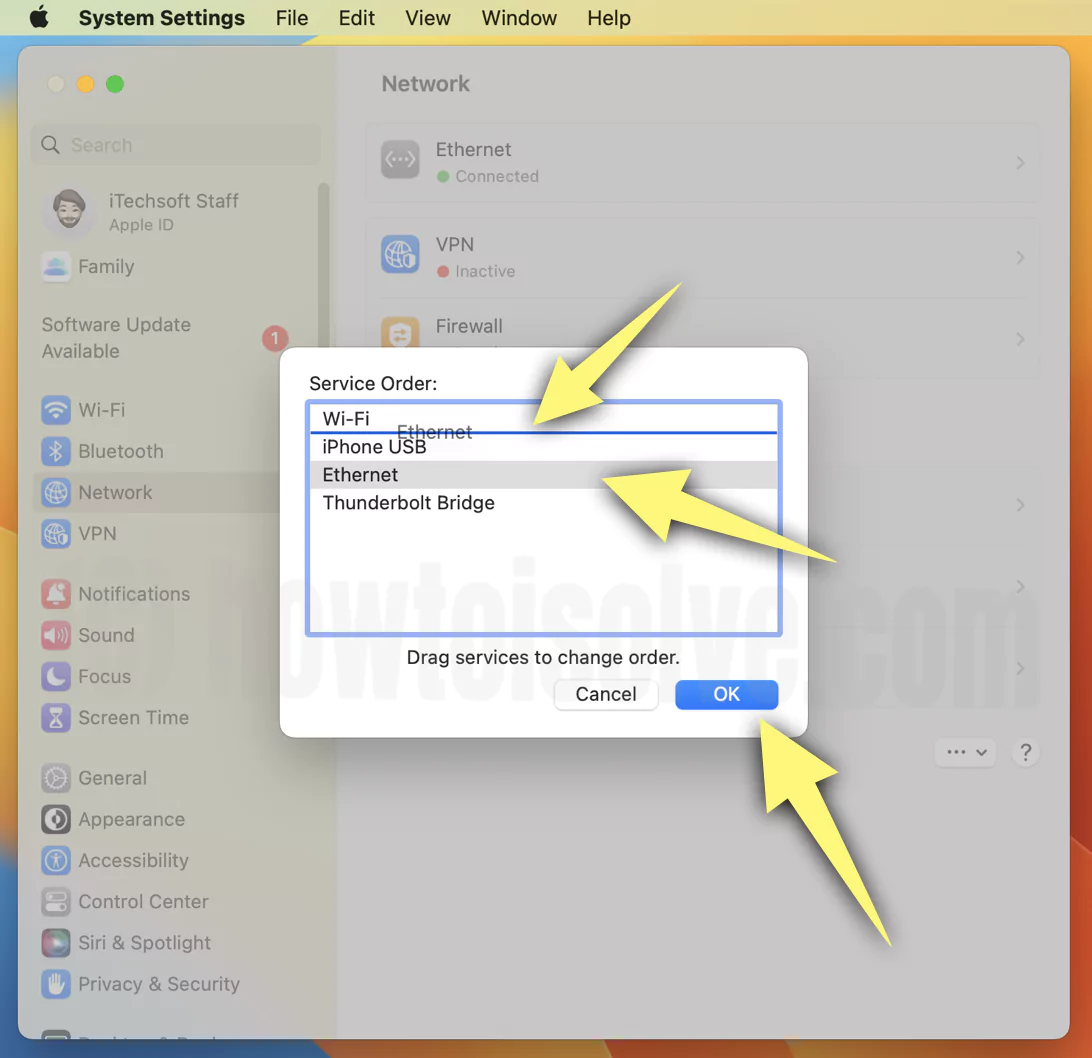
3→ Choose, Set Service Order… > Correct the Order Using Select & Drag it to Priory.
4→ Click on Ok. That’s it.
On MacOS Monterey & Earlier,
1→ Go to the Apple logo from the top Mac menu > System Preferences.

2→ Select Network.

3→ Choose “Edit location” from the top Dropdown menu.
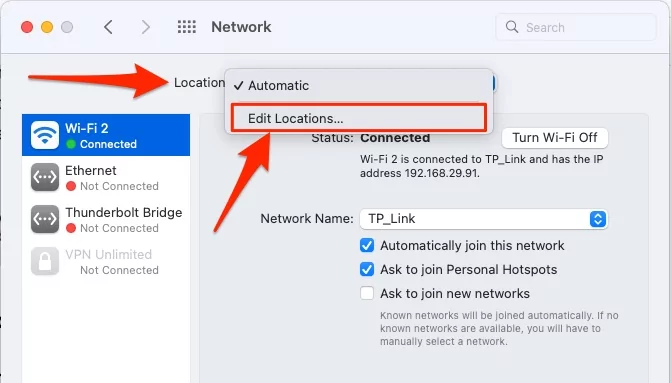
4→ Click on “+” button and Type a New location name.
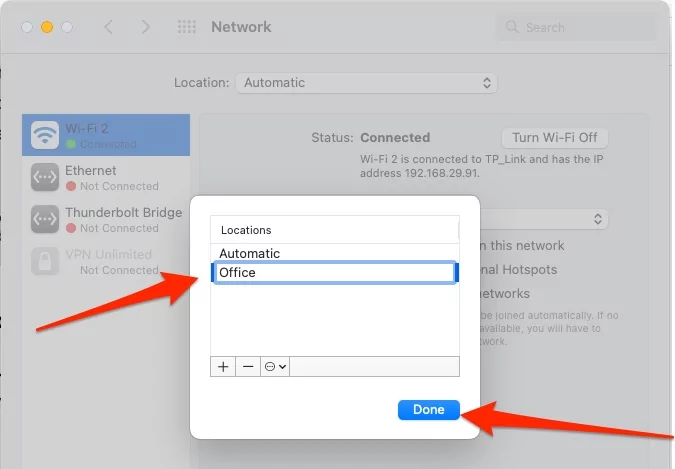
5→ Something like Office, Or Home.
6→ Now Click on Apply to make changes and Start using the internet on Mac with an Ethernet connection.

That’s it.
5: Try in Safe Mode
Apple is also recommending the Safe mode, and Safe mode can help you determine whether an issue is being caused by software that loads when your Mac starts up.
For the core macOS Functionality that may cause the issues like this, follow the below steps for Safe mode on Intel and M1 Mac.
Safe mode on M1 Mac: Shut down your Mac, Press and Hold the Power button for 10 seconds as Mac starts up. Release the Power button once you see the startup screen on Mac. and Select the Startup disk.
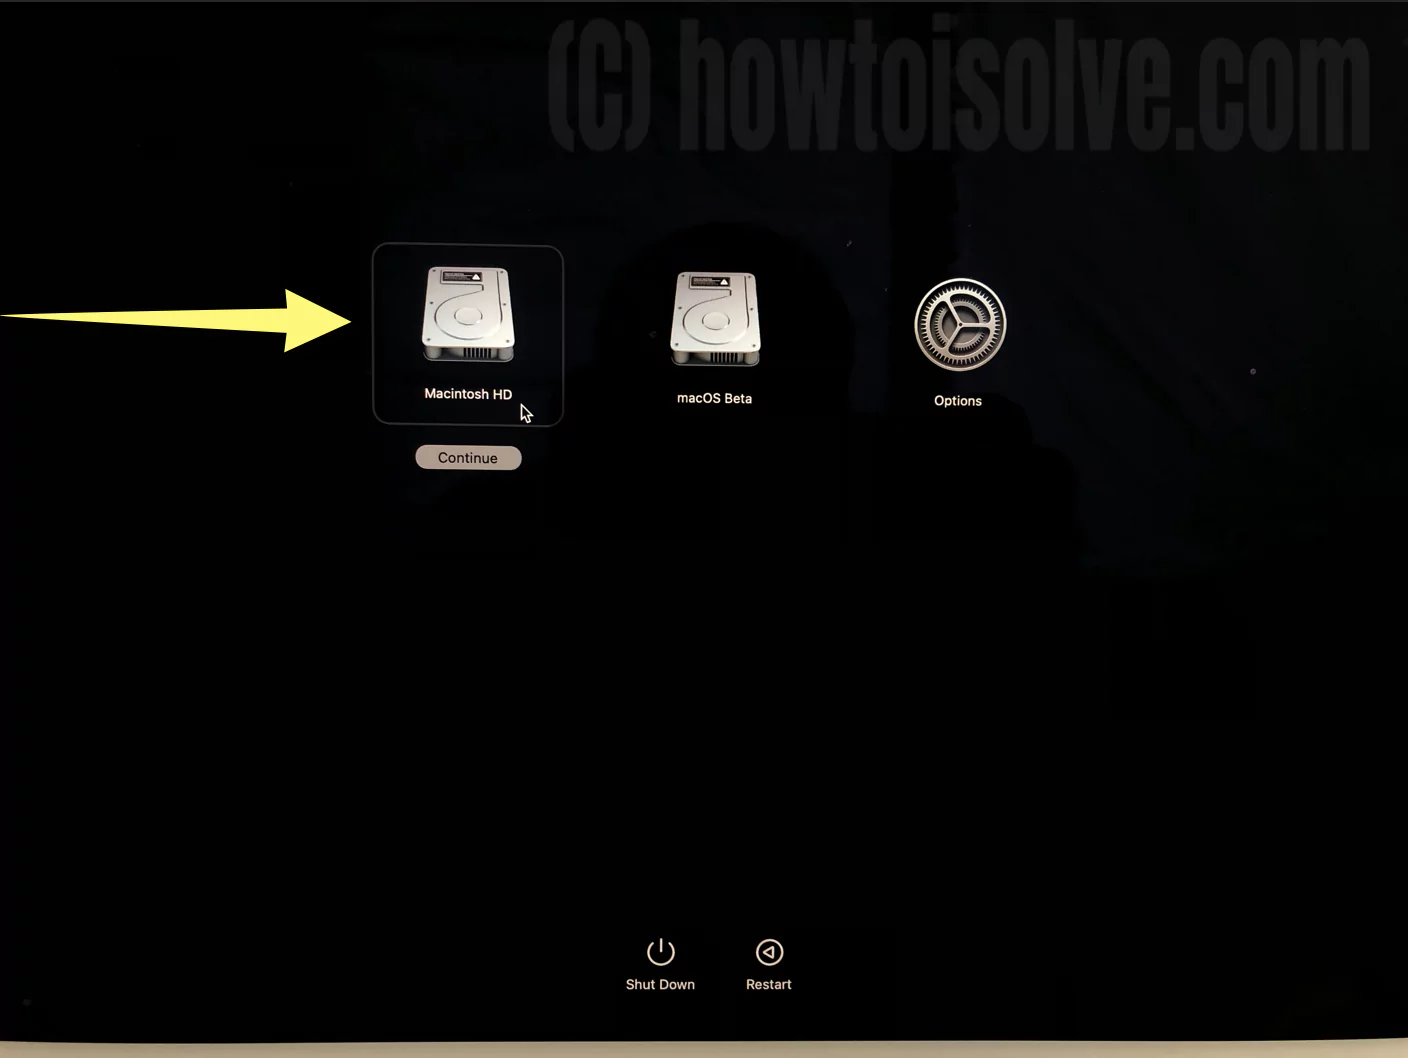
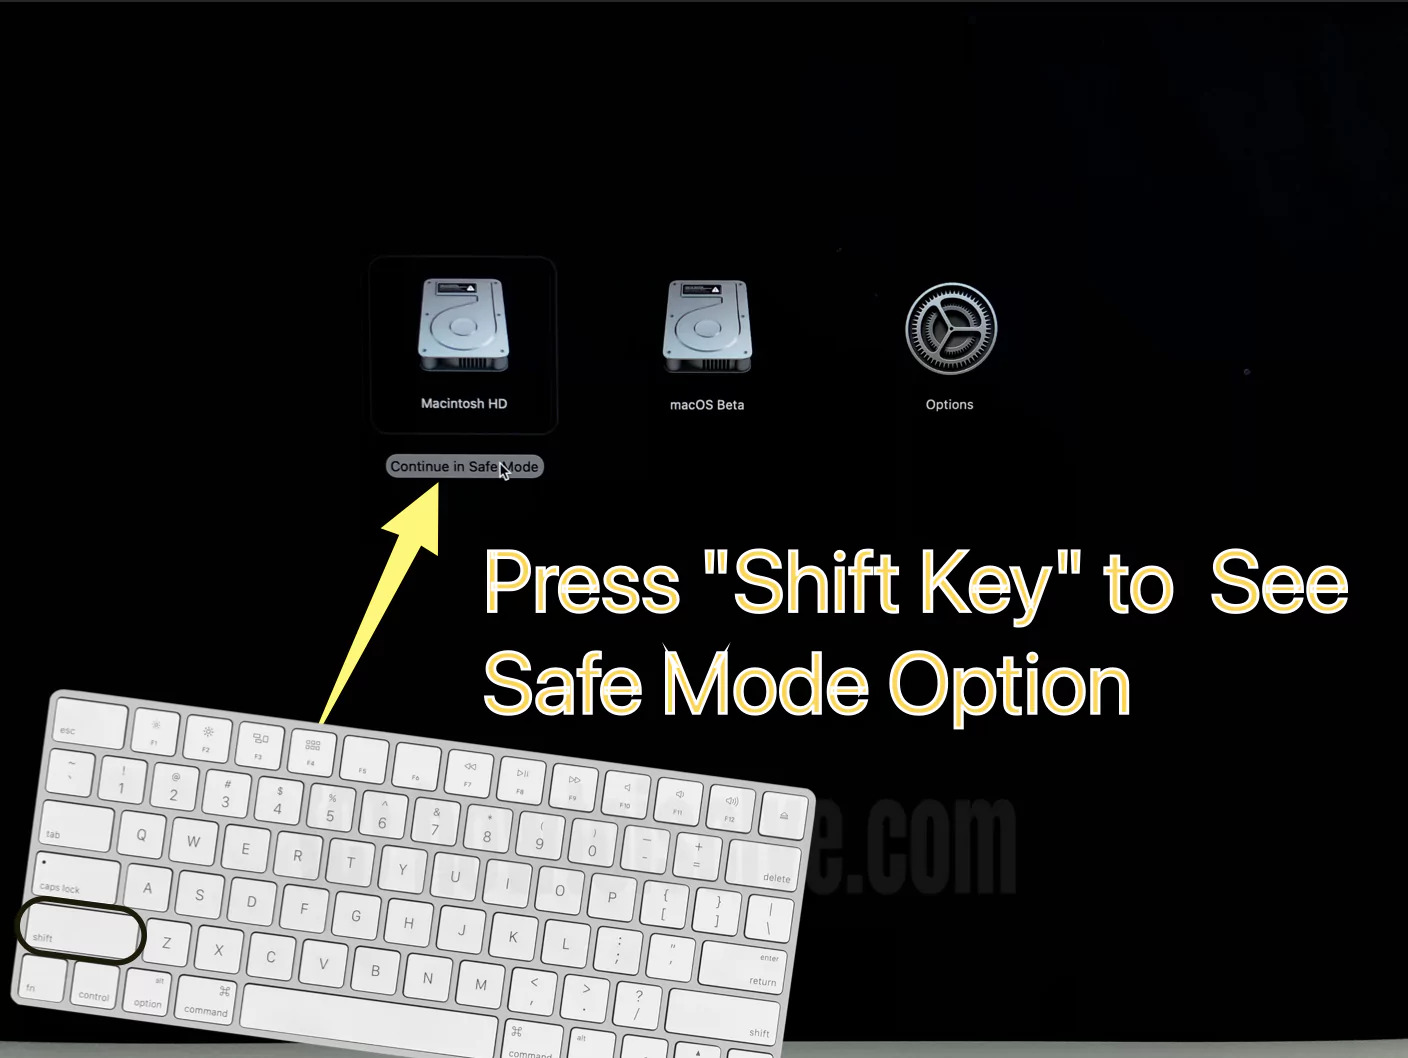
Press and hold the Shift key and click Continue in safe mode. Release the Shift key and log in to your Mac.
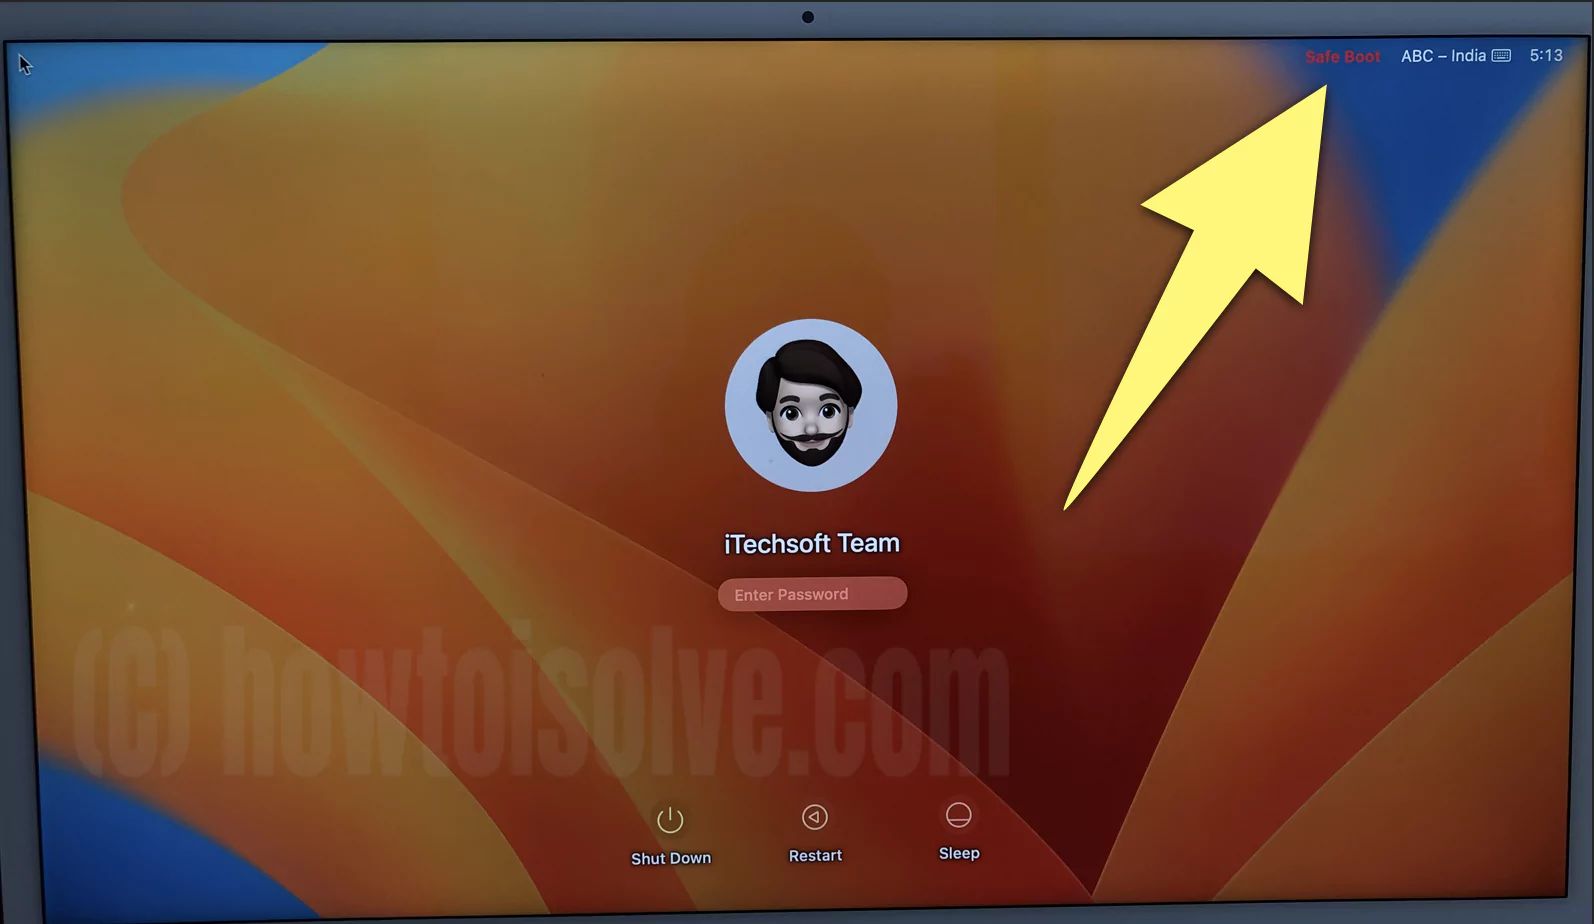
- Safe mode on Intel Mac: Restart your Mac and Quickly press and hold the shift key, Until you see the login window screen. You will see Safe mode at the top right corner of the screen. That’s it.
Still have an issue with the Ethernet internet not working then. There is no software issue.
Note: Keep your MacOS Updated, Apple Logo > System Preferences > Software Update > Download and install New Software if you found.
6: Apple Support
If your Mac is under warranty, then contact apple and Book Genius bar appointment online. Apple will help from scratch—and Gree Hardware repair or Replacement for under warranty MacBook model.
Check if your Mac Warranty Online; here’s a tutorial.
Suppose your Mac is out of warranty or can’t wait to reach a nearby Apple store, then here’s an alternate way to fix the Ethernet port hardware issue.
7: Hardware Fix: USB Ethernet Adapter
Now, For USB 3 and USB C ports for Mac computers and Macbooks, use these multifunctional USB Ethernet adapters to connect your System via an Ethernet cable. Just Plugin & use this adapter to save your Time and Dollars as well.
USB 3.0 Ethernet USB Adapter: Buy Now

Universal RJ45 Ethernet Adapter for all Mac [USB 3, USB C] & Computer with All macOS & Windows OC: Buy Now

Stay updated with more helpful solutions and tips on COnnectivity issues on Mac. Comment me to get more help asps.
