Are you trying to figure out how to give your MacBook permission to use Apple Music? You’re not the only one who can’t locate where to authorize your previous purchases and downloads. A lot of Mac users get stuck here, especially if they can’t remember their Apple ID password. This article will guide you on authorizing your MacBook to access all your Apple Music content without encountering issues.
Fix Error: Your Computer Is Not Authorized to Play This Song in Apple Music
Steps to authorize your MacBook for Apple Music
- Open the Music app on your Mac from the bottom dock.
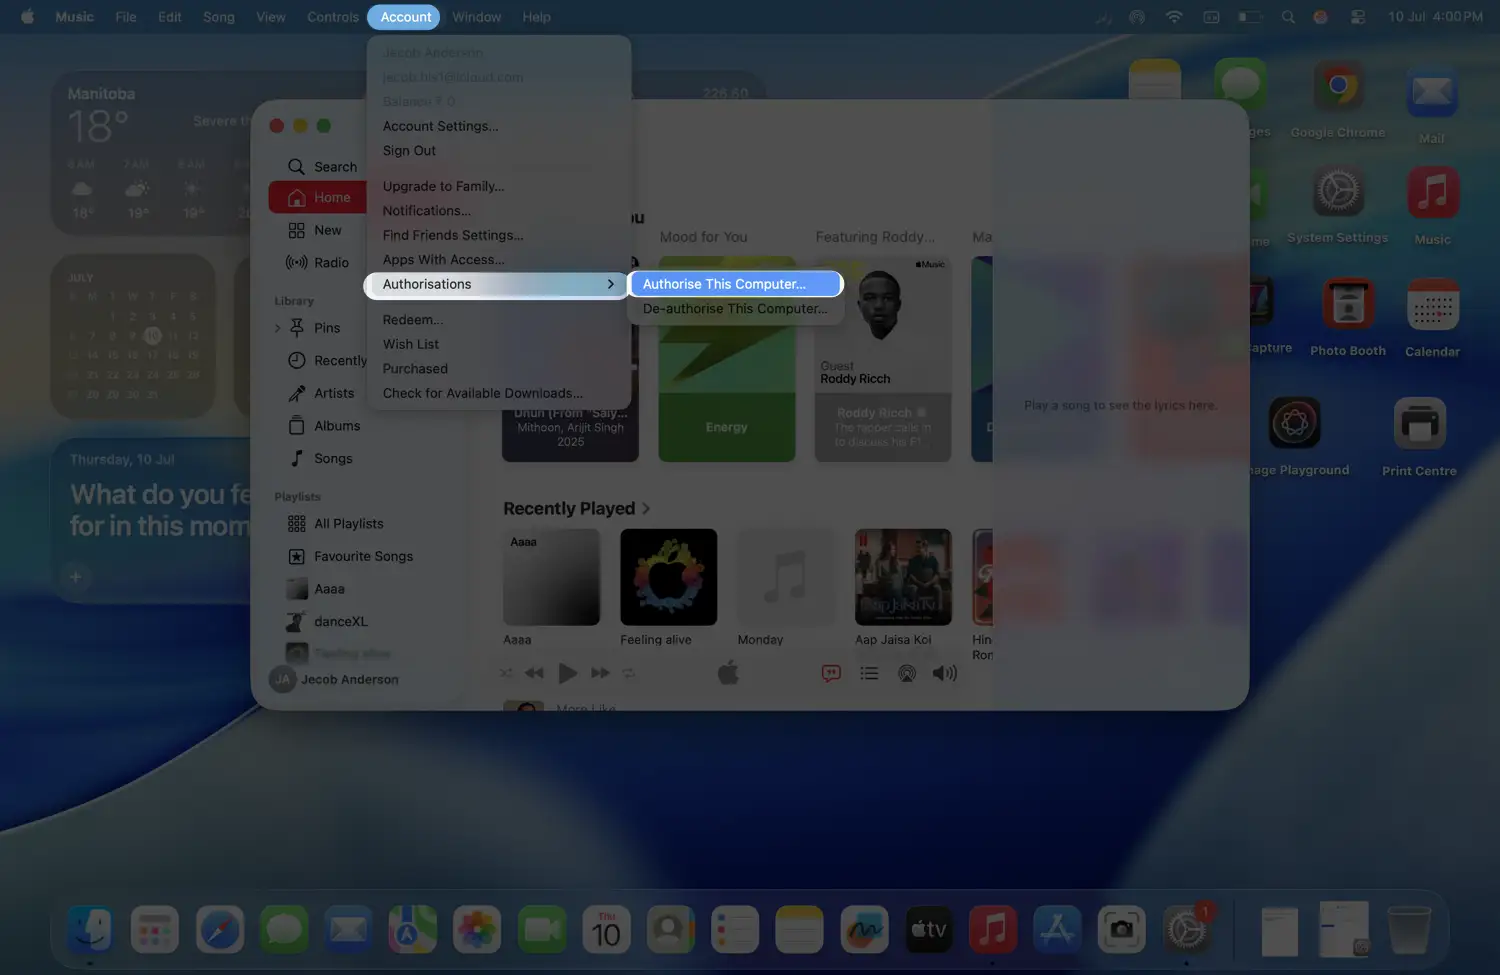
- In the top menu bar, click Account.
- Choose Authorizations, then click Authorize This Computer.
- Enter your Apple ID and password when prompted.
Hint: Follow my guide if you’ve forgotten your Apple ID or password.
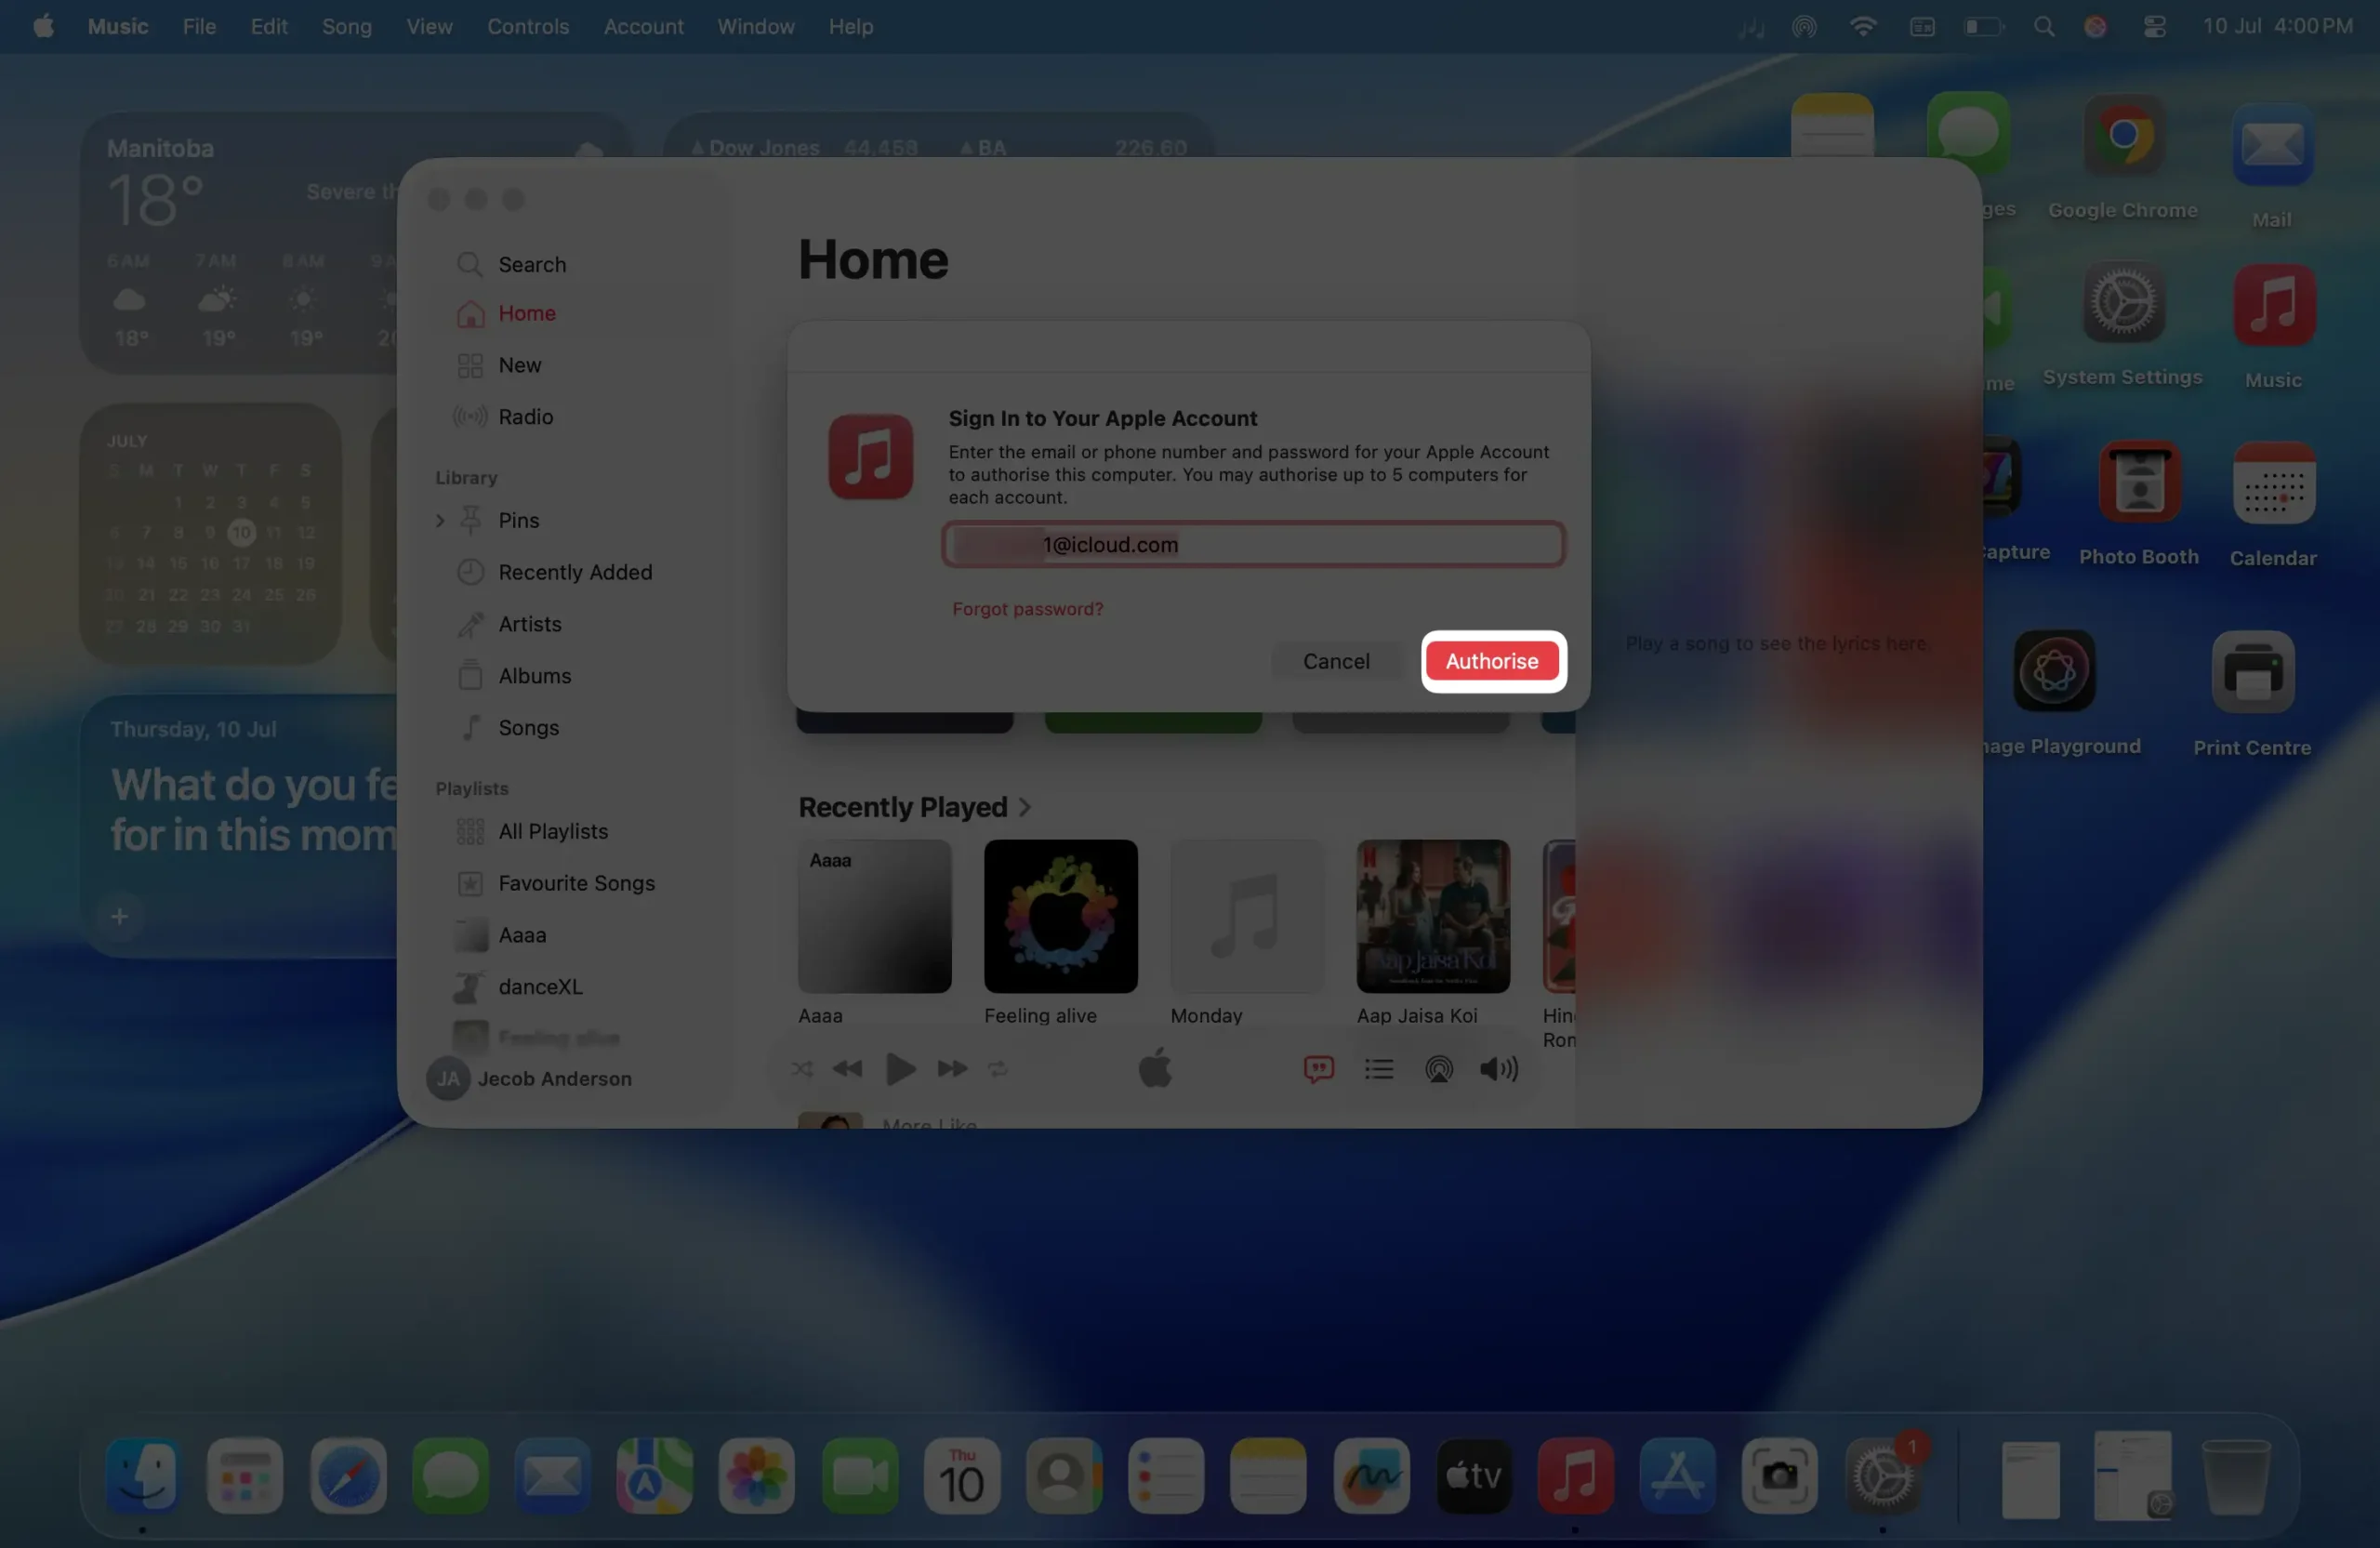
- Finally, click the Authorize button to confirm.
That’s all it takes.
Your Mac is now set up to download your past purchases and play your Apple Music library. Enjoy your music library across your devices without any interruptions.
Bonus tip: You can manage your list of devices right from icloud.com — no need to sign into the computer itself. Just use any web browser. With Apple’s official website, you can easily access your device management settings on Apple’s iCloud platform.
Unable to authorize Macs for Apple Music?
If your Mac isn’t authorized for Apple Music, it might be because you’ve already reached the limit — Apple only allows up to five authorized computers at a time. To fix this, you can simply deauthorize one of your existing computers that you’re no longer using. Then you’ll be able to authorize your current Mac without any problem. This five-device rule actually came from tough negotiations that Steve Jobs did years ago with the music industry, and it still works pretty smoothly today.