Out of the billions of websites on the internet, it’s reasonable to say you want to block some of them. Whether you want to reduce your screen time to enhance productivity or be a parent, you don’t want your kid to access sensitive data like banking sites or explicit content. Thankfully, you have more than one way to restrict websites on Mac’s default browser. So let’s talk about them.
How to Block Websites on Mac
There are three ways; Parent Control, Using Terminal, and Block on Safari. We have covered all of them.
Turning on Parental Control
Apple Parental control will help the guardians to safeguard their adolescents from accessing inappropriate content. However, first, you must add or create a child account in the family sharing. Then, follow the steps below to imply restriction.
The only drawback of this method is that the website is restricted to Safari. You can access the same website on Safari alternatives even if configured as the default browser on Mac.
macOS Ventura And Later
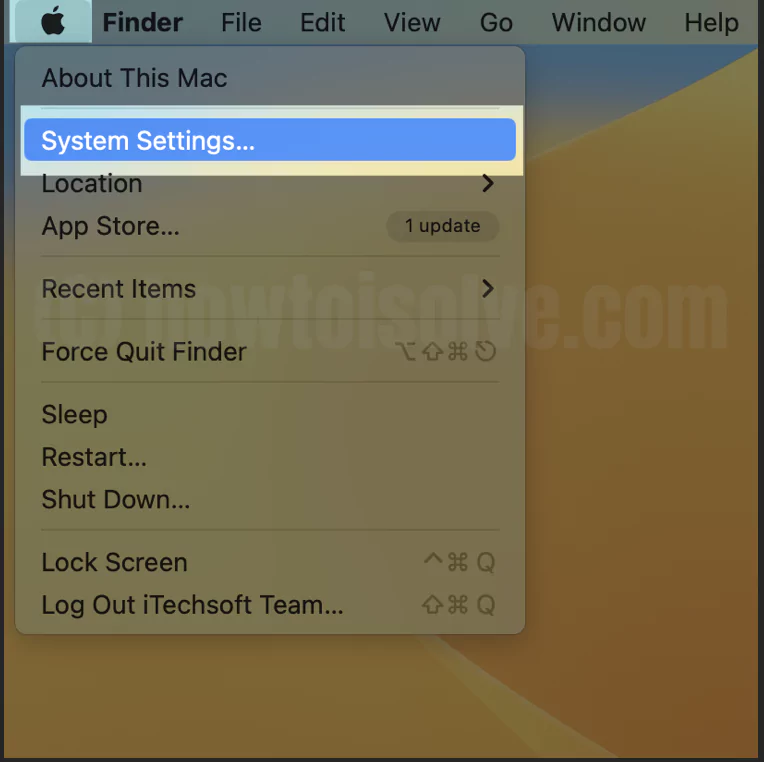
1→ Go to the Apple Logo. Click on System Settings…
2→ Select Screen Time from the left sidebar.
3→ Select the Family Member drop-down and select your Child’s ID.
Tip: Select your account from the Family Member drop-down if you want to restrict the website on your Apple ID.
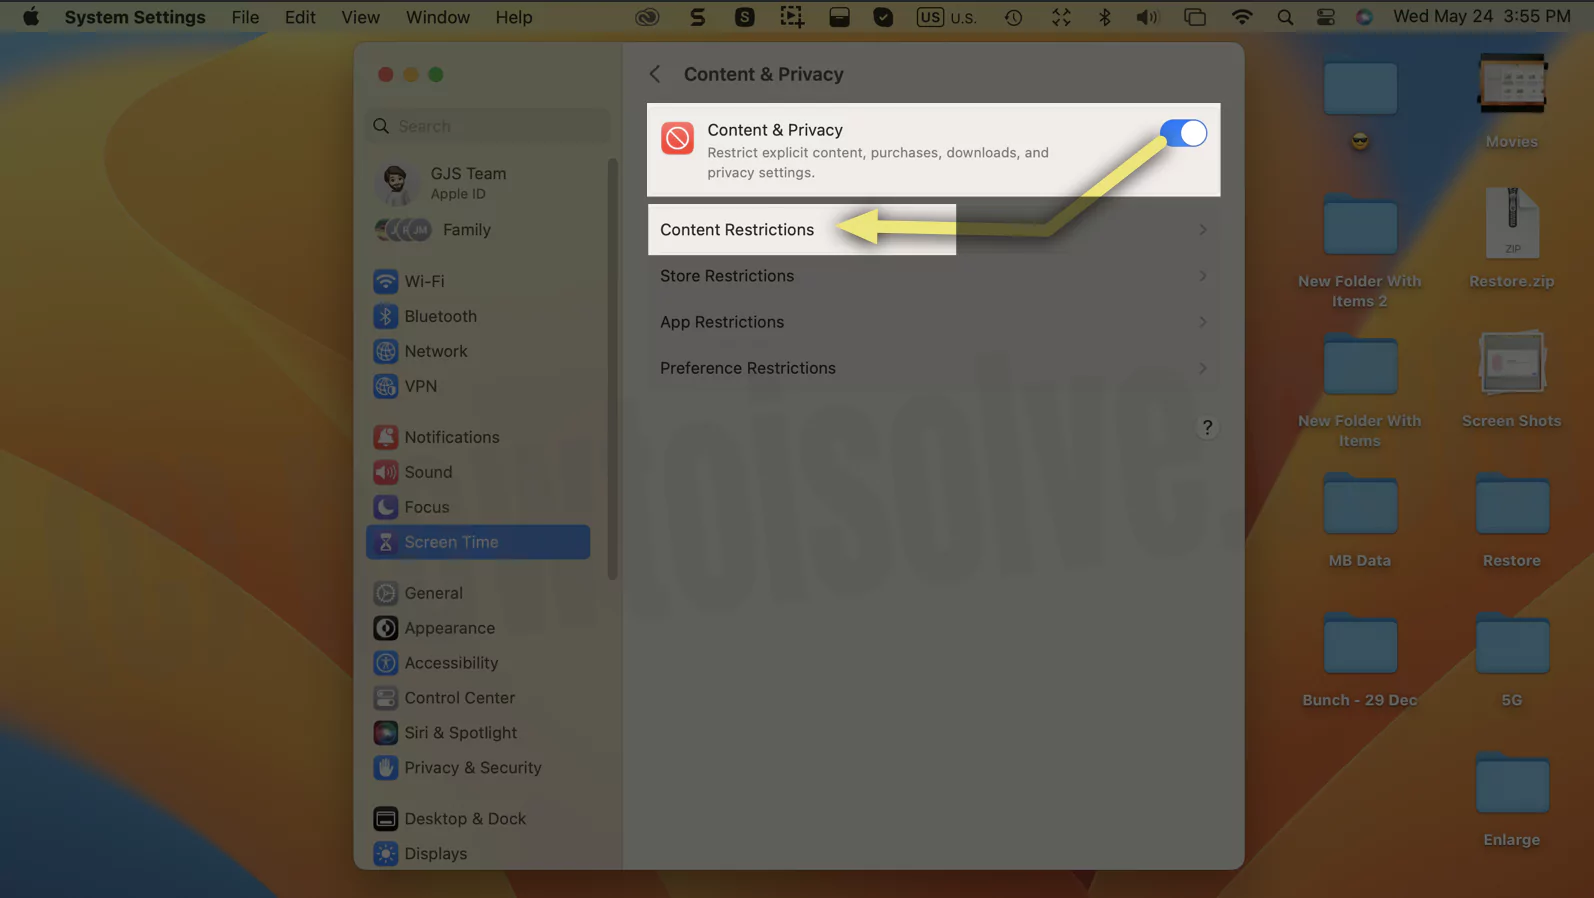
Select Content & Privacy. And enable the toggle next to it.

4→ Choose Content Restriction.
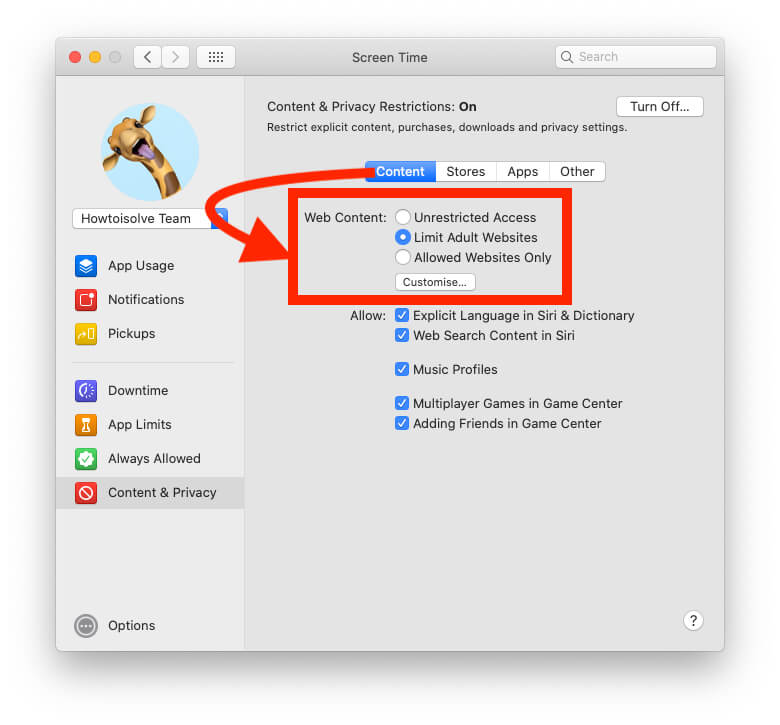
5→ Select Access To Web Content drop-down and configure it to Limit Adult Websites.
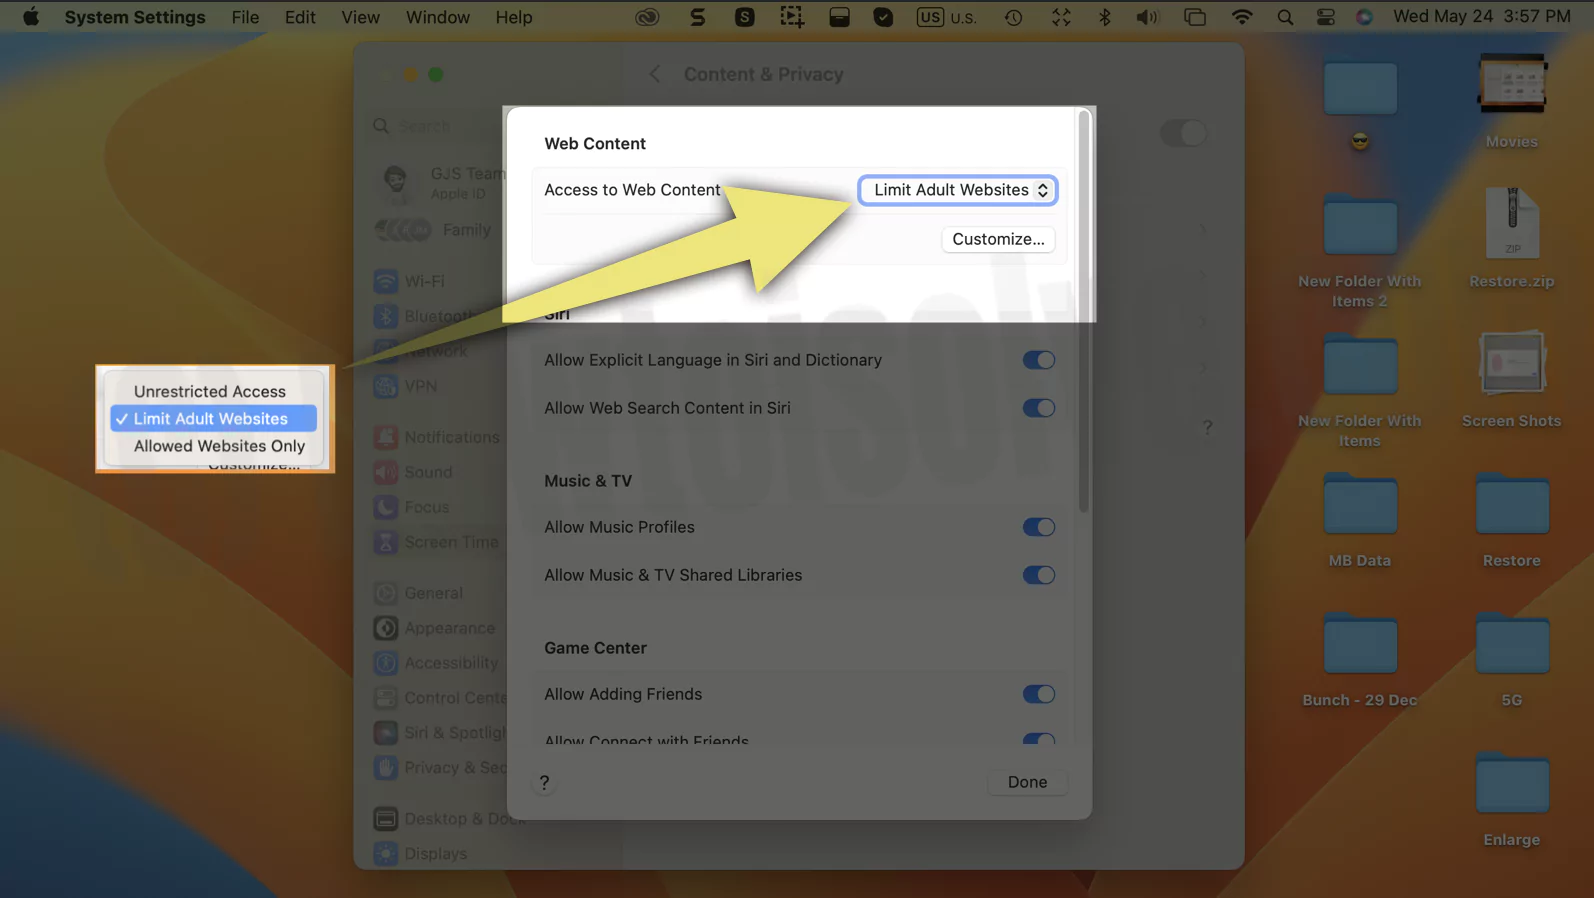
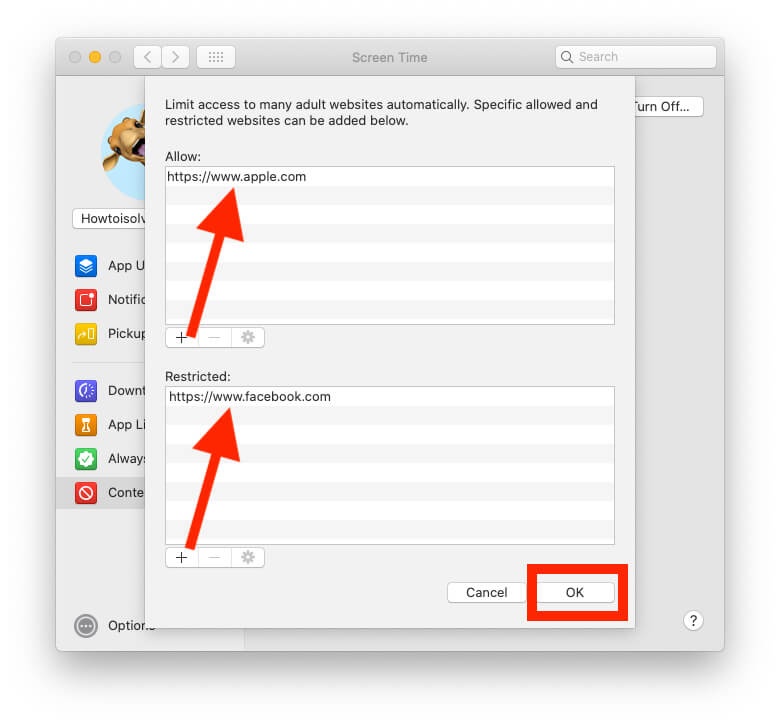
6→ Now, click on Customize Button.

- Allow: Enter the URL of web that can be accessed by your Kid.
- Restricted: Enter the URL of web you want to restrict from accessing.
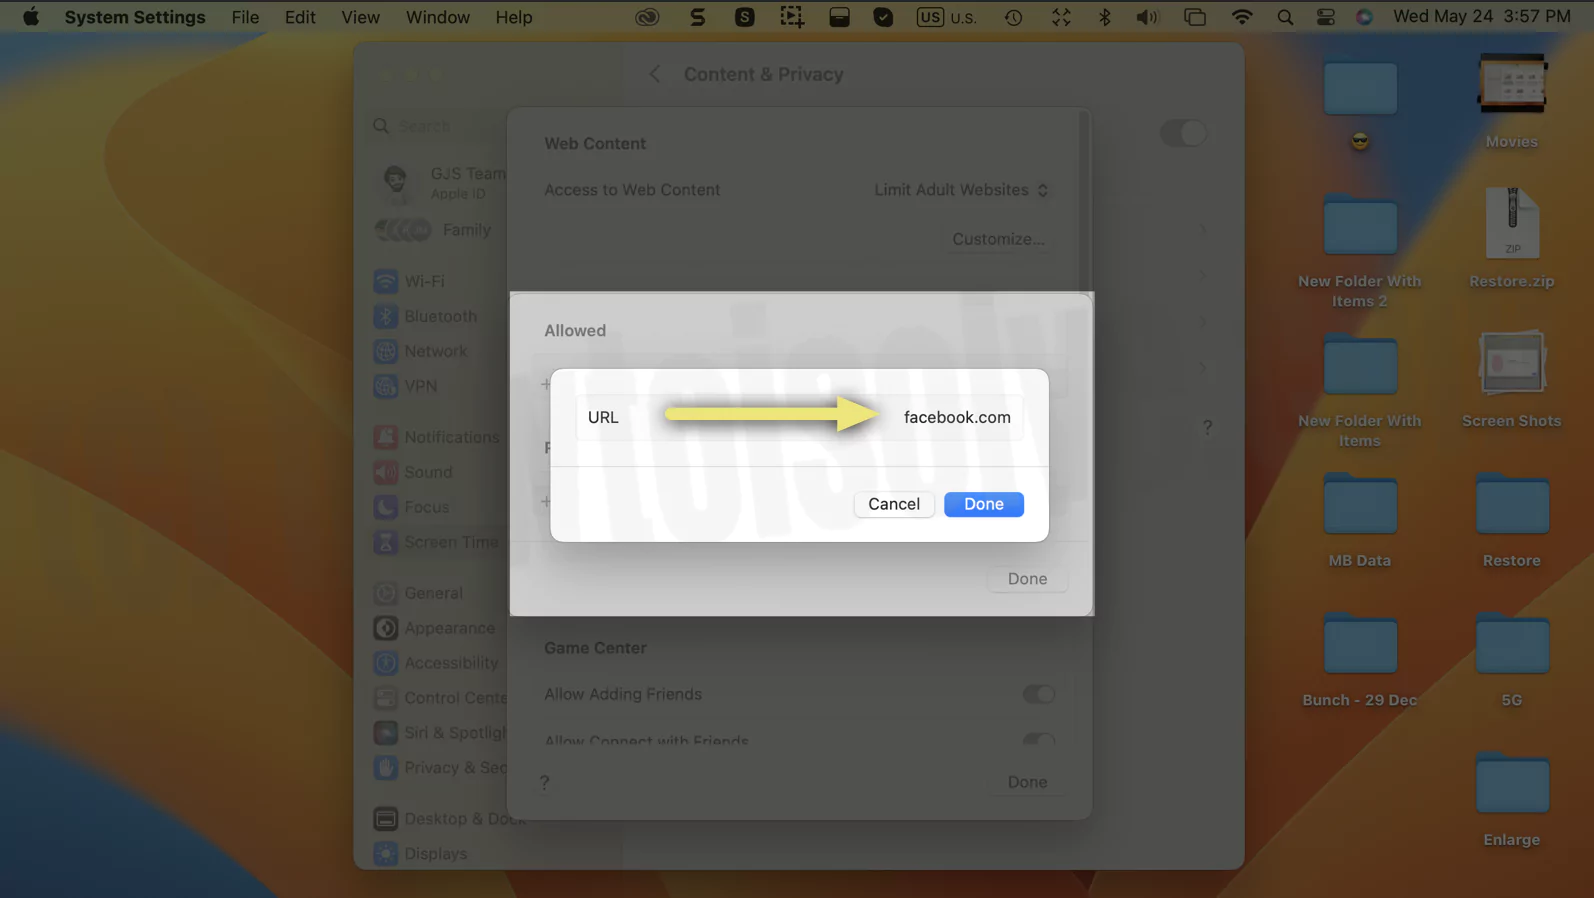
7→ Click Done.

macOS Monterey And Earlier
1→ Head to the Apple Logo. Click on System Preferences…
2→ Go to Screen Time.
3→ Select your Child’s ID from the drop-down below your Profile Photo.
Tip: Select your account from drop-down if you want to restrict the website on your Apple ID, and continue following the steps below.
4→ Go to Content & Restriction from the left sidebar.
5→ Click on Turn On button from the top left corner.
6→ Check the box next to the Limit Adult Websites.
7→ Now, click on Customize Button.
- Allow: Enter the URL of web that can be accessed by your Kid.
- Restricted: Enter the URL of web you want to restrict from accessing.
- Click Done.
That’s It! Now let’s check how to block websites on Mac using Terminal.
Using Terminal
In this method, the website will be restricted to the default Mac browser.
1→ Open Terminal.
2→ Type the sudo nano /etc/hosts command. Press Return and enter Mac’s log-in password.
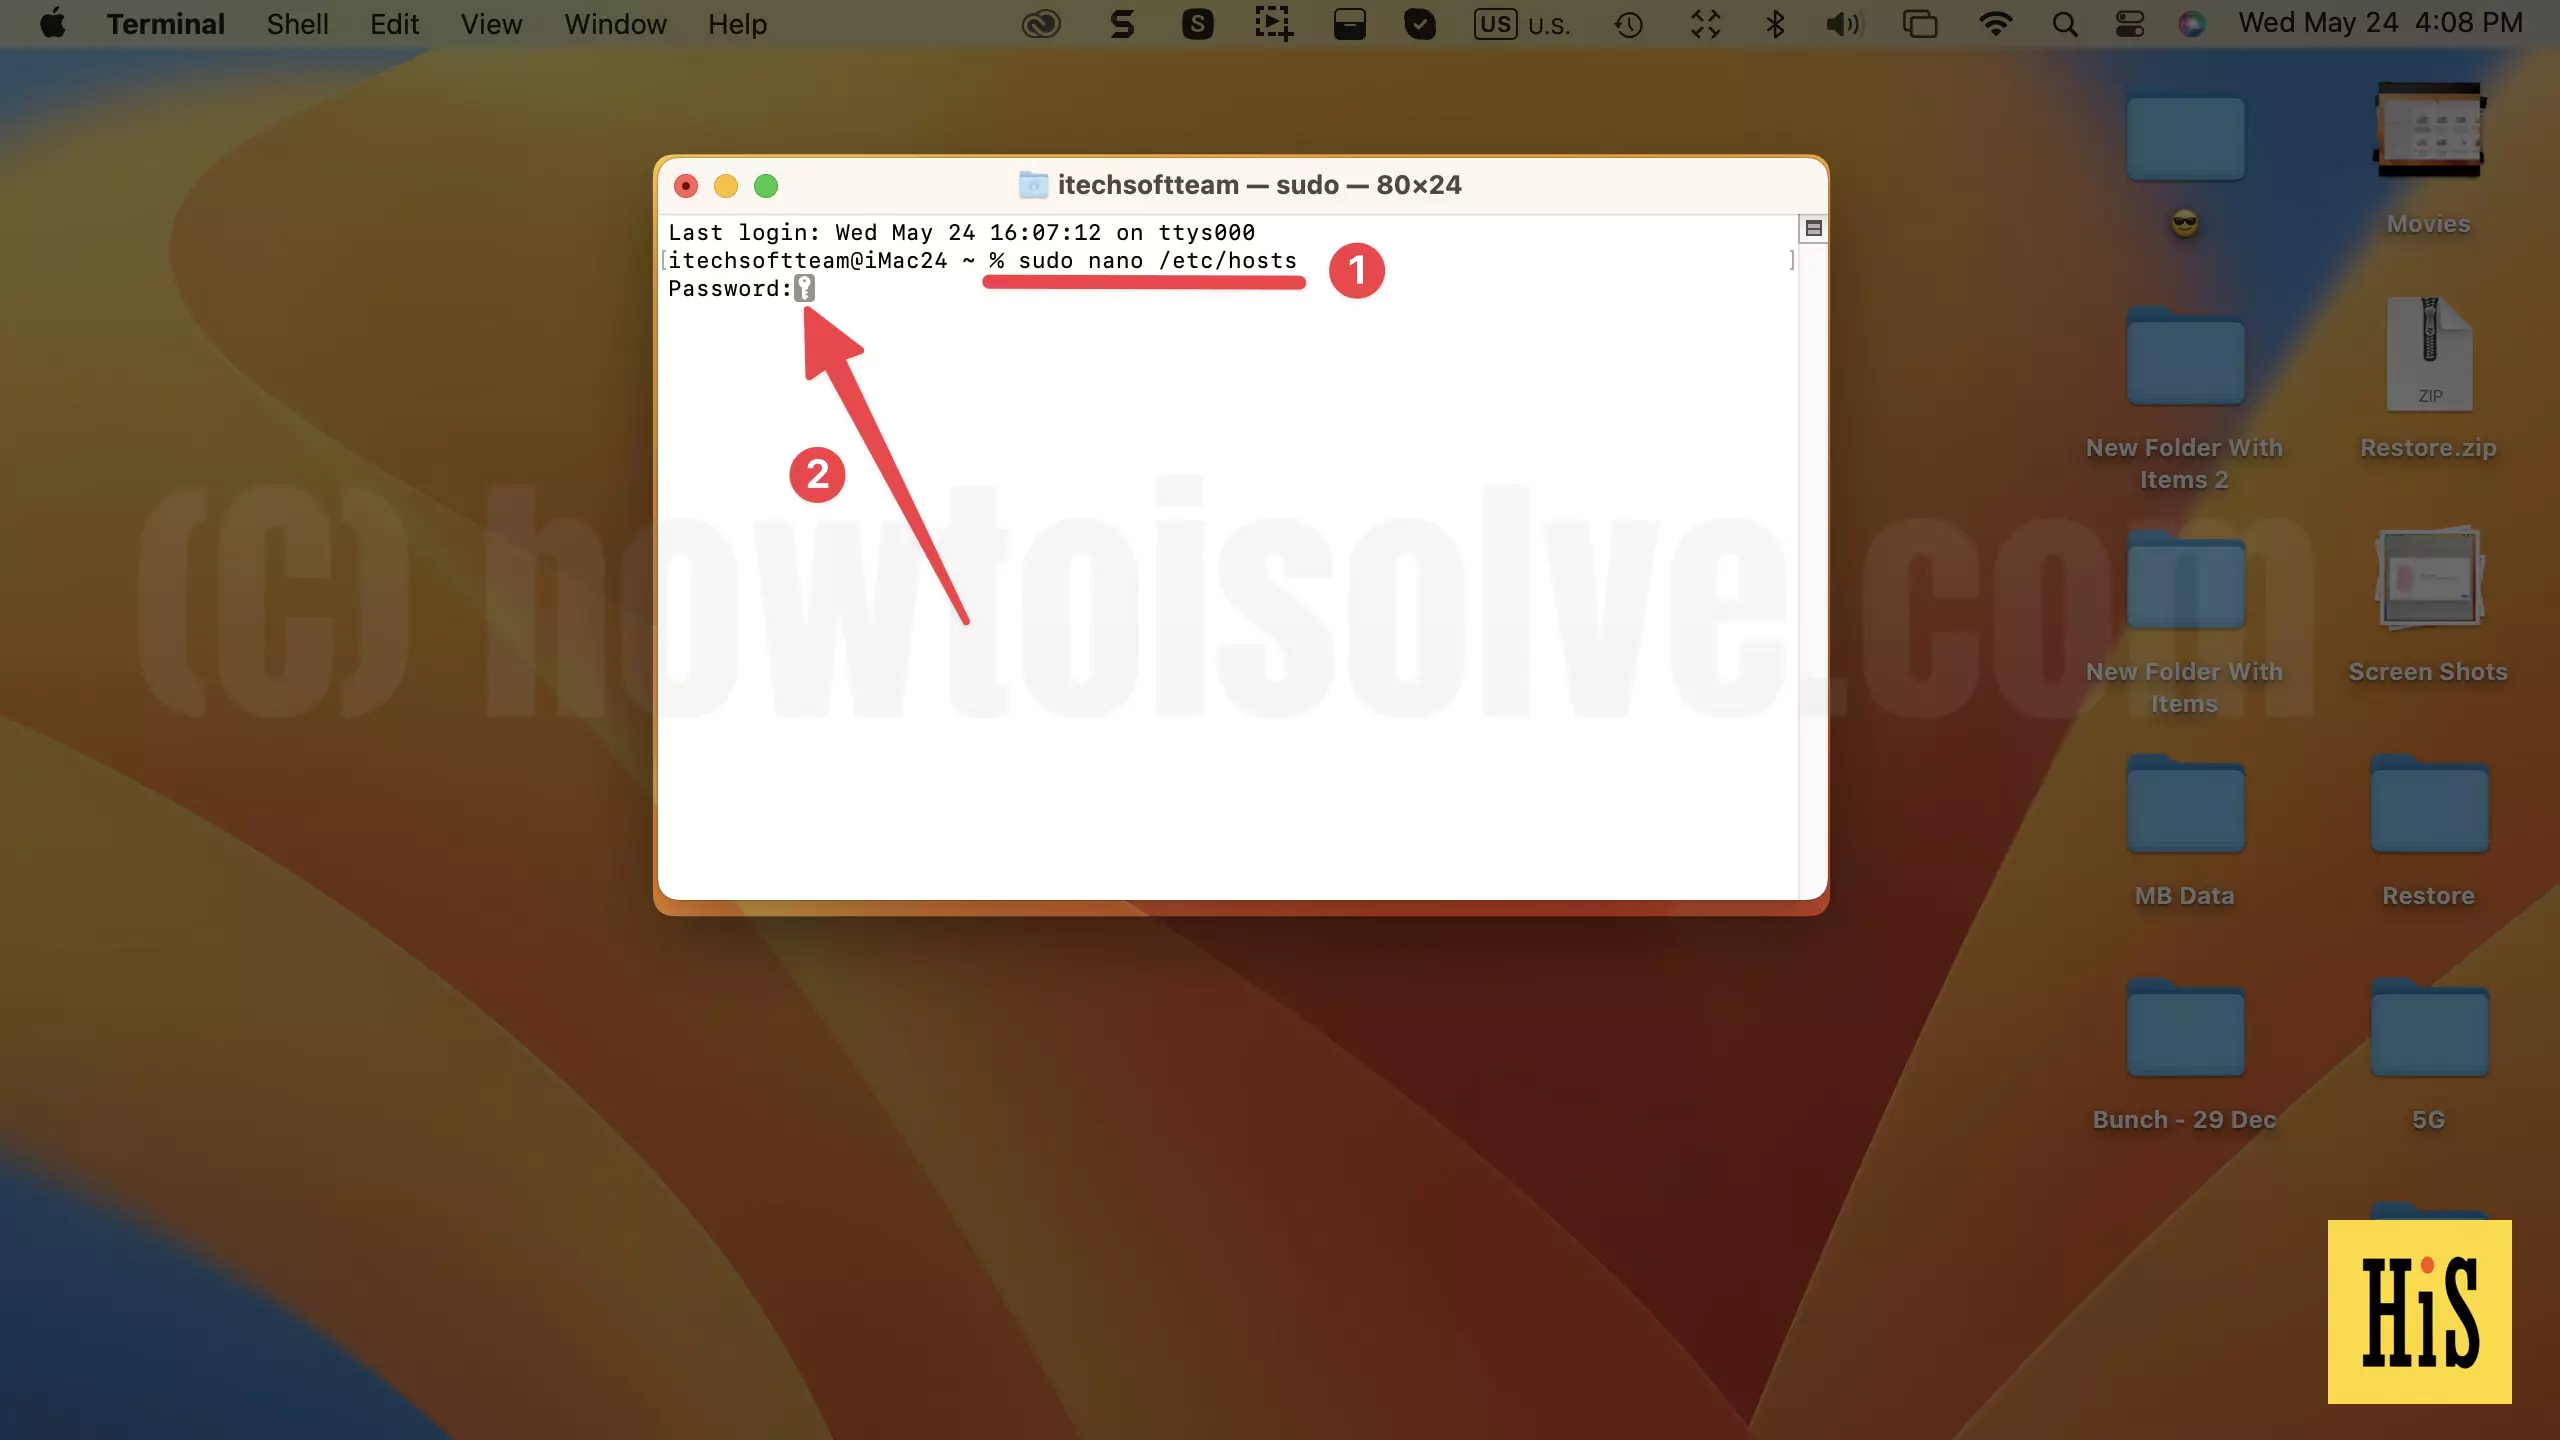
3→ Copy the localhost number from the Terminal Window.
4→ Then move down to the end of the text (Use Down Arrow Key from Keyboard), and paste the localhost number over there.
5→ Now type the desired website, for instance, www.websitename.com, next to the localhost number. After this, press Ctrl + O and then Return Key. And then press Ctrl + X to imply restrictions.
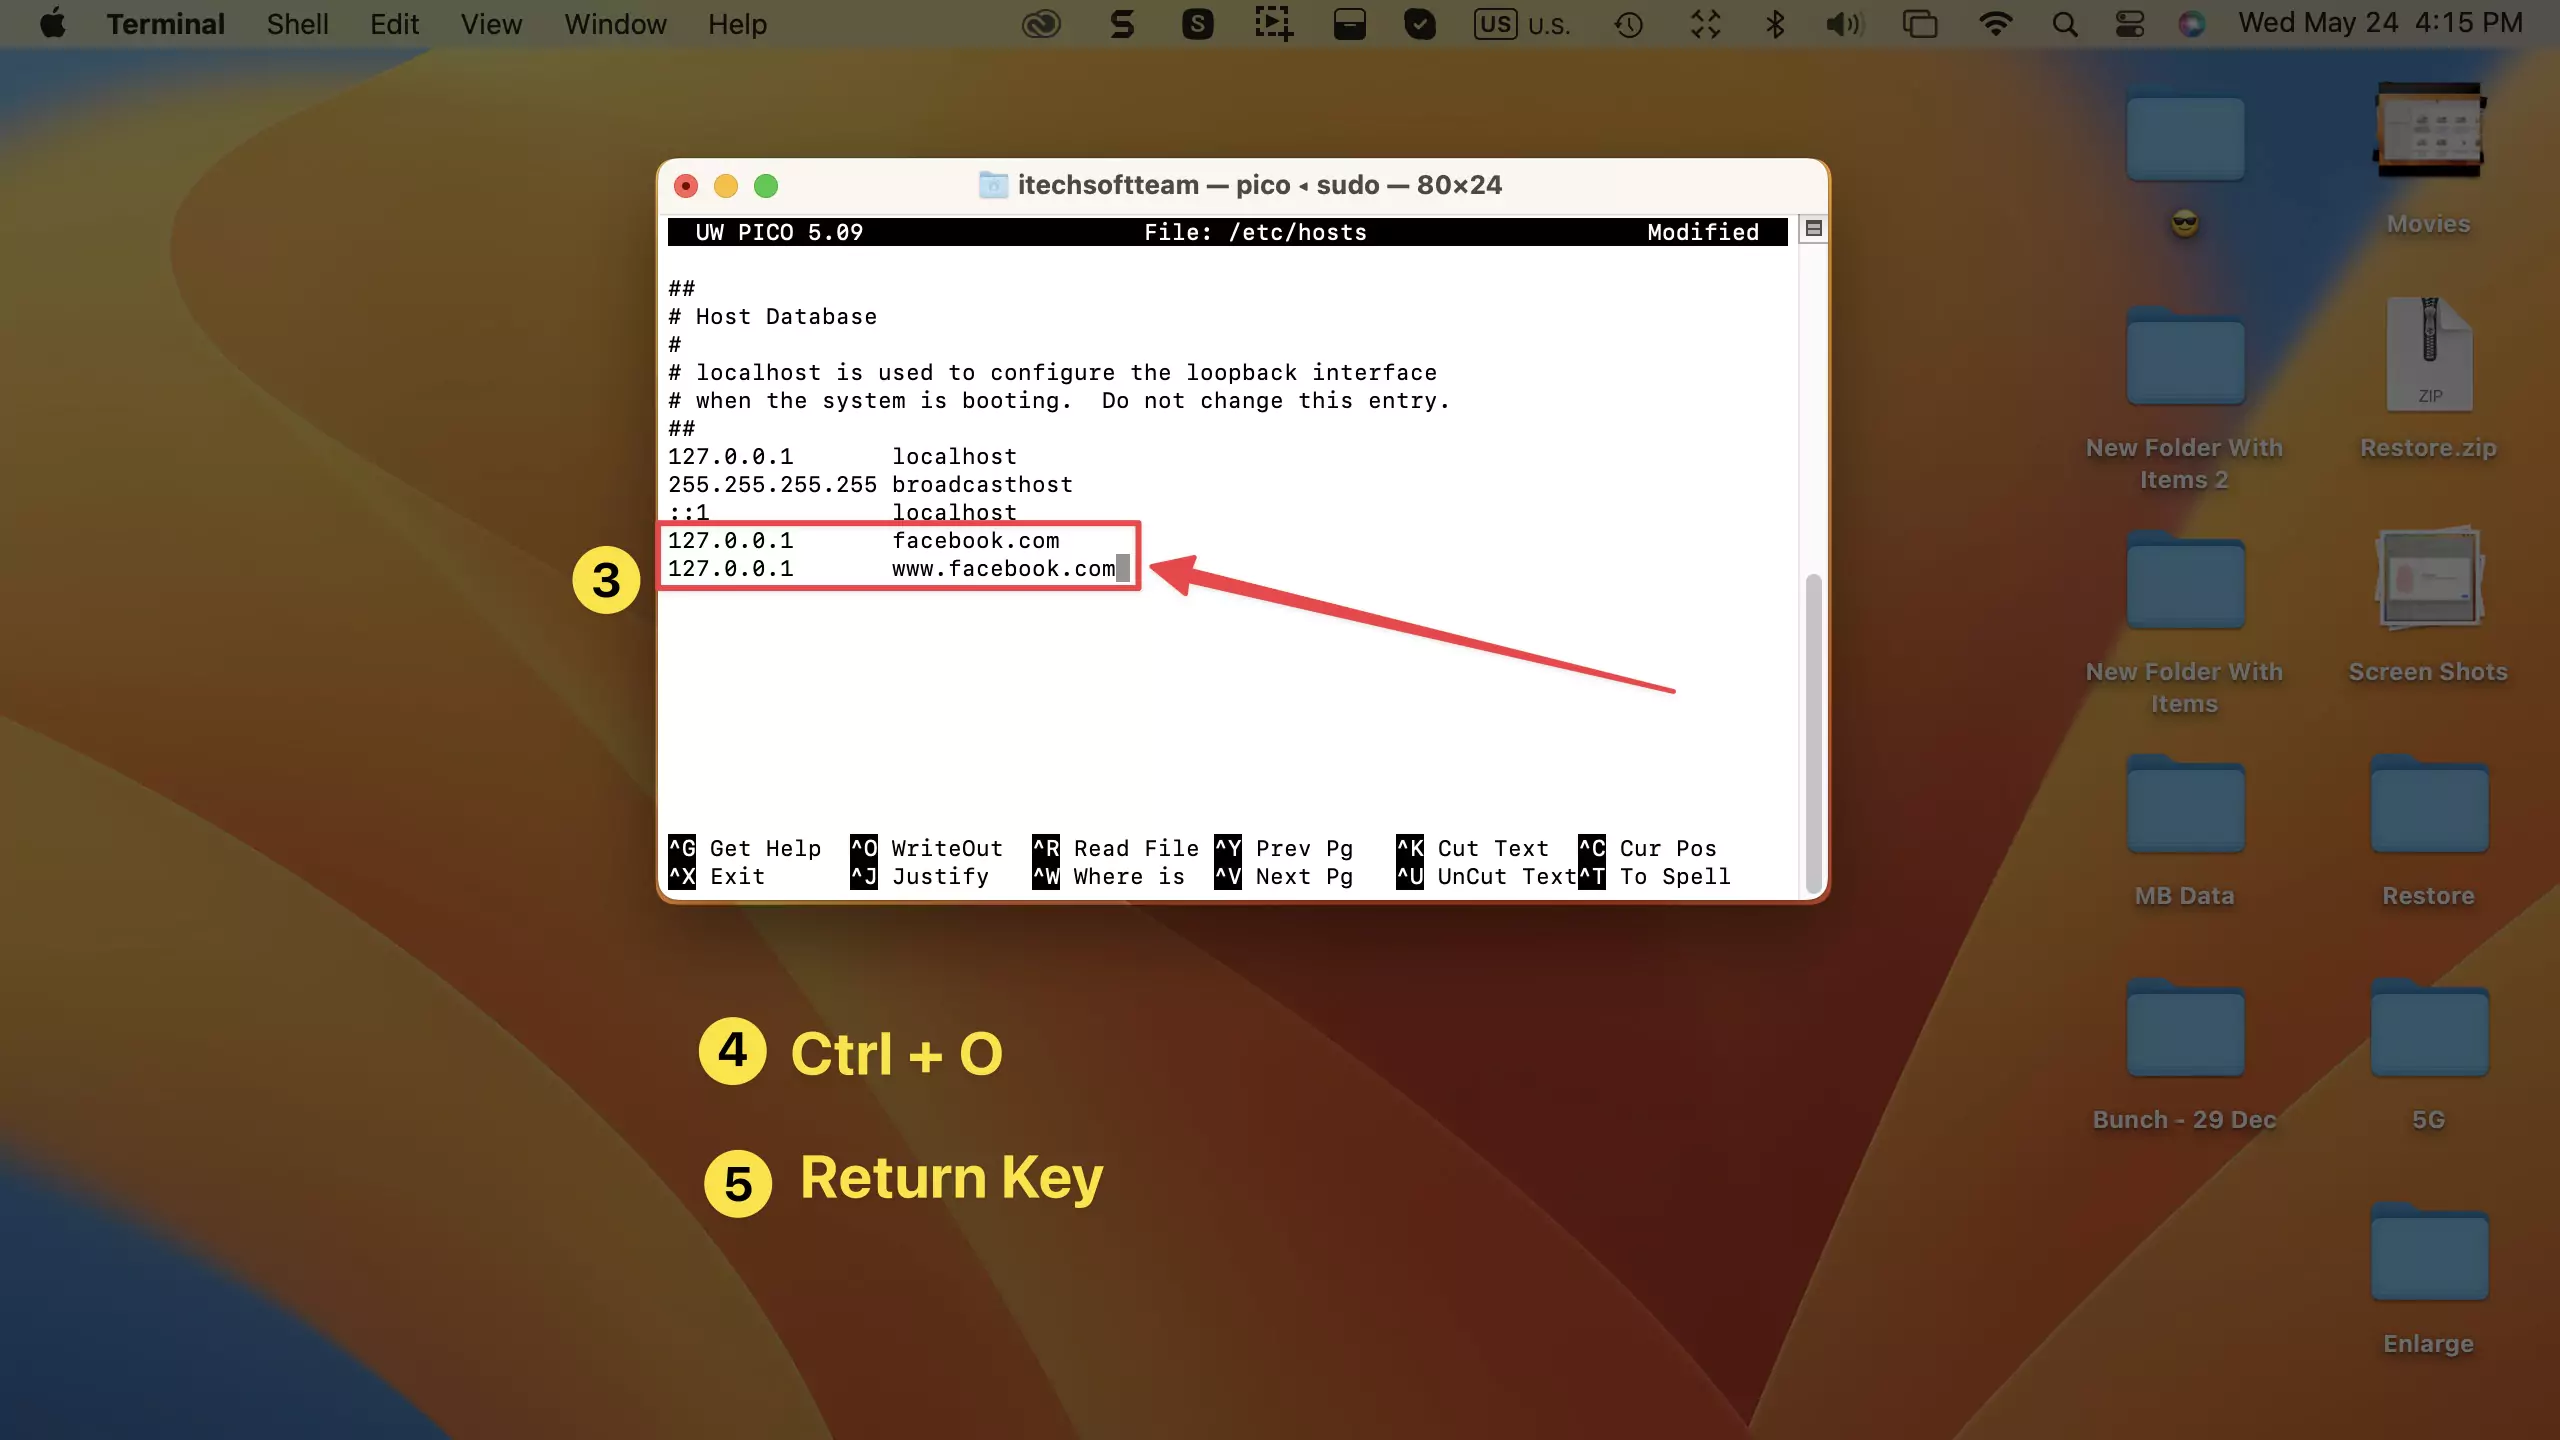
6→ At last, type the below command and press Return to clear Cache.
sudo dscacheutil -flush cache
This blocking rule is only happy on the default Web browser selected in your Mac system settings. Apple Logo > Desktop & Dock > Default web browser.

That’s it.
Remove Blocked Website Using Terminal on Mac
Here is my Example I blocked Safari on Mac, Now, I am removing Facebook URL from the Host file to allow use on Safari Browser.
- Open Terminal on Mac using Spotlight Search or From the Launchpad.
- Type sudo nano /etc/hosts command: Hit Return to run Command, and Enter Mac Admin Password.
- Use Arrow down Key from the keyboard to Remove the entire line from the host file. Keep Arrow on a line only that you want to remove. After that, Press Control + K key to cut the text line.
- Now, Control + O to Save Changes and Click Return to run.
Click Control + X.
Type the below command to Flush the internet cache and get the effect on your Mac instantly. Now use facebook.com on safari as usual.
sudo dscacheutil -flush cacheFinal Thought!
I’m sure this article helped you to restrict websites on your Mac. If you want to take it a step further, you can even use the best spy apps for Mac. If you have a query, let us know in the comment box below.

