
Reducing transparency on a MacBook can help improve its performance and reduce eye strain. This can be done by going to your macOS system settings. From there, you can toggle on the Reduce Transparency option. Please note that this may impact the appearance of certain interface elements.
For example, By adjusting the transparency settings on your macOS, you can easily and clearly locate the icons on the top menu bar of your Mac.
Step on Reduce transparency on macOS for better visibility
In macOS Ventura & later macOS, follow the steps below.
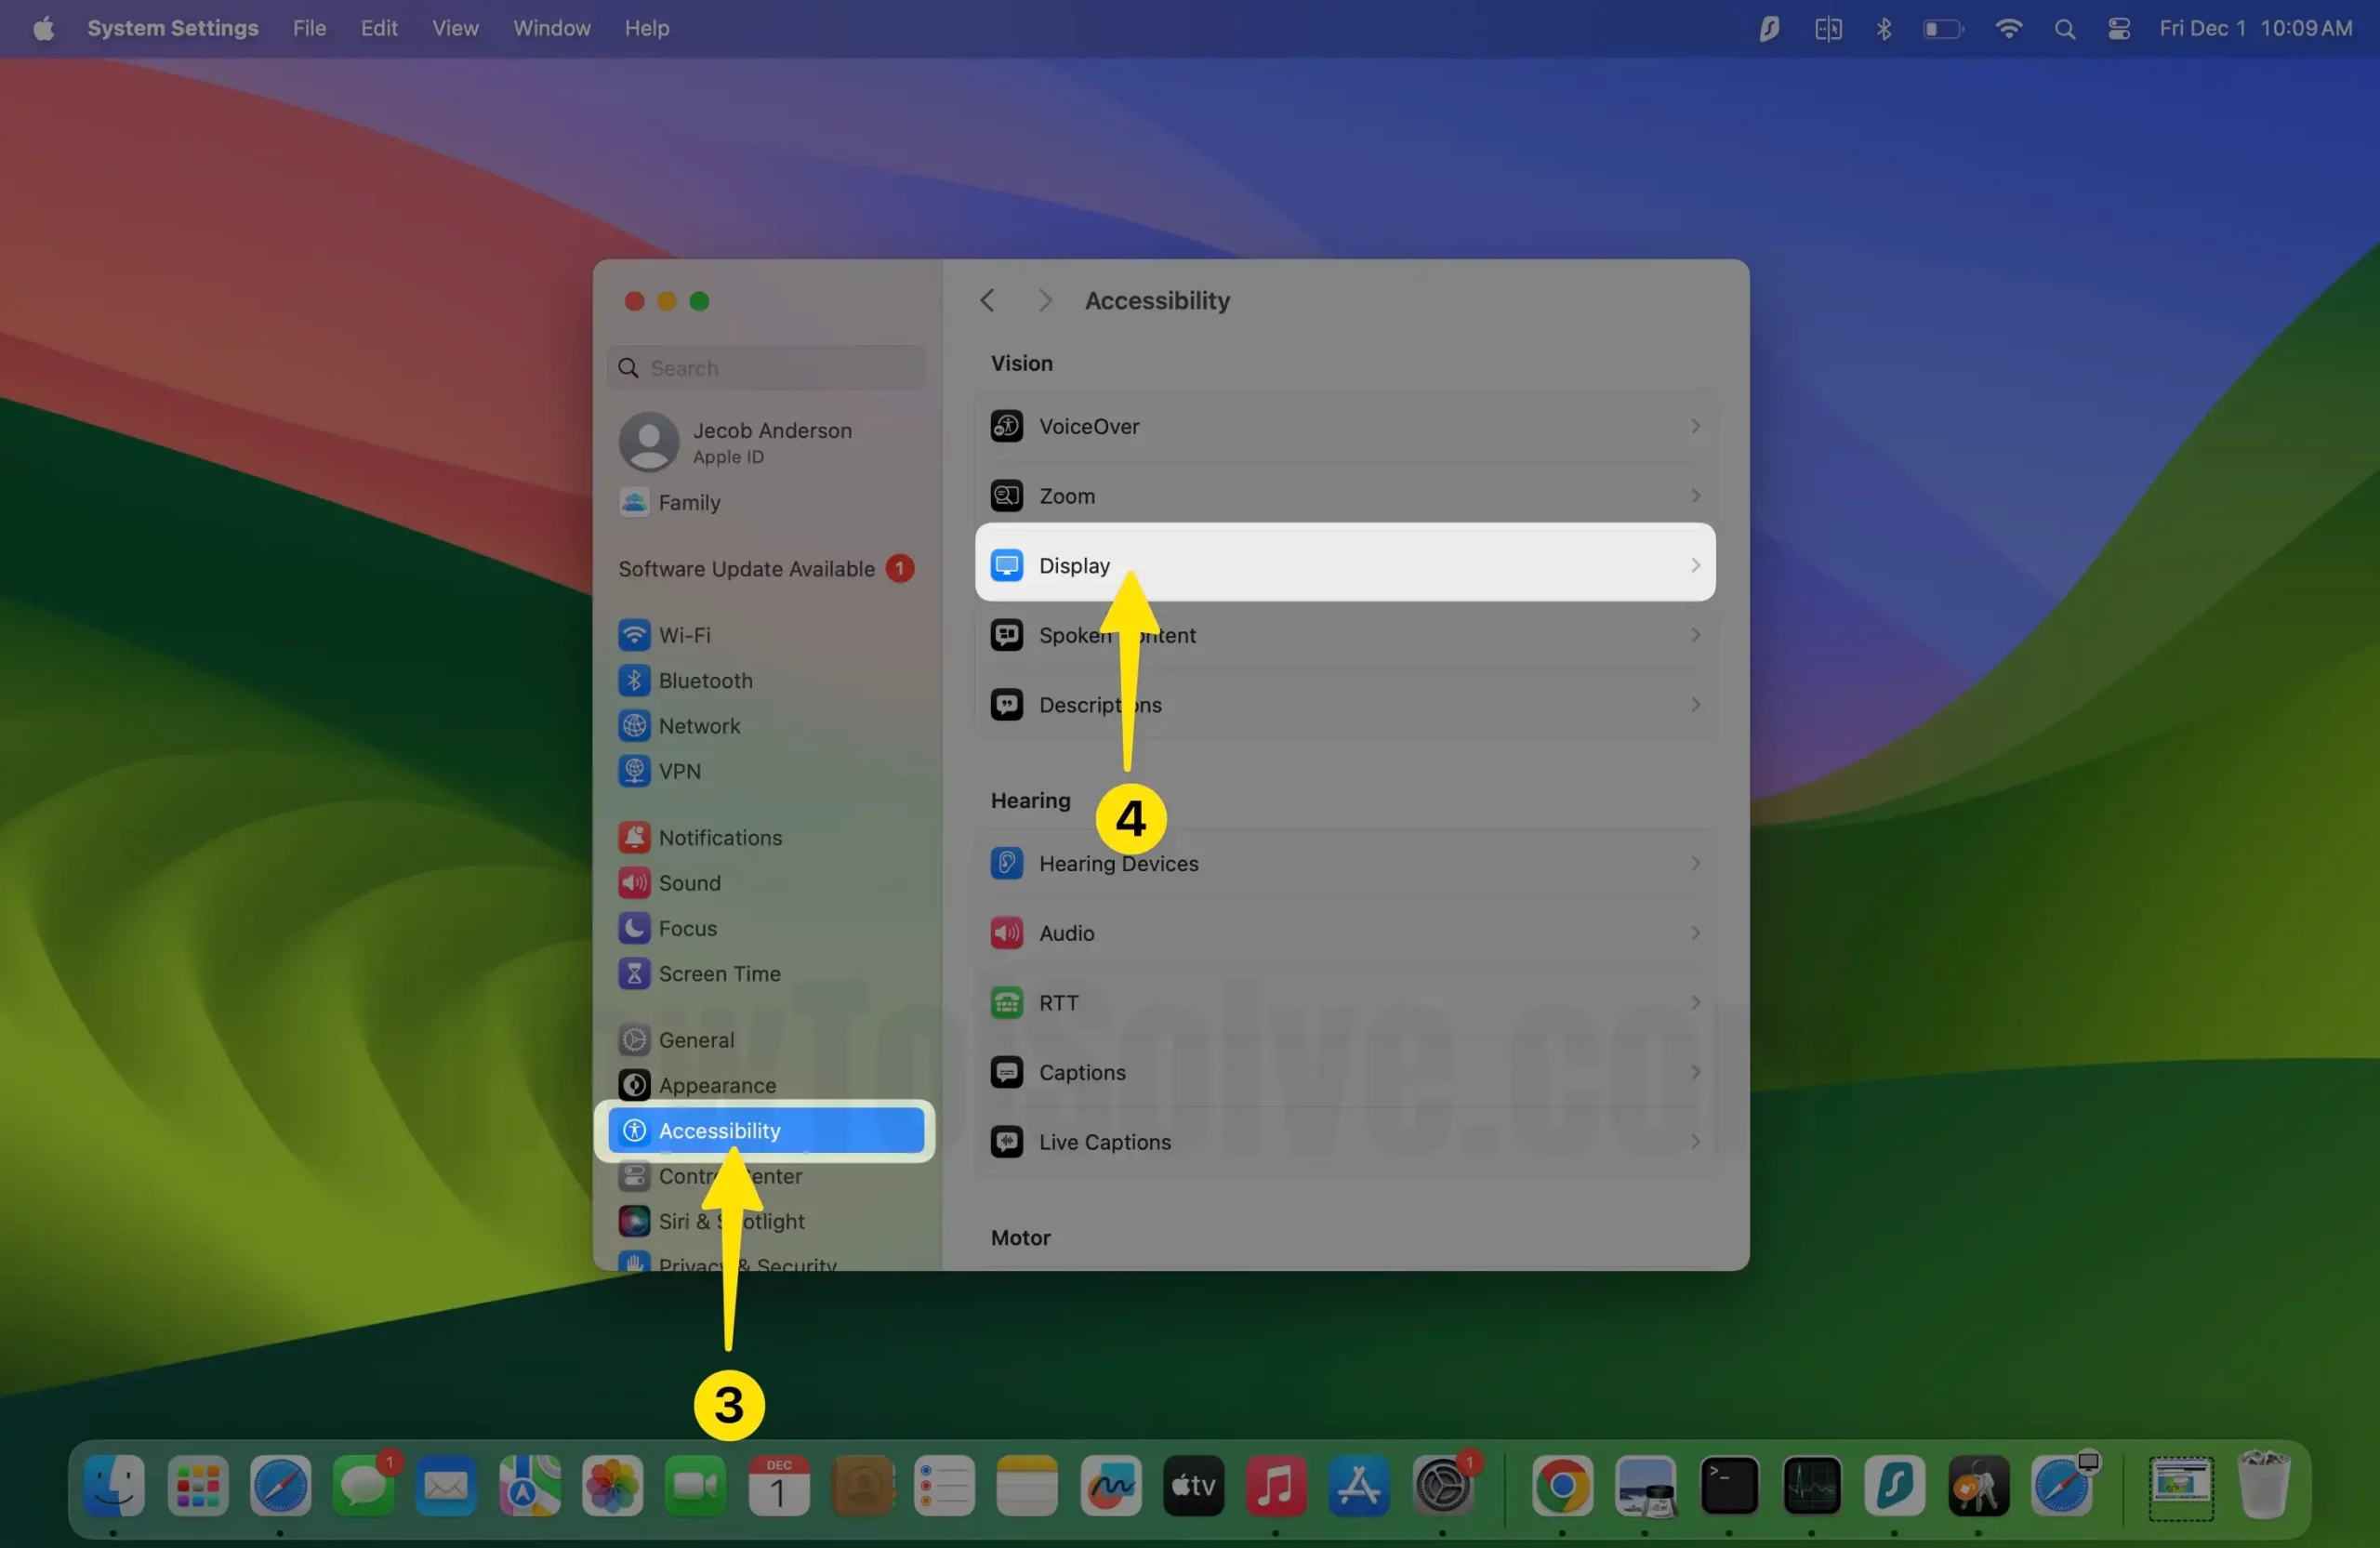
1. Go to the Apple Logo from the top menu and select System Settings.
2. Select Accessibility from the left side of the window and click on Display.
3. Now, scroll and enable the Reduce transparency toggle and see the instant changes on your Display user interface.

How to change transparency in Older macOS
- Go to the Apple logo > Now, Select System Preferences… option
- Select “Accessibility” inside the System Preferences Window
- Now Click On Display inside sections of Vision on the right side of the screen.
- Tick into the “Reduce transparency” box.


More: How to Check Which Version of macOS You’re Using on Mac
That’s it! Now, please check the screen and the appearance of the new window. We’d love to hear your thoughts in the comments. How do they look? In the Accessibility options, you can find features like invert colors, grayscale, increased contrast, and more.


