
What is Firewall and does my Mac really need a Firewall? One of the most common questions arises in every Mac user! The firewall is a gatekeeper because in recent times the day without any digital services is a kind of nightmare, security is one of the major aspects to work, no matter if it’s any Online Services or else performing the various operations on your macOS. That’s where we can consider Firewall as an important aspect because as of now and forever, the enabled Firewall on Mac takes care of everything.
Usually, the Firewall is adapted by the big enterprises that contribute to the system with everyone to have access to data from any geographical location, because the Firewall prevents unauthorized access to the data. Well, if you are not performing such tasks on the Mac, you can still use it as this feature adds up an extra layer of security and peace of mind.
How to Configure Firewall On My Mac
As we all know, there is multiple OS on Mac, considering this, we have listed the steps of Firewall for all OS. To perform the steps according to the OS installed on your Mac.
How To Turn On / Turn Off Firewall on MacOS Ventura & Later Version
If you have recently installed the latest version of macOS, it’s obvious that you will not be familiar with how to enable and disable the Firewall on the latest macOS.
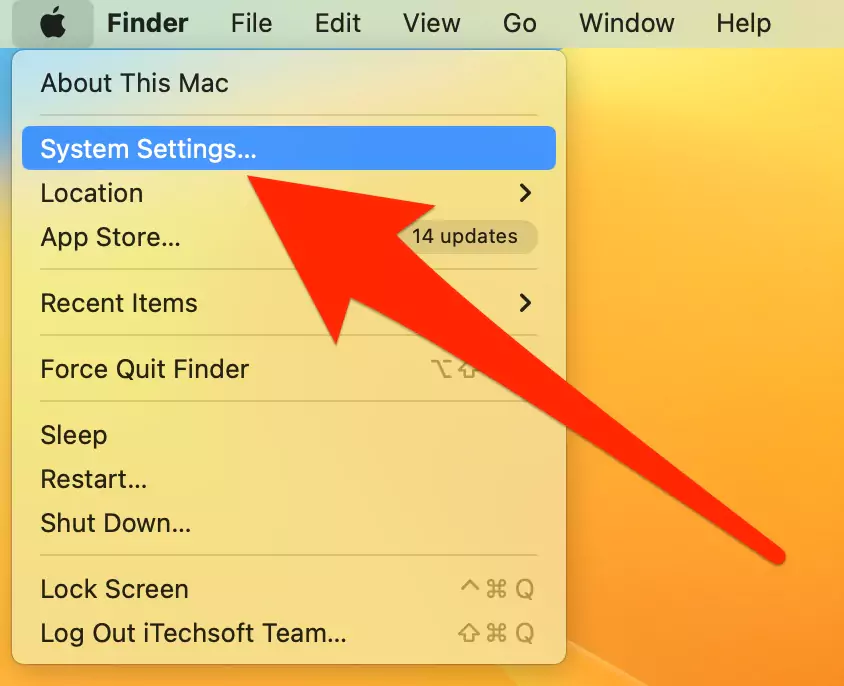
Step. 1→ Click on the Apple Logo present in the Menu Bar > System Settings.
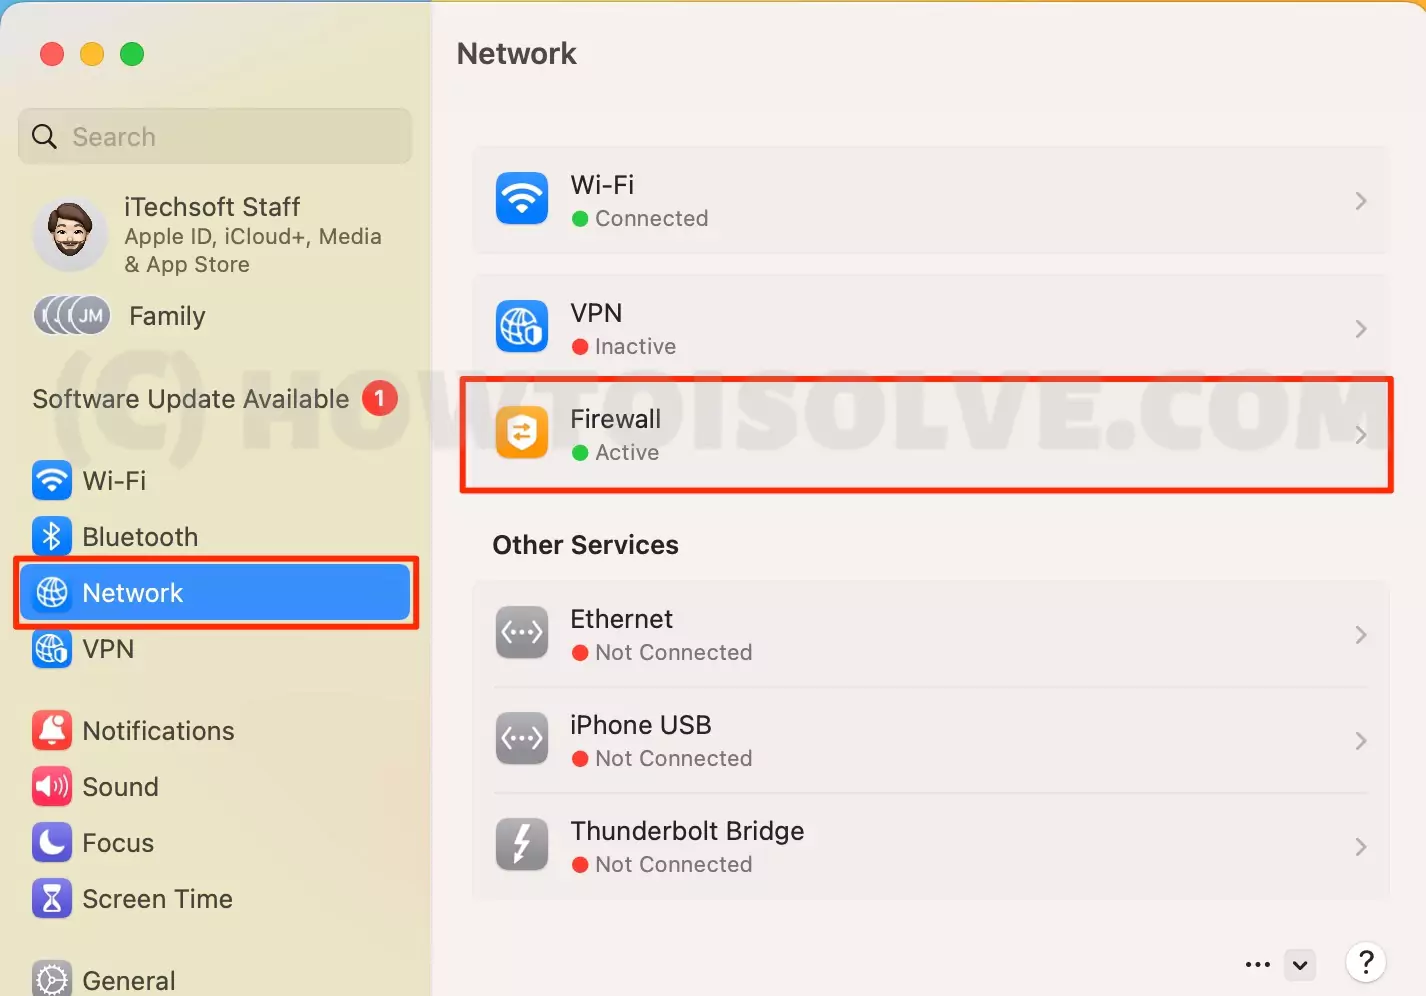
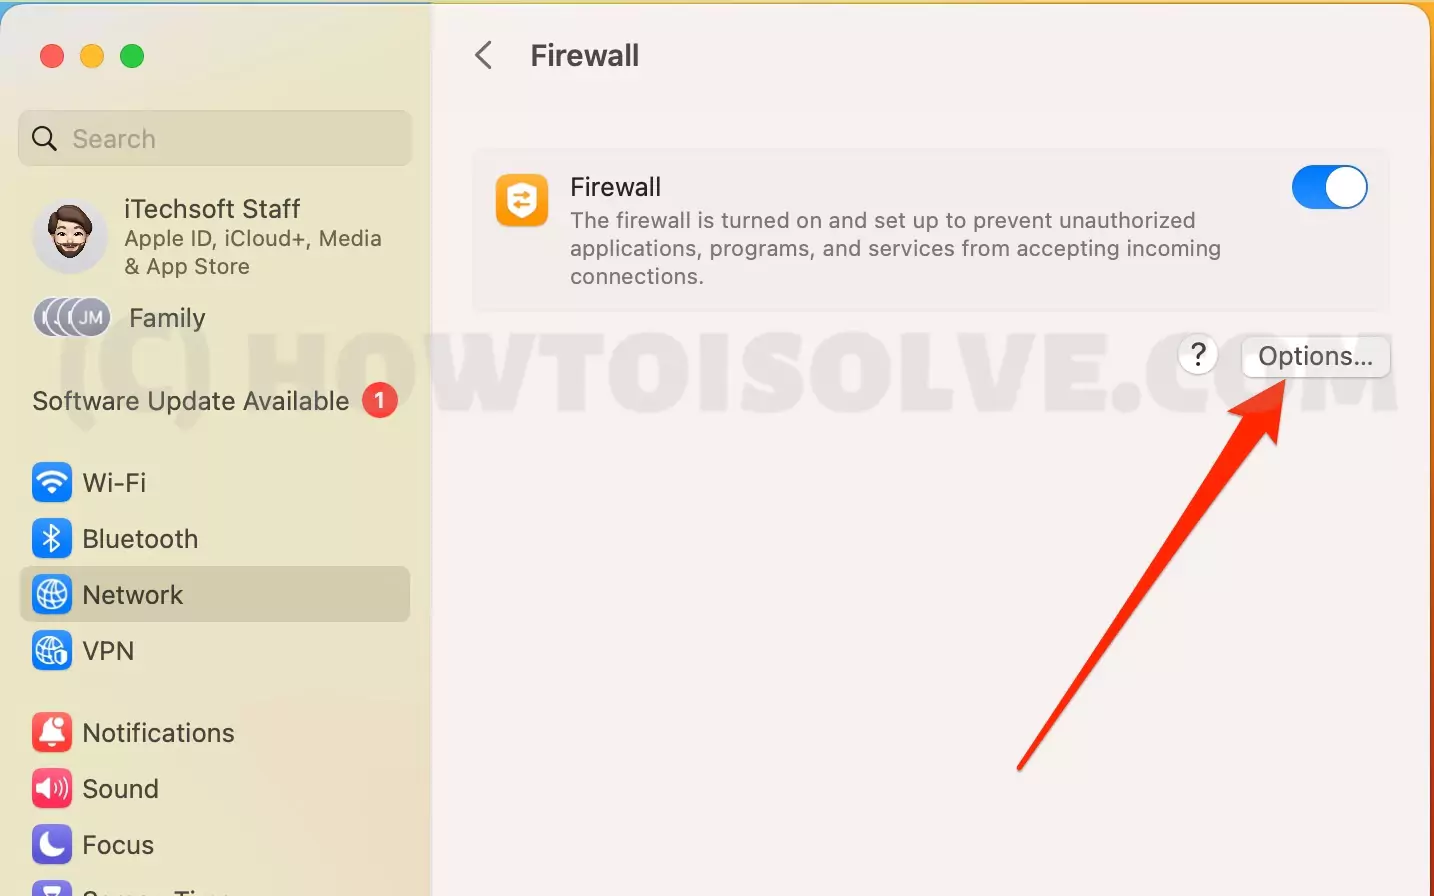
Step. 2→ Select Network > Firewall.
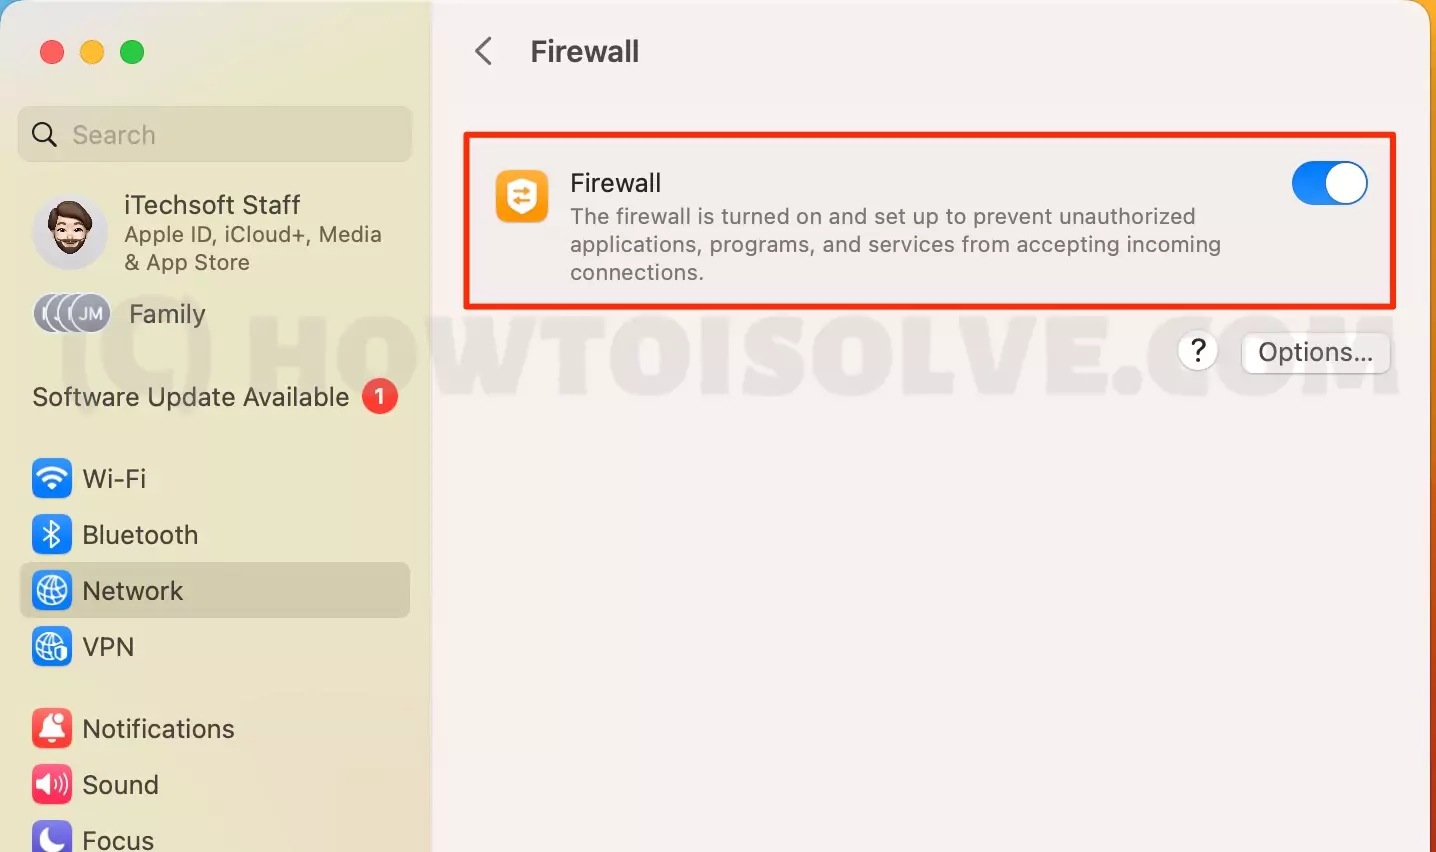
Step. 3→ Tap on the Toggle to Enable/Disable Firewall.
Without turning on this feature, the Mac is still secured as Apple is well known for keeping its users behind the bars. But if you want 0an extra security layer, it’s better to go with Firewall.
How To Turn On / Turn Off Firewall On macOS Monterey 12 & Earlier Version
Still, many Mac fans have the earlier version of macOS. And unfortunately, they are unknown with the steps to enable/disable the Firewall on Mac. If you are one of those, kindly follow the given below steps.
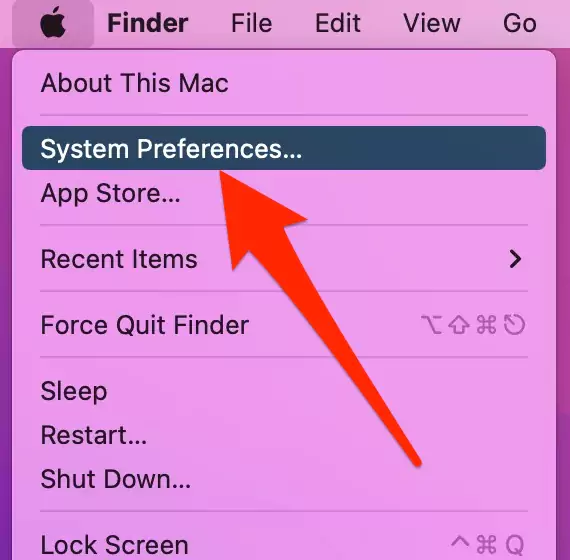
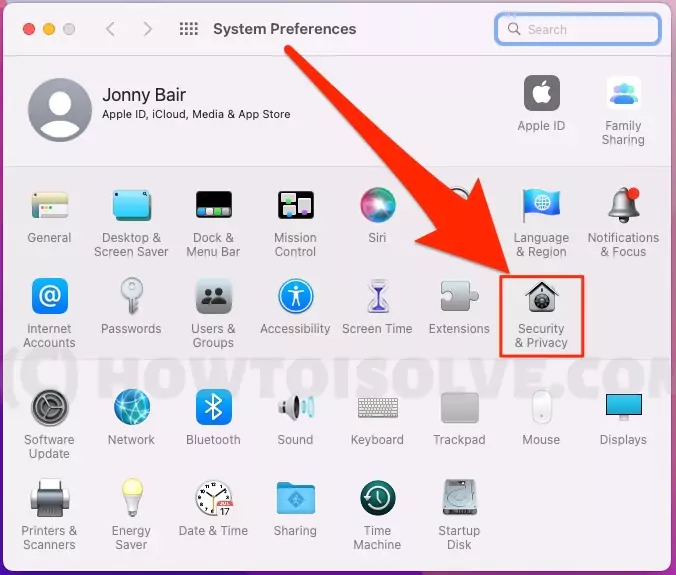
Step. 1→ Head to the Apple Logo present in the Menu Bar > System Preferences…
Step. 2→ Search for Security & Privacy and click on it > Firewall.

Step. 3→ Tap on the Lock located on the bottom left side. Enter the Administrator Name & Password > Firewall Options…
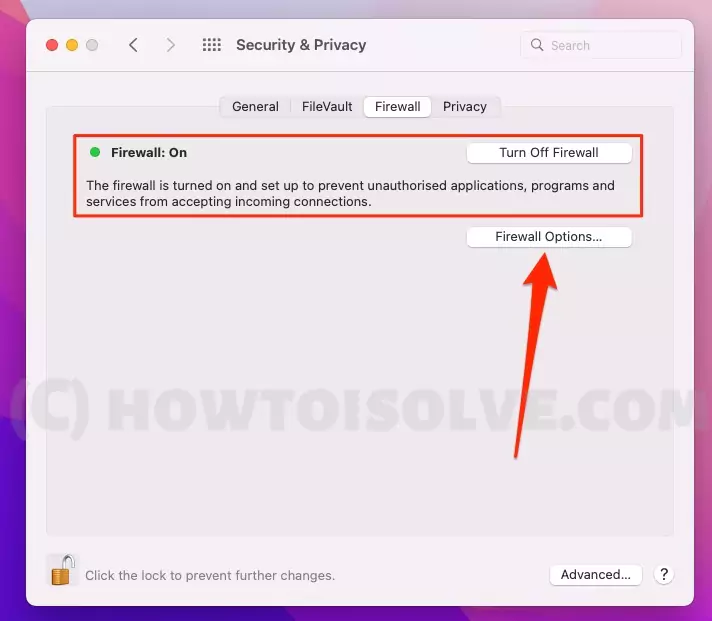
Step. 4→ Select Turn On Firewall in case it’s disabled. Or else choose Turn Off Firewall, in case it’s enabled.
Now and forever, after performing those steps on your Mac, there is no path for Malware and Hackers to enter your Mac through the network.
Should I Keep Firewall Turn On Or Turn Off On MacBook?
Well, there is no such kind of pros and cons to keeping either Firewall enabled or disabled on the MacBook. It’s just an extra security layer to prevent your MacBook from being stuck with various Malwares, Bugs, and at last to stop the hackers from getting deep into your important data. Moving forward, you might have to play with Firewall Settings to keep your device ready and steady by adding the networks manually to clear out all the Security Protocols. At the same point, there are chances where you might have recently installed the Best Antivirus For Mac, which ultimately creates the conflicts with Firewall as both are assigned to do the same task. This situation can be completely neglected by turning off the Firewall. But according to experts, it is always better to keep Firewall turned on because it offers a security layer and peace of mind.
How To Block All Incoming Connection To Your Mac With A Firewall
For advanced security reasons, the macOS Firewall comes with a built-in feature known as “Block All Connection”. This feature boosts the security factor in the Mac, which is hopped in an untrusted network. Here are the steps to enable it.
macOS Ventura And Later,
Step. 1→ Head to the Apple Logo > System Settings…
Step. 2→ Select Network > Firewall > Options…
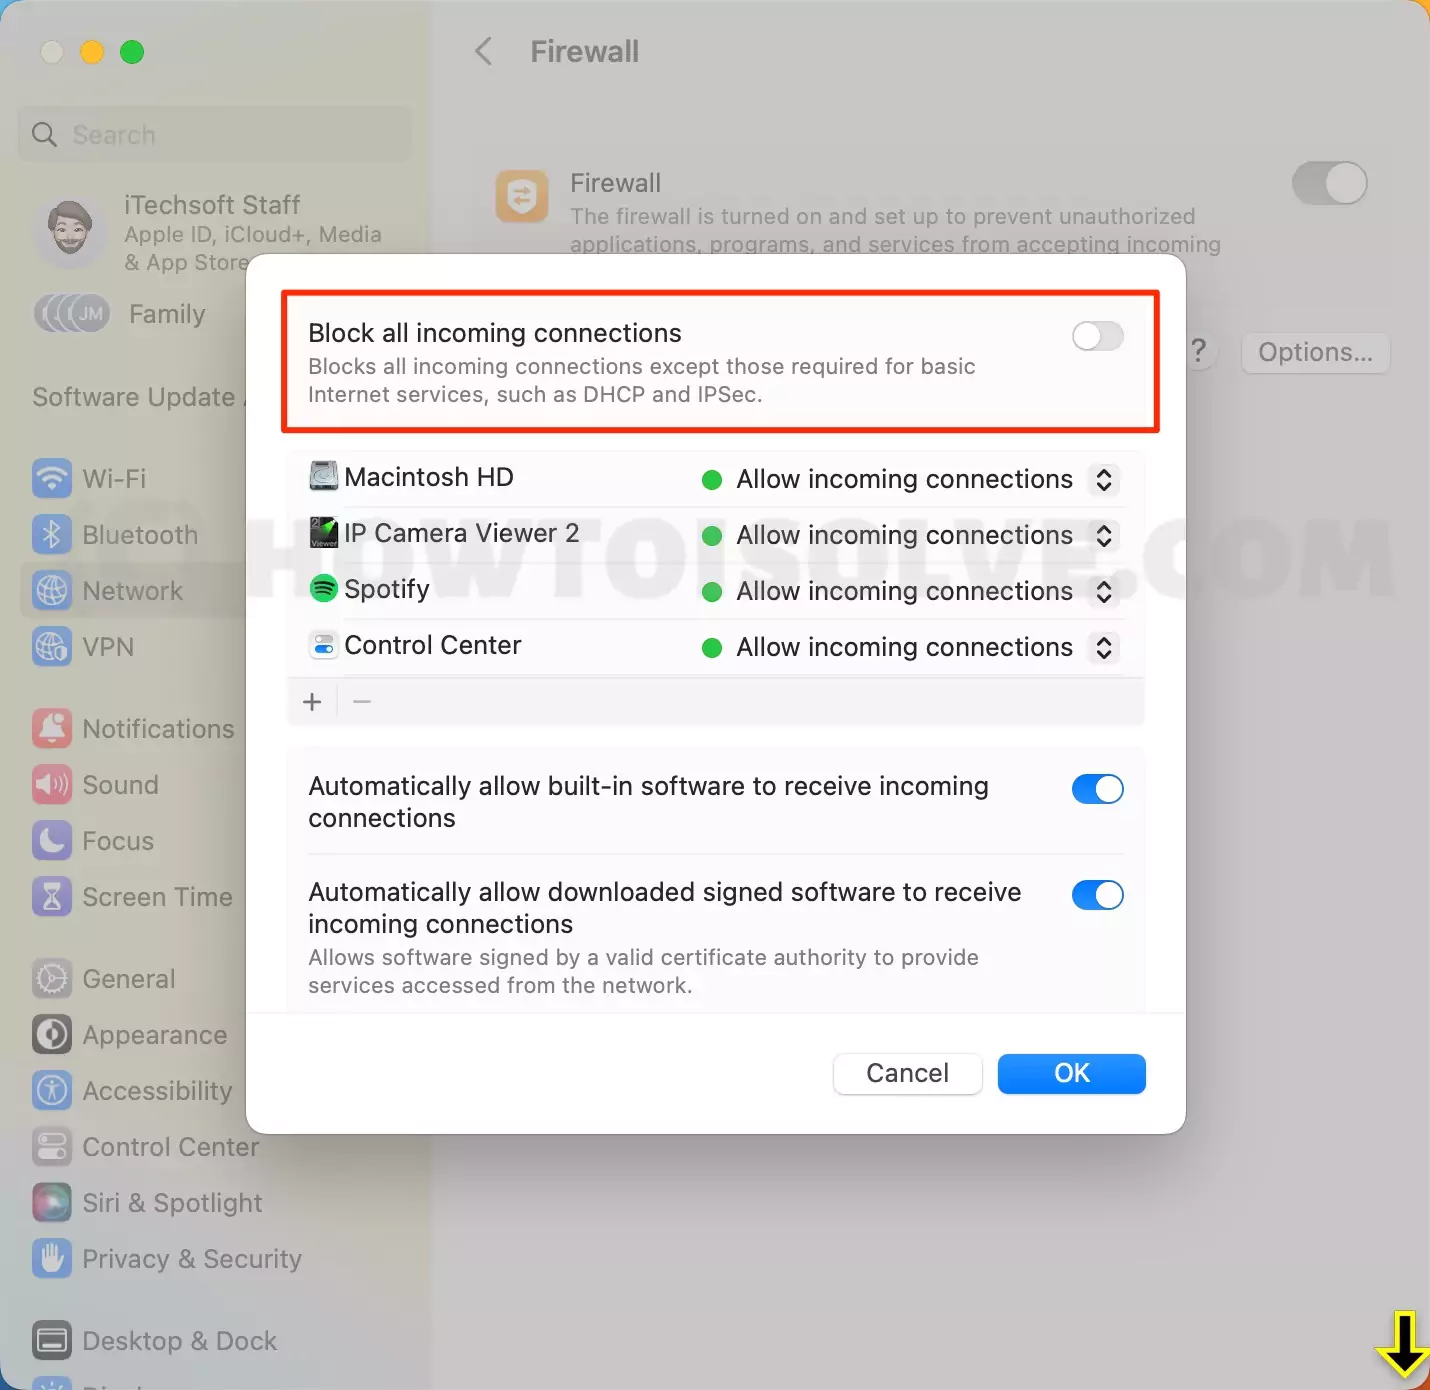
present on the Firewall Page. Enable the Toggle present next to the Block All Incoming Connection.
macOS Monterey And Earlier,
Step. 1→ Navigate to the Apple Logo > System Preferences…
Step. 2→ Choose Security & Privacy > Firewall.
Step. 3→ Click on the Lock Icon located in the left bottom corner of the screen. Now the Pop-Up will appear asking you to enter your Administrator Name & Password.
Step. 4→ Tap on Firewall Options… > Choose the Check Box present next to the Block All Incoming Connection.
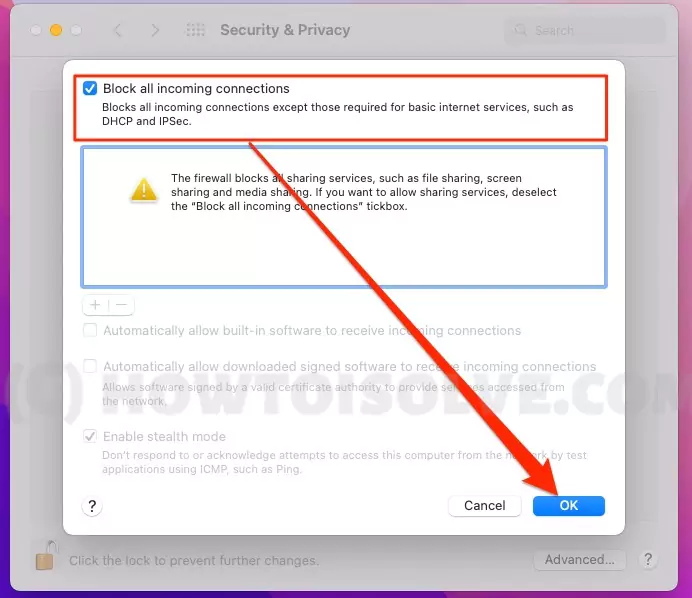
Turning On the block all incoming connections will disallow the incoming connections to non-essential applications and services except those who require normal internet services such as IPsc and DHCP
How To “Allow/Block Incoming Connection” For Application On Mac Firewall
A large number of applications are installed on the Mac, which causes Mac Firewall to ask whether to block or allow incoming connections. To design a single or array of applications for such a task, follow the below steps. Consider Zoom Application as an example for these steps.
macOS Ventura And Later,
Step. 1→ Choose the Apple Logo > System Settings… > Network.
Step. 2→ From the Firewall Page, select Options…
Step. 3→ On the next page, you will encounter the list of applications on a screen
Note: If you are willing to Add or Remove any of the desired applications, select “+” Icon > Add to add or “-“ Icon to remove.

Step. 4→ Select Zoom Application to highlight and tap on either Allow All Incoming Connections or else Block All Incoming Connections from the drop-down menu.

macOS Monterey And Earlier,
Step. 1→ Go to Apple Logo > System Preferences… > Security & Privacy > Firewall.
Step. 2→ Click on the Lock Icon located in the left bottom corner of the screen. Now the Pop-Up will appear asking you to enter Administrator Name & Password > Firewall Option…
Step. 3→ After doing so, the screen will feature the list of Applications.
Note: If you are willing to Add or Remove any of the desired applications, select “+” Icon > Add to add or “-“ Icon to remove.
Step. 4→ Now click on the Zoom Application from the list to highlight and choose either Allow All Incoming Connection or else Block All Incoming Connection from the drop-down menu.
The end result of this procedure is that only specified applications or services that are selected by you are assigned to either allow or block all incoming connections.
How To Allow Built-In Software To Receive Incoming Connections On Mac Firewall
Configuring the Mac Firewall is one of the most prominent operations to work. Because if there are amiss settings configured in networks, we result in misbehaving of built-in software of Mac. So here in the below-mentioned steps, we will make you learn how to Allow built-in Software to receive incoming connections on Mac Firewall.
macOS Ventura & Later,
Step. 1→ Click on the Apple Logo > System Settings…
Step. 2→ Hover the cursor on the Network > Firewall > Options and click on it. Choose Options… present on the Firewall Page.
Step. 3→ Click on the Toggle present next to Automatically Allow Built-In Software To Receive Incoming Connections.
macOS Monterey & Earlier,
Step. 1→ Select the Apple Logo > System Preferences…
Step. 2→ Search and select Security & Privacy > Firewall.
Step. 3→ Tap on the Lock Icon and enter the Administrator Name & Password. Click Firewall Options…
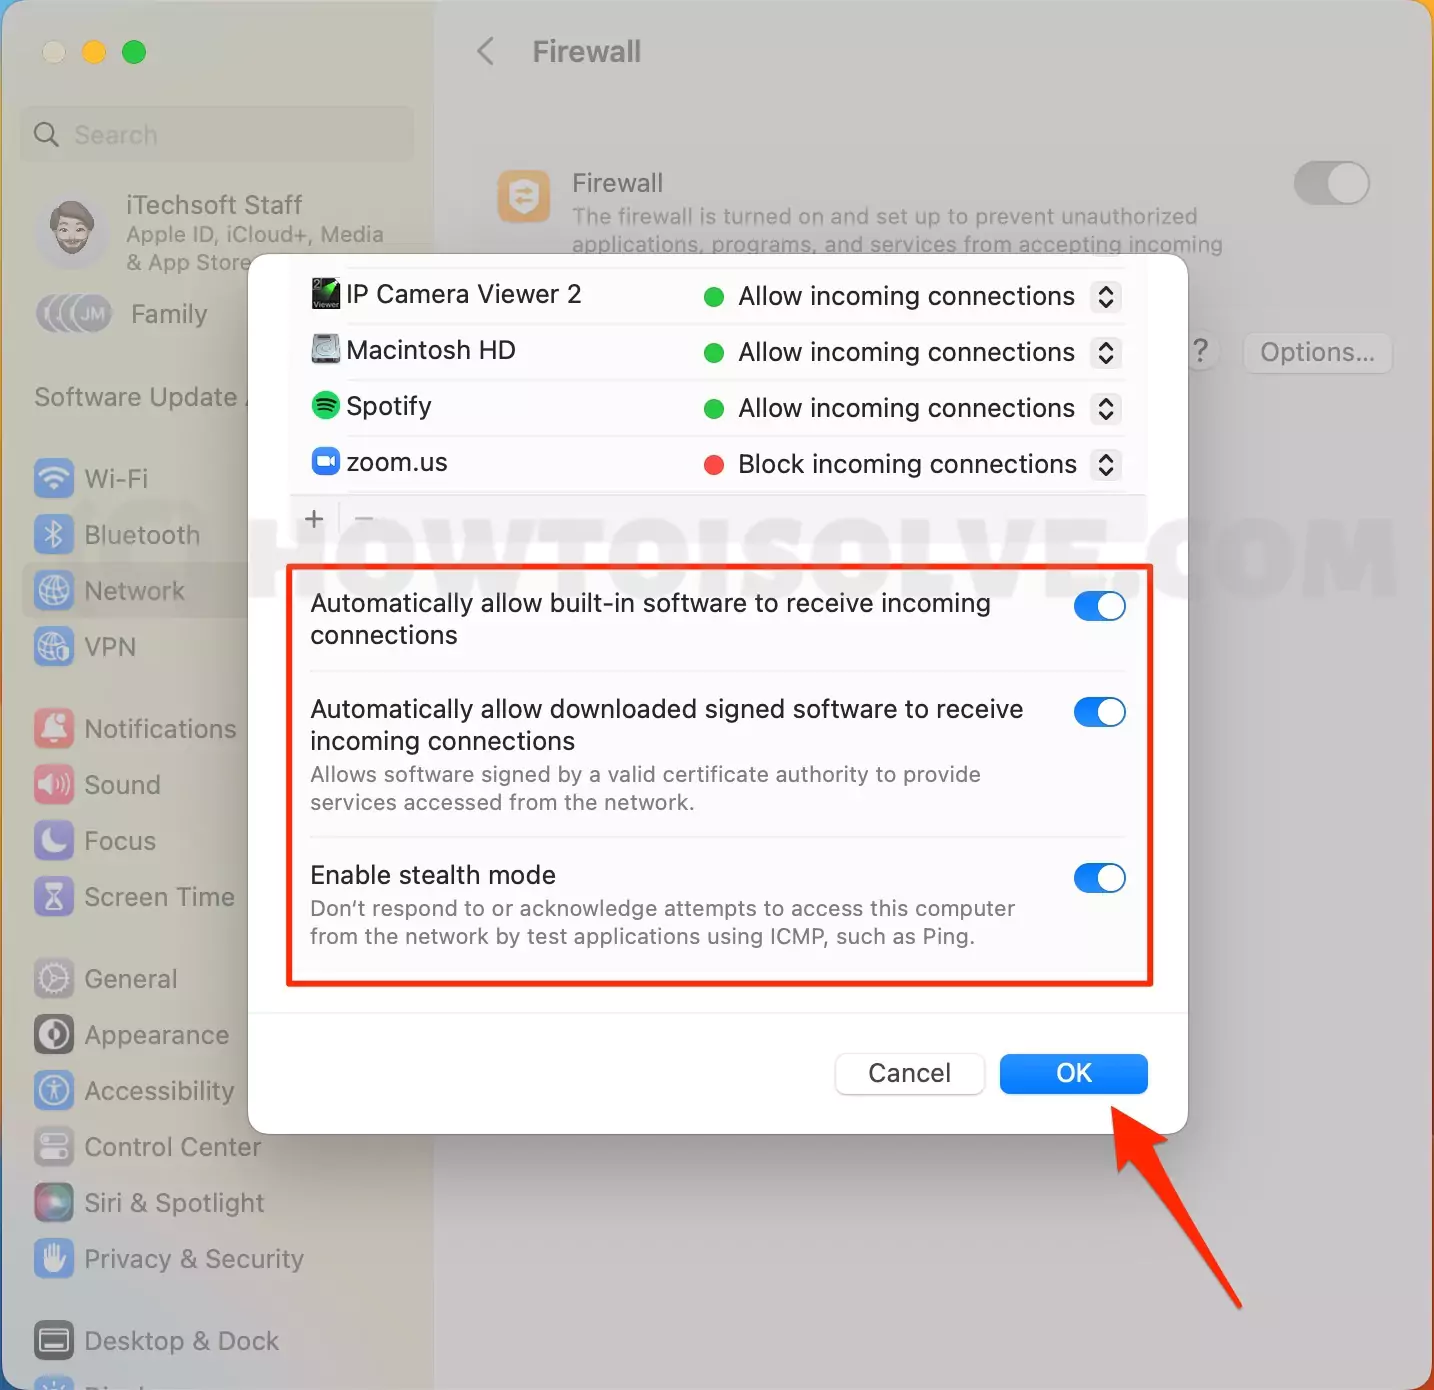
Step. 4→ From the next page select the Check Mark present next to the Automatically Allow Built-In Software To Receive Incoming Connections.
Using these settings in Mac Firewall, permits the Built-in services and applications that are signed by a trusted authority to automatically be added to the list of allowed applications and services without any kind of permission.
How To Automatically Allow Downloaded Signed Software To Receive Incoming Connection In Firewall On Mac
You might want to ignore the Softwares that are assigned by an invalid certificate authority; which might result in an insecure Mac. To prevent such software from receiving incoming connections, follow the given below steps.
macOS Ventura & Later,
Step. 1→ Navigate to the Apple Logo > System Settings…
Step. 2→ Select Network > Firewall > Options… present on the Firewall Page.
Step. 3→ On the next page, select the Toggle present beside the Automatically Allow Downloaded Signed Software To Receive Incoming Connection.
macOS Monterey & Earlier,
Step. 1→ Head to Apple Logo > System Preferences…
Step. 2→ Choose Security & Privacy > Firewall.
Step. 3→ Tap on the Lock Icon located in the bottom left corner of
the screen. Now the Pop-Up will appear asking you to enter Administrator Name & Password > Firewall Options…
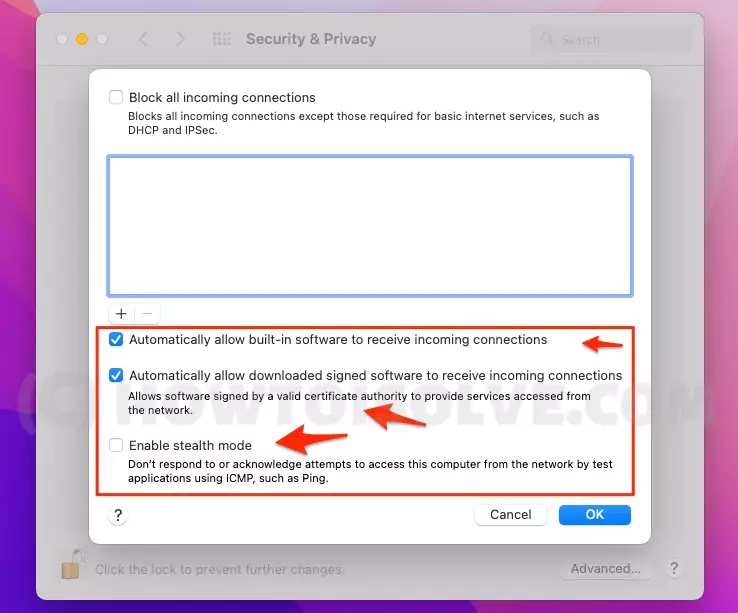
Step. 4→ On the next page, choose the Check Box present next to the Automatically Allow Downloaded Signed Software To Receive Incoming Connection.
Here we end up with the simple steps to prevent unauthorized software from receiving incoming connections. But it will never interrupt the performance and task of authorized software.
How To Enable/Disable Stealth Mode To Keep Mac More Secure
If you are concerned about Security and Privacy as you always bear important information and data on your Mac, you should enable the Stealth Mode in the Firewall. As Stealth Mode doesn’t react or reply to acknowledge attempts to get access to the computer from the Network.
macOS Ventura And Later,
Step. 1→ Hover the cursor to the Apple Logo > System Setting…
Step. 2→ Click on Network > Firewall >Options… located on the Firewall Page.
Step. 3→ From the next screen, select the Toggle present next to the Enable/Disable Stealth Mode. To make changes, ensure the “Block all incoming connections” toggle is off. Otherwise, the rest of the settings are grayed out.
macOS Monterey And Earlier,
Step. 1→ Navigate to the Apple Logo > System Preferences…
Step. 2→ Select Security & Privacy > Firewall.
Step. 3→ Right after that, choose the Lock Icon present in the bottom left corner screen to make changes. Doing so will feature a Pop-Up asking to enter the Administrator Name & Password, accordingly.
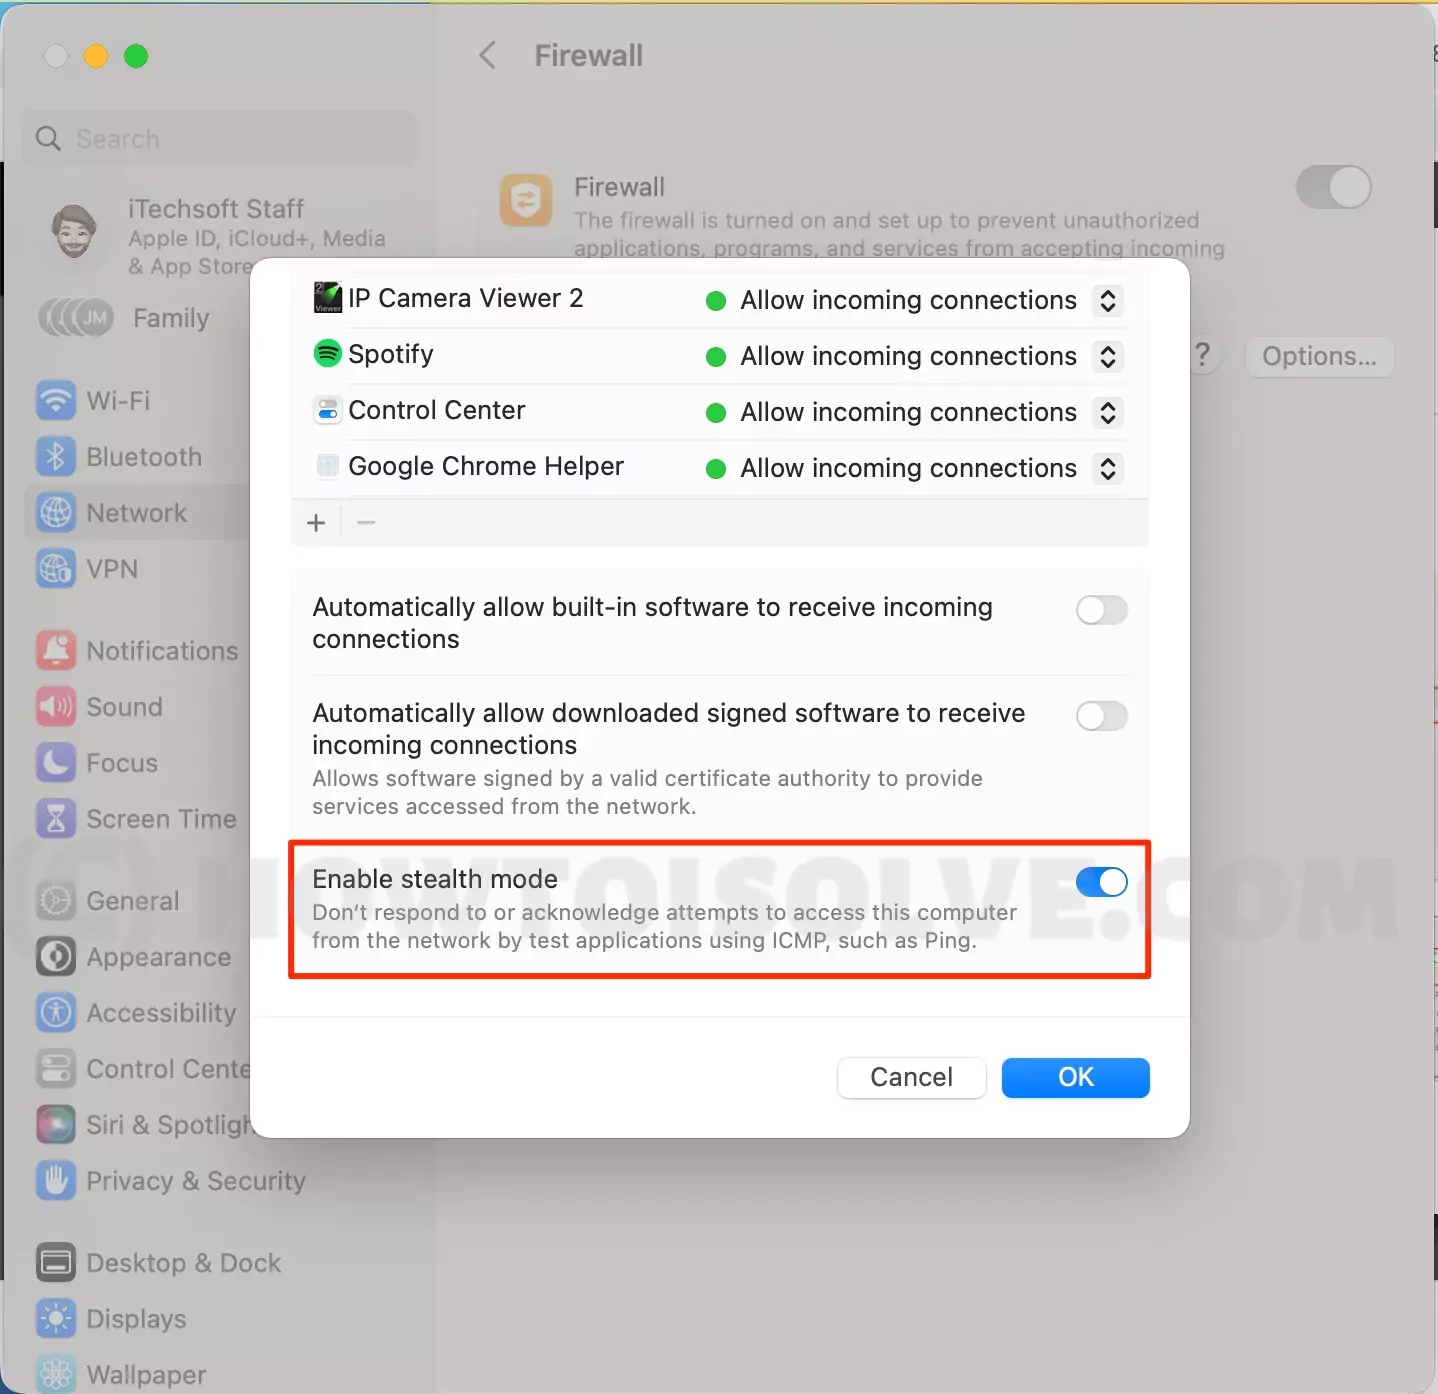
Step. 4→ Choose Firewall Options…> Select the Check Box present next to the Enable/Disable Stealth Mode.
The result of turning on this Mac Firewall feature is, now your Mac will not react to either any connection attempts made from closed networks or “Ping” requests.
Do You Want The Application “Google Chrome Helper.App” To Accept Incoming Network Connections

After turning the Firewall On most users find out the pop-up saying the Do You Want The Application “Google Chrome Helper. App” To Accept Incoming Network Connections. This situation takes place as the advanced Firewall setting Block All Incoming Connection is turned On. To fix pop-up follow the given below steps.
macOS Ventura And Earlier,
Step. 1→ Head to the Apple Logo > System Settings…
Step. 2→ Choose Network > Firwall >Options… present on the Firewall Page.

Step. 3→ Tap on the Toggle present next to the Block All Incoming Connections > if it’s Turn off, Make sure “Automatically allow built-in software to receive incoming connections” and “Automatically allow downloaded signed software to receive incoming connections“.
Or
Manually Add App under the Firewall, set for “Allow incoming connections“.
macOS Monterey And Earlier,
Step. 1→ Navigate to the Apple Logo > System Preferences…
Step. 2→ Click on the Security & Privacy from the menu > Firewall.
Step. 3→ Select the Lock Icon present at the bottom left corner of the screen and then write down Administrator Name And Password.
Step. 4→ Choose Firewall Options… > uncheck the box present next to the Block All Incoming Connections.
After completion of the steps see if the issue gets fixed or not.
Why Firewall Is Off By Default On Mac
Most of the time, users adopt the wrong concept regarding the Firewall. They consider it as an AD Guard or Malware Scanner, but in reality, it works completely differently. It’s just a security filter that seeks outbound and inbound traffic from the network depending on a set of rules created by the aggregation of port numbers and IP Addresses.
Well, the rules in the Firewall are always designed by the user according to their needs because turning on the Firewall with default settings doesn’t add-up advanced security. That’s the reason the Firewall is disabled by default.
How Can I Access Firewall On Mac As Guest Users
Using the Guest Modes on Mac consumes the similar Firewall settings as in the Administrator Mode. For the administrator’s Name & Password to access the Firewall as a guest user, follow the steps below.
macOS Ventura And Later,
Step. 1→ Move the cursor to Apple Logo > System Settings…
Step. 2→ Choose Network > Firewall.
Step. 3→ While you turn on Firewall, Now the Pop-Up will appear on the screen asking to write Administrator Name [How to Know mac Username] & Password.
macOS Monterey & Earlier,
Step. 1→ Click on the Apple Logo > System Preferences…
Step. 2→ Hit on the Security & Privacy > Firewall.
Step. 3→ Click on the Lock Icon present in the bottom left corner of the screen > Firewall Options…
Step. 4→ Doing so will feature the Pop-Up asking you to enter the Administrator Name & Password.
On the next screen, you encounter all the Firewall Advanced Settings which can be configured as mentioned above in the article.
Best Third-Party Firewall App For Mac Computer
- Little Snitch
- Real-Time Traffic Diagram: This advanced firewall software delivers a traffic history of about Twelve Months at the same point, you can take an overview of each and every data connection.
- Corresponding Protocol: This protocol works behind the bar to let out why connections are denied or allowed.
- Light & Dark Appearance: It offers a convenient way to choose the following appearance according to your need and personal choice.
- Data Bandwidth & Volumes: Advancely designed Firewall keeps eye on the per server, domain, and process.
- Paid & Not Open Source: This application is only compatible with macOS and Little Snitch is paid Firewall for Mac.
- Radio Silence
- Easy Privacy: Unlike the other Firewall, this one from the Radio Silence keep the eye on all the Applications and Services that are not allowed to Allow or Block All Incoming connections.
- Completely Invisible: It continuously keeps running in the background without keeping any window open without featuring unwanted pop-ups of ads and affecting the performance of the Mac.
- Exposes Everything: The radio silence firewall exposes the applications and services those are misbehaving and what’s great is that you can stop them with a single tap.
- Take Care Of Tricky Networks: Instead of playing with a system setting, it simply signs the right task. What I mean to say is that the Firewall software completely blocks the applications that are not able to access the network and at the same point allows them to work with an internal network. It’s a paid Firewall for Mac and fortunately it’s open source.
- Lulu
- Free & Open Source: In this line-up of alternatives of Mac Firewall, the Lulu is the only one that is free to use and compatible with varieties of OS.
- Detect & Block Outgoing Connections: As we all know the Mac Firewall only detects incoming connections, but in the case of Lulu it detects both incoming and outgoing connections such as those generated from Hackers or Malware when trying to connect with the Mac command to rule over it.
- Works Firmly: No matter whatever third-party app or software you have installed on your device, Lulu never creates a conflict with the system.
Guest Firewall
EASY PIZZY!
That’s how you can handily turn off and on Firewall on the MacBook. If you like our piece of article simply share it with the iOS or Mac fans who get stuck on the question I don’t know how to turn on the Mac firewall?
FAQs→
It’s turned off by default, Why! Turning On the Firewall consumes default settings such as “Automatically allow signed software to receive incoming connections,” and Allow Built-In Software To Receive Incoming Connections. For a brief understanding go through the topic mentioned in this article.
Turning On the Firewall mode will protect the Mac from the miscellaneous activity over the network to which the device is connected. However, your Mac with an enabled Firewall still allows some applications and services to allow all incoming connections.
Firewall turned off, no need to worry! As most users don’t require it and some users leave it disabled. As a regular user, there is no need for such kind of feature if and only if your device is not connected to a public network.
The simple meaning of Firewall is it protects the Mac computer from the various unwanted connections initiated from the Hackers PC when your Mac device is hopped with the network or internet.
Yes, the Mac Firewall is carved with a feature known as Enable Stealth Mode. Turning on this feature will prevent your Mac from reacting to the acute requests that are used to open up its existence. Lockdown mode on Mac is great a help to save from attack.
Well, there are various ways to protect your Mac, such as, Create Secure Password, Create Separate Log-in Alternative User, and Set An Array Of Users. And for more advanced security use FileVault and Mac Firewall.
As a complimentary, Apple has introduced the new feature known as Lockdown Mode which also makes your mac secure from unwanted attacks.
Yes, the enabled Firewall will affect the internet speed until and unless it doesn’t process the data the same as your Internet speed. It’s very annoying, But if something is blocking then time will be more.
Well saying antivirus is the wrong word in the case of Mac, We have good option with the help for this Best Antivirus for Mac, But it comes with a built-in Three Layer Of Defence System to protect macOS from malware.
Mac is always known for its Security & Privacy feature but still adding an external layer of Third-Party Antivirus creates an unbreakable wall to prevent the Malware from getting-in into your Mac.
One of the most common symptoms of your Mac getting infected is Random Popping Of Ads, Mac Running Slow Then Usual, and Receiving Security Alert Without Any Kind Of Scanning Operations.
Well, this kind of issue usually occurs when the Firewall is disabled on your macOS. To fix it, go to Apple Logo > System Preferences… > Security & Privacy > Select the Lock Icon present at the bottom left corner of the screen > Doing so will feature the pop-up saying System Preferences Is Trying To Unlock Security & Privacy Preferences. Touch ID or Enter Your Password To Allow This. In this case, use the Touch ID or Password to enter Firewall Settings. Keeping all the possibilities in mind, if you forget the password learn How To Reset Password On Mac Computers. (Interlink)
Firewall is turned off, however, still the Safari Browser is not allowing to access the array of Websites. In such a scenario, it’s better to go with Best Alternative Safari.


