
Macs have an incredible feature known as the Filevault that can be used to restrict unauthorized users from accessing the data encrypted on your system. The Filevault feeds the data in your MacBook’s startup disk and hides this information from the restricted users. Most company-issued MacBooks have FileVault enabled with a recovery key only known to the IT technicians. Even many of you might have enabled Filevault on your Macs to prevent other users from accessing your personal information, data and files. Sometimes, it will create a big problem during Restoring macOS or Forgot mac Login Password [mac will ask for recovery key if you set instead of apple id], Or Automatic login greyed out issue if FileVault is Enabled on Mac.
Although Filevault is an excellent way for encrypting and encoding the data onto the startup disk to hide it from other users, some people might want to disable it as the process of accessing or decrypting the data stored in Filevault can be tiring over a long period. Hence we have compiled this list of solutions and methods to disable Filevault on Mac.
How to Turn off FileVault in macOS Sonoma→
Now that macOS Sonoma has launched in the market for everyone, all the newly bought Macs will run on this operating system. Also, many old MacBook customers might have upgraded to macOS Sonoma from the earlier versions. So in this section, we will deliver instructions for turning off Filevault in Macs running on macOS Sonoma.
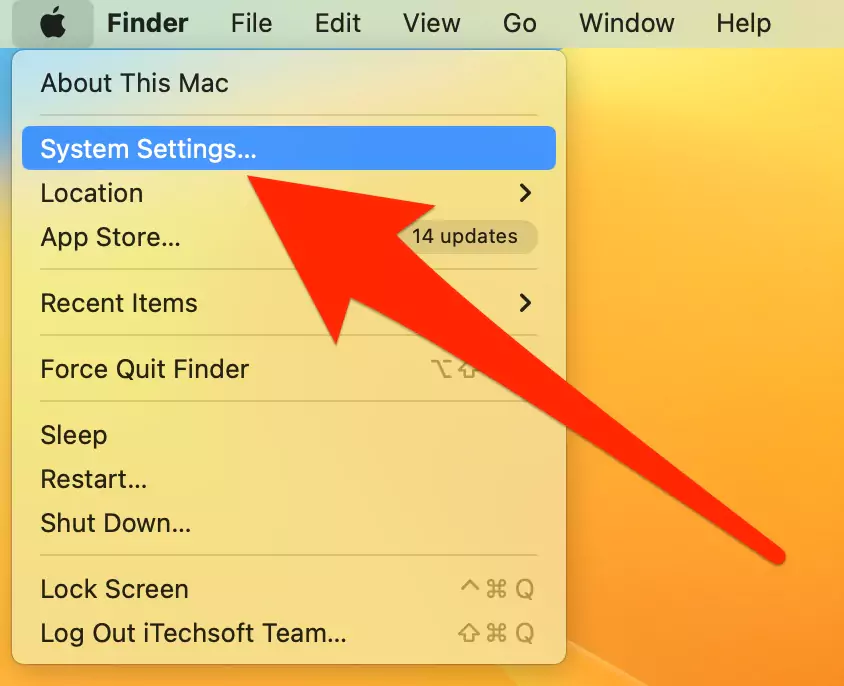
Step. 1→ Look for the Apple menu at the top left corner of your Mac and click on it to open the drop-down menu.
Step. 2→ In the drop-down menu, select system settings.
Step. 3→ Now hit the “Privacy & Security” option in the system settings window.
Step. 4→ Tap the toggle button to disable “Filevault” from your system.

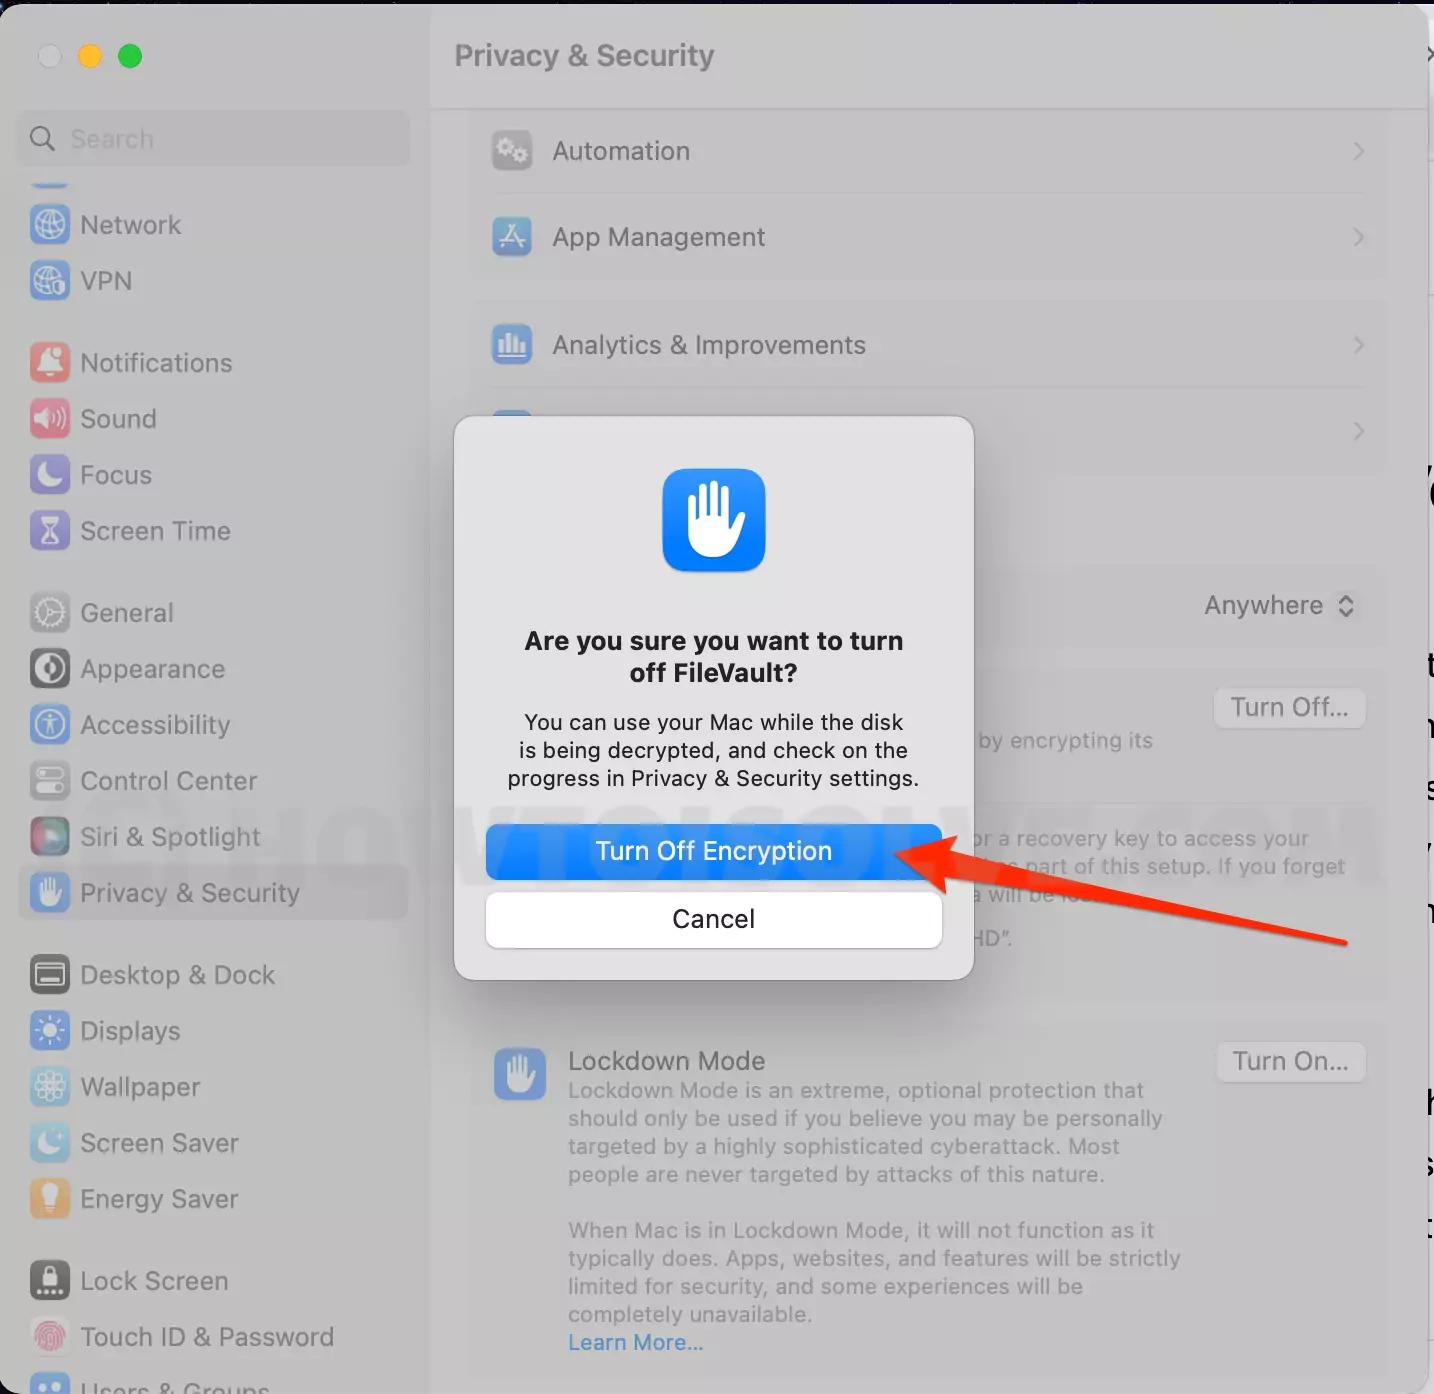
Step. 5→ Popup will ask “Are you sure you want to turn off FileVault?” and Turn off You can use your Mac while the disk is being decrypted and check on the progress in Privacy & Security settings.
Step. 6→ Confirm that you wish to disable Filevault from your Mac by entering the admin login details and clicking on the “Restart” button.
The system will automatically restart and decrypt the data encoded using Filevault. This process will disable Filevault from the MacBook so that the encrypted data is accessible to all the users and profiles of your device.
How to Re-Enable FileVault on Mac
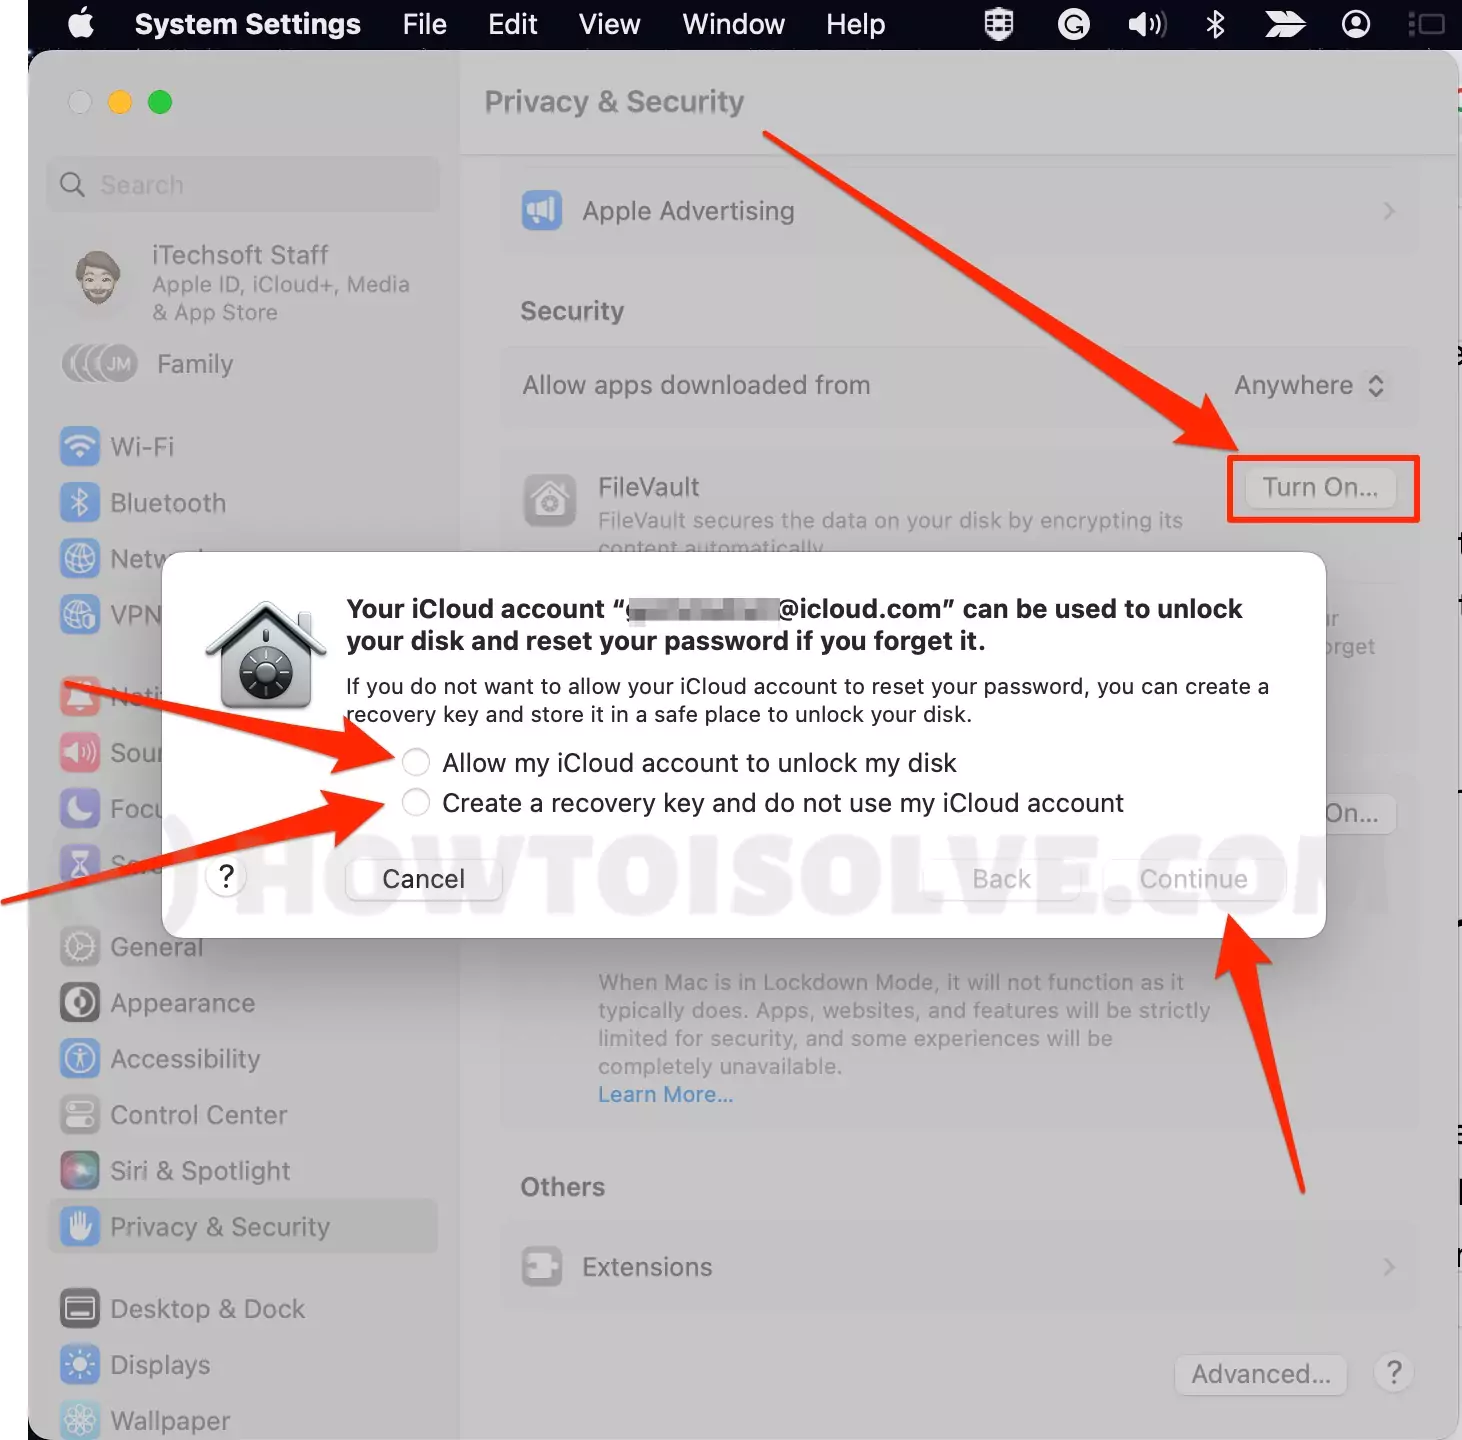
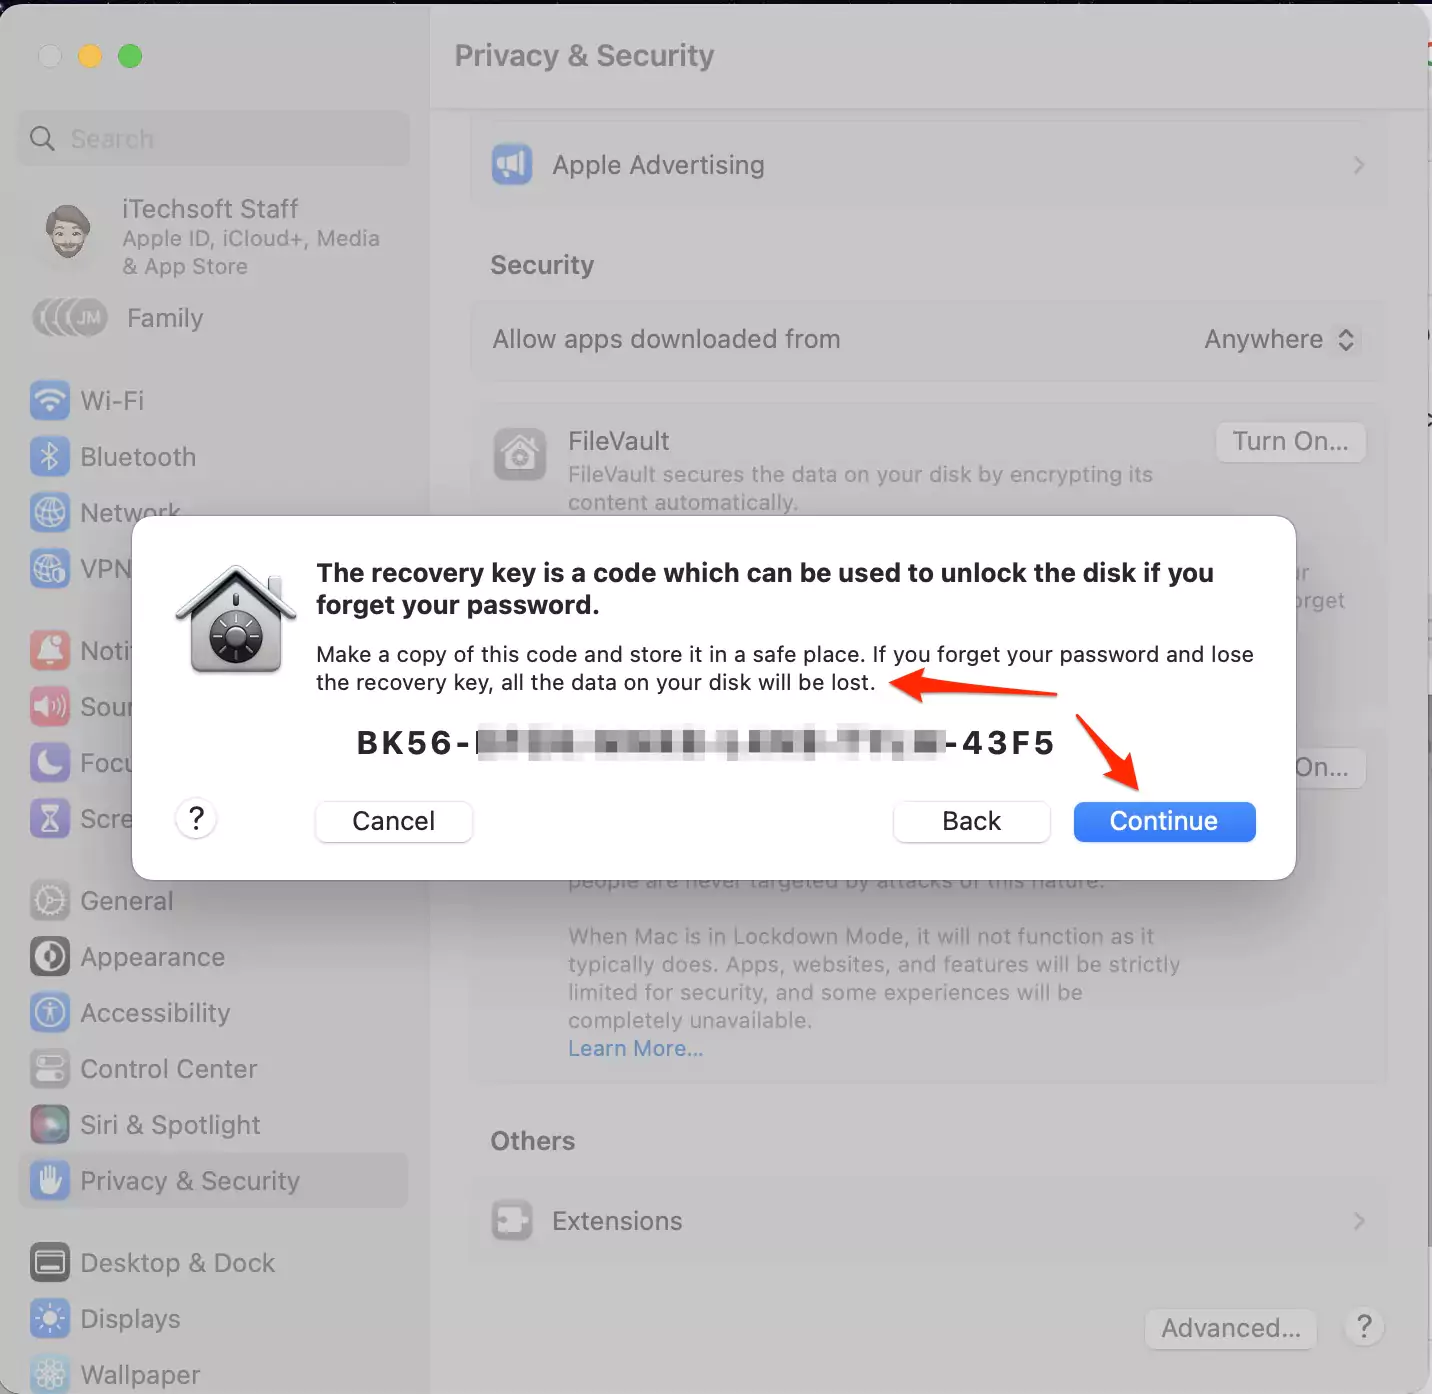
Important! Follow the same ways to turn On FileVault on Mac, and Choose the correct Option Either “Allow my iCloud account to unlock my disk” Or “Create a recovery key and do not use my iCloud account” and Store it Safe place to Unlock your Disk. Recovery key or iCloud Option helps you to Restore the MacOS or Forgot the mac Login password.
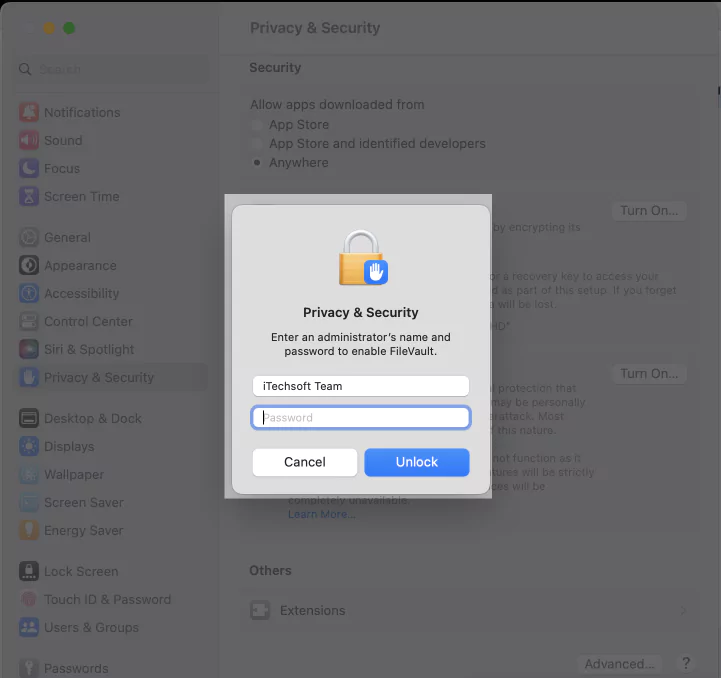
Your Mac will ask to enter an administrator’s name and password to enable FileVault. and Click on Unlock. (Know Your Mac Username or forgot Mac password or Reset mac administrator password)
You can select Any Option, with your Choise.


If you choose, Create a recovery key and do not use my iCloud account then your Recovery key is like that. Just keep a photo or Copy the Key and Store in a safe place.
How to Turn off FileVault in macOS Monterey and Earlier version of macOS→
Since most Mac users might still be using macOS Monterey, macOS X, or any other earlier operating system versions, we shall first talk about the method for turning off or disabling Filevault in those operating systems. Given below are the steps for disabling Filevault in macOS Monterey and earlier.
Step. 1→ Open the “System Preferences” tab by left-clicking on the Apple Logo menu at the top.

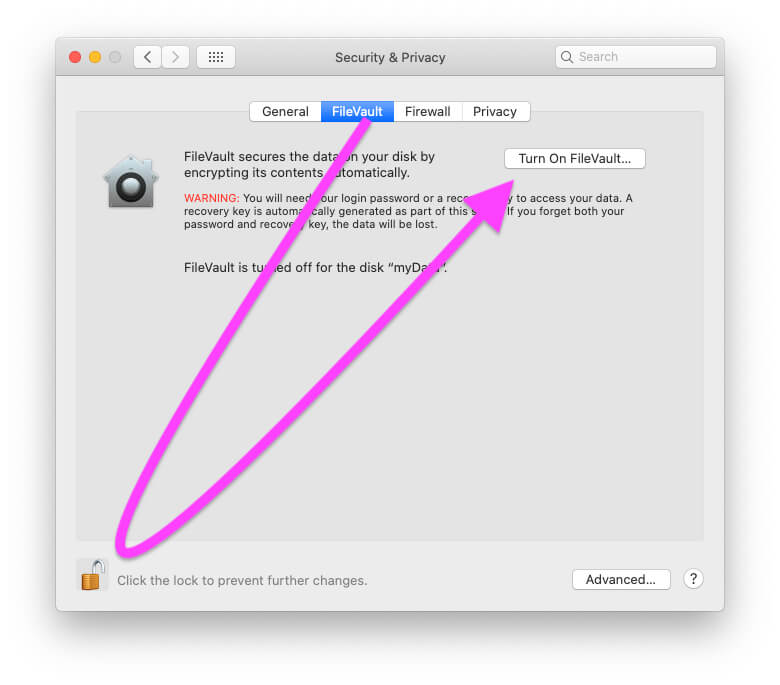
Step. 2→ Now, select the “Security & Privacy” pane in the system preferences tab.
Step. 3→ Then click on the “FileVault” section at the top of the security and privacy window.
Step. 4→ After that, left-click on the lock icon at the bottom left and verify by entering the administrator login ID and password.
Step. 5→ A new “Turn Off FileVault” button will appear on the screen. Click on it.
Step. 6→ At last, restart your MacBook and confirm that you want to disable Filevault by clicking on your device’s “Restart & Turn Off Encryption” button.
After clicking the “Restart & Turn Off Encryption” button, the Mac will automatically restart and initiate the decryption process required for turning off Filevault.
How to stop Filevault Encryption in Progress→
Suppose you have started encrypting the data using Filevault on your MacBook but get essential, urgent work that you need to complete. Still, the encryption process is making your MacBook sluggish or causing it to lag. In that case, you can monitor the status of this process and even stop it so that you can finish your work and then start the process again. To stop Filevault encryption in progress, follow these steps.
Step. 1→ Go to the “Security & Privacy” window from the system preferences pane (in macOS Monterey and earlier) or the system settings pane (in macOS Ventura & Later).
Step. 2→ Now hit the “Filevault” button in the top section of the security and privacy window.
Step. 3→ Tap on the lock icon at the bottom left to unlock it if it is locked.
Step. 4→ Enter your login or admin details if asked.
Step. 5→ Then, click on the “Turn Off FileVault” option and hit the “Turn Off Encryption” button.
Once you click the “, Turn Off Encryption” button, the ongoing process of encrypting the data stored on the specified disk will be put on hold or stopped. After this, the Mac will direct all of its resources towards the job you need the Mac to do to complete your assigned work without lag.
The decryption process can take a lot of time or get finished in a few minutes, depending upon the size of the disk getting decrypted. The decryption speed also depends on the type of disk getting decrypted: solid state drives (SSD) are much faster and more powerful than hard disk drives (HDD) and the amount of data encrypted on the disk.
Mac users can also use the MacBook while the decryption process runs in the background, but the device will perform much slower and might even lag a bit. It is best advised to initiate the decryption process overnight, or any other time your Mac will be idle, and you won’t use it. Hence, we recommend you try out these methods for turning off Filevault on your MacBook or stop the ongoing encryption process from boosting the MacBook’s performance and speed.
FAQs→
→ Once you disable Filevault from your MacBook, all the encrypted data stored in a specific disk will start getting decrypted. This data will be accessible to all the users without using the recovery key.
→ For most users, Filevault is not even required to be enabled on their Macs unless something important or personal data needs to be kept hidden from unauthorized users. Hence, if you have the Filevault enabled on the personal MacBook, you can disable it if no one else uses your device.
→ Yes, you can disable or turn off Filevault on your MacBook. The steps one should follow to disable Filevault on their Macs with macOS Monterey or earlier and macOS Ventura & Later are explained in detail in this article.
→ You can stop or disable Filevault using the straightforward method discussed in this post’s “How to disable Filevault in macOS Sonoma” section.
→ If you are the sole user of the MacBook and no one else uses it apart from you, then you can keep the Filevault disabled. But if multiple people have their accounts running on the same Mac, turning on Filevault on that MacBook will be the best decision to protect your privacy and data.
→ The methods or solutions listed in this post on disabling Filevault on the MacBook do not require the users to use their keyboards. These processes can be initiated and completed using the mouse or touchpad alone.


