
After updating Mac or MacBook to macOS to the latest macOS, you may encounter No admin account on Mac. Even sometimes, the admin account is recorded as a standard account on Mac. Most of the time, macOS will show no admin account when you migrate data from the old computer, Sometimes Accidentally delete the admin account, or Corrupted Hard drives or Data due to many reasons like buggy software, macOS Installation problems. Sooner or later, it won’t let you access the admin account on any macOS version.
There is only one way that one of the Mac users found to fix no admin account on macOS. You have to create a new account on Mac and then set up the computer as usual. Thereafter, you can change the standard account to an admin account from the Users & Groups menu. Learn how to get rid of no admin account on macOS,
Also, We can create multiple admin accounts or assign any Mac users to the Admin role under the Mac System Settings.
Fix No Admin Account on Apple Mac
Method 1: Restore your Mac in Recovery Mode – Remove the Setup file & Recreate
Reset the setup file and setup using this method works and helps to create an Admin account on Mac using the simple steps, First put your Mac in recovery mode then Reset the setup file using the Terminal command, and Create a New admin account with on-screen setup explained in below, This solution is working for both Apple Silicon (M1, M2) and Intel Mac.
Step #1. Put your Mac into Recovery mode, Shut down your Mac, and Wait for 10 seconds
- On M1 Mac, Press and Hold on the Power button, Until Your Mac sees the Startup volume and Option on the Screen. Select Options > Continue.
- On Intel Mac, Turn on and Quickly press and hold the Command + R key until you see the MacOS Recovery screen.

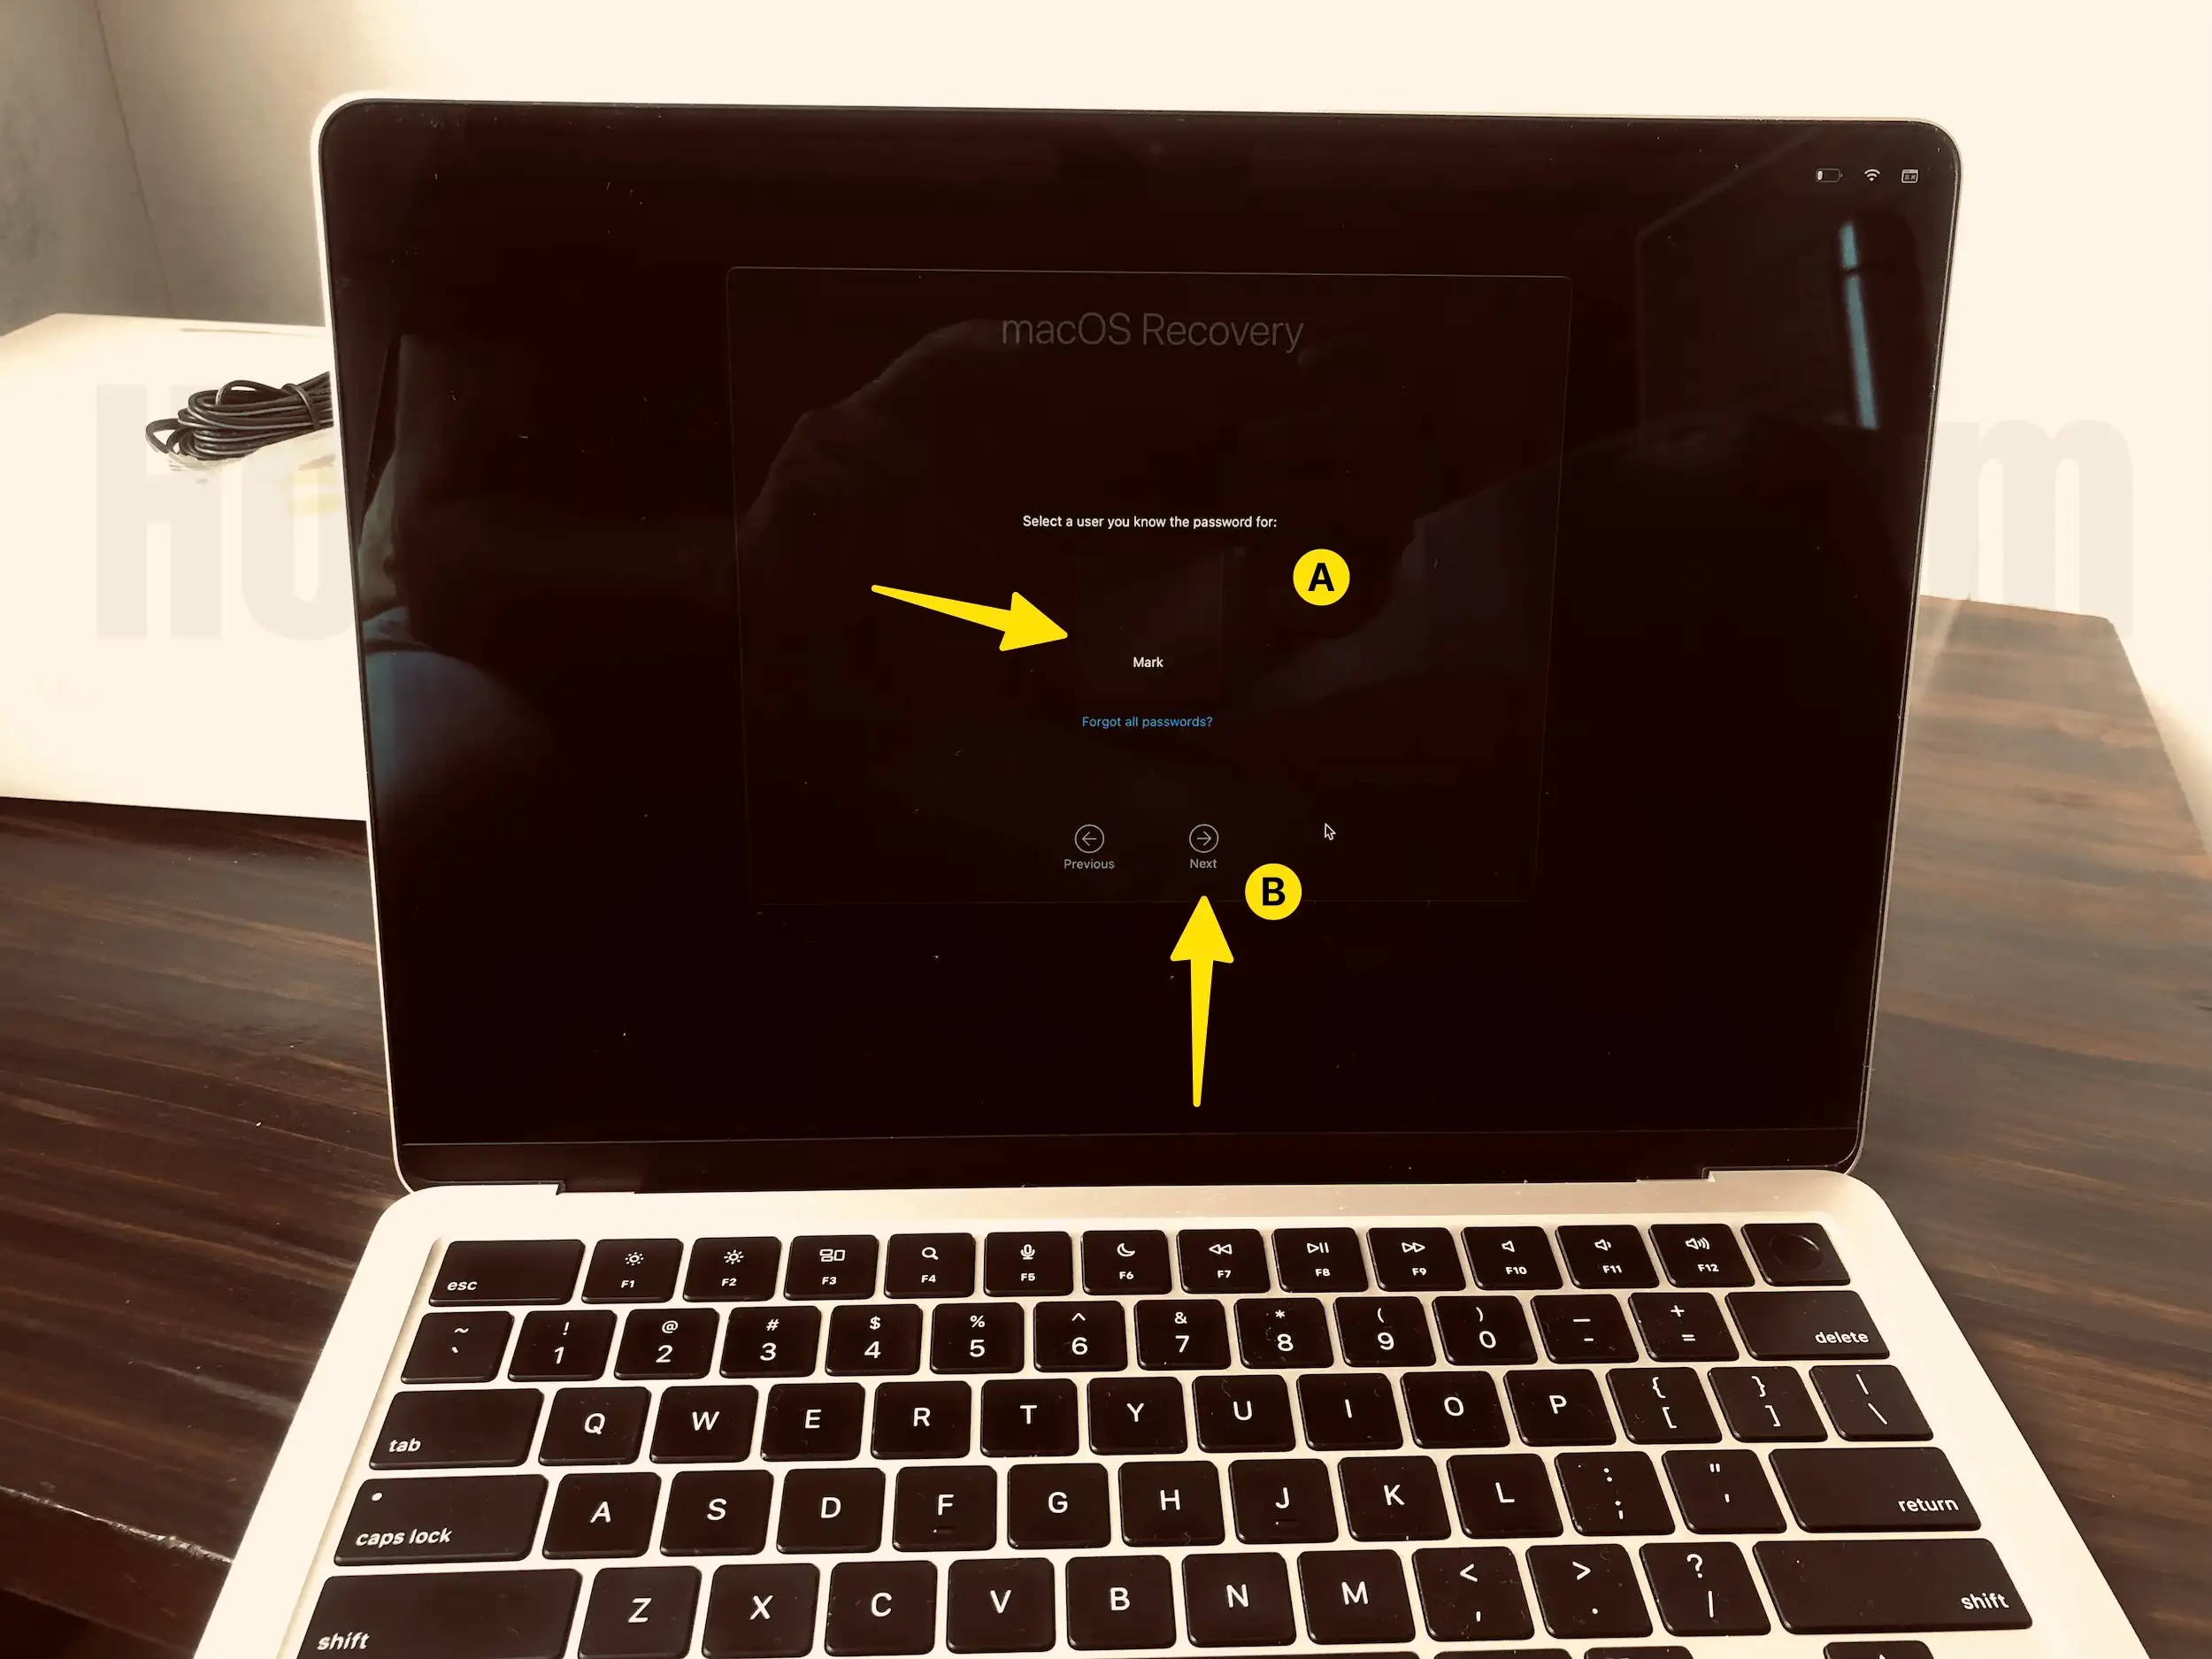
Step 2: Select a Volume to Recover on Mac in Recovery mode > Next.

Step 3: Select Profile and Next. You will be ask to enter your Mac login password.
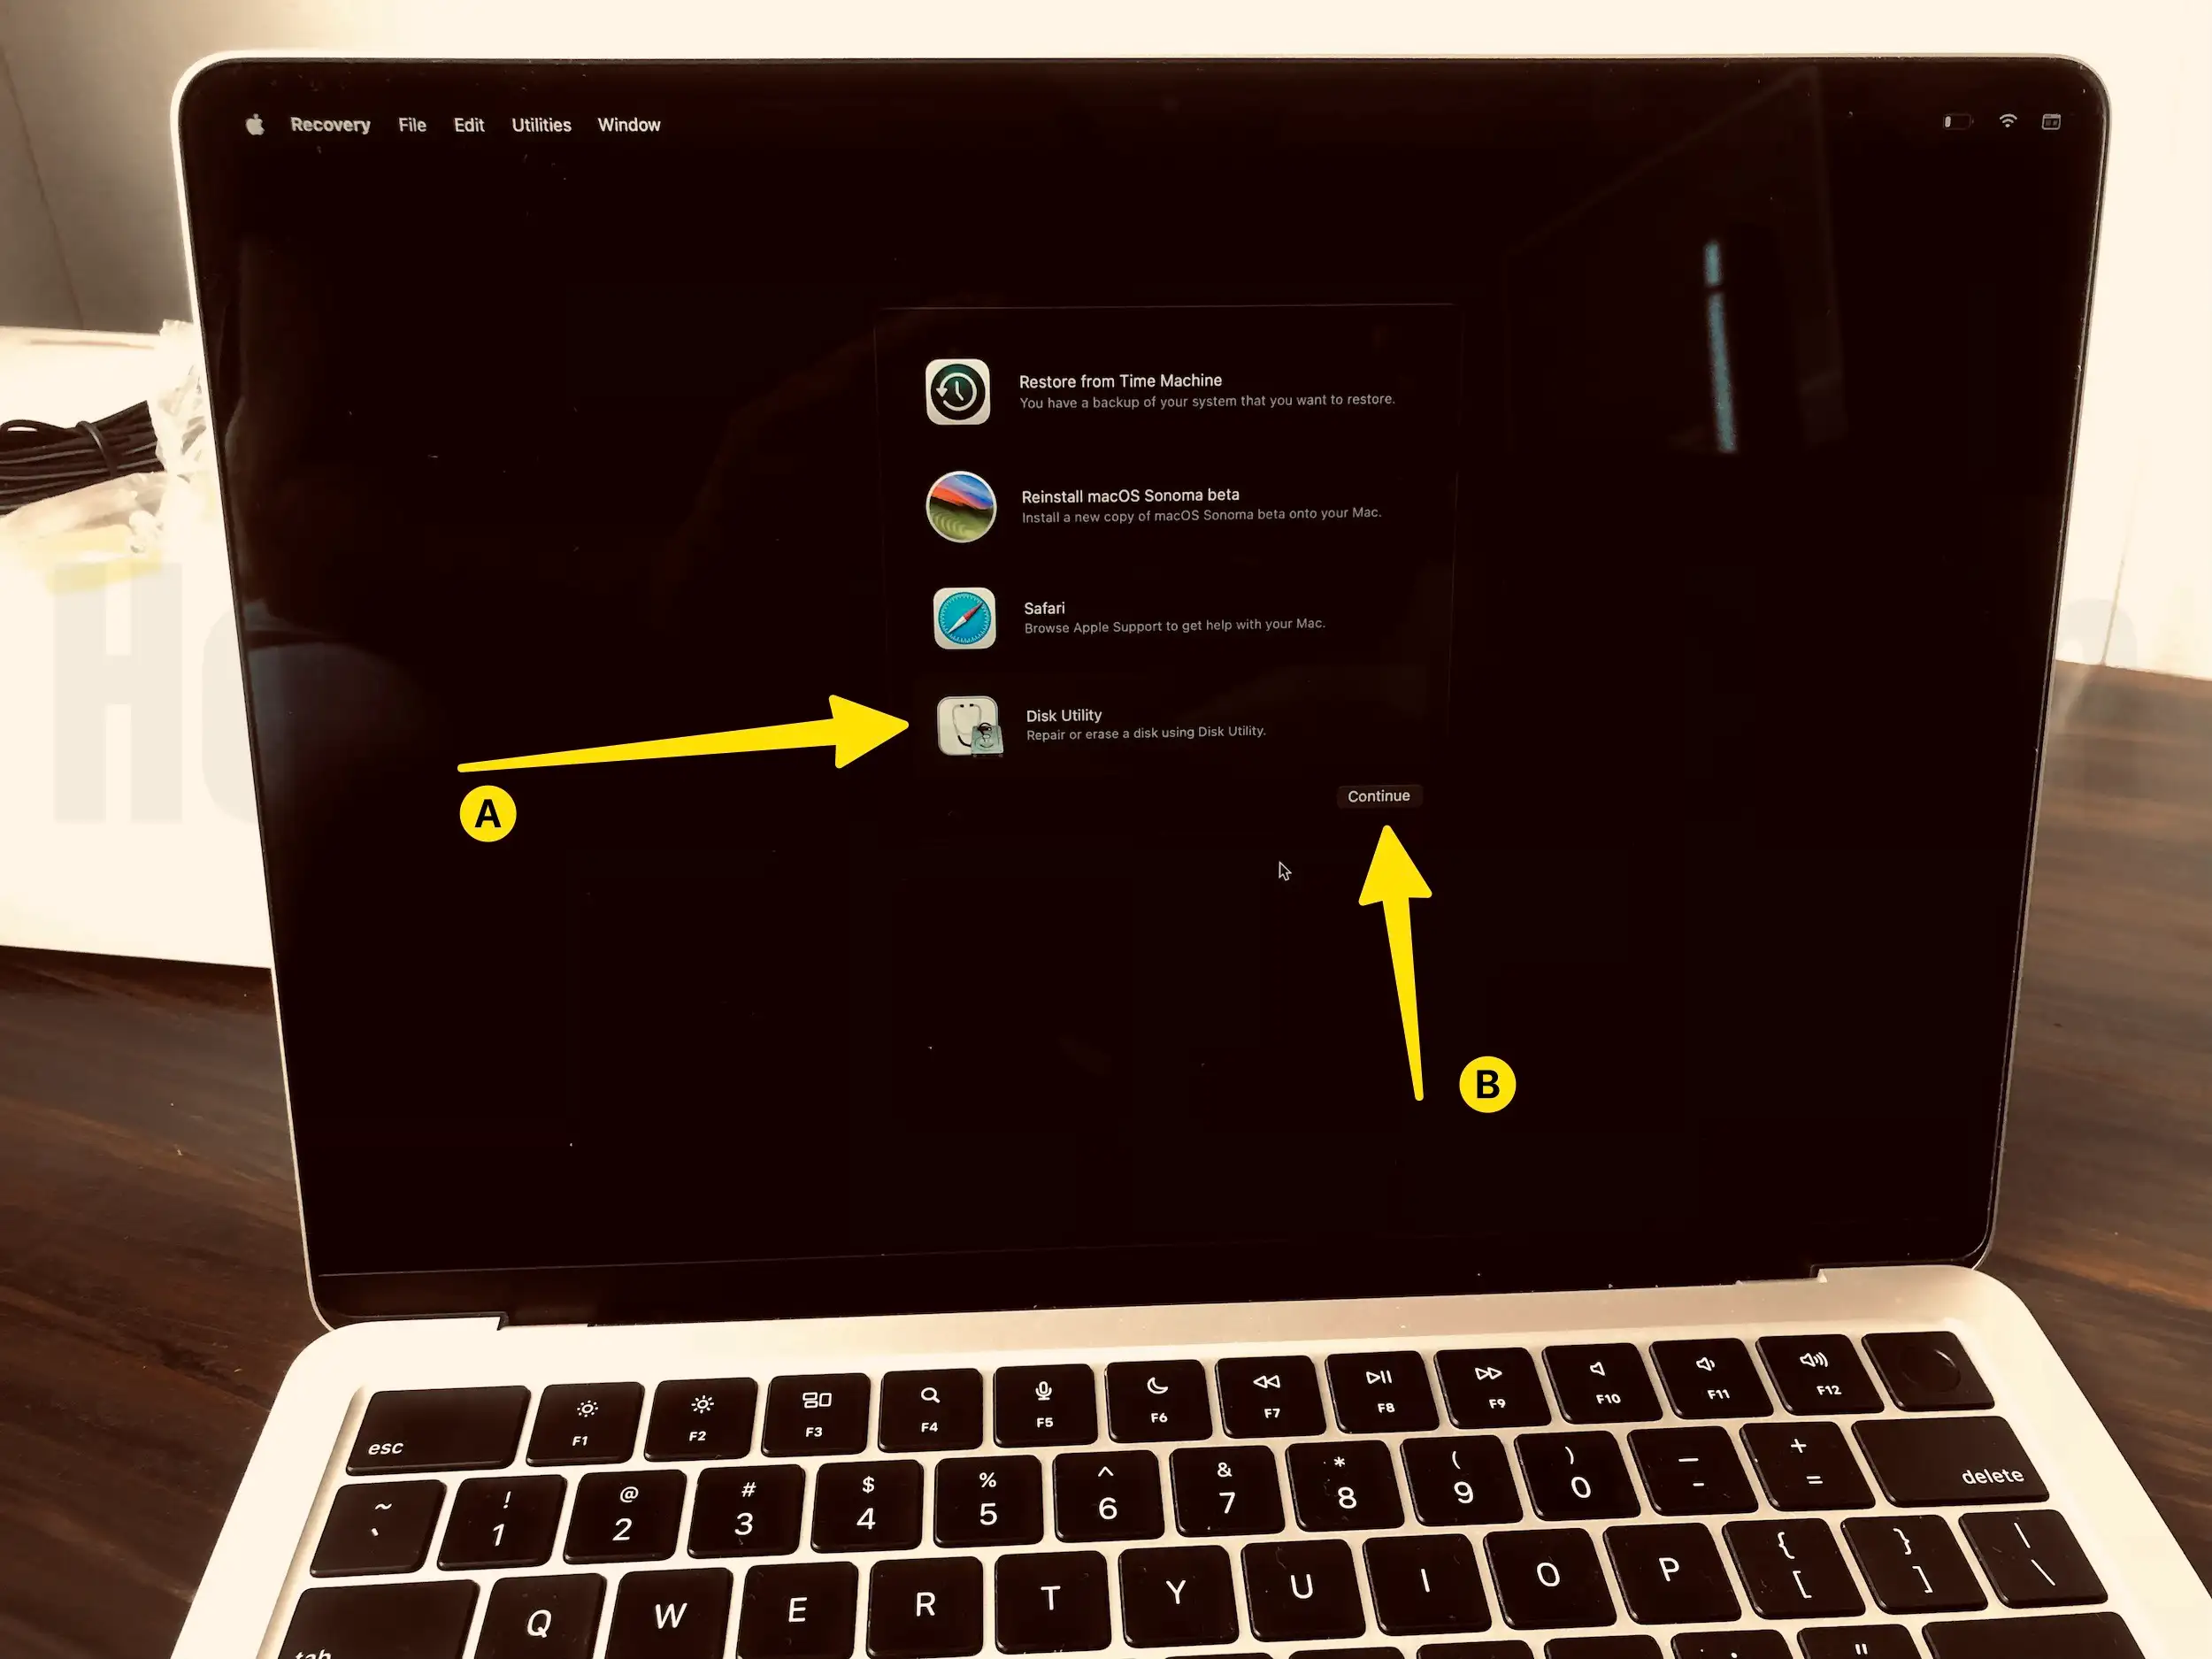
Step 4: Select Disk utility and Continue.
Step 5: Mount Macintosh HD, Select Drive from the Left side of the window > Mount.
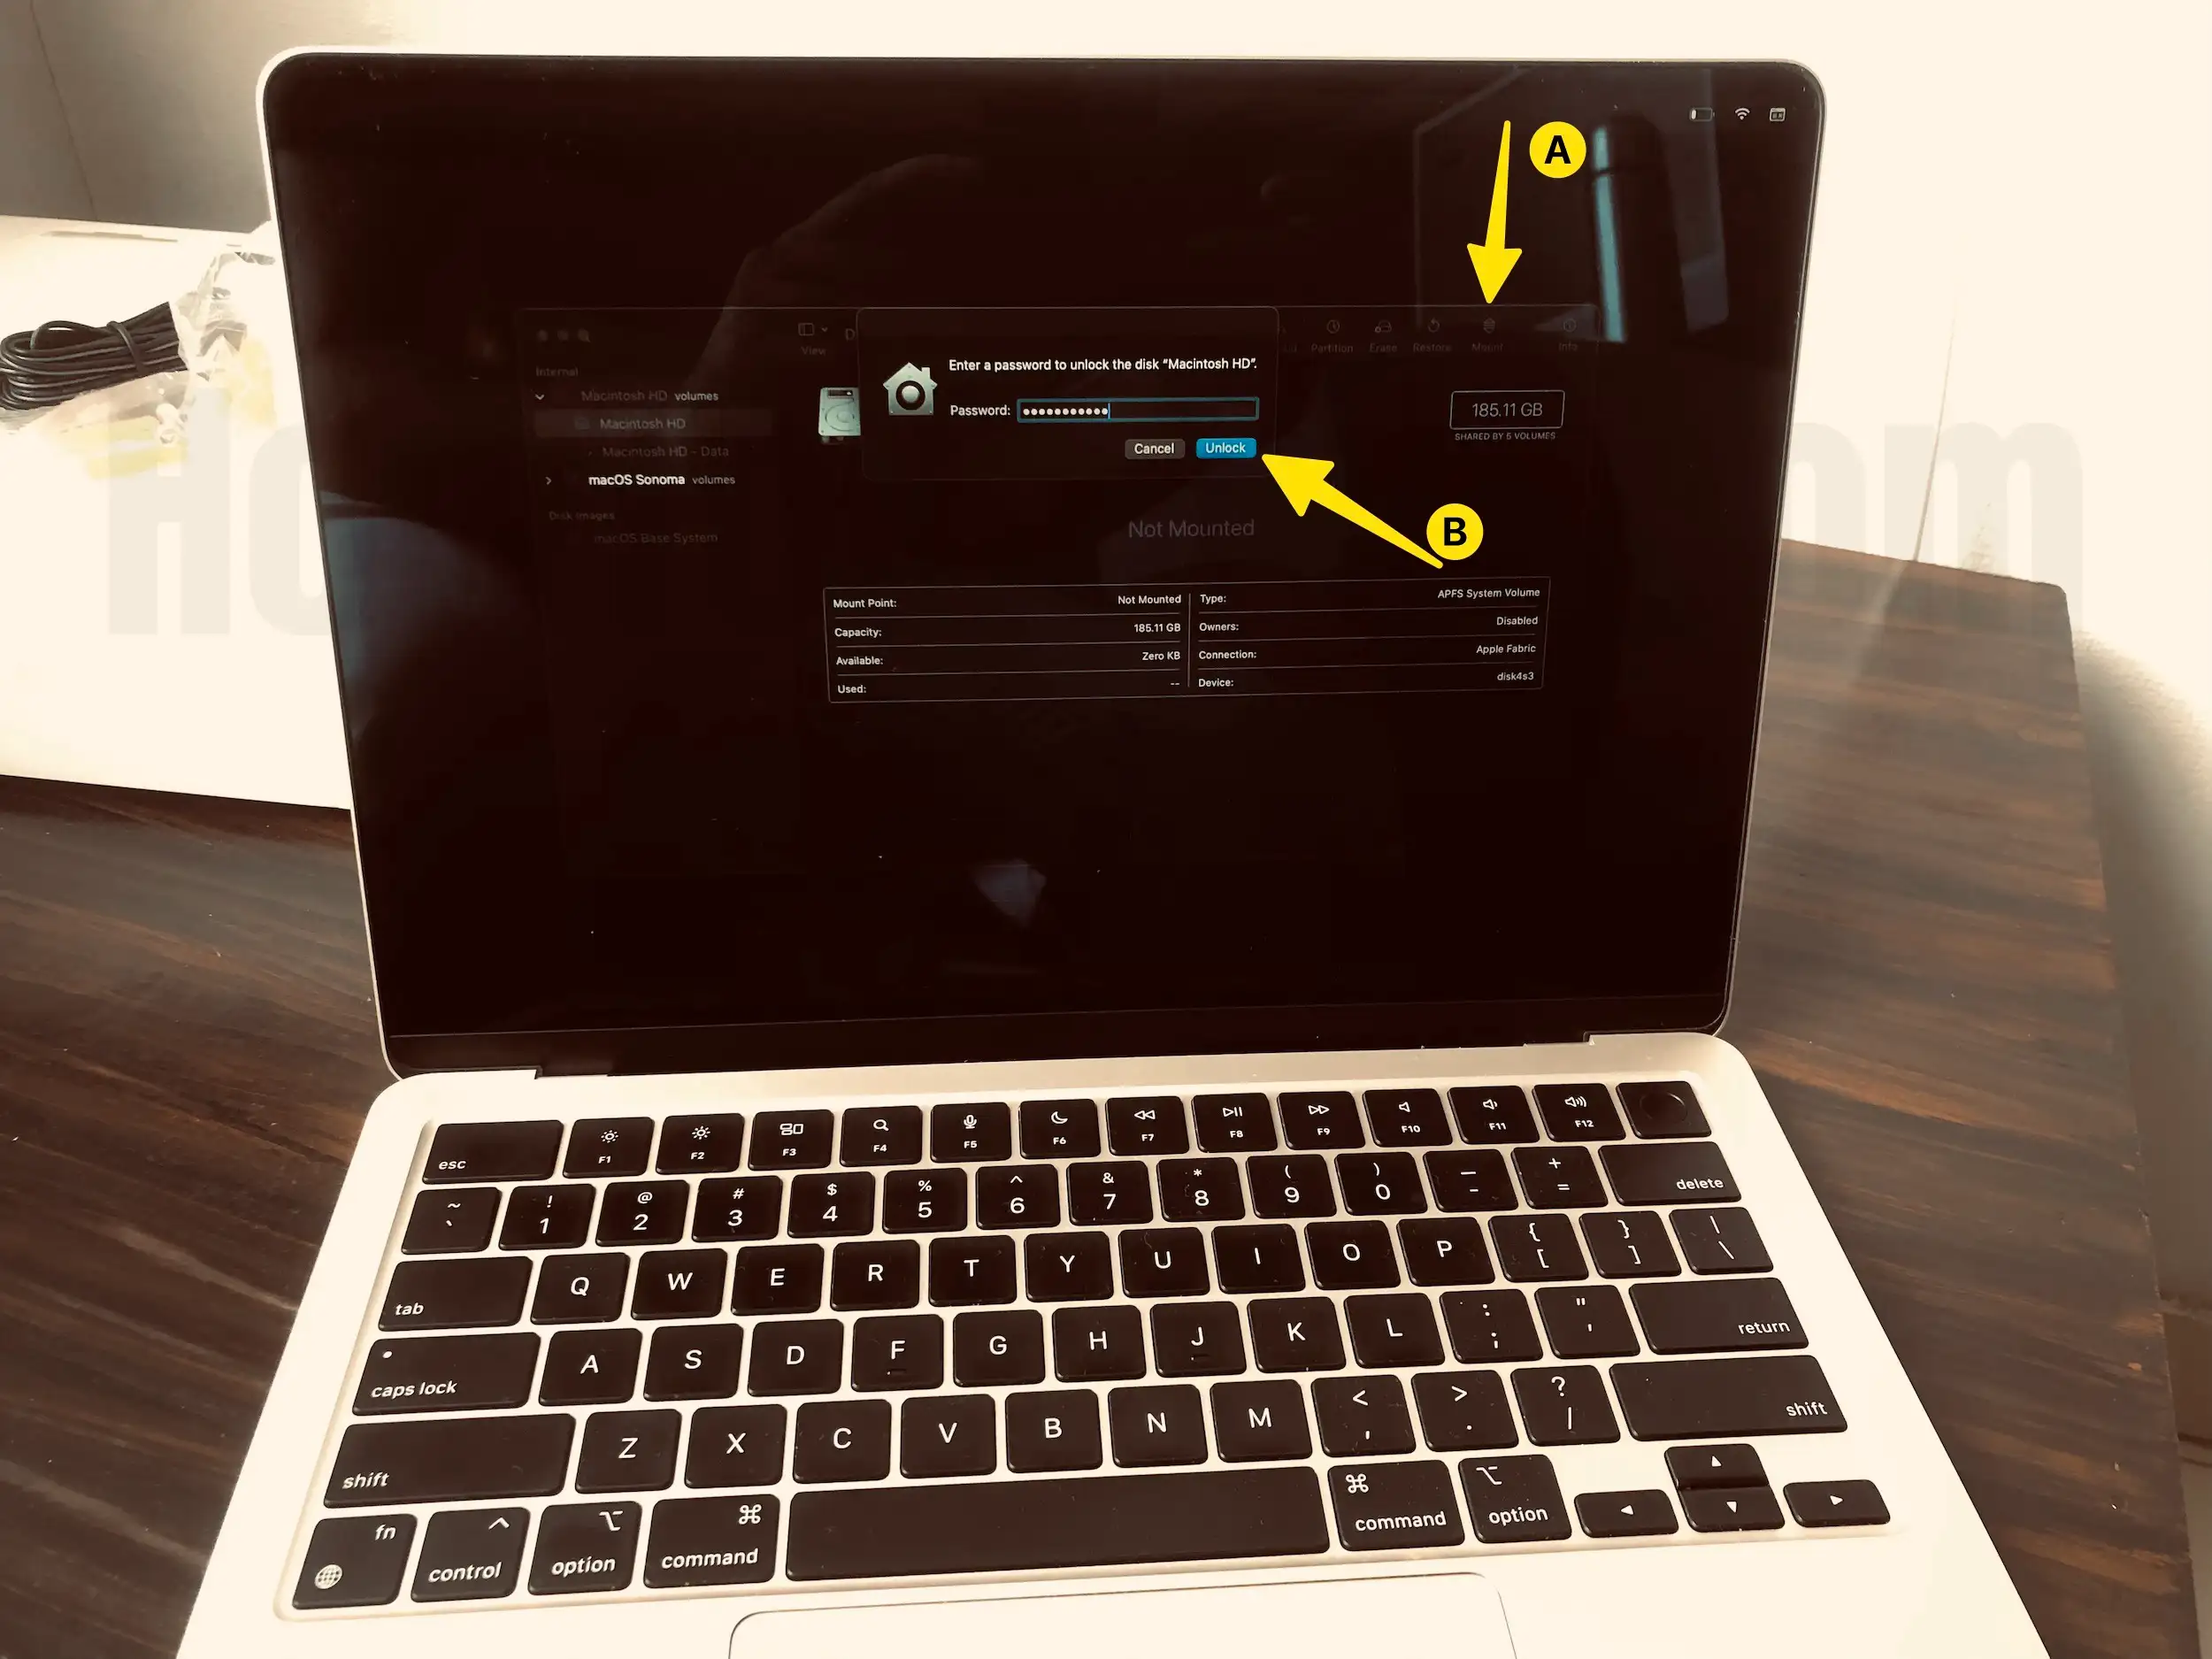
Step 5: Enter the mac login password to Verify and mount the drive. And Close the Disk Utility Windows.
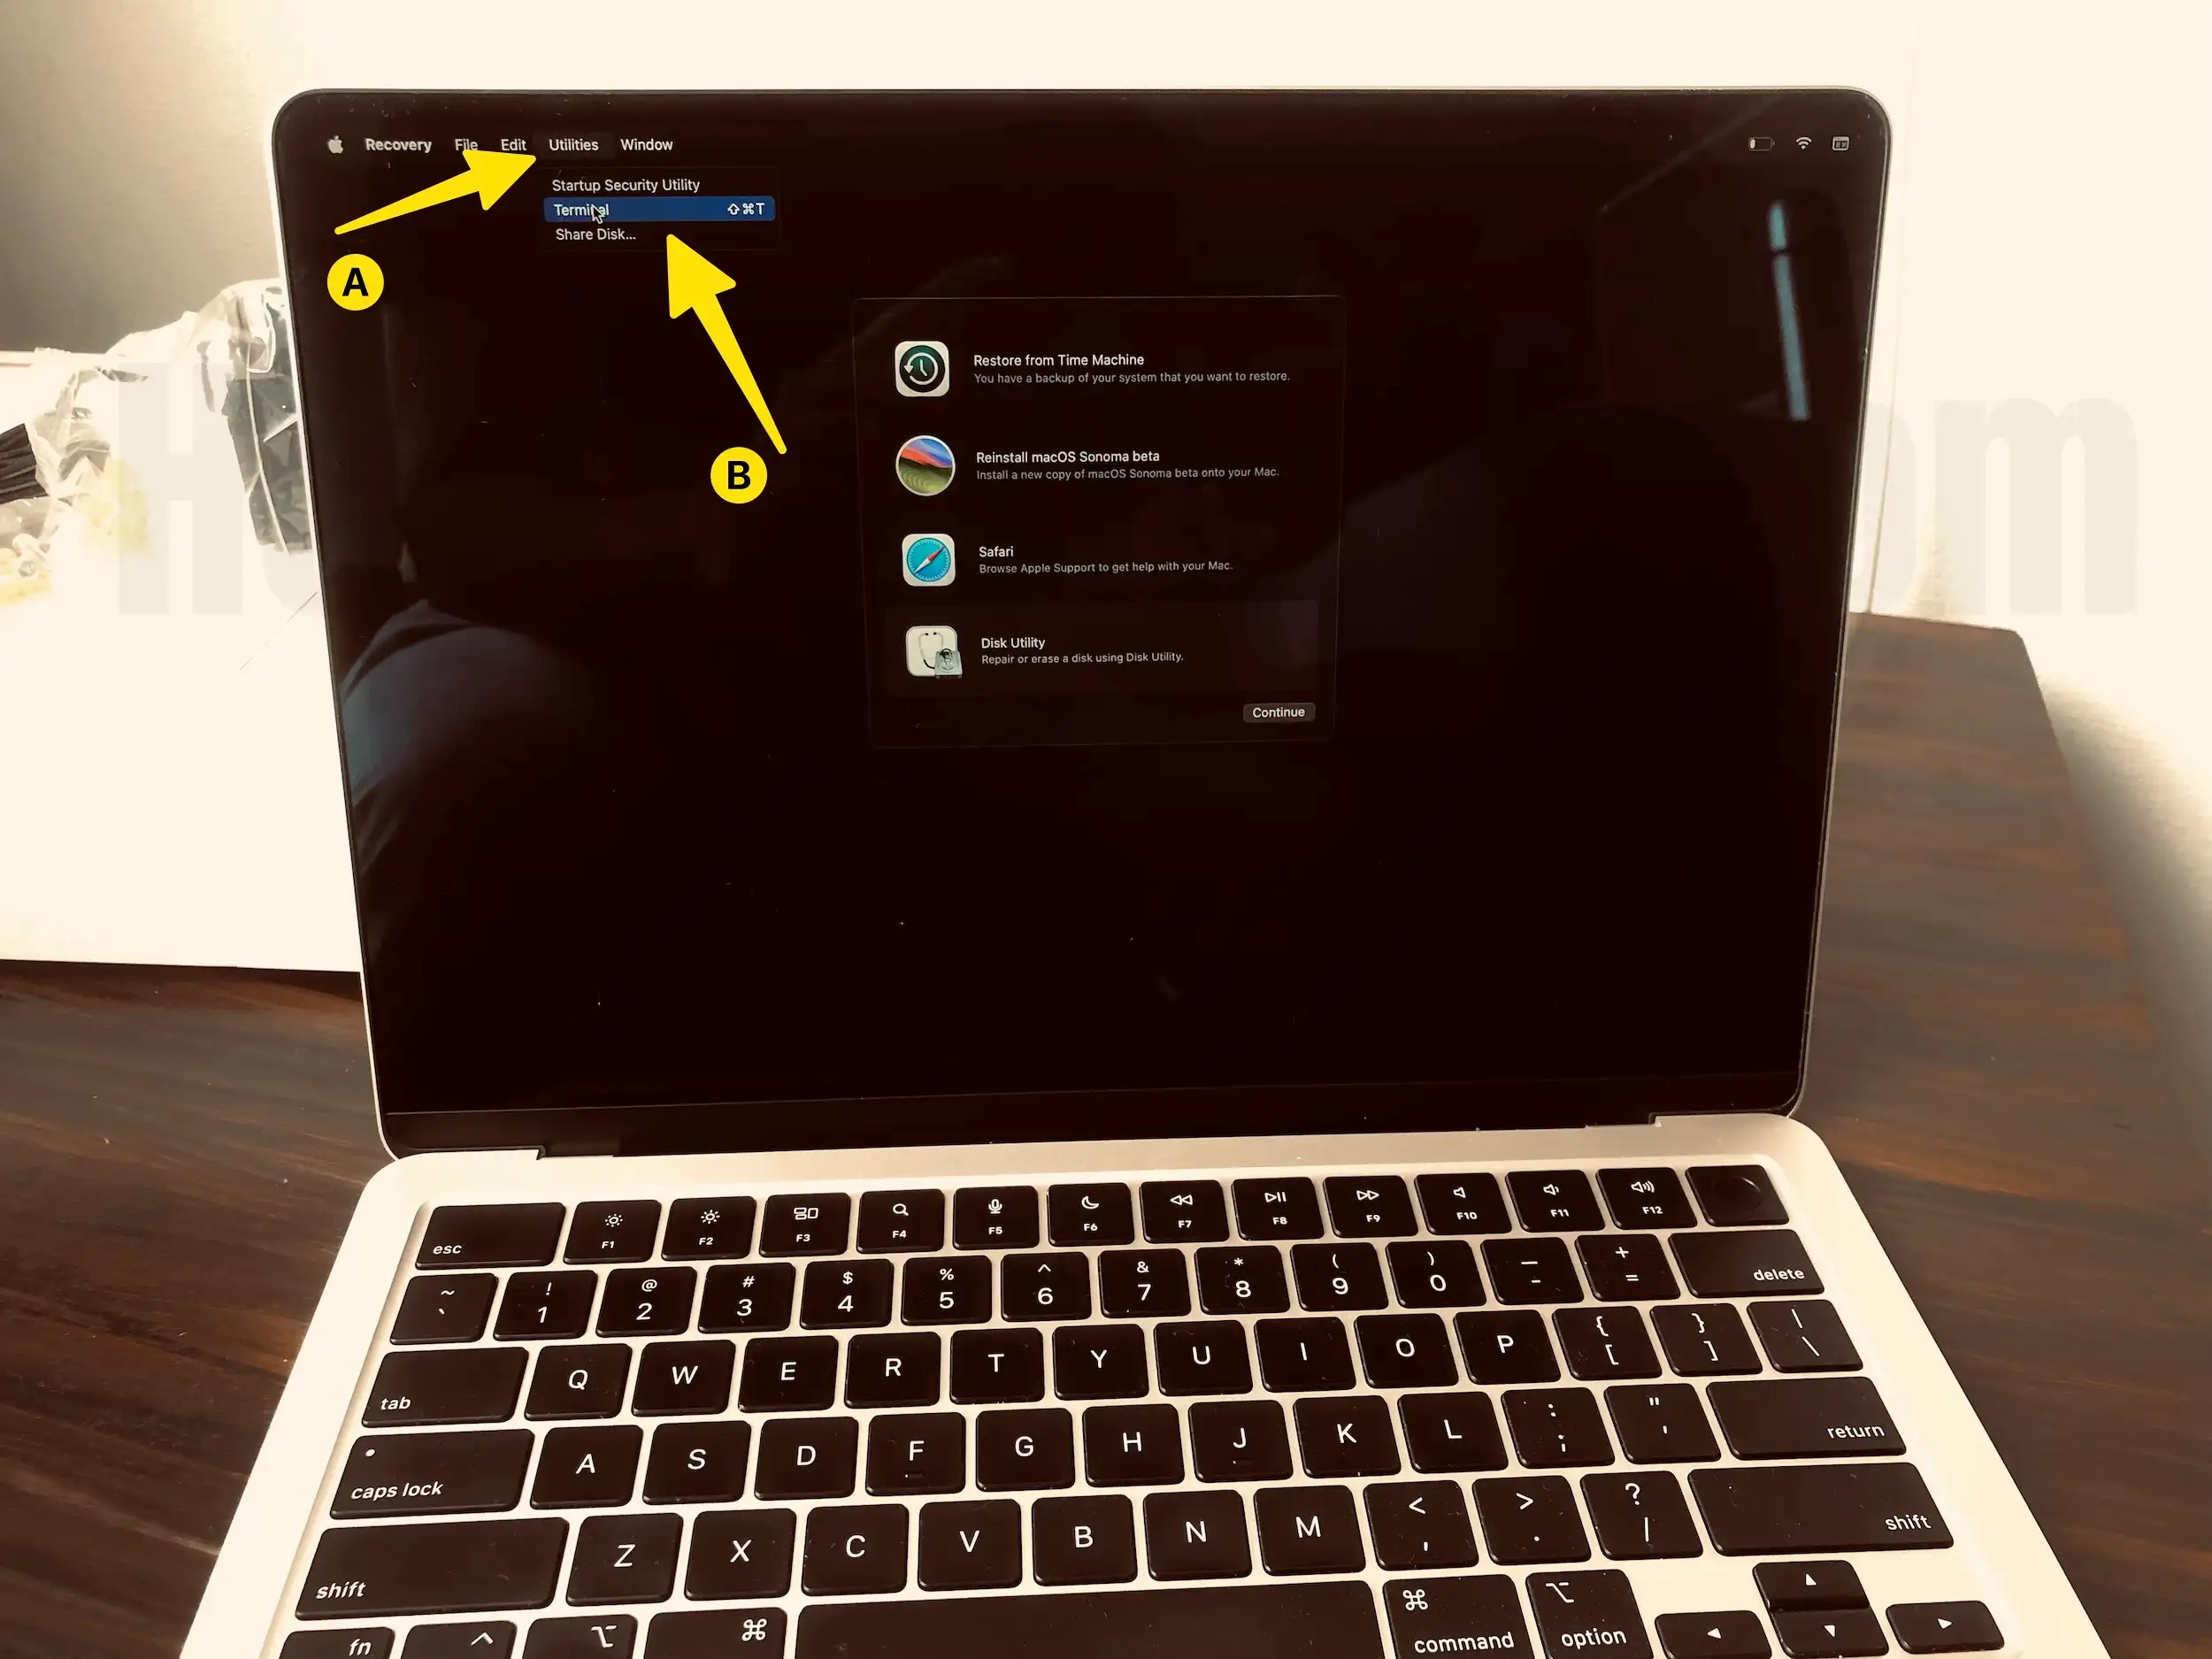
Step 6: Now, find the Utilities menu from the top Mac menu bar, and Click on Terminal to open and Run the command in Recovery mode.
Step #7: Enter the below command,
cd /Volumes/Macintosh HD/var/db/
Next, Enter the below command
rm .AppleSetupDone
Restart your Mac and follow the on-screen setup to create a new admin account for your Mac.
if you are settings up your Mac with a Standard User account, later on, we can assign this standard User account as Admin from the Mac system settings. Once you create an account and log in, See the option to change the Standard user for “Allow user to administer this computer”.
Method 2: How Do I Recover My Administrator Account on Apple Mac?
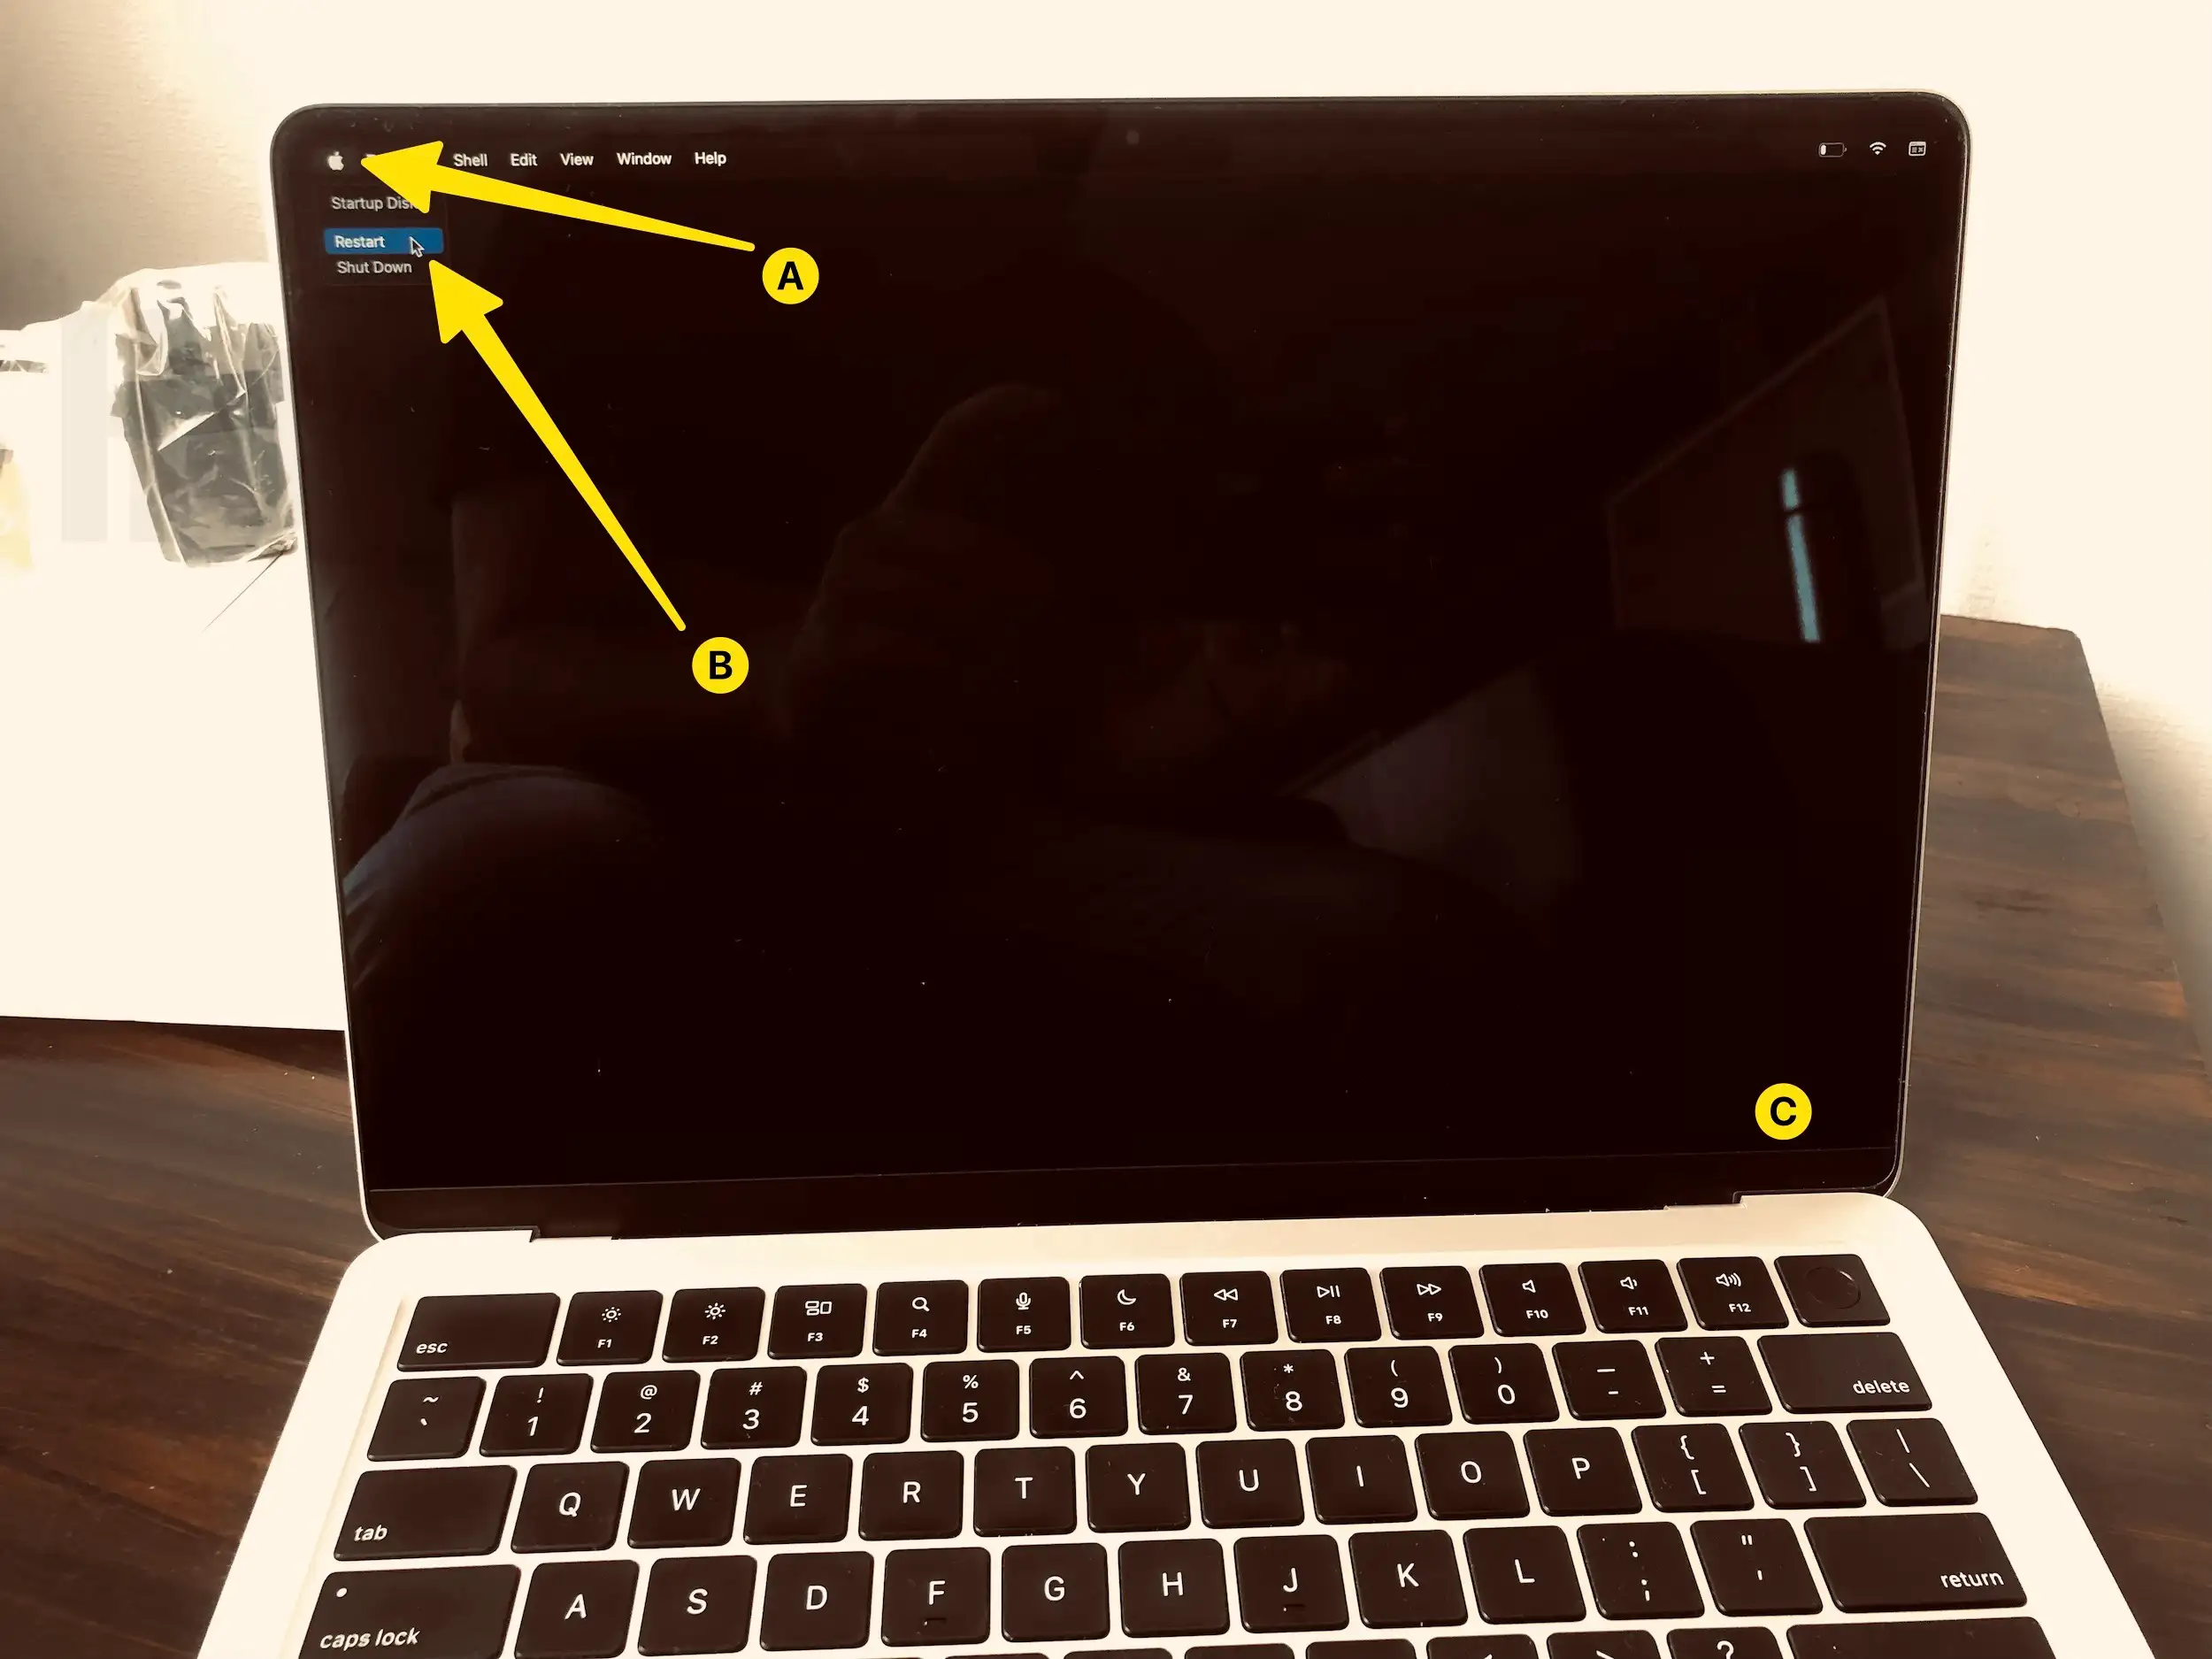
Step #1: Click on the “Apple” menu.
Step #2: Select “Restart”.
Step #3: When you hear startup chime on Mac press and hold the Command+S keys.
Step #4: Release the keys when text appears on Mac.
if the command doesn’t return any error message that means the command executed successfully.
When you will see “SDXC”
And Click on Enter, and you will see localhost:/ root”
Step #5: Type the following command, mount -uw/ and hit return key. or Use /sbin/mount –uw/
Step #6:
- Type, rm /var/db/.AppleSetupDone and press enter.
- Type, shutdown -r now, and Press enter.
Step #7: your Mac will reboot, Automatically.
Wait for few seconds, Mac will restart soon. and Go to create a new administrator account.
Step #8: Now, select “Language” and click Continue.
Step #9: Choose your “Country” and Continue.
Step #10: Select the “Keyboard” and then click Continue.
Step #11: Choose the Wi-Fi network to which you want to connect the Mac.
Step #12: Next, Mac will ask you to “Transfer information to This Mac”. Tick Mark the boxes appropriate boxes and continue to begin the transfer.
Step #13: “Sign in with your Apple ID” or click “Don’t Sign In” and skip this step.
Step #14: Agree to “Terms & Conditions”.
Step #15: Enter the following details to Create Admin Account on macOS Catalina and click on Continue.
Step #16: Again hit Continue on “Express Setup Screen”.
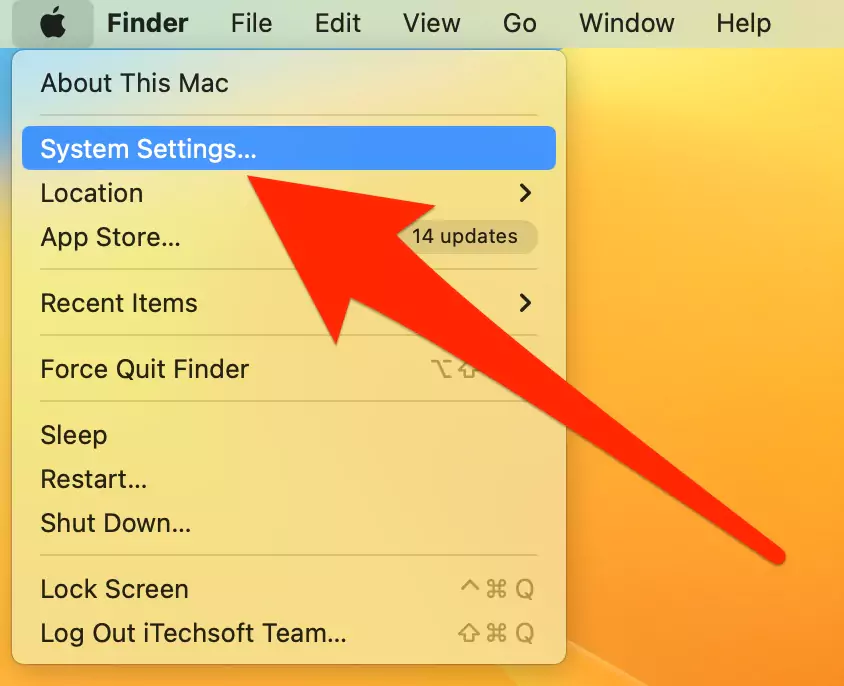
Step #17: Follow the path, Apple menu > System Preferences > User & Groups.
Step #18: To make changes, click on the “Lock” icon on the bottom-left window and type the password to Unlock.
Here your problem of no admin account on macOS resolves. To make changes read the next step.
Step #19: If you would like to change the standard account to an Admin account, then select “Allow user to administer this computer”.
Another Ways to Create a New Admin Account or Assign Admin role to any Mac users
This is another tricky solution for people who cannot type a command like the above or failed to perform a command on Mac for any reason. Follow the below steps and create & Use a new admin account on the same Mac system with a different login Username and Password from the Mac Startup screen.
On MacOS Ventura: Create a New Admin Account
- Go to the Apple Logo from the top menu > System Settings.

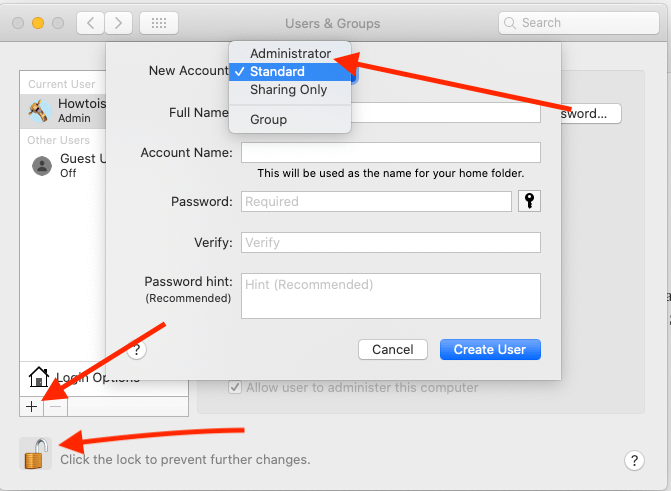
- Find and Open Users & Groups > Add Account…

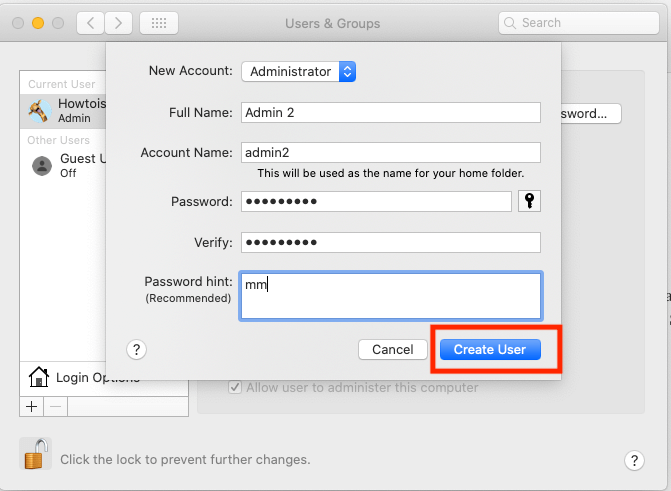
- Select Account Type “Administrator”, Full Name of your Account, Account name, Password, and Verify Password. Optional Password Hint.

- Click on Create User. That’s it.


On MacOS Monterey & Earlier: Create a New Admin Account
- Go to the Apple Logo on the Mac screen.
- Scroll to System Preference and click on it.
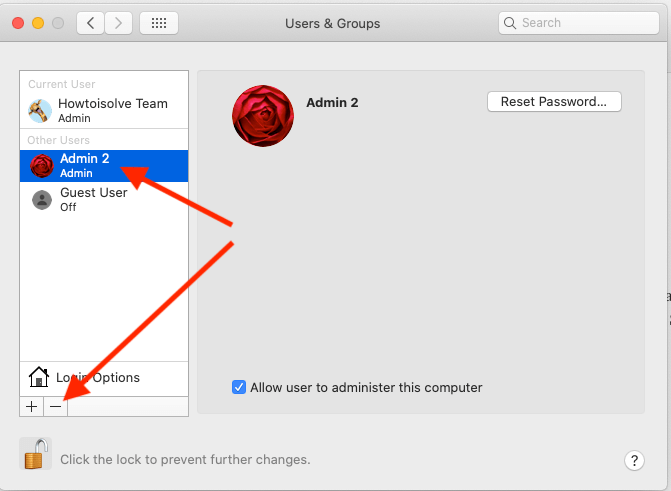
- Now, Click on the Users & Group option.
- Next Click on the lock button that available on the bottom left of the window. Enter the Mac password to authenticate and make admin level changes.
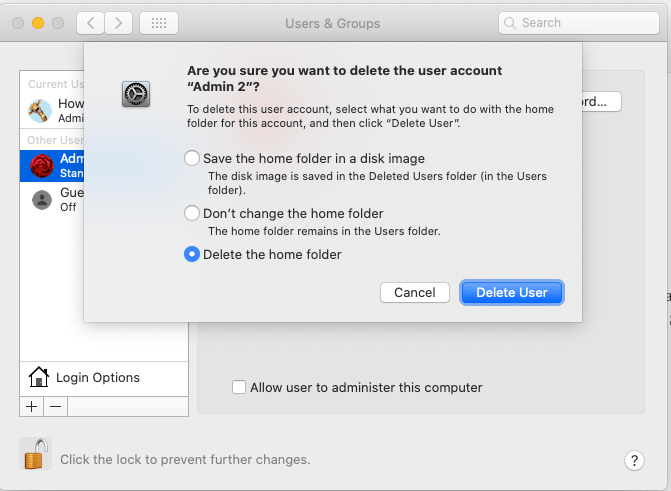
That’s it. also we can delete the admin account, To delete it select the account name and click on “-“ sign.
Also Select which types or deletion you required, to completely delete it, select last option and click on Delete button to remove admin account from Mac completely.
Change or Update Admin to Standard user type on Mac

This all are alternate ways to fix no admin account on Mac.


