
MBOX files are one of the most common file formats used to store emails and other mailbox items by several desktop-based email clients, like Apple Mail, Mozilla Thunderbird, Poco Mail, Eudora, and many others. These MBOX files are used on all important platforms, including Windows, Mac, and UNIX. On the other hand, Office 365 is one of the most widely recognized cloud storage services, provided by Microsoft. It provides several online applications, with great features and accessibility from anywhere and at any time. Its user-friendly approach and exclusive features are attracting a number of users to move their MBOX files to this cloud-based platform.
Reasons to Move MBOX Files to Office 365
An important aspect that many users consider when deciding to move MBOX files to Office 365 is the consolidation of all accounts at one place. In addition, following are some important factors that attract users to migrate to Office 365:
- Enhanced Security: Office 365 provides a number of security features that can help you to protect your emails, such as encryption, spam filtering, and malware protection.
- Data Loss Prevention: The Data Loss Prevention (DLP) feature in Office 365 helps prevent data loss or breach. This feature, when in place, prevents any unauthorized users to send any sensitive information, such as financial data, proprietary data, health records, credit card number, or social security numbers outside of the organization or to a public cloud service.
- Improved Collaboration: Office 365 makes collaboration easy with others. You can collaborate with anyone and from anywhere. It helps you to share files, edit them in real time, and allows you track changes.
- Accessibility: Being a cloud-based service, Office 365 is accessible from anywhere. It allows its user to access their emails and files from anywhere and at any time with an internet connection.
- Centralized Management: Office 365 makes it easy to manage your email accounts and files from one place. You can create and manage users, set permissions, and track usage.
- Scalability: Office 365 is a scalable solution. It allows you to easily add users and enhance storage as your needs grow.
- Reliability: Office 365 is a reliable service with a high uptime. Being a cloud service, Office 365 is always up-to-date.
- Support: Microsoft’s support to Office 365 is assured. It provides support in case users face any problems with the service.
The above advantages of Microsoft Office 365 are enough to compel the users to move MBOX mailboxes to Office 365.
Methods to Move MBOX Files to Office 365
Moving MBOX files to Office 365 can be tedious or easy, depending upon the method you choose. Below, we will be discussing two methods of moving MBOX files to Office 365.
Method 1: Move MBOX Files to Office 365 Manually
To manually move the MBOX files to Office 365, you need to configure Office 365 in an MBOX-based email client. Here, we will be using Thunderbird email client. Follow the below step-by-step process to import the MBOX files into Office 365.
Phase 1: Create Office 365 Profile in Thunderbird
- Open Thunderbird application on your system (Install it, if not installed).
- Now go to the Thunderbird menu and click on the Account Settings option.
- Then, click the Account Actions button and select Add Mail Account.
- Now, enter your full name, Office 365 email address, and password. After that, click on the Continue option.
- Next, select the configuration settings and click Done.
Phase 2: Import MBOX Files into Office 365
- Create a new folder to import MBOX files into Office 365. Add ImportExport plugin to Thunderbird.
- Right-click on the left pane and choose the New Subfolder option.
- Enter a name for the subfolder and click Create Folder.
- Click Menu and then select the Add-on & Themes option.
- Search ImportExportToolNG and add it to Thunderbird.
- Now, right-click on the left pane, choose and click ImportExportToolNG option. From the list, select Import MBOX files.
- Select the Import directly one or more MBOX files option and click OK.
The above process will help you move your MBOX files to Office 365. However, this procedure can take a lot of time and does not guarantee 100% success. Also, the method is restricted to moving one file at a time.
Method 2: Use a Professional MBOX Converter Software
To overcome the limitations of the manual method, you can use professional MBOX converter software, such as Stellar Converter to MBOX. It is a convenient tool that helps you to directly move MBOX mailbox items to Office 365. Given below are the steps to import your MBOX mailboxes into Office 365 by using the software:
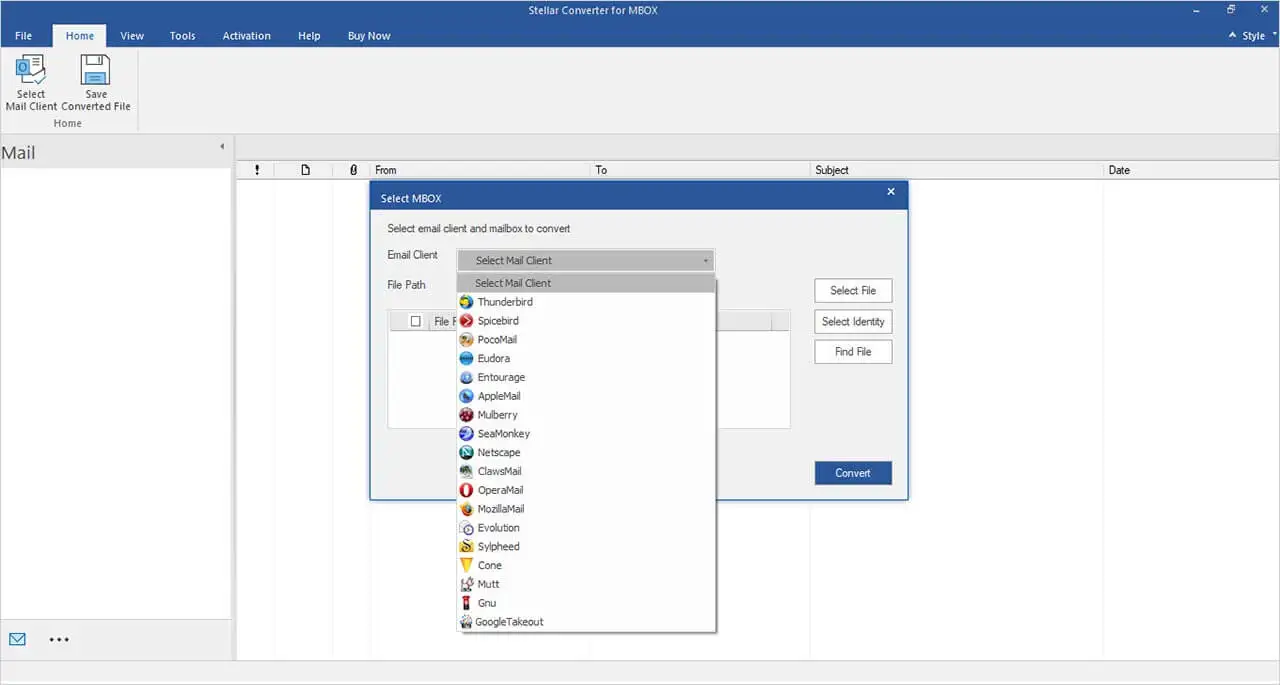
Step 1: Open Stellar Converter for MBOX.
Step 2: Select MBOX email client from the dropdown menu.
Step 3: Click on ‘Select File’, browse and select MBOX files. You can select multiple MBOX files to export them to Office 365.
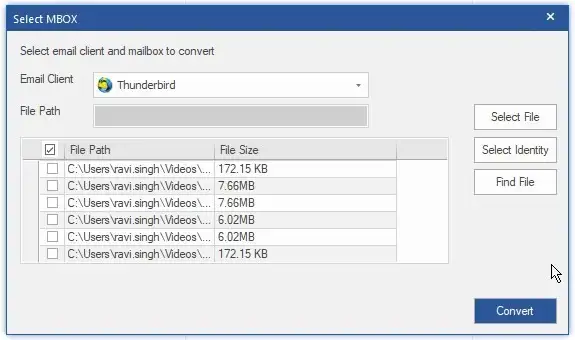
Step 4: Click Convert after Selecting MBOX file(s).
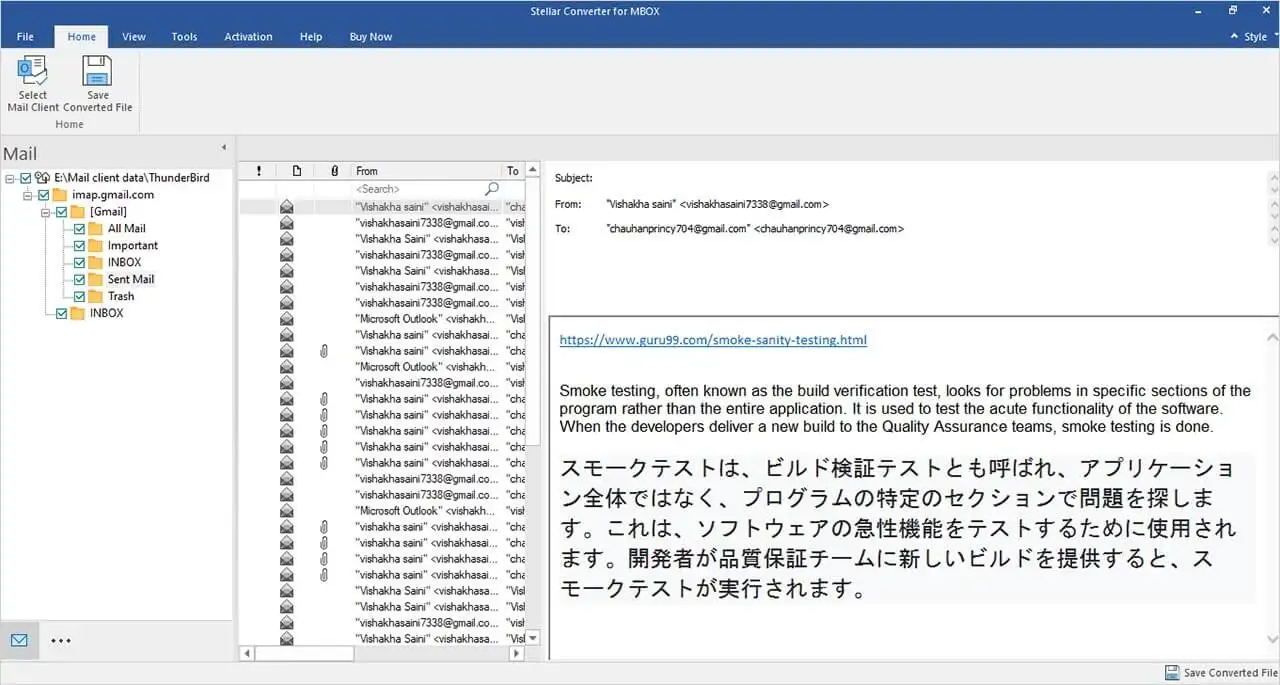
Step 5: Software will scan and list MBOX mail items. You can preview any item.
Step 6: From Menu bar, select ‘Save Converted File’.
Step 7: Choose Office 365 and click ‘Next’.
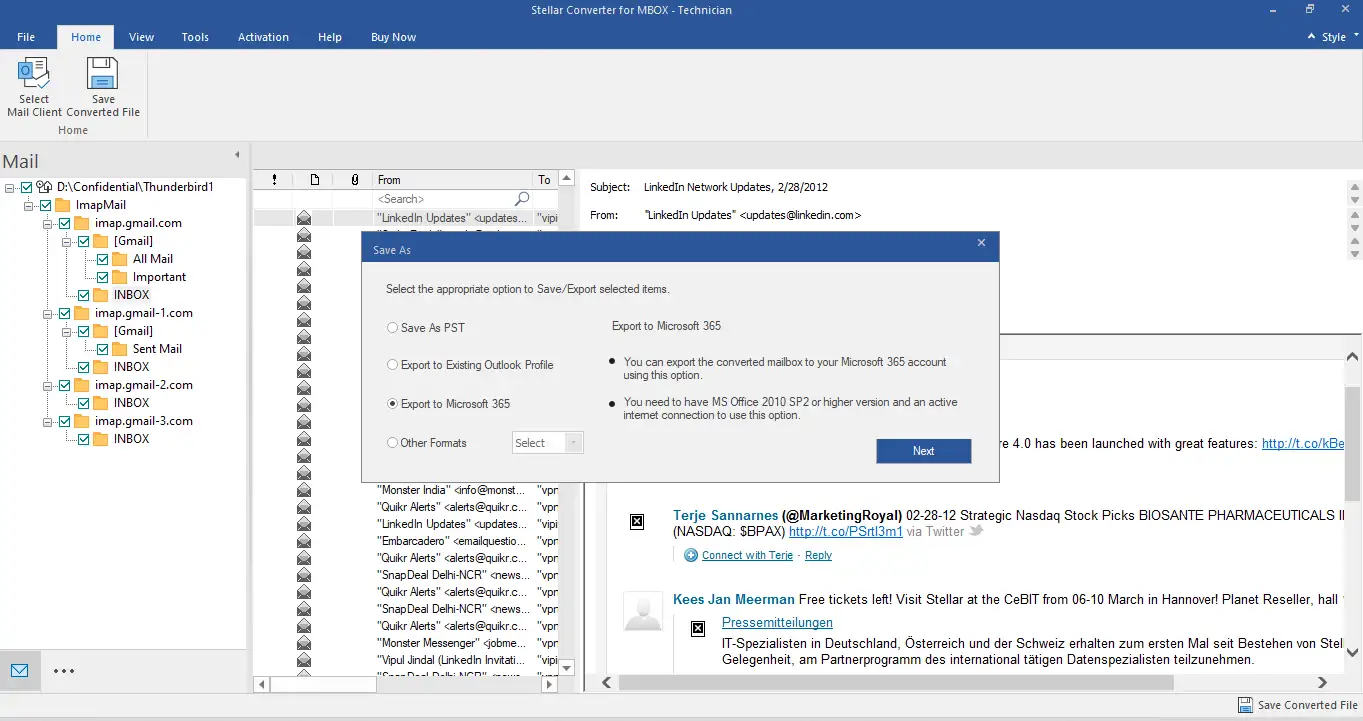
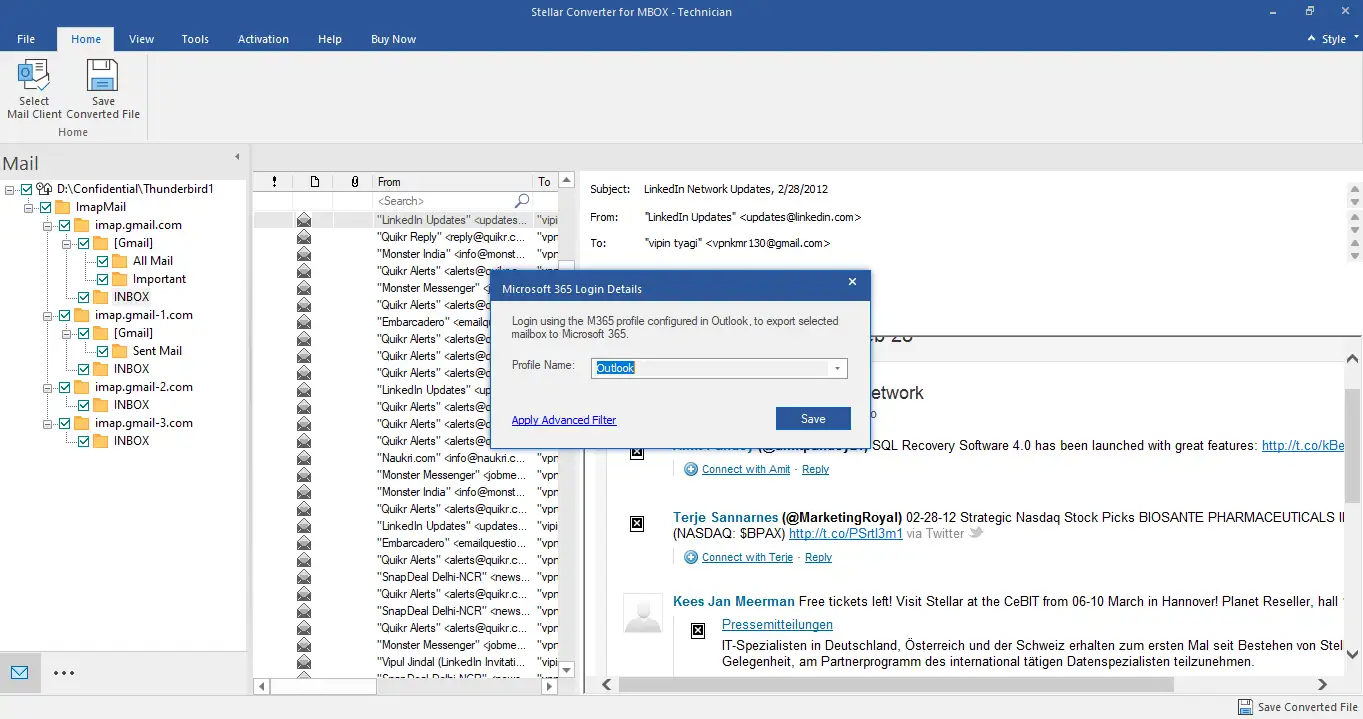
Step 8: It extracts all emails from the MBOX files and uploads them to Office 365 by configure Microsoft 365 profile configured in Outlook.
Note: You will require an Office 365 account and an internet connection to convert and export MBOX mailbox items to Office 365 account.
Conclusion
Office 365 is a cloud-based service that allows you to work as you want – from virtually anywhere. Another aspect that Office 365 is known for is its data safety. Due to these and various reasons, users are shifting to Office 365. If you are planning to move MBOX files to Office 365, then you can choose the methods mentioned above to import the MBOX data into Office 365. For quick and easy process, it is recommended to use a professional MBOX conversion tool like Stellar Converter for MBOX.


