Unwanted emails can clutter your inbox, distract you during the day, and even increase the risk of phishing or spam. With iOS 26, Apple has made it easier than ever to block email senders directly from the Mail app. Whether you’re dealing with spam, marketing emails, or someone you simply don’t want contacting you, blocking is a quick and effective solution.
Why Block Emails on iPhone?
Blocking an email sender helps in several ways:
1. Reduce inbox clutter
Persistent marketing emails, newsletters, and automated spam can fill your Inbox faster than you can organize it.
2. Avoid harassment or unwanted contact
If someone is repeatedly emailing you, blocking their address prevents further messages from appearing in your inbox.
3. Improve your digital privacy
Spam emails often track when you open them. Blocking them stops the sender from gathering activity data.
4. Protect yourself from scams
Phishing emails pretending to be banks, delivery services, or government agencies are increasingly common. Blocking them adds a layer of defense.
5. Automatically filter junk
iOS 26 allows blocked emails to be automatically moved to the Trash or Junk folder depending on your settings.
How to Block Emails on iPhone (iOS 26)
Blocking emails can be done directly through the Mail app or the Settings app. Here’s the full guide.
Method 1: Block Email Directly from the Mail App
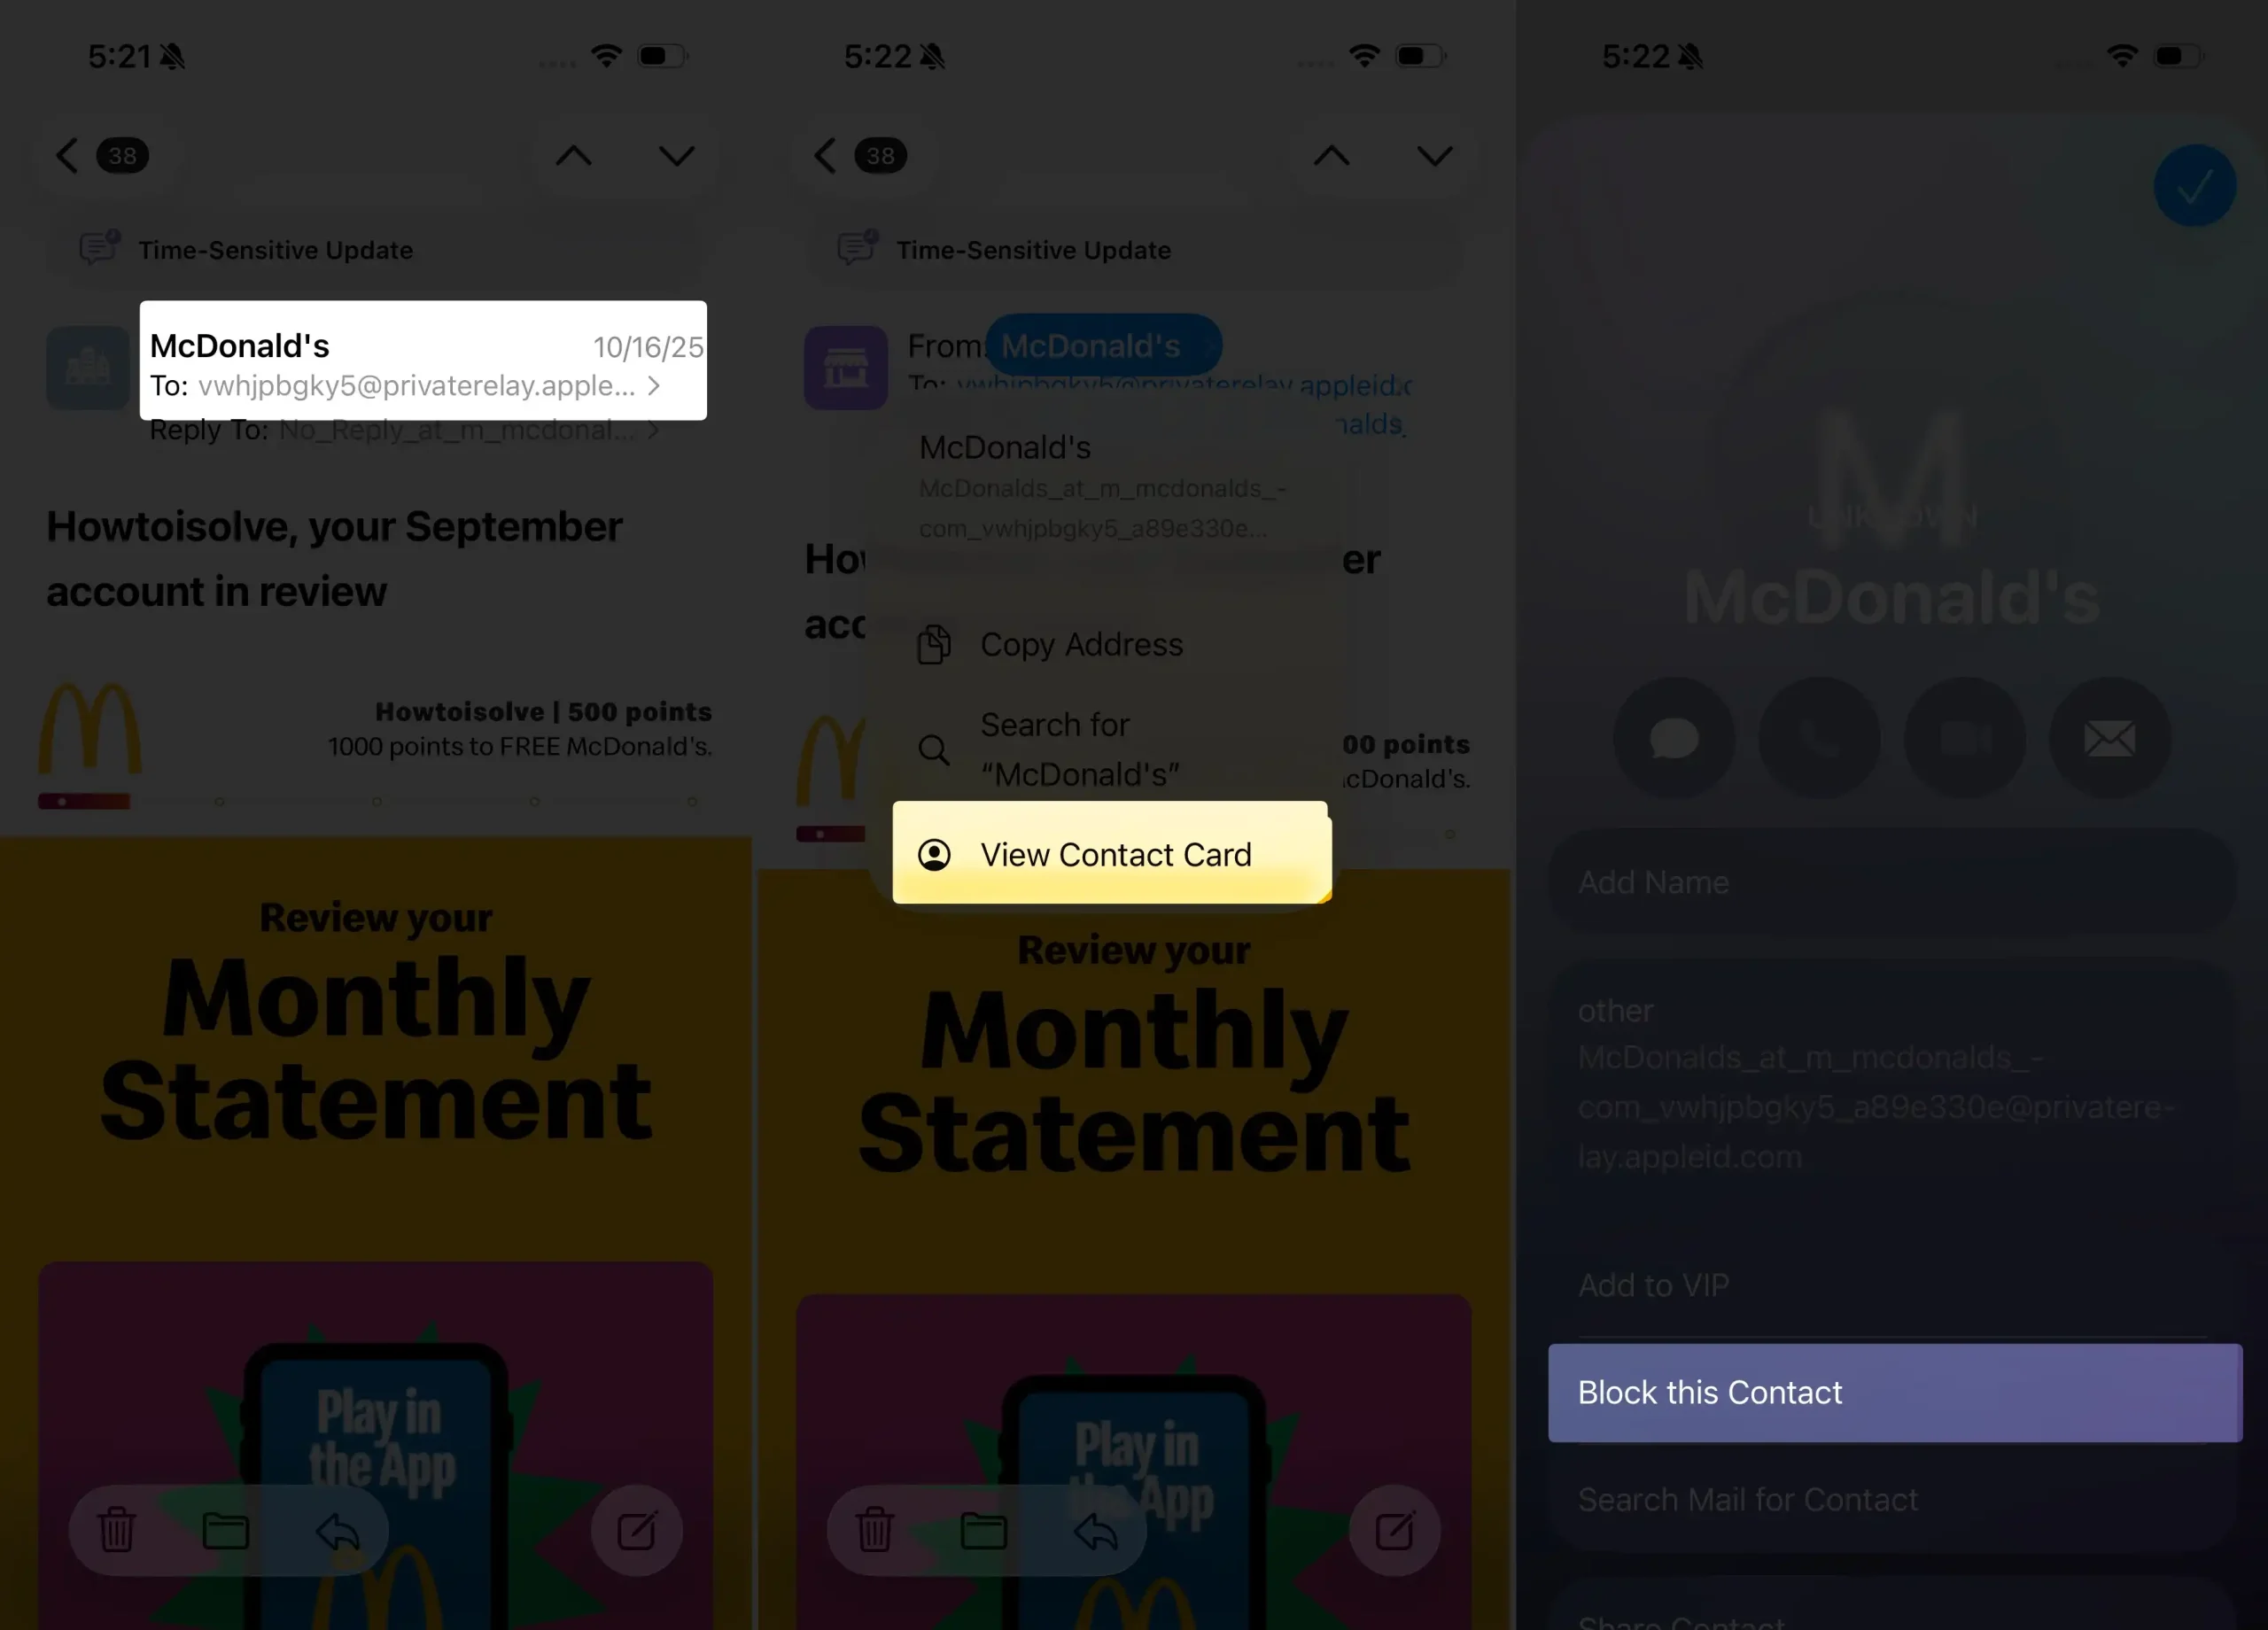
Step 1 — Open the Mail App
Tap All Inboxes, then tap the email you want to block.
Step 2 — Tap the Sender’s Name or Email
A contact card pop-up appears. Tap on the View Contact Card.

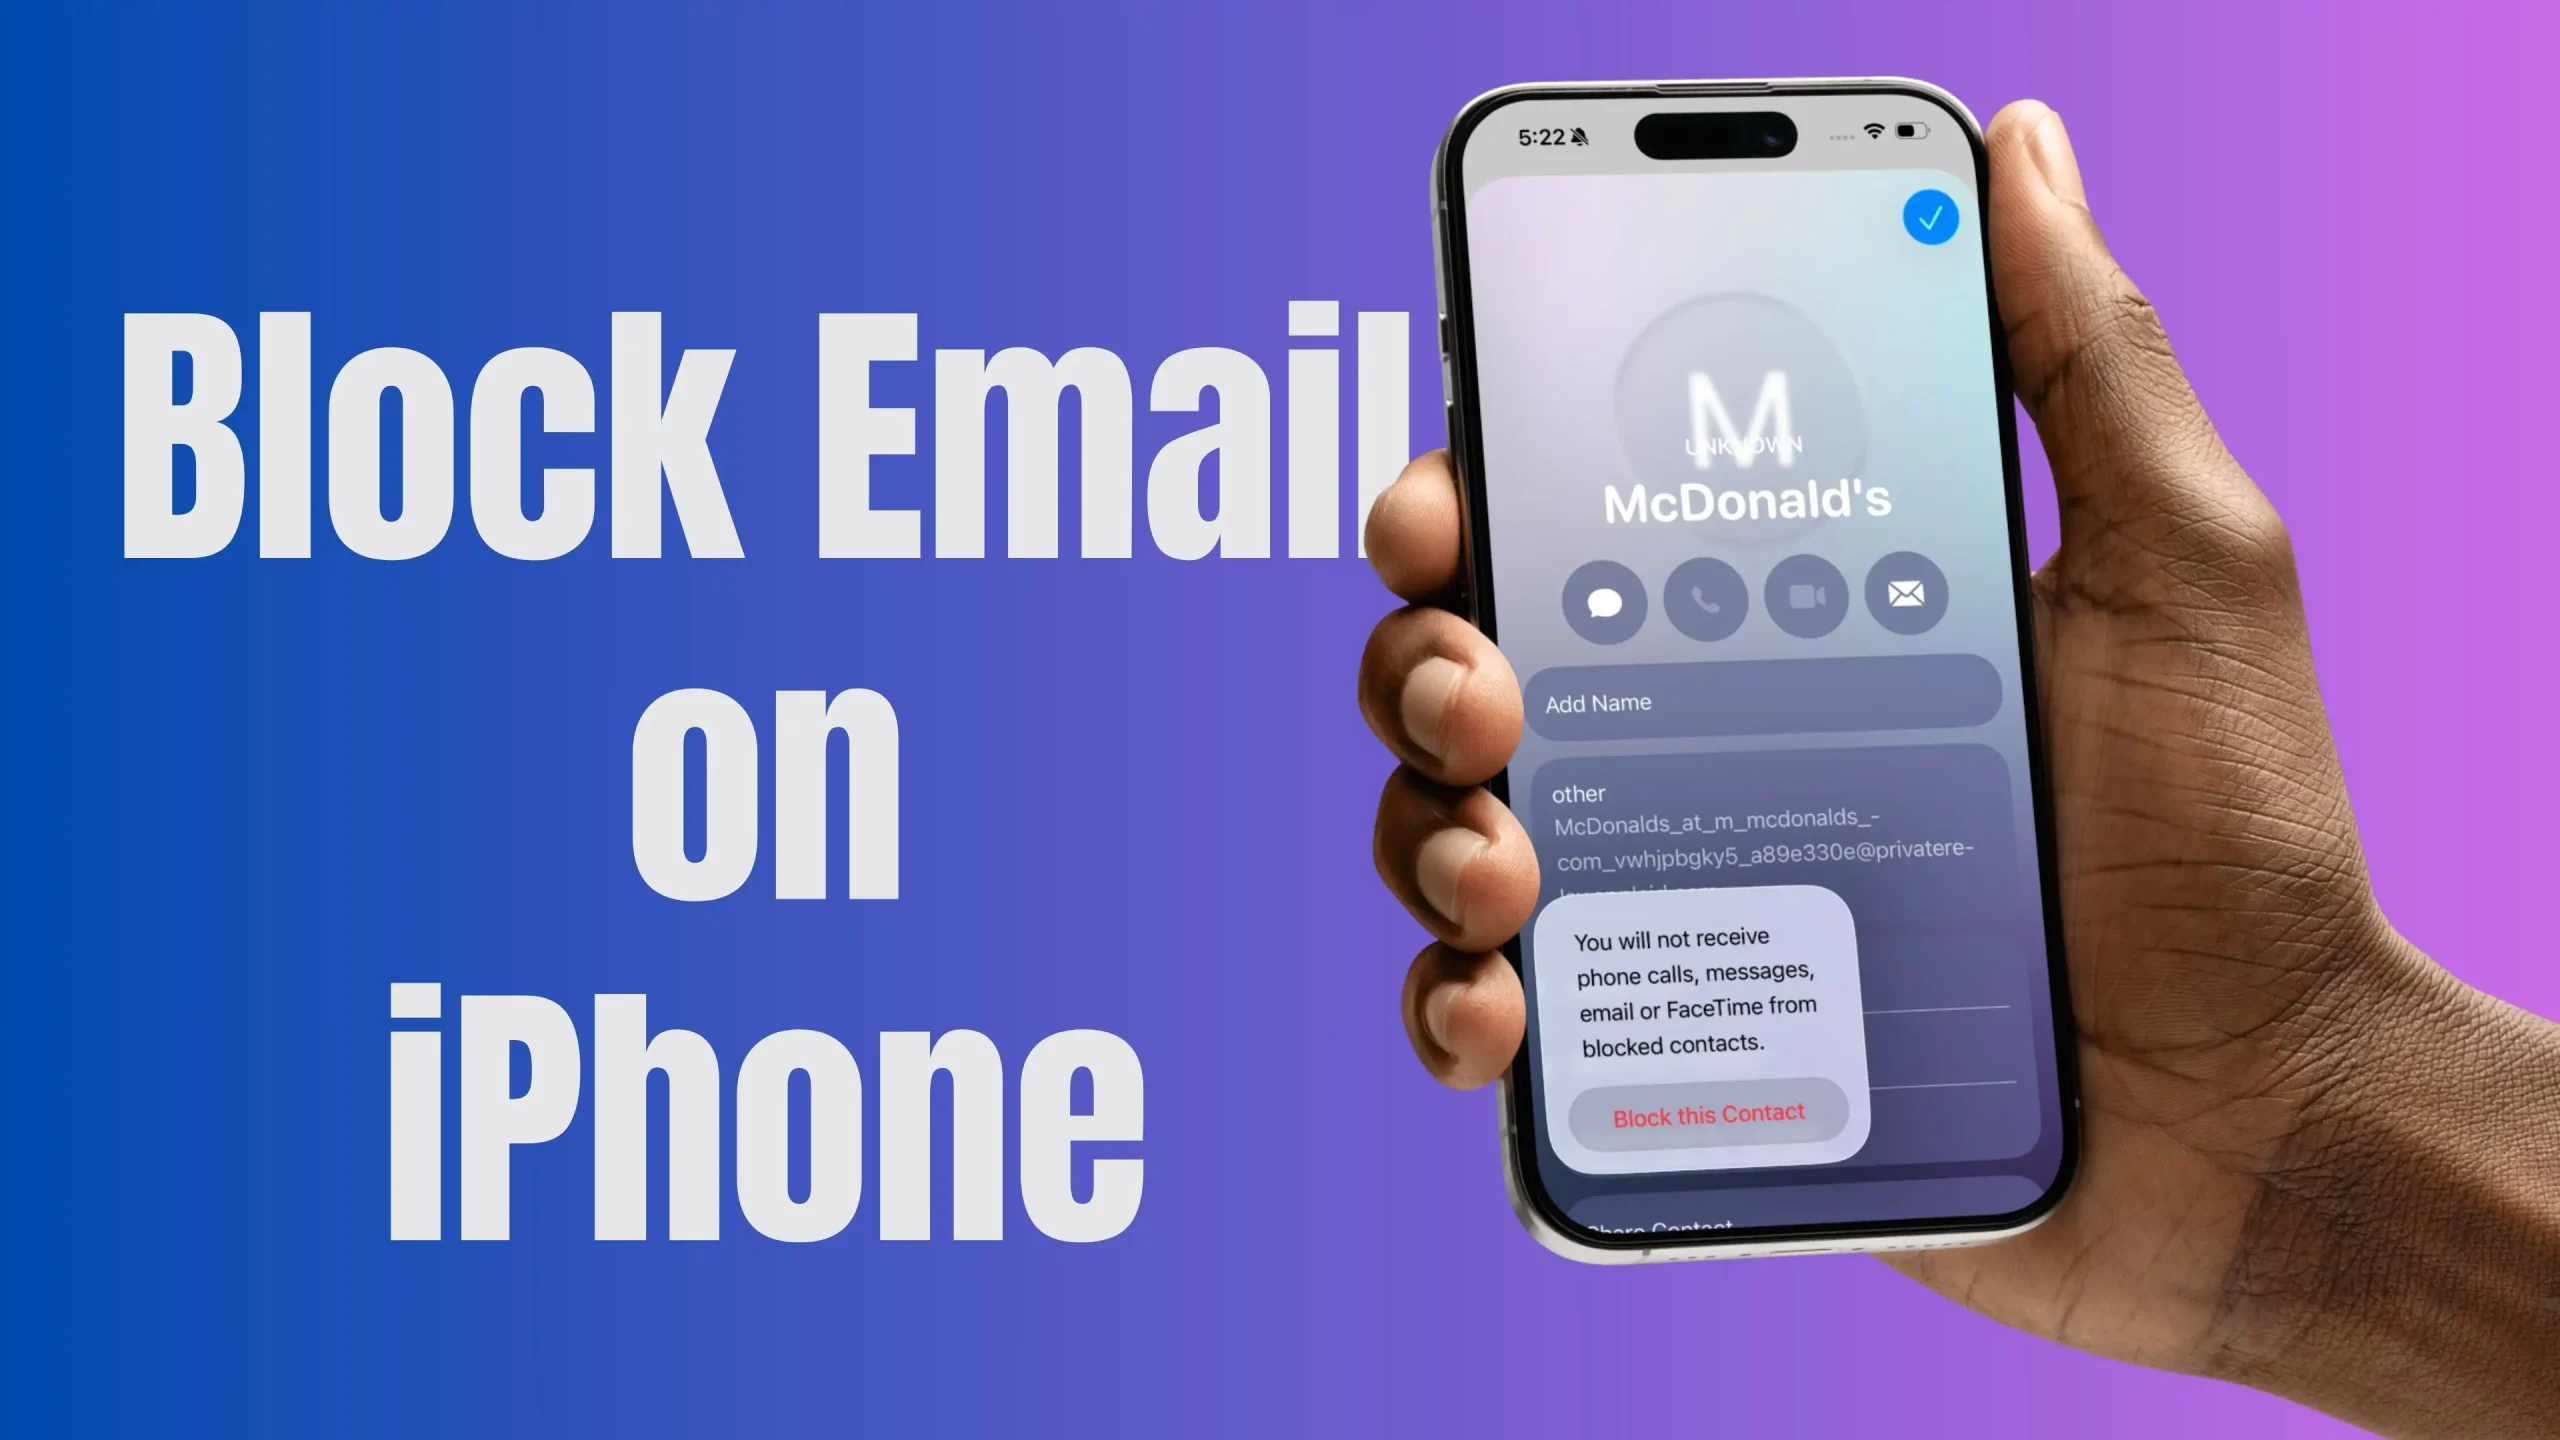
Step 3 — Tap “Block this Contact”
This option appears below the sender information.
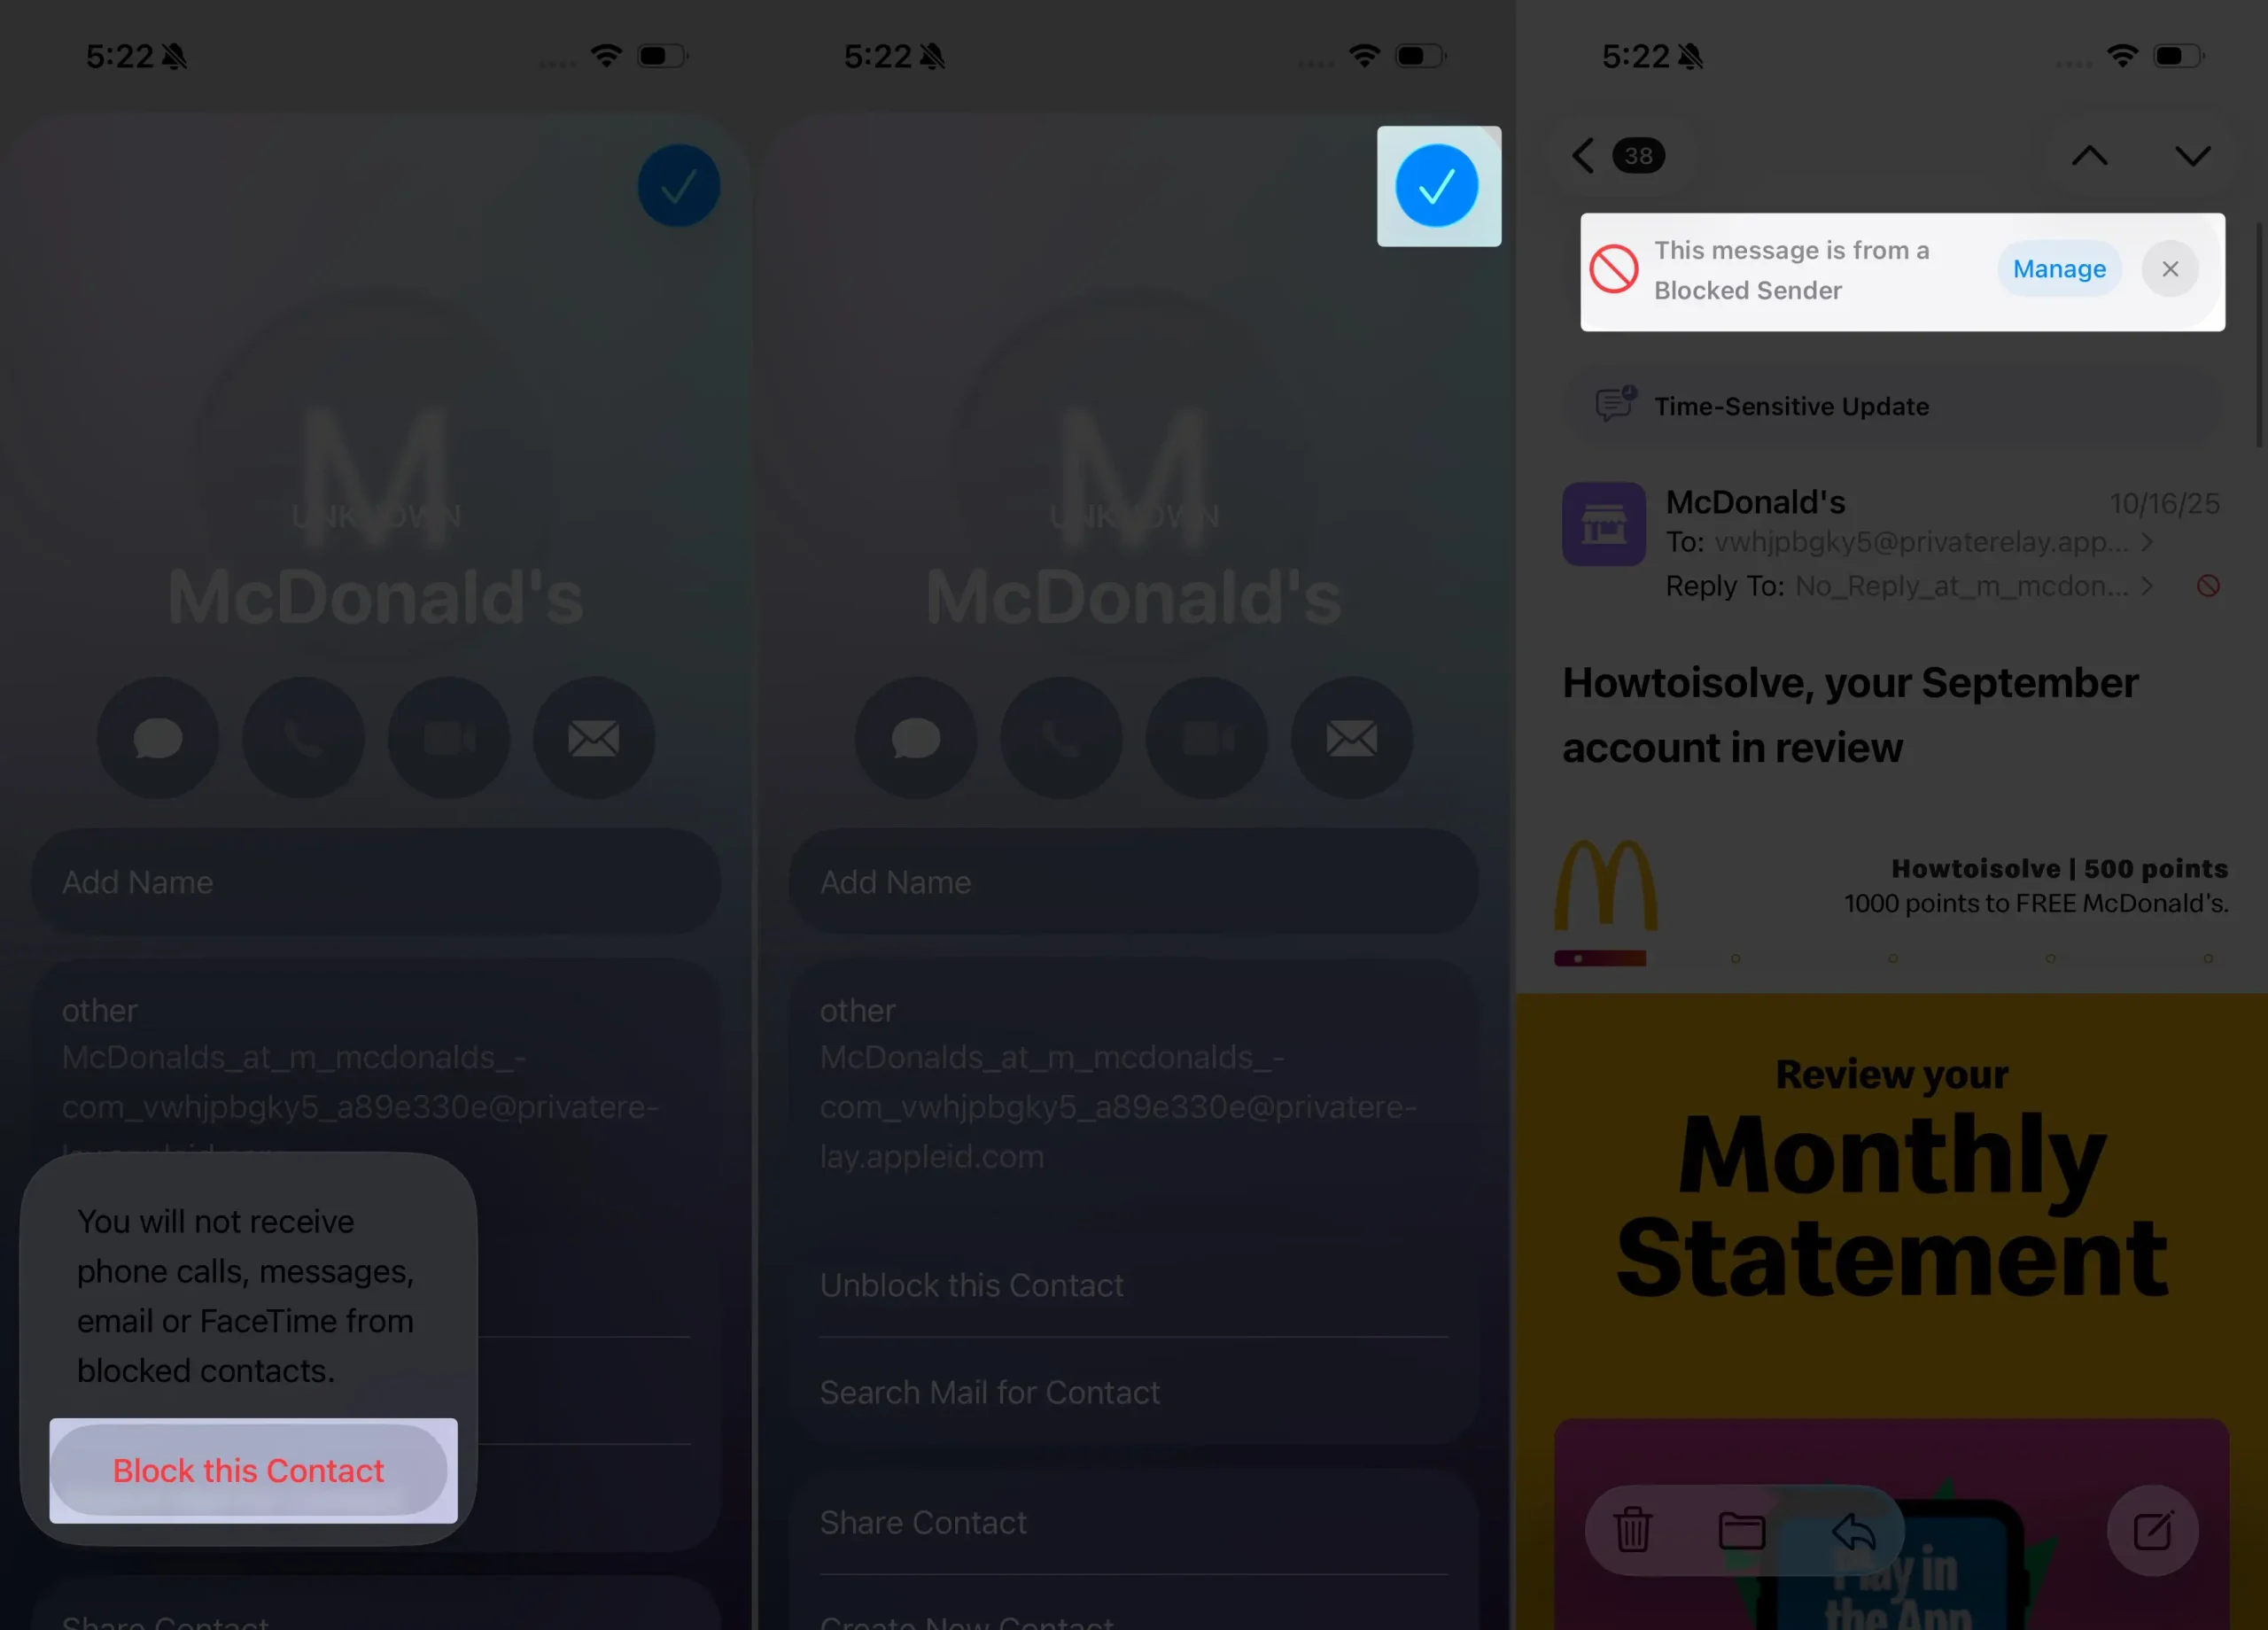
Step 4 — Confirm
Select Block Contact to activate the block.
Once blocked, messages from that email are automatically moved based on your Mail settings.
Step 5 — tap on the blue tick mark to exit edit mode.
You can see that the screen that shows this message is from a blocked sender.
Method 2: Manage Blocked Emails in Settings
Step 1 — Open Settings
Scroll down and tap Apps, then scroll to Mail.
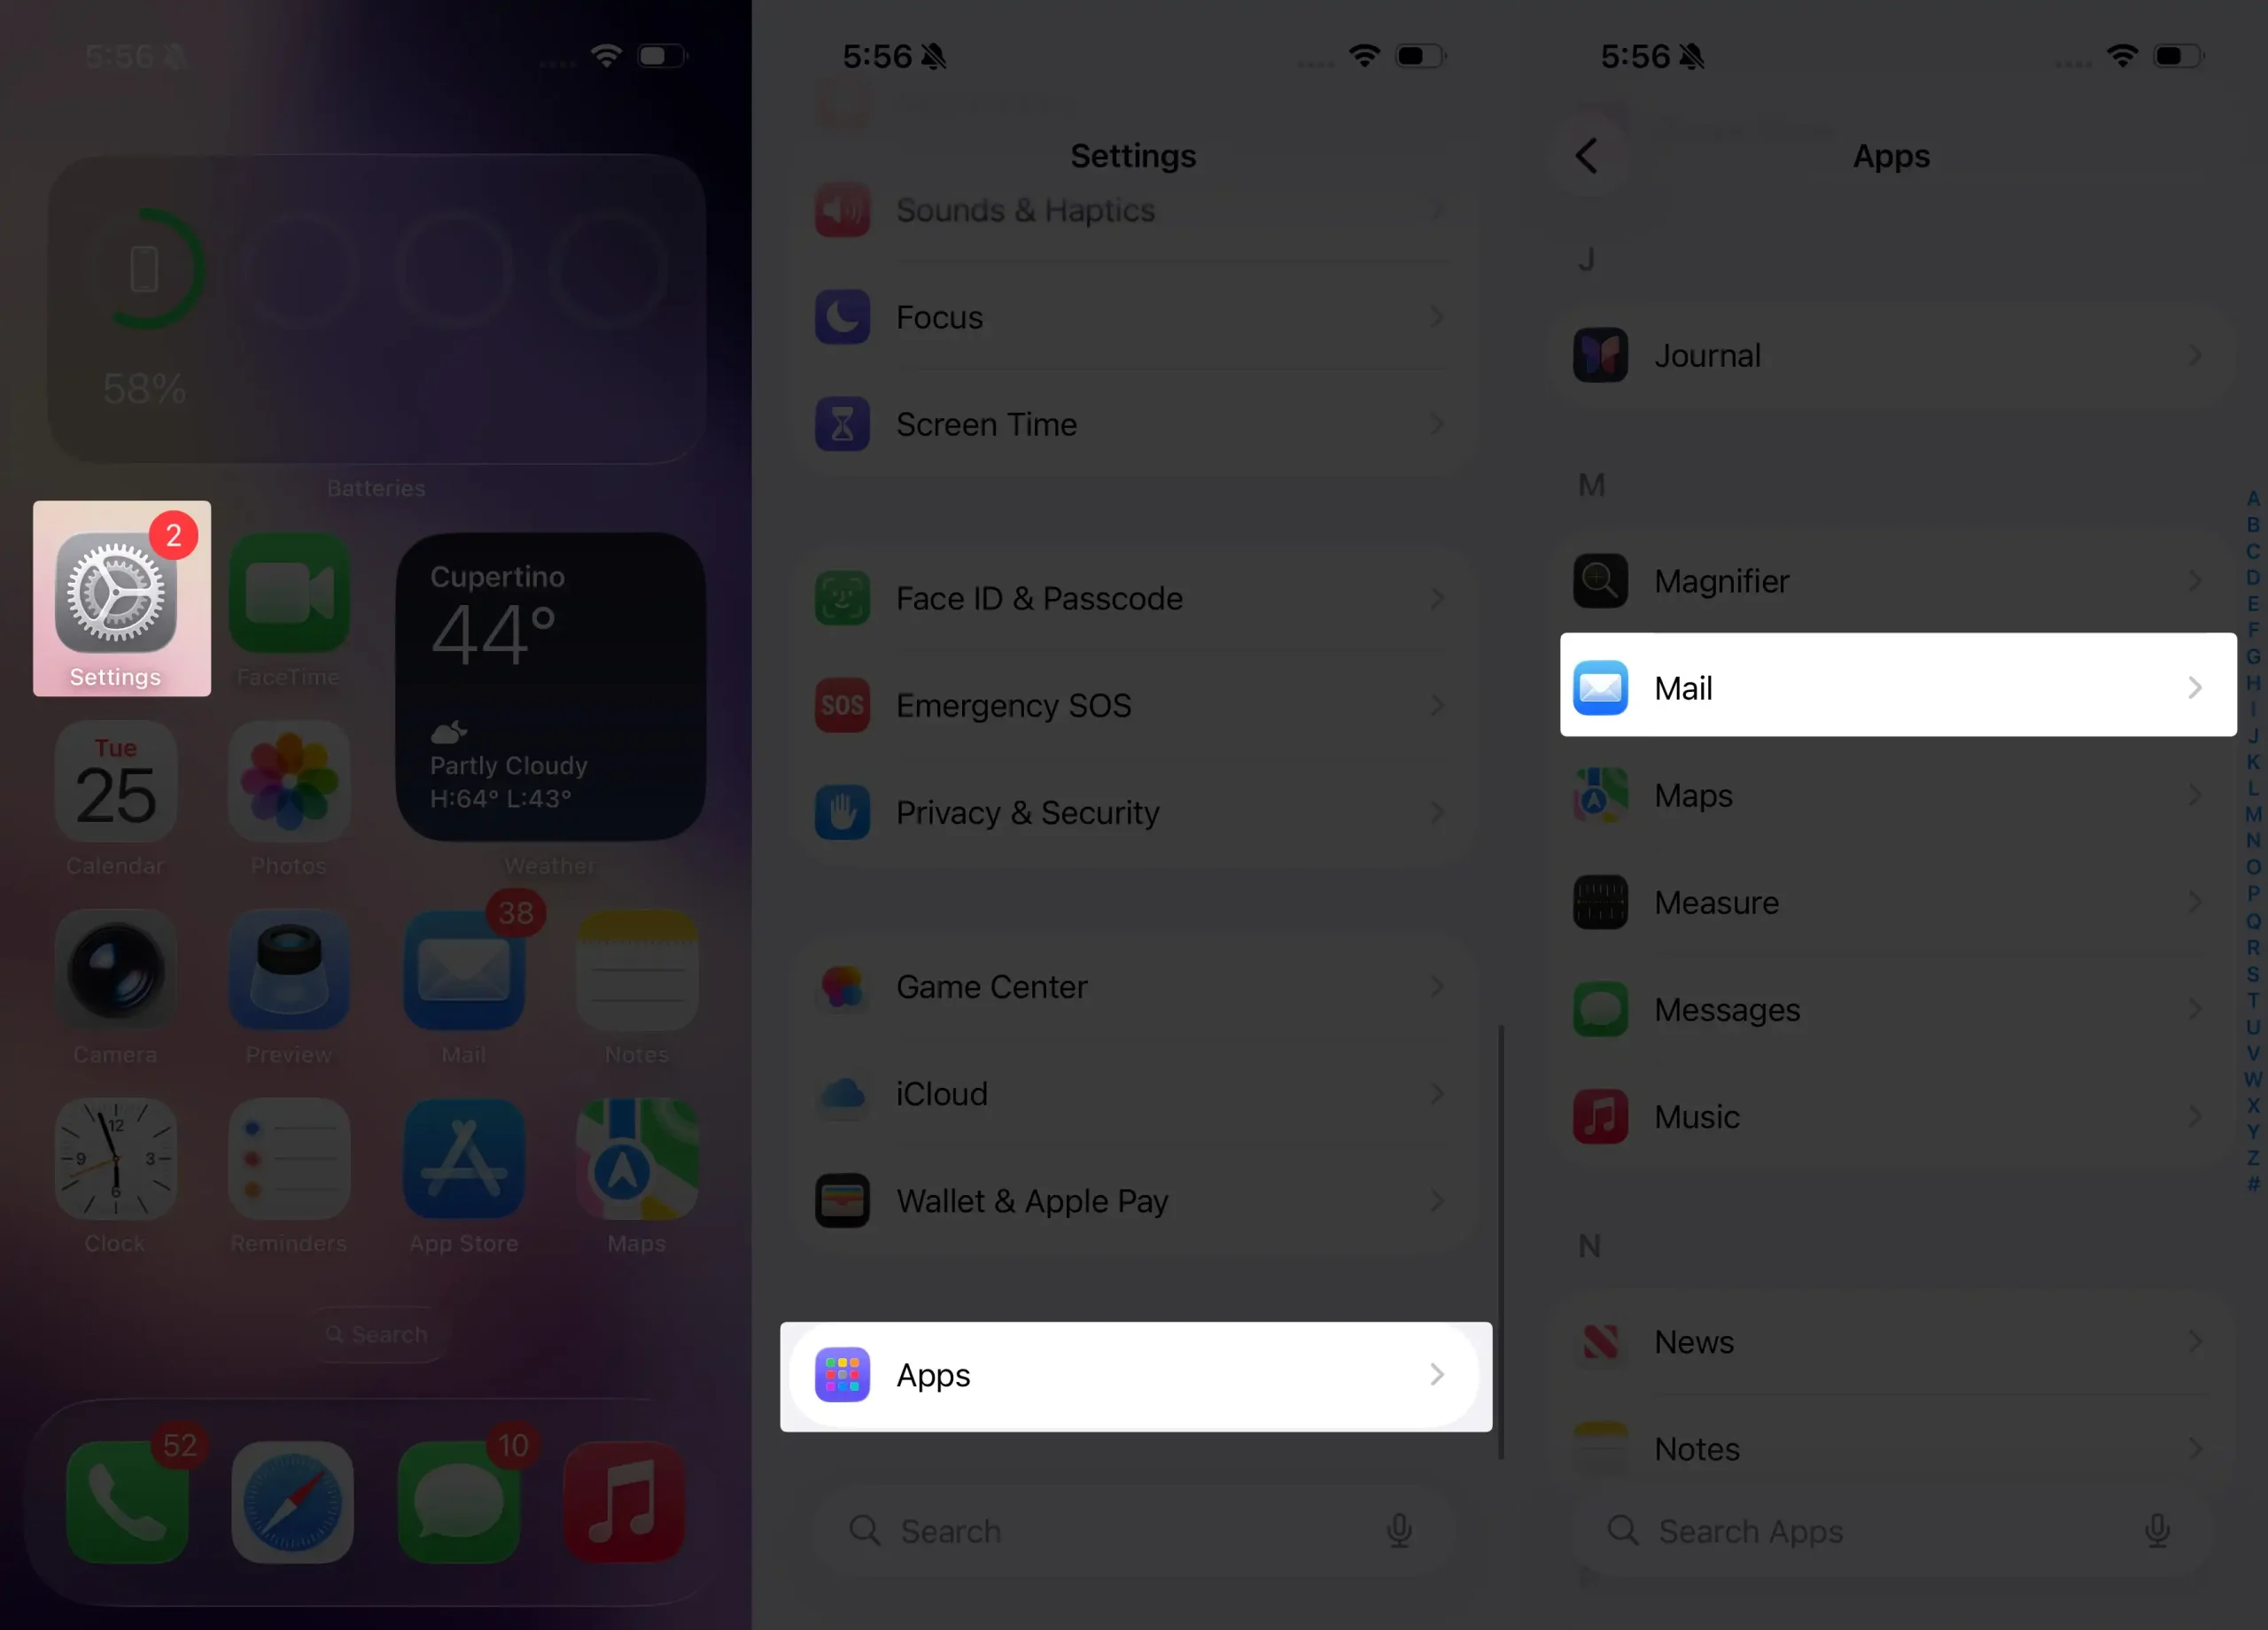
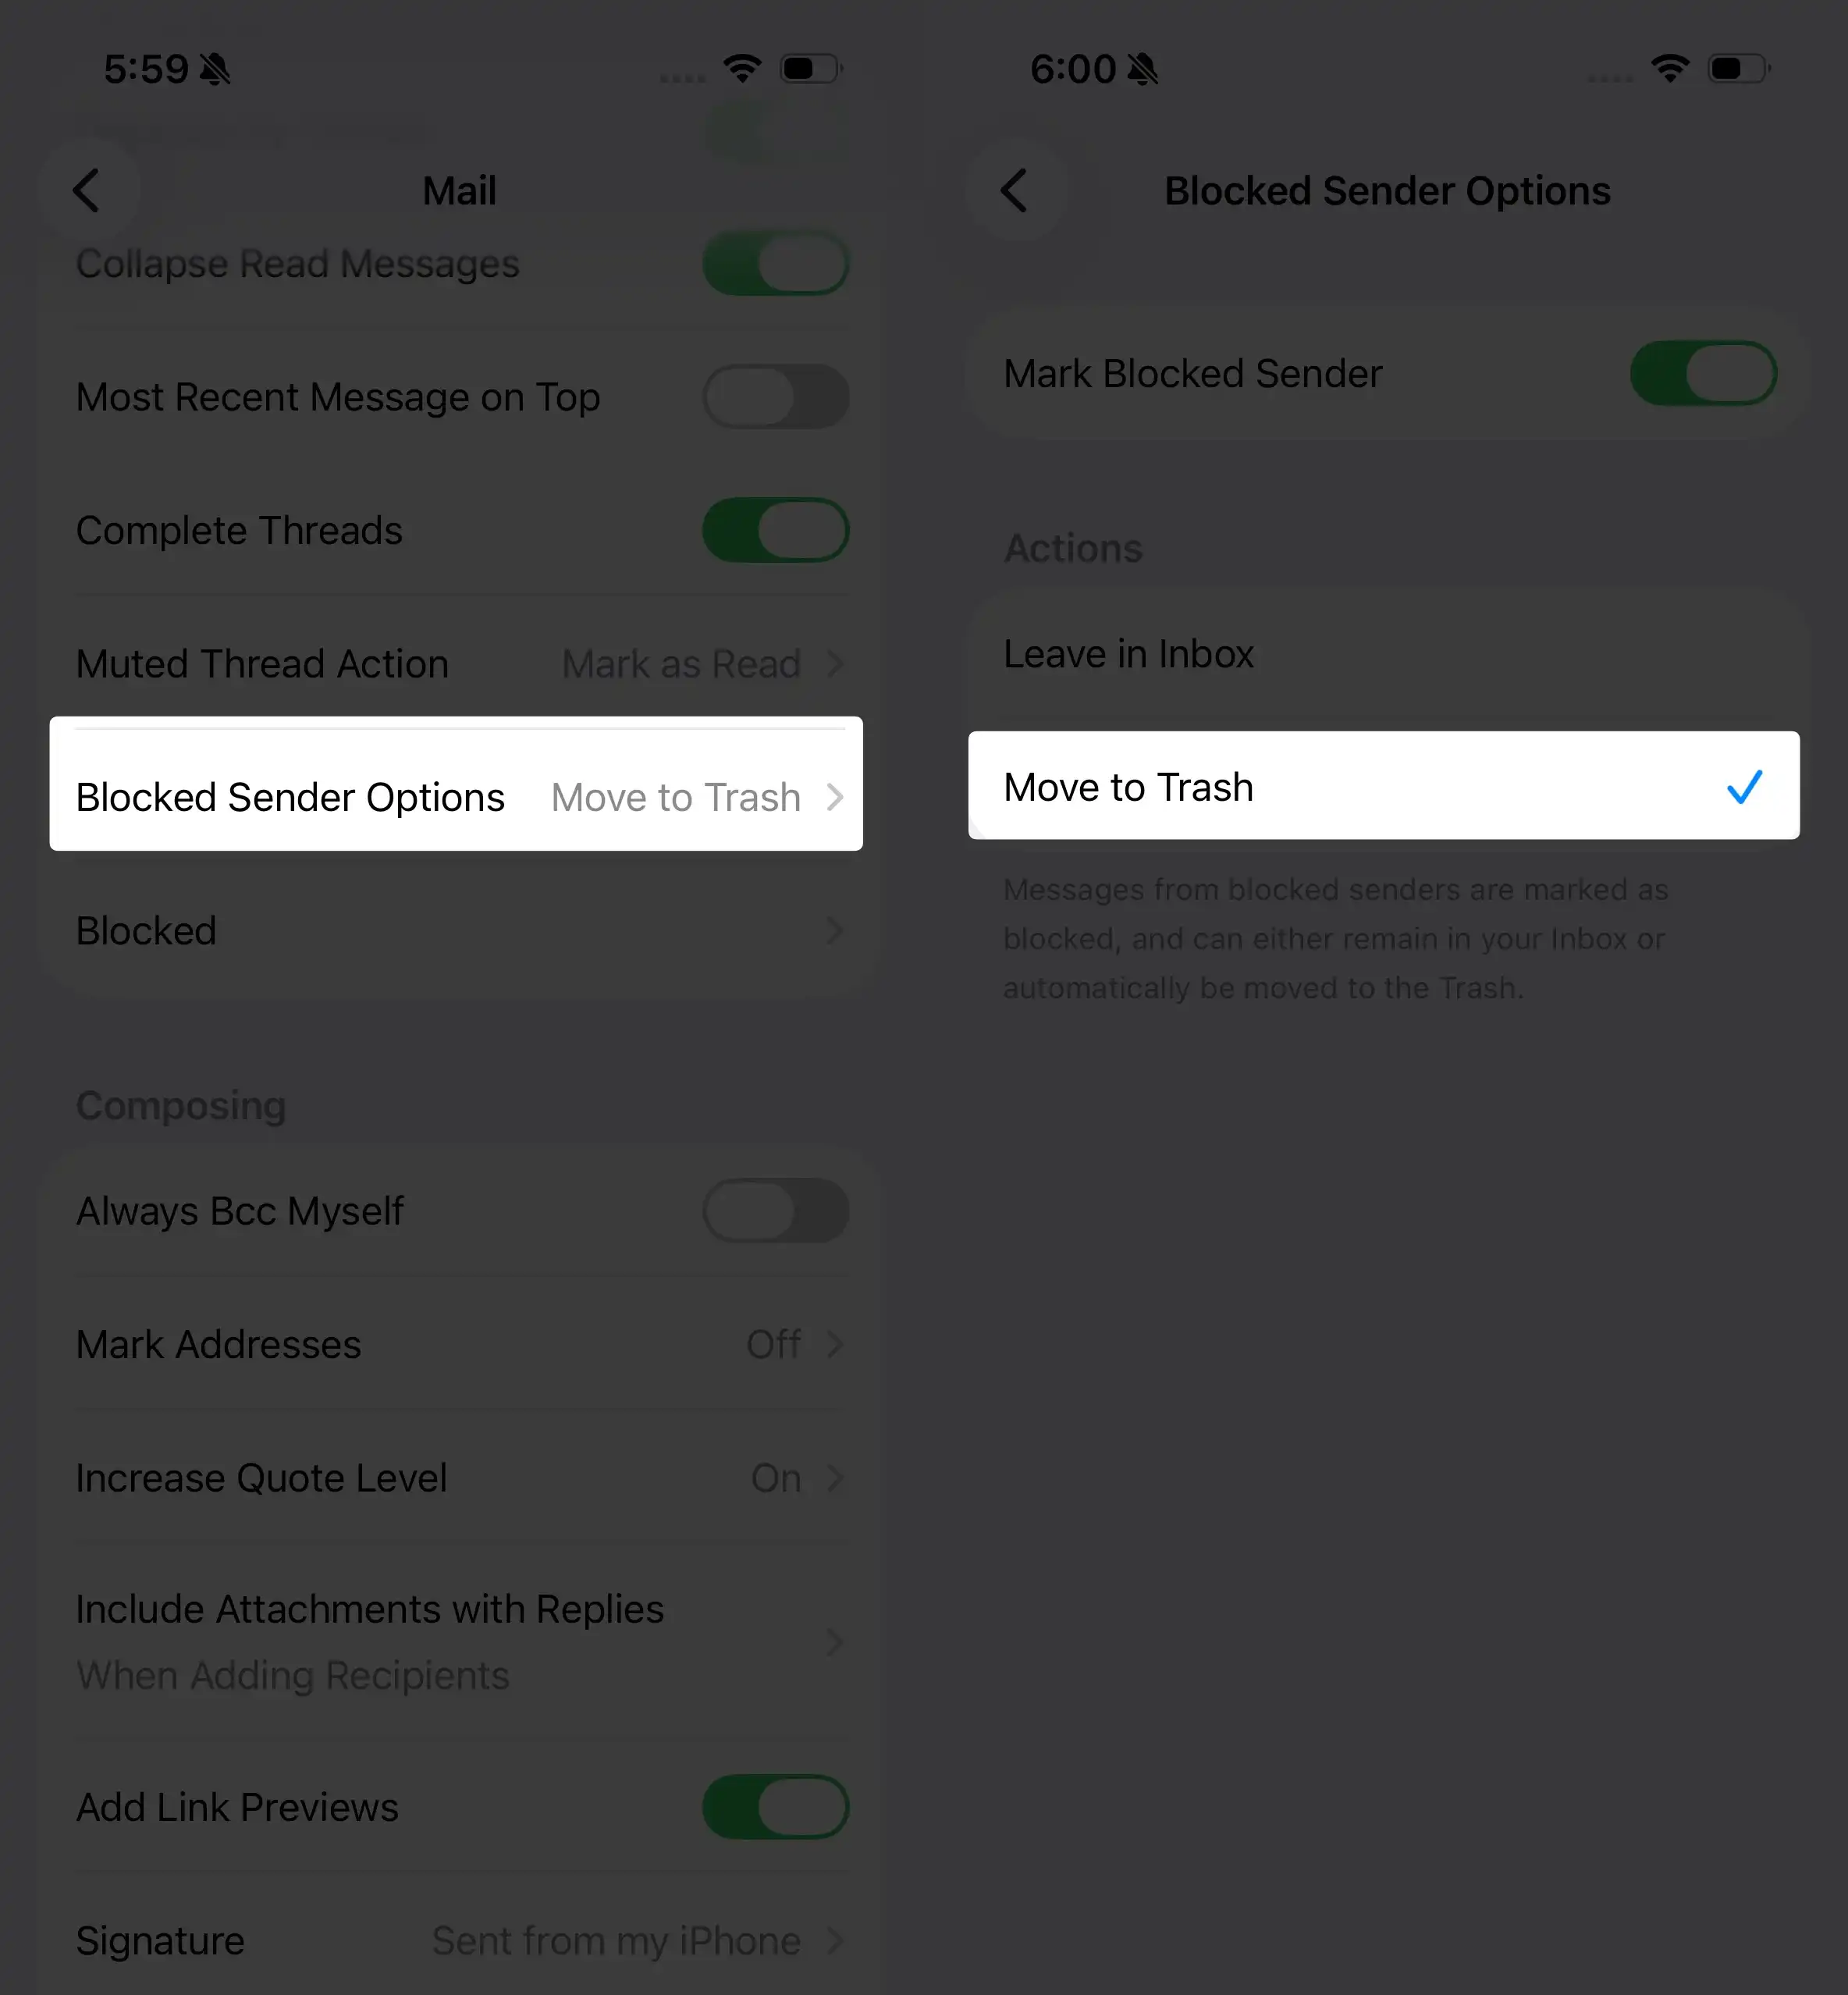
Step 2 — Tap “Blocked Sender Options”
Choose what happens to blocked emails.
Step 3 — Select Your Preferred Action
- Move to Trash (recommended)
- Mark as Blocked, Leave in Inbox
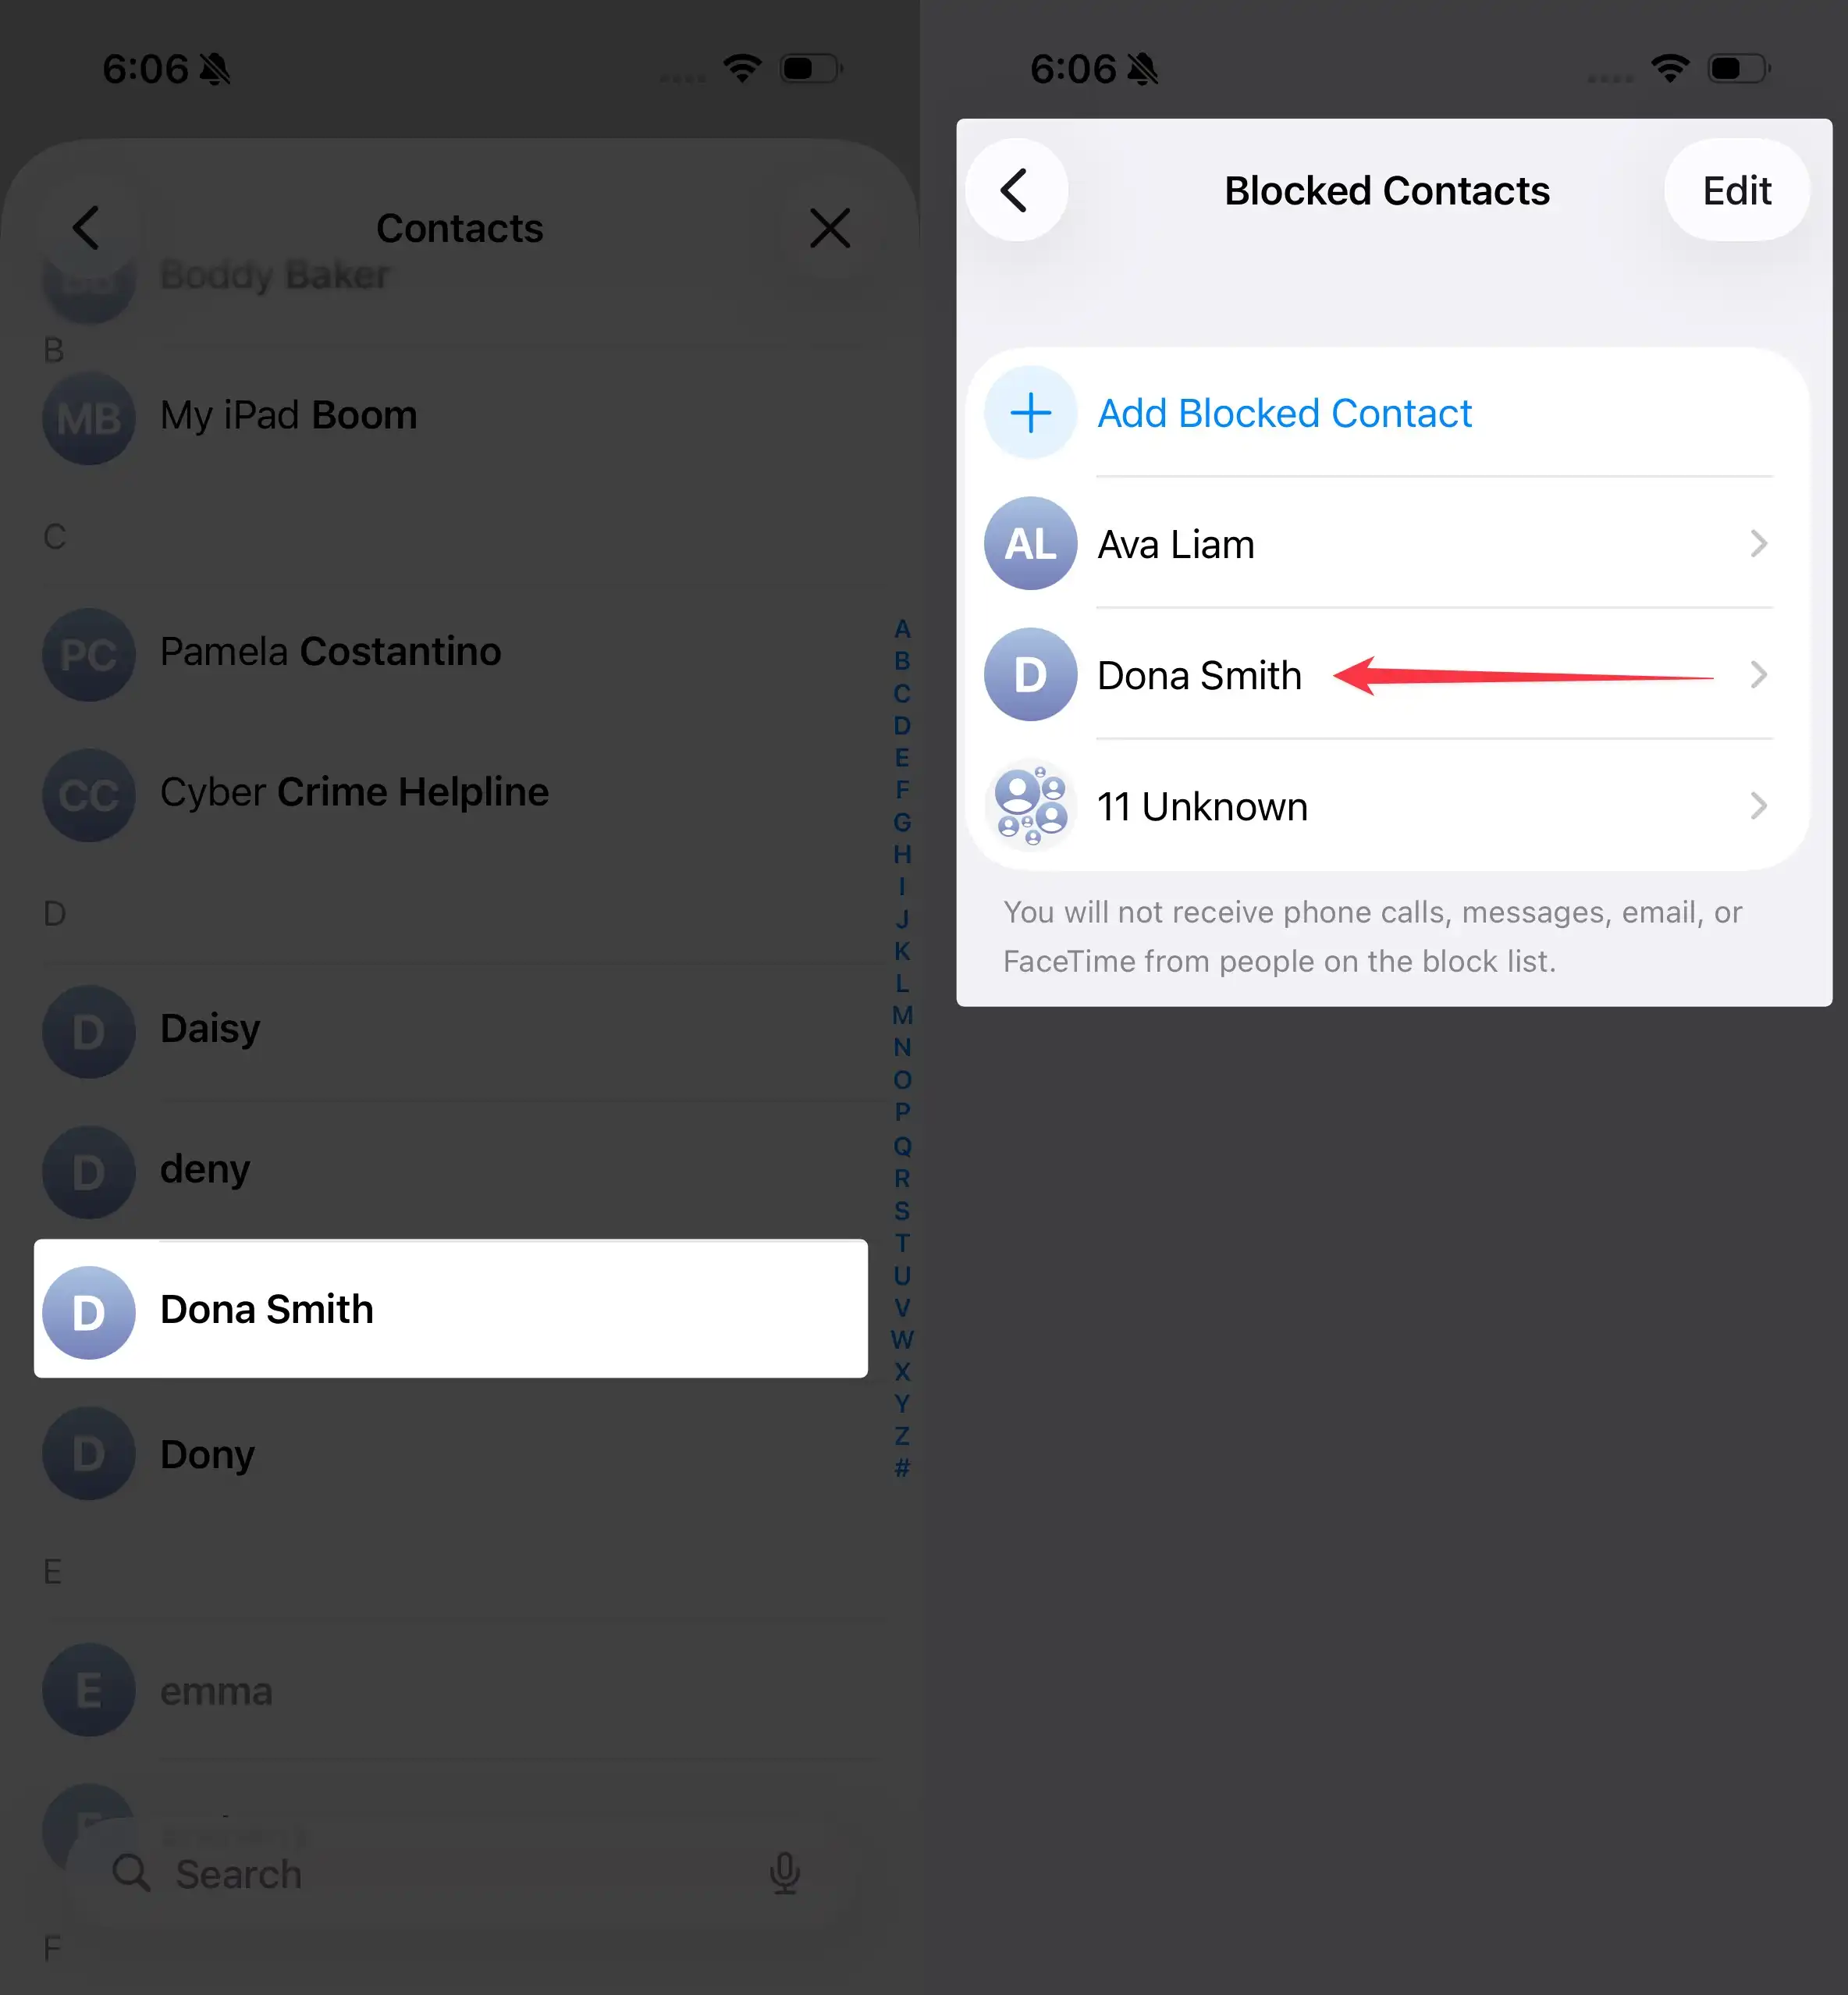
Step 4 — Tap “Blocked”
Here you can view and manage all blocked email addresses.
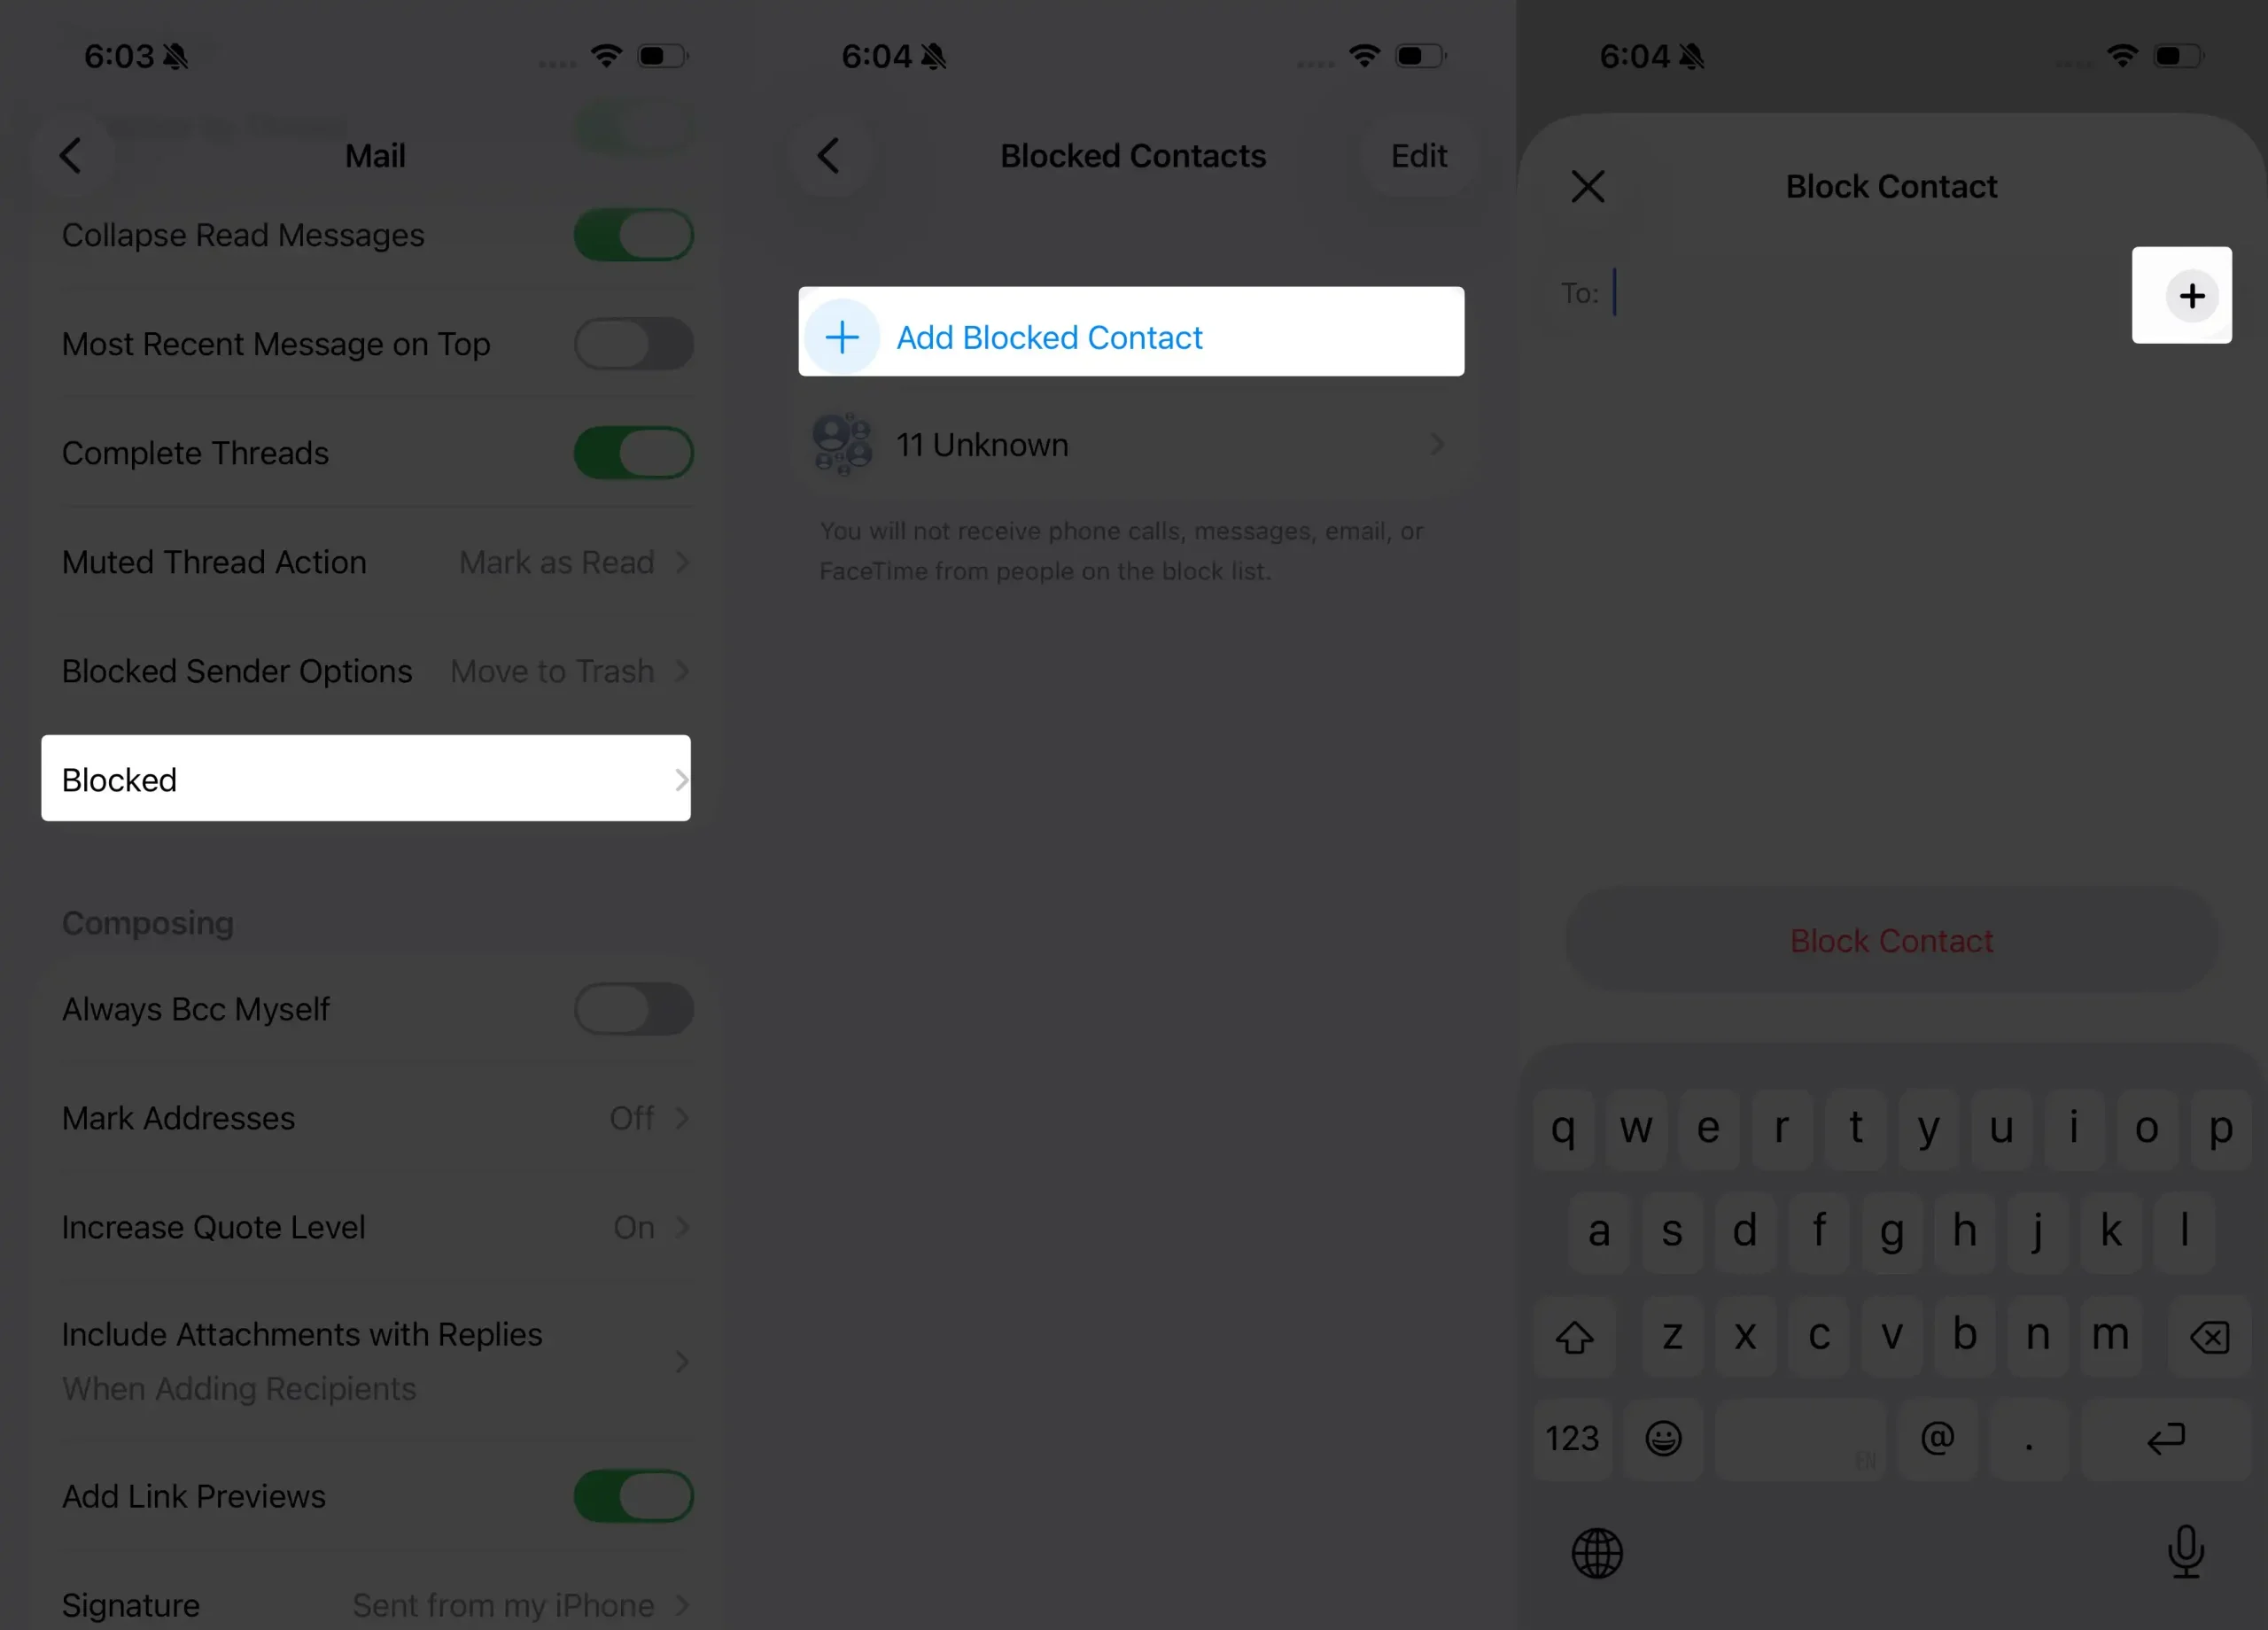
Step 5 — Add New Blocked Senders Manually
Tap Add Blocked Contact → Tap on + next to (To:) option then → select a contact to block.
Quick Comparison Table
| Action | What Happens | Best For |
|---|---|---|
| Move to Trash | Automatically deletes blocked emails | Spam or unwanted contacts |
| Leave in Inbox | Emails stay but are marked as blocked | Monitoring suspicious senders |
| Block Contact | Stops all emails from a sender | Individual nuisance contacts |
| Unblock | Allows email again | Emails stay, but are marked as blocked |
iOS 26 Blocking Behavior Chart
| Feature | Enabled | Disabled |
|---|---|---|
| Auto-trash for blocked emails | Yes | No |
| Manual block from Mail app | Yes | No |
| Syncs across devices with iCloud Mail | Yes | No |
| Stops notifications | Yes | No |
Frequently Asked Questions (FAQ)
1. Does blocking an email notify the sender?
No. The sender will not know they’ve been blocked.
2. Does blocking remove old emails?
No. Only future messages from the blocked sender are affected.
3. Does blocking work for Gmail, Yahoo, or Outlook accounts?
Yes. If the account is added in the Apple Mail app, blocking is supported on iOS 26.
4. Why do emails still appear after blocking?
You may have selected “Leave in Inbox”. Change it under:
Settings → Apps → Mail → Blocked Sender Options → Move to Trash.
5. Does blocking stop spam completely?
No system can stop all spam, but blocking significantly reduces repeated unwanted senders.
6. Can I unblock someone later?
Yes. Go to:
Settings → Apps → Mail → Blocked → Swipe left on a contact → Tap Unblock.
The Bottom Line
Blocking emails on iPhone with iOS 26 is simple, effective, and helps keep your inbox clean and secure. Using Apple’s built-in tools, you can instantly silence spam, scams, and unwanted contacts. Whether you’re protecting your privacy, improving organization, or avoiding digital distractions, blocking is one of the most powerful email management features on iOS.


